SecureW2 now supports post-quantum cryptography (PQC), so you can issue certificates using quantum-resistant algorithms alongside classical ones. Classical algorithms such as RSA and ECDSA are used to issue certificates and authenticate users over RADIUS, but Cryptographically Relevant Quantum Computers (CRQCs) are expected to eventually break these algorithms, leaving your PKI vulnerable.
This guide explains how to configure PQC in the JoinNow Management Portal to issue quantum-safe certificates.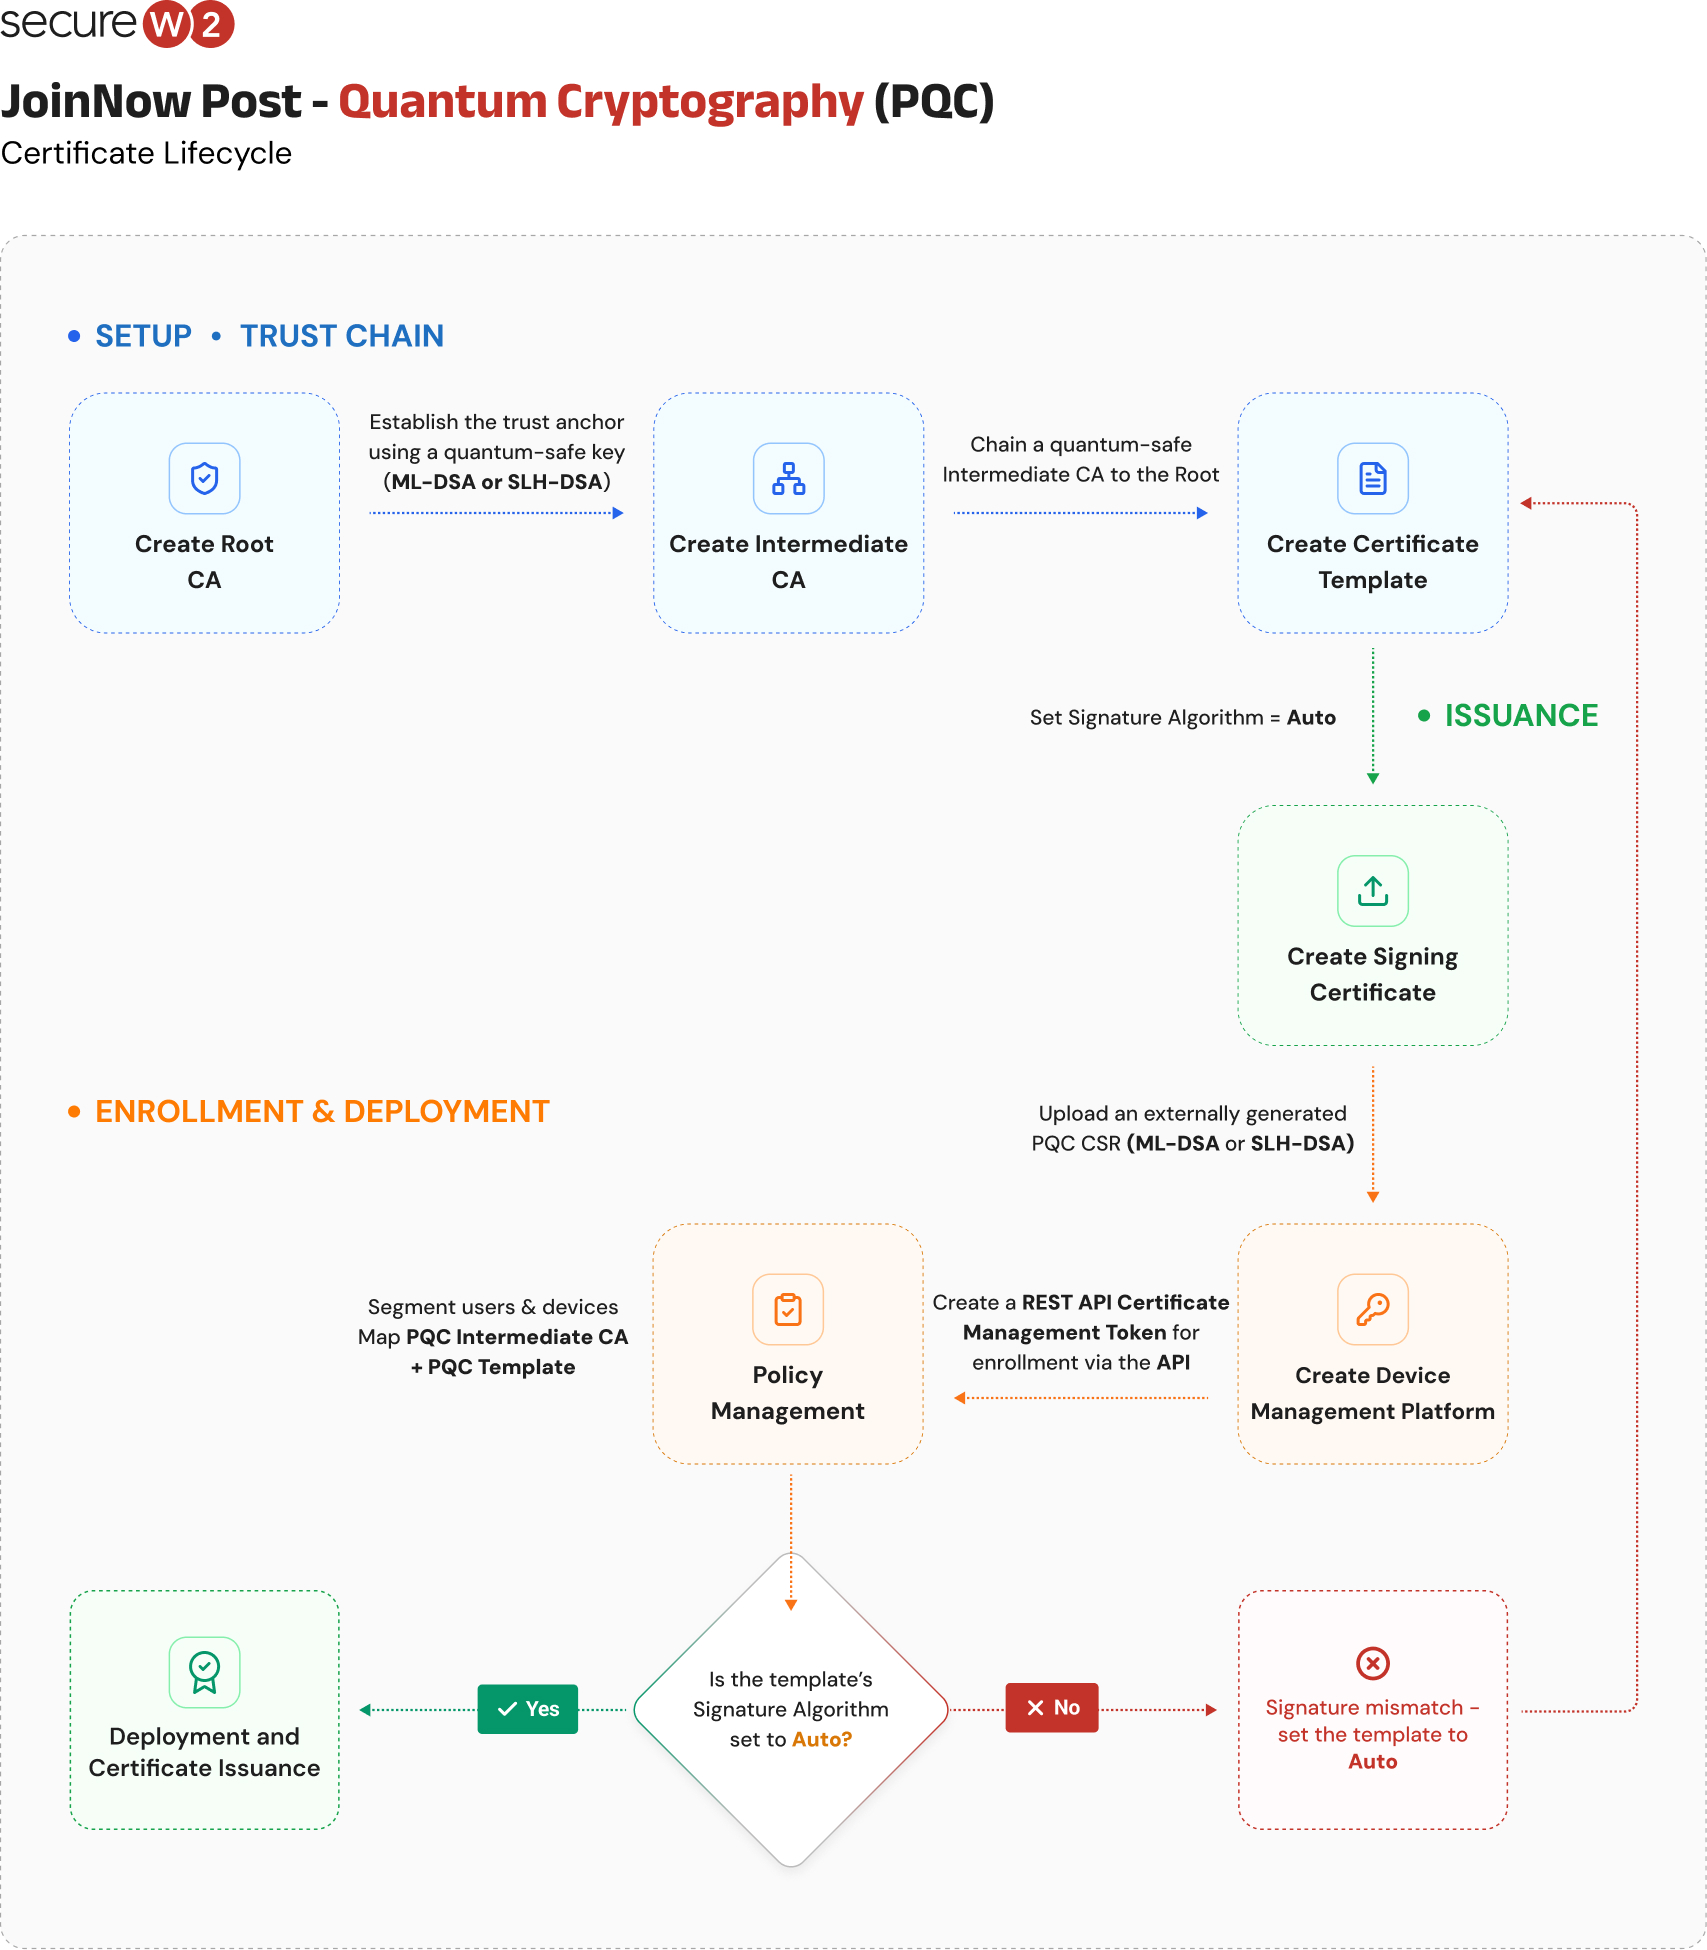
A Root CA is the trust anchor that signs the intermediate CAs that issue certificates. When you create a Root CA, you can choose a classic key type (RSA or ECDSA) or a post-quantum key type (ML-DSA or SLH-DSA), which is what will be used in this guide.
To create a root CA, perform the following steps:
- Log in to the JoinNow Management Portal.
- Navigate to Dynamic PKI > Certificate Authorities.
- Click Add Certificate Authority.
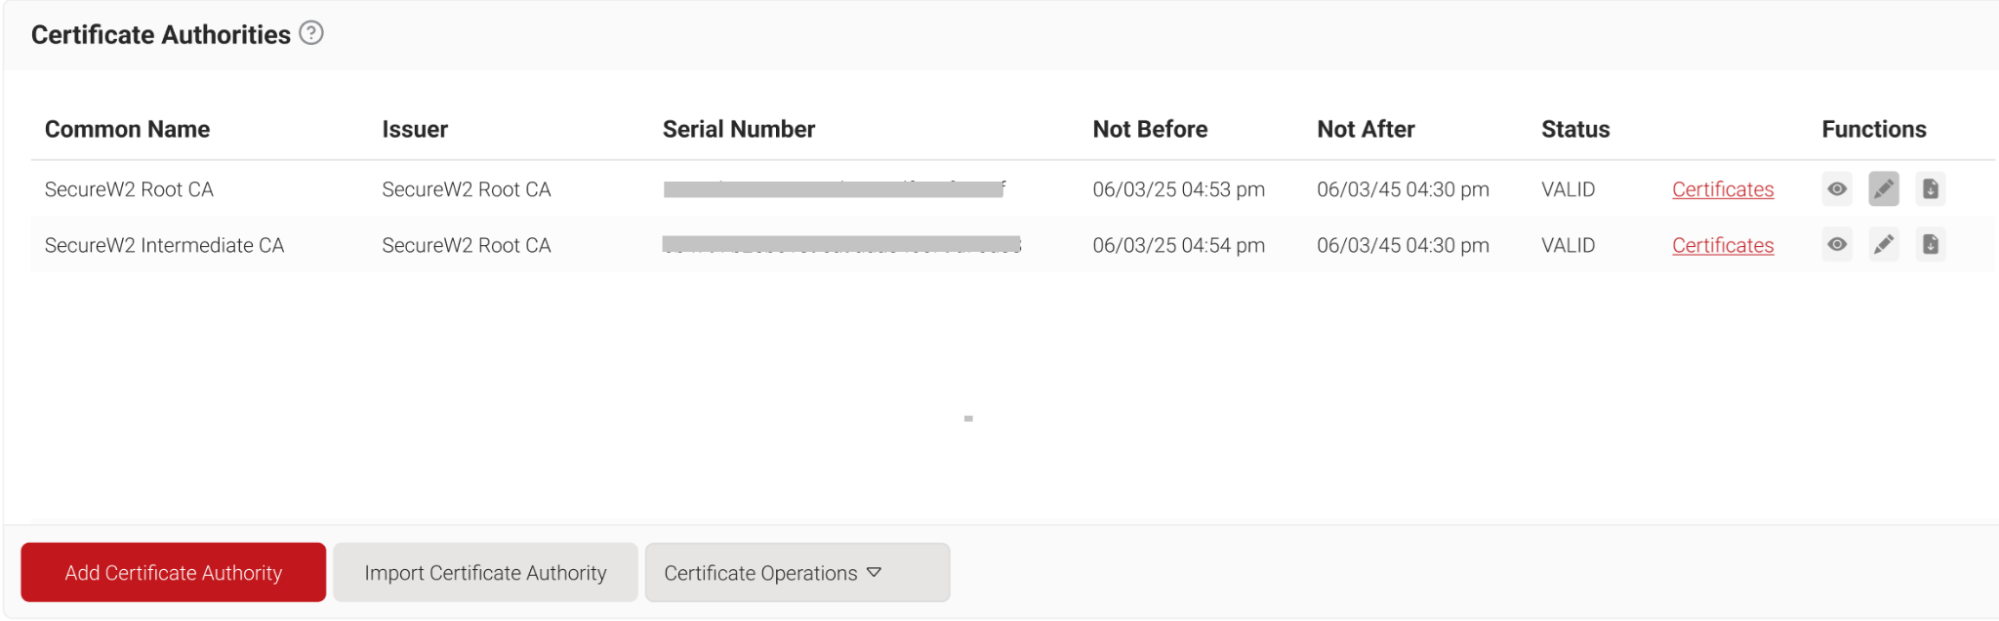
The Certificate Authorities Page
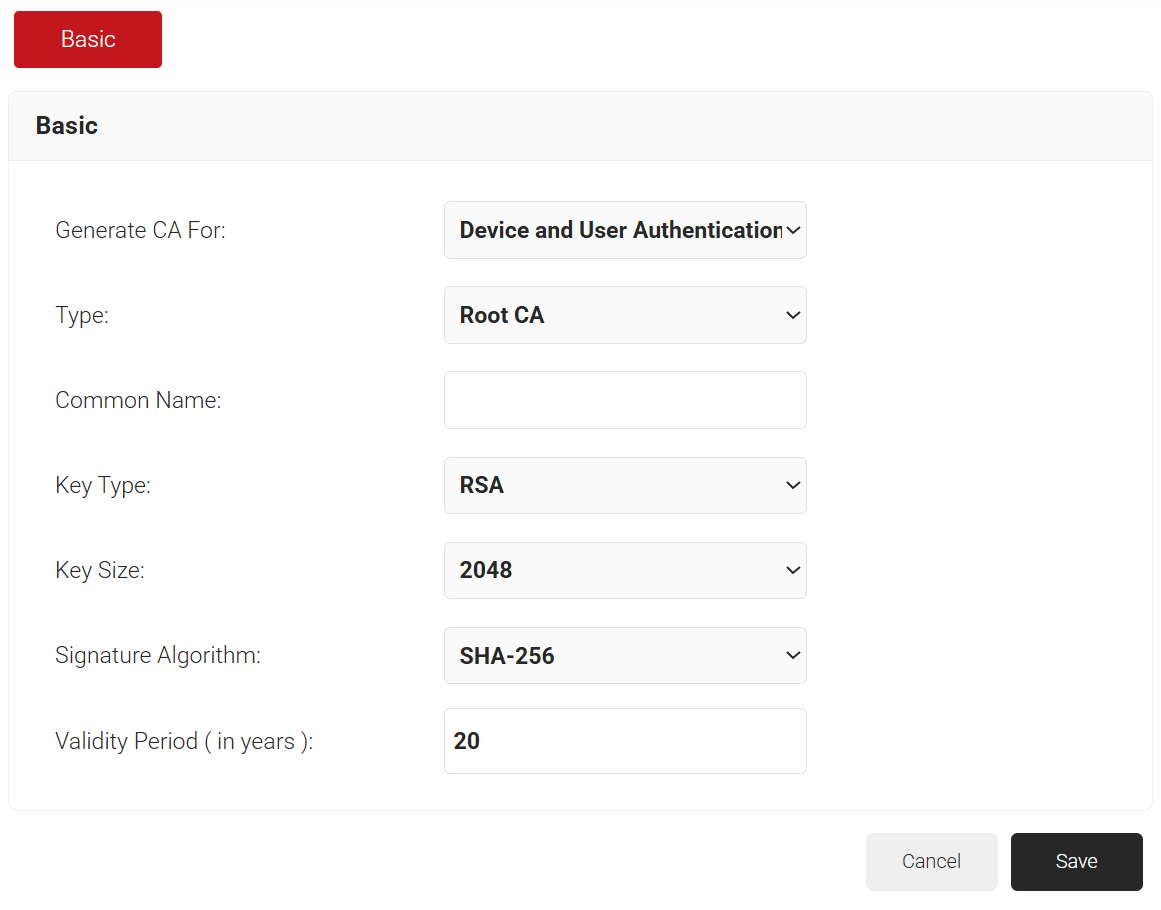
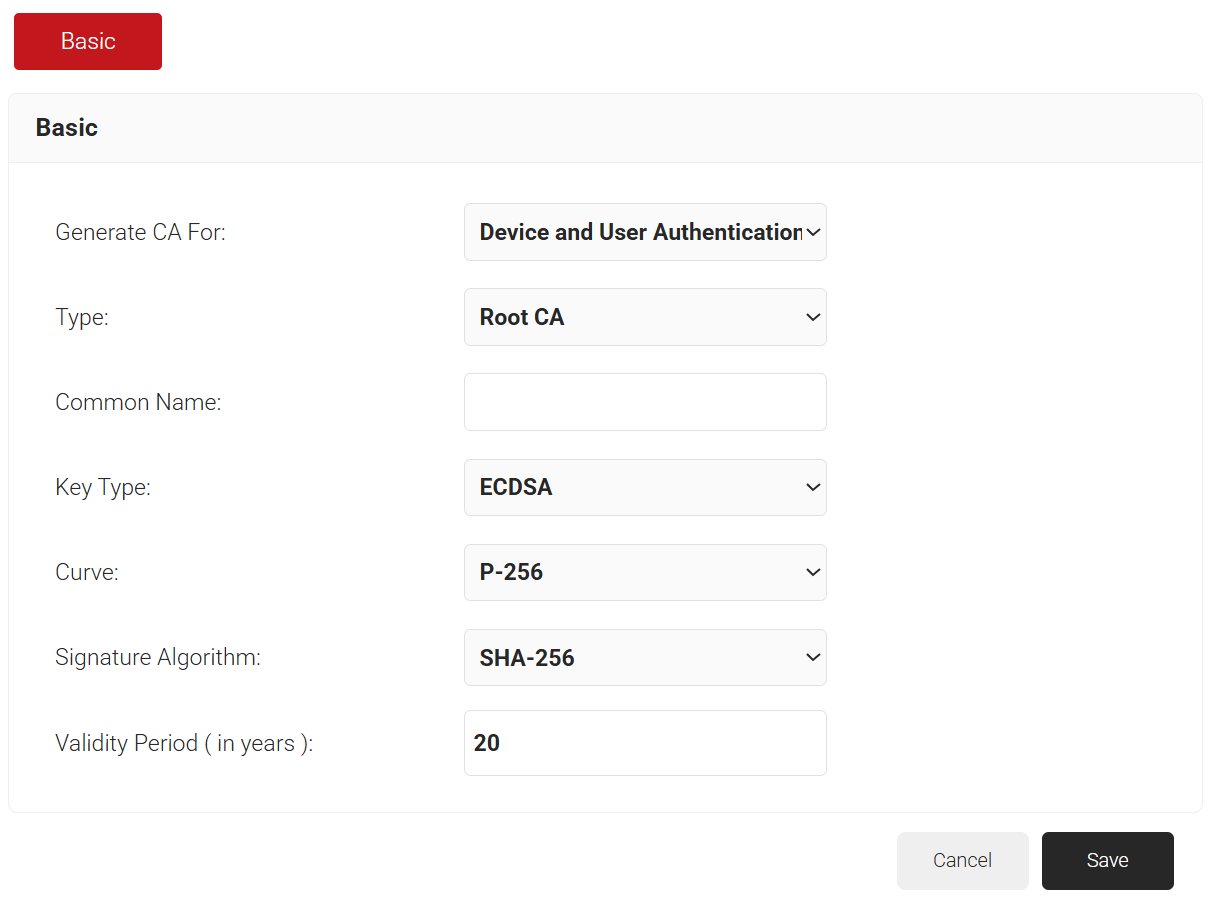
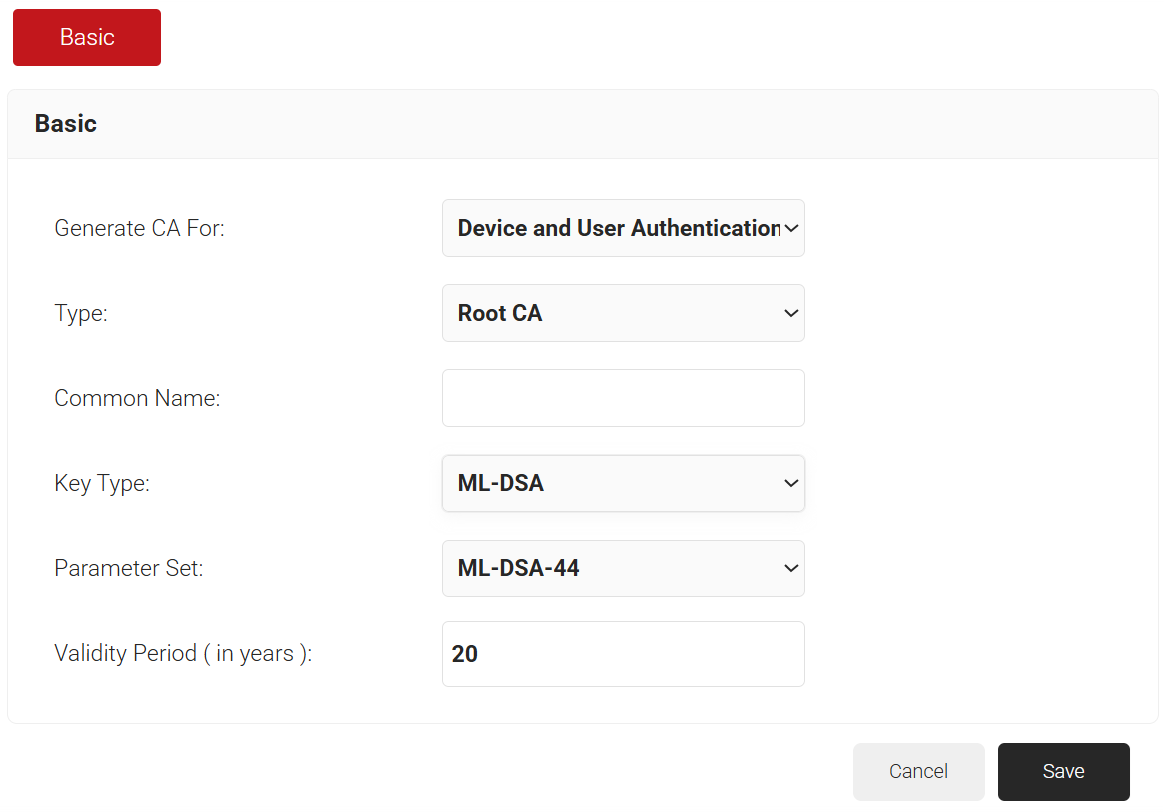
- In the Basic section, from the Generate CA For drop-down list, select the Device and User Authentication option to authenticate devices and users.
- From the Type drop-down list, select Root CA.
- For the Common Name field, enter a name.
- From the Key Type drop-down list, select the cryptographic algorithm used to generate the CA’s key pair. The available types are grouped into two categories:
- Classic – RSA and ECDSA. These use widely adopted cryptography that current systems support.
- Post-Quantum – ML-DSA and SLH-DSA. These use NIST-standardized algorithms designed to resist quantum-computer attacks.
- From the Key Size drop-down list, select the key size for the CA certificate key pair (2048 or 4096). This field appears only when RSA is selected as the Key Type.
- From the Curve drop-down list, select the elliptic curve used to generate the CA certificate key pair (P-256, P-384, or P-521). This field appears only when ECDSA is selected as the Key Type.
- From the Parameter Set drop-down list, select the post-quantum parameter set used to generate the CA certificate key pair. This field appears only when ML-DSA or SLH-DSA is selected as the Key Type. A higher number indicates a stronger security level.
Configuring a Root CA with an RSA Key Type for Device and User Authentication Configuring a Root CA with an ECDSA Key Type for Device and User Authentication
 Configuring a Root CA with a Post-Quantum Key Type for Device and User Authentication
- In the Validity Period (in years) field, enter the validity period for the root CA in terms of the number of years.
- Click Save.
SecureW2 recommends using a new intermediate CA as a best practice for enrollments. When you create the intermediate CA, choose a classic key type (RSA or ECDSA) or a post-quantum key type (ML-DSA or SLH-DSA) to make it quantum-safe.
To create an intermediate CA, perform the following steps:
- Navigate to Dynamic PKI > Certificate Authorities.
- Click Add Certificate Authority.
- In the Basic section, from the Generate CA For drop-down list, select the Device and User Authentication option to authenticate devices and users.
- From the Type drop-down list, select Intermediate CA.
- From the Certificate Authority drop-down list, select the default Root CA included with your organization.
- For the Common Name field, enter a name.
- From the Key Type drop-down list, select the cryptographic algorithm used to generate the CA’s key pair. The available types are grouped into two categories:
- Classic – RSA and ECDSA. These use widely adopted cryptography that current systems support.
- Post-Quantum – ML-DSA and SLH-DSA. These use NIST-standardized algorithms designed to resist quantum-computer attacks.
- From the Key Size drop-down list, select the key size for the CA certificate key pair (2048 or 4096). This field appears only when RSA is selected as the Key Type.
- From the Curve drop-down list, select the elliptic curve used to generate the CA certificate key pair (P-256, P-384, or P-521). This field appears only when ECDSA is selected as the Key Type.
- From the Parameter Set drop-down list, select the post-quantum parameter set used to generate the CA certificate key pair. This field appears only when ML-DSA or SLH-DSA is selected as the Key Type. A higher number indicates a stronger security level.
- In the Validity Period (in years) field, enter the validity period for the Intermediate CA in terms of the number of years.
- In the Notifications section:
- From the Expiry Notification Frequency (in days) drop-down list, select the frequency interval for which a certificate expiration notification should be sent to users.
- Select the Notify user on successful Enrollment checkbox to notify users after a successful enrollment.
- In the Revocation section:
- In the Revoke Certificate if unused for field, select the number of days after which an unused certificate can be revoked.
- Since last usage – Select this checkbox to revoke the certificate after a specified number of days if it remains unused.
- Since certificate issuance – Select this checkbox to revoke the certificate after a specified number of days after it is issued.
- From the Reason Code drop-down list, select any one of the following reasons for which the certificate is revoked.
- Certificate Hold
- AA Compromise
- Privilege Withdrawn
- Unspecified
- In the Revoke Certificate if unused for field, select the number of days after which an unused certificate can be revoked.
- Click Save. This generates the new intermediate CA.
Intermediate CA for Device and User Authentication – Using Internal System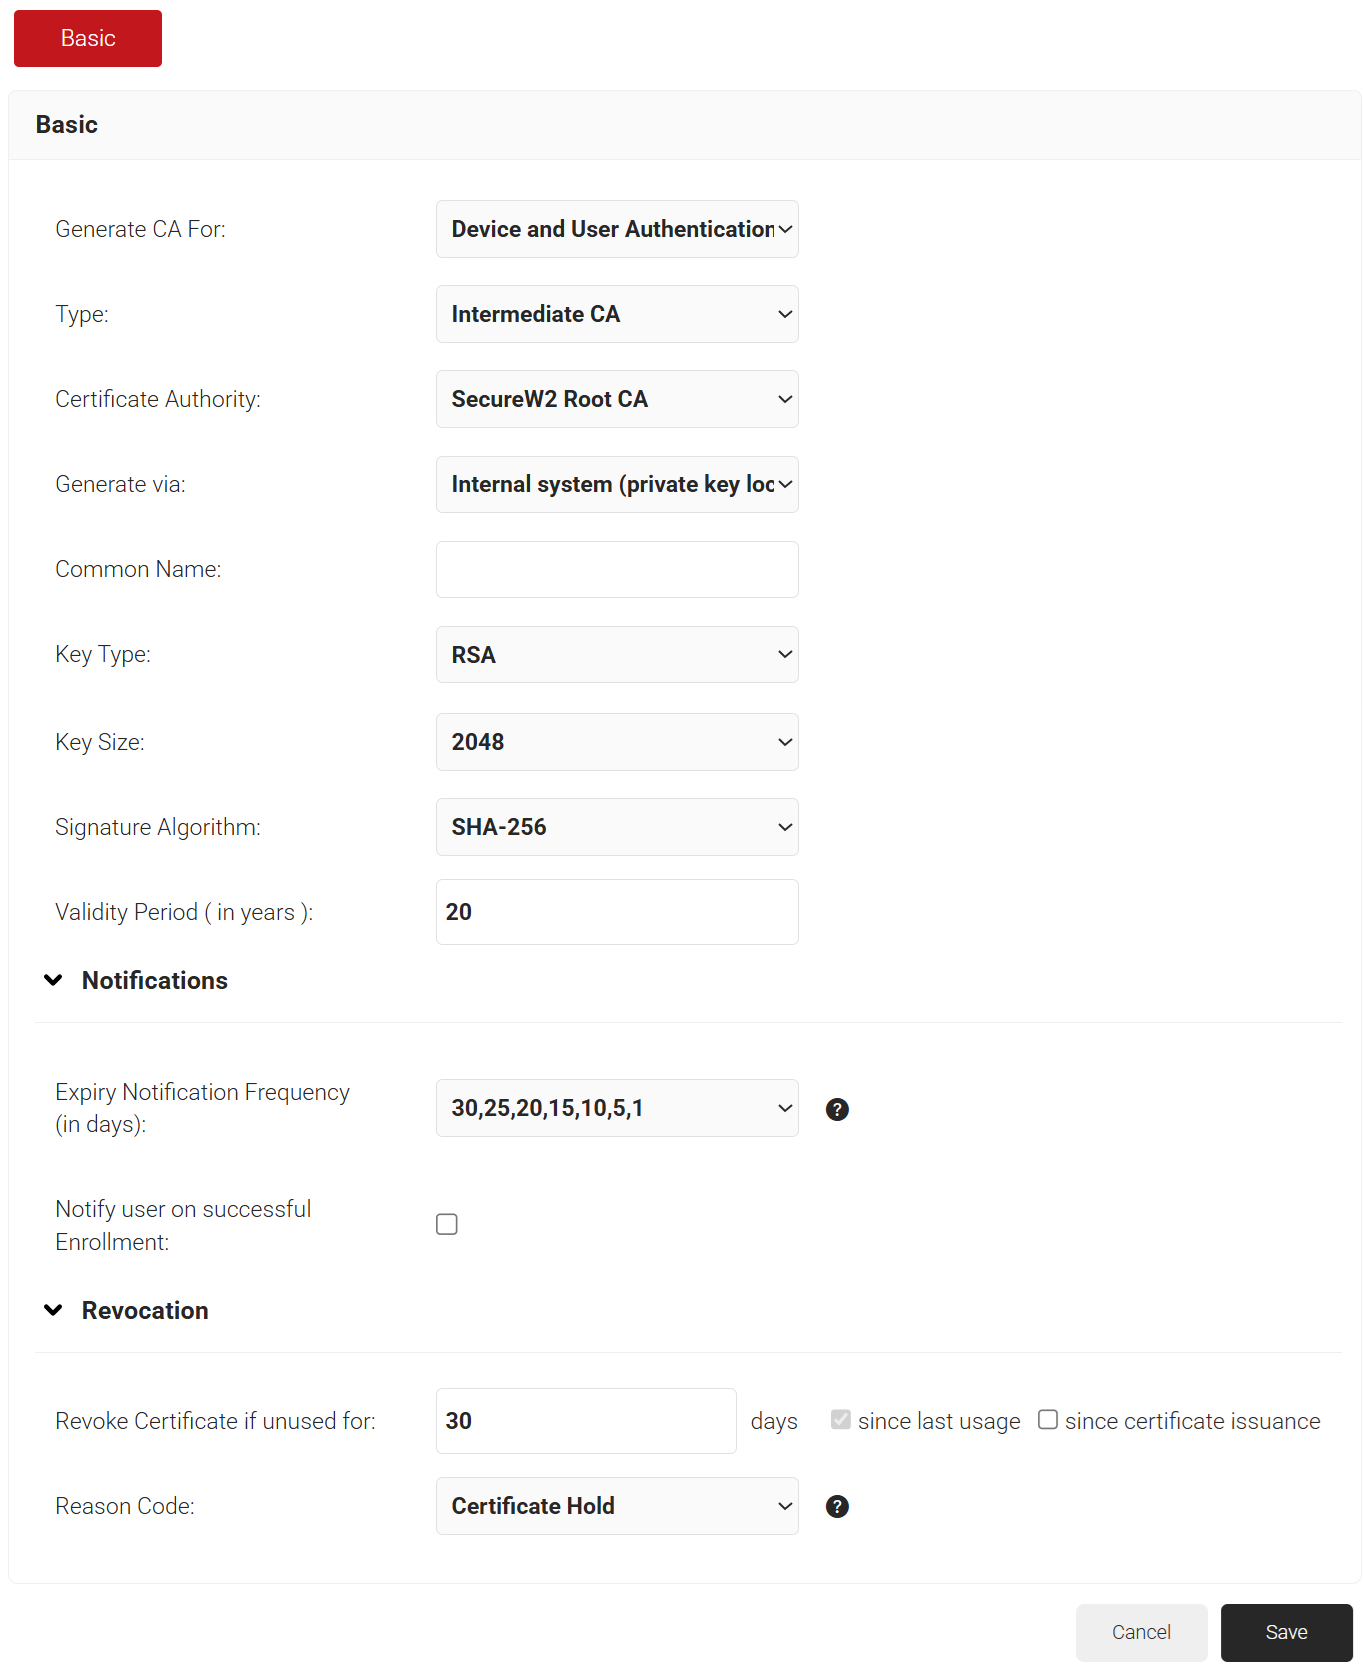
Intermediate CA for RadSec Client Authentication – Using Internal System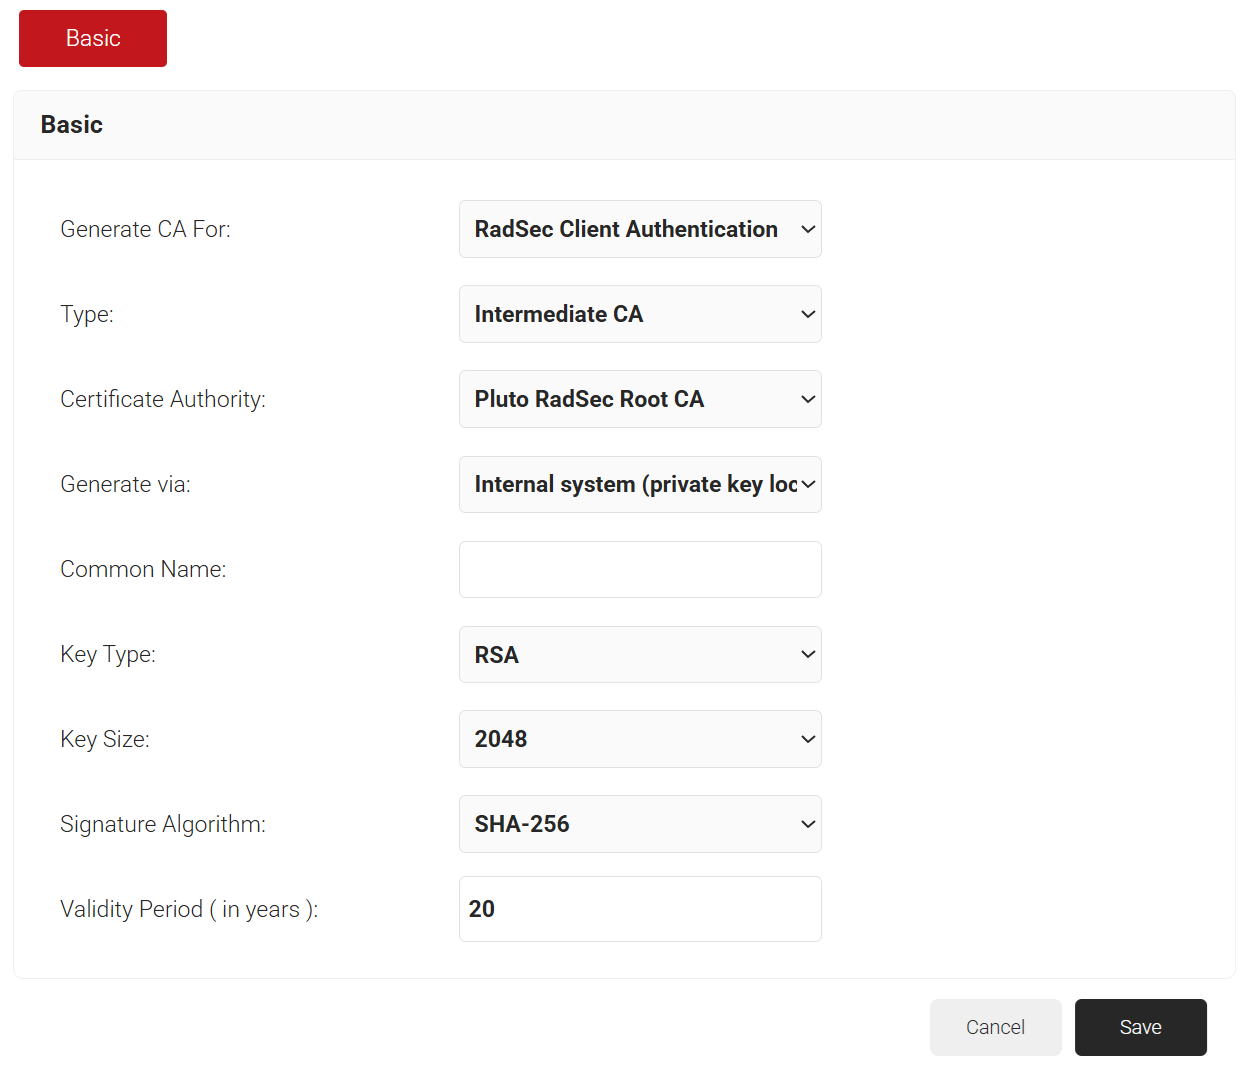
Intermediate CA for Device and User Authentication – Using Browser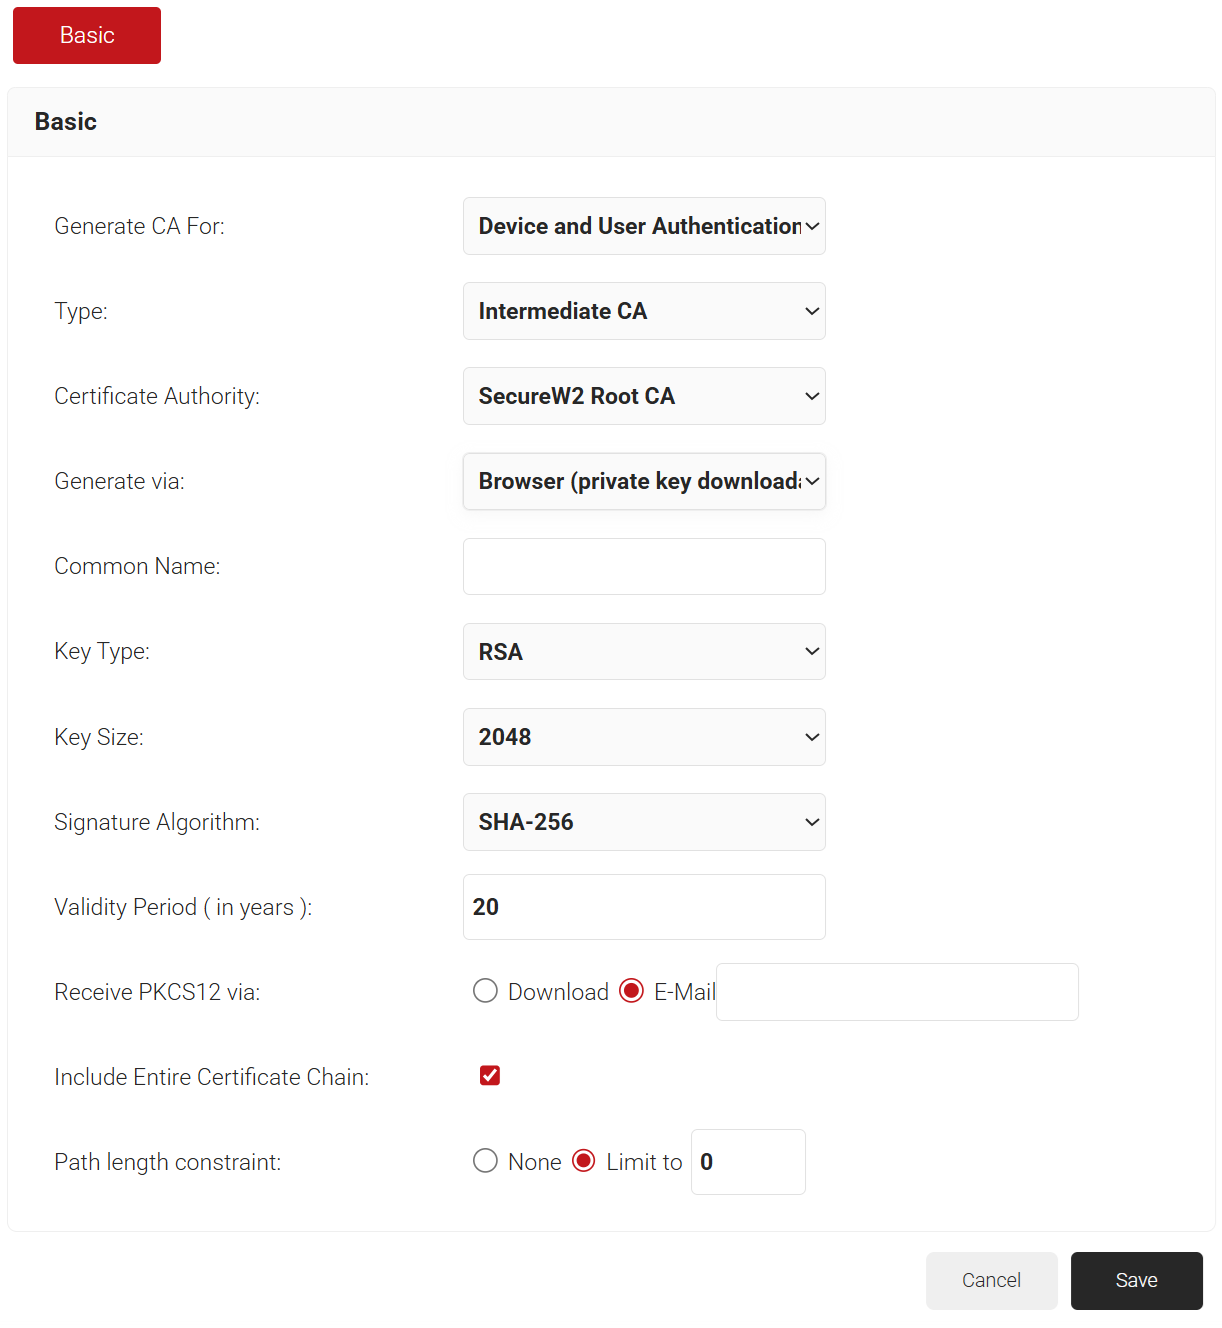
Intermediate CA for Device and User Authentication – Using CSR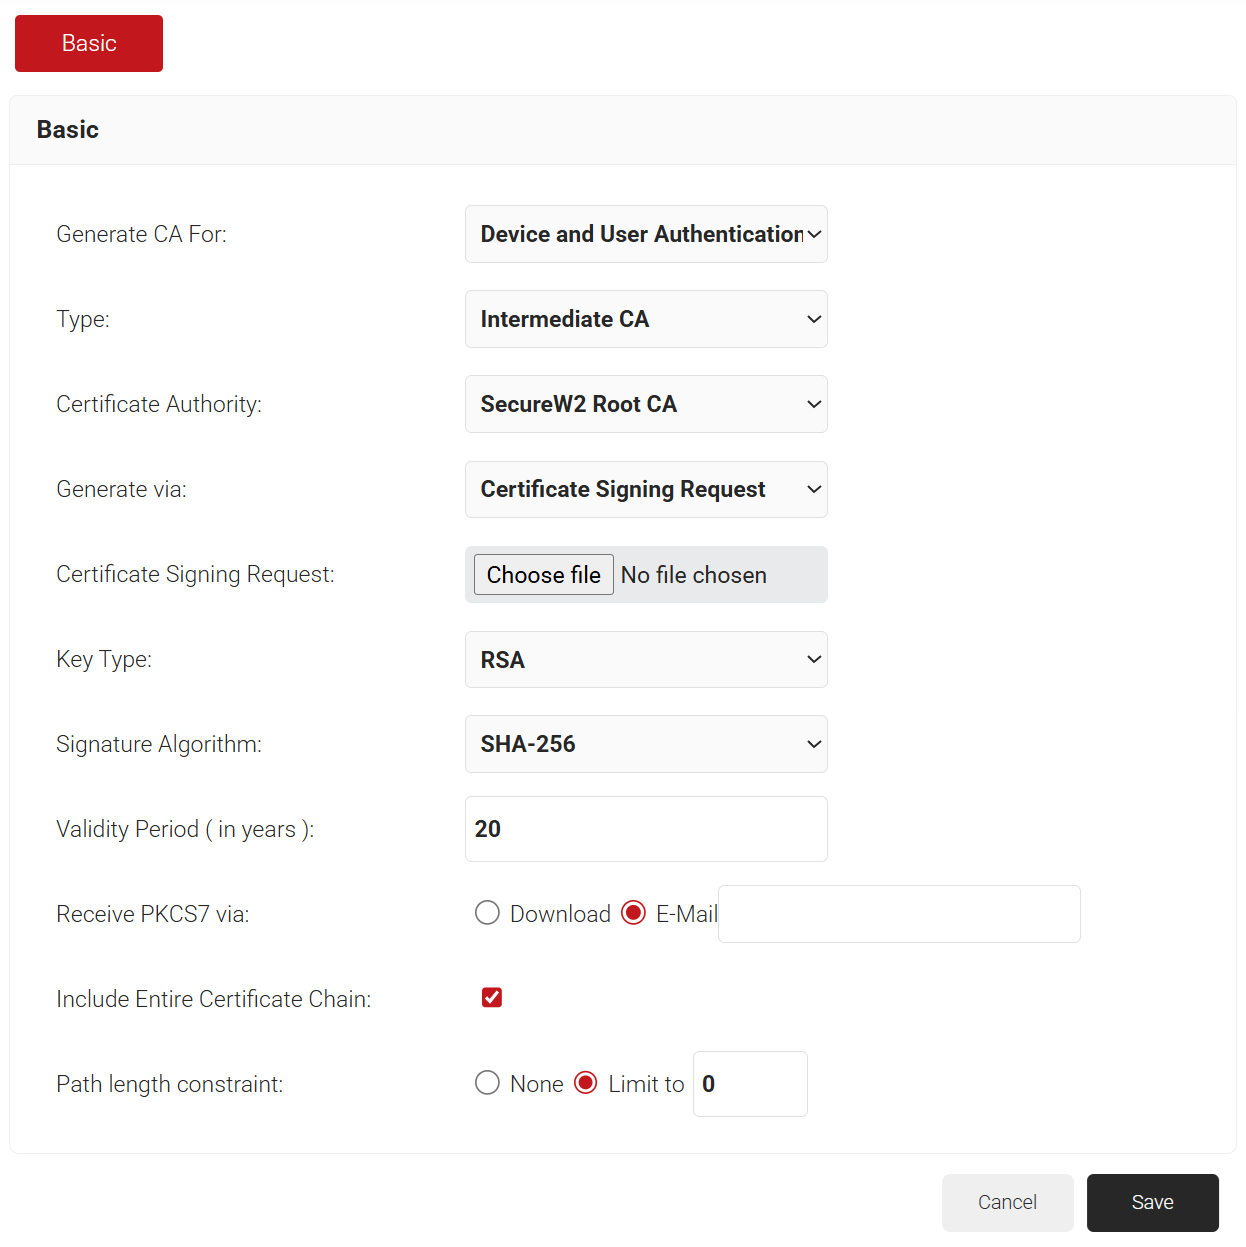
Intermediate CA for Device and User Authentication – Using External Root CA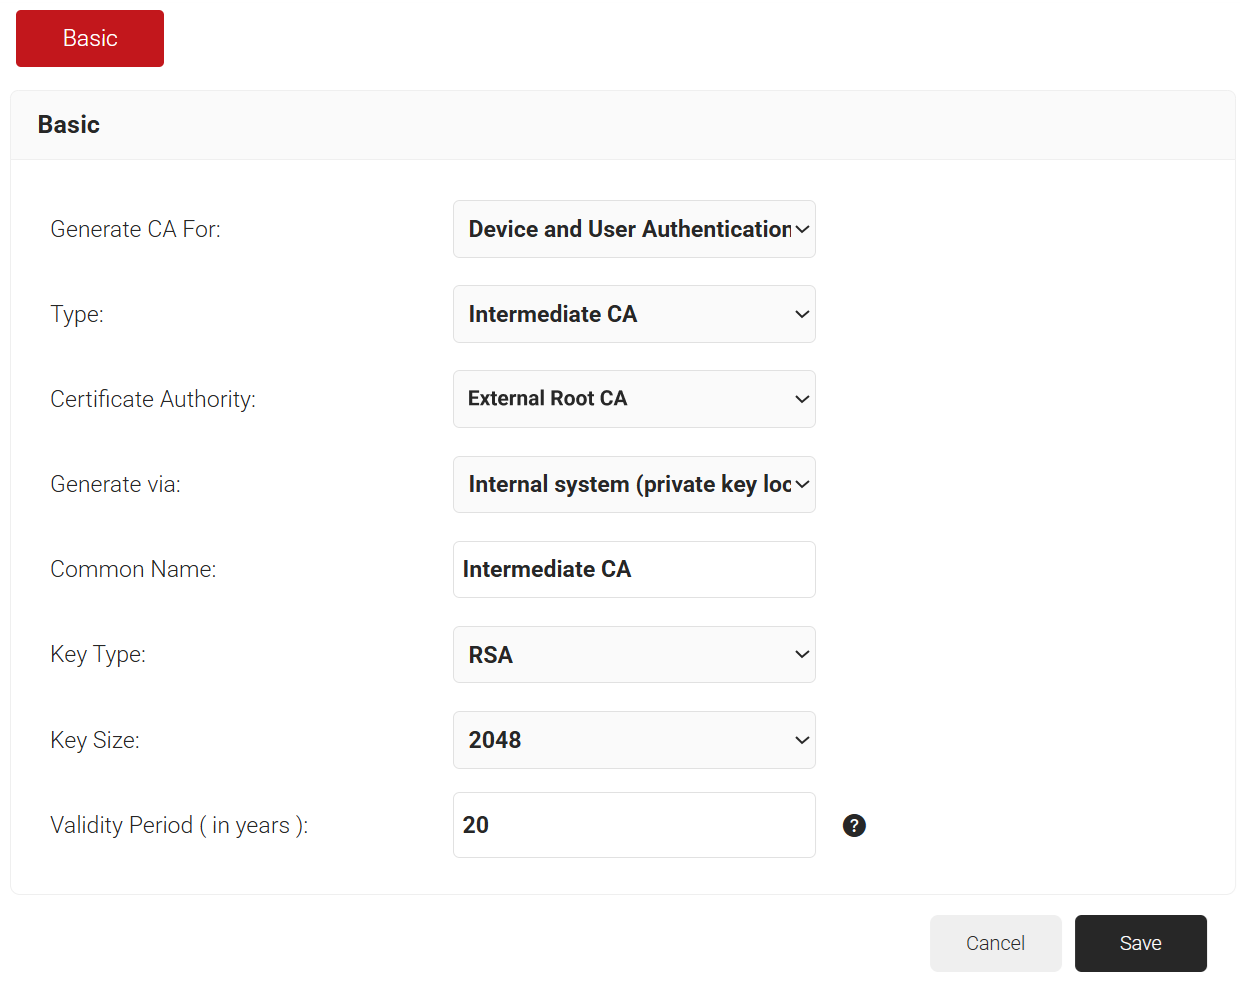
A certificate template defines how information is encoded in the certificates issued by a Certificate Authority. It lists the certificate attributes and specifies how each attribute’s value is encoded. For a quantum-safe setup, the template also sets the Signature Algorithm that the CA uses to sign the certificate, including the Auto option for PQC-based CAs.
To create a certificate template, perform the following steps:
- Navigate to Dynamic PKI > Certificate Authorities.
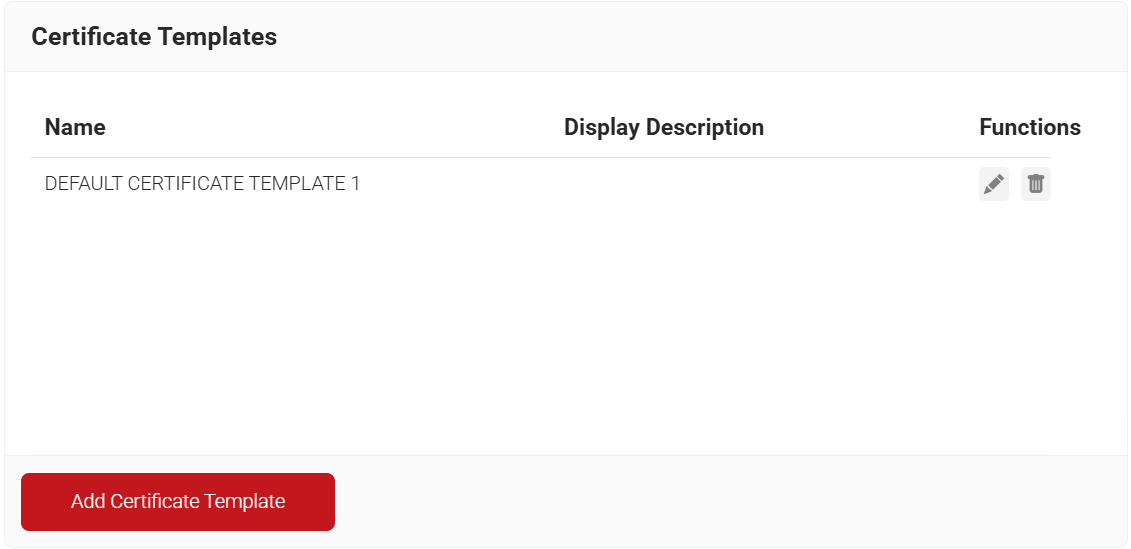
- Scroll to the Certificate Templates section and click Add Certificate Template.

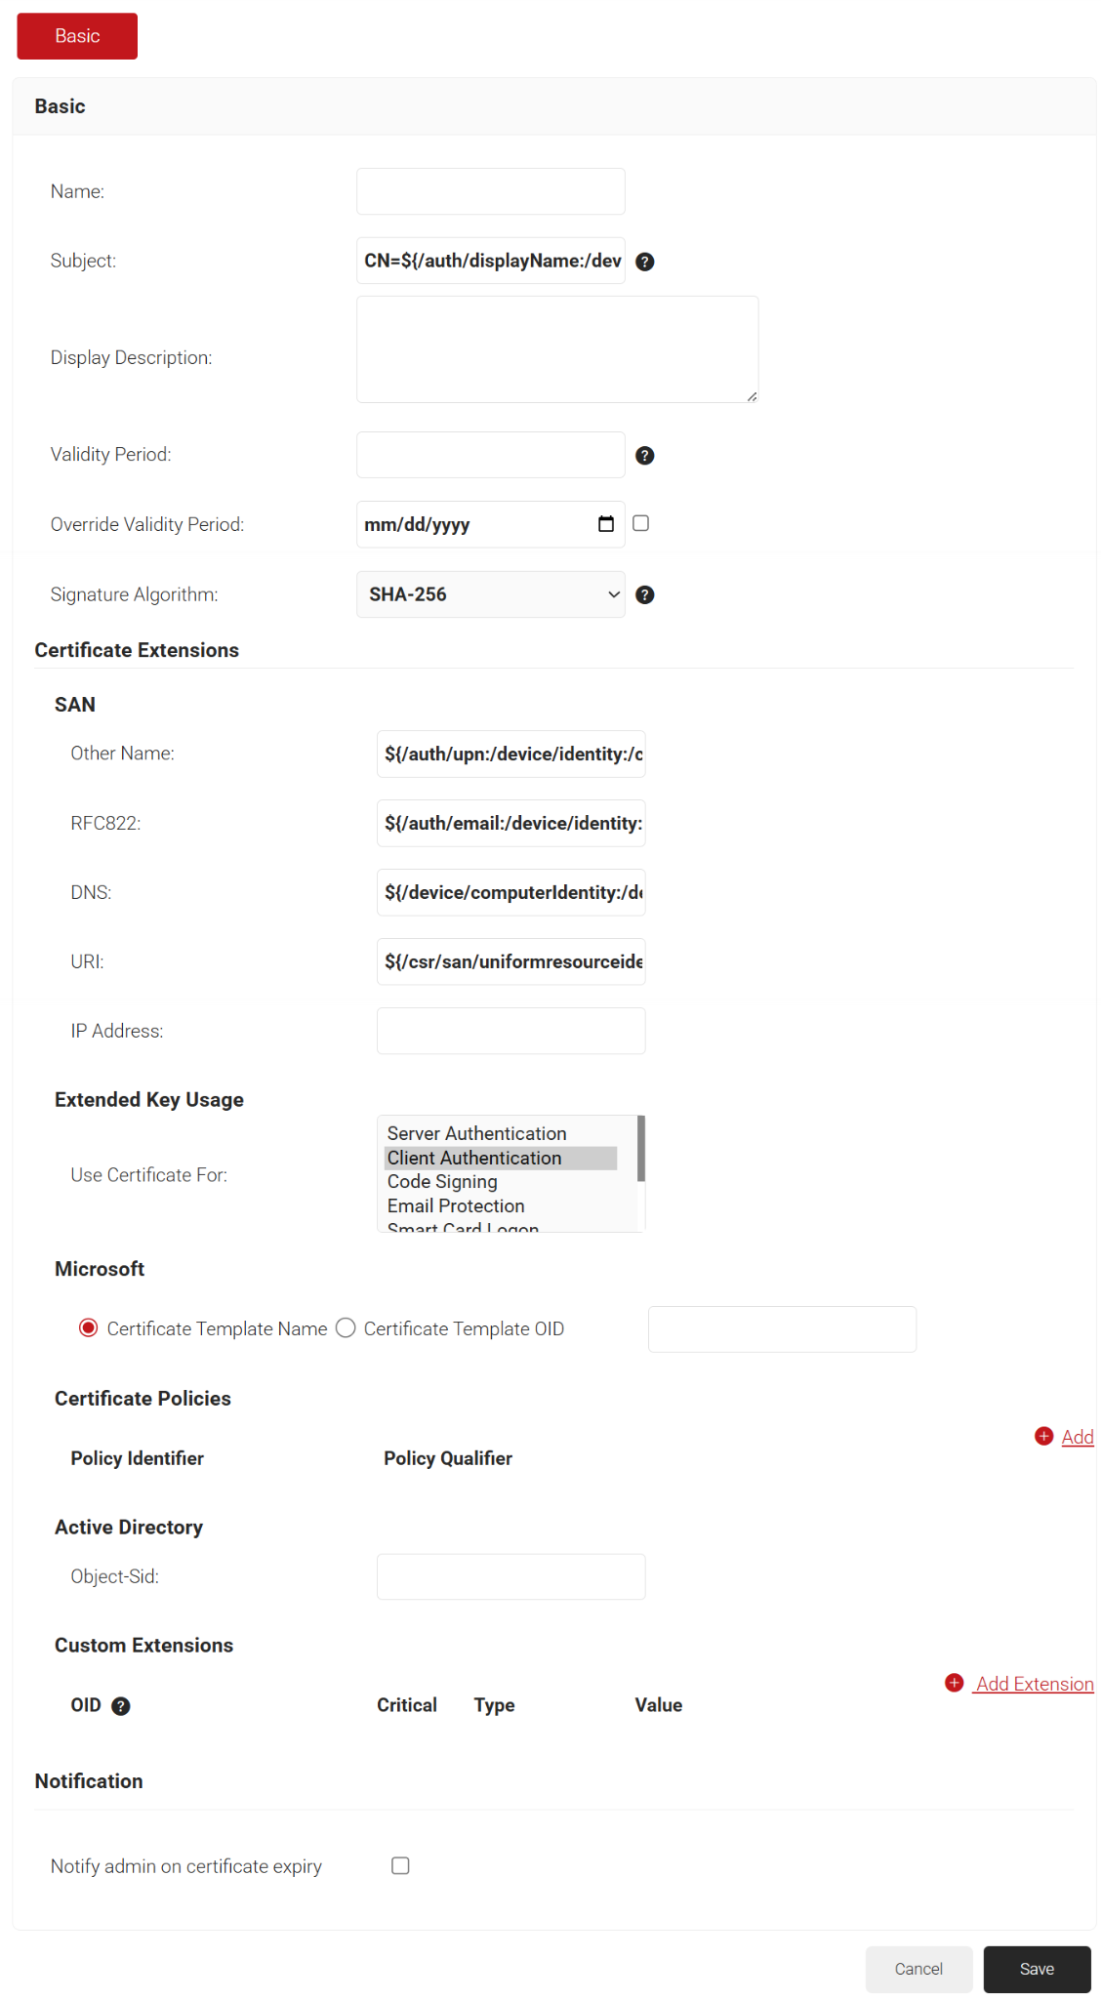
- In the Basic section, enter the name of the certificate template in the Name field.
- In the Subject field, retain the default value CN=${/auth/displayName:/device/identity:/csr/subject/commonname}
- In the Display Description field, enter a suitable description for the certificate template.
- In the Validity Period field, type the validity period of the certificate (based on the requirement).
- To override the Validity Period attribute, select the Override Validity Period checkbox and choose an end date from the date picker to set a hard-coded expiry date for a certificate.
- The hash algorithm used to sign the certificate. Select one of the following options:
- SHA-256
- SHA-384
- SHA-512
- Auto
NOTE: Auto is primarily for Post-Quantum Cryptography (PQC) CAs, which don’t have a separate hash algorithm, so it uses a default signing algorithm.
- In the SAN section, use the default values.
- In the Extended Key Usage section, from the Use Certificate For list, select Client Authentication.
- Click Save.

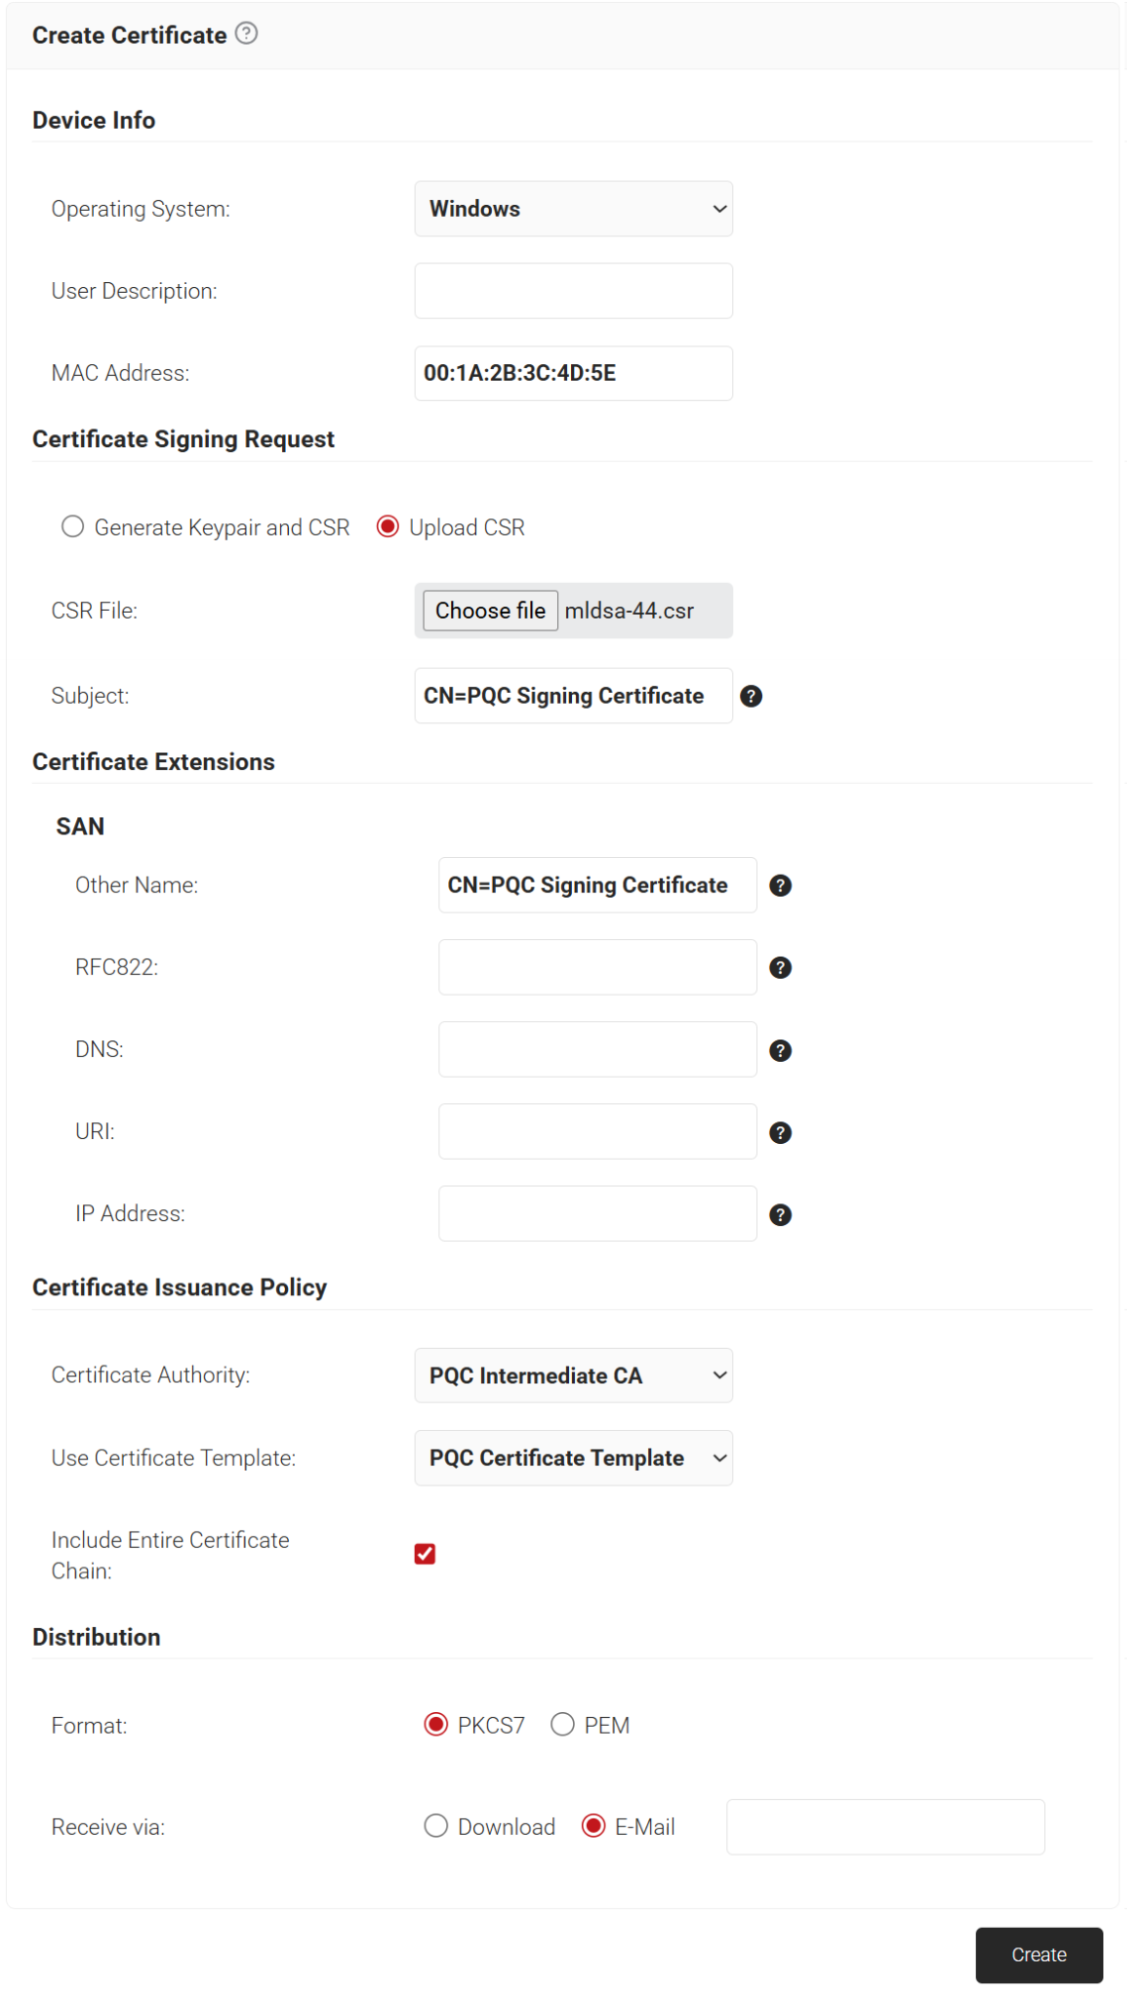
On the Create Certificate page, you can create client certificates for end-user devices by specifying the parameters required for each certificate.
To issue a quantum-safe certificate, use the Upload CSR option. The Create Certificate page currently doesn’t support PQC, so it can’t generate PQC key pairs. Instead, generate the PQC key pair and CSR externally, then upload the CSR to issue the certificate.
To create a signing certificate, perform the following steps:
- Navigate to Dynamic PKI > Create Certificate.
- In the Device Info section, from the Operating System drop-down list, select an operating system.
- In the User Description description, enter a description to identify the device associated with the certificate.
- In the MAC Address field, enter the device’s unique MAC address.
- In the Certificate Signing Request section, select the Upload CSR option to create the client certificate by using an existing .csr file.
- In the CSR File field, click Choose file to upload the .csr file.
- In the Subject field, enter the common name of the certificate.
- In the Other Name field, enter the same value you entered in the Subject field.
- In the Certificate Issuance Policy section, from the Certificate Authority drop-down list, select the PQC intermediate CA you created earlier (see Creating an Intermediate CA).
- From the Use Certificate Template drop-down list, select the PQC certificate template you created earlier (see Creating a Certificate Template).
- Select the Include Entire Certificate Chain checkbox to include the entire certificate chain with the issued certificate. This is mandatory.
- In the Distribution section, from the Format field, select the format for the issued certificate: PKCS7 or PEM.
- In the Receive via field, select how to receive the certificate:
- Download: Download the certificate directly.
- E-Mail: Send the certificate to the specified email address.
- After configuring the fields, click Create to issue the certificate.

The REST API Certificate Management Token authenticates and authorizes external systems that call the certificate management REST API. It provides access to all endpoints, enabling actions such as retrieving device, user, and MAC details, performing enrollments, and revoking certificates. To control the level of access, you can assign each token either Read-Only or Read-Write access.
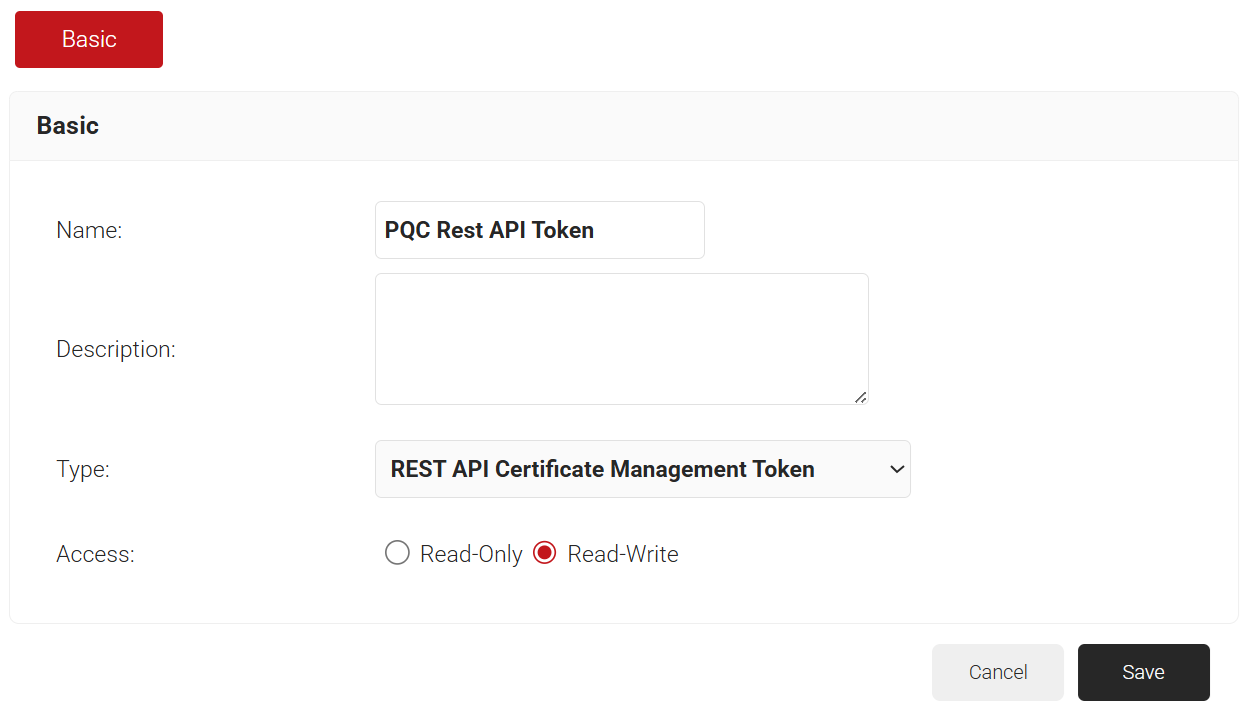
To create a REST API Certificate Management Token, perform the following steps:
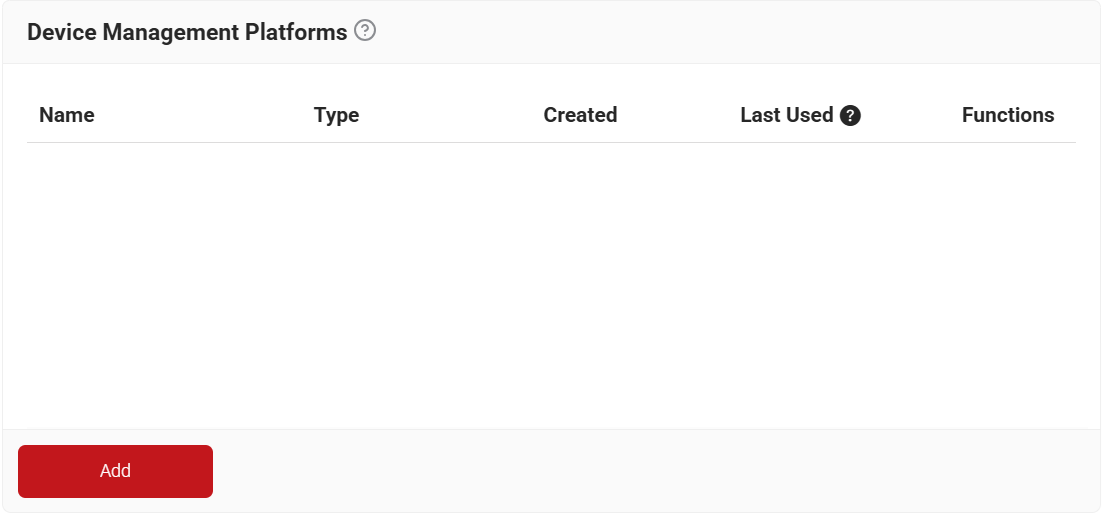
- Navigate to Integration Hub > Device Management Platforms.
- Click Add.

- In the Basic section, enter the device management platform name in the Name field.
- In the Description field, enter the description for the device management platform.
- From the Type drop-down list, select REST API Certificate Management Token to enroll a certificate using the REST API.
- In the Access field, select the access level for the token:
- Read-Only – The token can view items but cannot make changes.
- Read-Write – The token has full control, including viewing and modifying items.
NOTE: Read-Only is the default for new tokens, and Read-Write is the default for existing tokens. You can change the access level at any time.
- Click Save. A .csv file containing the API secret and Enrollment URL is downloaded.
NOTE: Save the .csv file securely. This file is downloaded only once during token creation. If the file is lost, you cannot retrieve the token and secret.
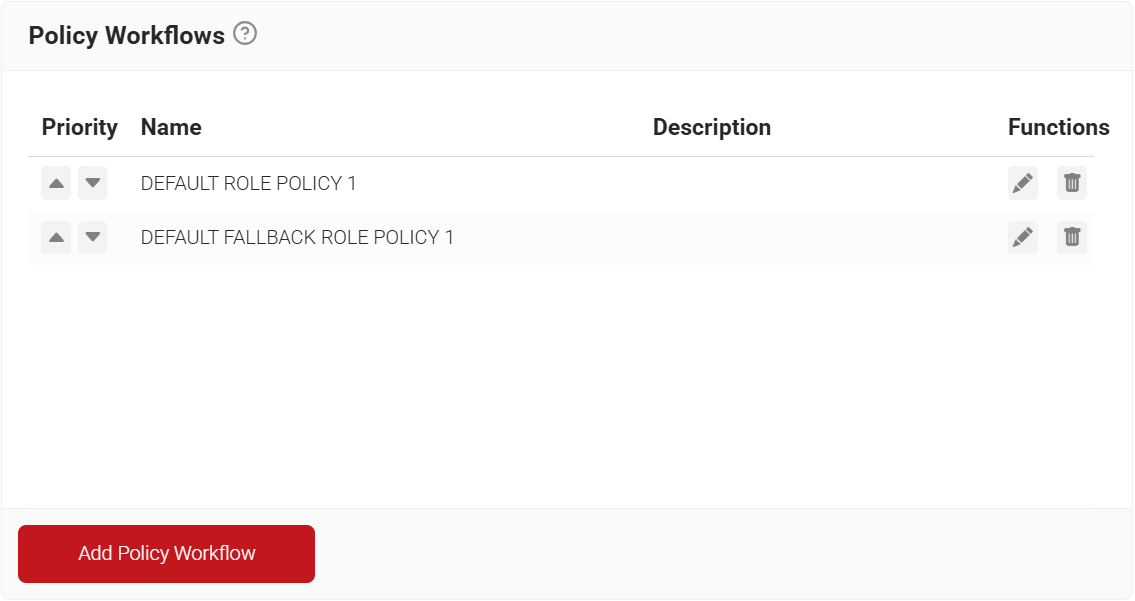
A Policy Workflow segments users and devices based on predefined criteria or their associated attributes and groups, with each segment defined as a distinct Policy Workflow. For each Policy Workflow, you can configure how PQC certificates are issued through the Enrollment Policy.
To create a policy workflow, perform the following steps:
- Navigate to Policy Management > Policy Workflows.
- Click Add Policy Workflow.

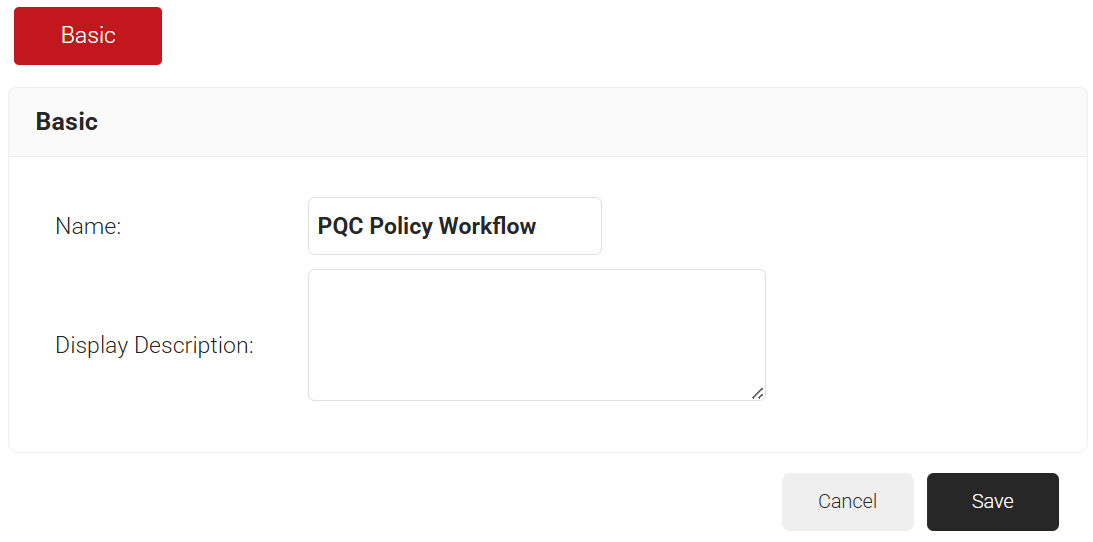
- In the Basic section, enter the name of the policy workflow in the Name field.
- In the Display Description field, enter a description for the policy workflow.

- Click Save. The page refreshes, and the Conditions tab is displayed.
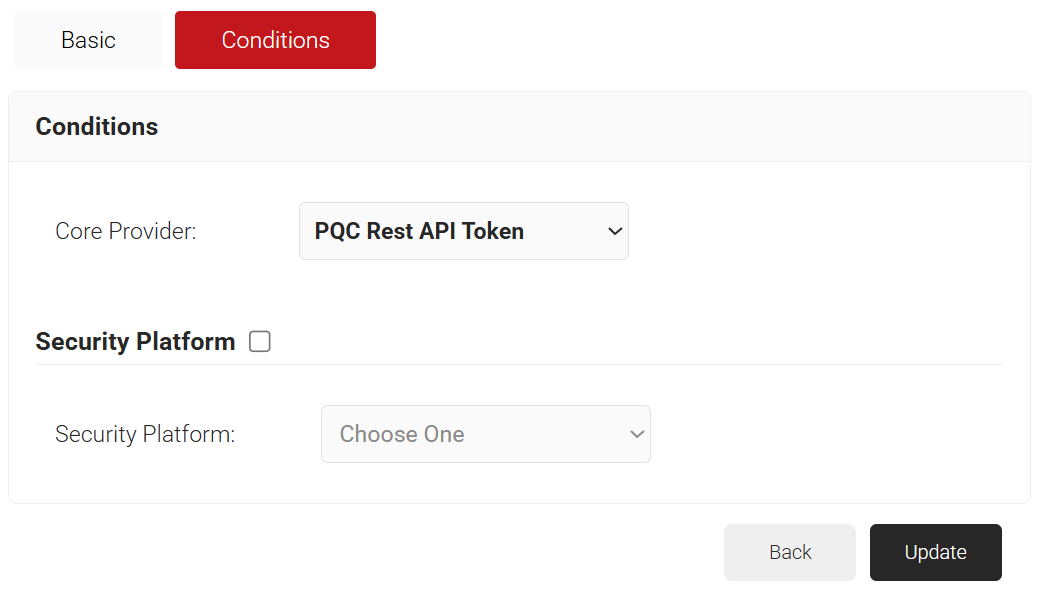
- Select the Conditions tab.
- From the Core Provider drop-down list, select the API token you created in the Creating a Device Management Platform section.

- Click Update.
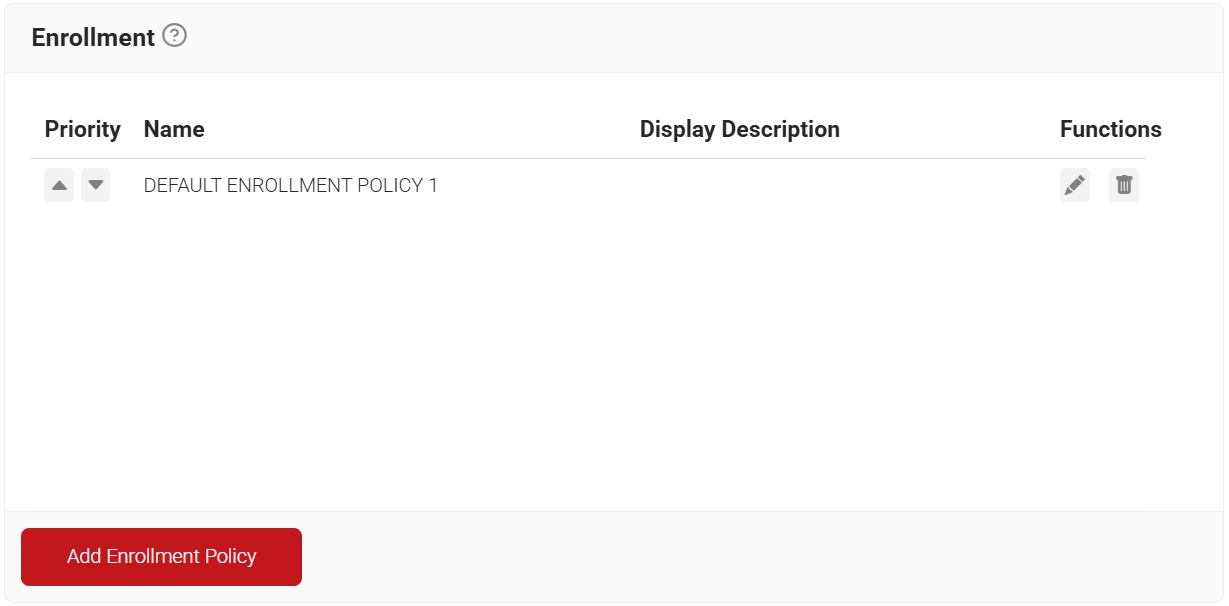
An Enrollment Policy defines the client certificate template and the Certificate Issuer to be used for each Policy Workflow. It leverages the segmentation established in the Policy Workflow to ensure that the appropriate client certificate template is issued for each workflow.
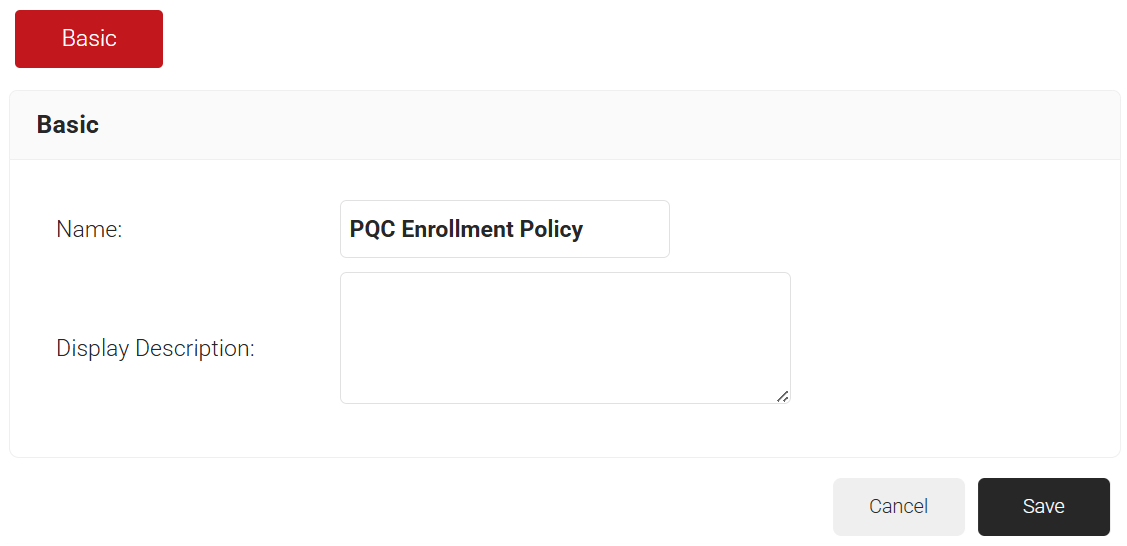
To create an enrollment policy, perform the following steps:
- Navigate to Policy Management > Enrollment.
- Click Add Enrollment Policy.

- In the Basic section, enter the name of the enrollment policy in the Name field.
- In the Display Description field, enter a suitable description for the enrollment policy.

- Click Save. The page refreshes, and the Conditions and Settings tabs are displayed.
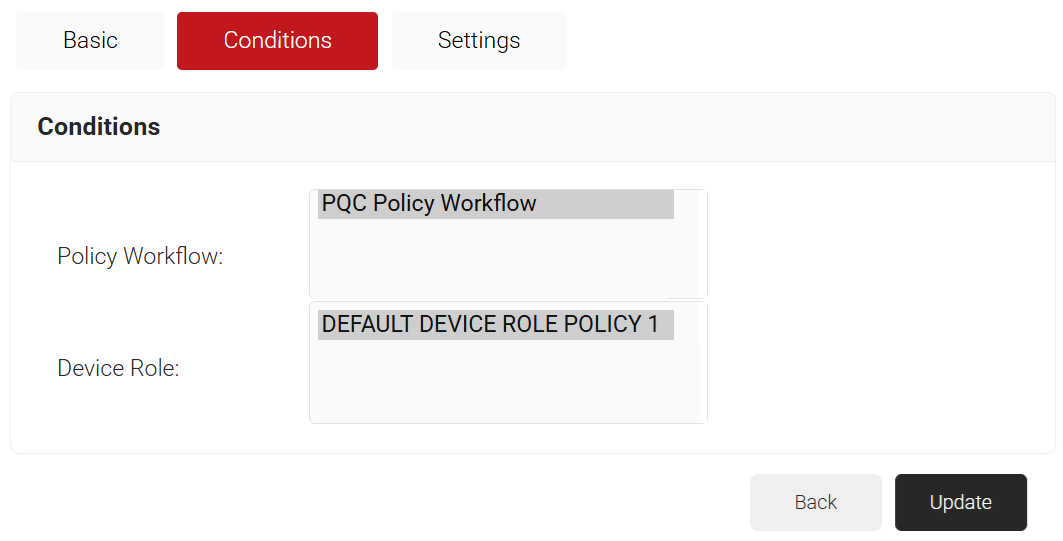
- Select the Conditions tab.
- From the Policy Workflow list, select the policy workflow you created earlier (see Creating a Policy Workflow).
- From the Device Role list, select DEFAULT DEVICE ROLE POLICY 1.

- Select the Settings tab.
- In the Settings section, from the Use Certificate Authority drop-down list, select the intermediate CA you created earlier (see Creating an Intermediate CA).
- From the Use Certificate Template drop-down list, select the template you created earlier (see Creating a Certificate Template).
- In the other settings, retain the default values.
- Click Update.

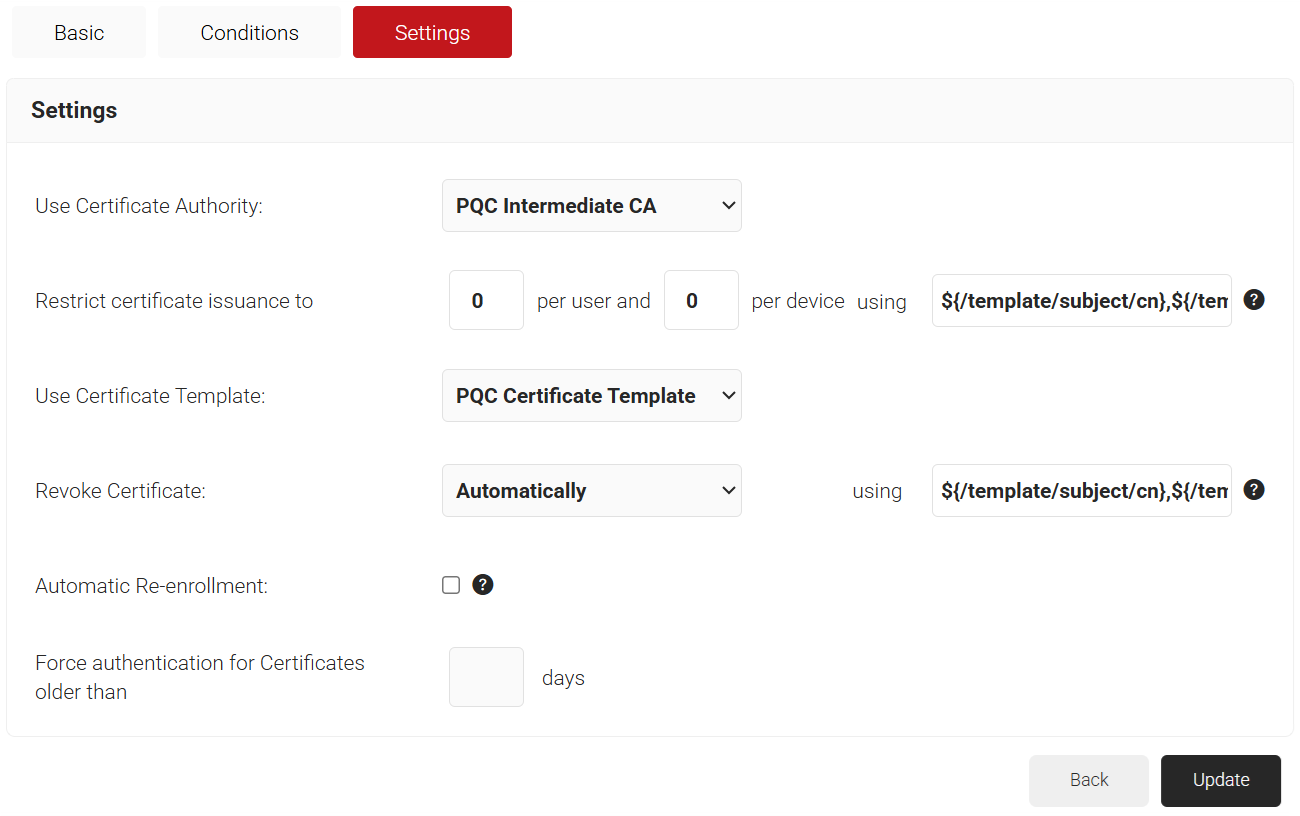
NOTE: PQC CAs must be mapped only with the Auto Signature Algorithm. In the certificate template, set the Signature Algorithm to Auto; otherwise, a signature algorithm mismatch error occurs.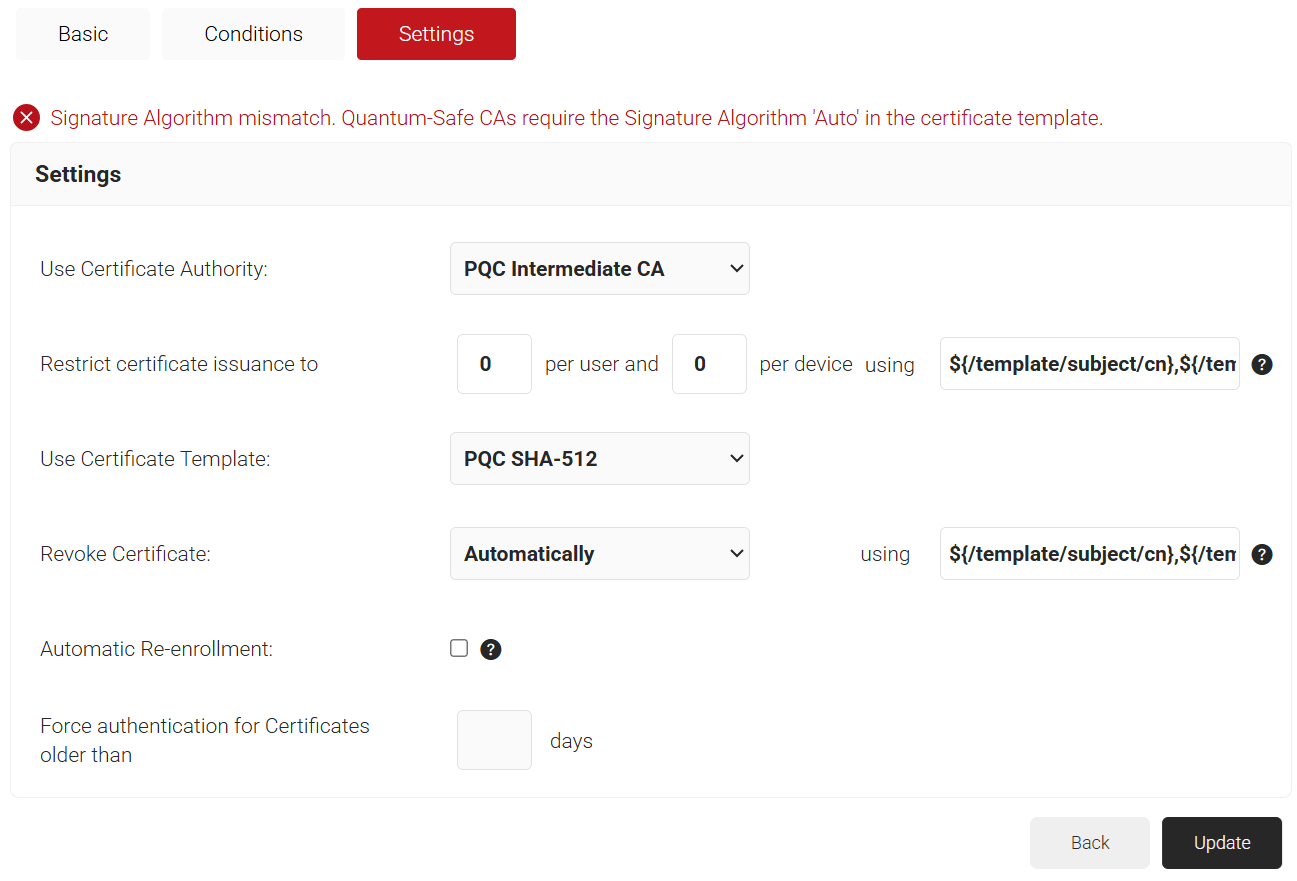
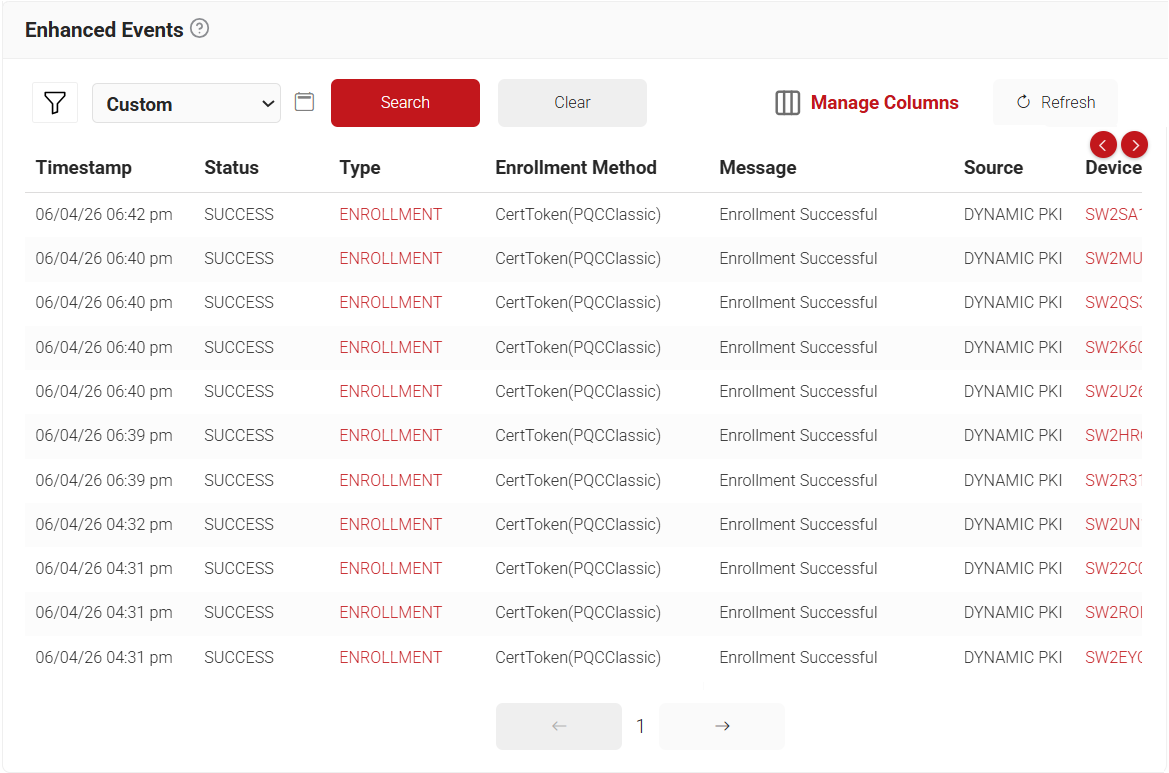
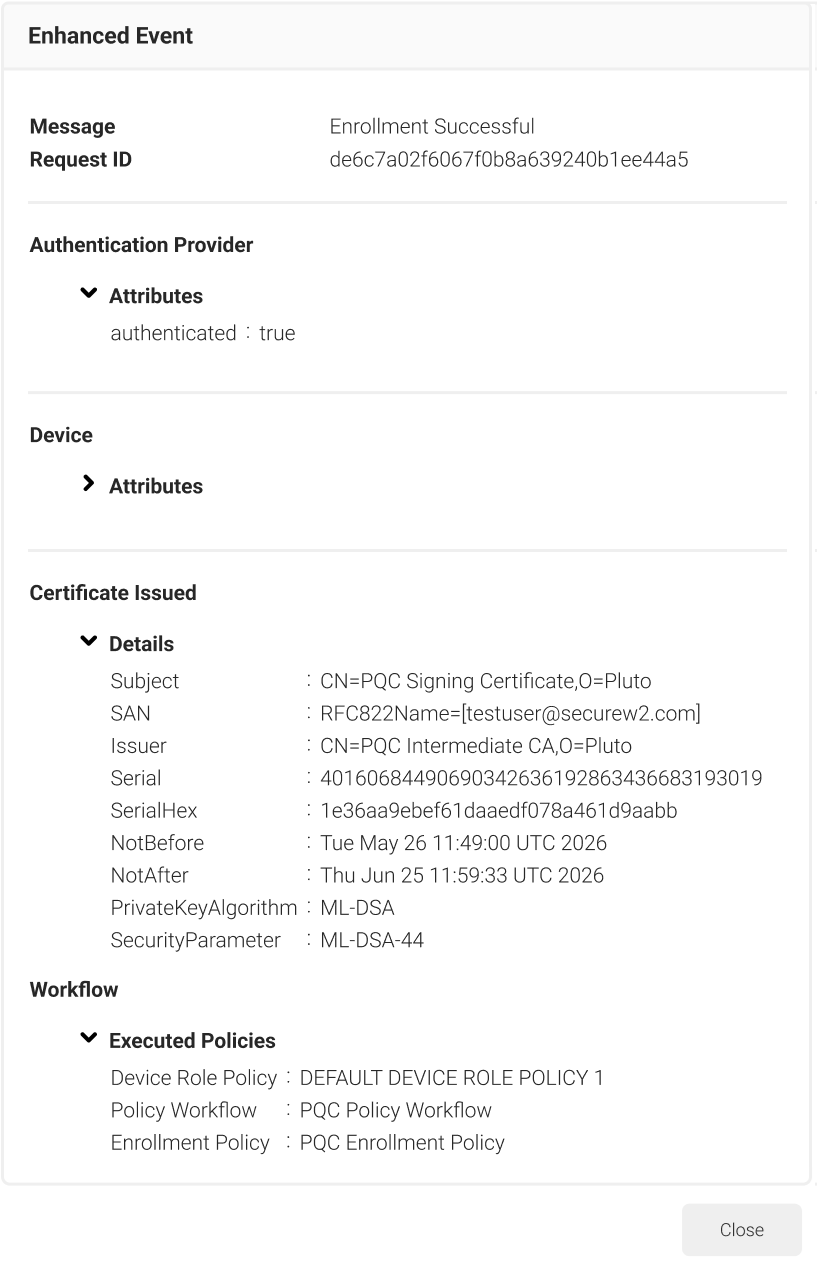
SecureW2 administrators can verify successful PQC certificate enrollment by navigating to Data and Monitoring > Enhanced Events in the JoinNow Management Portal.