MAC Authentication Bypass (MAB) authenticates devices based on their MAC (Media Access Control) address. Once the source MAC address is identified, the switch generates an Access-Request message using the device’s MAC address as the identity and sends it to the RADIUS server. The RADIUS server evaluates the MAC address against the configured policies to determine whether the device is allowed to access the network and what access attributes should apply. If authentication is successful, the RADIUS server returns an Access-Accept message, and the switch grants the device network access. If authentication is not successful, the RADIUS server returns an Access-Reject message, and the switch denies the device access to the network.
This guide covers how to manage MAB devices using either the JoinNow Management Portal or the SecureW2 API, including adding devices individually, in bulk via CSV upload, or programmatically via API, so administrators are not limited to configuring one device at a time.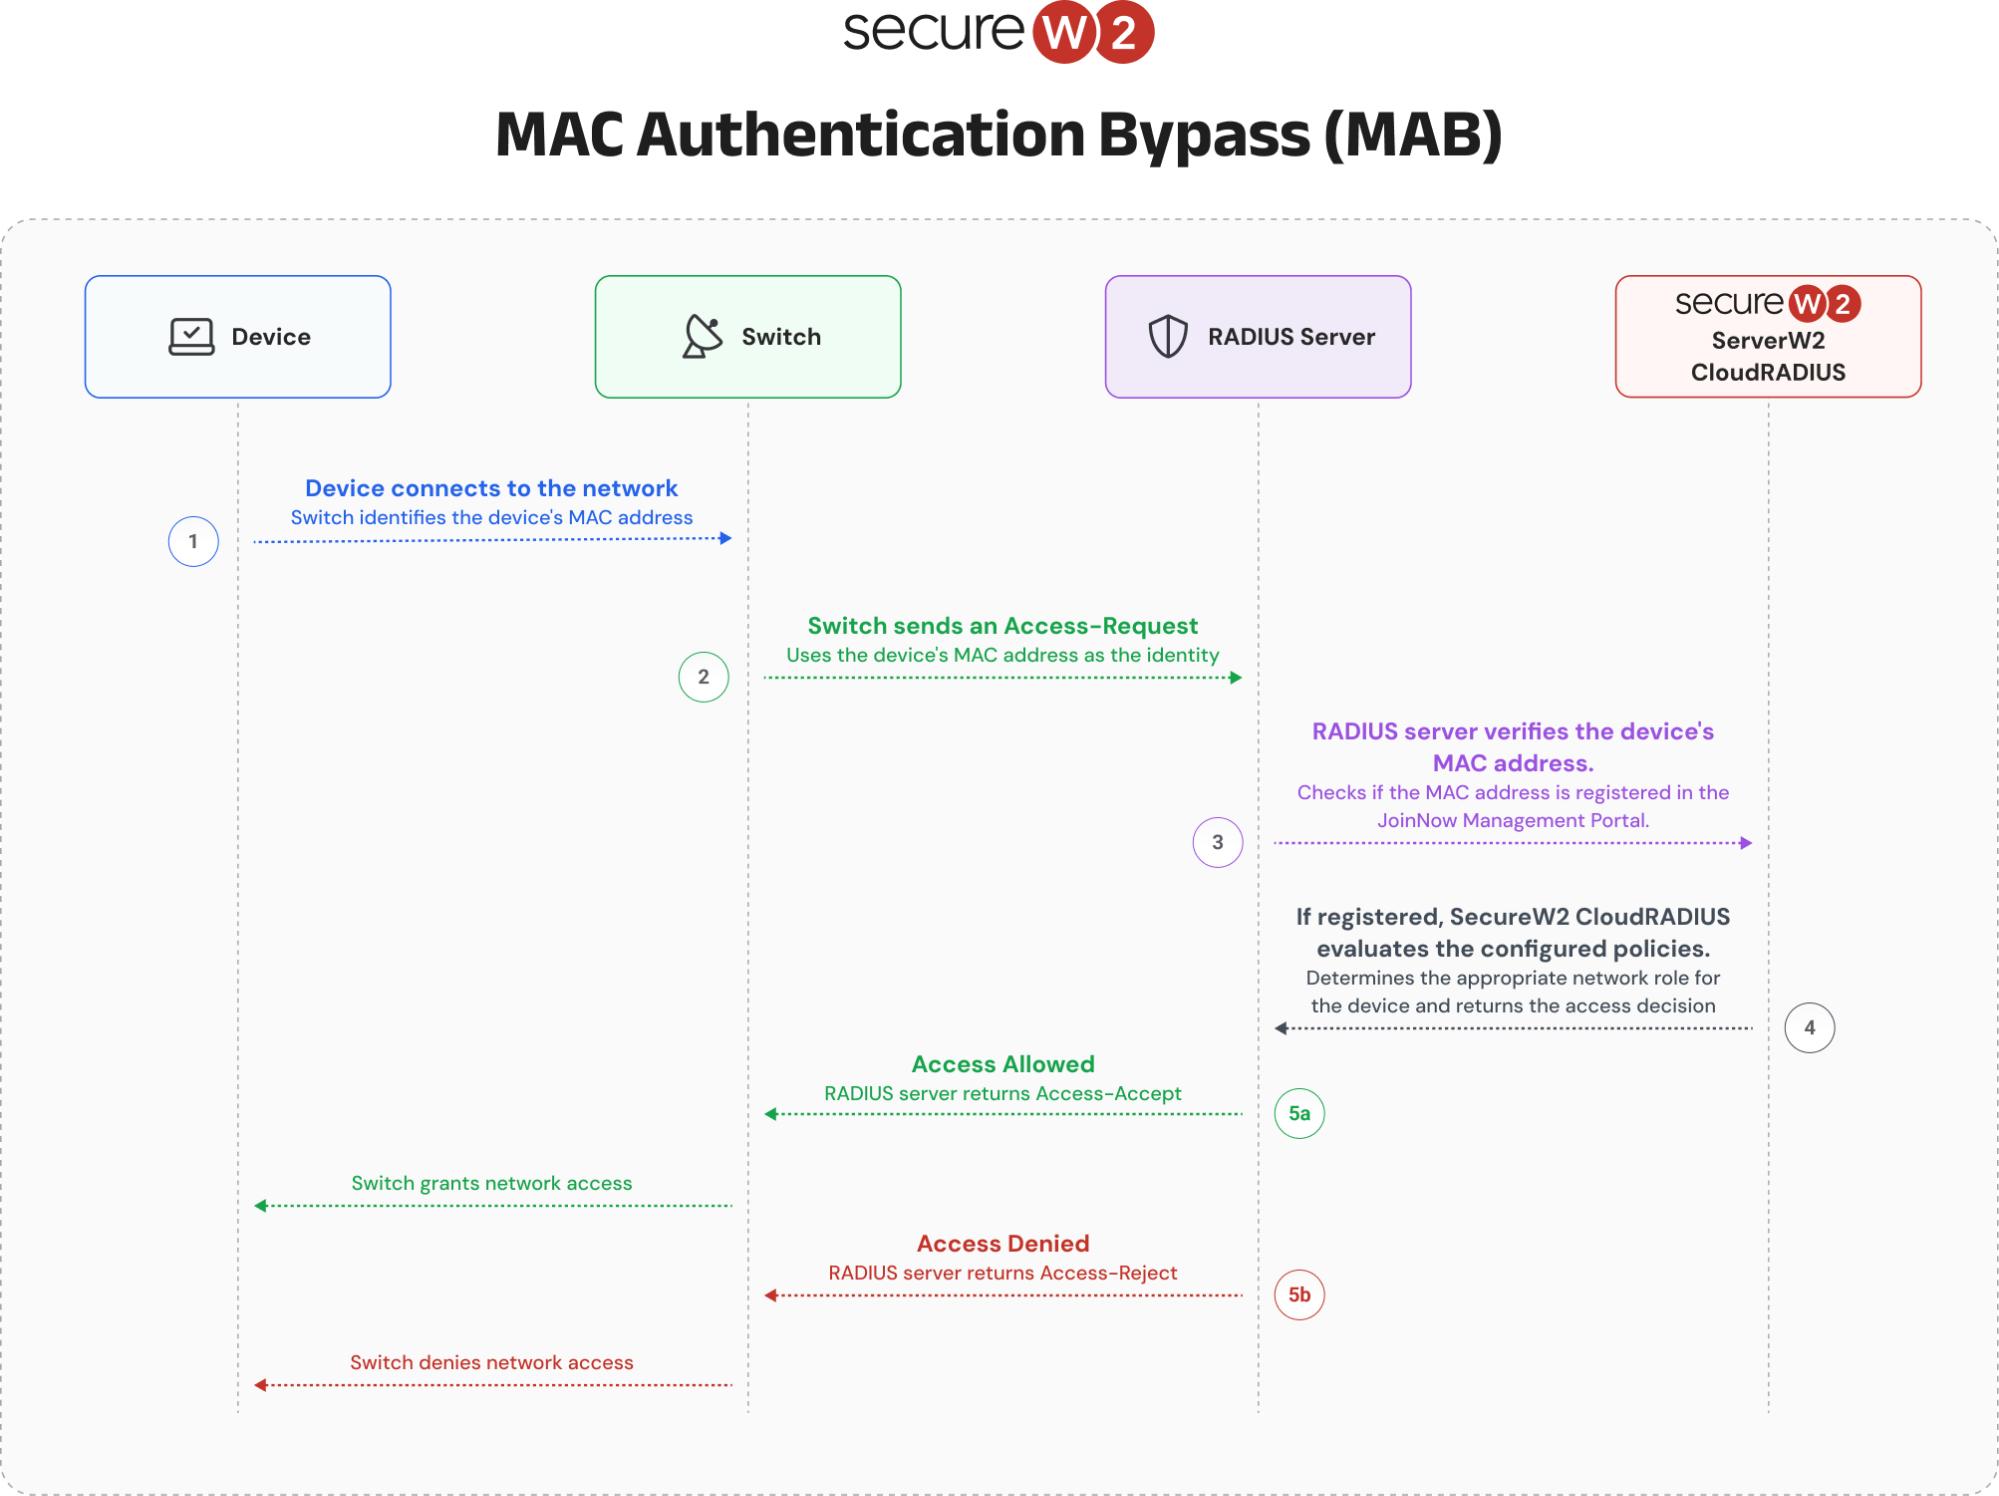
Before configuring MAC Authentication, you must create and configure a Core Provider in the JoinNow Management Portal. This section explains how to create the MAC Authentication Core Provider, organize devices into groups, and add or delete device MAC addresses for authentication.
To create a MAC Authentication core provider, perform the following steps:
- Log in to the JoinNow Management Portal.
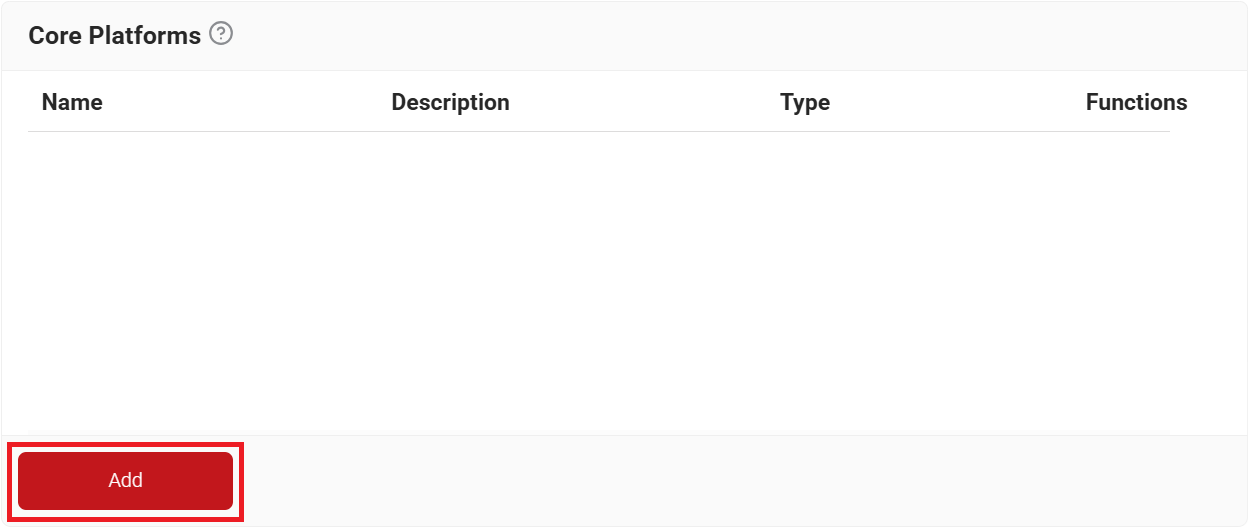
- Navigate to the Integration Hub > Core Platforms.
- Click Add.

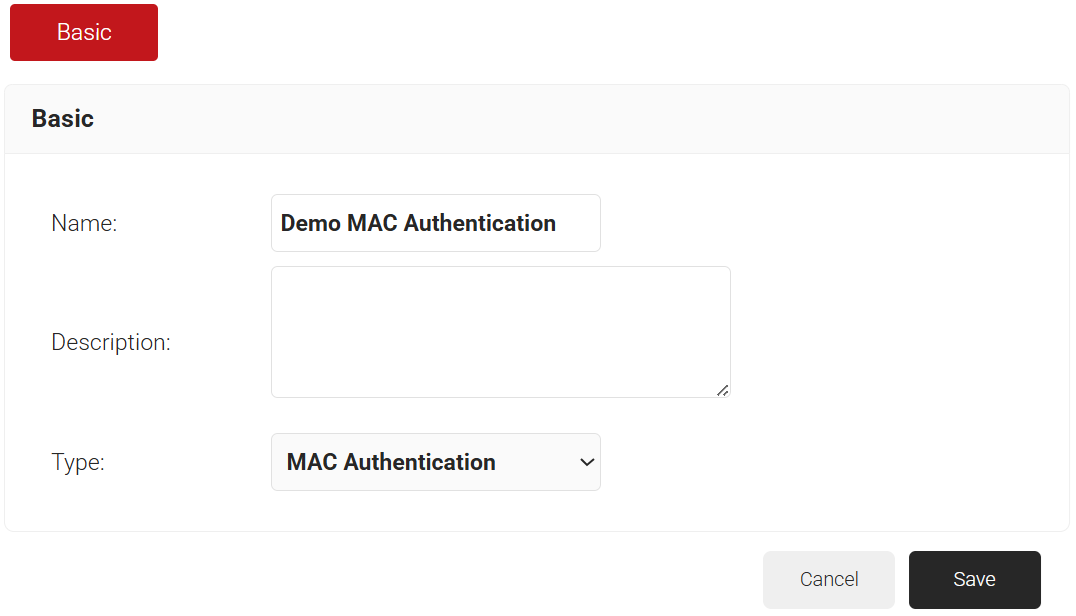
- On the Basic tab:
- In the Name field, enter the name of the core provider.
- In the Description field, enter a suitable description for the core provider.
- From the Type drop-down list, select MAC Authentication under the Core Provider category.

- Click Save. The page refreshes and displays the Configuration and Groups tabs.
Groups allow you to organize devices for MAC Authentication and associate them with the appropriate Policy Workflows to apply network access and VLAN assignment policies to authenticated devices.
To create a MAC group, perform the following steps:
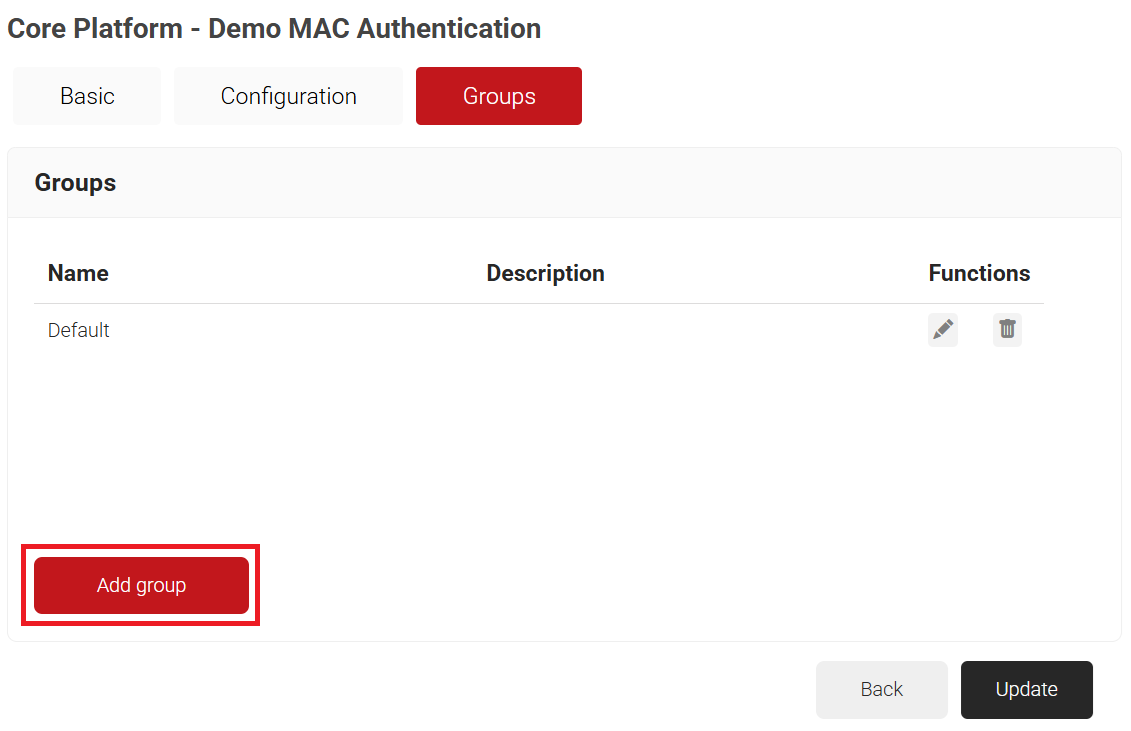
- Select the Groups tab.
- Click Add group.

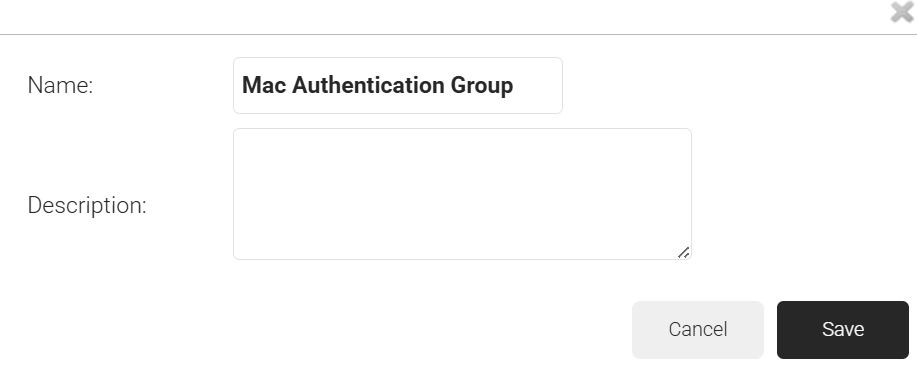
- On the displayed pop-up window, in the Name field, enter a name for the MAC Group.
- In the Description field, enter a suitable description for the MAC Group.

- Click Save.

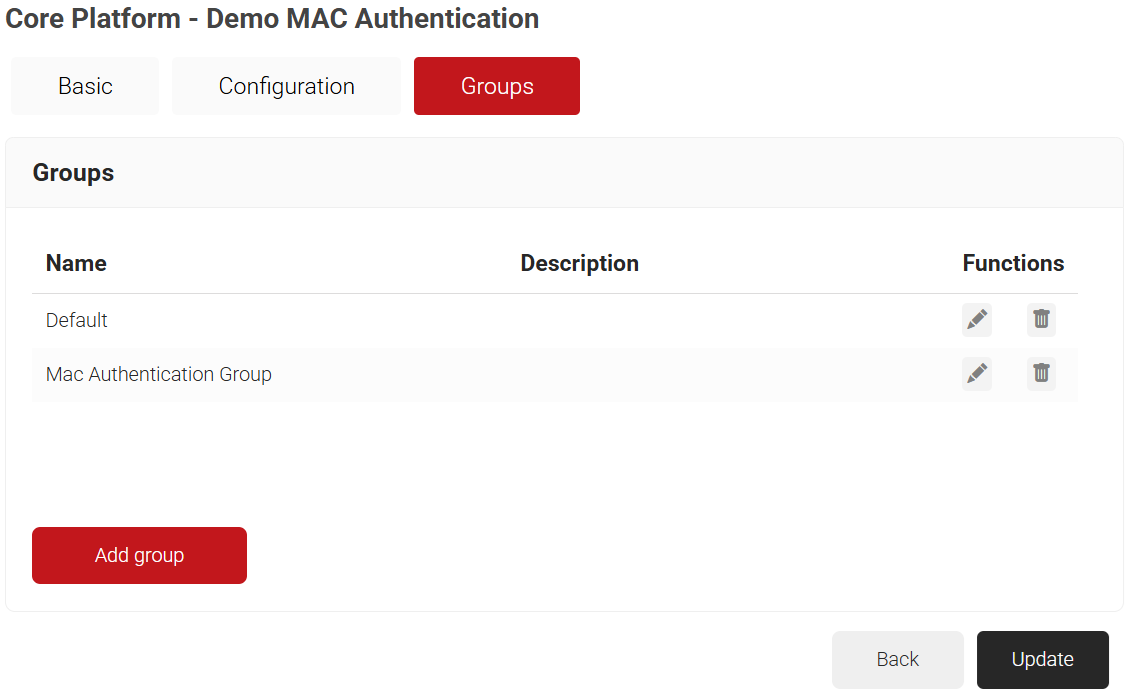
- Click Update to save the group.
NOTE: Clicking Save only closes the pop-up window. You must click Update to save the group. Otherwise, the group name will not appear in the Group Name drop-down list when adding a device.
This section describes how to add a single device to a MAC Group by entering its MAC address in the JoinNow Management Portal.
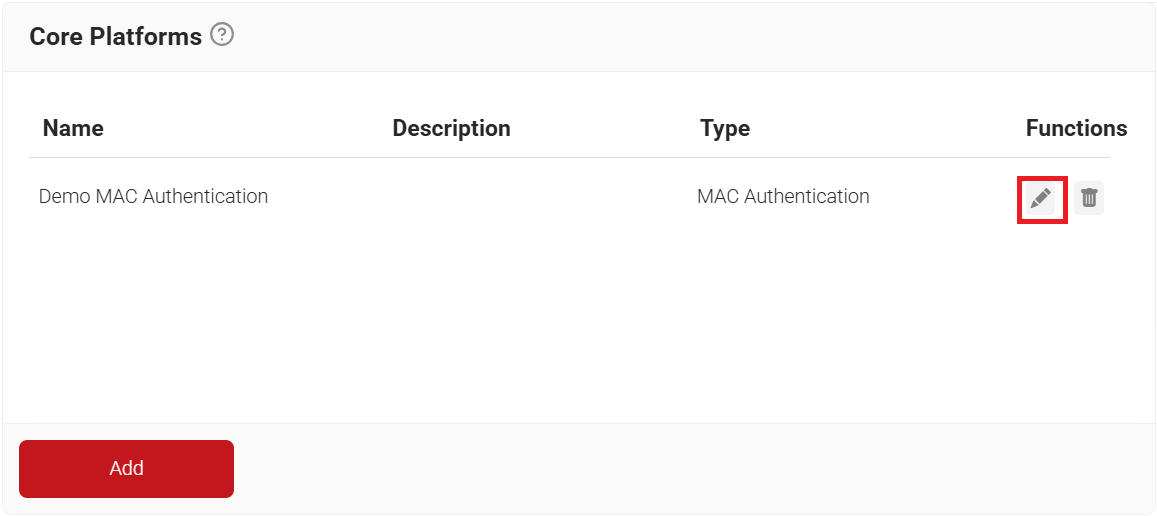
- Select the MAC Authentication core provider created earlier and click Edit.

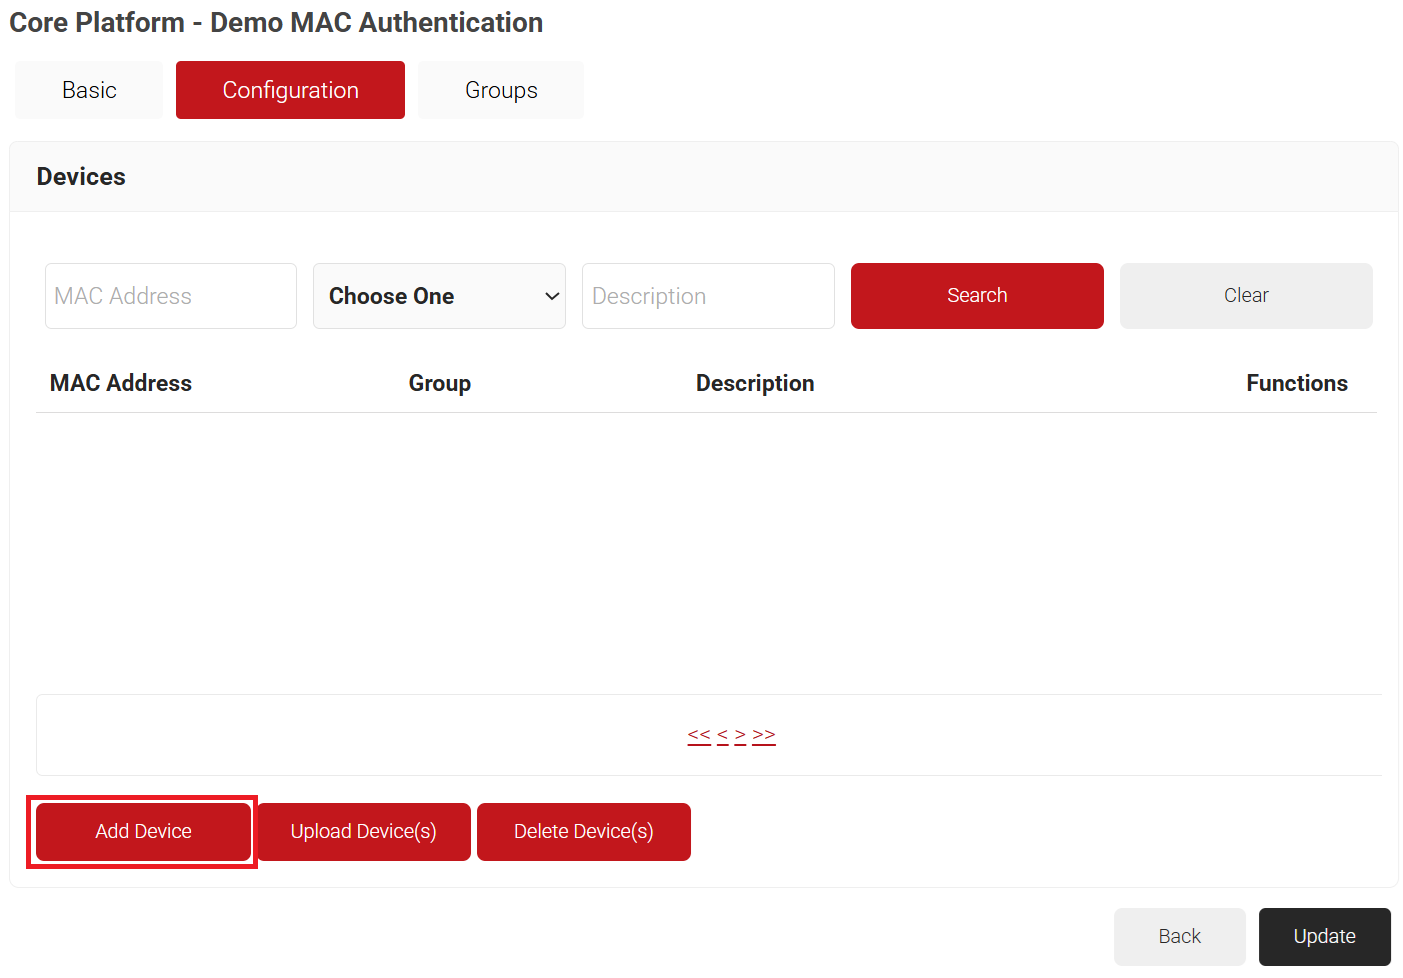
- Select the Configuration tab.
- Click Add Device.

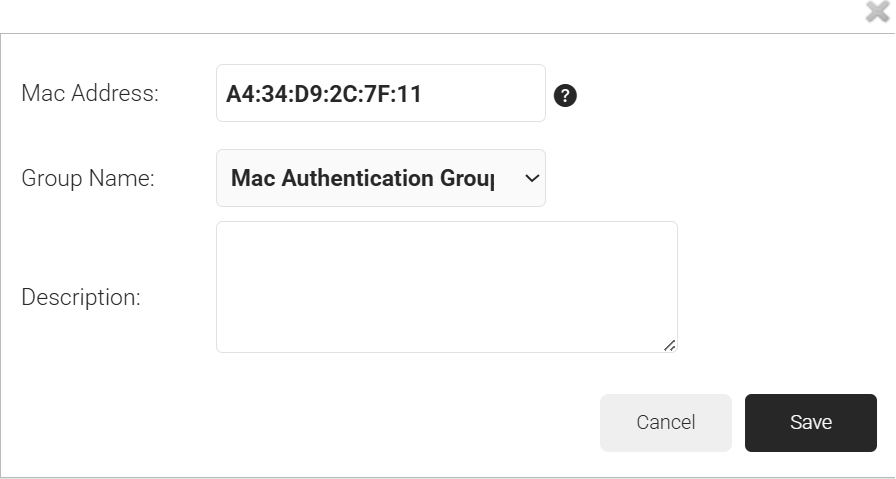
- On the displayed pop-up window, in the MAC Address field, enter the MAC address of the device you want to authenticate.
- From the Group Name drop-down list, select the group name you created in the Create a MAC Group section.
- In the Description field, enter a suitable description for the device.

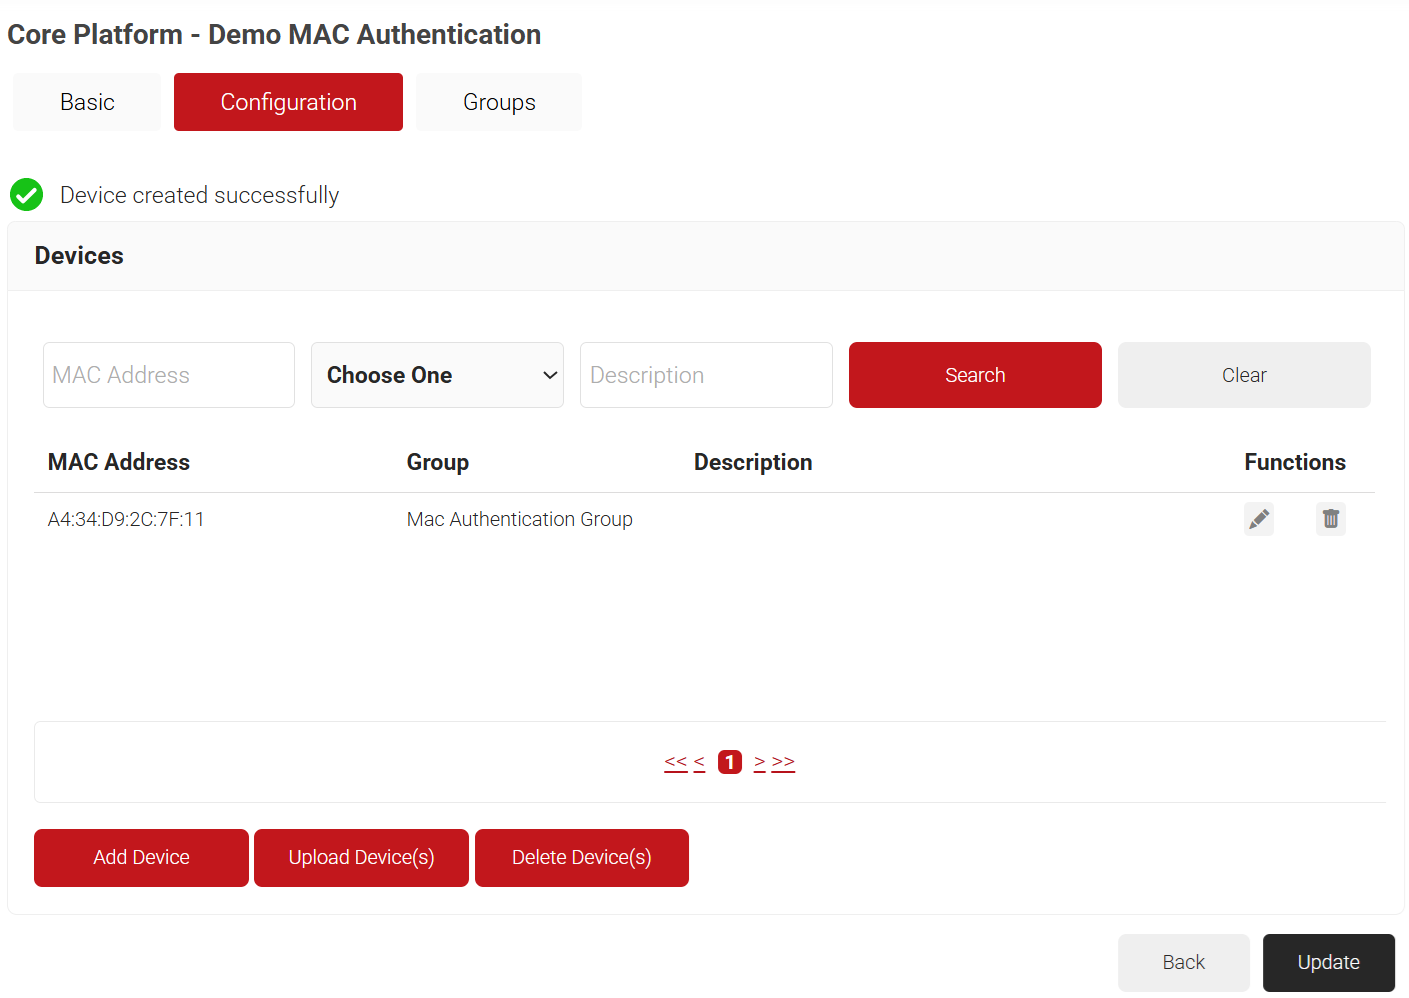
- Click Save.

This section describes how to add multiple devices to a MAC Group at once by uploading a CSV file containing their MAC addresses.
- Select the MAC Authentication core provider created earlier and click Edit.
- Select the Configuration tab.
- Click Upload Device(s).
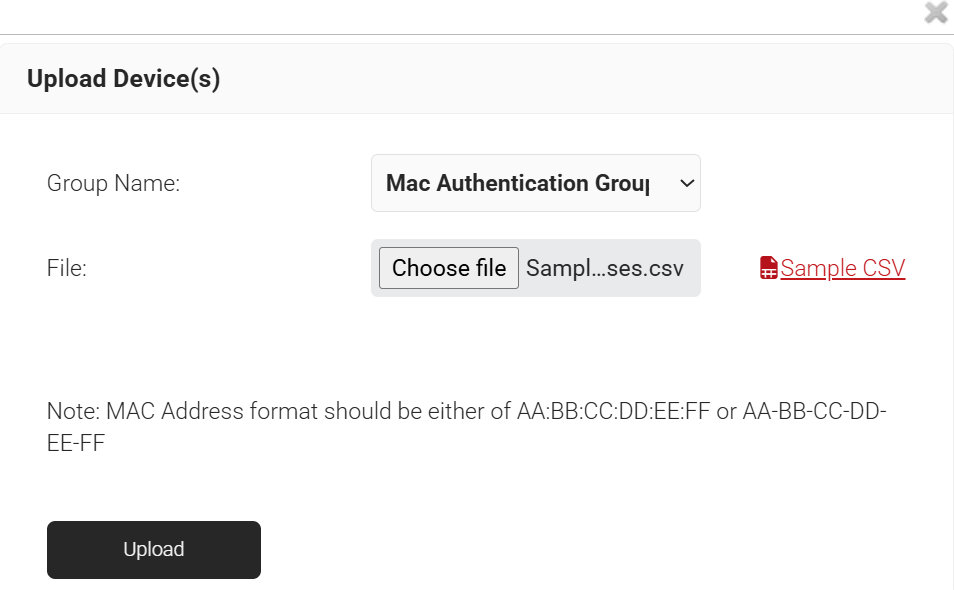
- On the Upload Device(s) pop-up window, from the Group Name drop-down list, select the group name you created in the Create a MAC Group section.
- In the File field, click Choose file to select the .csv file containing the MAC addresses of the devices.
NOTE: The uploaded .csv file can be a maximum of 256 KB and can contain as many MAC addresses as fit within that size.
NOTE: The MAC address must be in either AA:BB:CC:DD:EE:FF or AA-BB-CC-DD-EE-FF format.
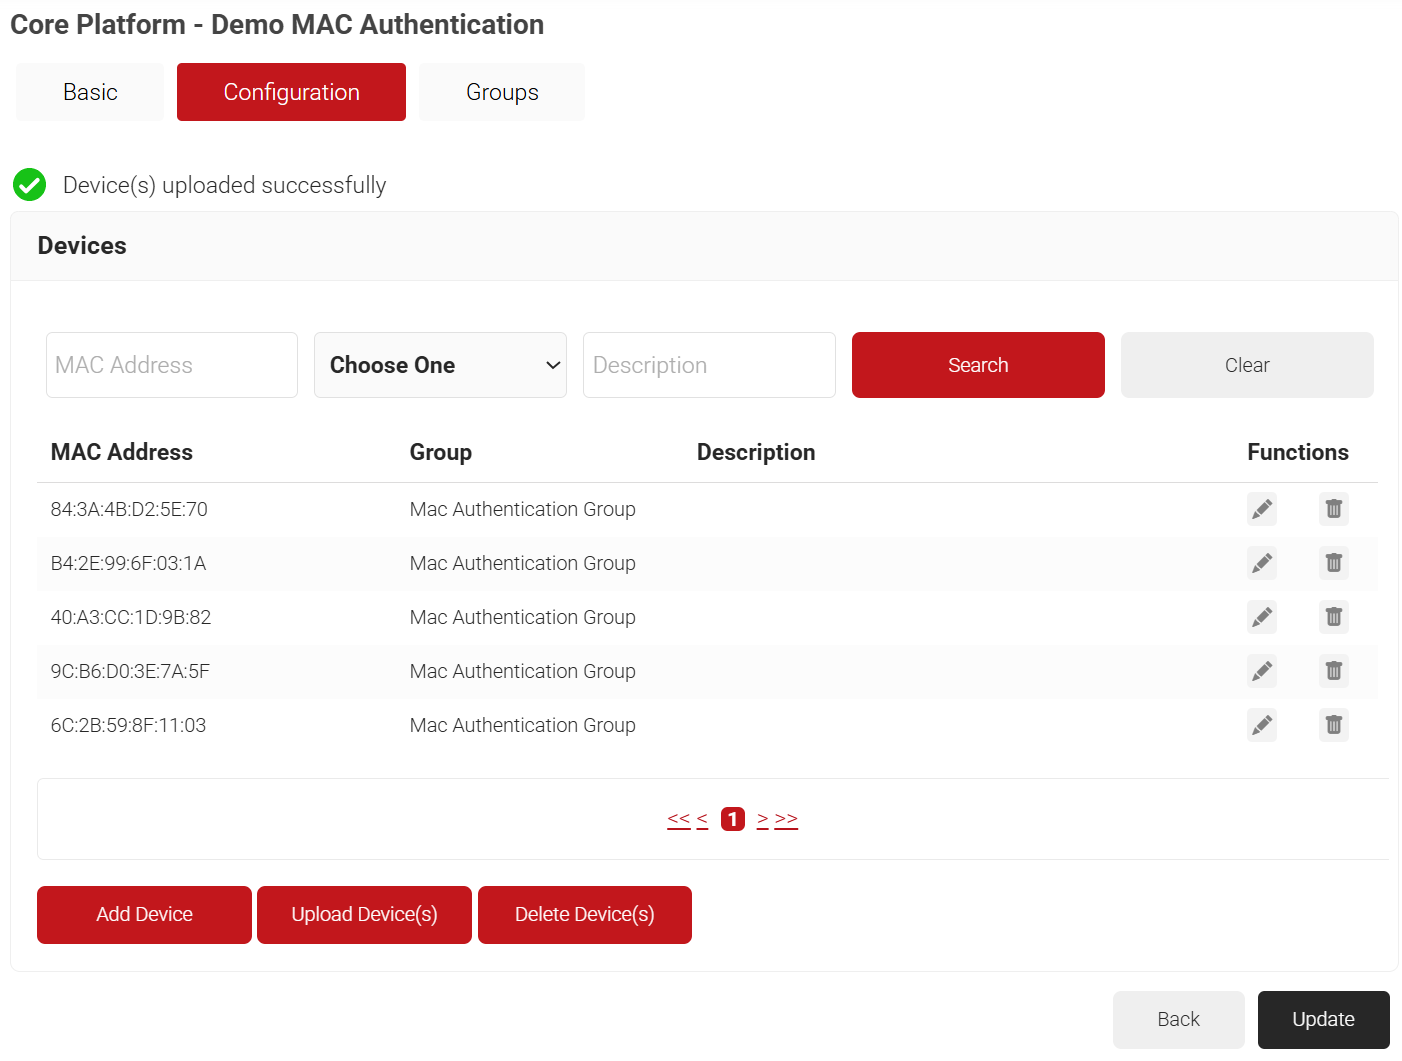
- Click Upload. The list of device MAC addresses is displayed.

- Click Update.
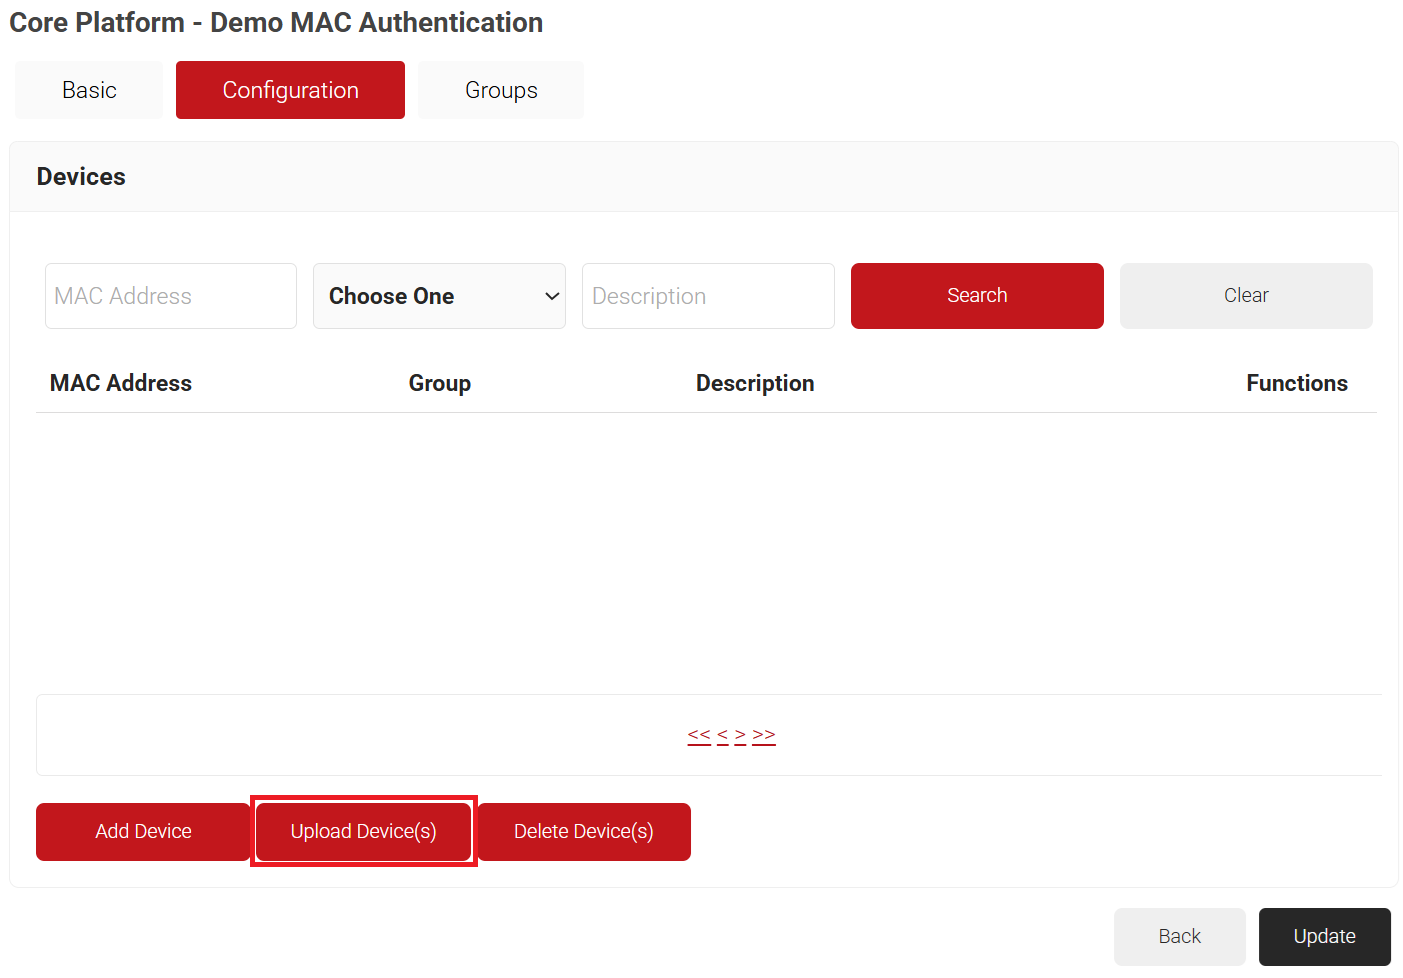
This section describes how to delete devices from the MAC Authentication configuration in the JoinNow Management Portal. Devices can be deleted individually, or multiple devices can be deleted at once.
To delete a device individually:
- Select the MAC Authentication core provider created earlier and click Edit.
- Select the Configuration tab.
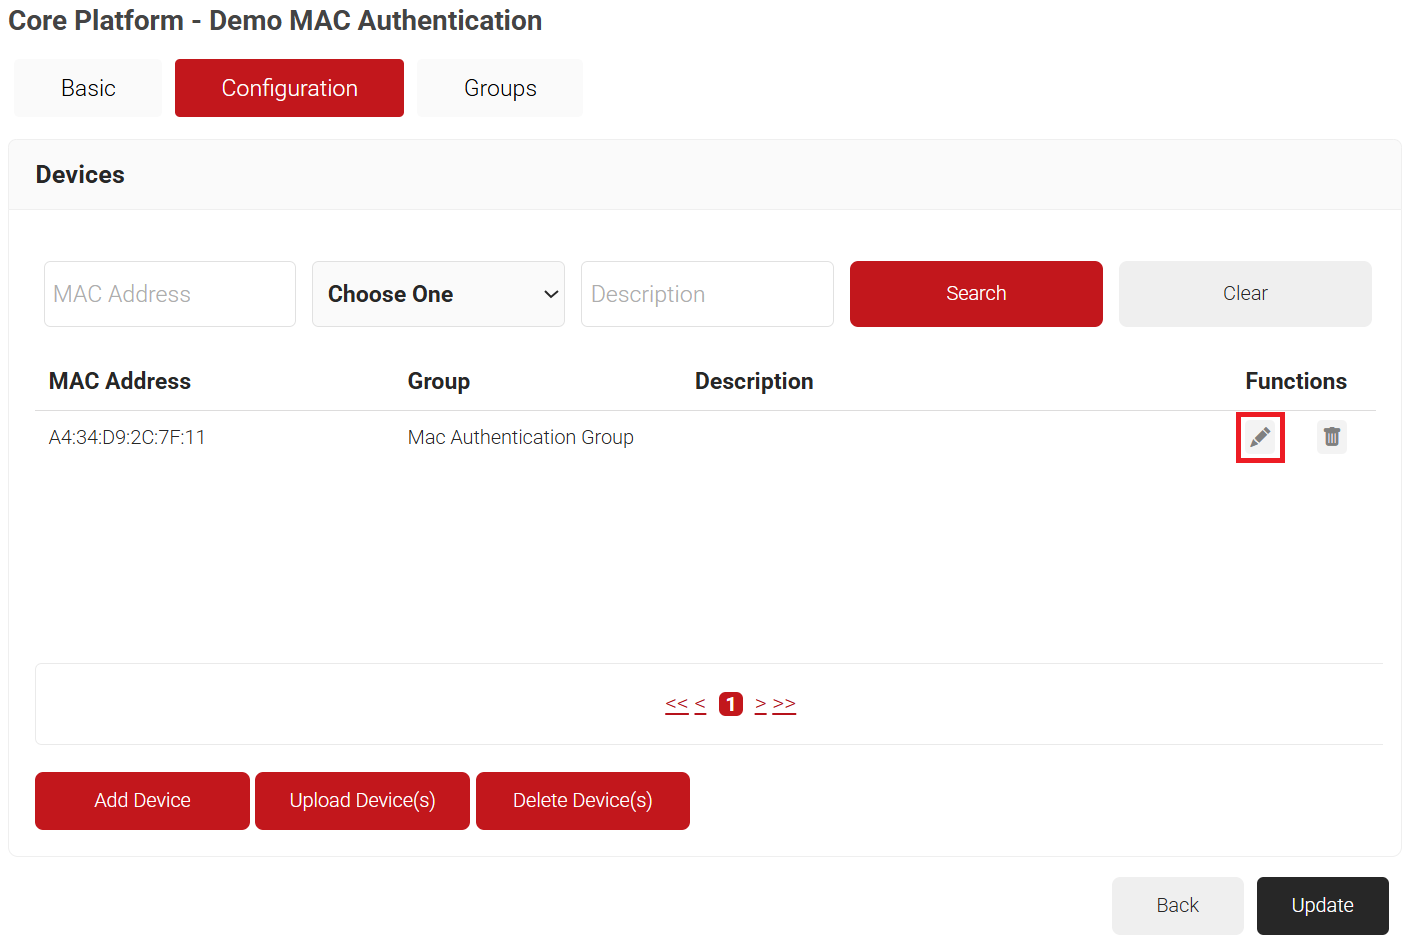
- Click the Delete icon next to the device you want to delete.

- Click Update.
To delete multiple devices at once:
- Select the MAC Authentication core provider created earlier and click Edit.
- Select the Configuration tab.
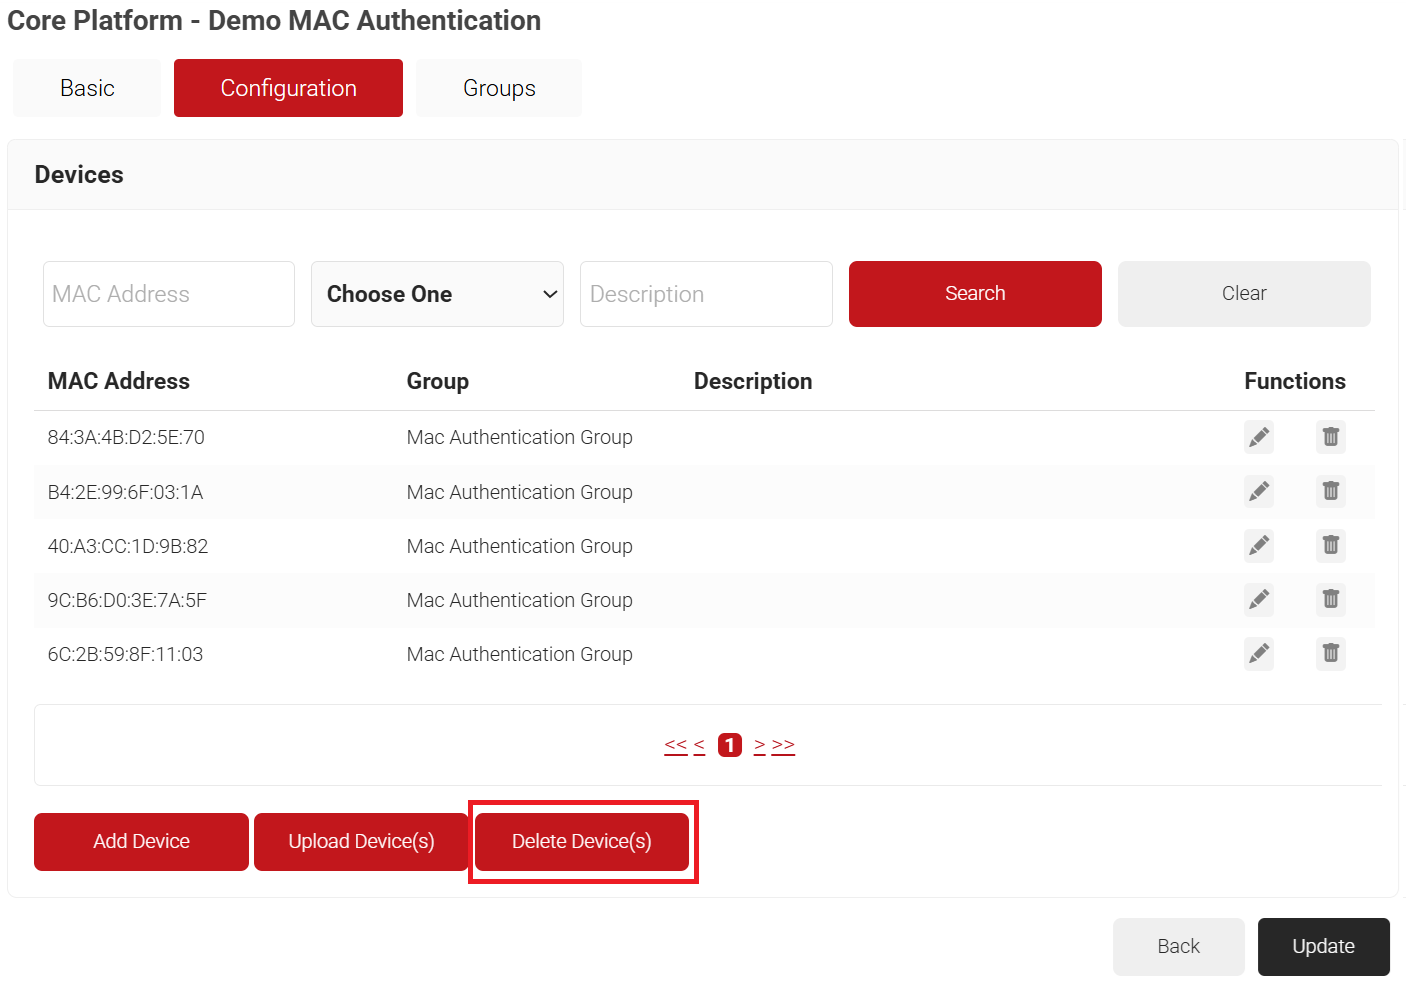
- In the Devices section, click Delete Device(s).

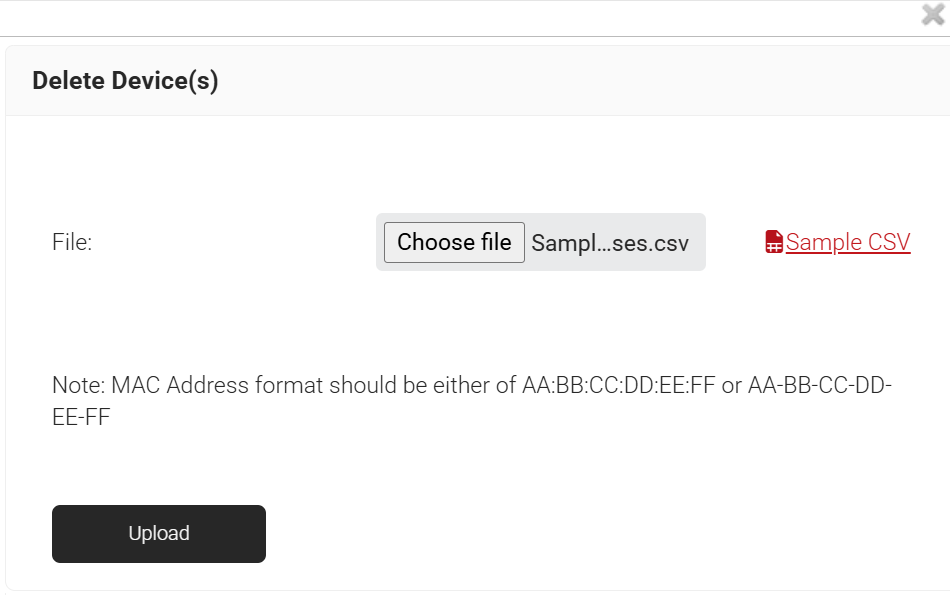
- On the Delete Device(s) pop-up window, in the File field, click Choose file to select the .csv file containing the MAC addresses of the devices you want to delete.
- Click Upload.

- Click Update.
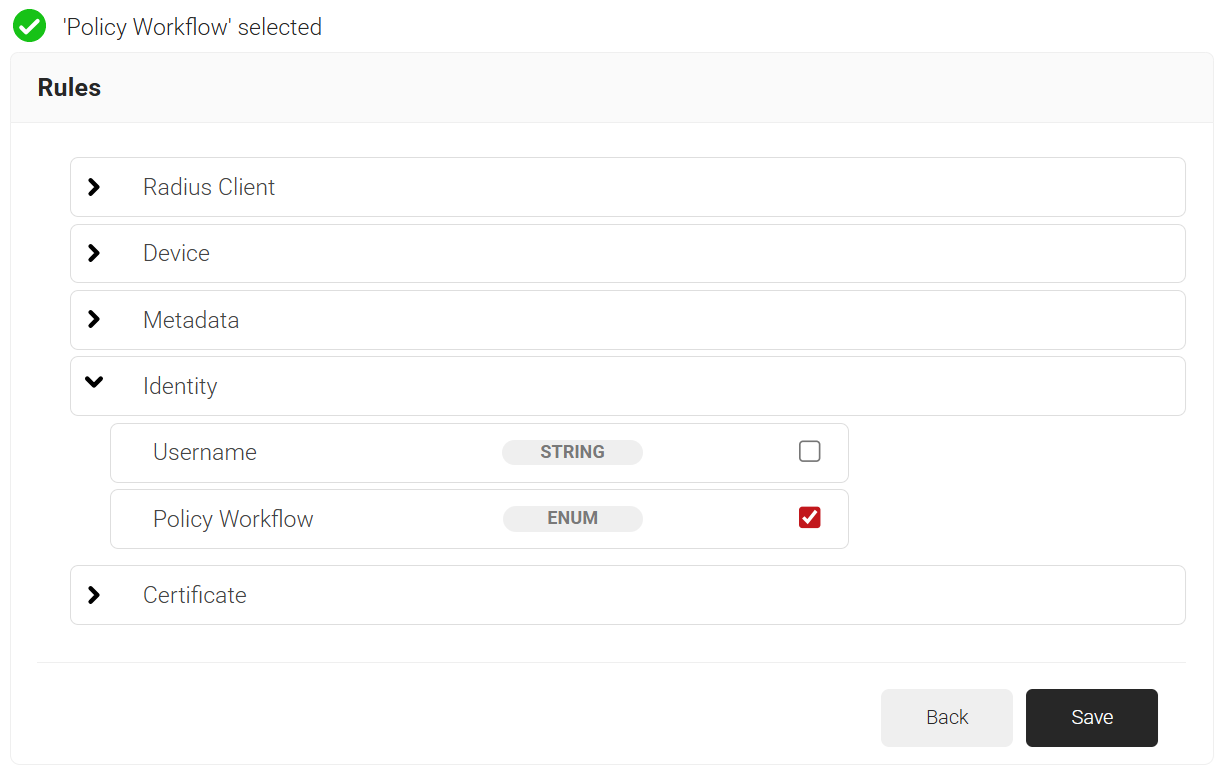
Policy Workflow segments devices based on defined criteria. It allows you to define and create roles based on groups retrieved from the Core Provider.
To create a policy workflow, perform the following steps:
- Navigate to Policy Management > Policy Workflows.
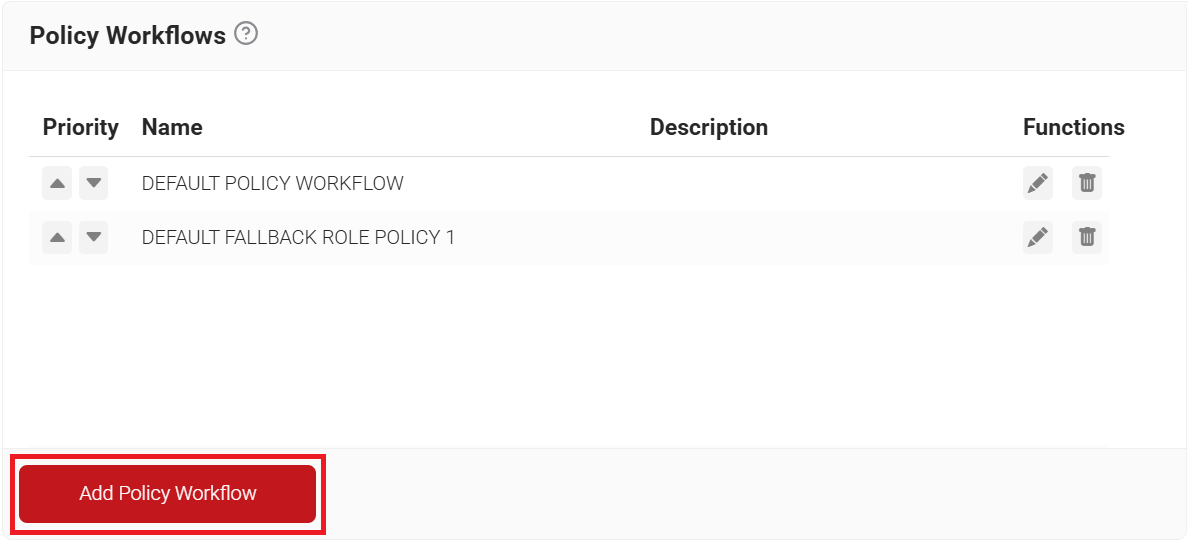
- Click Add Policy Workflow.

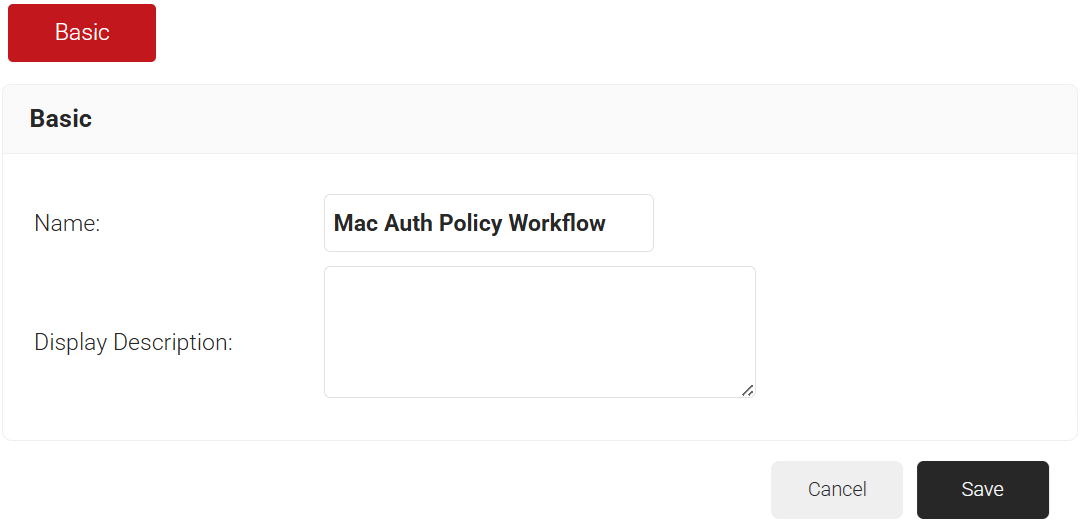
- In the Basic tab, enter the name of the Policy Workflow in the Name field.
- In the Display Description field, enter a suitable description for the Policy Workflow.

- Click Save.
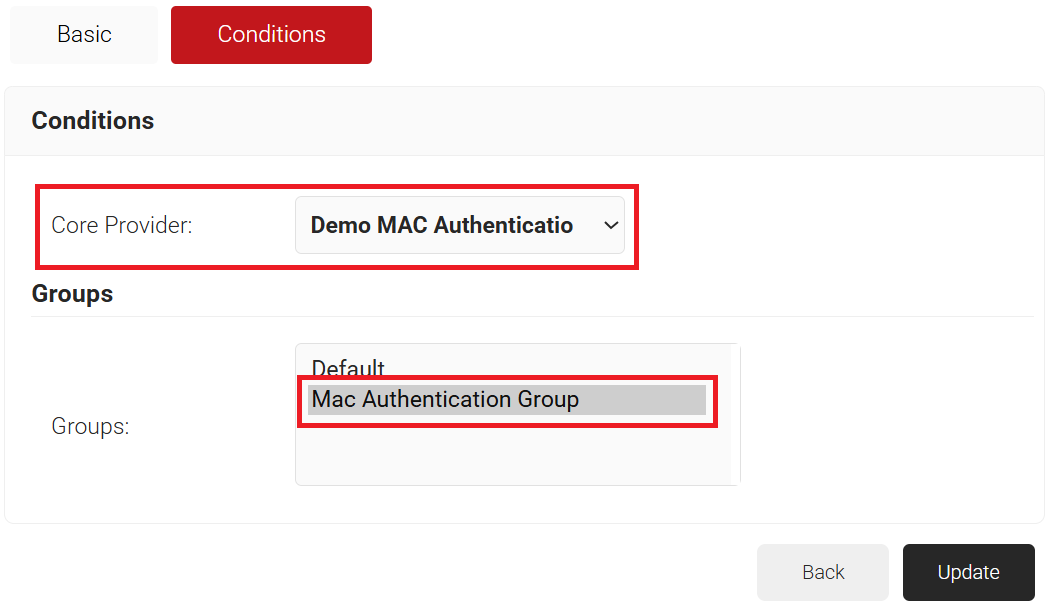
- The page refreshes, and the Conditions tab is displayed.
- Select the Conditions tab.
- From the Core Provider drop-down list, select the MAC Authentication that you created earlier.
- In the Groups field, select the MAC Group that you created earlier.

- Click Update.
A Network Policy defines how device connection decisions are made based on device information obtained from the Policy Workflow. It allows you to specify whether the device will be granted or denied network access, along with other RADIUS attributes that can be sent, which are most commonly VLAN assignments.
NOTE: Configure a Network Policy only if your organization uses SecureW2 CloudRADIUS as its RADIUS server.
To create a network policy, perform the following steps:
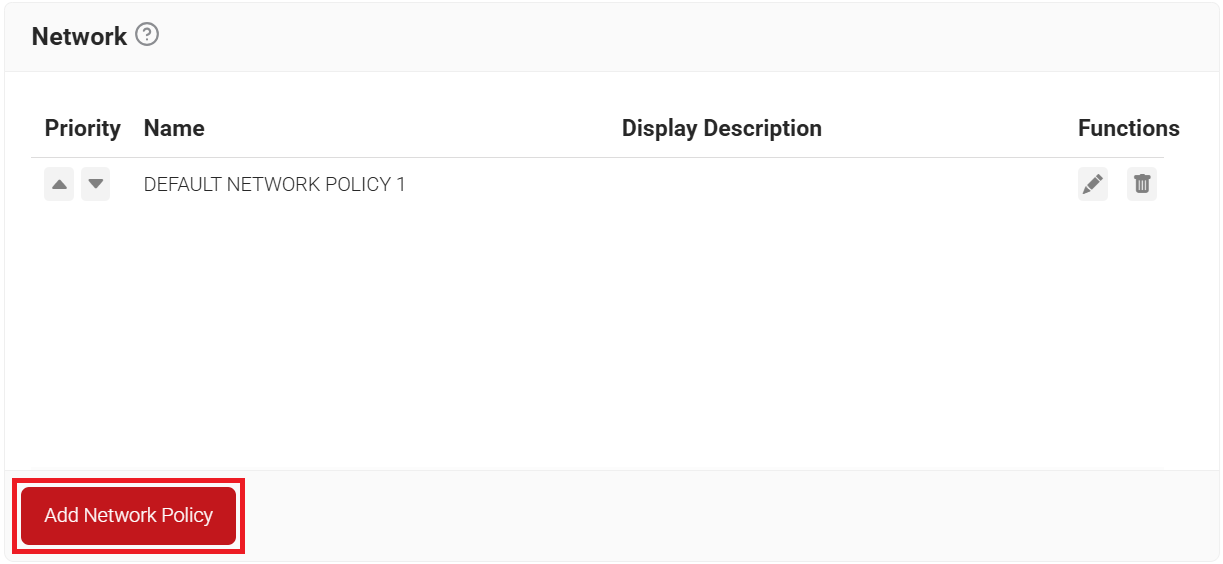
- Navigate to Policy Management > Network.
- Click Add Network Policy.

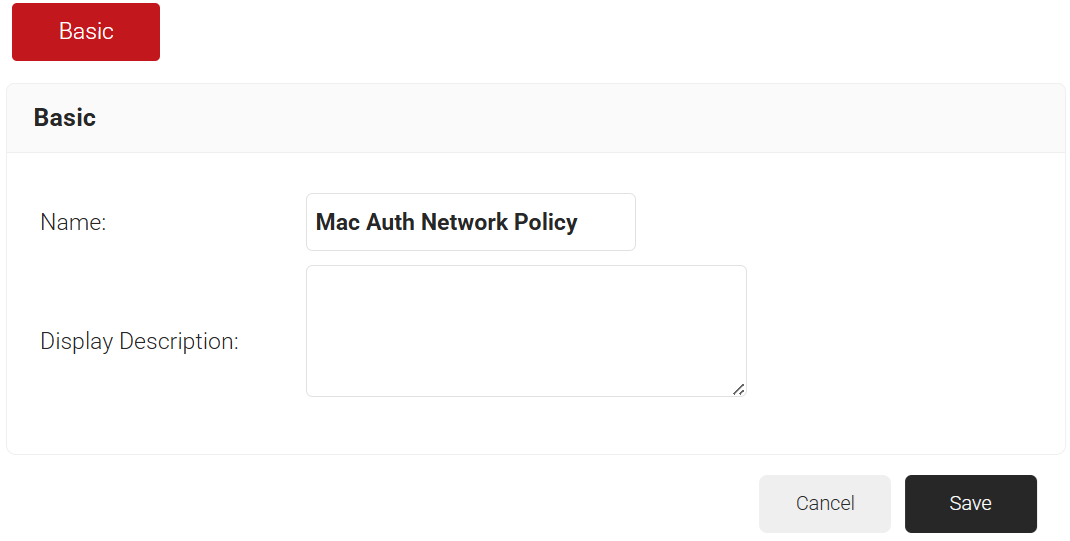
- Under the Basic tab, in the Name field, enter the name of the network policy.
- In the Display Description field, enter a suitable description for the network policy.

- Click Save.
- The page refreshes, and the Conditions and Settings tabs appear.
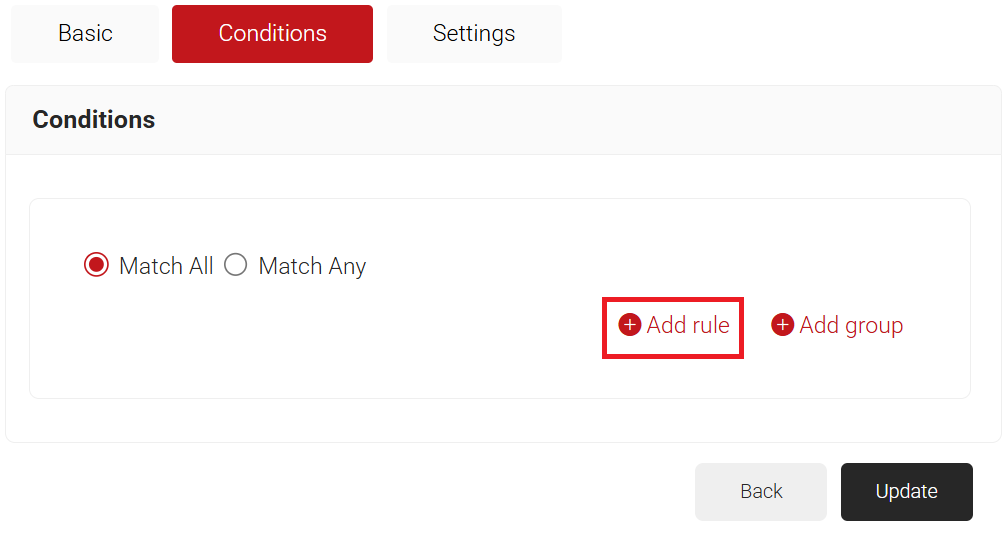
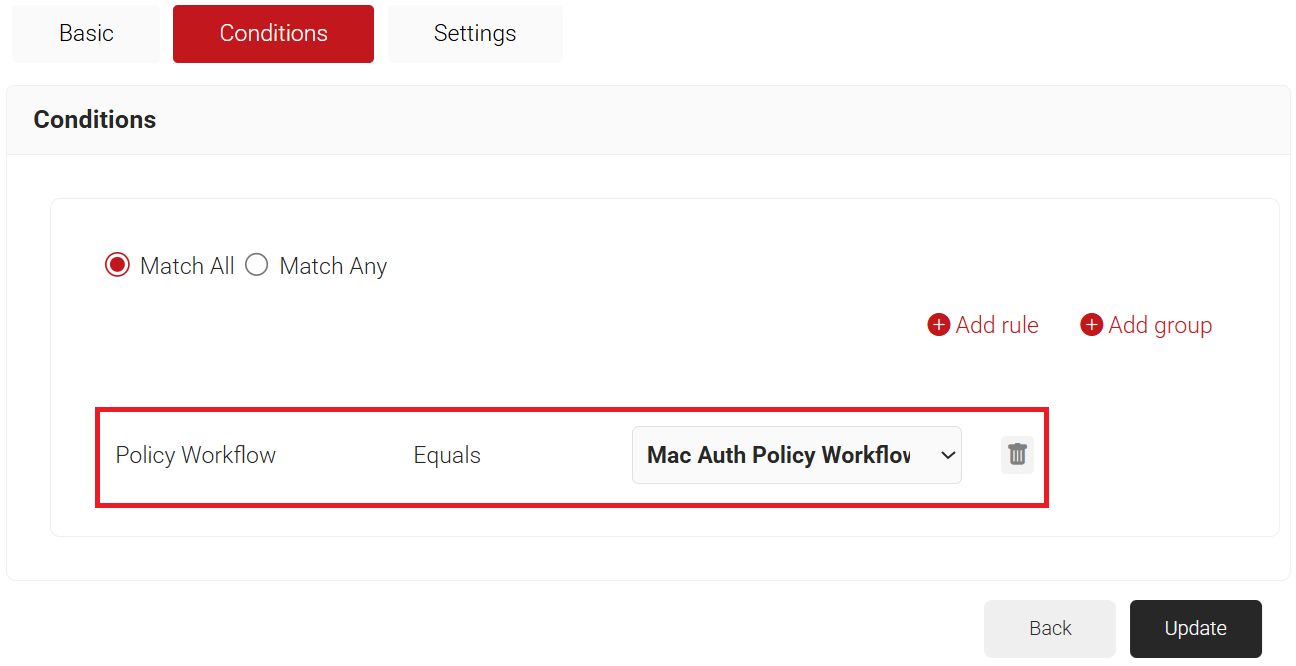
- Select the Conditions tab.

- Click Add rule and select the Policy Workflow to assign to the Network Policy. This mapping directs SecureW2 RADIUS to validate the device’s MAC address against the selected Policy Workflow during authentication.


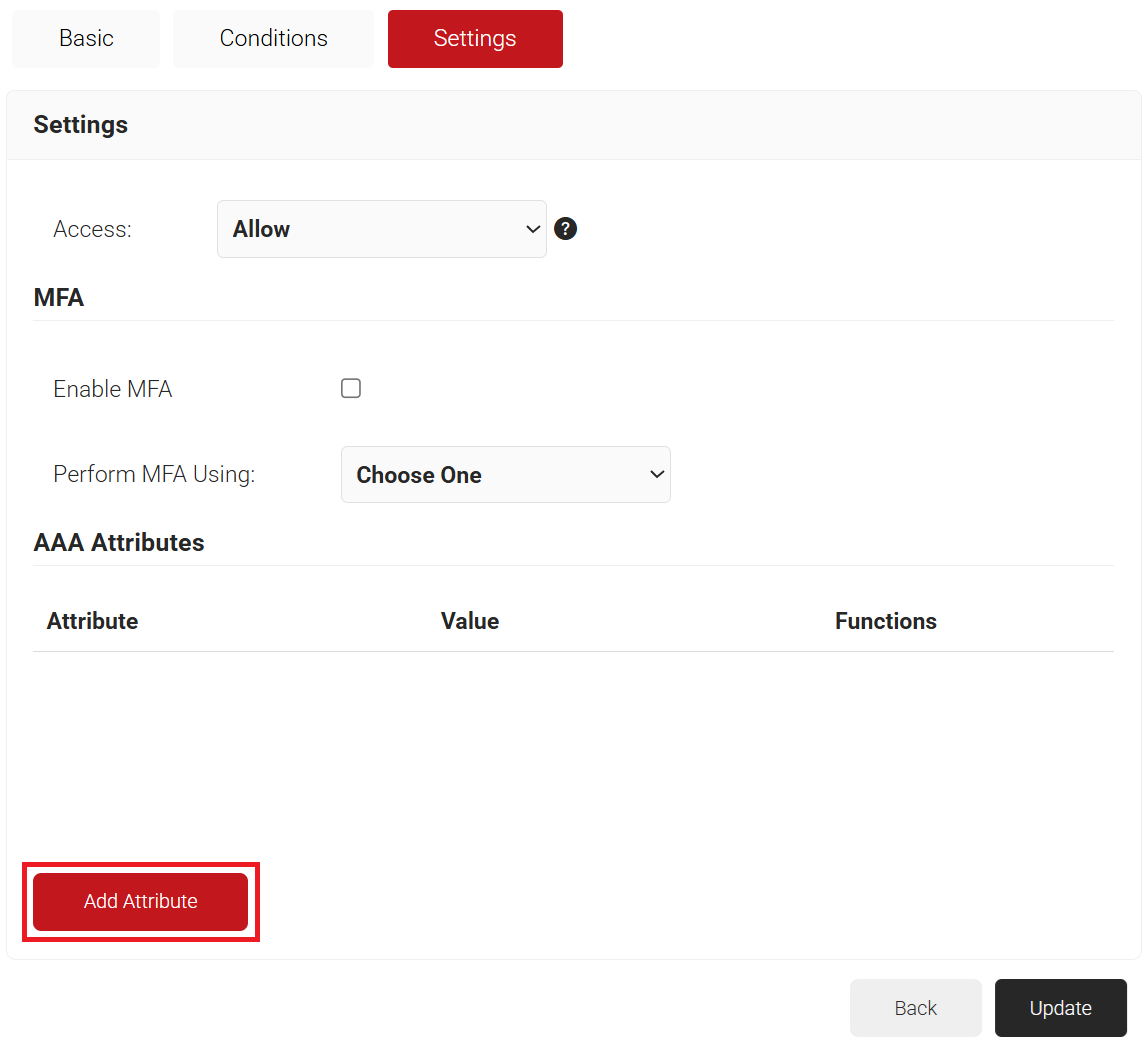
- Select the Settings tab.
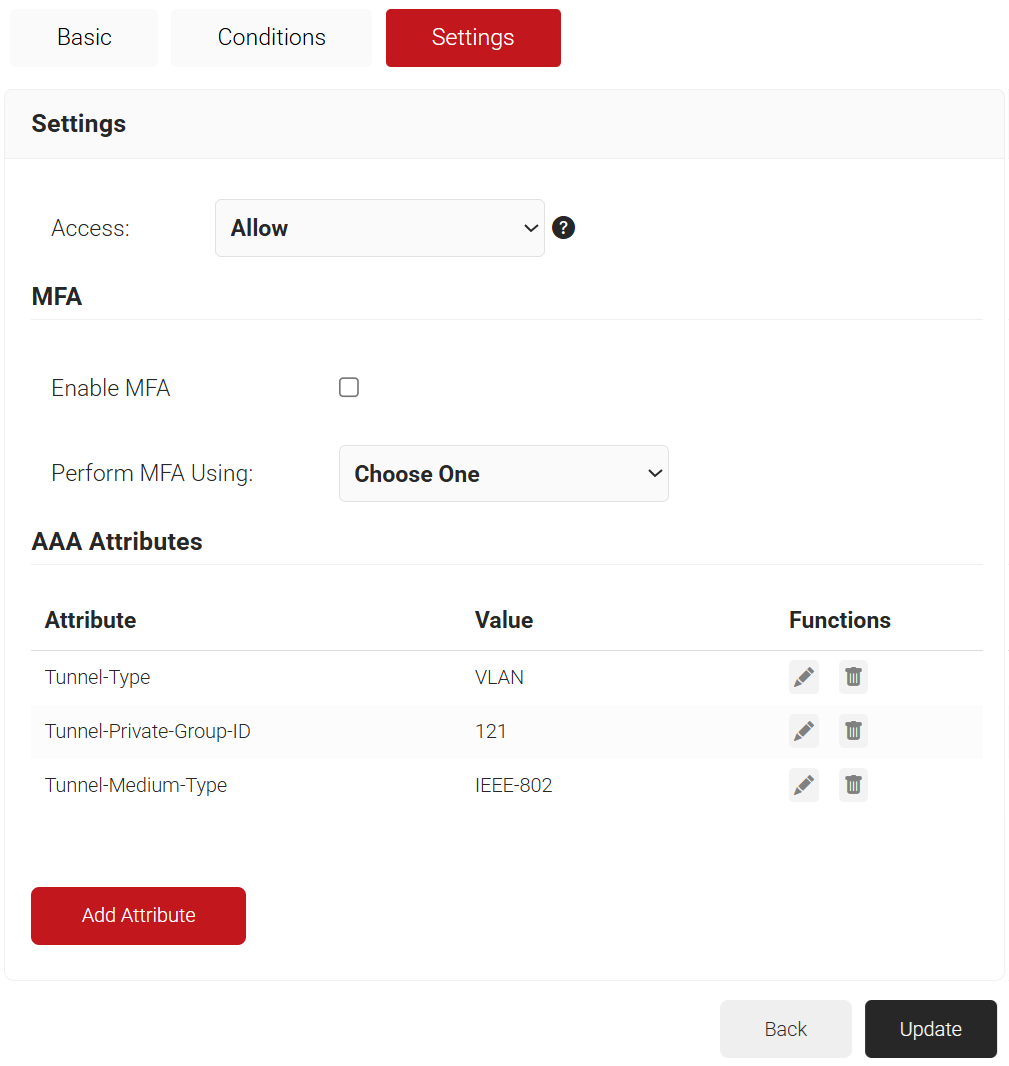
- From the Access drop-down list, select any one of the options to allow or deny authentication requests. The default value is “Allow”.
- Click Add Attribute.

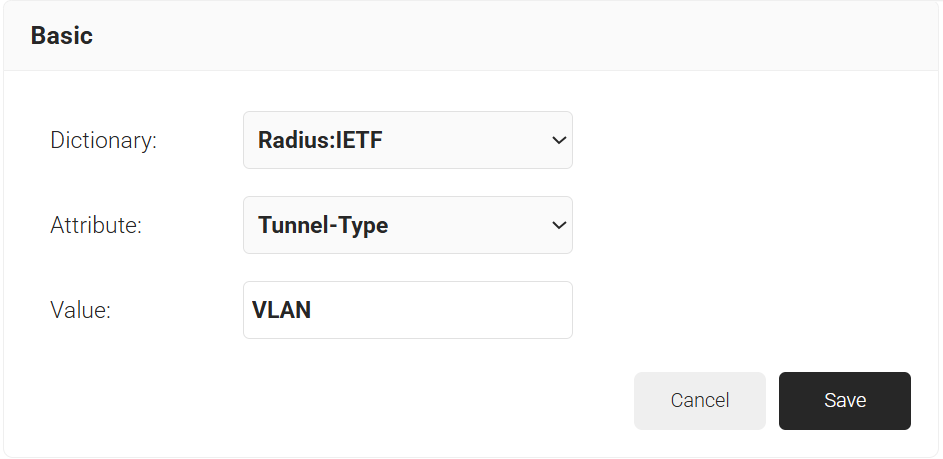
- From the Dictionary drop-down list, select an option:
- Radius:IETF: Uses standard RADIUS attributes for VLAN assignment.
- Custom: Uses Vendor-Specific Attributes (VSA).
- Add the RADIUS attributes required for VLAN assignment. For reference, here is what is commonly required for VLAN Assignment:
- Tunnel-Medium-Type: IEEE-802
- Tunnel-Private-Group-ID: {VLAN Name}
- Tunnel-Type: VLAN

- Click Save.

- Click Update.
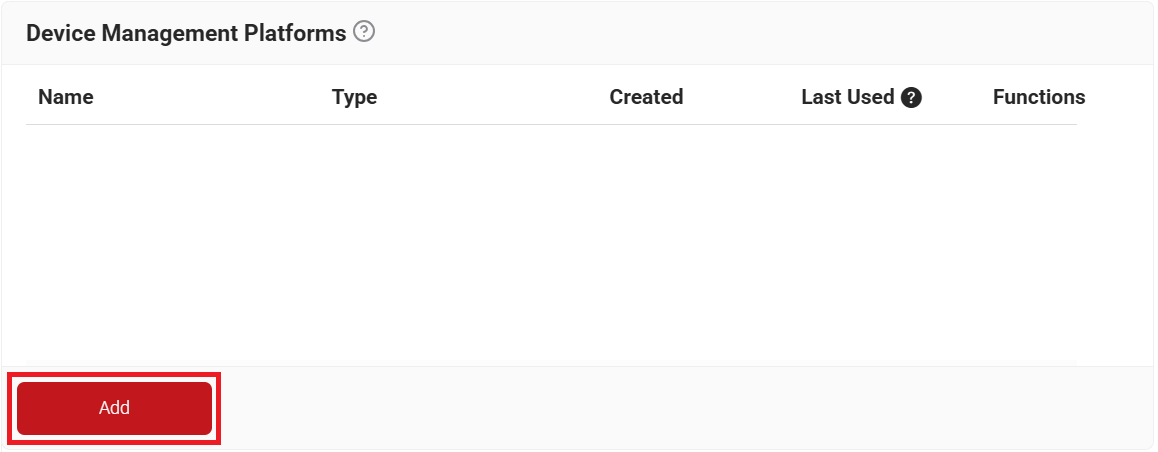
The REST API Device and User Management Token is SecureW2 API-based method for managing MAC Authentication devices. Unlike the JoinNow Management Portal, which requires manual configuration, this token lets you add, retrieve, update, and delete MAC addresses programmatically.
To create a REST API Device and User Management token, perform the following steps:
- Log in to the JoinNow Management Portal.
- Navigate to Integration Hub > Device Management Platforms.
- Click Add.

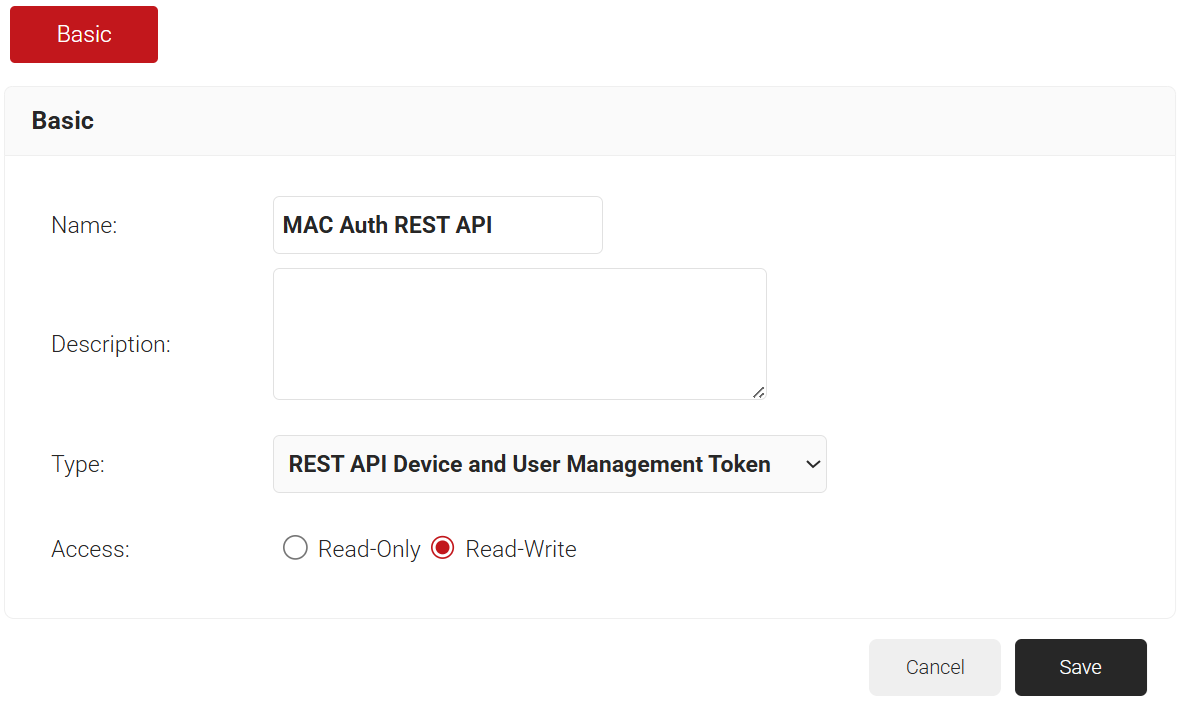
- In the Basic tab, enter the device management platform name in the Name field.
- In the Description field, enter the description for the device management platform.
- From the Type drop-down list, select REST API Device and User Management Token.
- In the Access field, select Read-Write to grant the token full control over resources, allowing it to interact with endpoints using GET, POST, PUT, and DELETE methods.

- Click Save. A .csv file containing the API Key ID and API Secret is downloaded.
NOTE: Save the .csv file securely. This file is downloaded only once at the time of token creation. If lost, the token and secret cannot be retrieved.