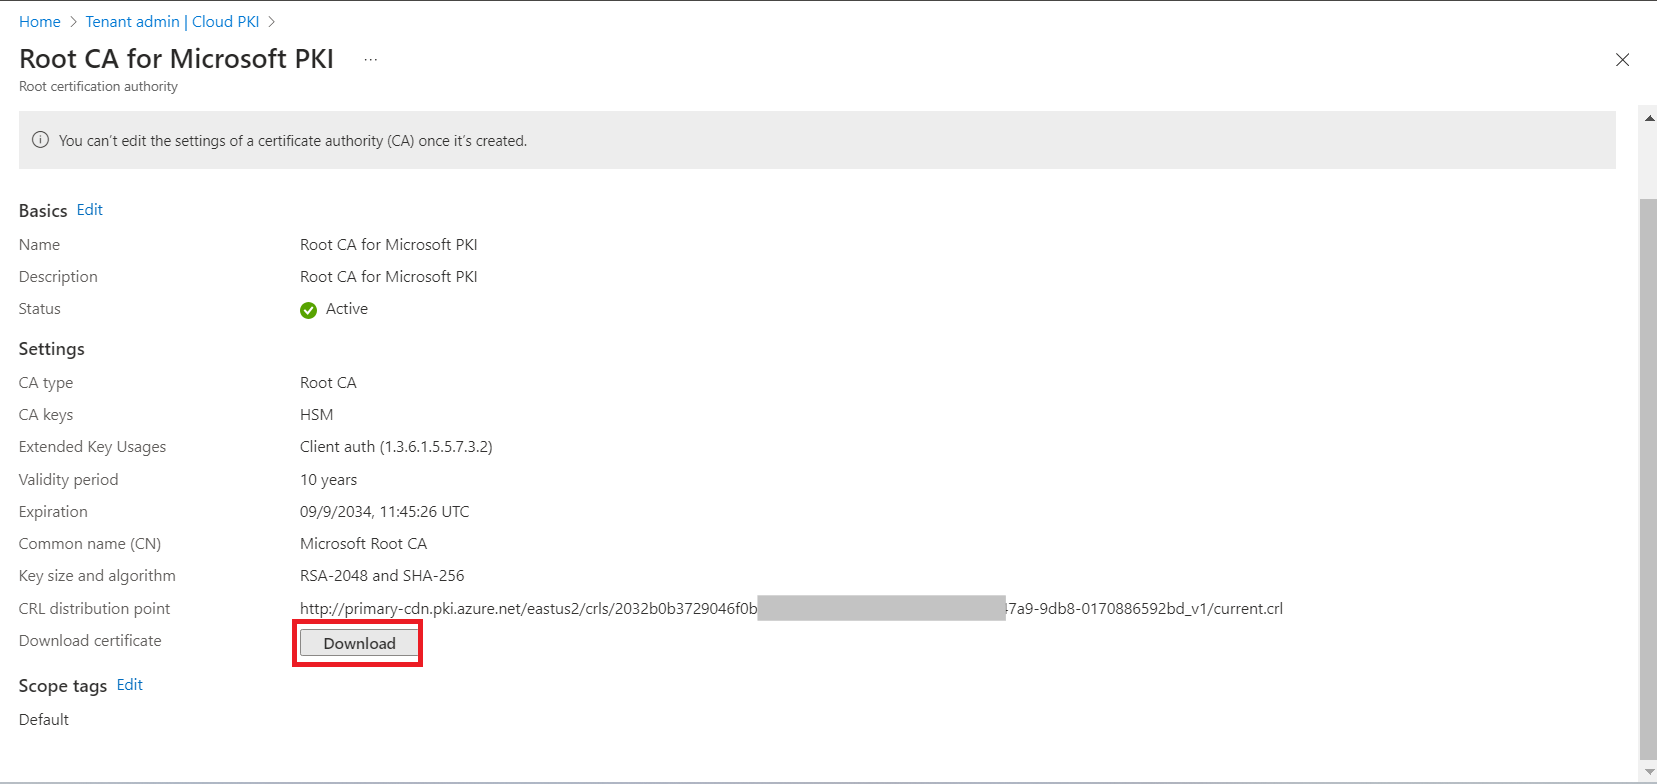
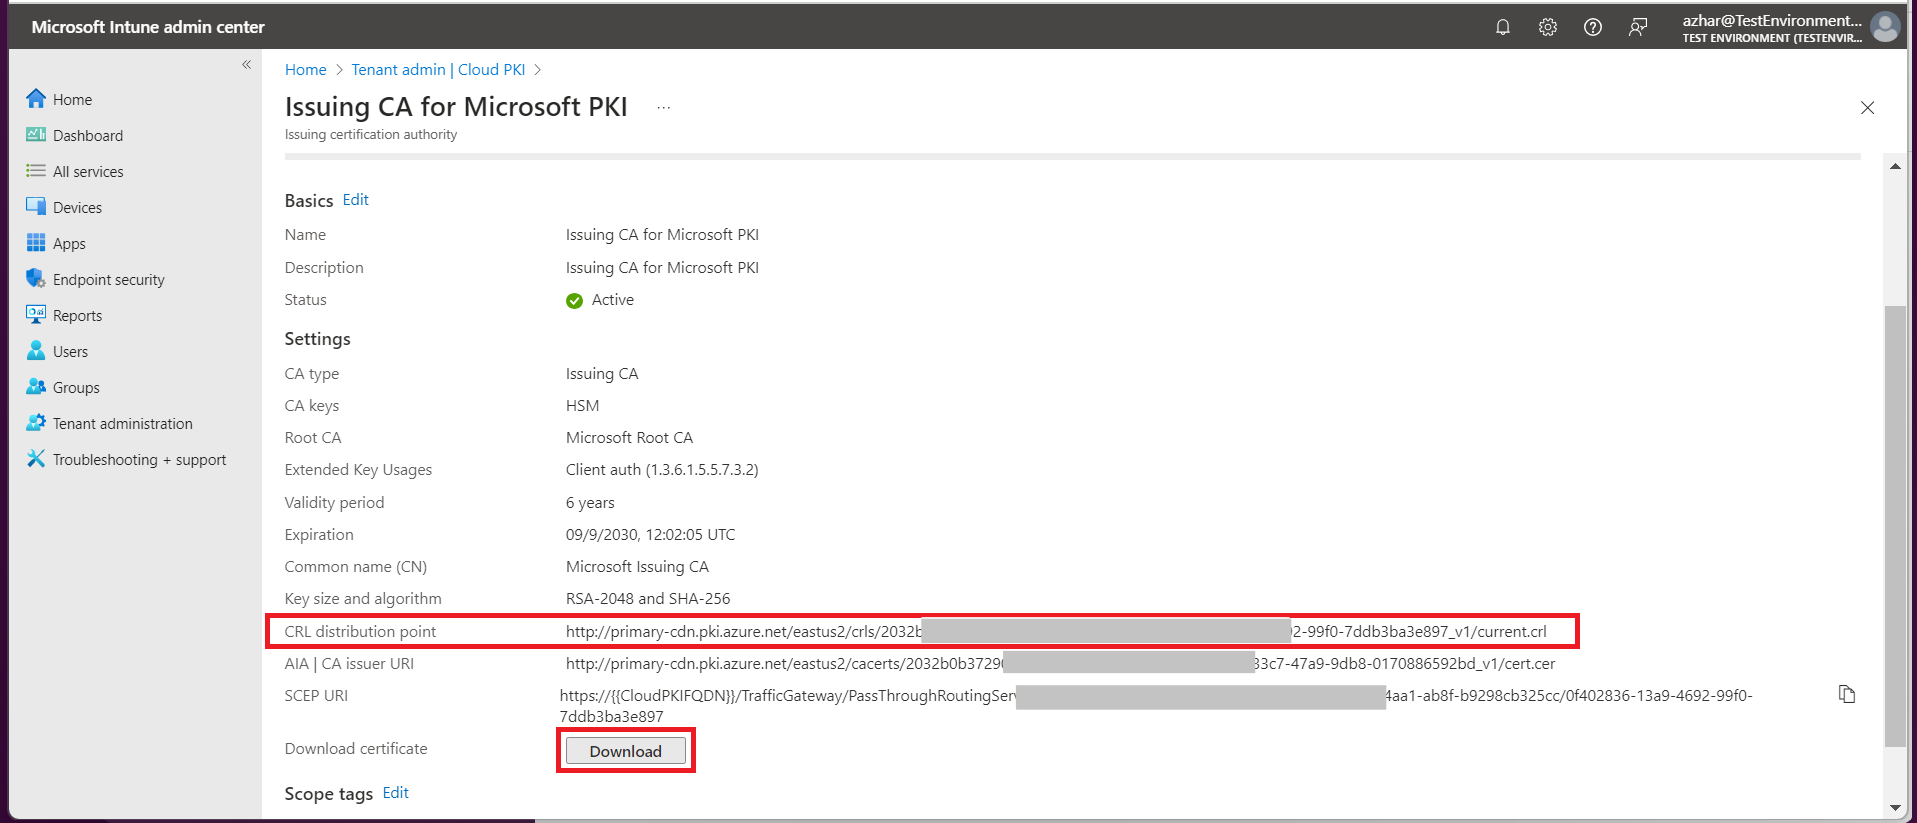
- To download the Root and Intermediate CAs from Intune, navigate to Tenant Admin > Cloud PKI. Click the created CA, then download the Root CA certificate.

- Download the Intermediate CA the same way.

To create an app in Azure to communicate with the CA Intune IdP, follow the given steps:
- Log in to the Azure portal.
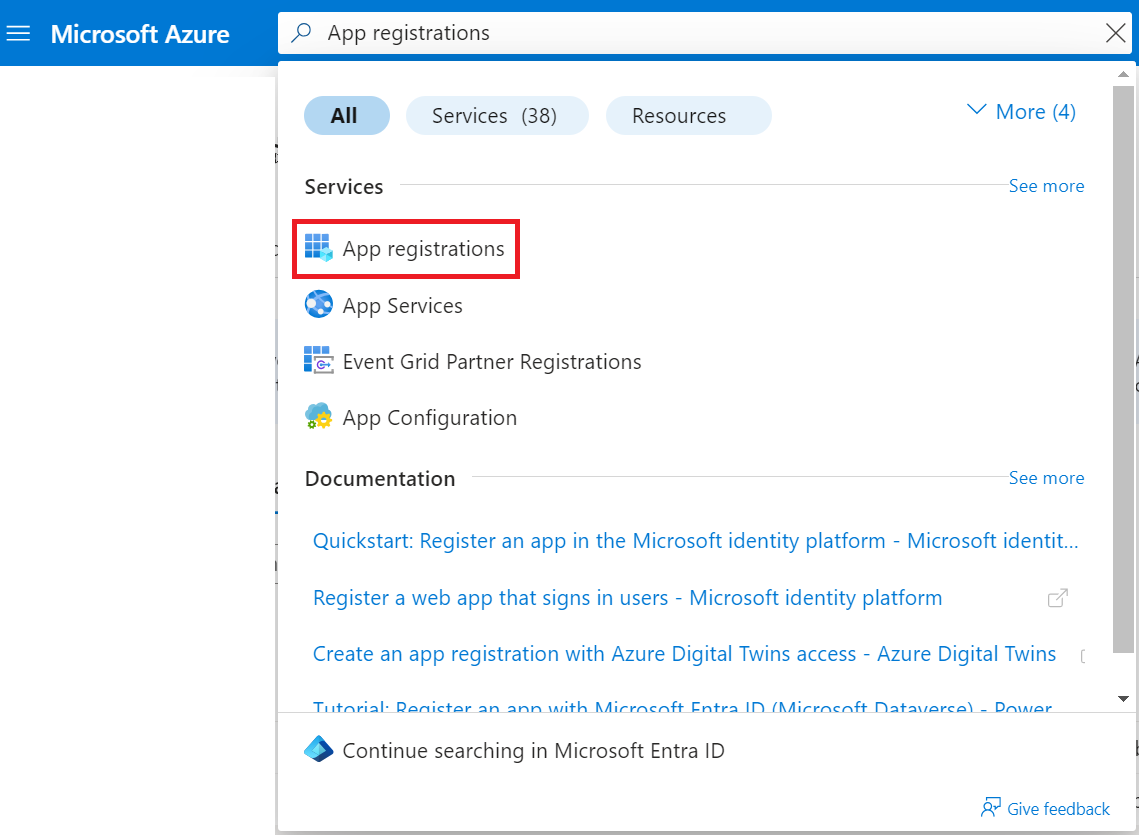
- Go to App registrations.

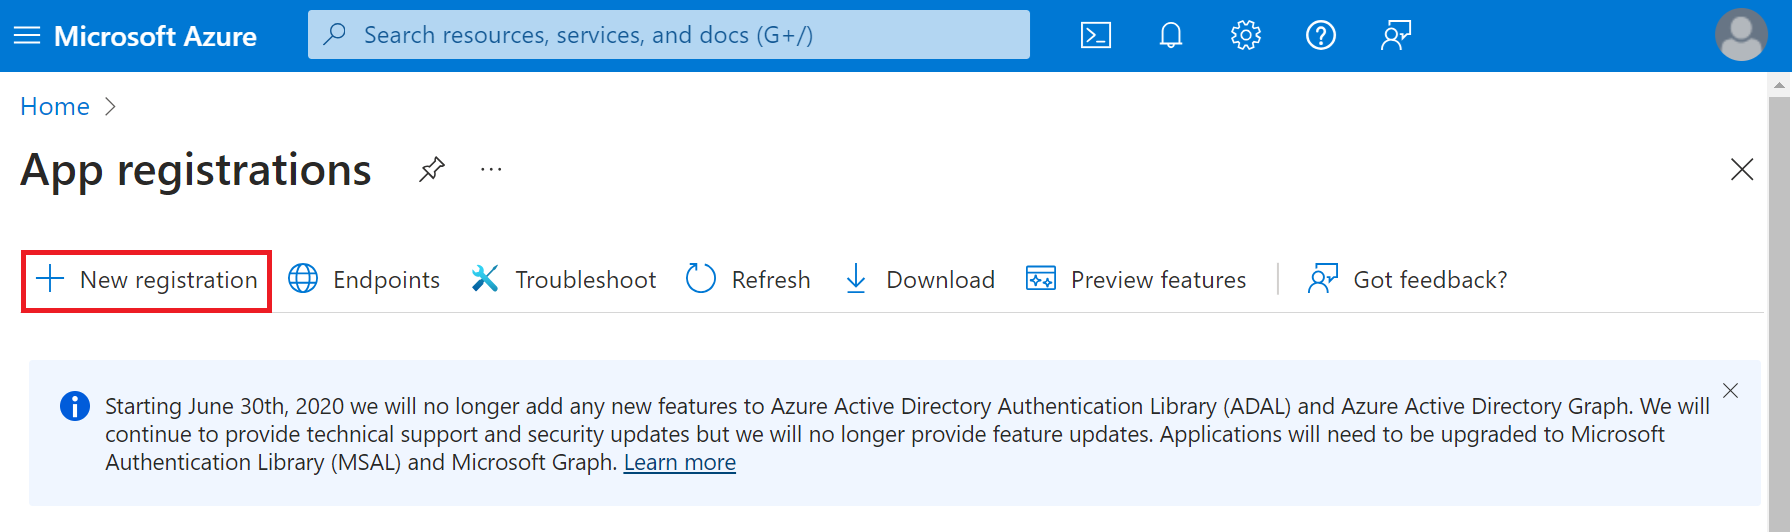
- Click New registration.

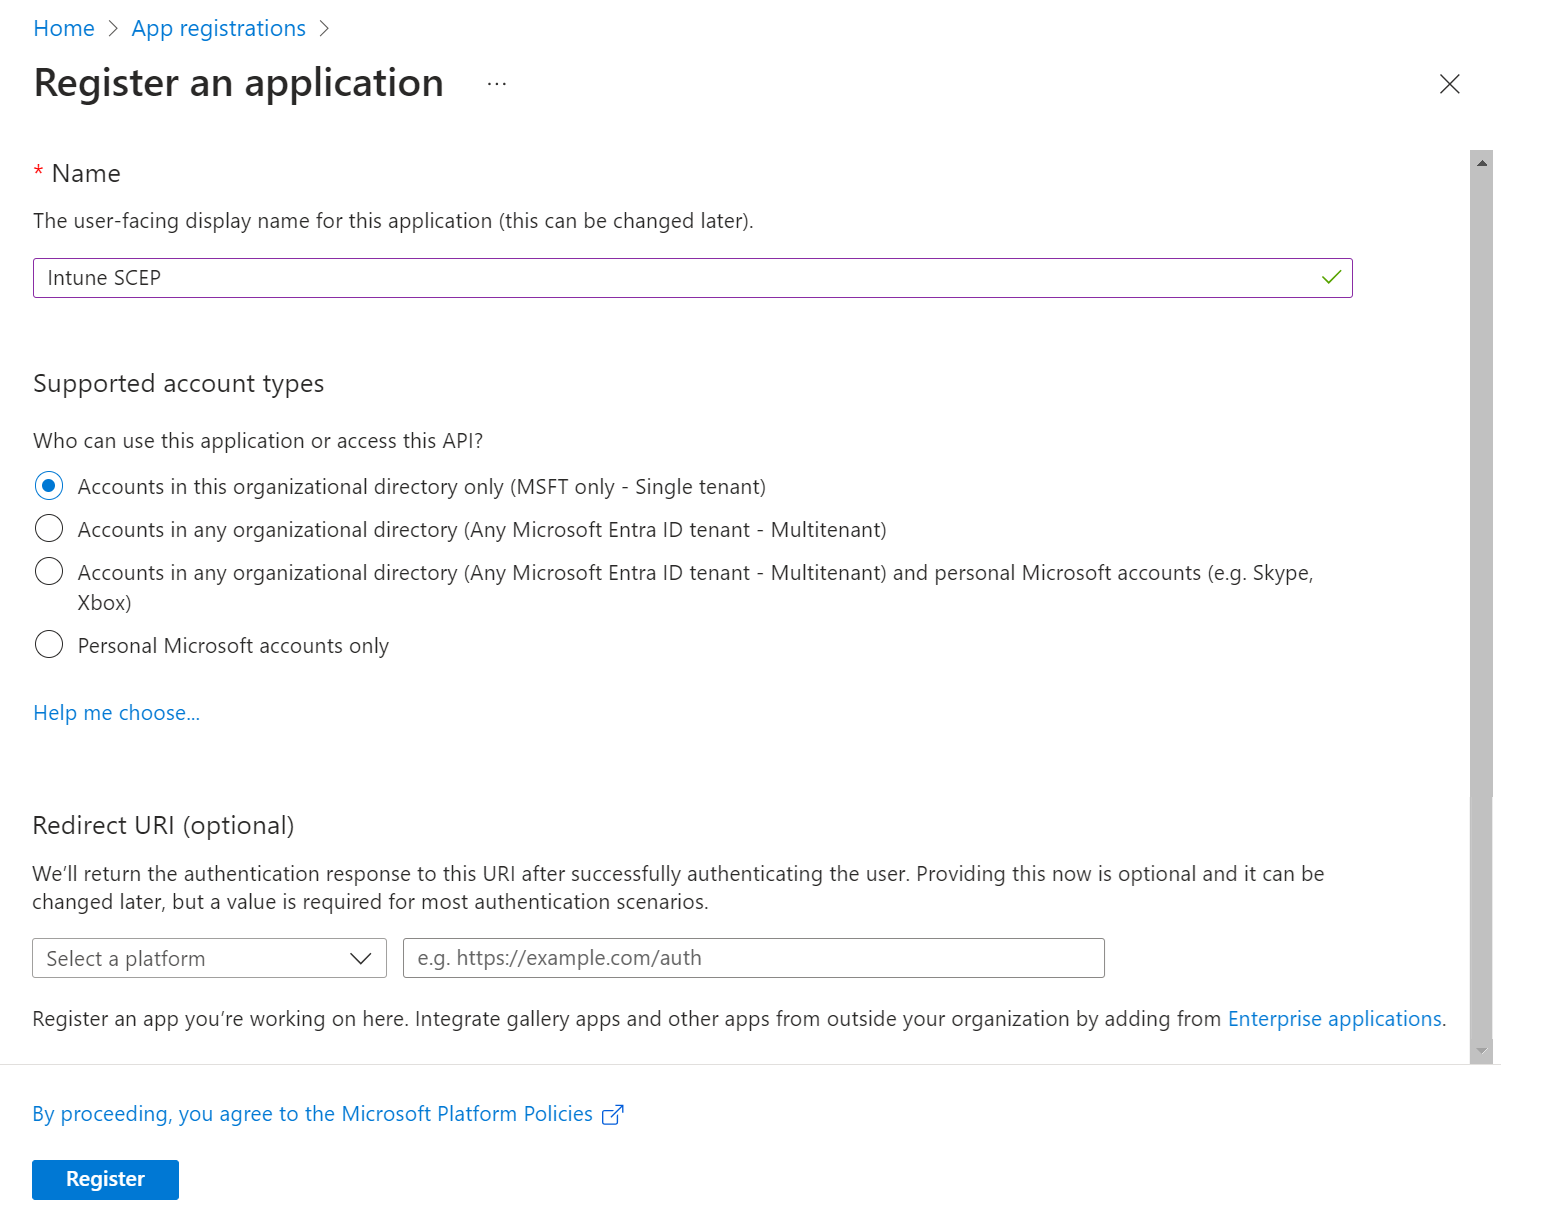
- On the Register an application page, enter the name of the application in the Name field.
- In the Supported account types section, specify who can use the application by selecting any one of the following options:
- Accounts in this organizational directory only (MSFT only – Single tenant)
- Accounts in any organizational directory (Any Microsoft Entra ID tenant – Multitenant)
- Accounts in any organizational directory (Any Microsoft Entra ID tenant – Multitenant) and personal Microsoft accounts (e.g., Skype, Xbox)
- Personal Microsoft accounts only

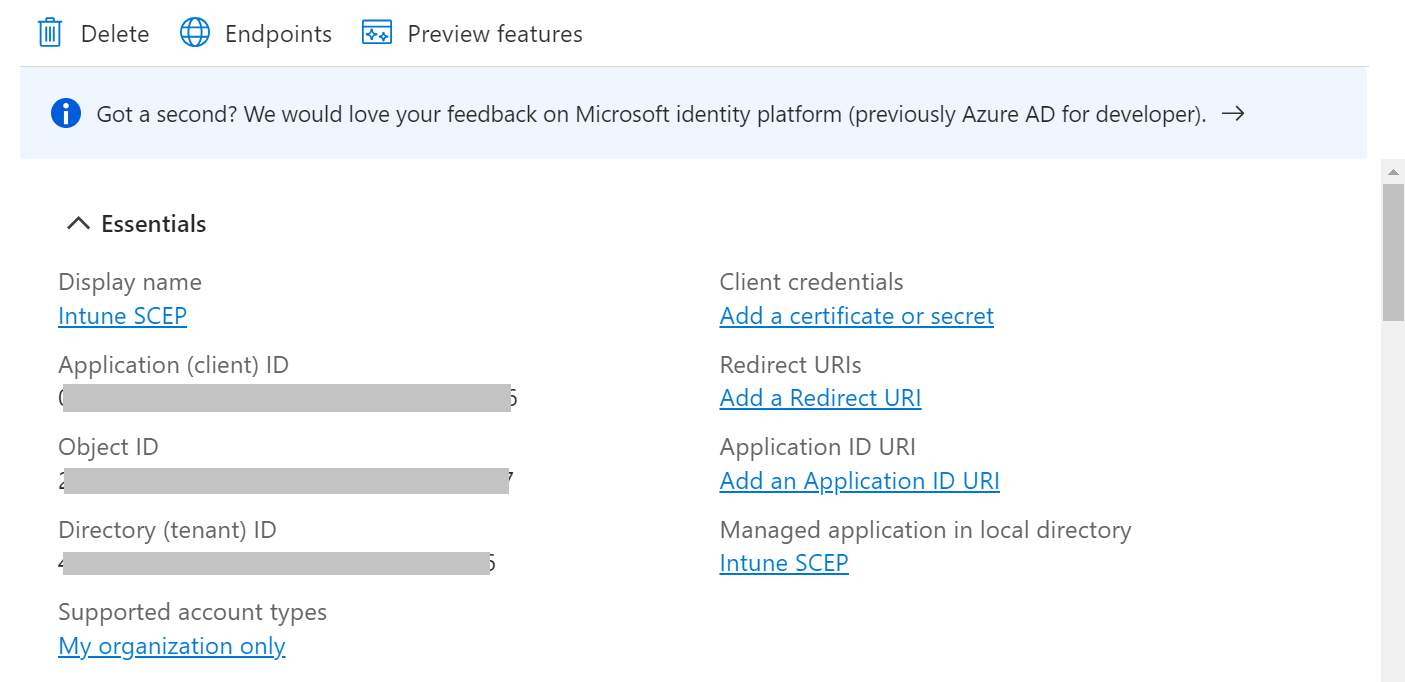
- Click Register. The following screen is displayed.

- Copy the Application (client) ID, Object ID, and Directory (tenant) ID values to your console. These values are required to create an Intune IdP in the JoinNow Management Portal (refer to the Creating a Core Provider section).
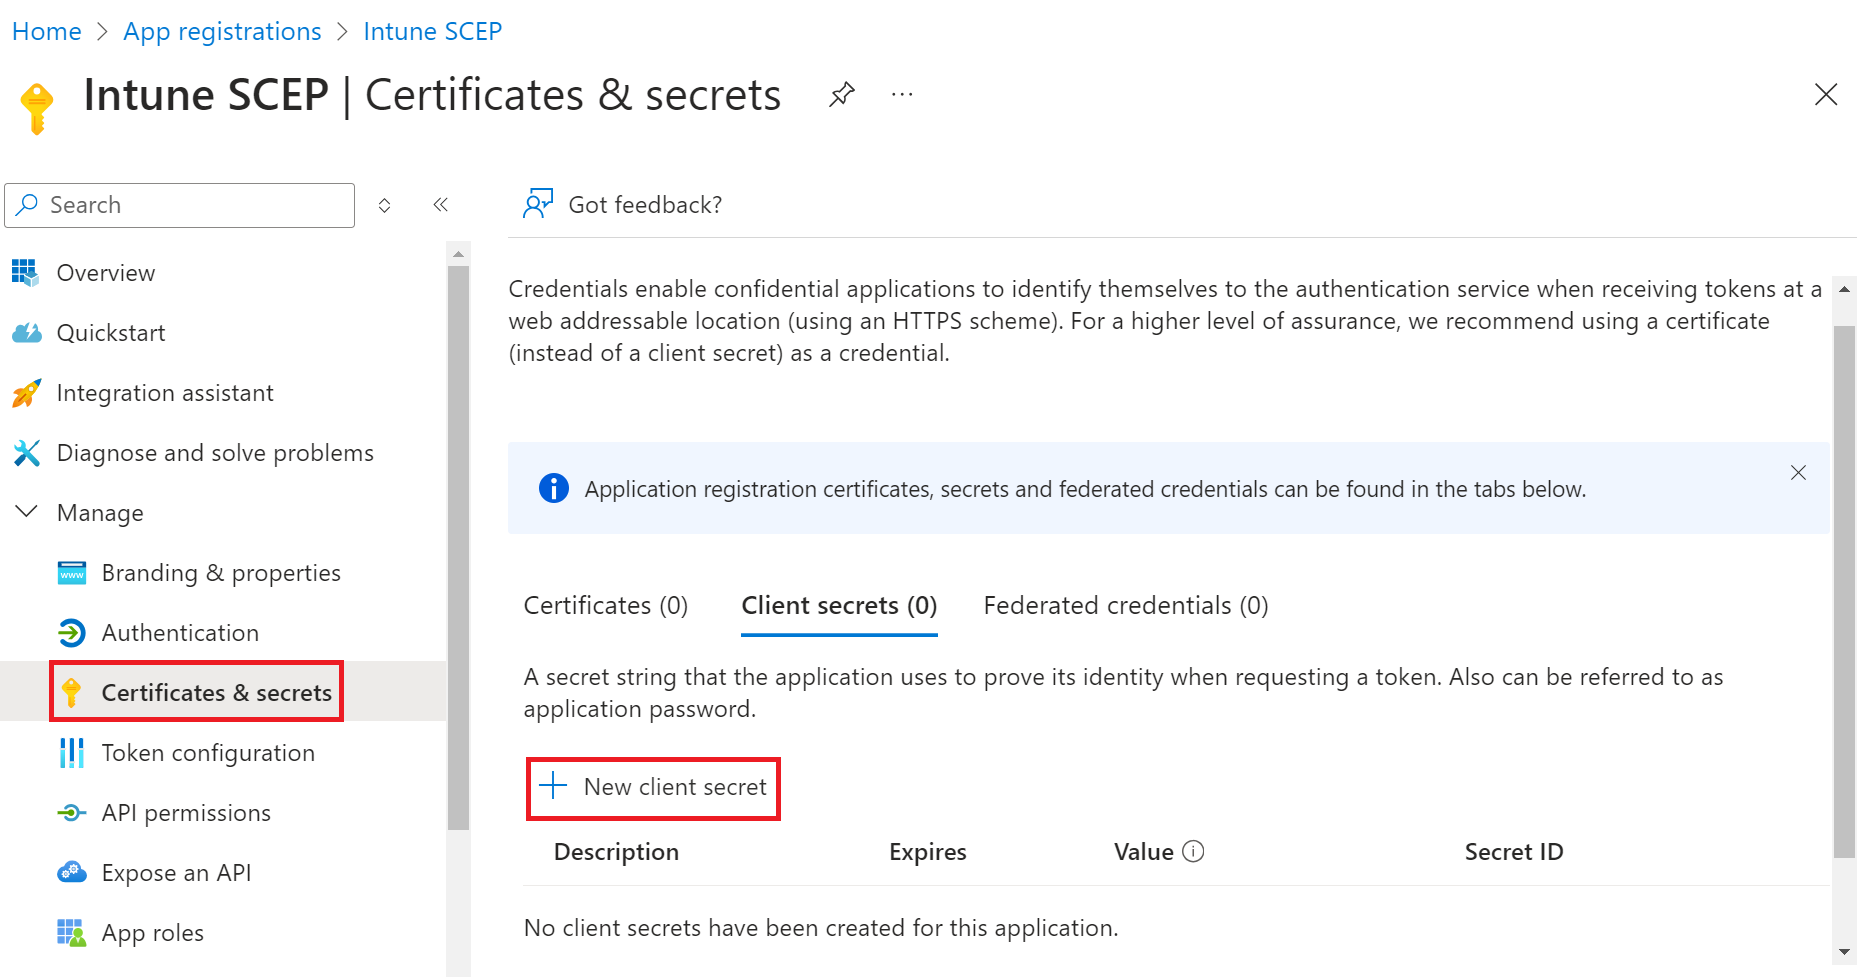
- On the left pane, go to Manage and click Certificates & secrets.
- Click New client secret.

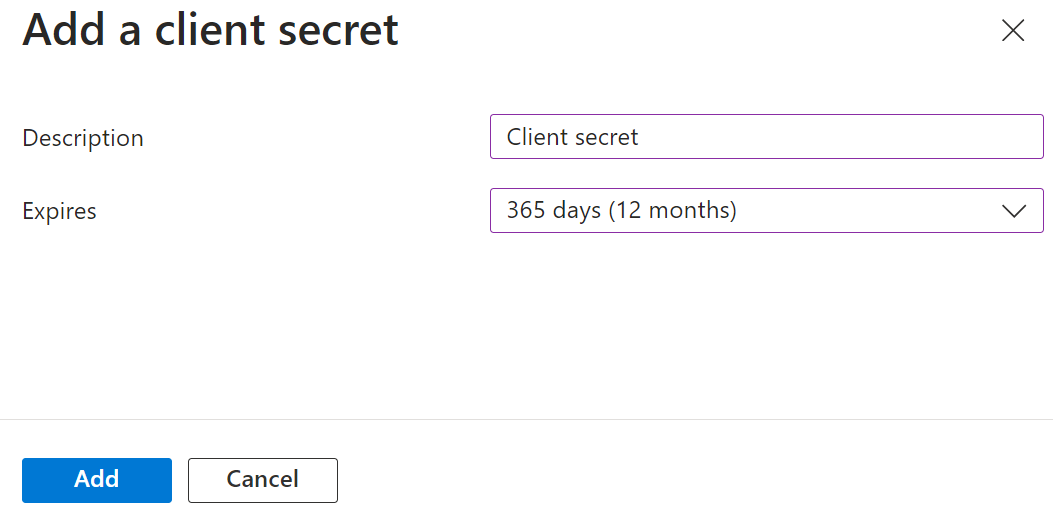
- In the Add a client secret pop-up window, enter a description for the client secret in the Description field.
- From the Expires drop-down list, select the expiration date of the client secret.

- Click Add.
- The client’s secret is displayed under the Value column. Copy the client secret and expiration date to a text editor.

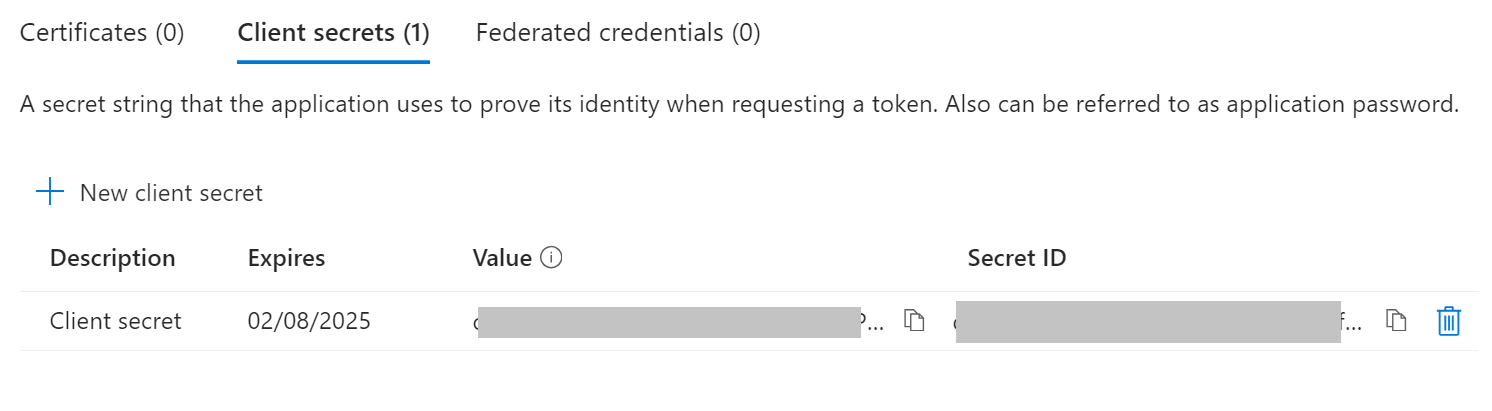
NOTE: Ensure that you properly save the client secret in your console, as this secret is non-recoverable.
The following API permissions should be selected for a successful Lookup operation. These permissions allow the MDM to read group and user attributes to validate RADIUS authentication.
- Navigate to API Permissions under the Manage section.
- Click Add a permission and add the following permissions:

- After adding the permissions, click Grant admin consent for {your organization}.

The downloaded CA certificates must be uploaded to the corresponding trusted profiles before being deployed on client devices. The deployment of these CA certificates is necessary to form a chain of trust during the enrollment and RADIUS authentication. Intune requires the creation of three trusted certificate profiles:
- Trusted Certificate Profile for Root CA
- Trusted Certificate Profile for Intermediate CA
- Trusted Certificate Profile for Root CA of the RADIUS Server certificate
To create trusted profiles in Intune:
- Sign in to the Microsoft Endpoint Manager portal.
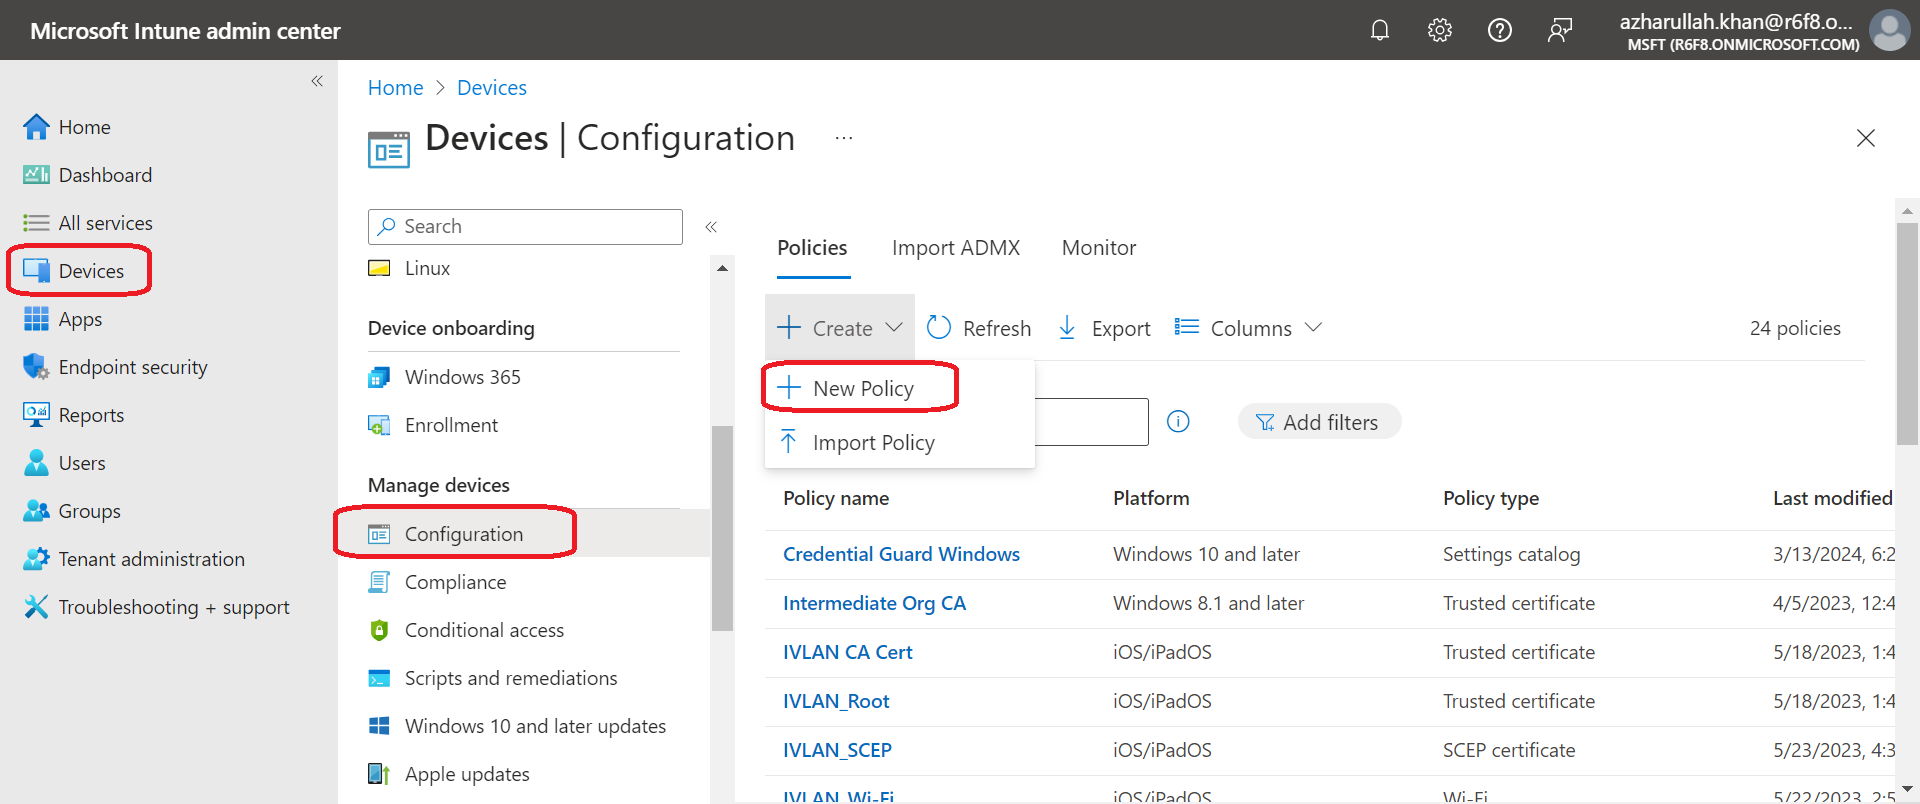
- Navigate to Devices > Configuration > Create > New Policy.

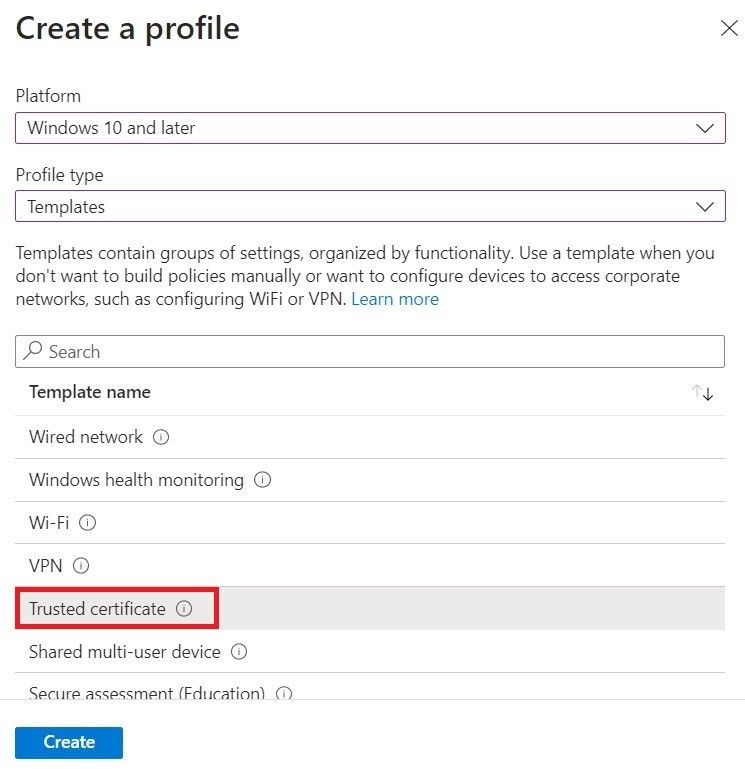
- On the Create a profile page, select the device platform from the Platform drop-down list for this trusted certificate. The options are:
- Android
- iOS
- macOS
- Windows 10 and later
NOTE: You must create a separate profile for each OS platform. The steps to create trusted certificates are similar across device platforms.
- From the Profile type drop-down list, select Templates, and then select Trusted certificate.

- Click Create.
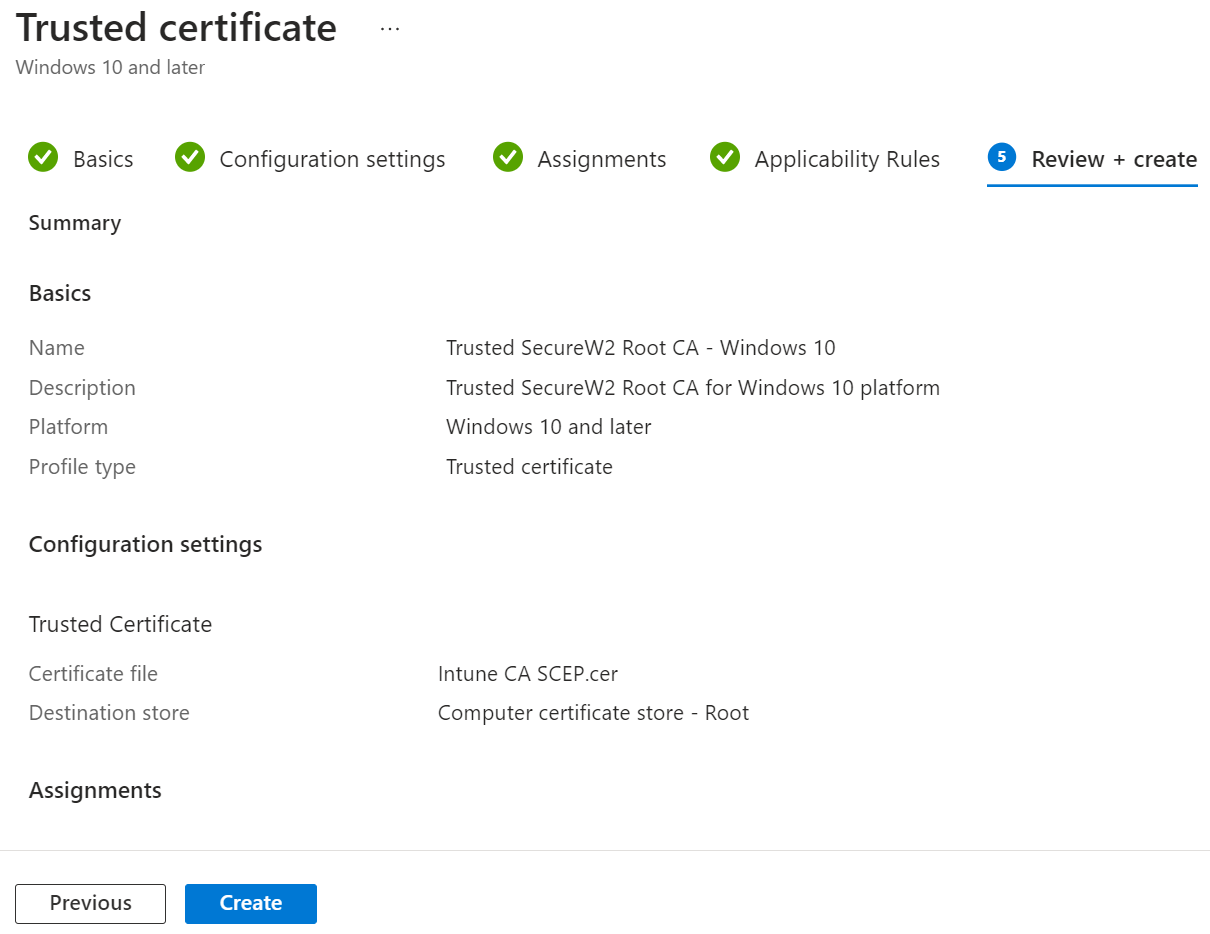
- On the Trusted certificate page, in the Basics section, enter a suitable name for the Trusted Certificate in the Name field. Suitable naming conventions, such as “Root, Intermediate, and RADIUS CA,” can be used for easy identification.
- In the Description field, enter a suitable description for the trusted certificate.
- Click Next.
- In the Configuration settings section, click the Browse button for the Certificate file field. Select the certificate appropriate to the trusted profile being created, as shown in the table below:
Trusted Profile mapped with Intermediate CA Trusted Profile mapped with Root CA Trusted Profile mapped with RADIUS Server Root CA Upload the Intermediate CA downloaded from Microsoft cloud PKI in Creating an Intermediate (Issuing) CA
From the Destination store drop-down, select “Computer certificate store – Intermediate”.
Upload the Root CA of the organization downloaded from Microsoft Cloud PKI in Creating Root CA in Microsoft Cloud PKI
From the Destination store drop-down, select “Computer certificate store – Root”
Upload the RADIUS Server Root CA of the organization downloaded from the JoinNow portal in Downloading the RADIUS Server Root CA
From the Destination store drop-down, select “Computer certificate store – Root”
- Click Next.
- Assign the profile to the appropriate Groups and Rules, review it, and click Create.

- Sign in to the Microsoft Endpoint Manager portal.
- Navigate to Devices > Configuration > Create > New Policy.
- On the Create a profile page, select the device platform from the Platform drop-down list for this trusted certificate.
NOTE: You must create a separate profile for each OS platform. The steps to create trusted certificates are similar across device platforms. - From the Profile type drop-down list, select Templates, and then select Wi-Fi.
- Click Create.
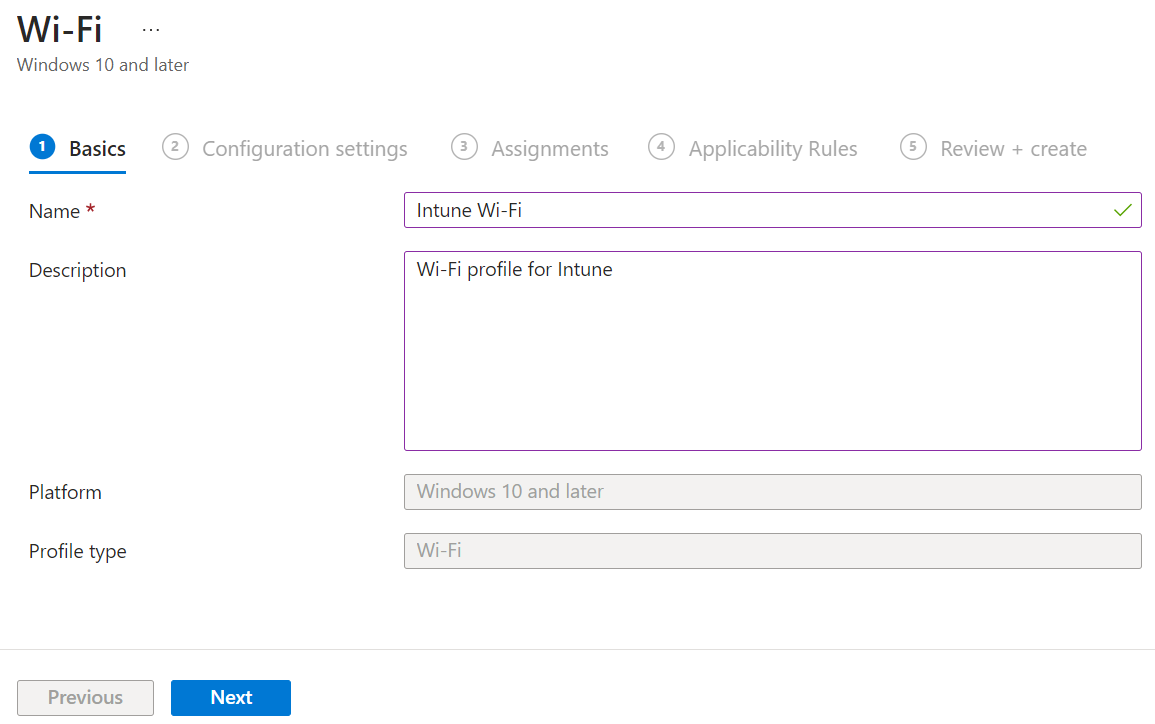
- On the Wi-Fi page, in the Basics section, enter the name of the Wi-Fi in the Name field.
- In the Description field, enter a suitable description for the Wi-Fi.

- Click Next.
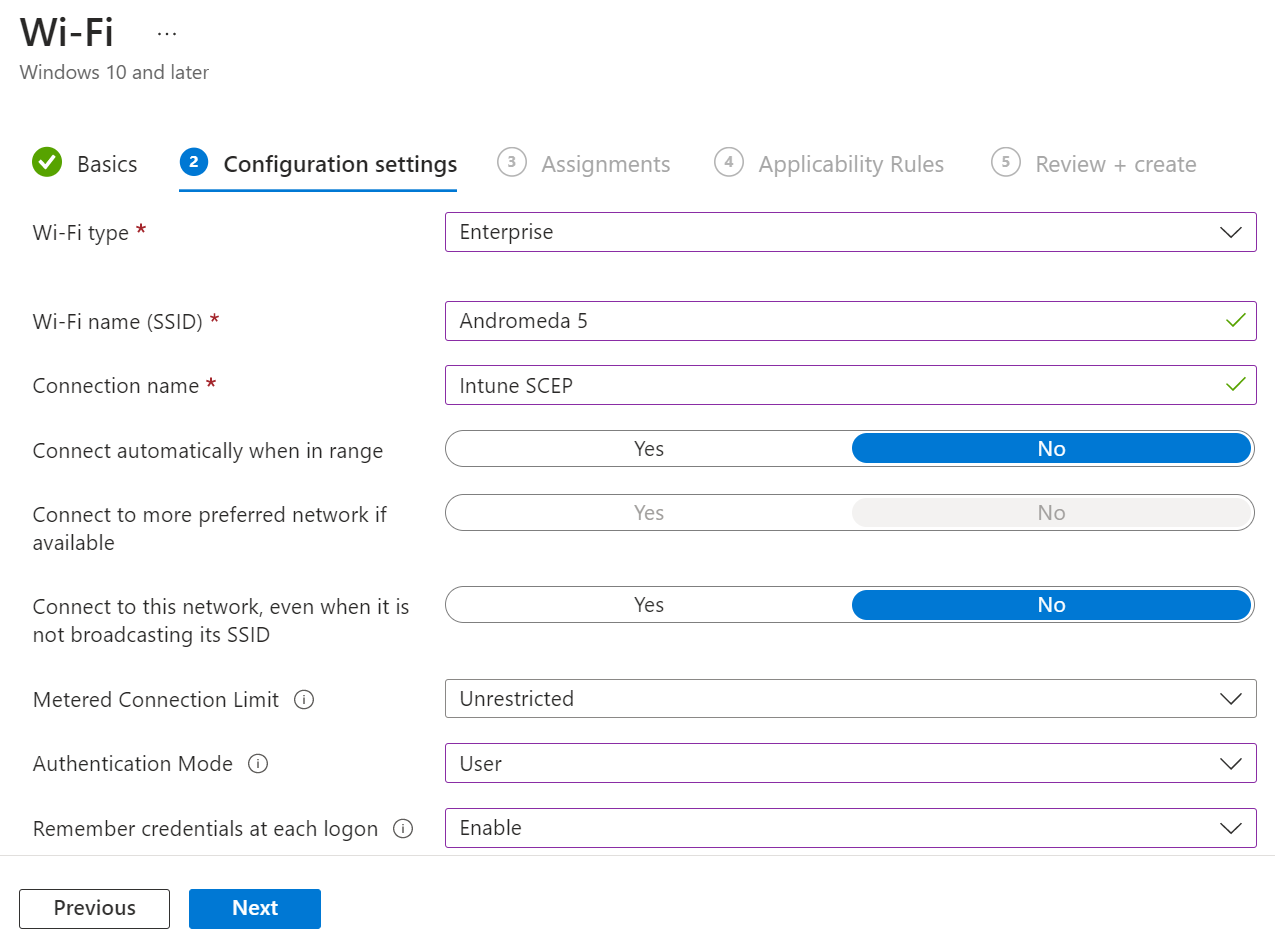
- In the Configuration Settings tab, select Enterprise from the Wi-Fi type drop-down.
- In the Wi-Fi name field, enter the name of the broadcasting SSID.
- From the EAP type drop-down list, select EAP-TLS.
- In the Server Trust field, enter one or more common names used on your RADIUS server certificates issued by your trusted CA. For the SecureW2 RADIUS, it’s: radius01.securew2.com
- From the Root certificate for server validation drop-down list, select the RADIUS server certificate profile created in Creating Trusted Certificate Profiles in Intune section. This certificate is presented to the server when the client connects to the network and is used to authenticate the connection. Select OK to save your changes.
- Configure the remaining required Wi-Fi settings, then click Next.

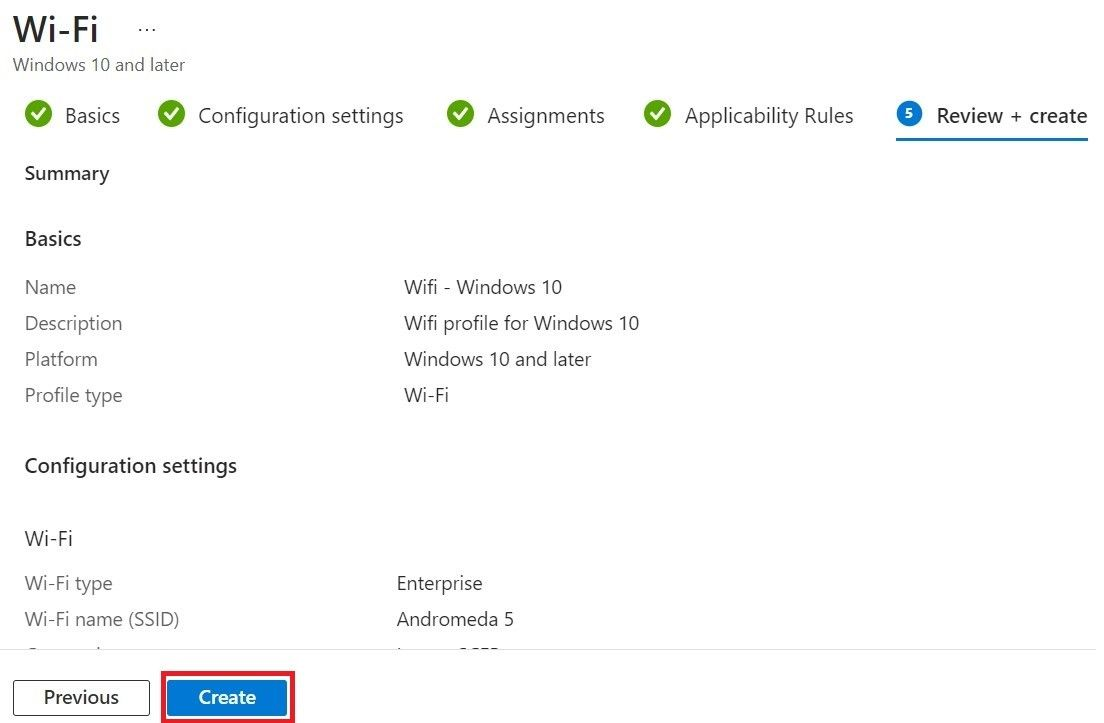
- Assign the profile to the appropriate Groups and Rules, review it, and click Create.

After creating a profile, you must specify the devices to which it will be pushed. To assign the devices, perform the following steps:
- Sign in to the Microsoft Endpoint Manager portal.
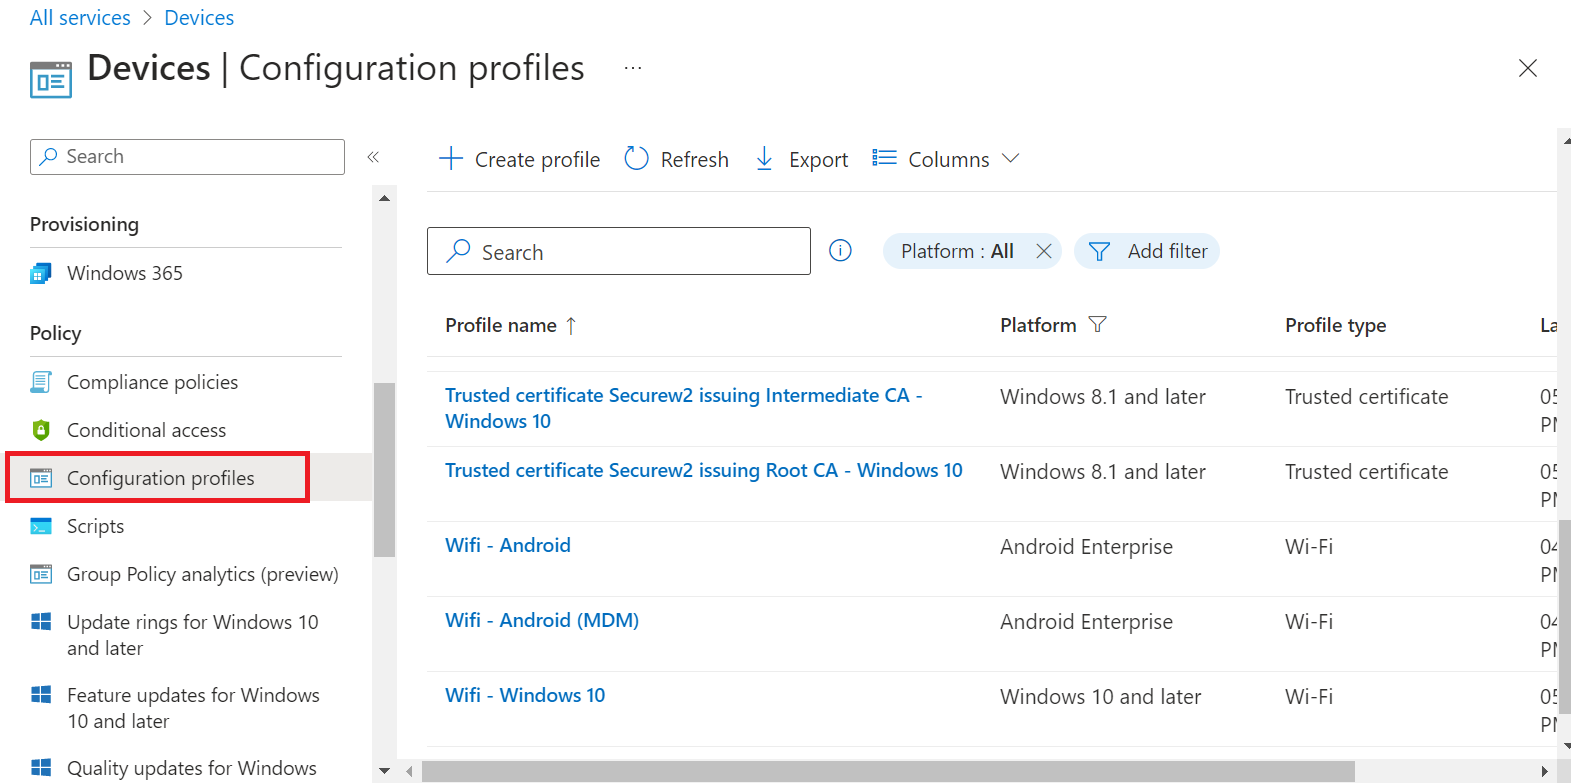
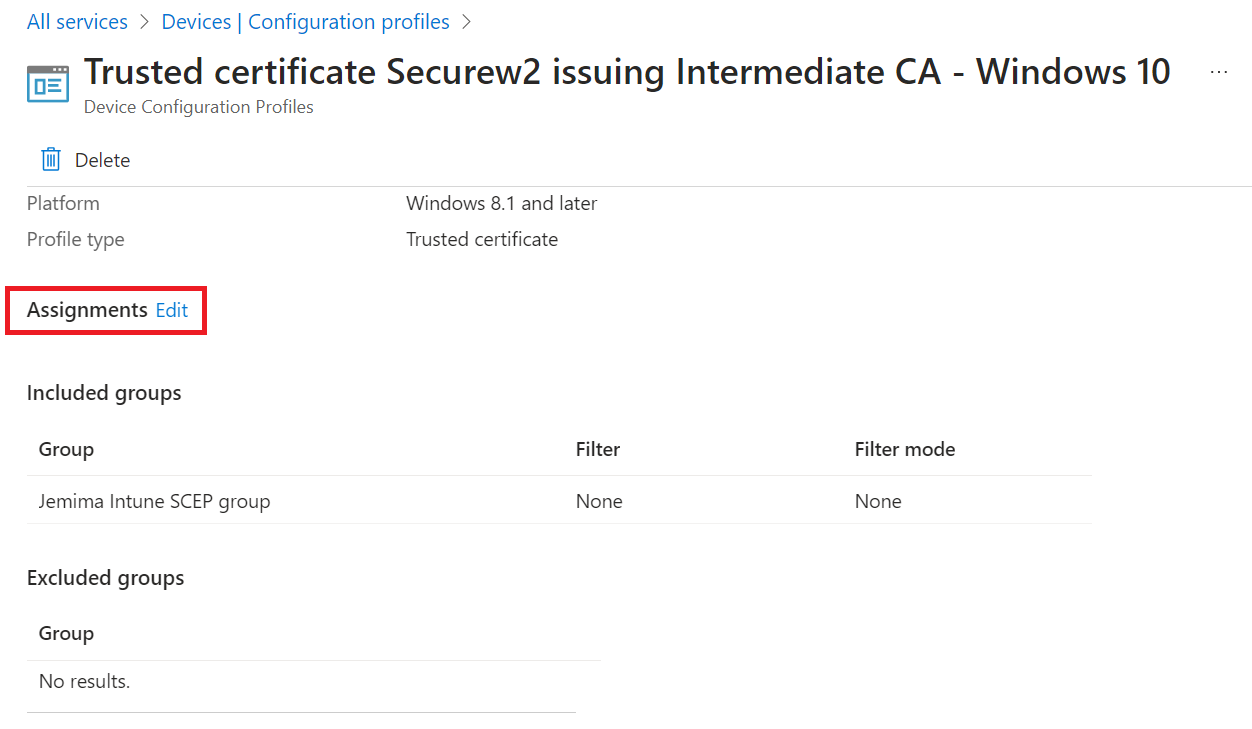
- Navigate to Devices > Configuration profiles.

- Select the profile you want to assign a policy to users or groups.
- Scroll to the Assignments section and click the Edit link.

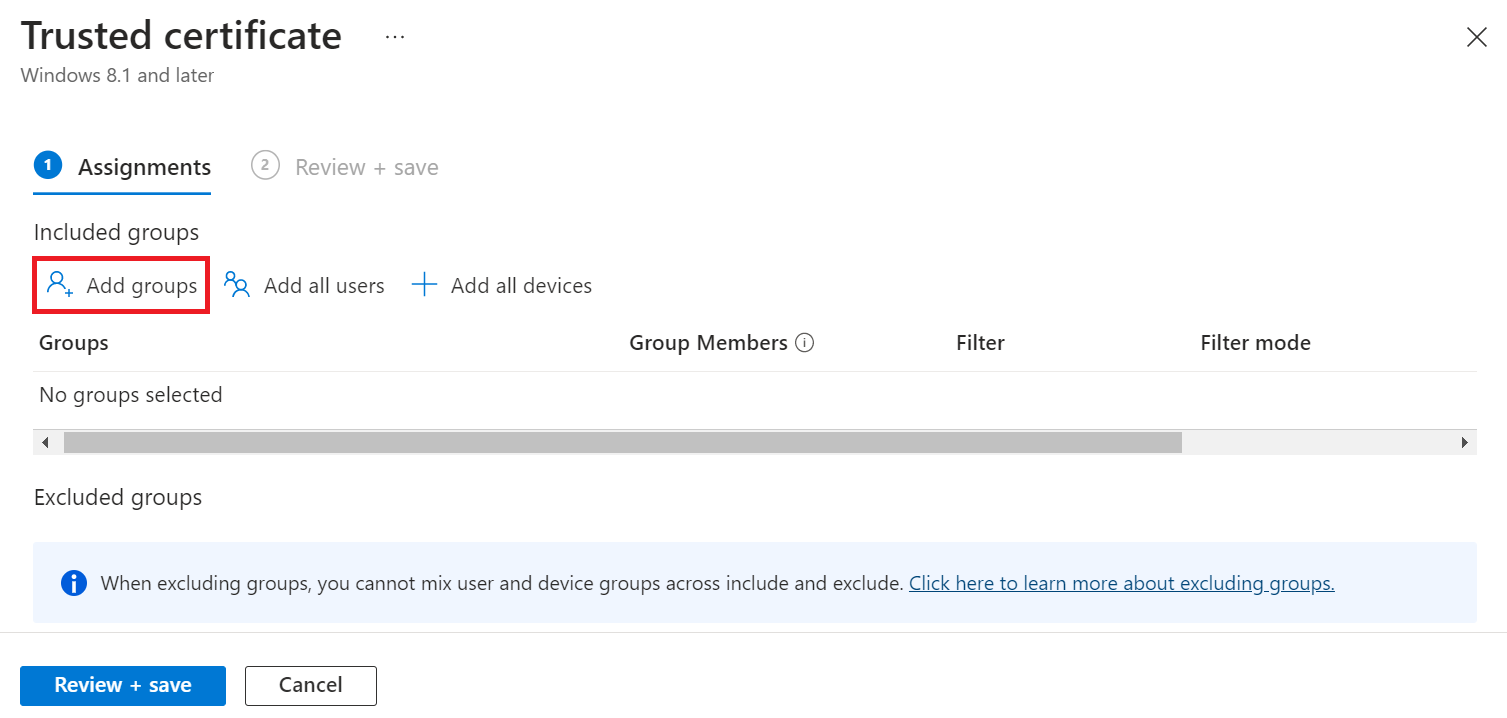
- Under the Included groups or Excluded groups section, click Add groups to add one or more Entra ID Groups. To apply the policy to all relevant devices, select Add all users or Add all devices.
NOTE: If you click Add all users or Add all devices, the Add groups option is disabled.
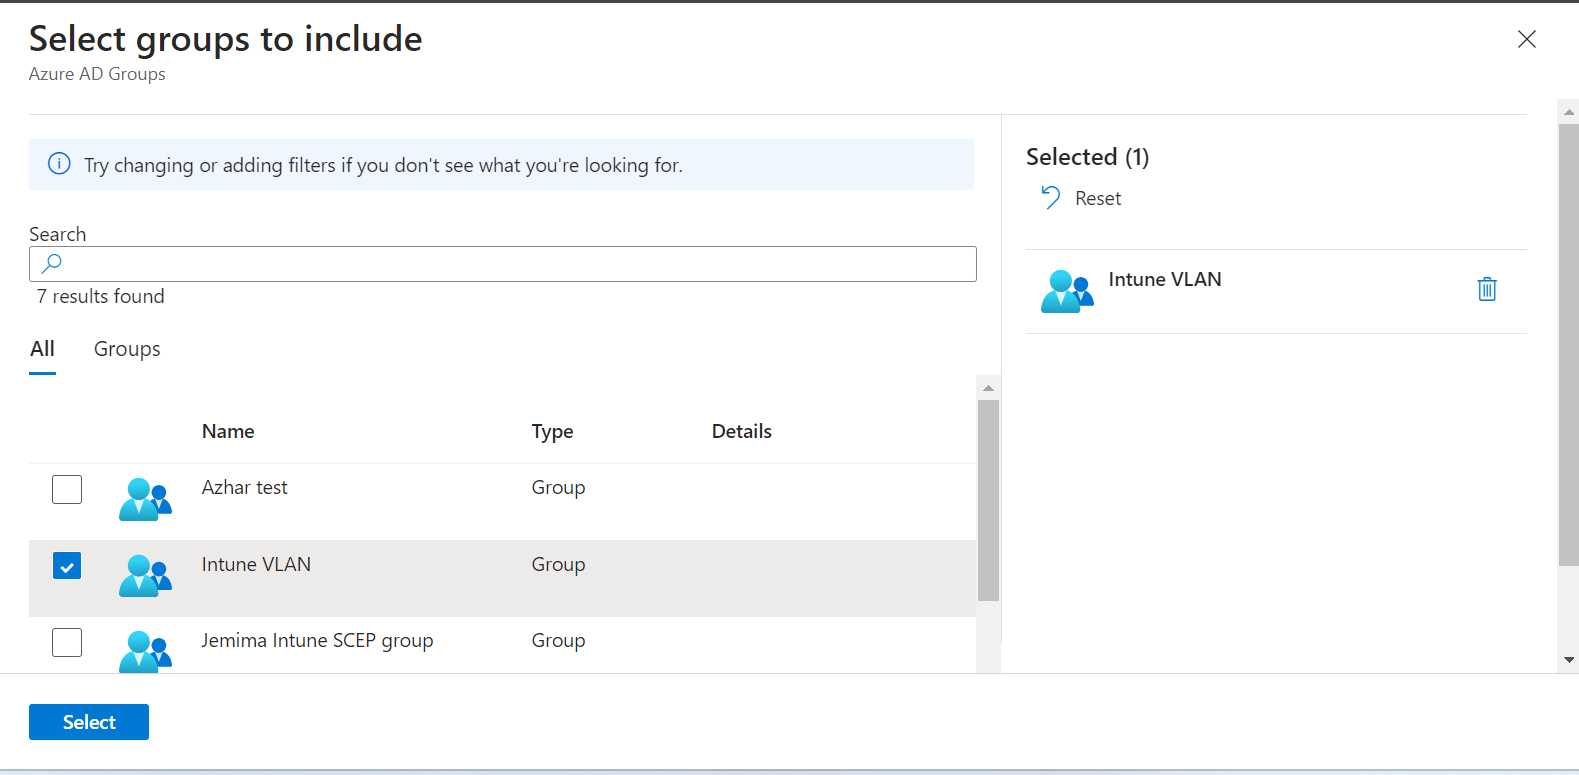
- On the Select groups to include page, select the Entra ID group to which the policy must be assigned and click Select to add the group.

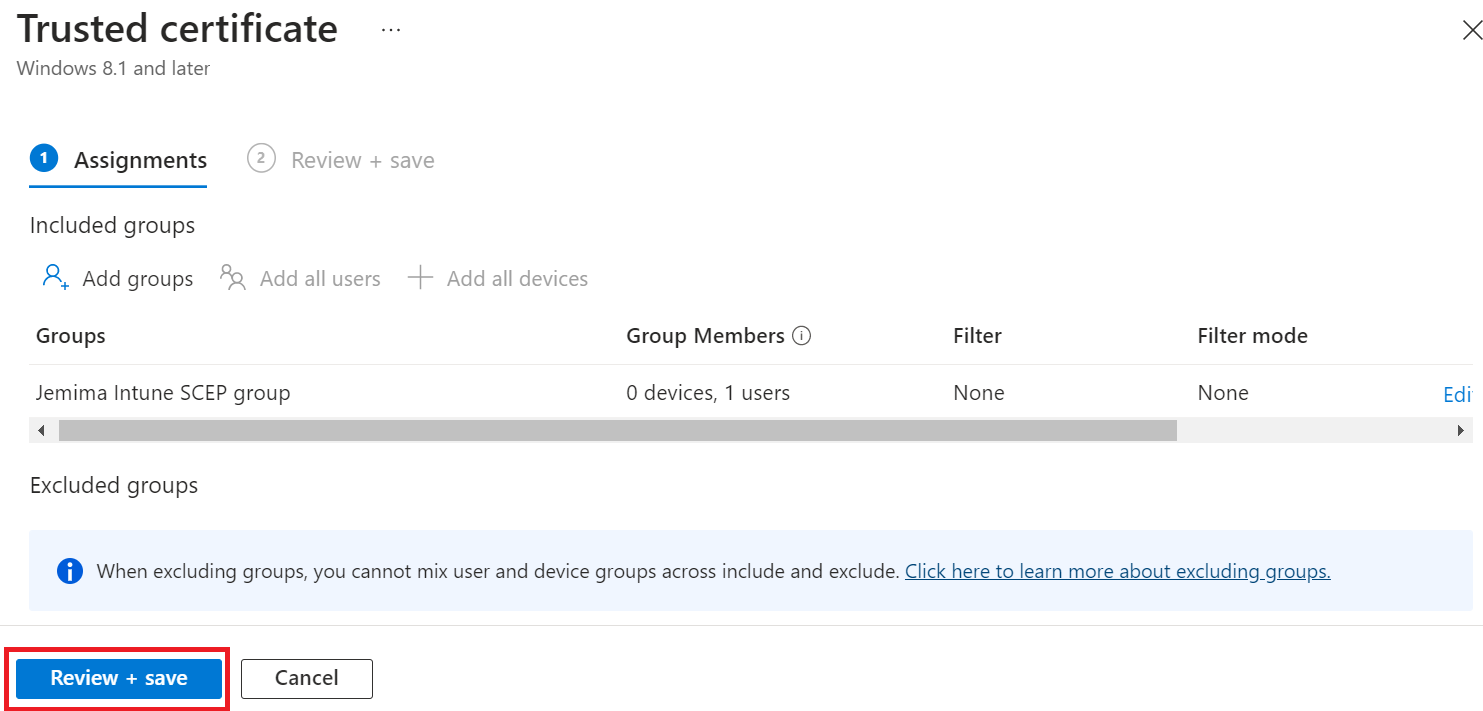
- Click the Review + Save button.

- Click Save.
The RADIUS server certificate is required for RADIUS authentication and subsequent access to secure Wi-Fi networks. To download the RADIUS server CA from the JoinNow Management Portal:
- Log in to the JoinNow Management Portal.
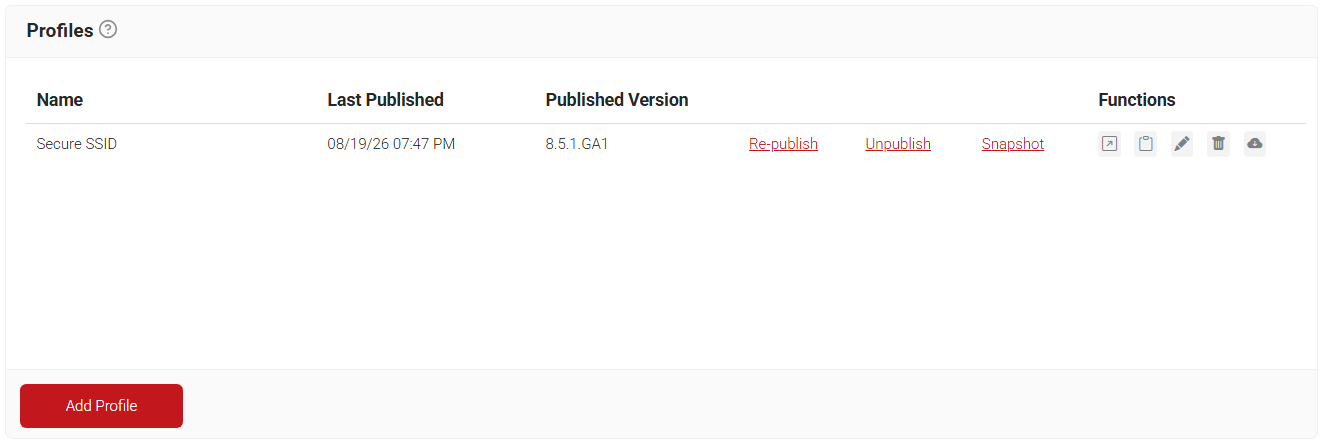
- Navigate to Device Onboarding > Profiles.

- Click the Edit link of the network profile configured earlier.
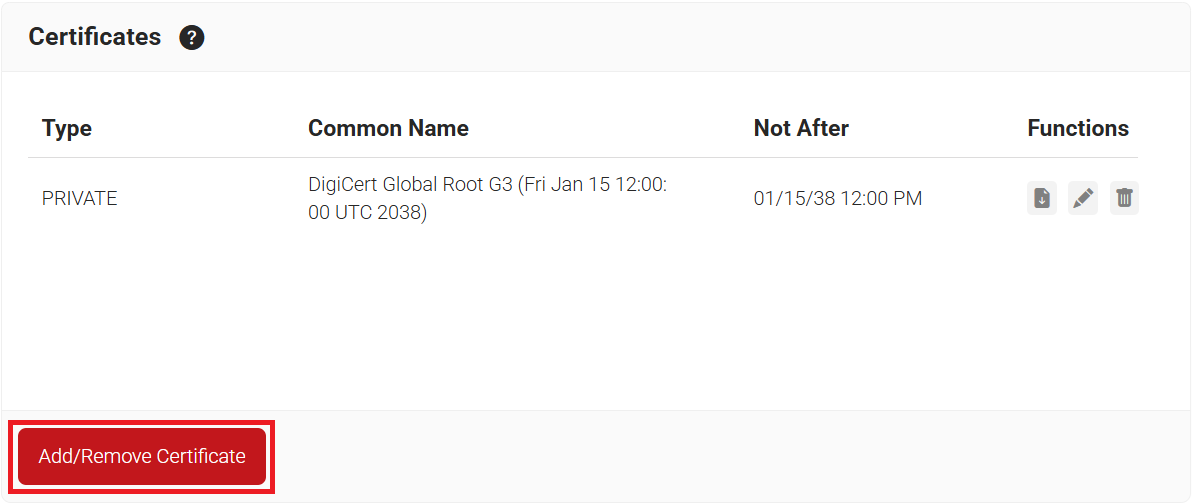
- In the Certificates section, click Add/Remove Certificate.

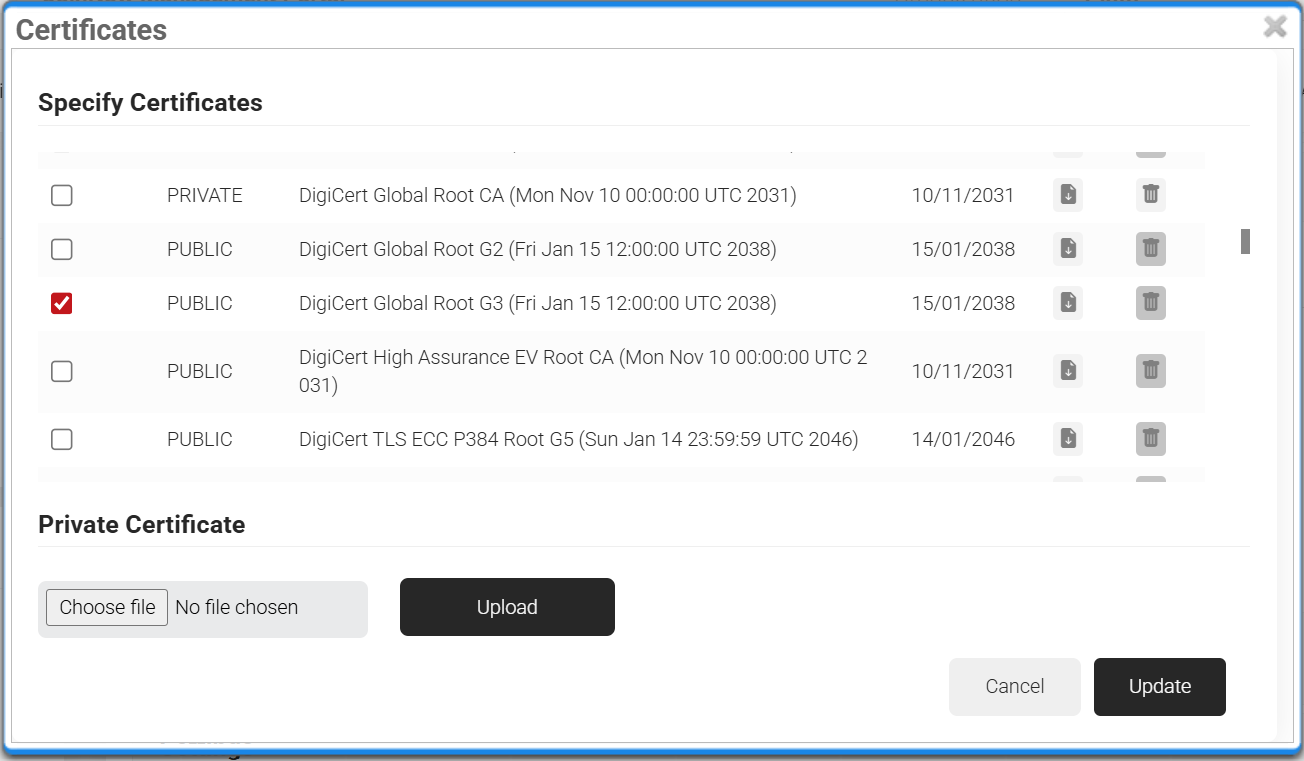
- Check the checkbox next to DigiCert Global Root G3 (Fri Jan 15 12:00:00 UTC 2038) as shown in the following screen.

- Click Update.
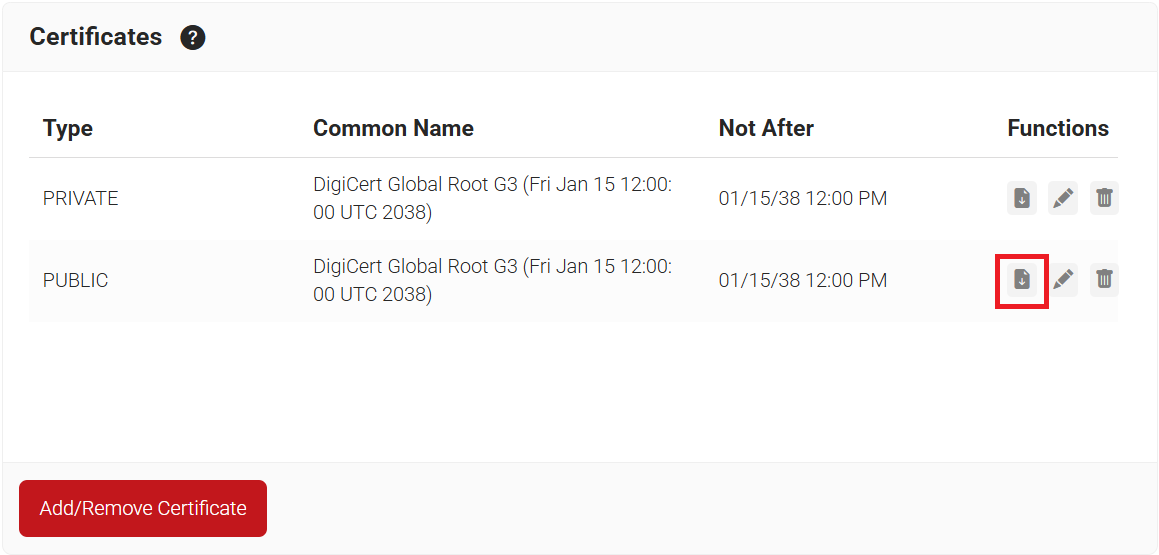
- The CA appears in the Certificates section.

- Click Download.
SecureW2 CloudRADIUS has been engineered to check whether a user/device is still active in Intune and to retrieve any attribute value at the time of network connection. This is important as Microsoft Cloud PKI uses just a basic SCEP, a static URL that hackers can easily abuse to issue certificates from the same trusted CA. Configuring a lookup will prove the authenticity of a user/device during every connection attempt. This will also be useful during VLAN authorization and, hence, network policy assignment.
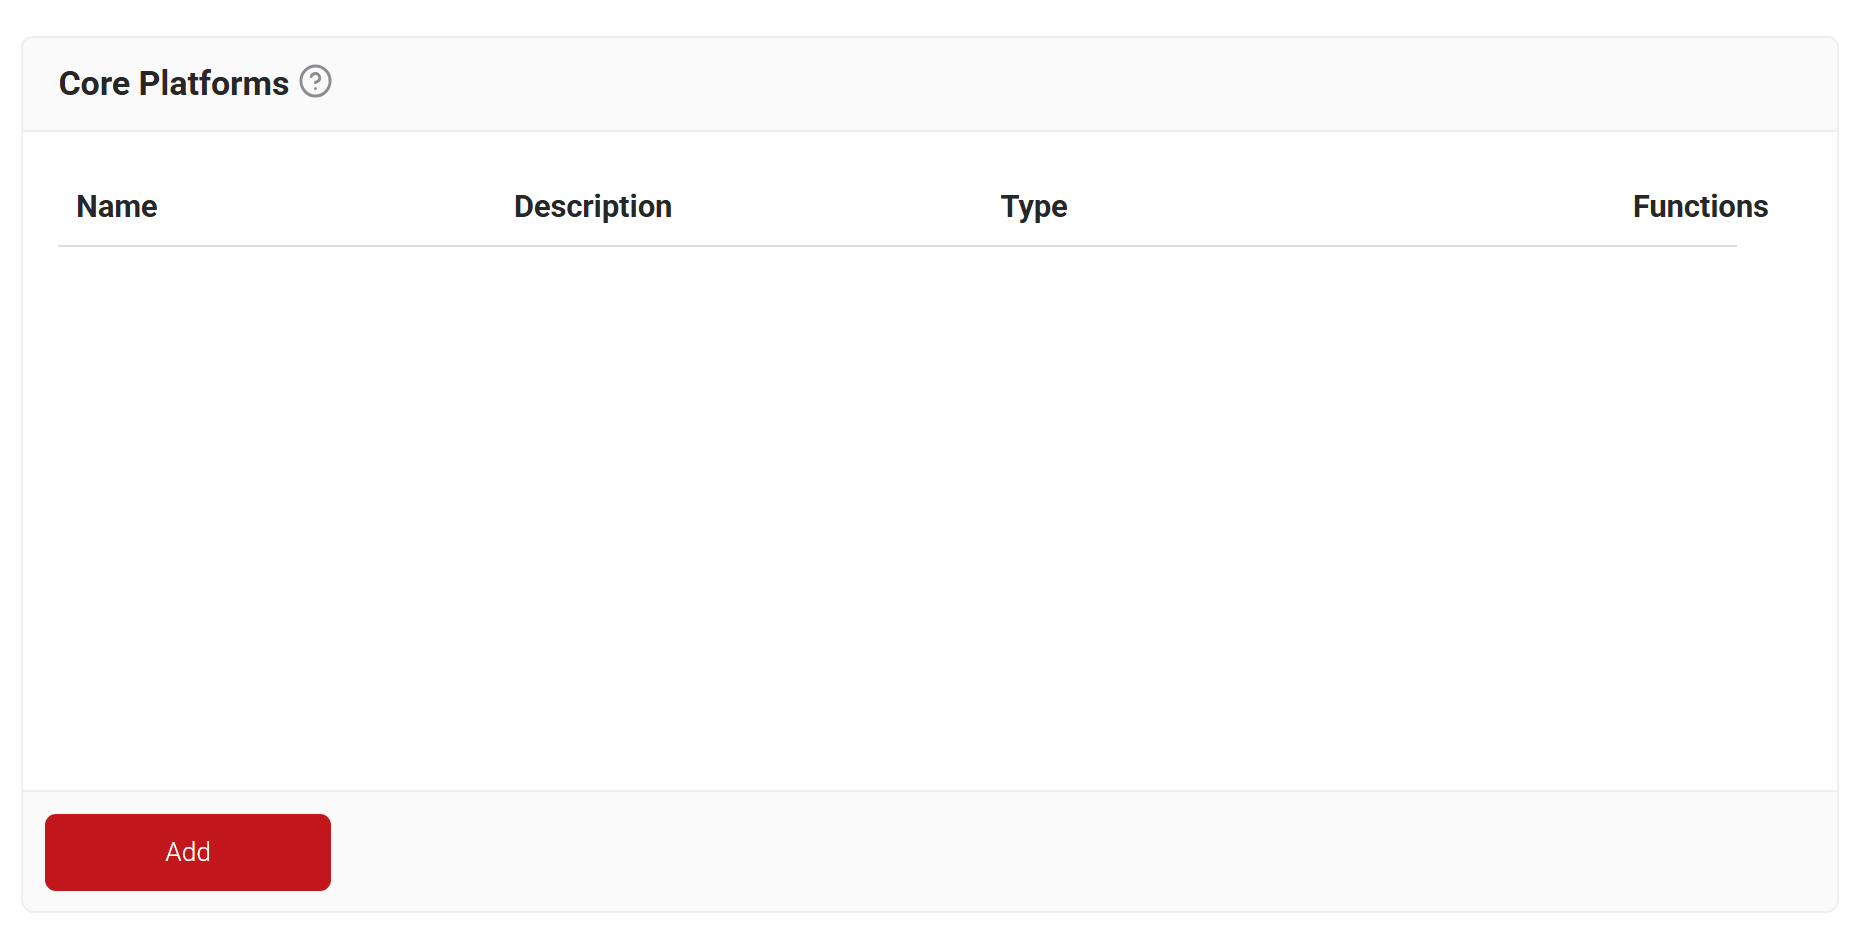
- Navigate to Integrations Hub > Core Platforms.
- Click Add.

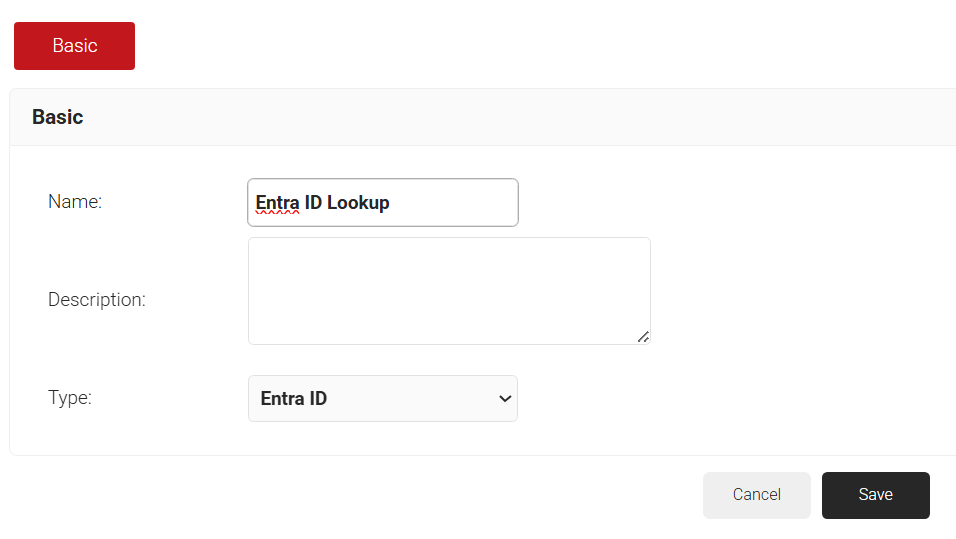
- For the Name field, enter the name of the core provider.
- For the Description field, enter a suitable description for the core provider.
- From the Type drop-down list, select Entra ID.

- Click Save.
- The page refreshes and displays the Configuration, Attribute Mapping, and Groups tabs.
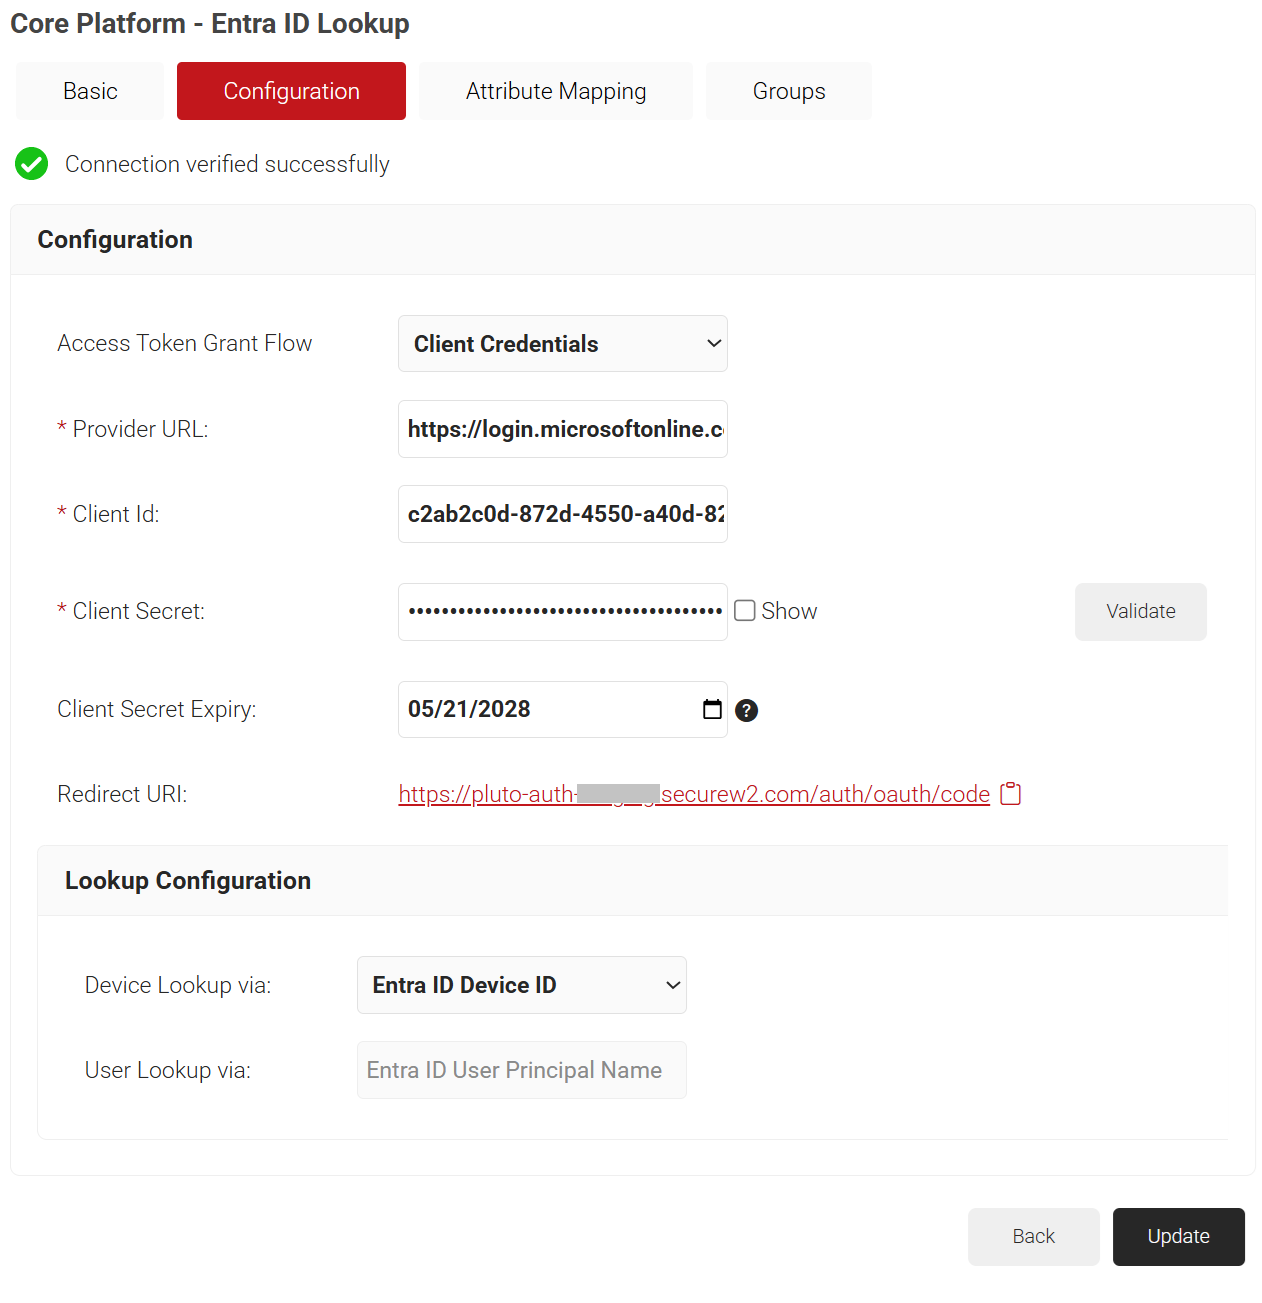
- Click the Configuration tab.
- From the Access Token Grant Flow drop-down list, select one of the following options.
- Client Credentials – This option eliminates the need for frequent token reauthorization from the Azure portal and is the recommended method.
- Authorization Code – This option requires reauthorization of the token from the Azure portal every 90 days.
- In the Provider URL field, enter the URL you created earlier using the Directory (tenant) ID: https://login.microsoftonline.com/{Directory (tenant) ID}. This should look like this:
https://login.microsoftonline.com/561bc66f-1d86-4244-8bc4-5eb12cba45ac - In the Client Id field, enter the Application (client) ID that you retrieved from Azure Portal earlier (refer to the Creating a New Application section).
- In the Client Secret field, enter the Client secret you generated in the Azure Portal earlier (refer to the Creating a Client Secret section).
- In the Client Secret Expiry field, enter the client secret’s expiry date (refer to the Creating a Client Secret section).
- Under the Lookup Configuration section, from the Device Lookup via drop-down list, select the required device lookup attribute from the options listed below:
- Entra ID Device ID – The lookup is performed using Azure ADID.
- Entra ID Device Name – The lookup is performed using the device name. For additional search filters, select the required checkboxes:
- Is Managed – checks if the device is managed.
- Is Compliant – checks if the device is compliant.

- Click Update.
- From the Access Token Grant Flow drop-down list, select one of the following options.
This step is required for SecureW2 CloudRADIUS to create a chain of trust and verify the Microsoft-issued client certificate.
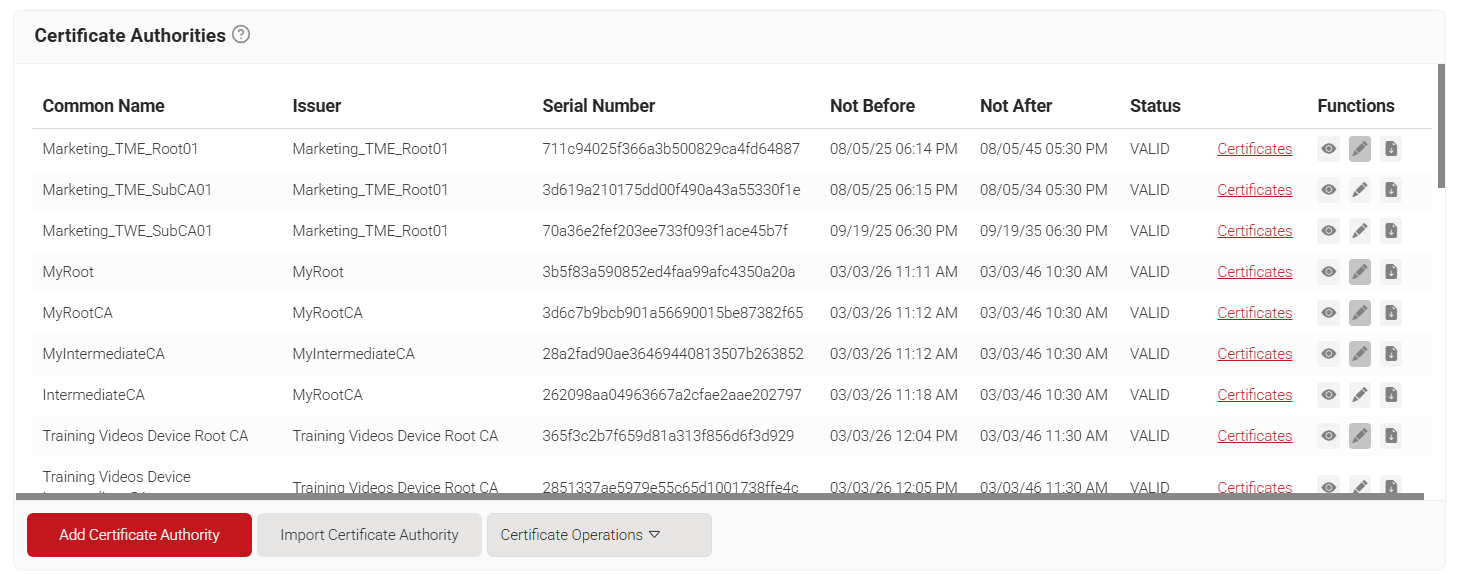
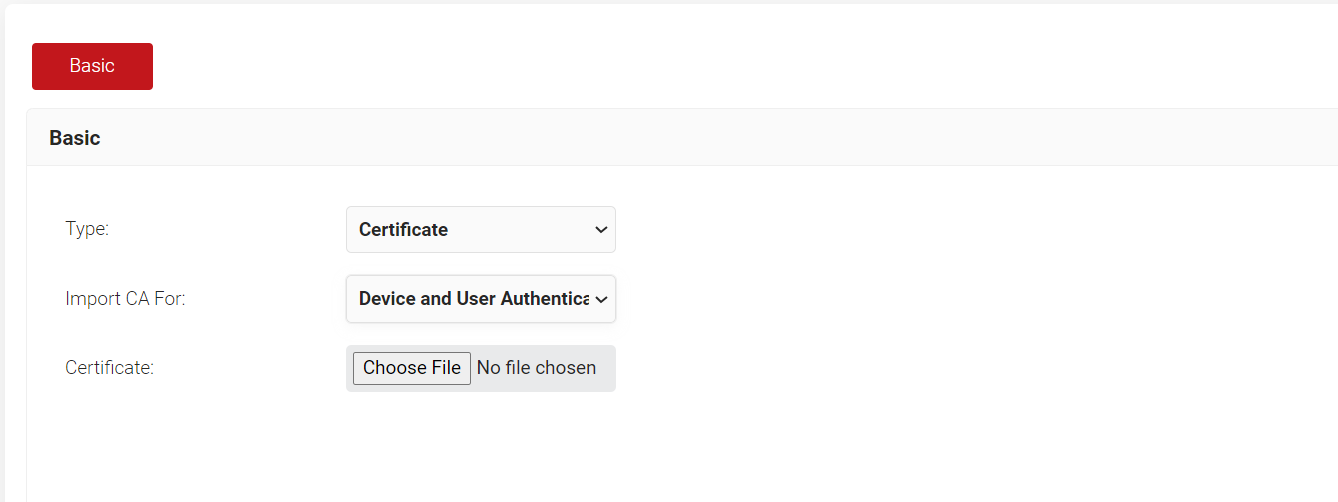
- Navigate to Dynamic PKI > Certificate Authorities and click Import Certificate Authority.

- In the Basic section, from the Type drop-down list, select the type of authentication as Certificate
- From the Import CA for drop-down list, select ‘Device and User Authentication’

- In the Certificate option, upload the Root CA that you downloaded from Intune.
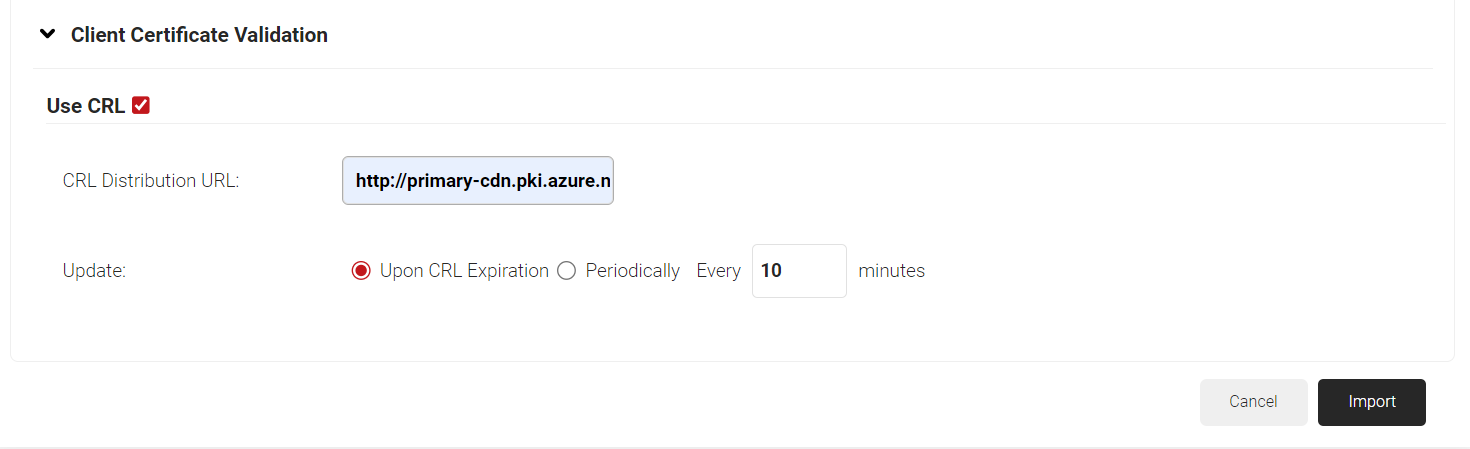
- Under the Client Certificate Validation tab, enable the Use CRL check-box.
- In the CRL Distribution URL field, enter the URL from where the CRL file can be downloaded to check the client certificate status.
- For the Update field, enter a period for CRL updation (In minutes) based on:
- Upon CRL Expiration – CRL file is updated after it expires.
- Periodically Every – CRL file is updated periodically for the selected time interval (minutes). The minimum time interval is 10 minutes.

- Repeat the same process for the second time for Intermediate CA. You have Now Imported both the Root and Intermediate CA from Microsoft Cloud PKI into your JoinNow Management Portal.
Lookup Policies are how we configure the new Core Provider to trigger based on the user or certificate values.
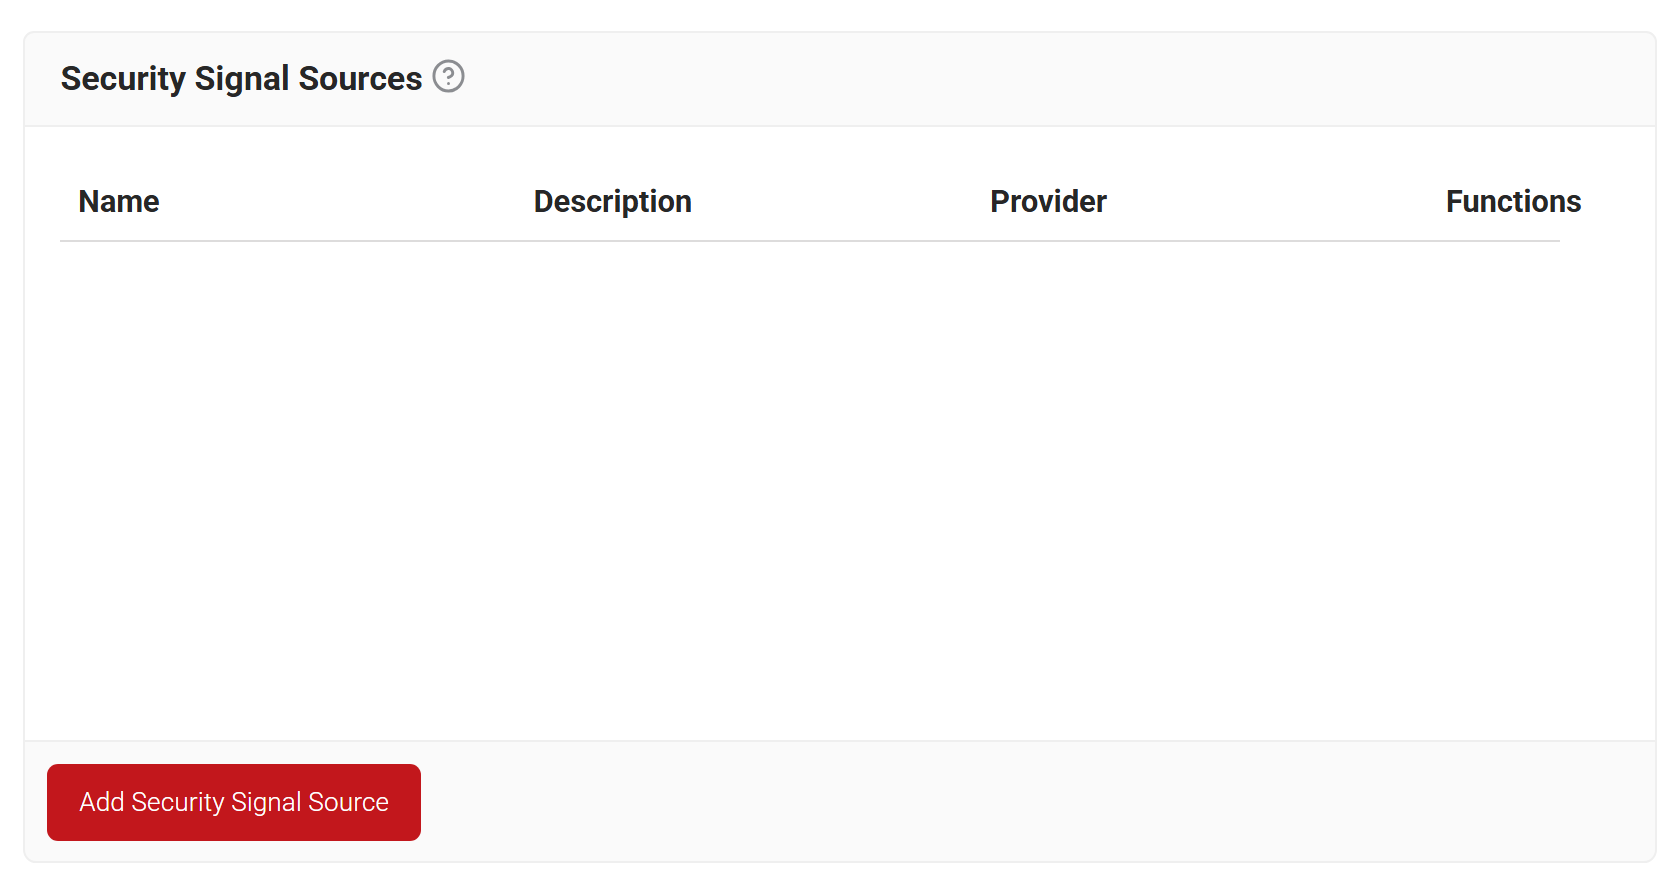
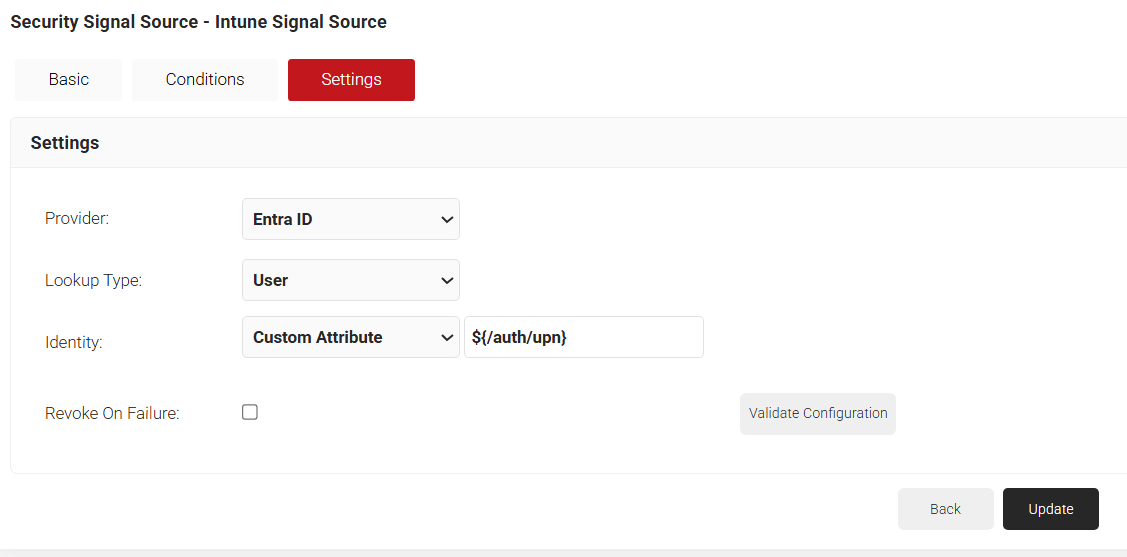
- Navigate to Policy Management > Security Signal Sources.
- Click Add Security Signal Source.

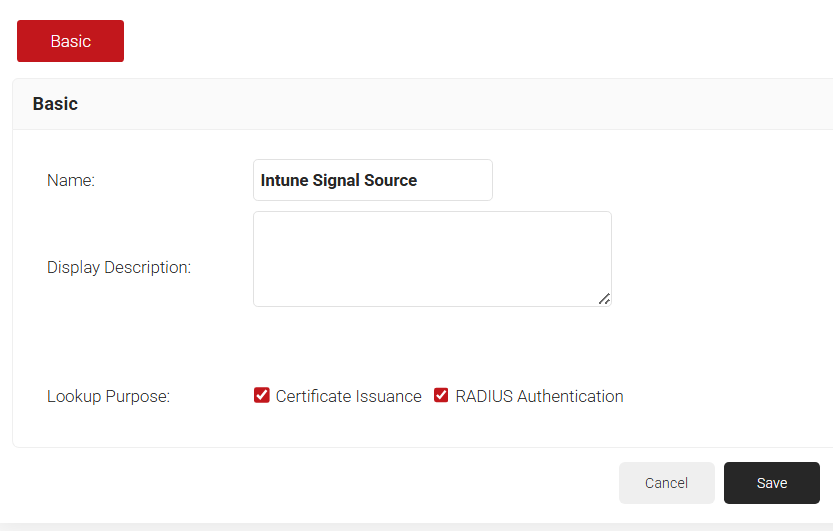
- On the displayed screen, enter a Name and Display Description for the Security signal source.
- Lookup Purpose – Purpose of Account Lookup
- Certificate Issuance – To lookup user/device account during Enrollment.
- RADIUS Authentication – To lookup user/device account during RADIUS Authentication.

- Click Save. The Conditions and Settings tabs appear.
- Click the Conditions tab.
- From the Identity drop-down list, select the required identity attribute for lookup.
- In the Regex field, enter the value you want to match.
- Under the Settings tab, from the Provider drop-down list, select the Google Workspace Identity Lookup you created in the Creating a Core Provider section.
- From the Lookup Type drop-down, select:
- Auto – The system automatically uses identity as the Lookup attribute.
- Device – The Identity drop-down list is displayed. Select a device identity required for lookup.
- User – The Identity drop-down list is displayed. Select a user identity required for lookup.
- From the Identity drop-down, select the Identity attribute mapped for lookup.

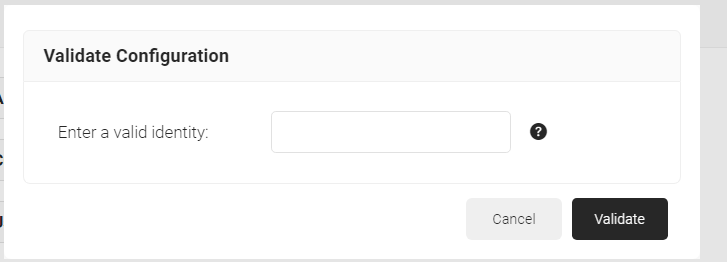
- Click on Validate Configuration. Enter the Identity of the user/device in Enter a valid identity field. Click Validate.

- Click Update.
To configure a Policy Engine Workflow:
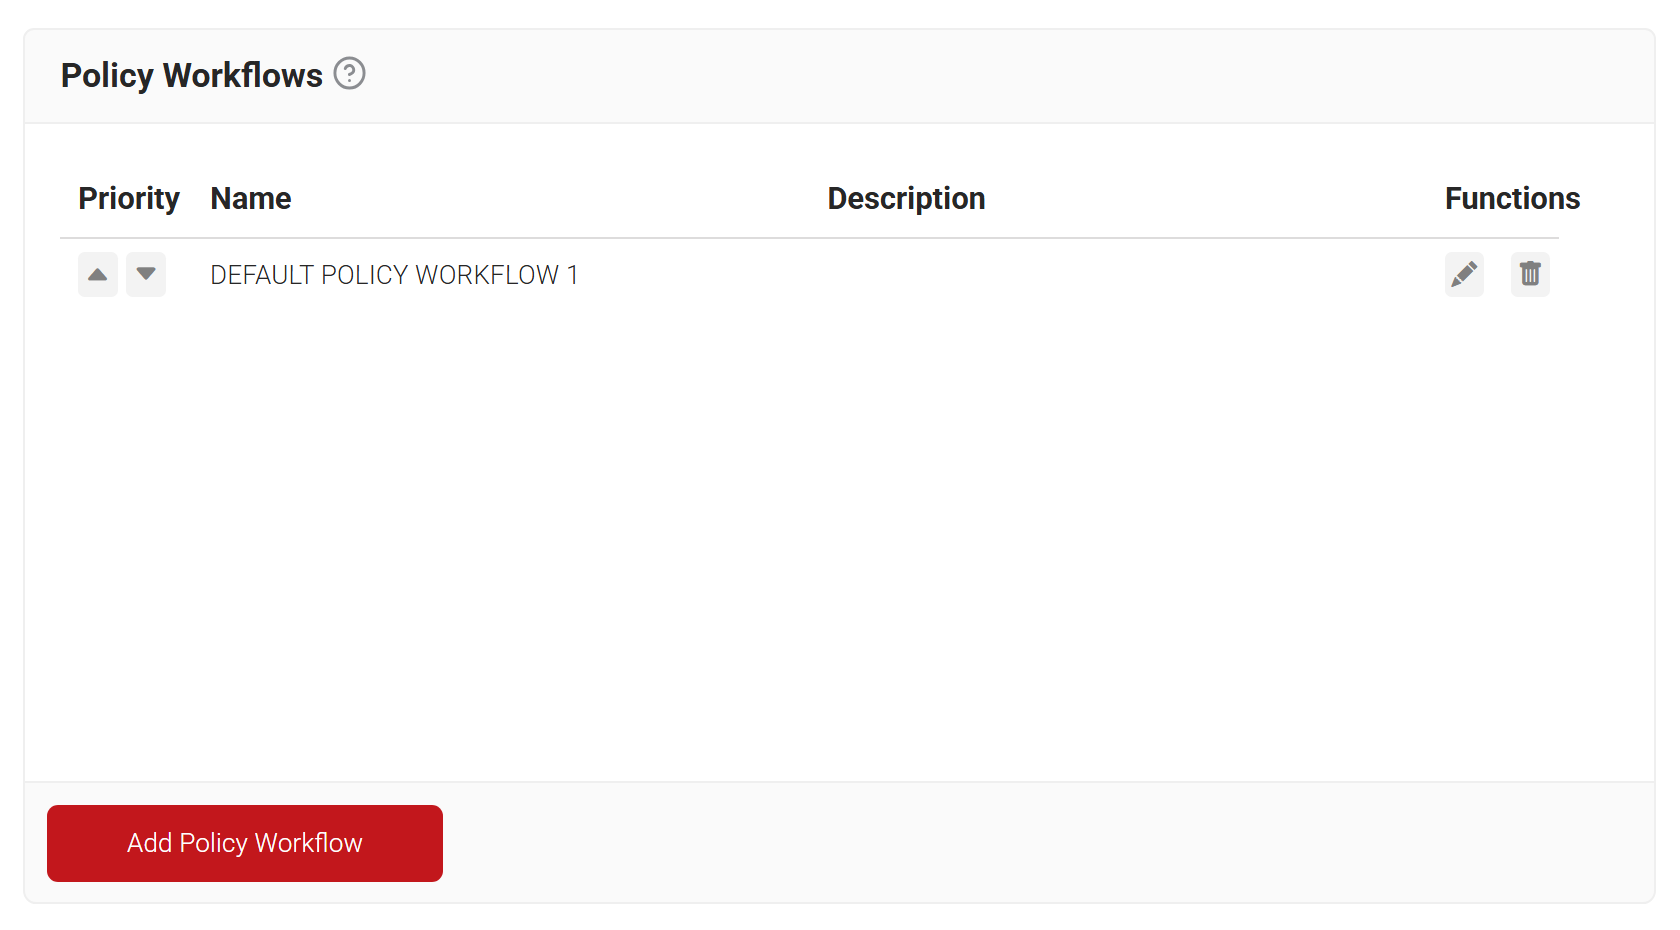
- Navigate to Policy Management > Policy Workflows.
- Click Add Policy Workflow.

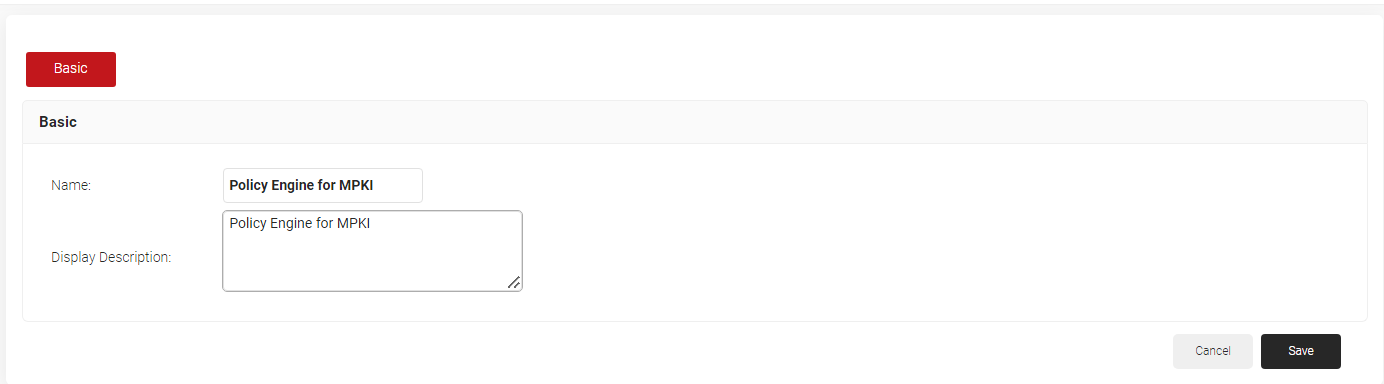
- In the Basic section, enter the name of the role policy in the Name field.
- In the Display Description field, enter a suitable description for the role policy.

- Click Save.
- The page refreshes, and the Conditions tab is displayed.
- Select the Conditions tab.
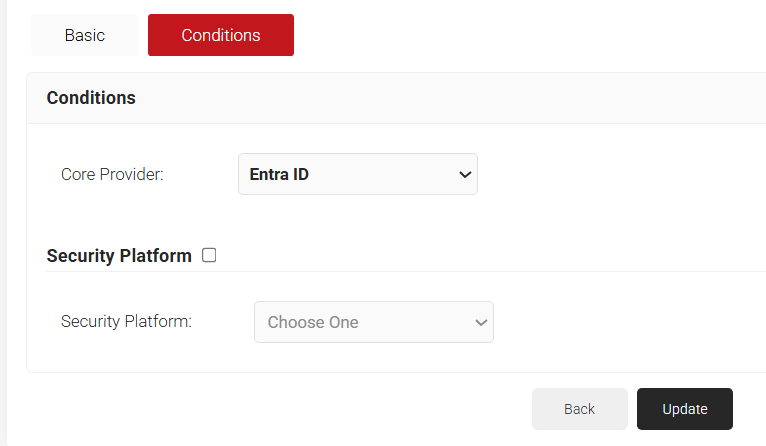
- In the Conditions section, from the Core Provider drop-down list, select the Intune CA IDP you created earlier (see the Creating a Core Provider section).

- Click Update.
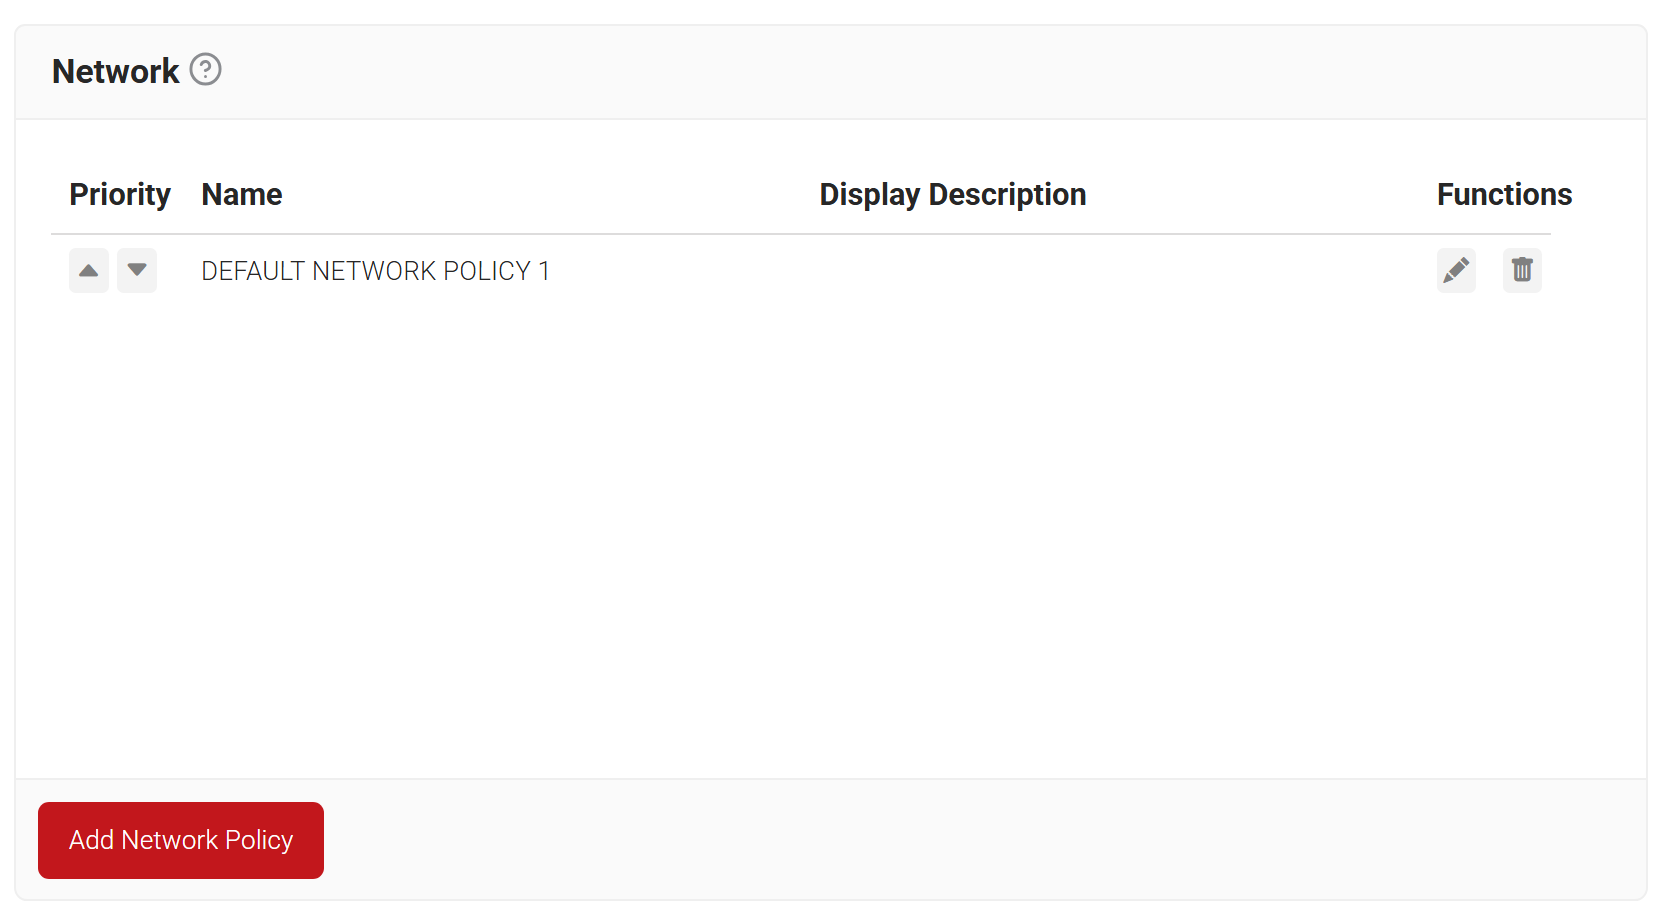
Similar to the check during certificate issuance, Lookup can be used before the RADIUS Authentication as a dynamic check. To trigger the lookup during the RADIUS Authentication, map the policy engine workflow created in section Configuring a Policy Engine Workflow in the Network Policy, created below:
- Navigate to Policy Management > Network.
- On the Network Policies page, click Add Network Policy.

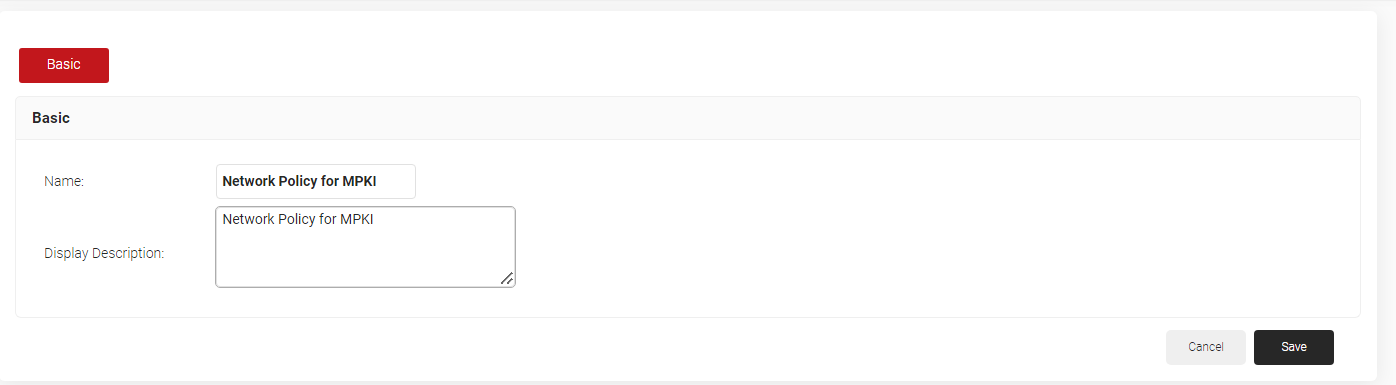
- On the displayed screen, enter a Name and Displayed Description for the network policy in the corresponding fields.

- Click Save.
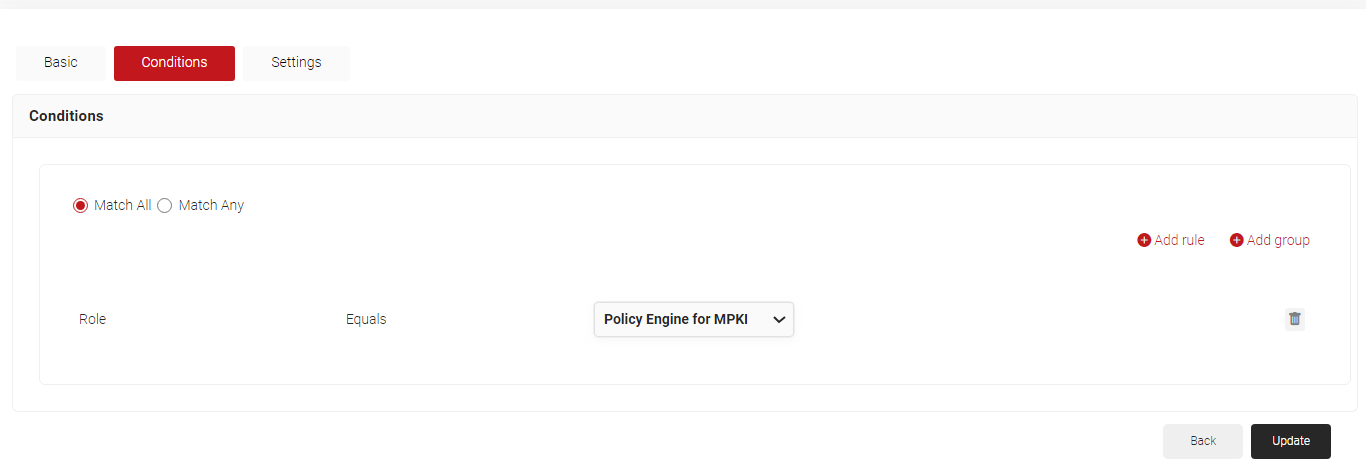
- Click the Conditions tab.
- Click Add rule and select the user role you want to assign to this network policy.

NOTE: You can assign a network policy to multiple user roles. - Click the Settings tab.
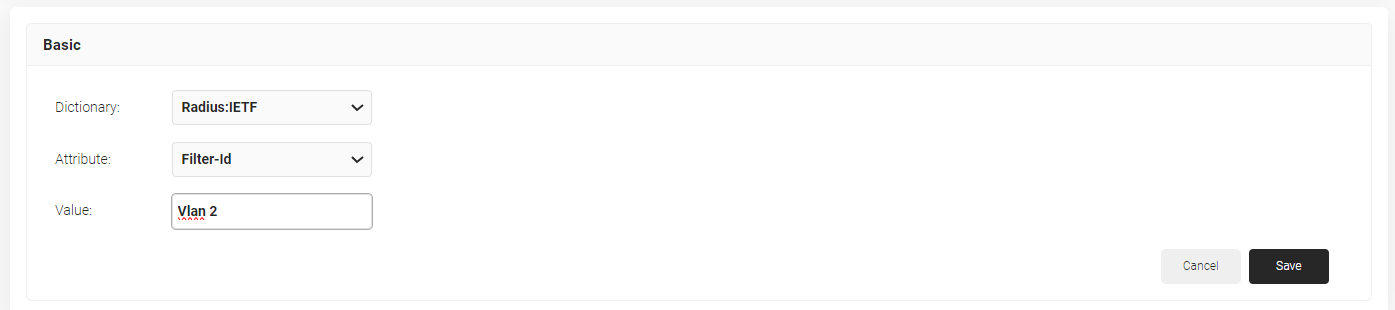
- Click Add Attribute.
- From the Dictionary drop-down-list, select an option: Radius:IETF or Custom.
- From the Attribute drop-down-list, select an option.
- In the Value field, enter the appropriate value for the attribute.

- Click Save.
- Click Update.
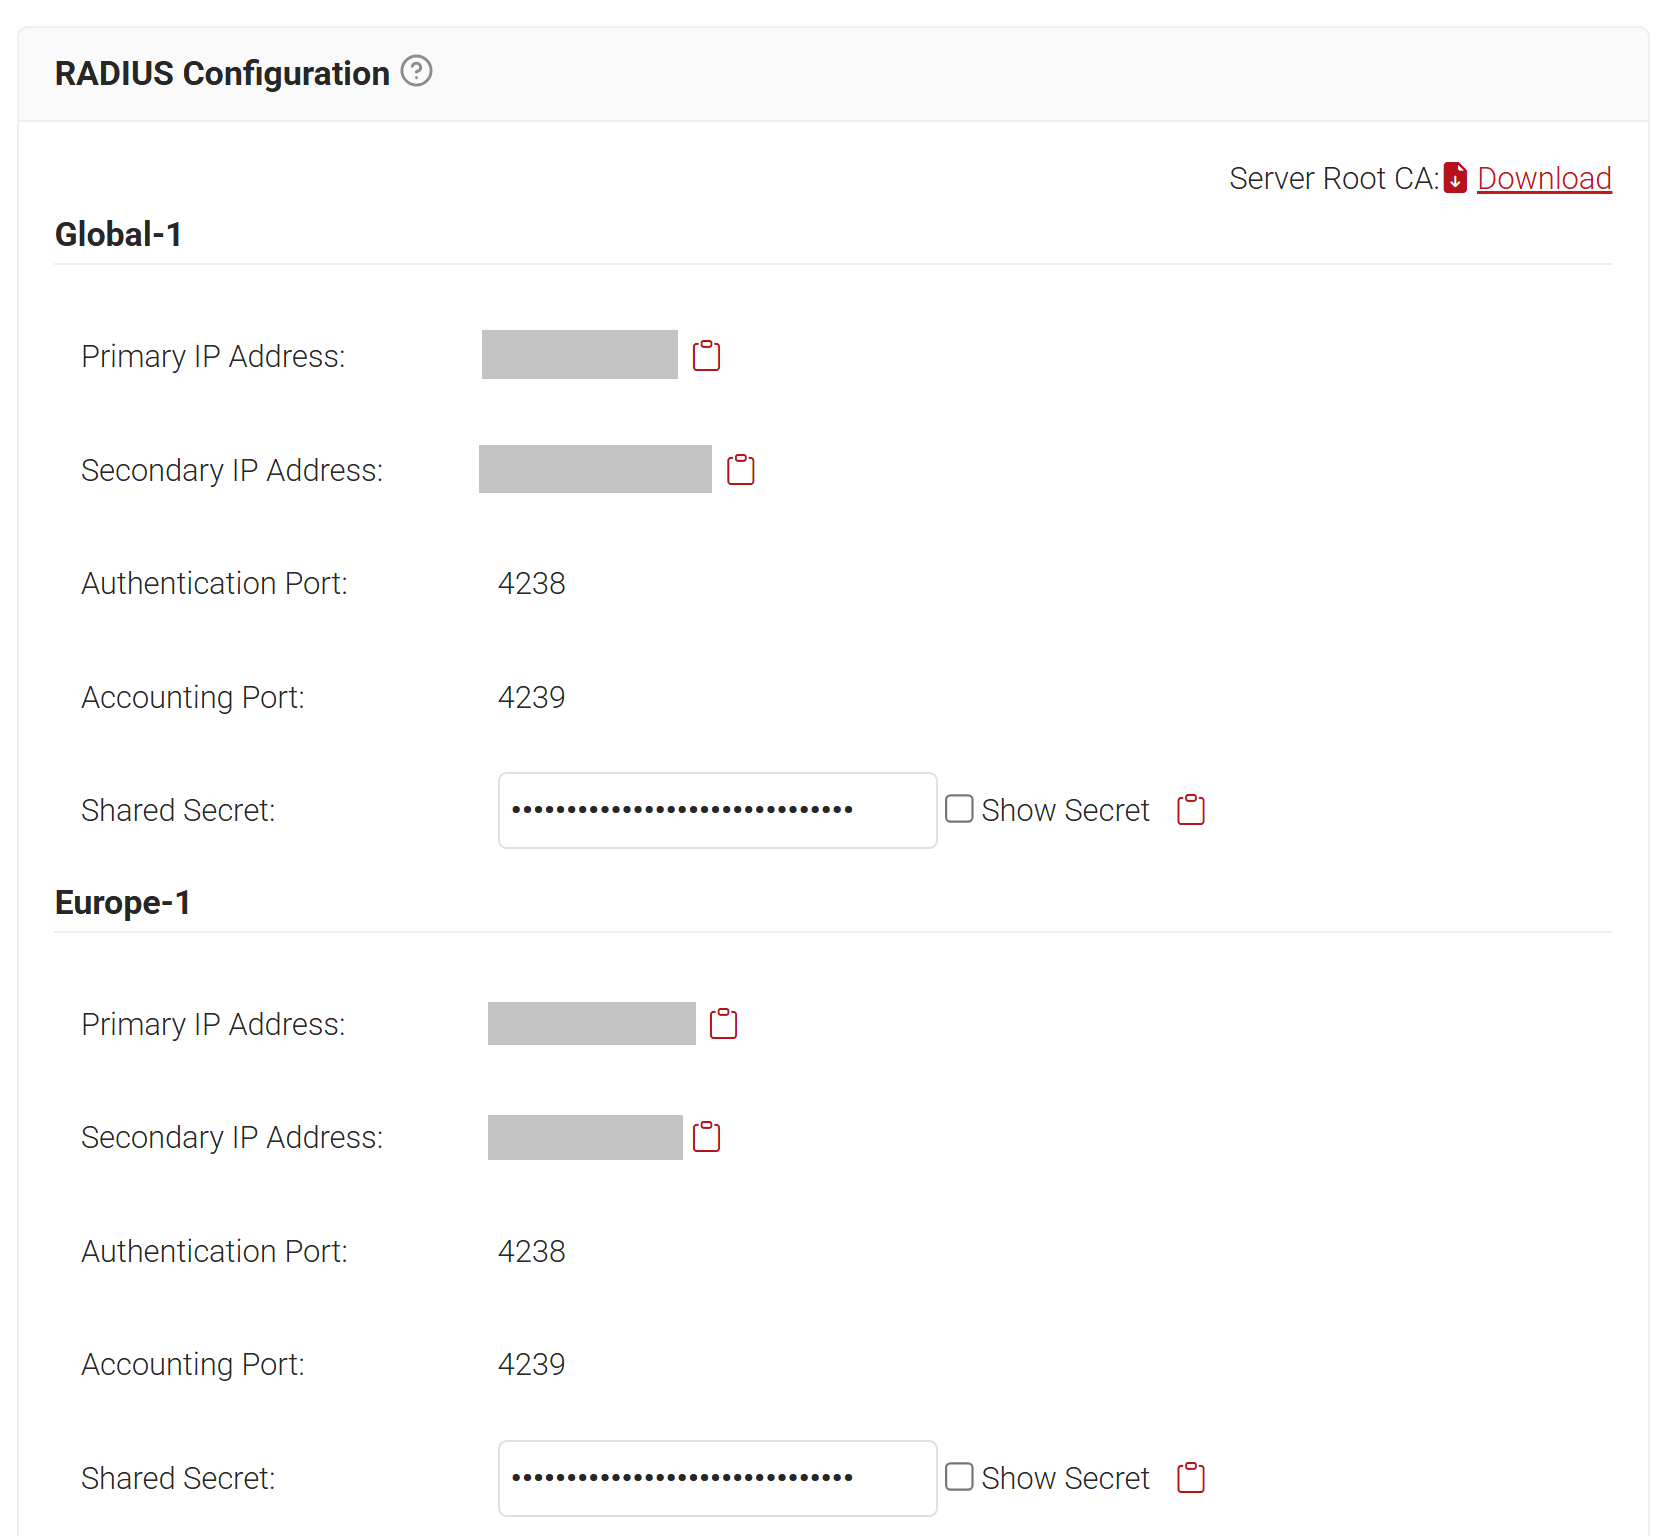
Configure the SecureW2 CloudRADIUS IP address and shared secret into your wireless controller. Configuring the Aruba Controller is shown as an example.
- Log in to the JoinNow Management Portal.
- Navigate to RADIUS > RADIUS Configuration. Copy your IP address and port numbers of your RADIUS, and then configure them on your Wi-Fi controller.

- The Secure SSID must then be configured with the RADIUS IP details to set up a secure network for RADIUS Authentication.

Aruba Controller set-up 
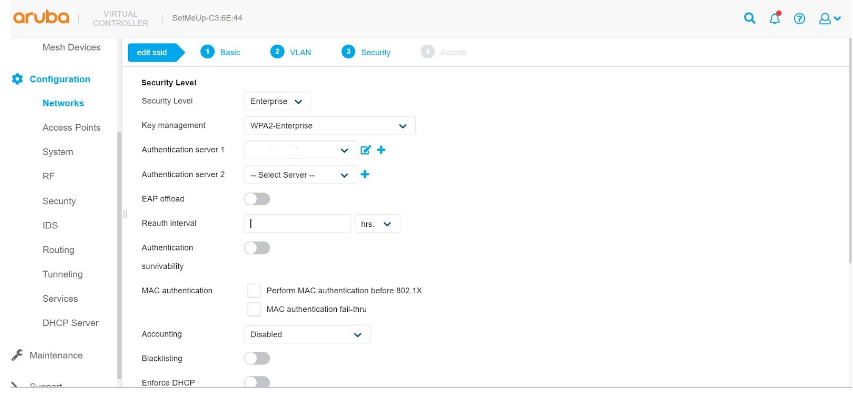
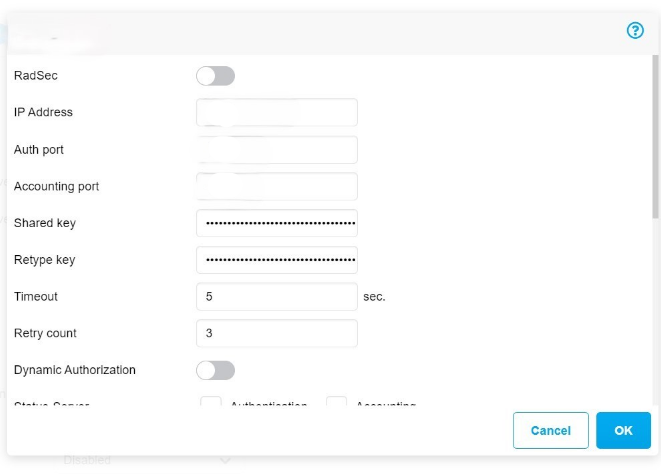
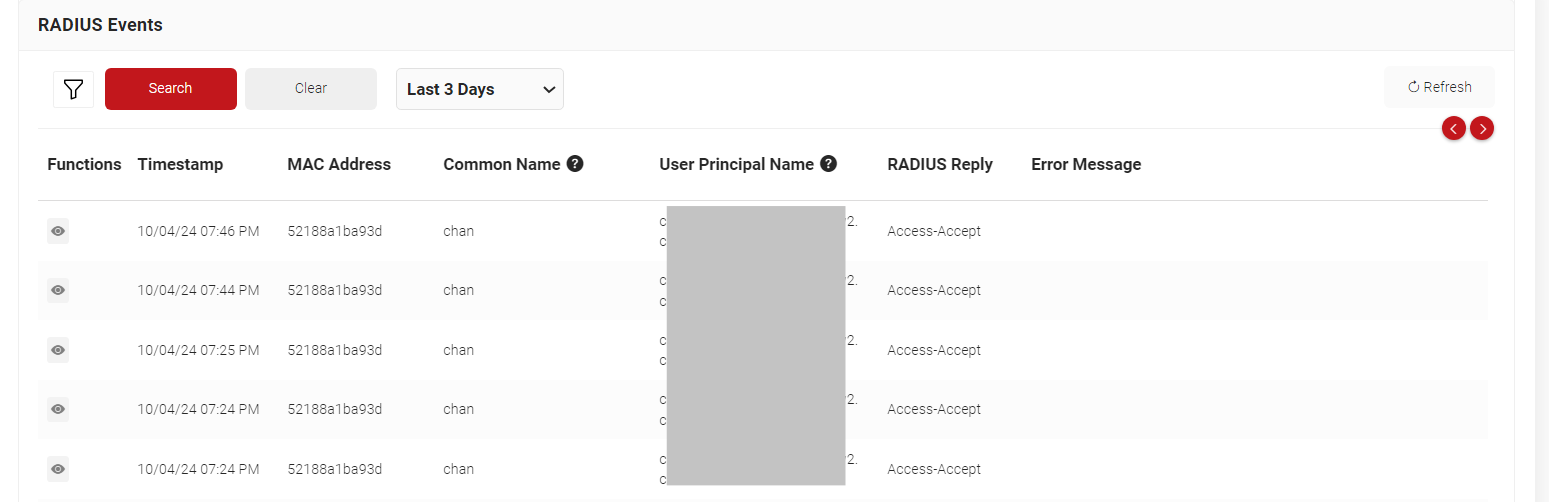
After successful configuration, device authentication is tracked in RADIUS Events. To access the RADIUS Events page, log in to the JoinNow Management Portal and navigate to Data and Monitoring > RADIUS Events.
SecureW2 CloudRADIUS is flexible and can be integrated smoothly with Microsoft PKI or any other PKI Vendor. If you are stuck somewhere and need support, contact us at support@securew2.com.