Azure MFA VPN Integration Guide
Introduction
To safeguard access to data and applications, users can avail Azure AD multi-factor authentication (MFA) with SecureW2’s Cloud RADIUS and connect to a VPN.
This guide is to help you connect a device to a VPN using token-based authentication and Azure MFA.
Prerequisites:
You need to obtain a VPN license from: sales@securew2.com
Create an Azure MFA IDP
To create an Azure MFA IDP:
- Navigate to Identity Management > Identity Providers.
- Click Add Identity Provider.
- Enter a suitable name and description for the IDP in the respective fields.
- From the Type drop-down list, select Azure MFA.

- Click Save.
- Click the Configuration tab.
- In the Tenant ID field, type the Directory (tenant) ID obtained from the Microsoft Azure portal. For more information on how to obtain the Tenant ID, see the SecureW2 JoinNow Integration Guide available in the JoinNow MultiOS Management Portal.
- From the Identity drop-down list, select the attribute used for identification, either token-based or certificate-based.

- Click Update.
- For the newly added IDP, click the Edit icon.

- Navigate to the Configuration tab and click the Download button to obtain the setup script file. Save the file.
NOTE: You need to run the Powerscript file to complete the setup. The PowerScript file is supported only in Windows.
- On your Windows machine, click Start, type PowerShell, and select Run as administrator.
- On the command line, go to the location of the PowerScript file and run the following command: powershell -ExecutionPolicy Bypass -File “Azure MFA Authorization Script.ps1”
- You need to install certain packages and will be prompted with the following messages:
- The MSOnline module is not installed on the system. Automatically install it? – Type Y
- NuGet provider is required to continue. PowerShellGet requires NuGet provider version ‘2.8.5.201’ or newer to interact with NuGet-based repositories. The NuGet provider must be available in ‘C:\Program-Files\PackageManagement\ProviderAssemblies’ or ‘C:\Users\user\AppData\Local\PackageManagement \ProviderAssemblies’. You can also install the NuGet provider by running the Install-PackageProvider-Name NuGet -MinimumVersion 2.8.5.201 – Force the command. Do you want PowerShellGet to install and import the NuGet provider now? – Type Y
- This script will enable SecureW2 to access your Azure Strong Authentication Service in order to verify users in your Azure organization with Tenant ID < >. In order to do so, you will have to log in to Azure using an organization admin account. Continue? – Type Y
- The Azure sign-in window is displayed. Enter the organization admin account credentials and click Sign in.

NOTE: You need to use the latest version of Firefox or Chrome as your default browser.On successful authorization, the following message is displayed at the prompt: “Azure Strong Authentication Service OAuth credential registered successfully”.
Creating a VPN Profile
To create a VPN profile:
- Navigate to Device Onboarding > Getting Started.
- On the Quickstart Network Profile generator page, from the Profile Type drop-down list, select Virtual Private Network.
- In the Profile Name field, enter a suitable name for the VPN profile.
- From the VPN Vendor drop-down list, select a vendor.
- Global Protect VPN Client – For this attribute, you need to enter the VPN Server Address value only.
- Native VPN Client – For this attribute, you need to enter both the VPN Server Address and VPN Shared Secret values.
- From the RADIUS Vendor drop-down list, select a vendor. If you select any RADIUS vendors other than the SecureW2 RADIUS server, ensure that you have the Root or Intermediate CA that issue the RADIUS server certificates.
- Click the Choose File button to upload a logo for the profile.

- Click Create.
The newly created VPN profile will be available in the Network Profiles after it is published.
NOTE: You can edit the VPN Shared Secret and Server Address values. For this, go to the Device Onboarding > Network Profiles > Network Profiles page. Click the Edit link of the VPN profile and then click the Advanced tab.
NOTE: To obtain a VPN license for your organization, contact support@securew2.com
Mapping the VPN Profile
To map the VPN profile to the IDP for authentication:
- Navigate to Policy Management > Authentication Policies.

- Click the Edit link of the newly created VPN profile policy.

- Select the Conditions tab and make sure that your network profile is displayed in the Profile field.

- Click the Settings tab, and from the Identity Provider drop-down list, select the IDP you created earlier for authentication.

- Select the Enable User Self Service checkbox, if required.
- Click Update.
Configuring the VPN Profile
To configure the VPN profile for MFA:
- Navigate to Policy Management > Network Policies.
- Click Add Network Policy.
- On the displayed screen, enter a name and description for the network policy in the corresponding fields.

- Click Save.
- Select the Conditions tab.
- In the Conditions section:
- From the Role list, select a user role policy you created earlier.
- From the Device Role list, select DEFAULT DEVICE ROLE policy.
- In the Dynamic section:
- From the Identity drop-down list, select an option from the following:
- Username
- Certificate-CommonName
- Certificate-SAN-UPN
- Certificate-SAN-Email
- In the Regex field, enter the value you want to match.
- Issuing Intermediate CA: The default Intermediate CA that comes with your organization is displayed.
- SSID: Secure network to which a device is configured to connect.
- NAS-ID: Network Access Server Identifier (NAS-ID), indicates the source of the RADIUS access request.
- NAS-IP: Provides the IP address of the requester.
- NAS-Port Type: Indicates the type of port used by RADIUS to authenticate the requestor.
- Click Update.
- Navigate to the Settings tab.
- In the MFA section, select the Enable MFA checkbox.
- From the Perform MFA Using drop-down list, select the IDP you created for MFA.

- Click Update.
Creating a Language Template for VPN
You can customize the Self Service Portal in any supported language so end users can download their credentials and configure the VPN easily.
- To create a new language template for VPN settings:
- Go to Self Service > Language templates.
- Click the Add Language Template.
- In the Name field, type a name for the VPN template.
- In the Display description field, type a suitable description.
- In the Locale field, enter the required language (for example: for English type en and for Dutch, de).
- Click Save.
- Click the VPN tab and enter appropriate values in the different fields.
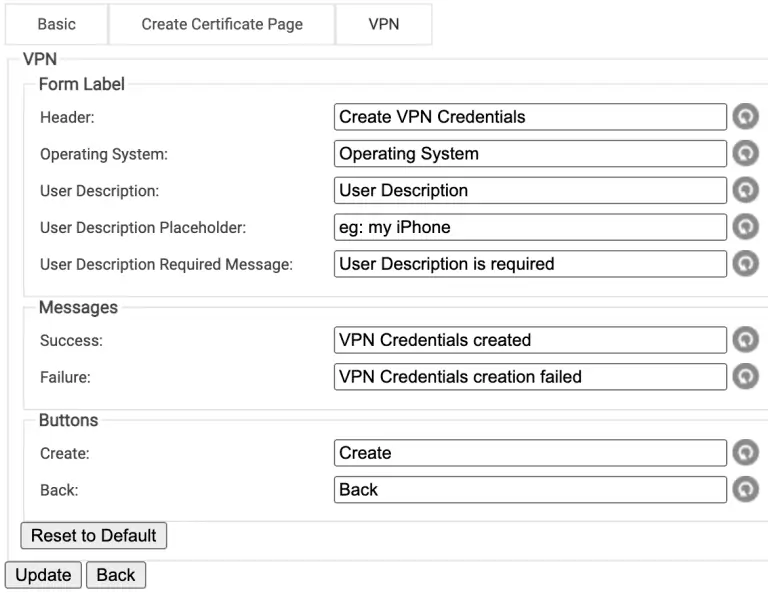
- Click Save.
Now, administrators can configure VPN on the Self Service Portal in the specified language.
- To customize settings for the VPN:
- Go to Self Service > Settings and click the VPN tab. The following screen is displayed.

- In the Basic section, select an option to set the Device Description input to mandatory, optional, or not to be displayed.
- Click Update. The following screen is displayed.
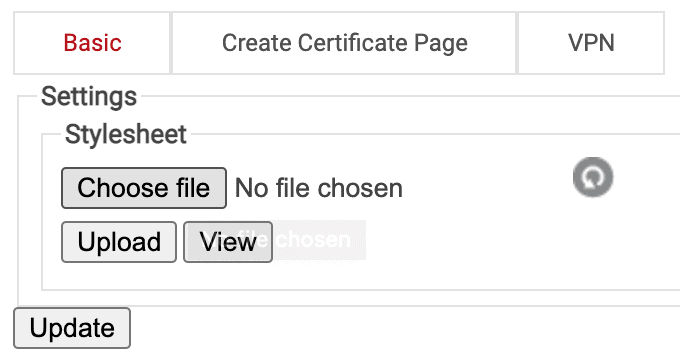
- To upload the required stylesheet, click Choose File and then click Upload.
- Click Update.
As Cloud RADIUS supports token-based authentication for VPN, RADIUS authentication events are displayed in AAA Management > Events.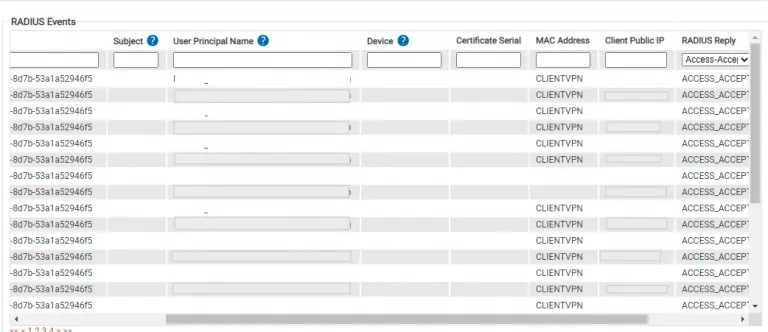
Obtaining VPN Credentials
Once the VPN profile is published, administrators can share the VPN profile landing page link to end-users. On accessing the landing page link, users can download their credentials and configure their devices for VPN using the following steps.
- Click the Sign In button on the Landing Page of the VPN.
- This should open the SAML portal which the Organization Administrator has configured
- Enter the appropriate username and password in the SAML portal
- After successful authentication by the SAML, Landing Page of the VPN is redirected
- Now, enter the User Description detail and click Next to download the VPN CREDENTIALS
- Click the VPN CREDENTIALS link to download the credentials.
- Click Next to configure the device for VPN.
- Click the Internal Guide button to view the instructions for either macOS or Windows.
macOS
- On your Mac, click the Apple logo > System Preferences > Network.
- Click the + button at the bottom of the left pane.
- In the pop-up menu, from the Interface drop-down list, select VPN.
- From the VPN Type drop-down list, select L2TP over IPSec.
- In the Service Name field, type a name for the service and then click Create.

- On the Network window, enter the Server Address and Account Name for the VPN connection, in the respective fields. These values are available in the vpn-credentials.txt file downloaded from the SecureW2 Landing page.
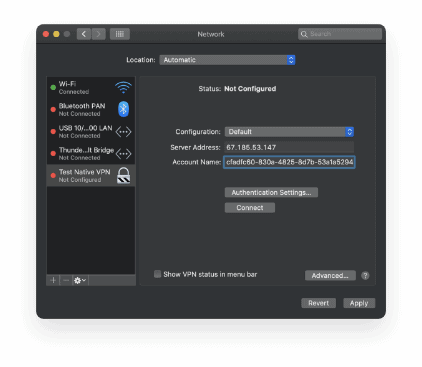
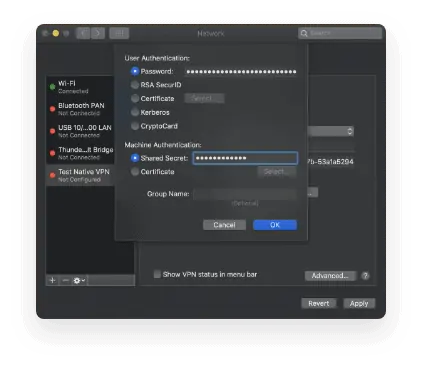
- Click Authentication Settings, and in the pop-up, enter the password and shared secret in the respective fields. These values are available in the vpn-credentials.txt file downloaded from the SecureW2 Landing page. Click OK and then click Apply.
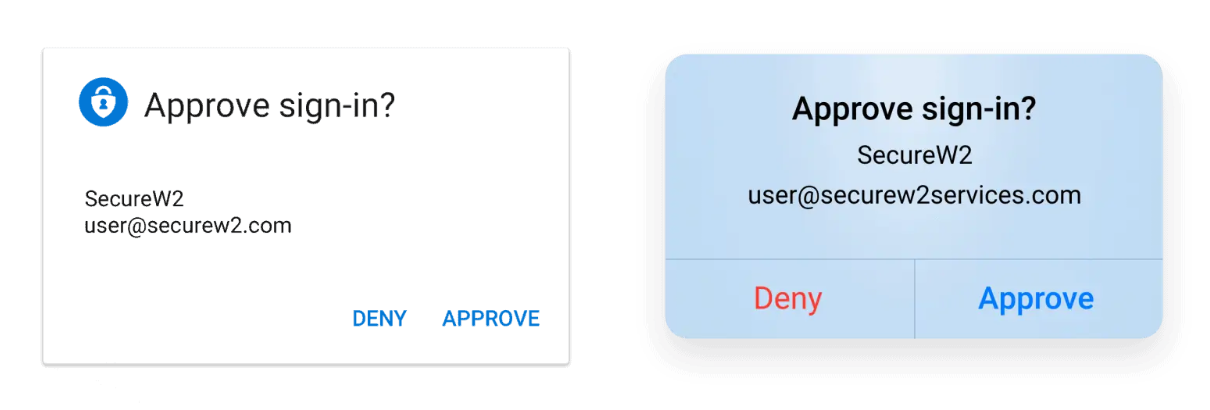
- Once the credentials are verified, you will receive an “Approve sign-in?” MFA prompt from Azure. Select Approve on the prompt on your MFA device.
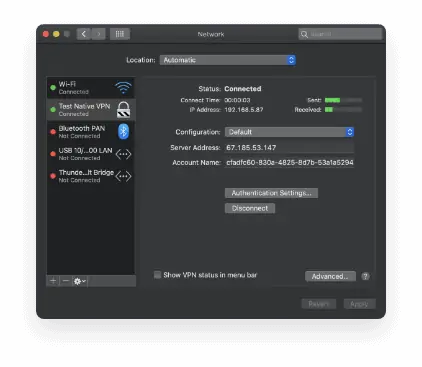
- After multi-factor authentication (MFA) is approved, you will be connected to the VPN.
Windows
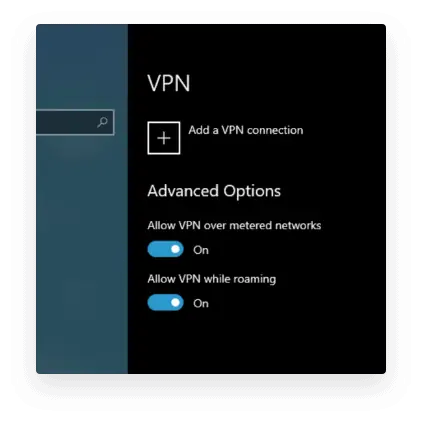
- Click Start, then go to Settings > Network & Internet and click VPN.
- Click the + button to add a VPN connection.
- In the Add a VPN connection window:
- For the VPN provider field, select Windows (built-in).
- In the Connection name field, enter a VPN connection name (for example, My Personal VPN).
- In the Server name or address field, enter the IP address of the VPN server.
- From the VPN type drop-down list, choose L2TP/IPsec with pre-shared key.
- From the Type of sign-in info drop-down list, choose Username and password.
- Type the username and password, in the respective fields, and click Save.
Note: The Server IP, Username, Password, and Pre-shared key values are available in the VPN-credentials.txt file downloaded from the SecureW2 Landing page.

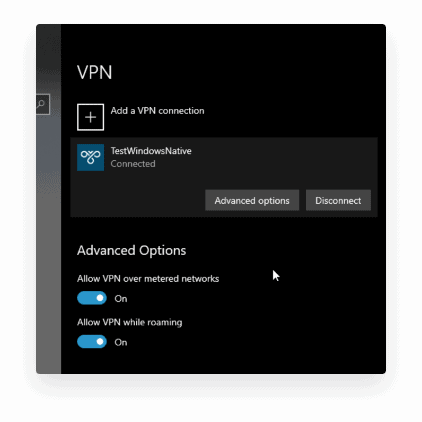
- On the VPN window, select the VPN connection you just created and click Connect.

- Once the credentials are verified, you will receive an “Approve sign-in?” MFA prompt from Azure. Select Approve on the prompt on your MFA device.

- After successful multi-factor authentication (MFA), you will be connected to the VPN.
Schedule a Demo
Sign up for a quick demonstration and see how SecureW2 can make your organization simpler, faster, and more secure.
Schedule NowPricing Information
Our solutions scale to fit you. We have affordable options for organizations of any size. Click here to see our pricing.
Check Pricing