PKI uses the Transport Layer Security protocol to facilitate communication between client and server at the time of authentication, an EAP protocol that is considered secure, while user authentication is done using an X. 509 client certificate signed by a valid and reputable Certificate Authority, thus ensuring only authorized clients or devices get access to your network.
WPA-2 enterprise with EAP-TLS (Extensible Authentication Protocol-Transport Layer Security) is considered the most secure. There is the option to allow network connection only after successfully completing server certificate validation. Mutual authentication, or matching both the server and client certificates, makes this EAP authentication method almost impenetrable among all EAP methods.
Managing PKI can feel daunting. However, SecureW2 Managed PKI solutions, designed to work across operating systems, offer an easy-to-use graphical interface to view and manage your certificates from issuance to revocation in a few clicks. Our industry-exclusive Identity Lookup with LDAP & SAML Identity Providers enables real-time user identity lookup at authentication.
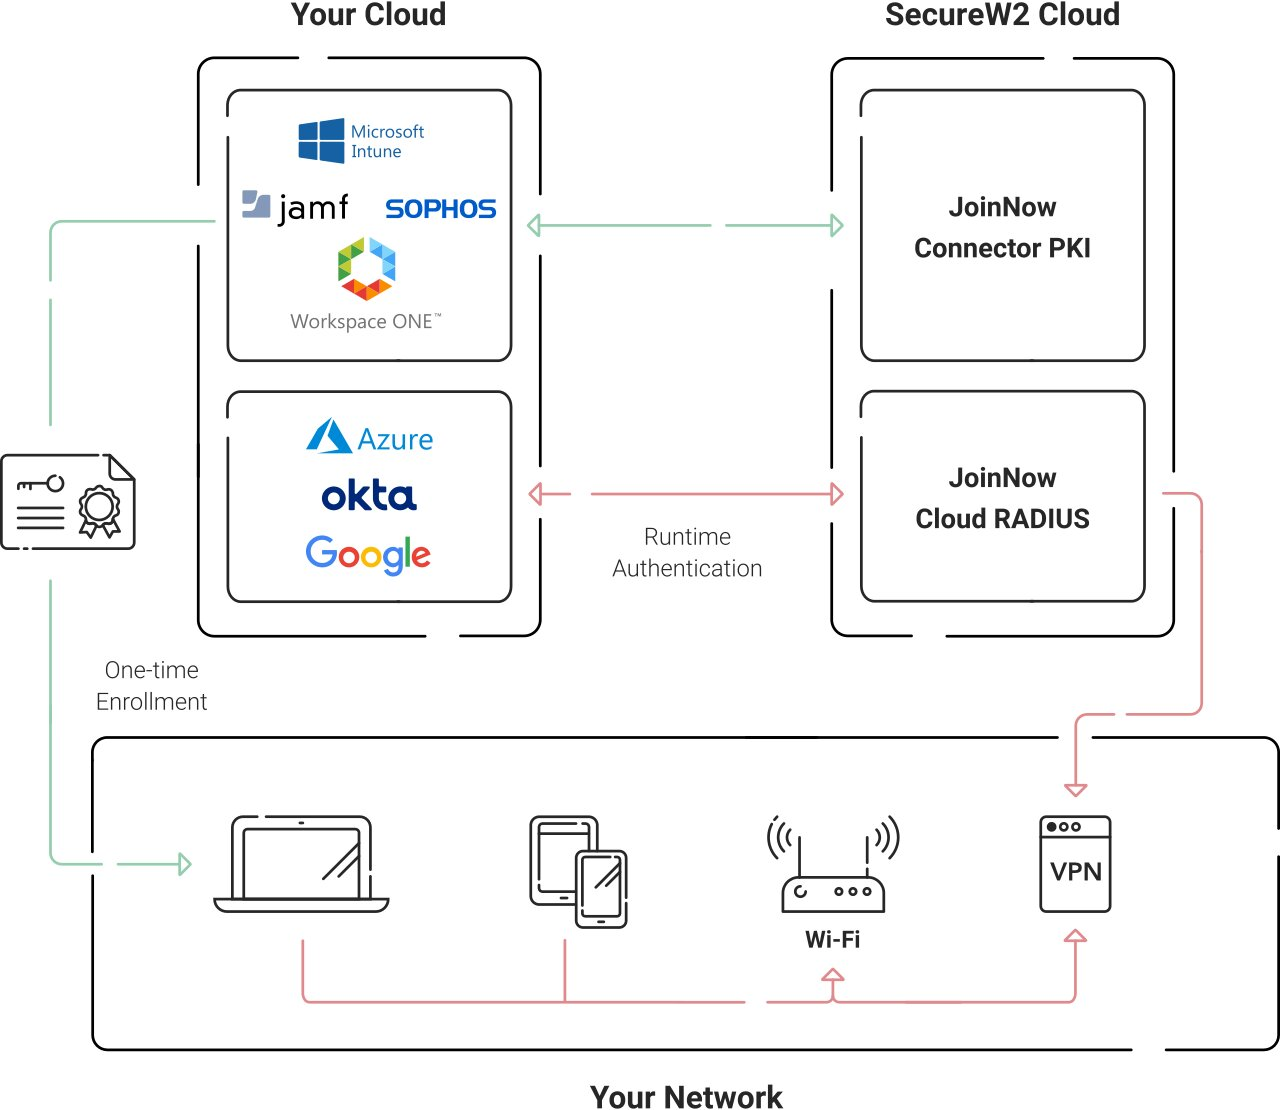
A core provider verifies a user’s or device’s identity. Creating a core provider in SecureW2 instructs the Cloud Connector to connect to your Google Workspace user database, verify user credentials, and issue certificates.
- Log in to the JoinNow Management Portal.
- Navigate to Integration Hub > Core Platforms.
- Click Add.

- In the Basic section, enter the name of the core provider in the Name field.
- In the Description field, enter a suitable description for the core provider.
- From the Type drop-down list, select Google SAML.

- Click Save.
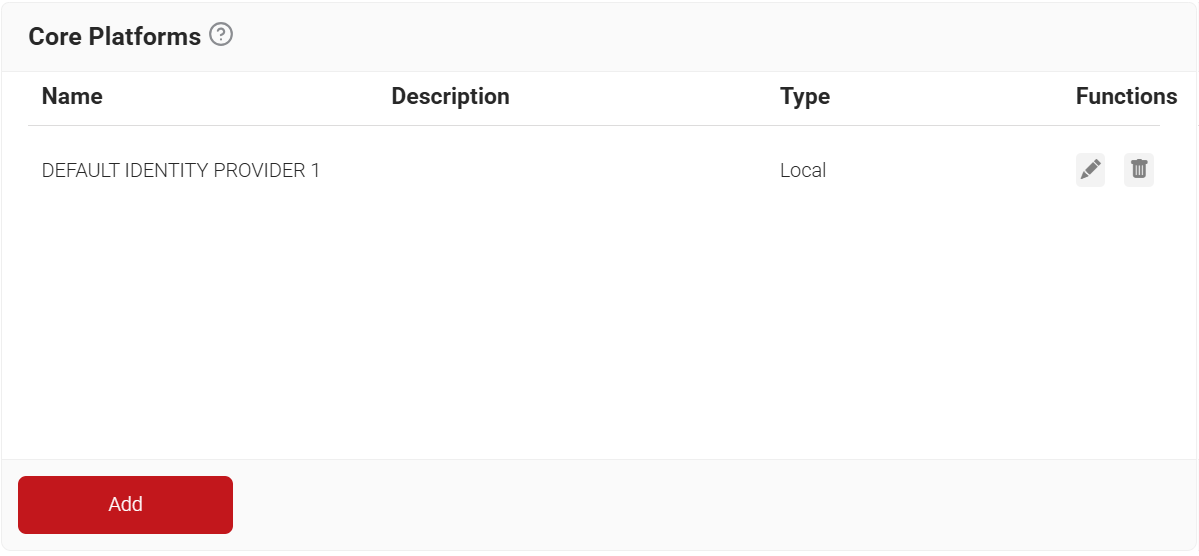
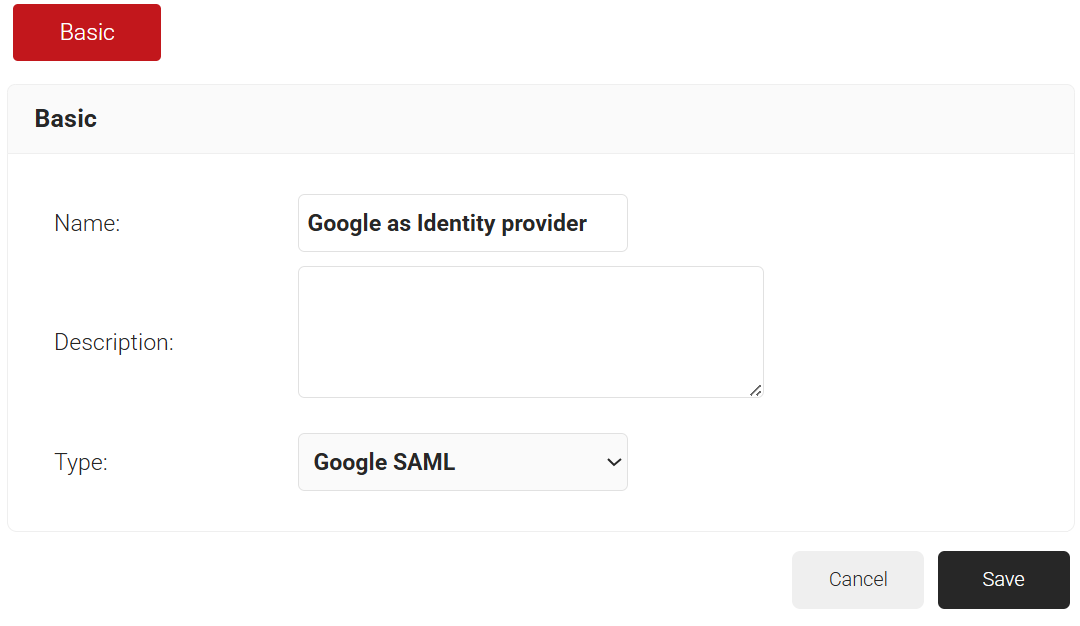
Now, SecureW2 Cloud Connector can exchange information with your provider’s user database.
The SAML application is a crucial connection between the core provider and SecureW2. The SAML application lets users enter their credentials, which the core provider then verifies. The core provider verifies the user’s identity and sends attributes to the SAML application, which then passes the attributes to SecureW2 for certificate issuance.
To create a SAML application in Google:
- Log in to your Google Admin Console.
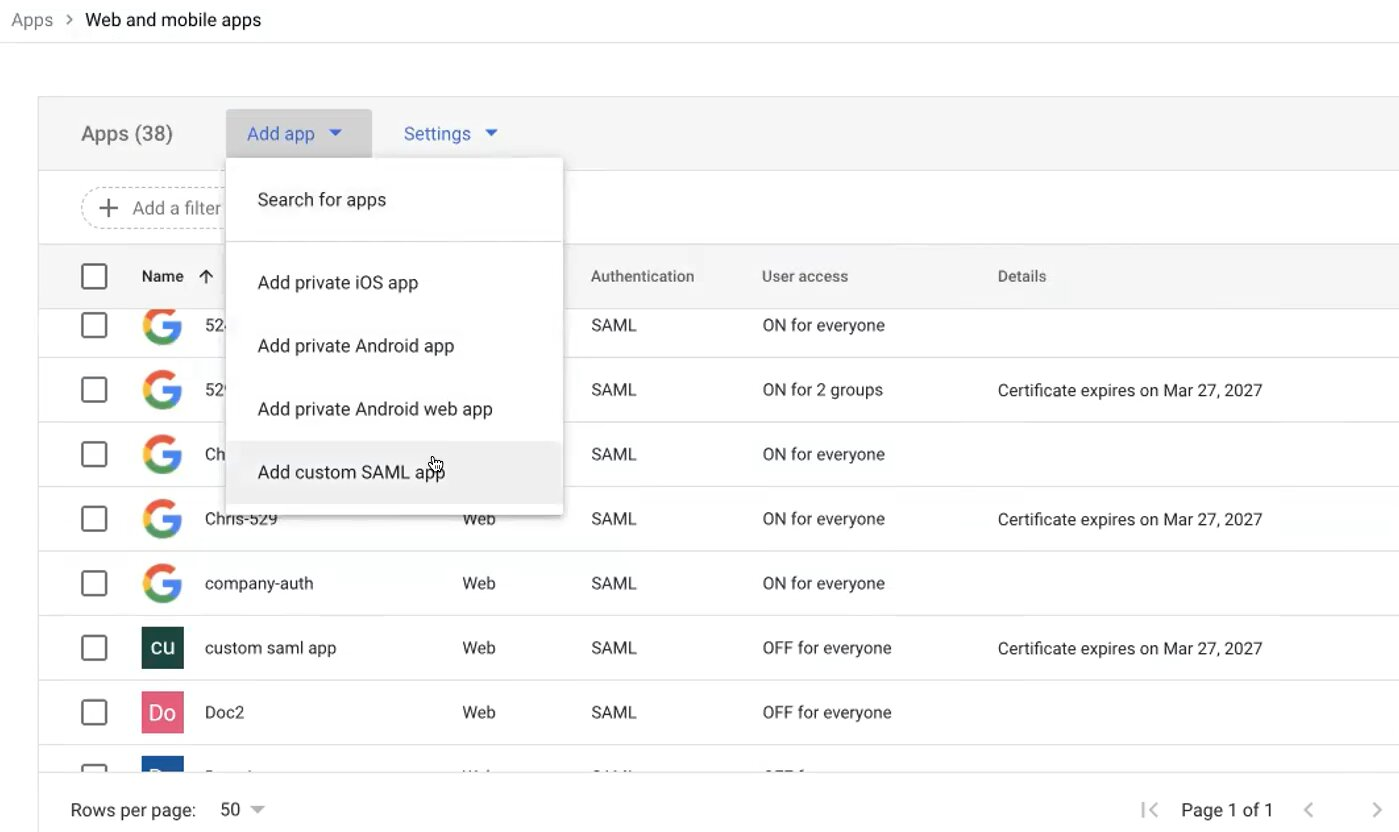
- From the menu, select Apps > Web and mobile apps.
- Click Add app and select Add custom SAML app.

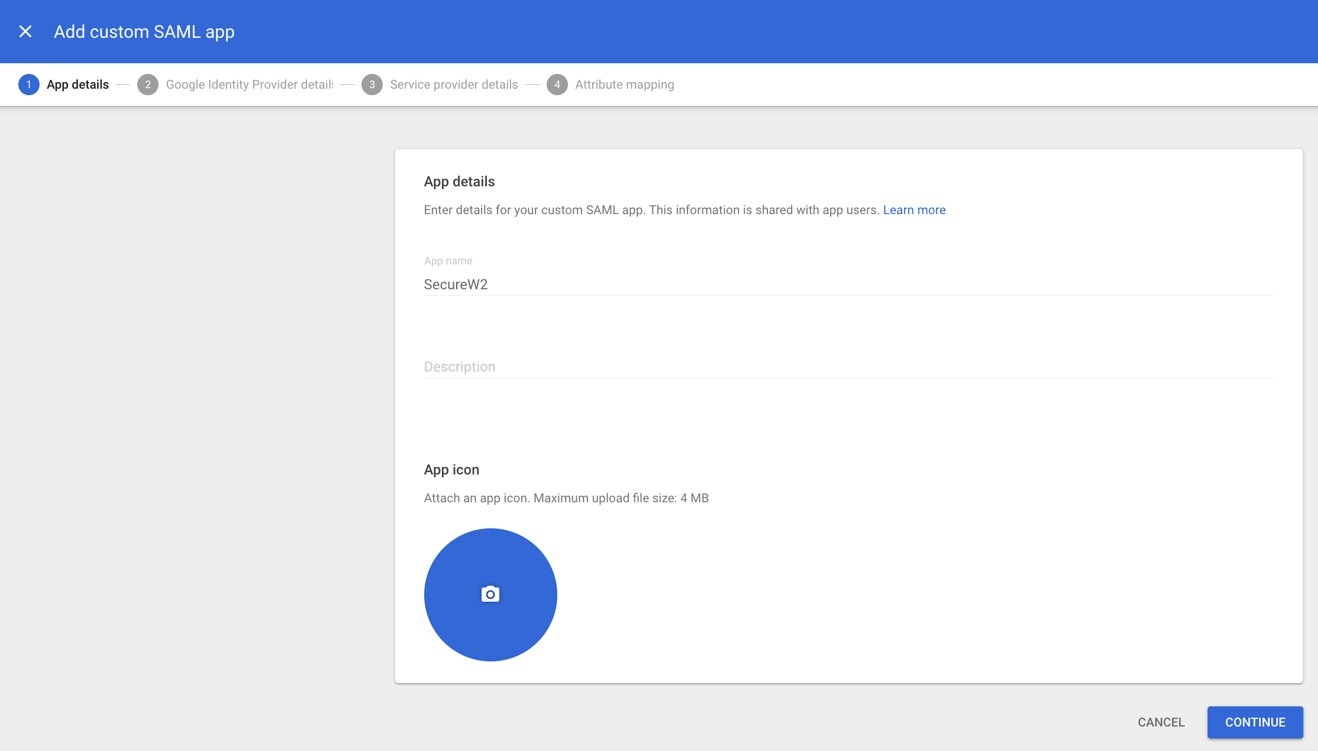
- In the App name field, type a unique name for the app and click CONTINUE.

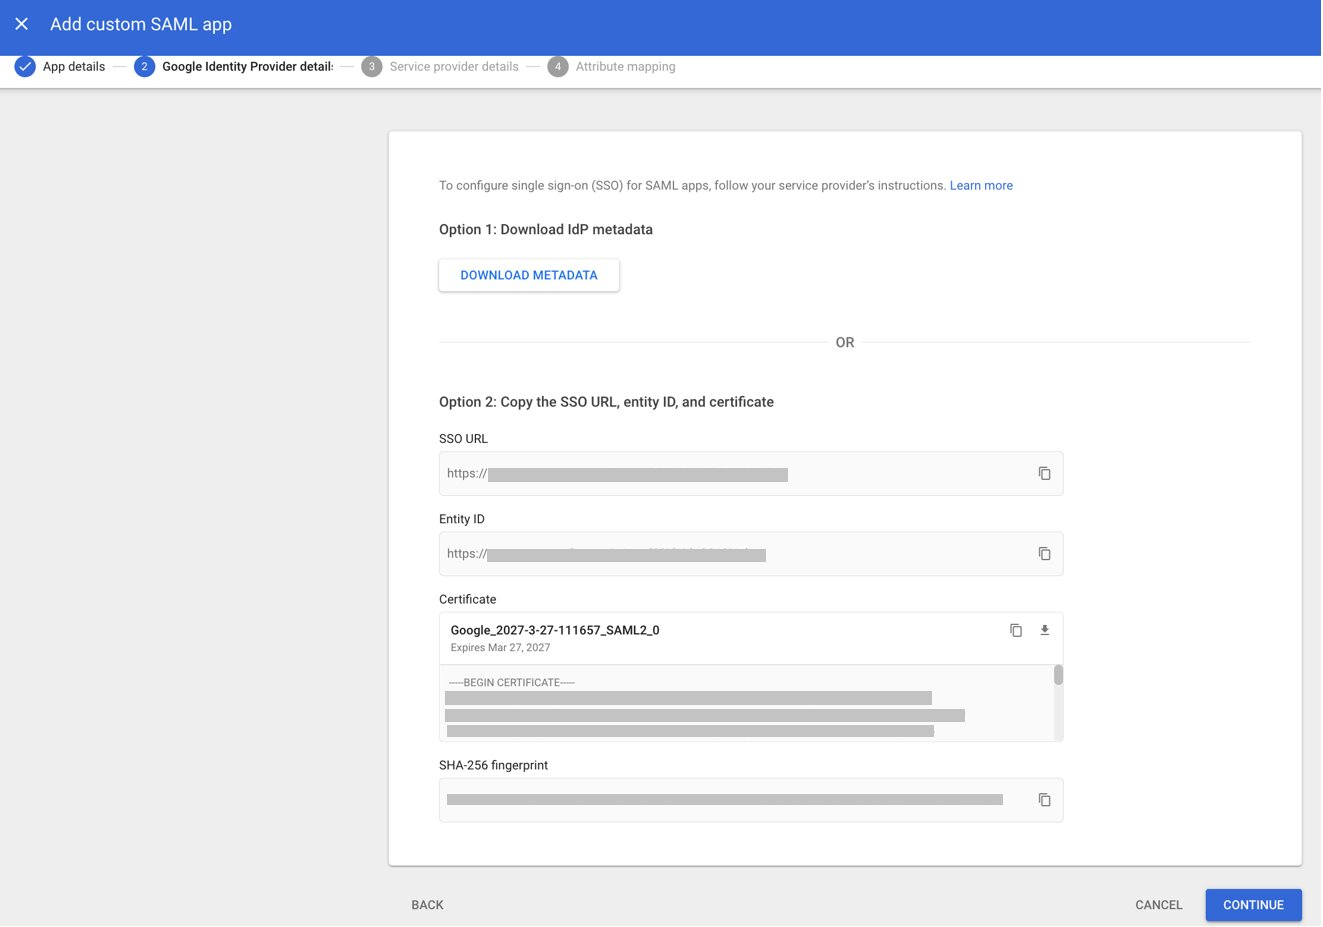
- Under Option 1, click the DOWNLOAD METADATA button and save the metadata file (.XML) on your computer. You need to import this metadata file to the JoinNow Management Portal.

- Click CONTINUE.
- In the JoinNow Management Portal, go to Integration Hub > Core Platforms.
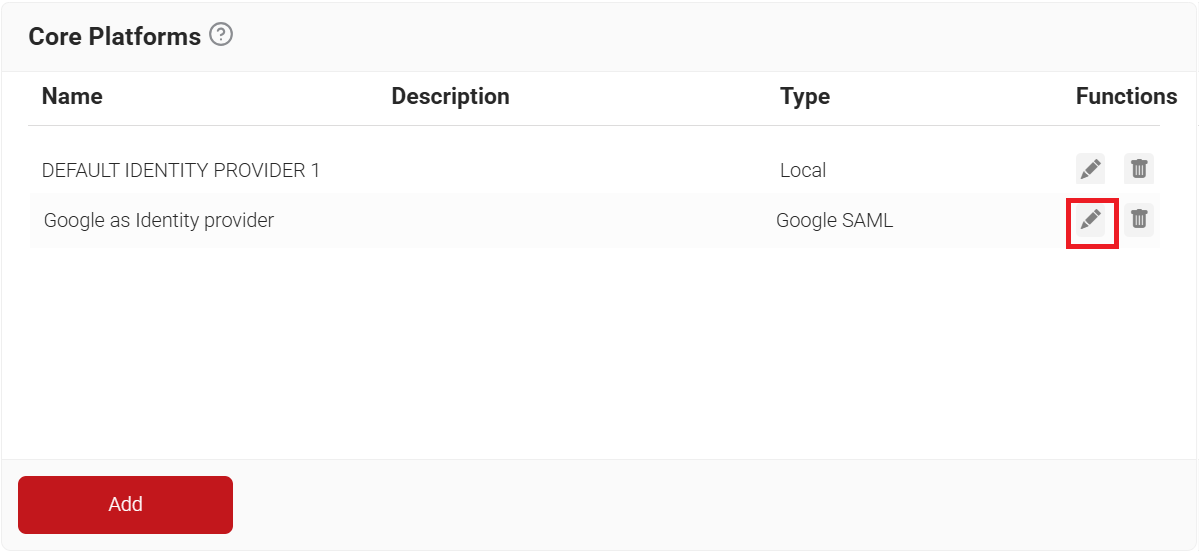
- Click the Edit link for the newly added SAML application.

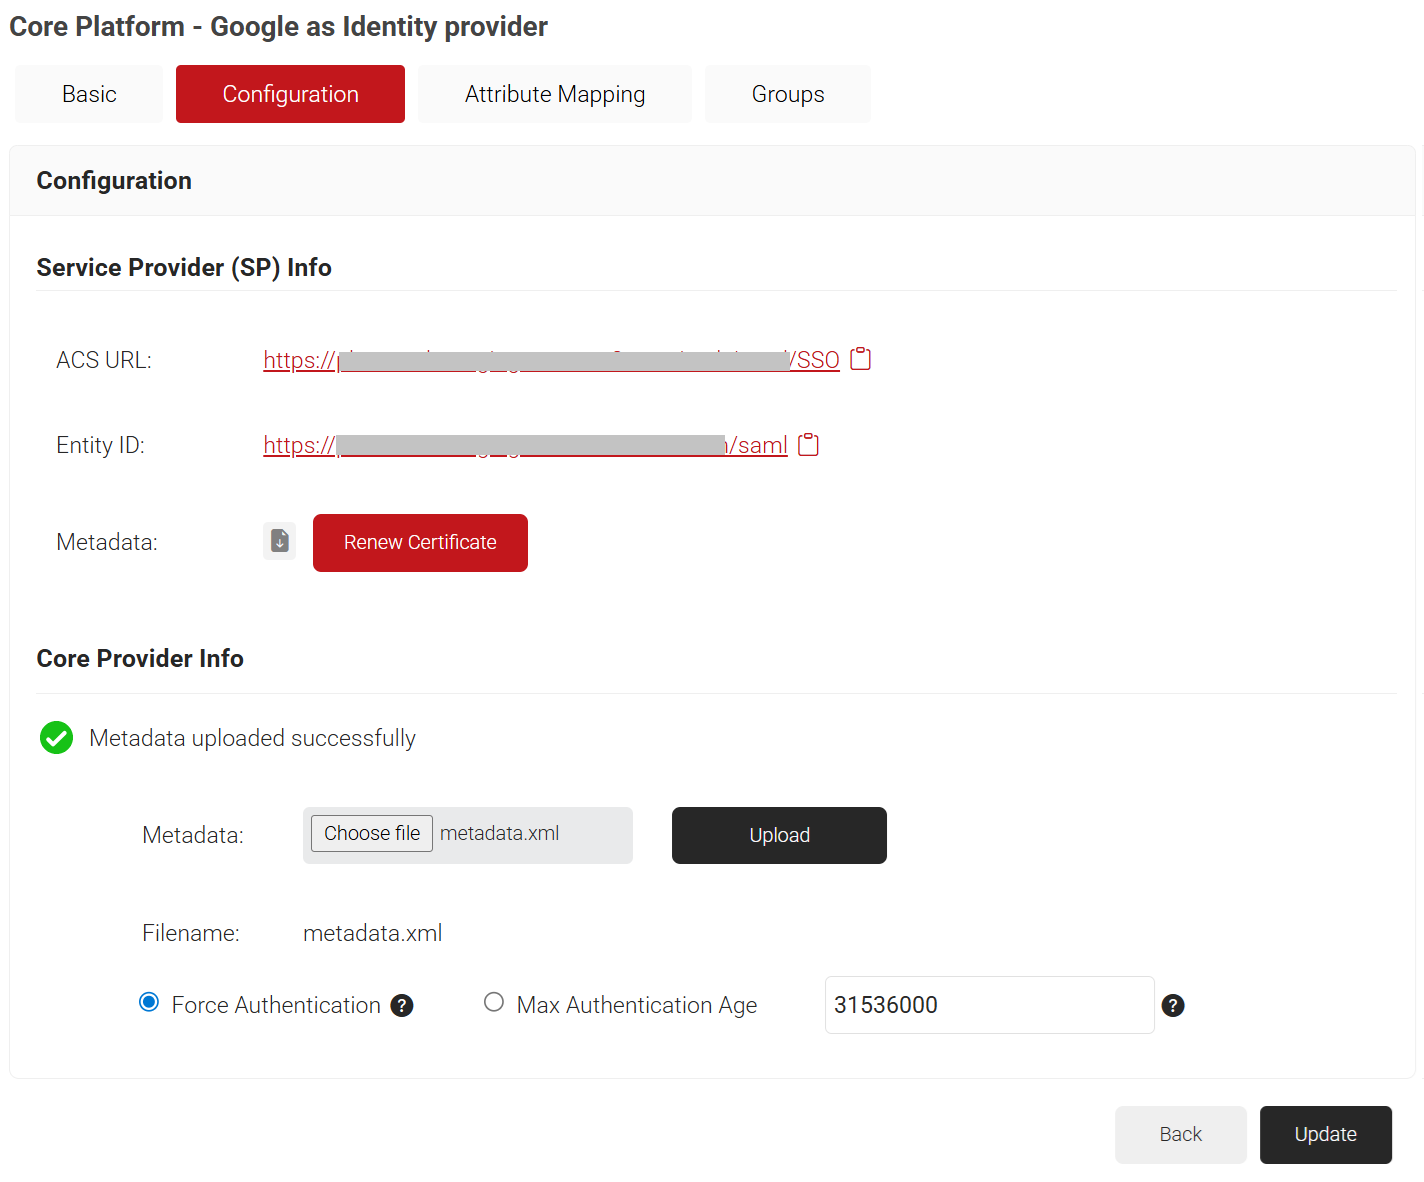
- Click the Configuration tab.
- In the Service Provider (SP) Info section, copy the ACS URL and Entity ID values to your clipboard.
- In the Identity Provider (IDP) Info section, for the Metadata field, click Choose file and select the metadata (.XML) file that you downloaded earlier from Google SAML Apps, and click Upload.

- Click Update.
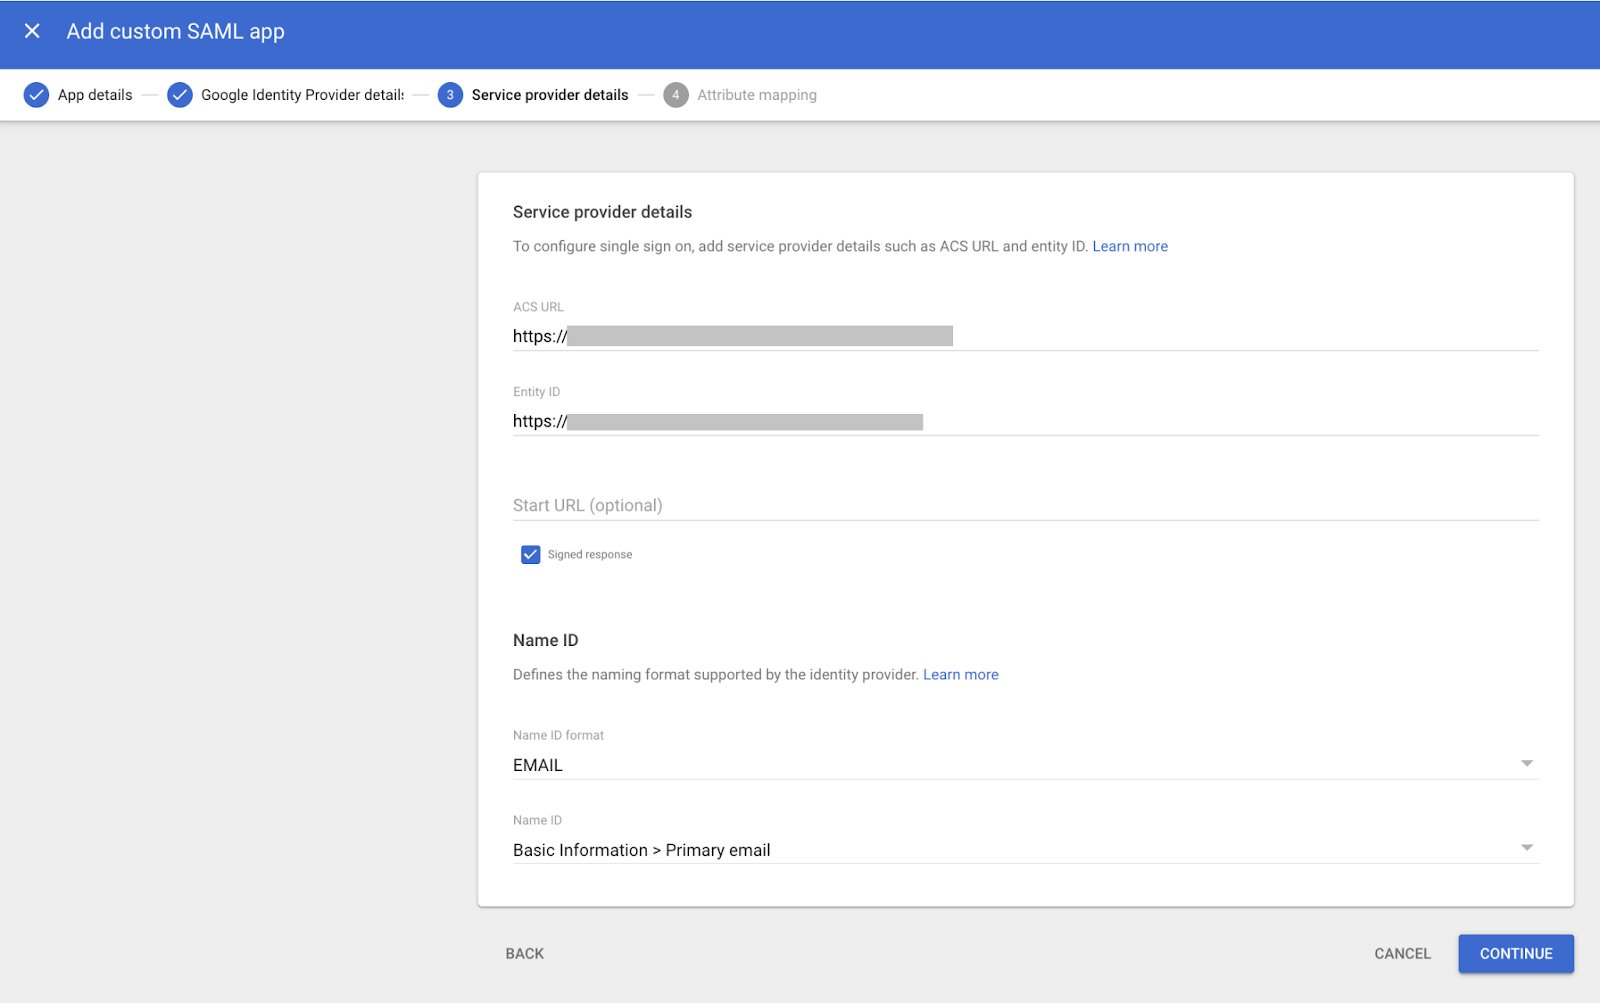
- Go to Google SAML Apps, and on the Service provider details screen, add the ACS URL and Entity ID (obtained in step 10).
- Check the Signed response checkbox.
- From the Name ID format drop-down list, select EMAIL.
- From the Name ID drop-down list, select Basic information > Primary email.
- Click CONTINUE.

- Click Finish on the Attribute Mapping screen.
- On the Google Admin page, scroll down to Attribute Mapping.
- Click ADD MAPPING to configure the attributes to be encoded in the certificate.
NOTE: Your directory will likely have a name and an email. - From the Google Directory attributes drop-down list, under Basic Information, select Primary email.
- In the App attributes field, type Email.
- Click ADD MAPPING again.
- From the Google Directory attributes drop-down list, under Basic Information, select First name.
- In the App attributes field, type FirstName.

- Click FINISH
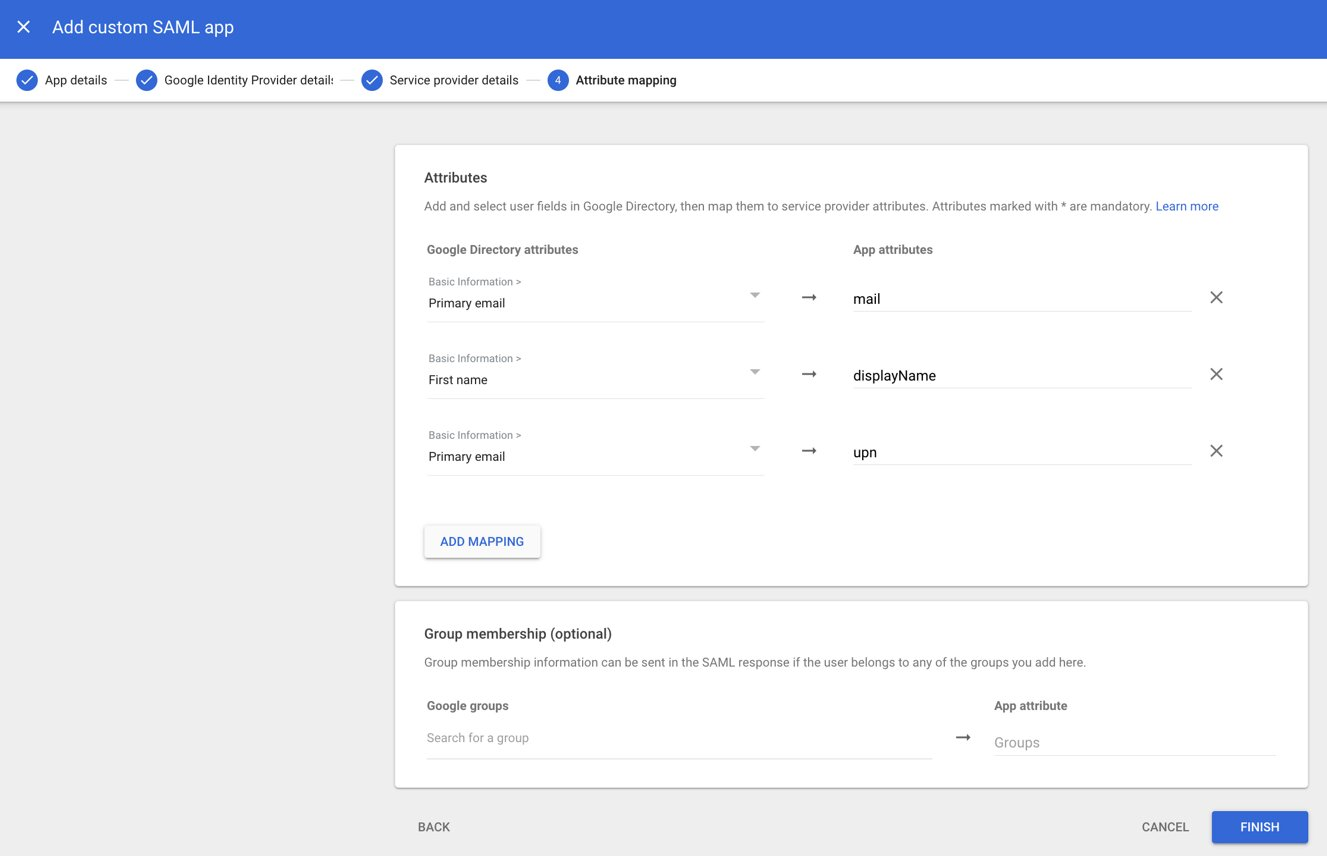
After Google identifies the users trying to connect, it sends their name and email to SecureW2, which populates the certificates. Google populates the attributes it sends into the certificate variables.
- In the JoinNow Management Portal, navigate to Integration Hub > Core Platforms.
- Click the Edit link for the SAML application that you created earlier.
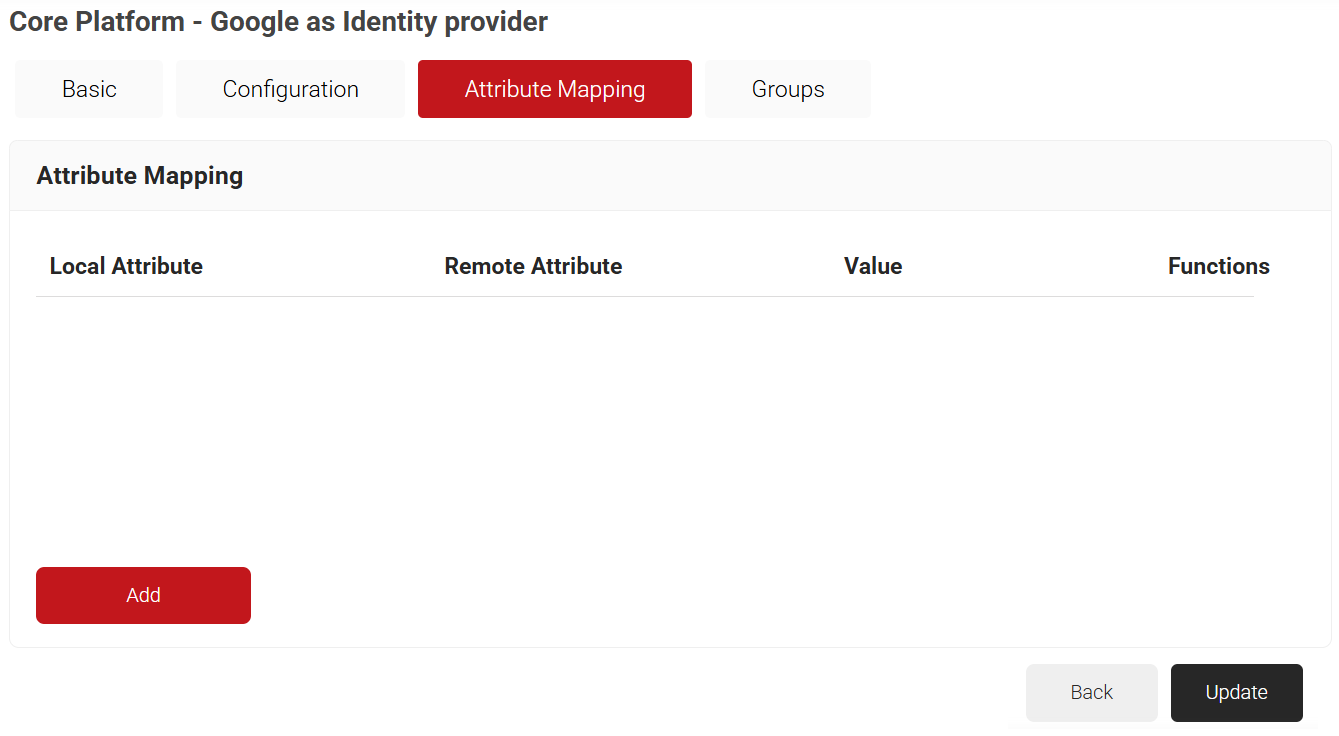
- Click the Attribute Mapping tab.
- Click Add.

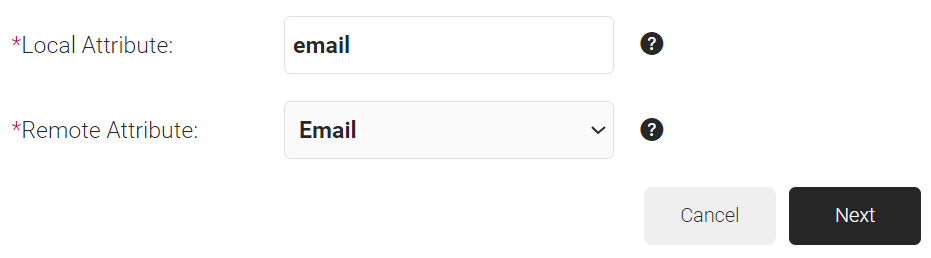
- In the Local Attribute field, enter email as the name of the variable.
- From the Remote Attribute drop-down list, select Email.

- Click Next.
- Click Add.
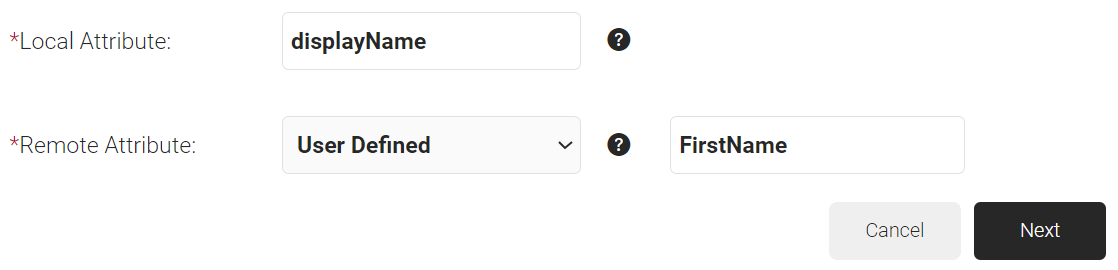
- In the Local Attribute field, enter displayName as the variable’s name.
- From the Remote Attribute drop-down list, select User Defined. Enter FirstName in the field that appears next to the Remote Attribute field.

- Click Next.
- Click Add.
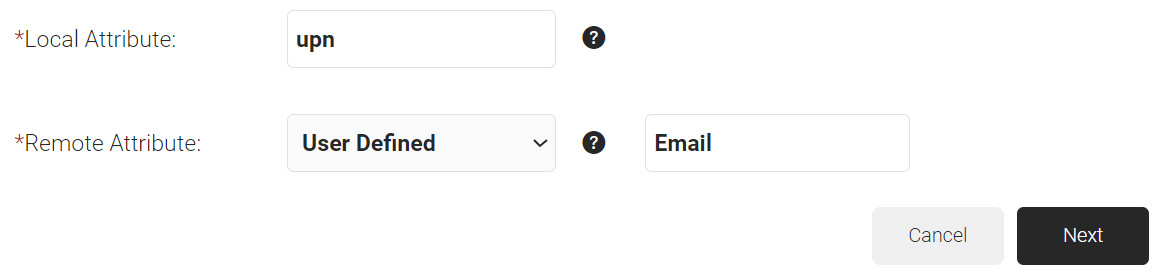
- In the Local Attribute field, enter upn as the name of the variable.
NOTE: When using digital certificates for eduroam authentication, the request includes the UPN, which contains the username and realm. This helps identify the user’s organization and ensures RADIUS requests are routed correctly. - From the Remote Attribute drop-down list, select User Defined. Enter Email in the field that appears next to the Remote Attribute field.

- Click Next.
- Click Update.
The attributes are now configured, and you can view them under certificates. To do so:
- Navigate to Dynamic PKI > Certificate Authorities.
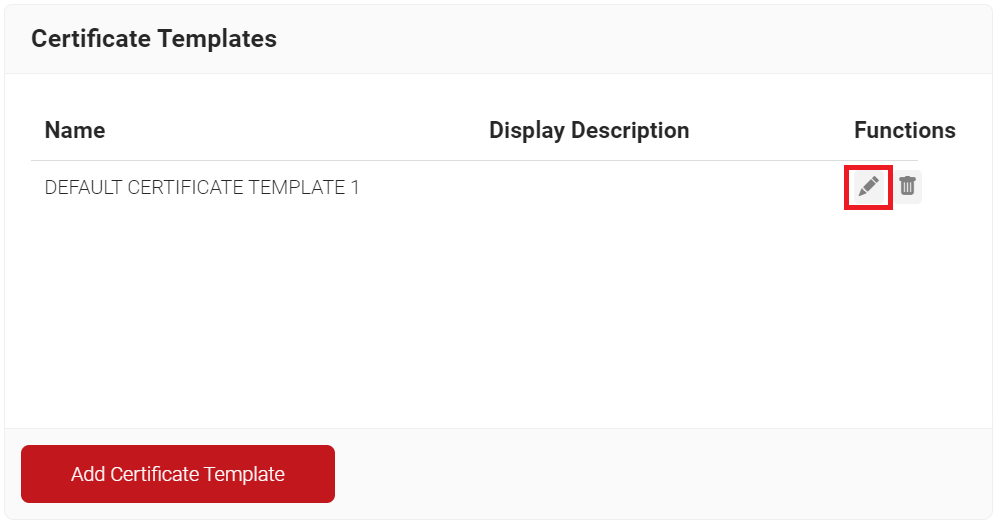
- Scroll to the Certificate Templates section and click the Edit link for DEFAULT CERTIFICATE TEMPLATE 1.

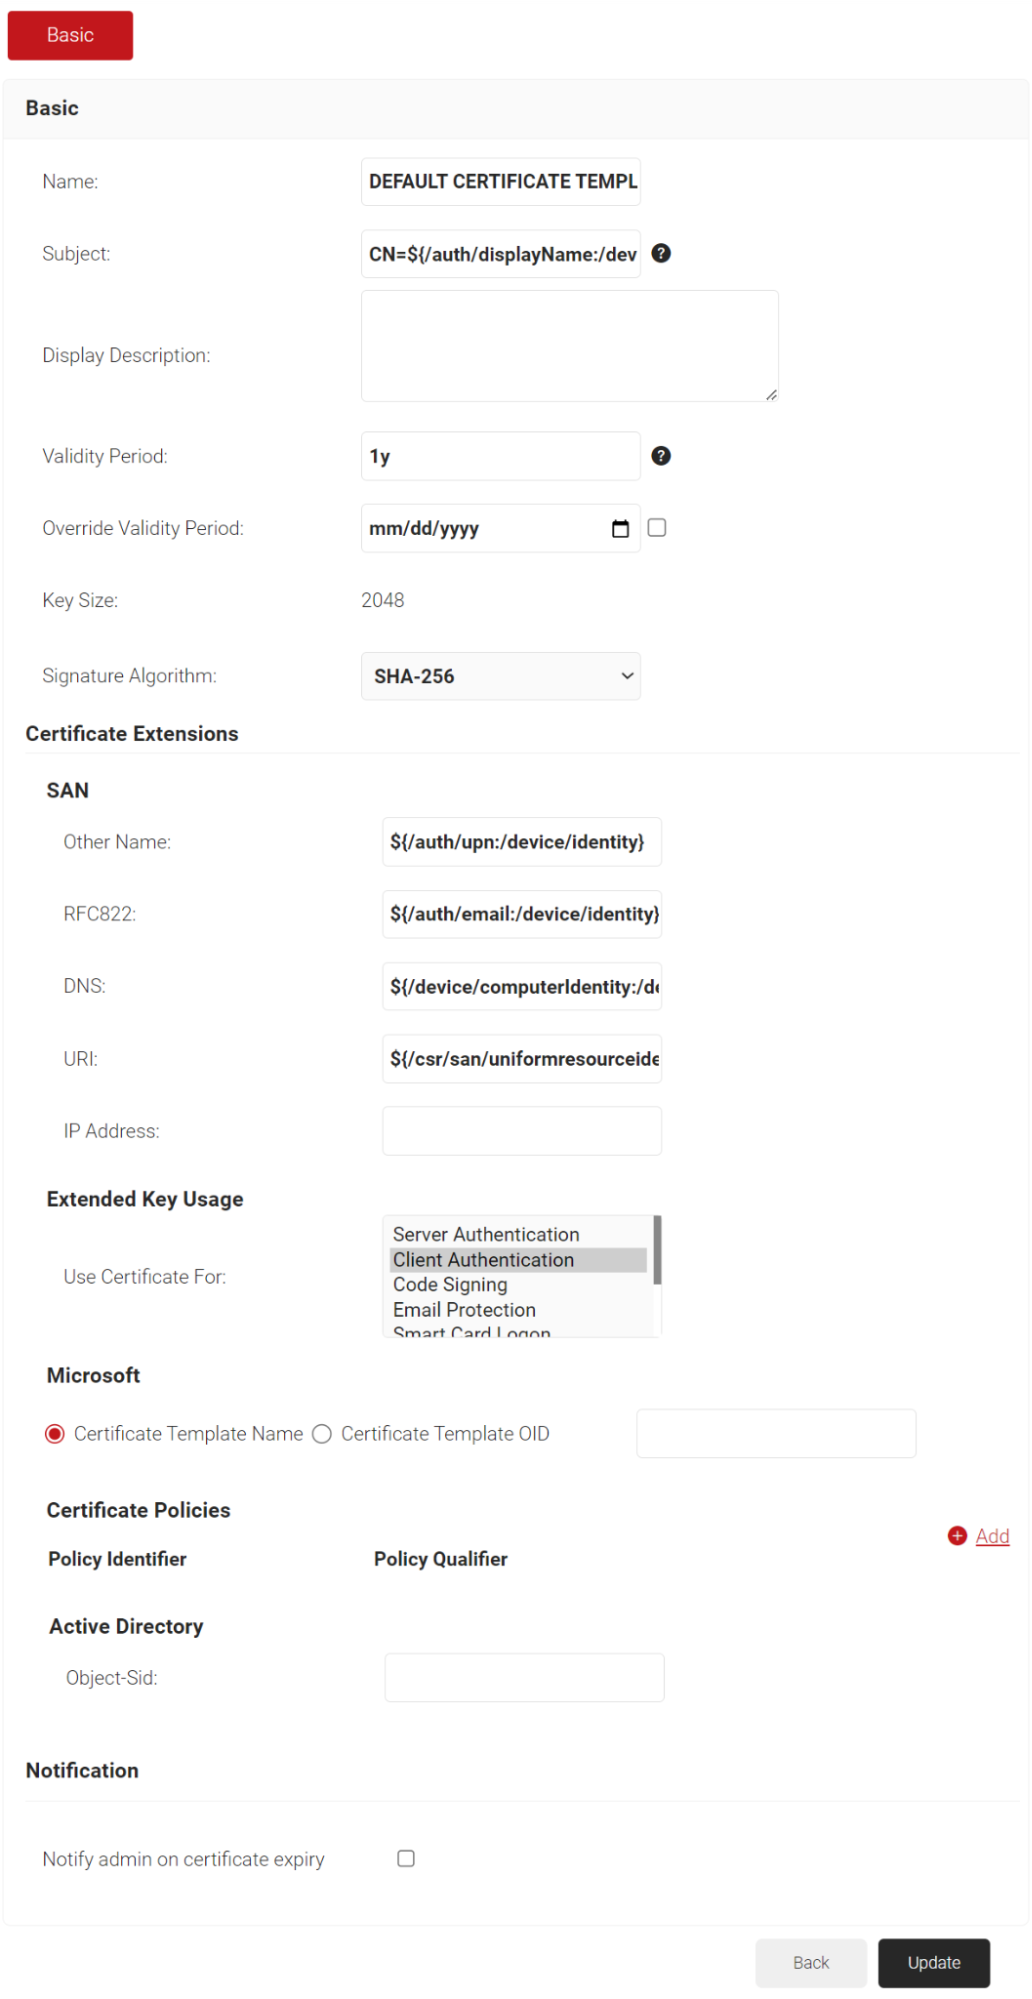
- Under the Basic section, note that the displayName variable is encoded as Subject.
- Under SAN, note that the upn is encoded as Other Name, and email is encoded as RFC822.

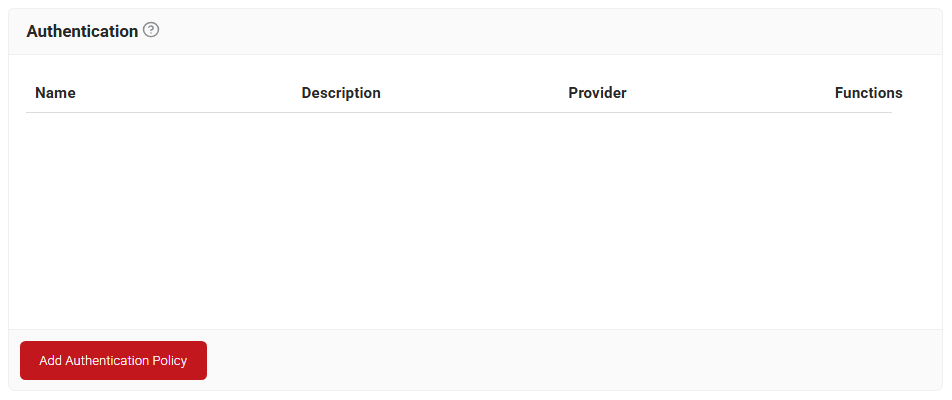
An Authentication Policy can be created from the Authentication page. If you’ve already set up an authentication policy through Getting Started, you can either edit it with the required values or create a new one.
To create a new authentication policy, perform the following steps:
- Navigate to Policy Management > Authentication.
- Click Add Authentication Policy.

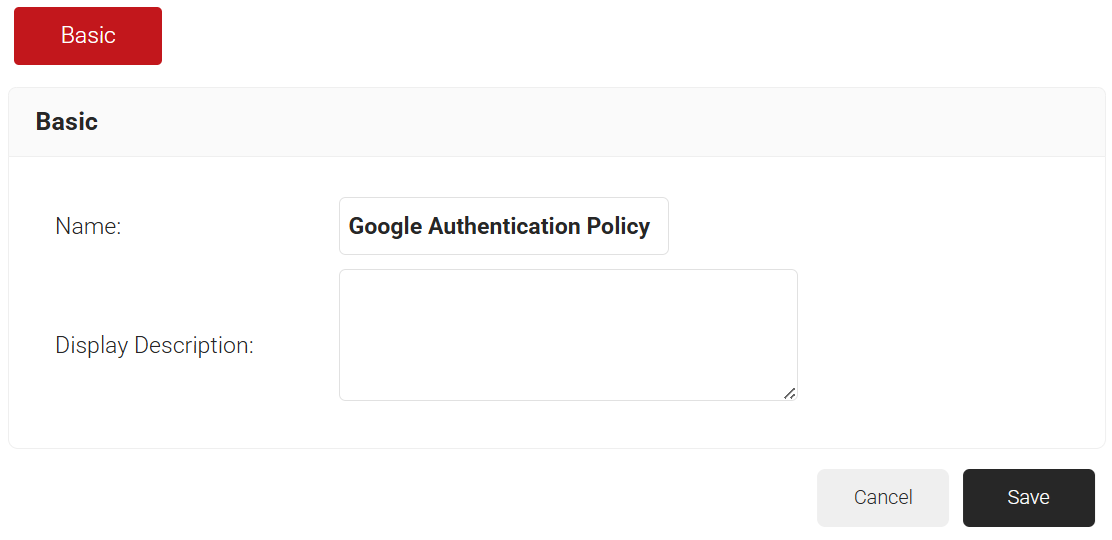
- In the Basic section, enter the name of the authentication policy in the Name field.
- In the Display Description field, enter a suitable description for the authentication policy.

- Click Save.
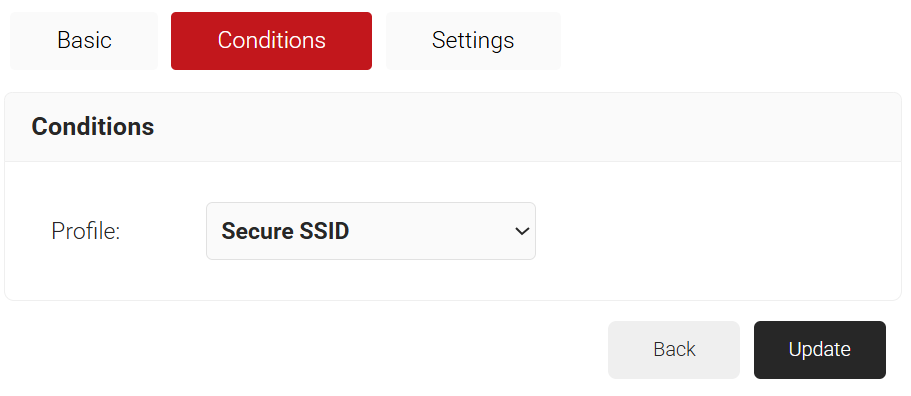
- Click the Conditions tab.
- In the Profile drop-down list, ensure that your network profile is selected.

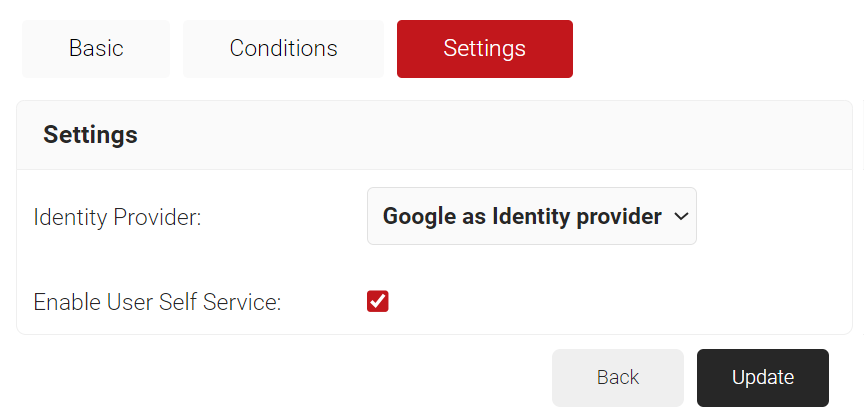
- Click the Settings tab.
- From the Core Provider drop-down list, select the core provider you created earlier (refer to the Creating a SAML Core Provider in SecureW2 section).
- Select the Enable User Self Service check box.

- Click Update.
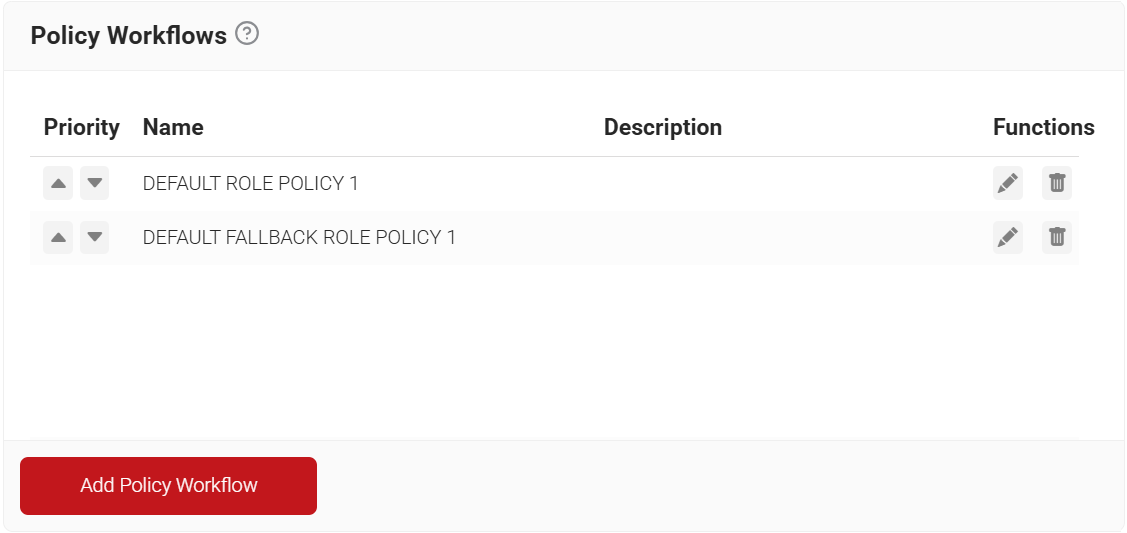
To configure a policy workflow:
- Navigate to Policy Management > Policy Workflows.
- Click Add Policy Workflows.

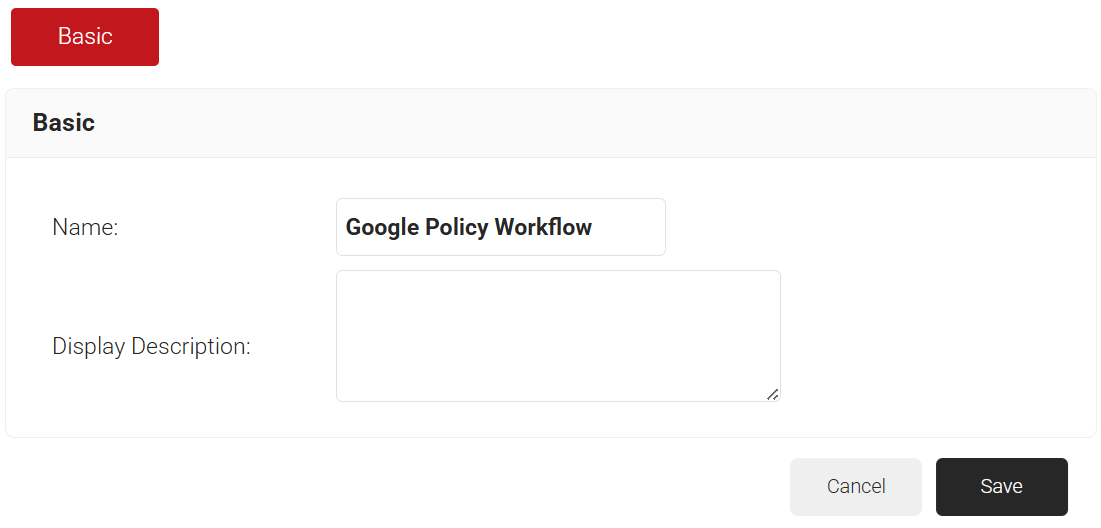
- In the Basic section, enter the name of the policy workflow in the Name field.
- In the Display Description field, enter a suitable description for the policy workflow.

- Click Save.
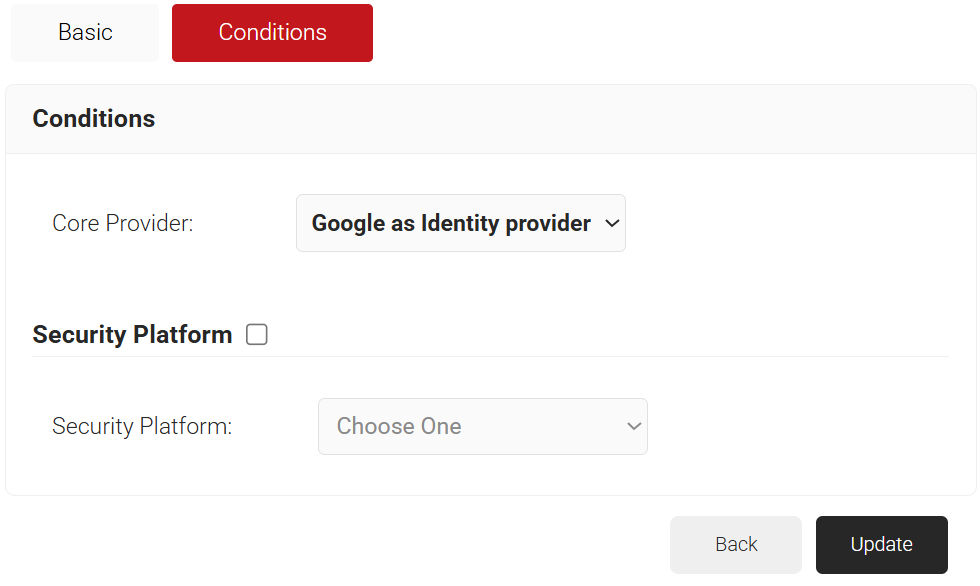
- Select the Conditions tab.
- From the Core Provider drop-down list, select the core provider that you created earlier (refer to the Creating a SAML Core Provider in SecureW2 section).

- Click Update.
You can now use the lookup before certificate issuance as a dynamic check. To trigger the lookup during certificate issuance, map the policy engine workflow (created in the Creating a SAML Policy Workflow section) in the enrollment policy created below:
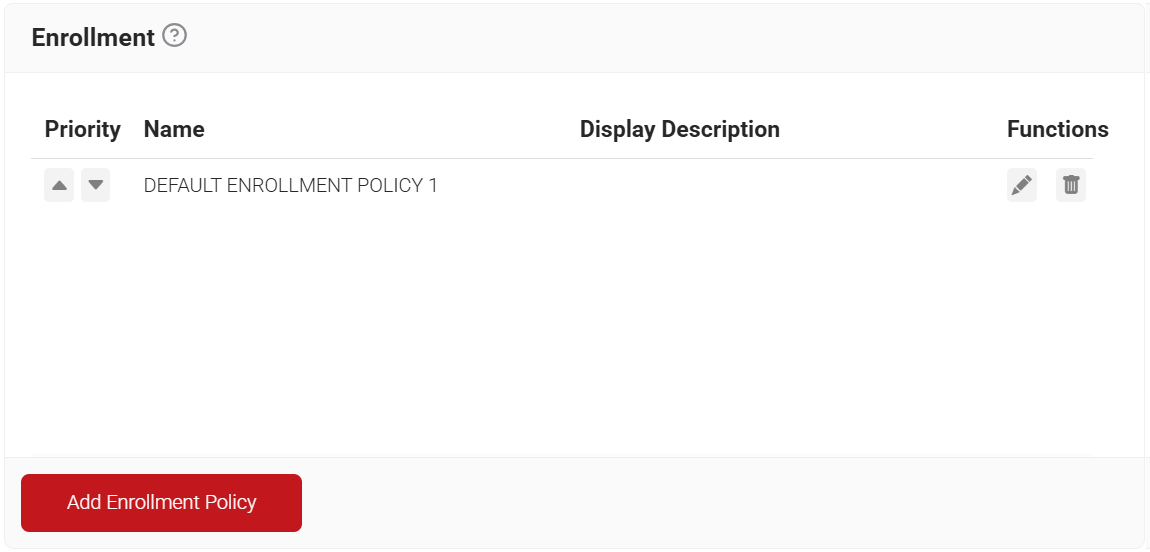
- Navigate to Policy Management > Enrollment.
- Click Add Enrollment Policy.

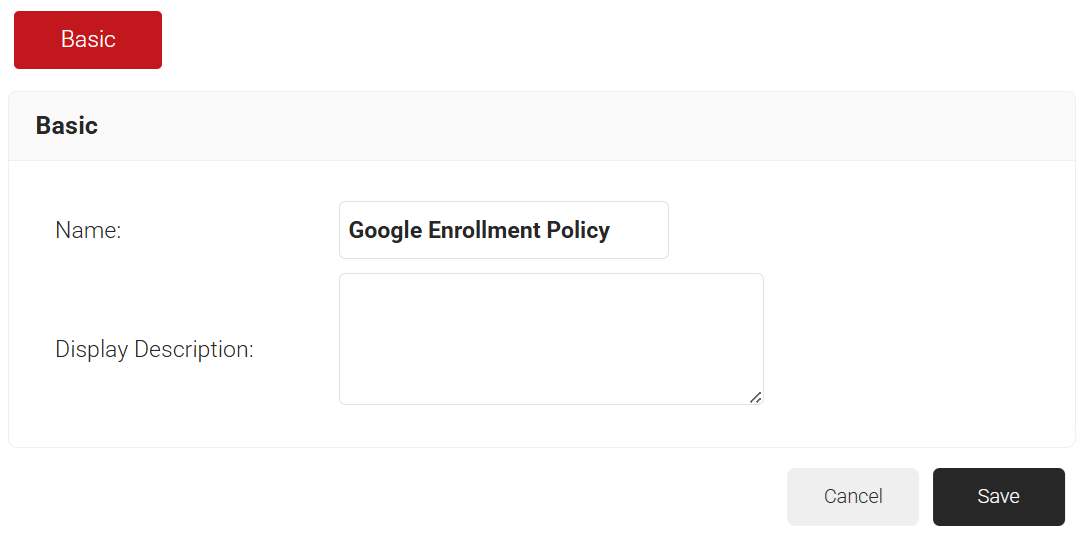
- In the Basic section, enter the name of the enrollment policy in the Name field.
- In the Display Description field, enter a suitable description for the enrollment policy.

- Click Save.
- The page refreshes, and the Conditions and Settings tabs are displayed.
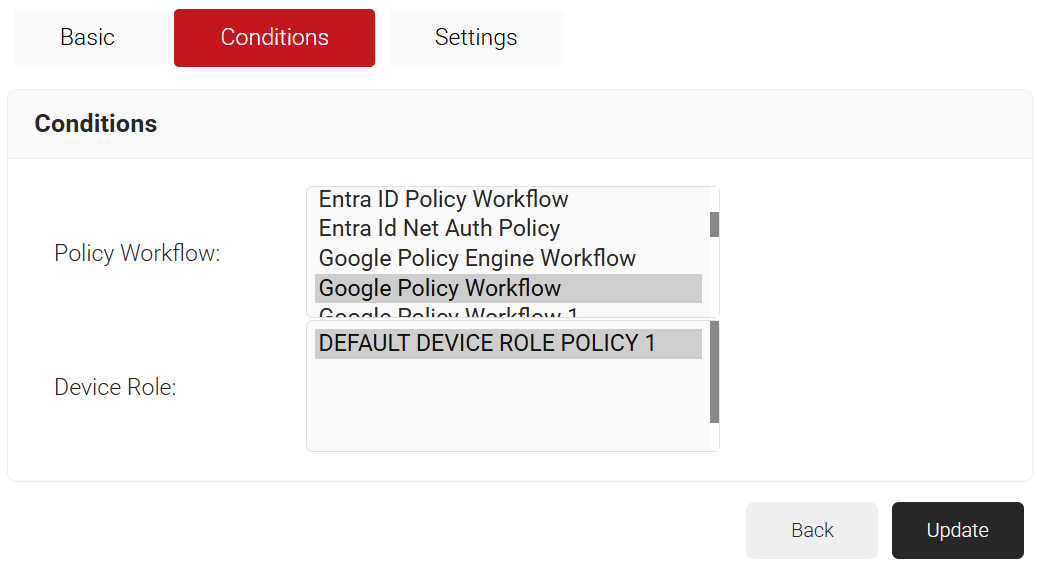
- Select the Conditions tab.
- In the Conditions section, from the Policy Workflow drop-down list, select the role policy you created earlier (see the Creating a Policy Workflow section).
- From the Device Role drop-down list, select DEFAULT DEVICE ROLE POLICY 1.

- Click Update.
The Google Service Account must be created in the IAM & Admin console. Log in to the Google IAM & Admin console using the link here.
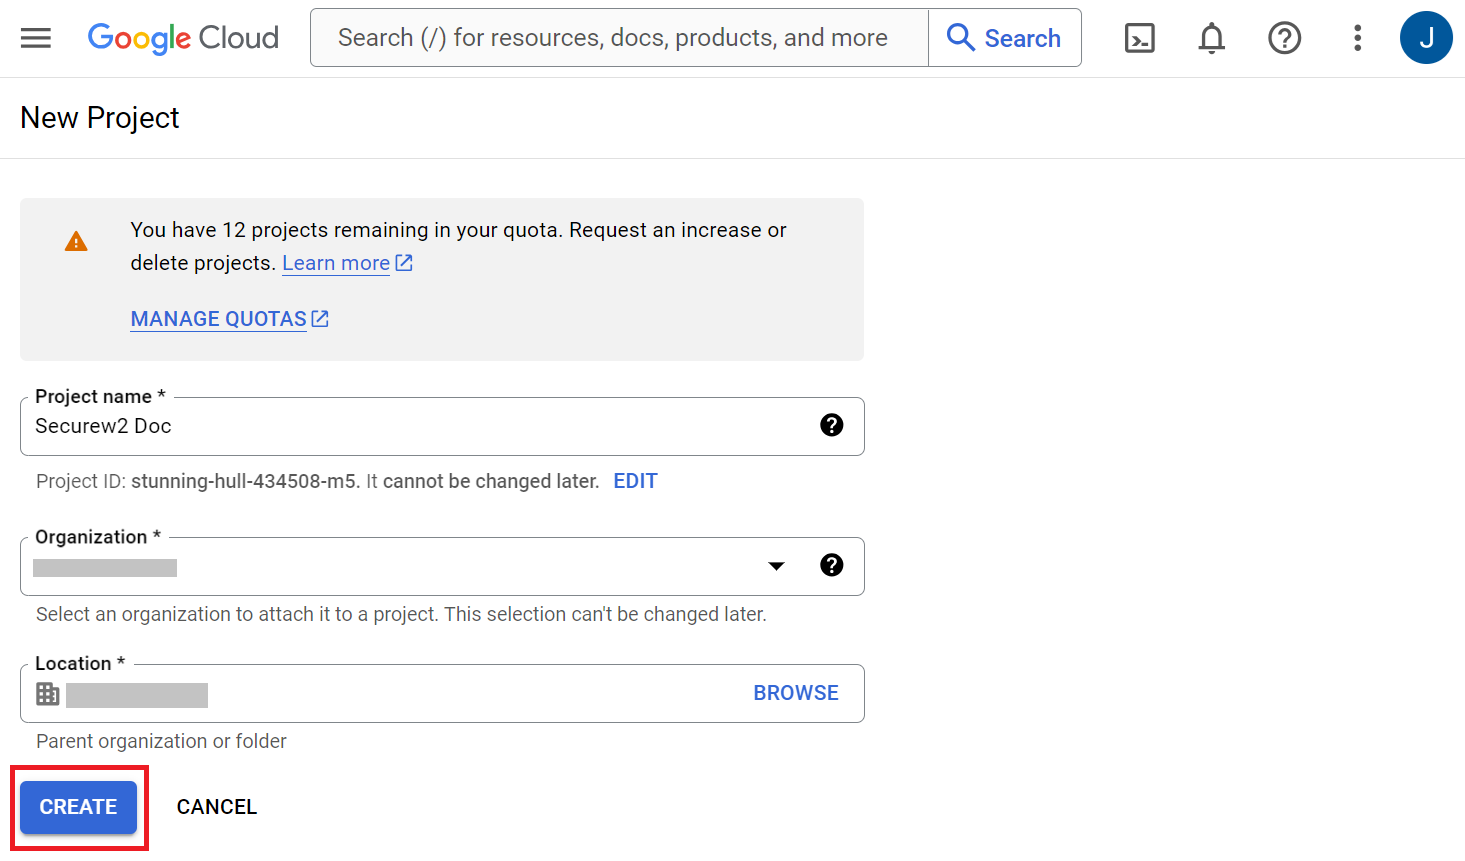
To create a new project in the Google Service Account:
- Log in to the Google Service Account.
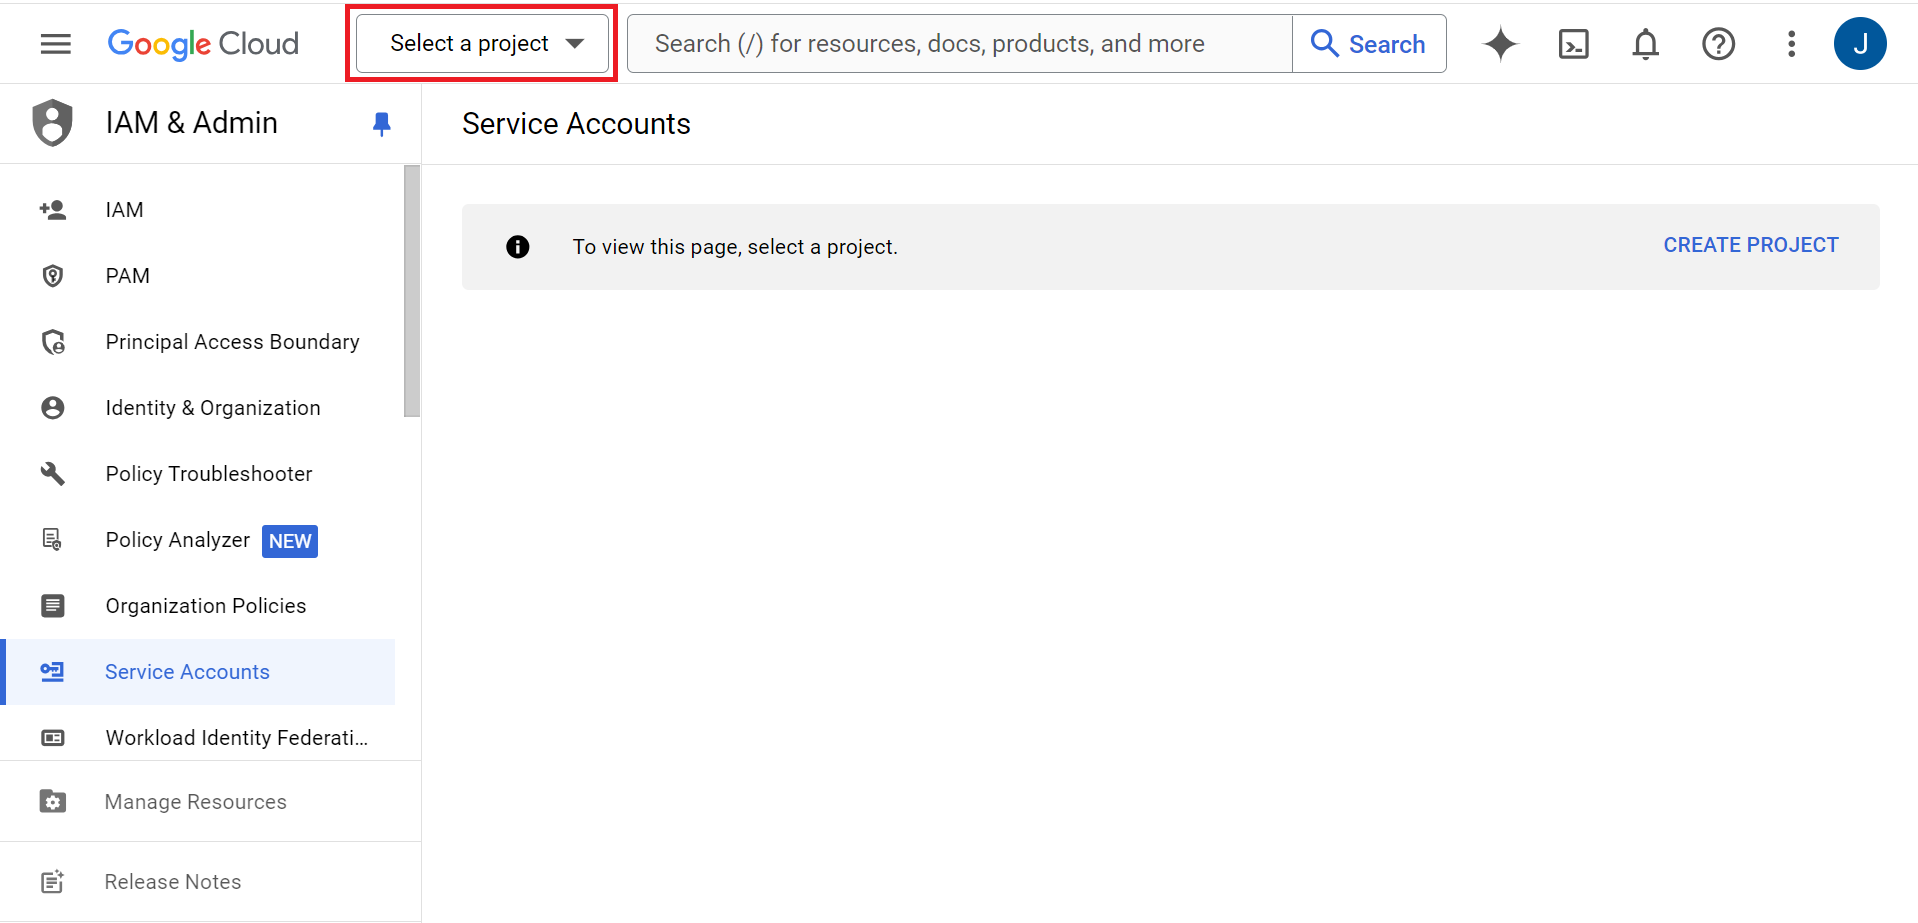
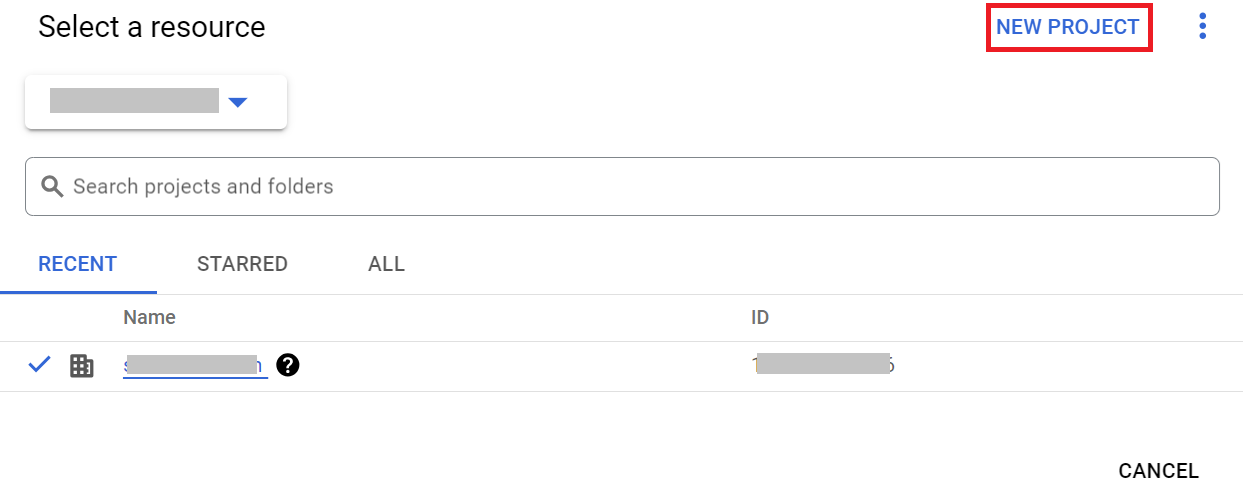
- Click the Select a Project drop-down list at the top of the page.

- Click NEW PROJECT.

- On the New Project page, enter a name for the project in the Project name field.
- From the Organization drop-down list, select the required organization for the project.
- From the Location drop-down list, select the parent organization.

- Click Create.
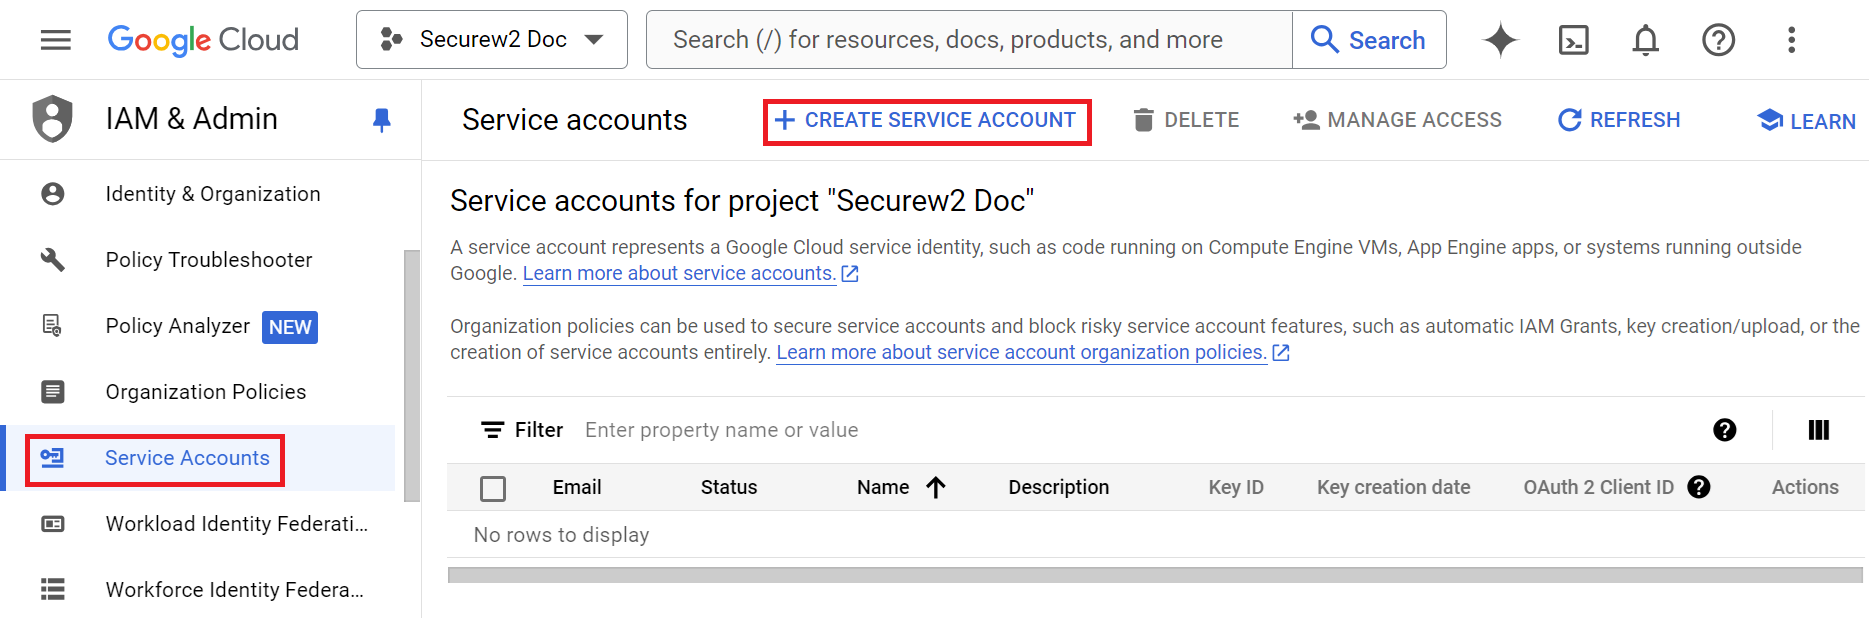
JoinNow needs a Google Service Account to authorize communication with Google to do a lookup operation on behalf of the service account. To create a Service Account in Google:
- From the left menu pane, click Service Accounts.
- Click + CREATE SERVICE ACCOUNT.

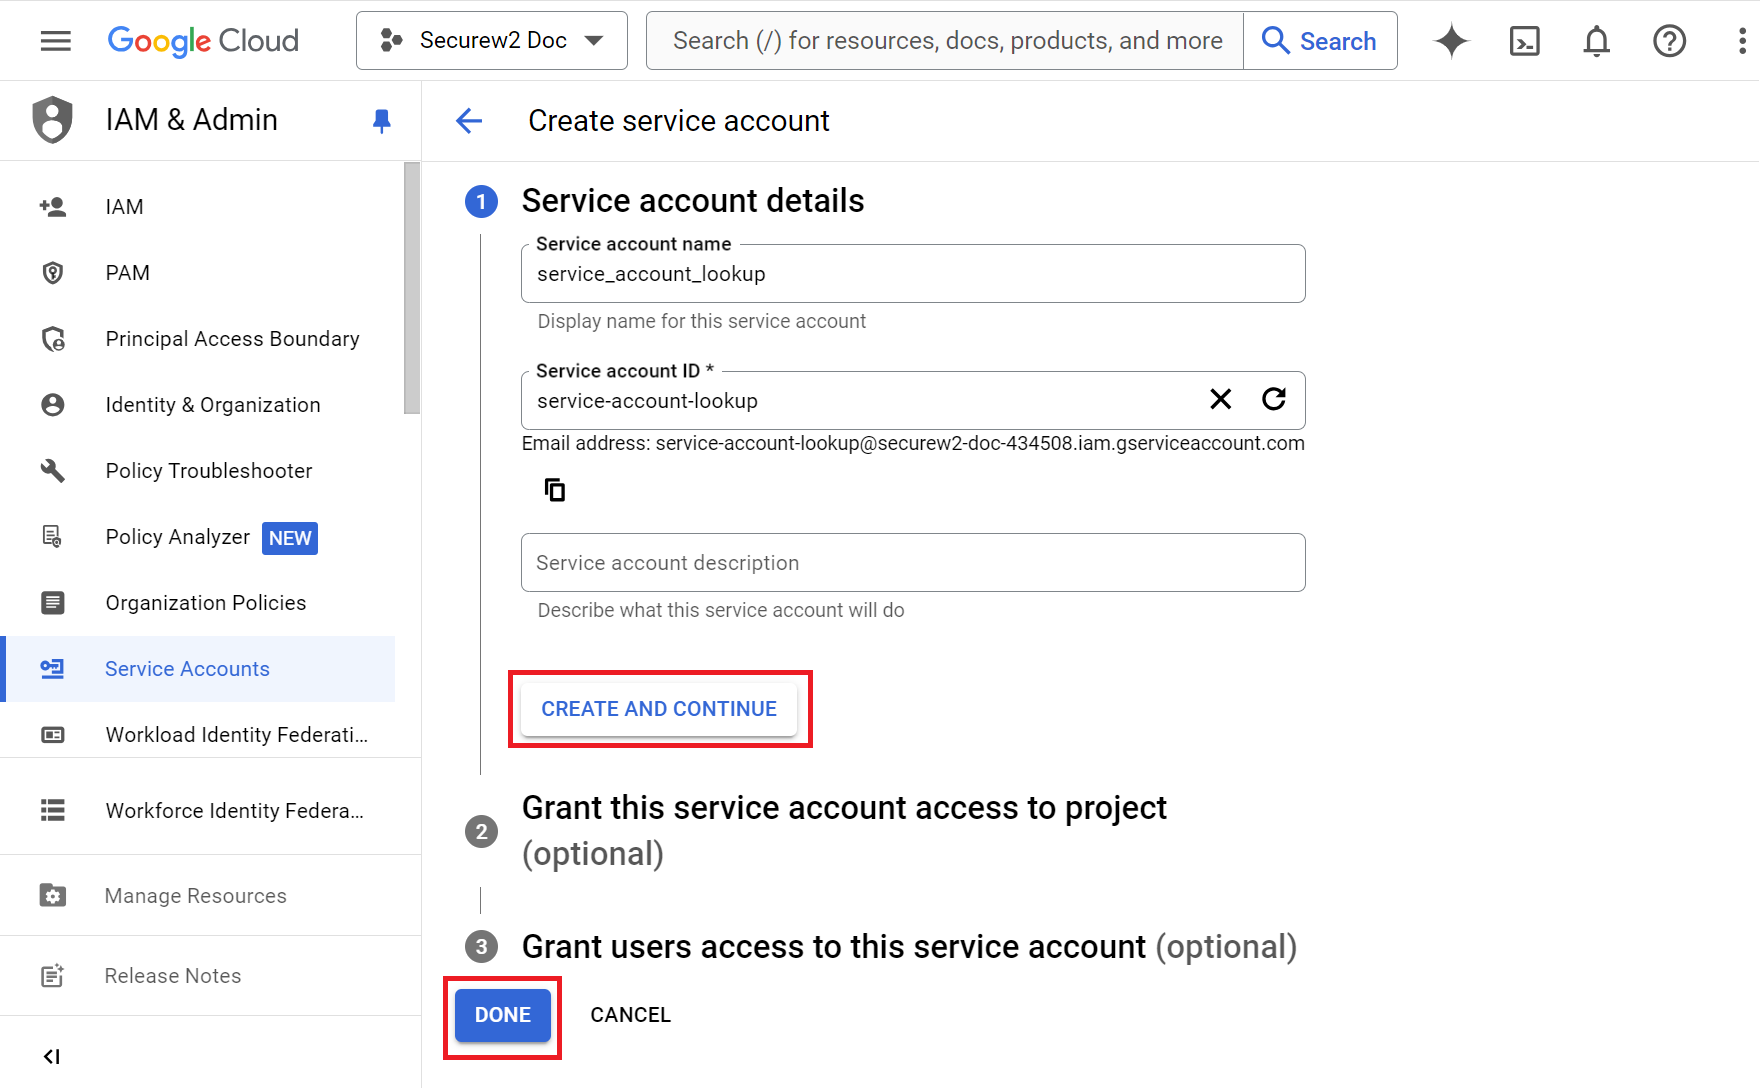
- In the Service account name field, enter a name for your service account. By default, the service account name entered previously is automatically used as the Service account ID. You can either use this default name or enter a new one.

- Click CREATE AND CONTINUE.
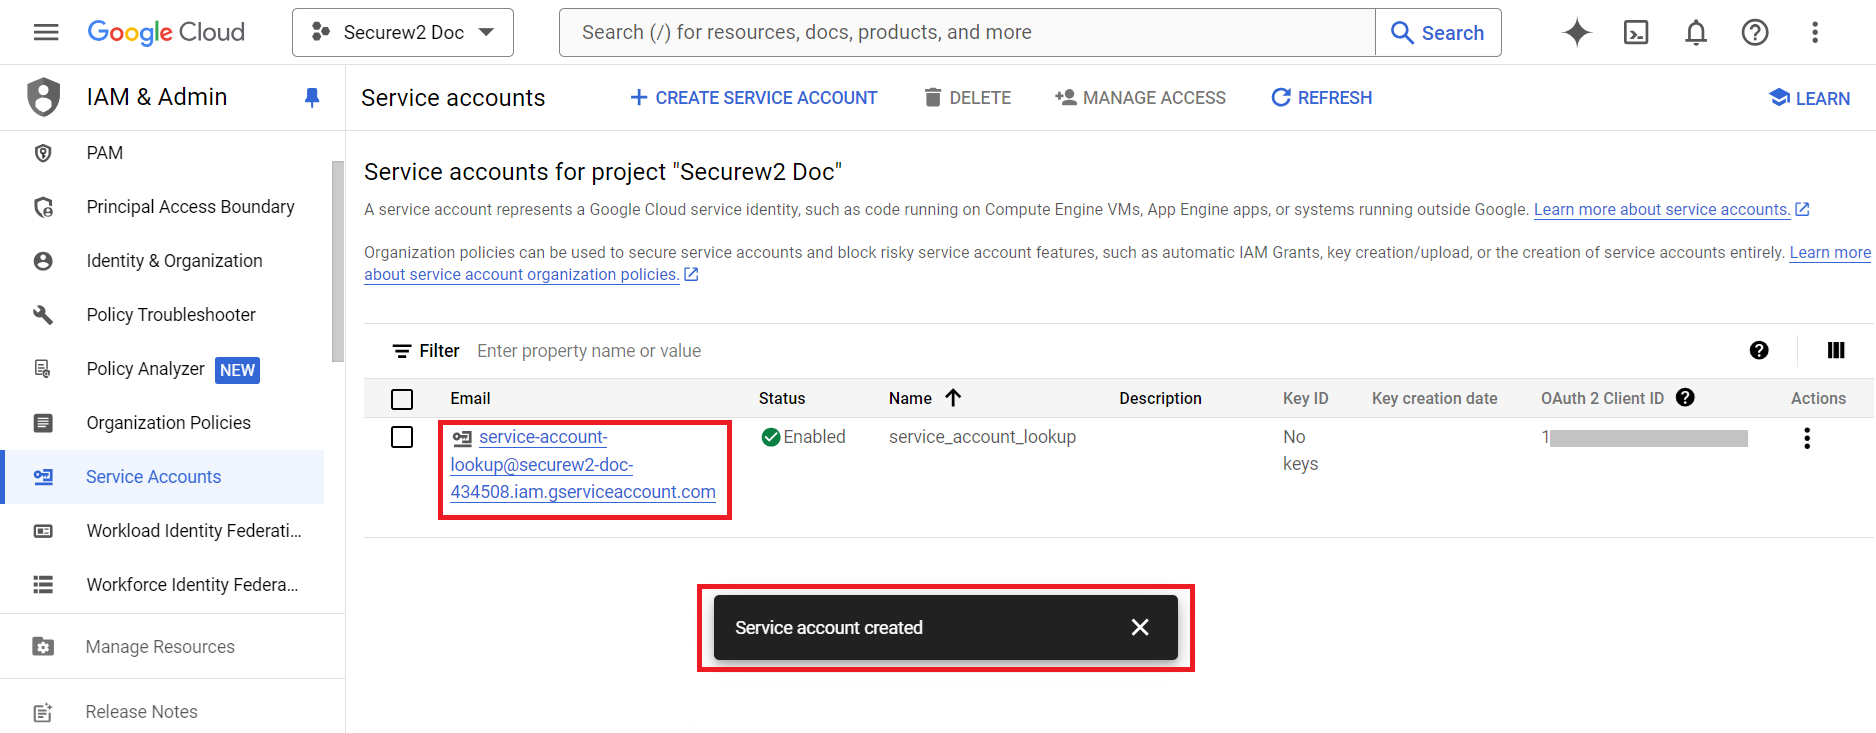
- Click DONE. The required service account will be created.
- Click on the recently created service account link.

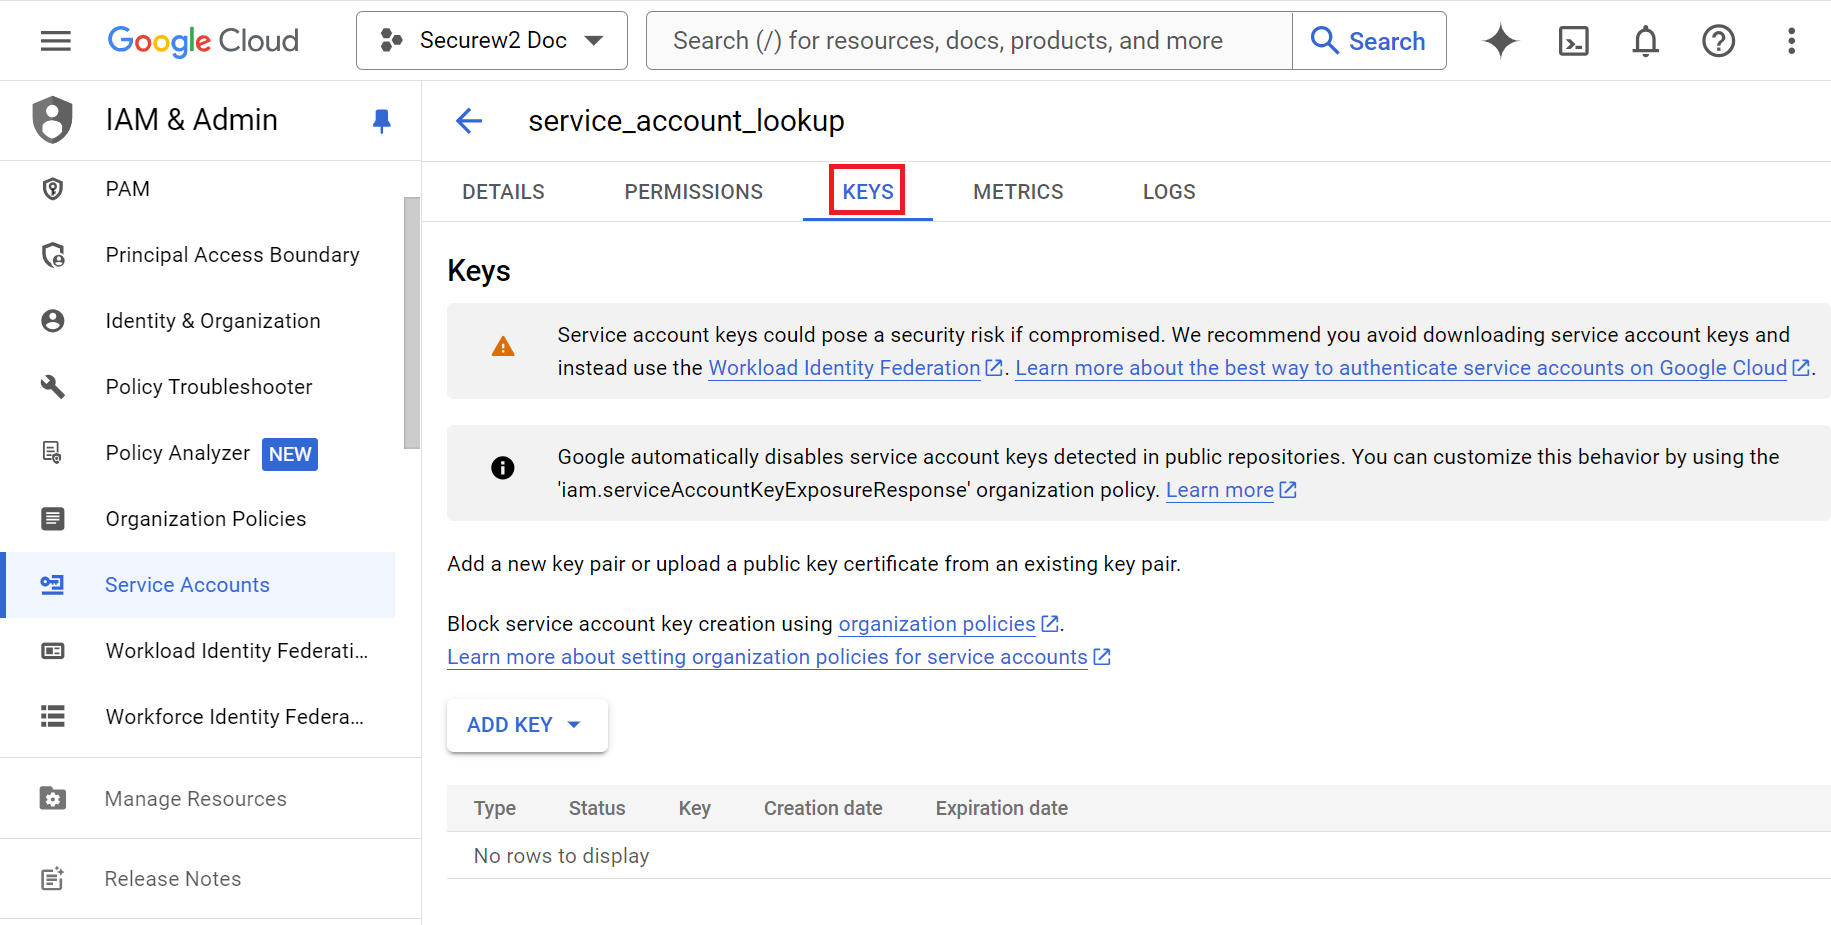
- On the service_account_lookup page, click the KEYS tab.

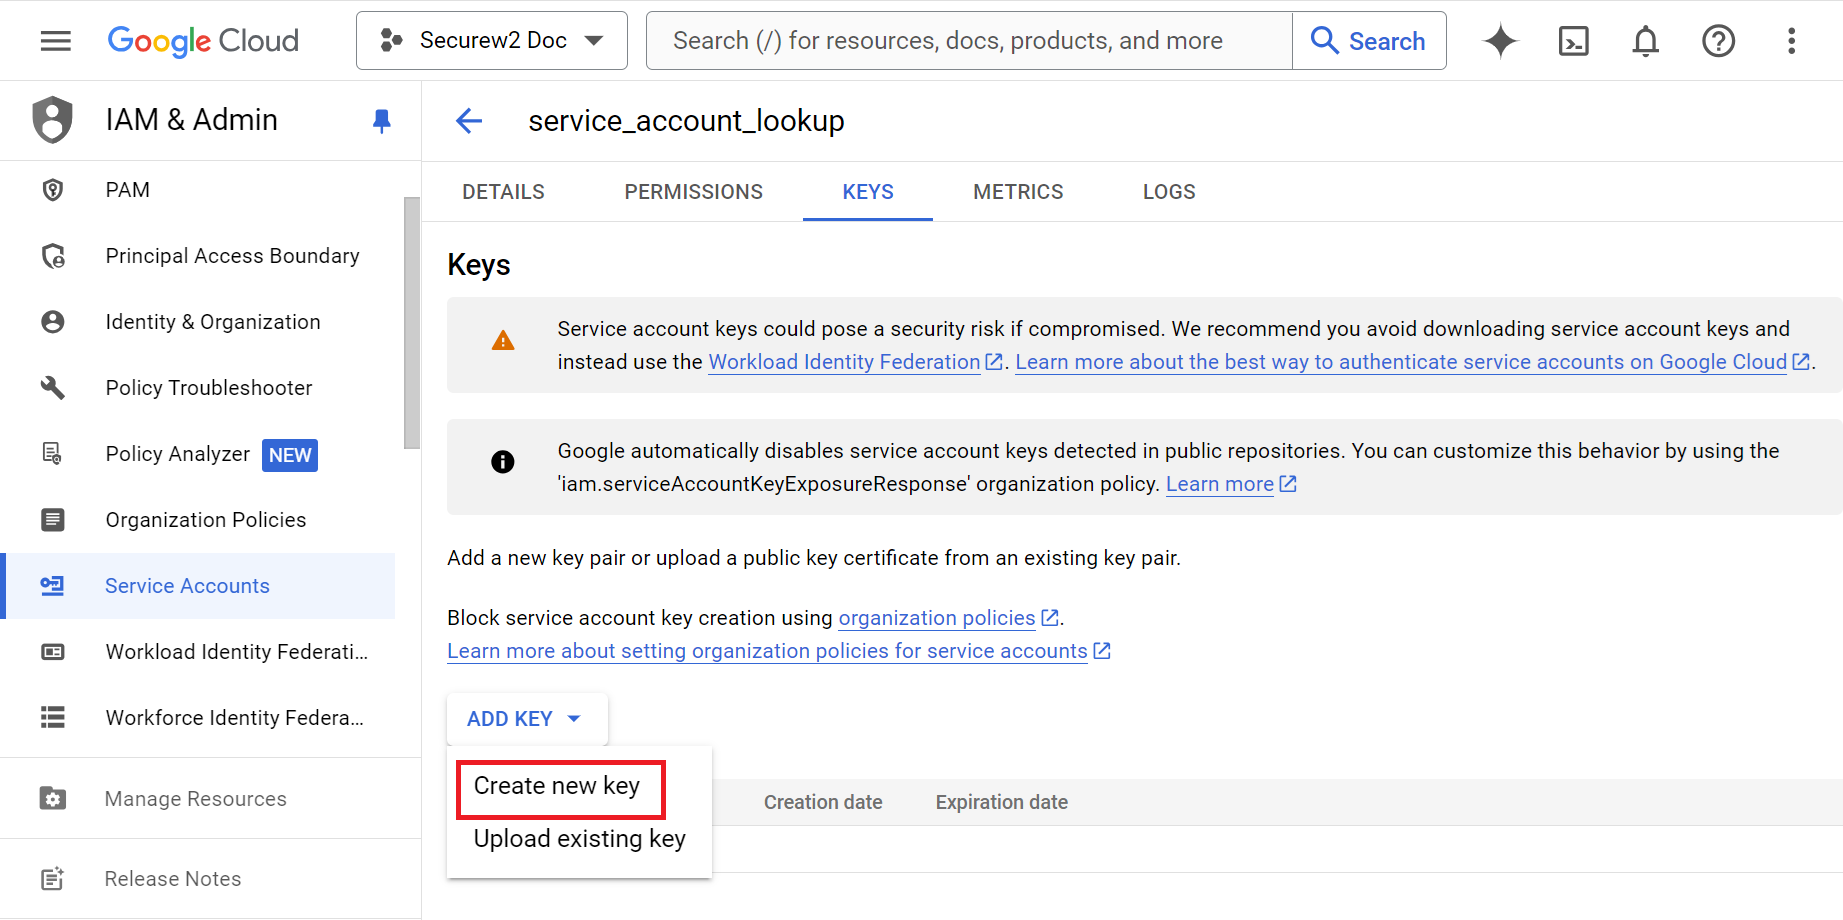
- From the ADD KEY drop-down list, select Create new Key.

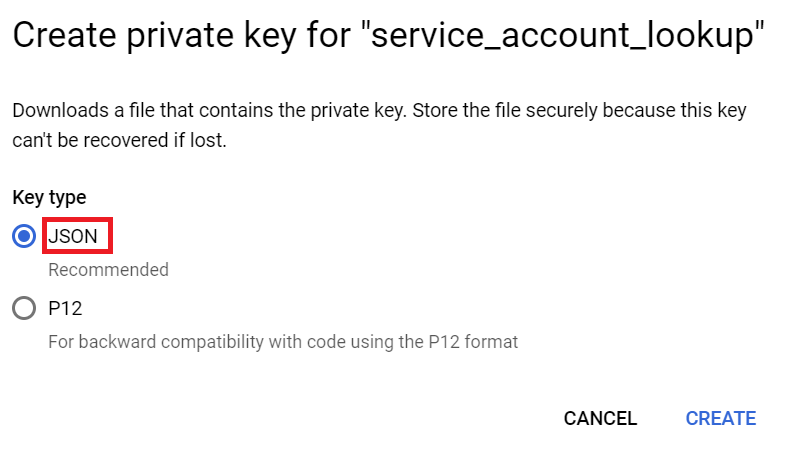
- In the Create private key pop-up, select Key type as JSON.

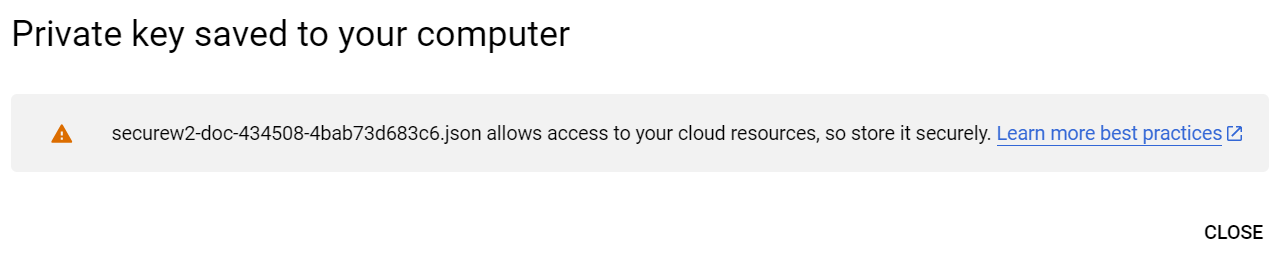
- Click CREATE. The JSON file will be downloaded to the device.

- Click CLOSE.
Delegating domain wide authority helps administrators of the organization to authorize the service account to access user data required for lookup. Admins can delegate access to a service account from their Google Admin console.
To delegate domain wide authority:
- Log in to the Google admin console.
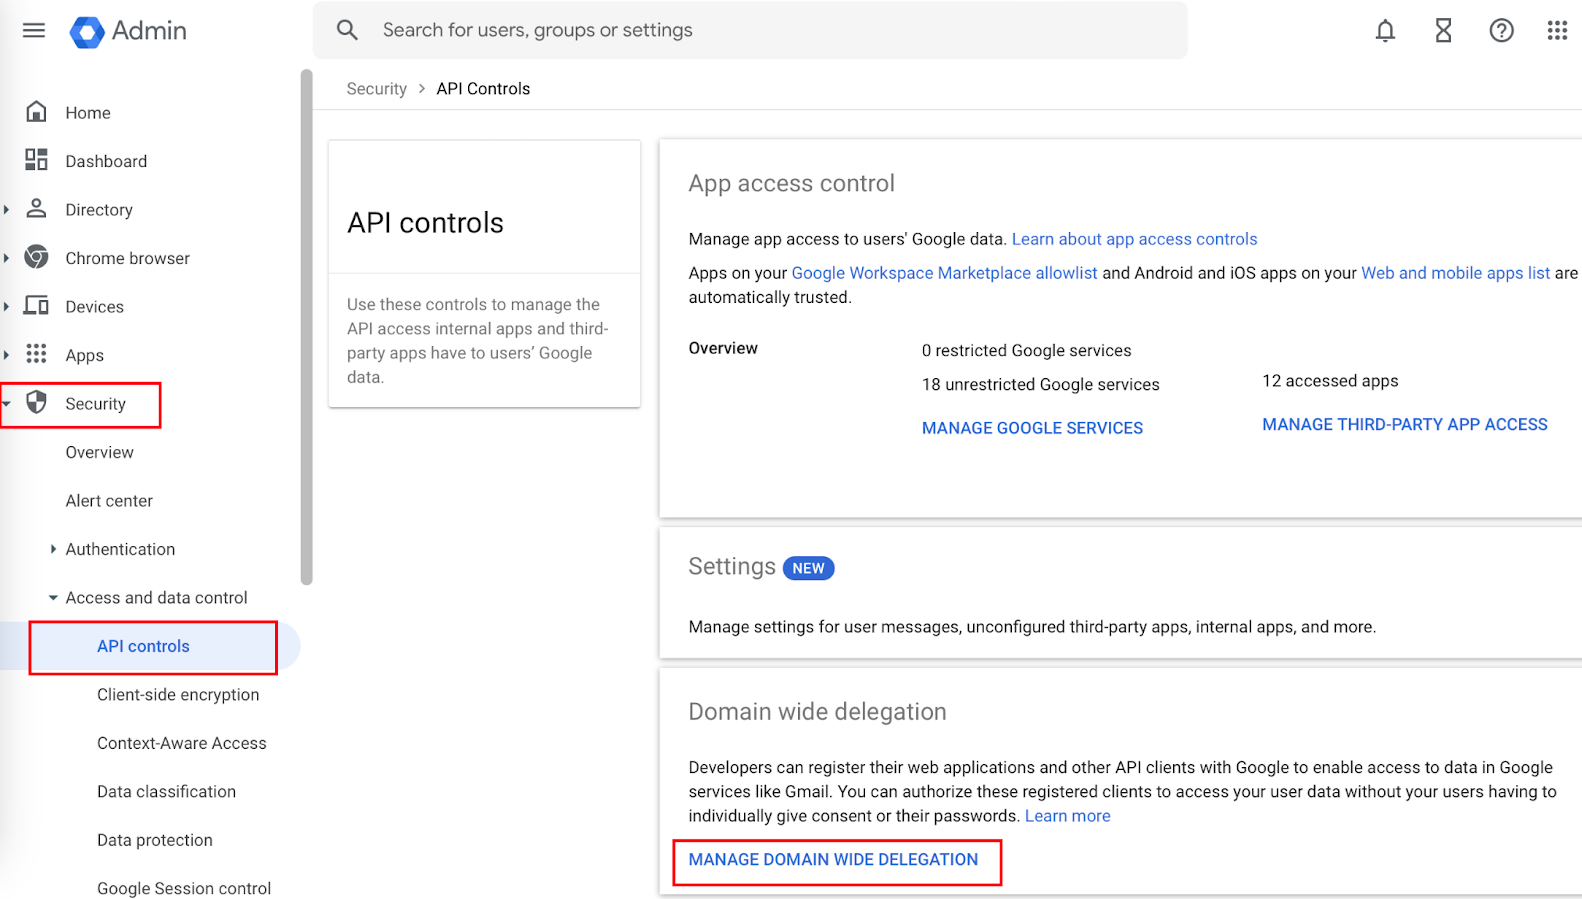
- Navigate to Security > Access and data controls > API controls.
- In the Domain wide delegation section, click MANAGE DOMAIN WIDE DELEGATION.

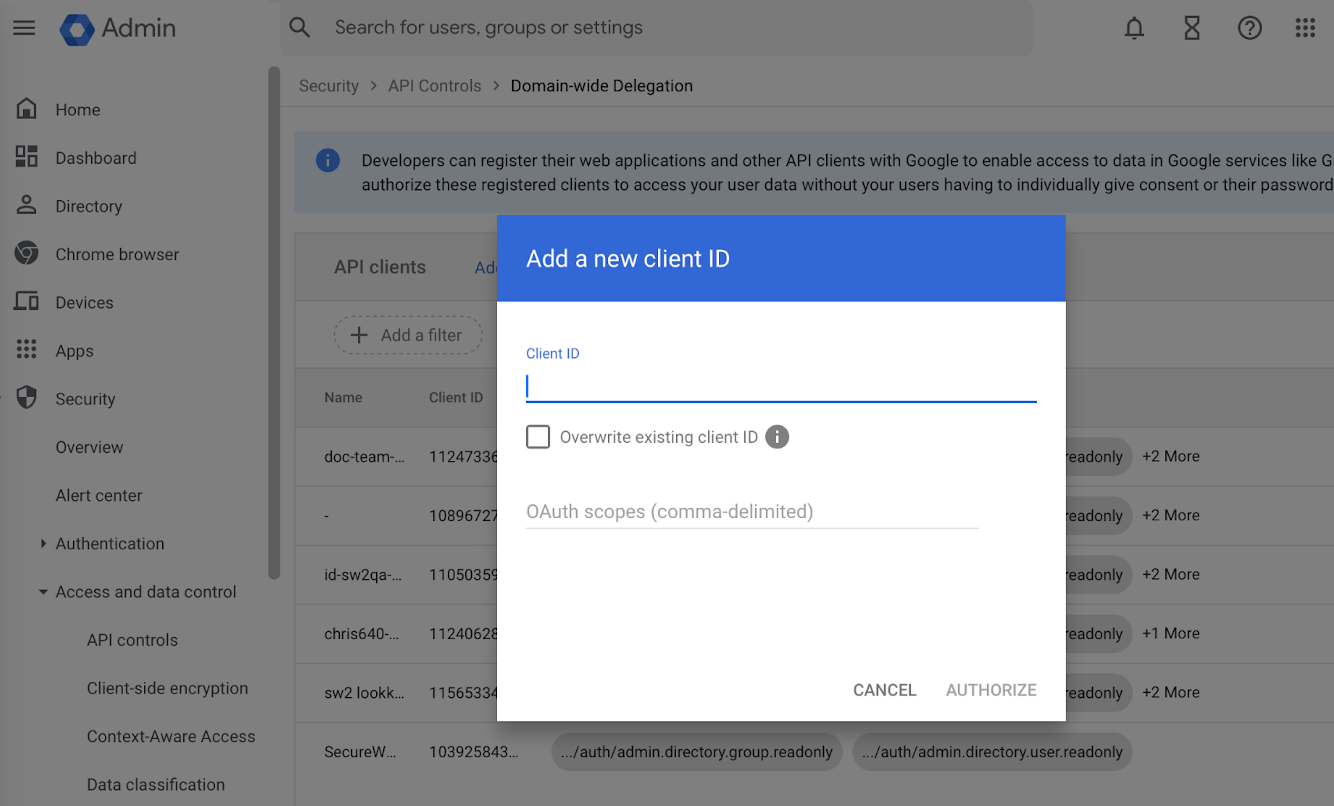
- Click Add new. A pop-up to add client ID will appear.

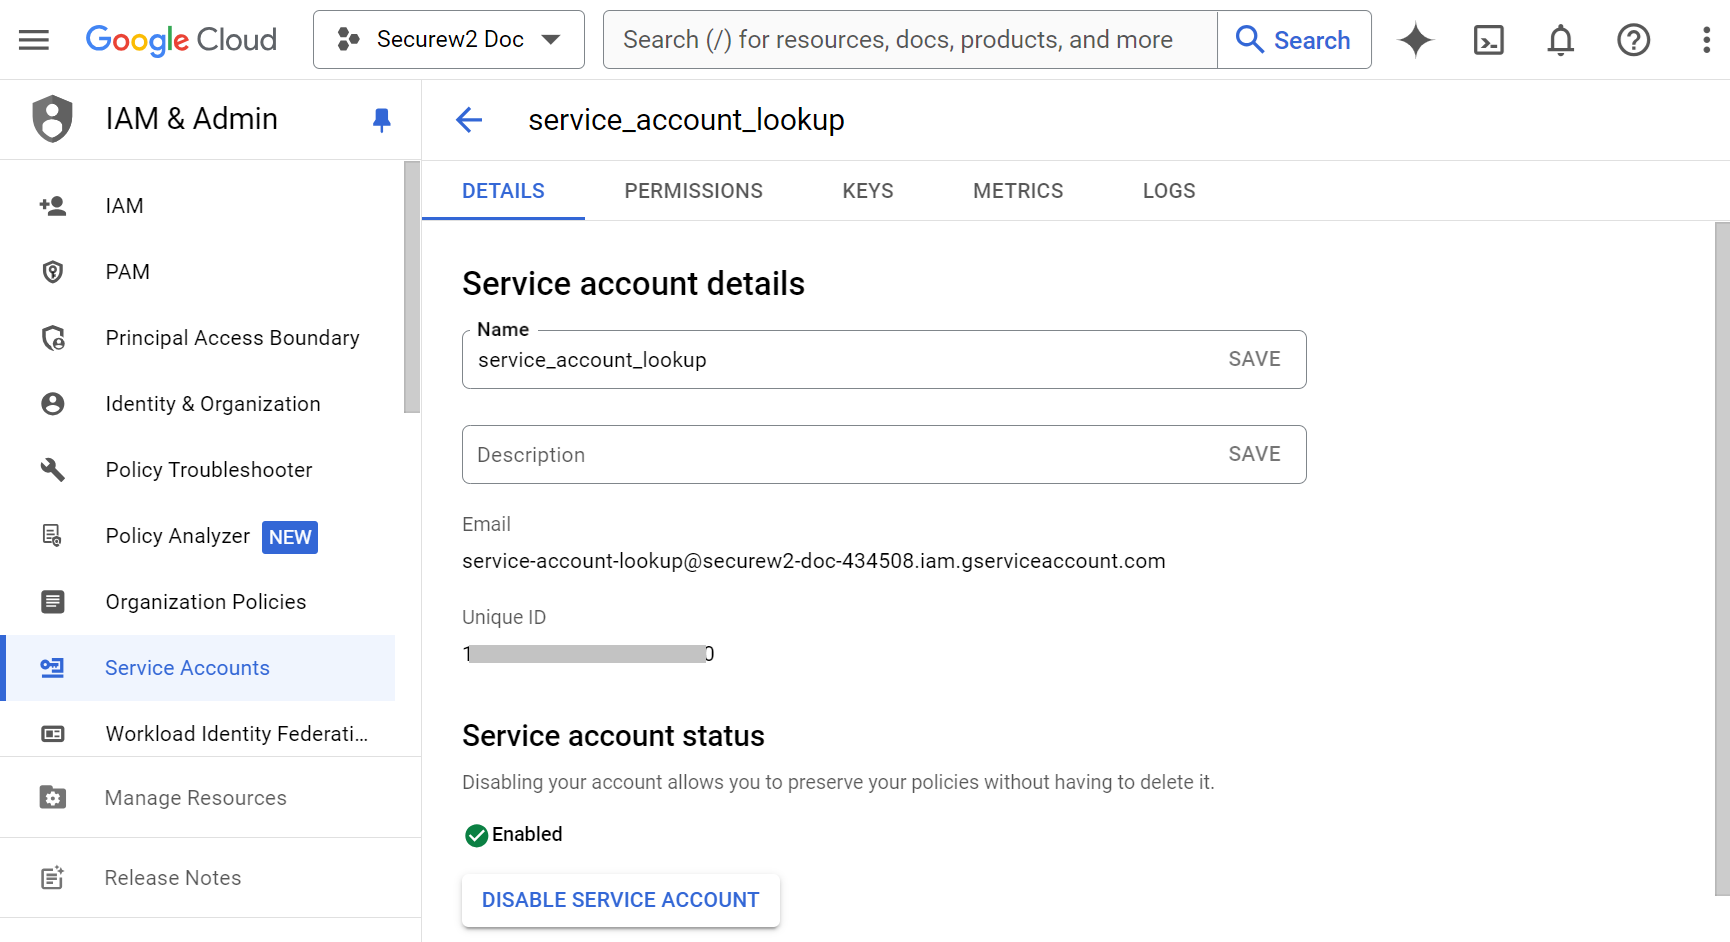
- Navigate back to your Google Service Account. Go to the Service Accounts tab and click on the service account created in Creating A Service Account and a JSON Key File section. Copy the Unique ID displayed under the DETAILS tab.

Paste the value in the Client ID field. - In the OAuth scopes field, enter “https://www.googleapis.com/auth/admin.directory.user.readonly,https://www.googleapis.com/auth/admin.directory.group.readonly,https://www.googleapis.com/auth/admin.directory.device.chromeos.readonly,openid”.
- Click Authorize.
Google mandates the creation of a user for the access of information from the service account. To create a user in the Google Admin console:
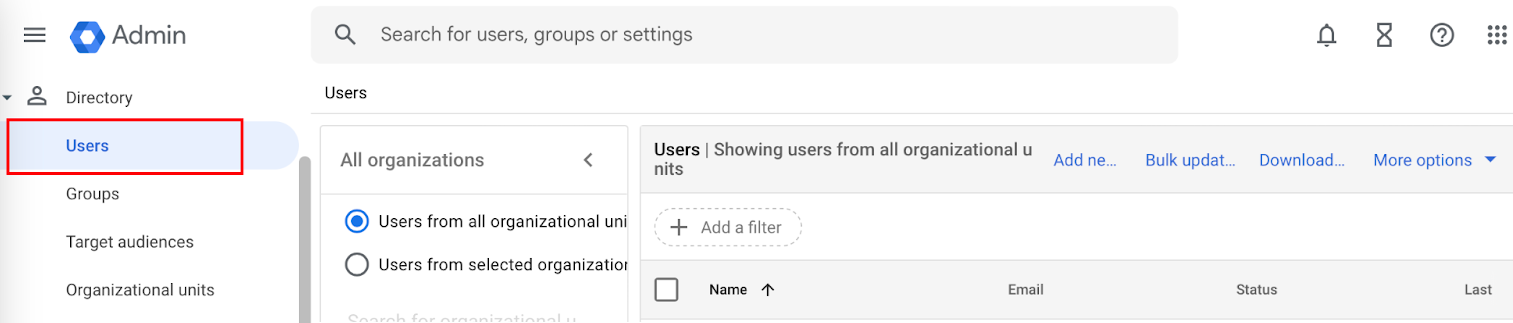
- Navigate to Directory > Users.

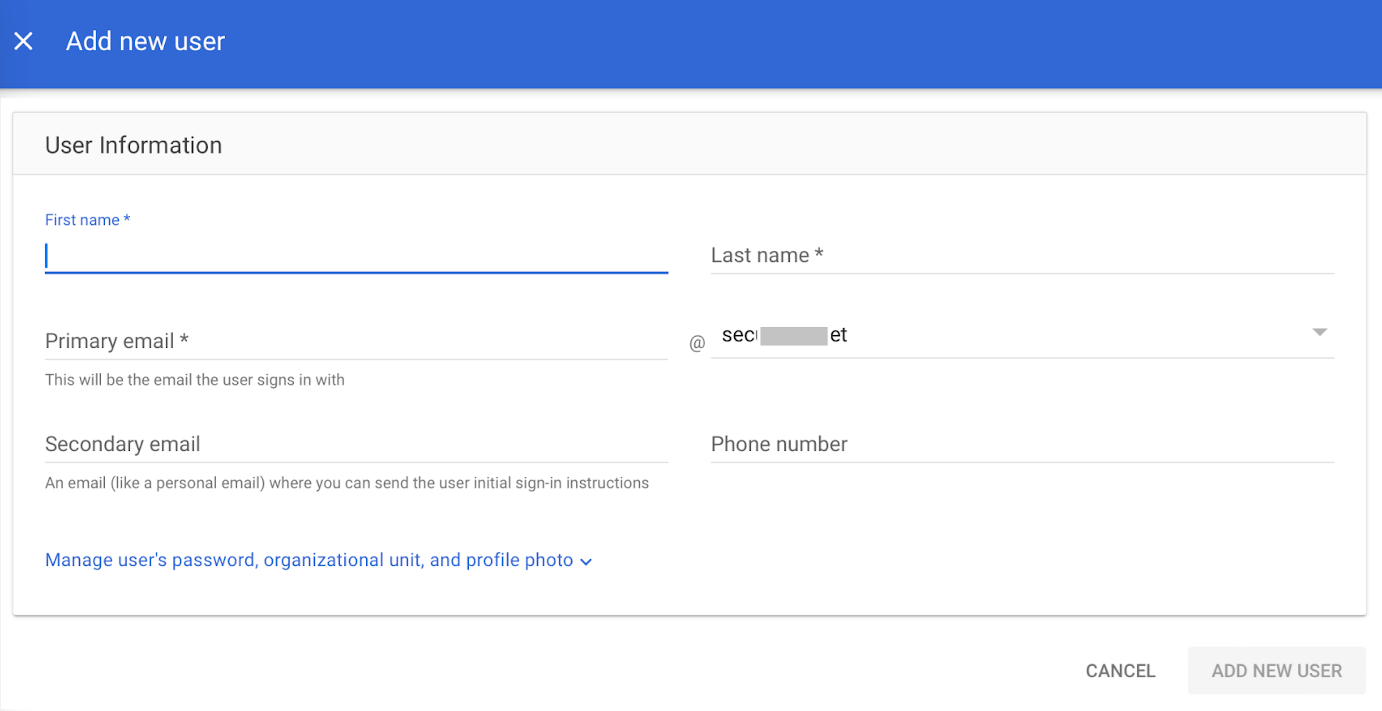
- Click Add new user. The Add new user form opens.

- In the First name field, enter the first name of the user.
- In the Last name field, enter the last name of the user.
- In the Primary email field, enter the organizational email of the user.
- Click ADD NEW USER.
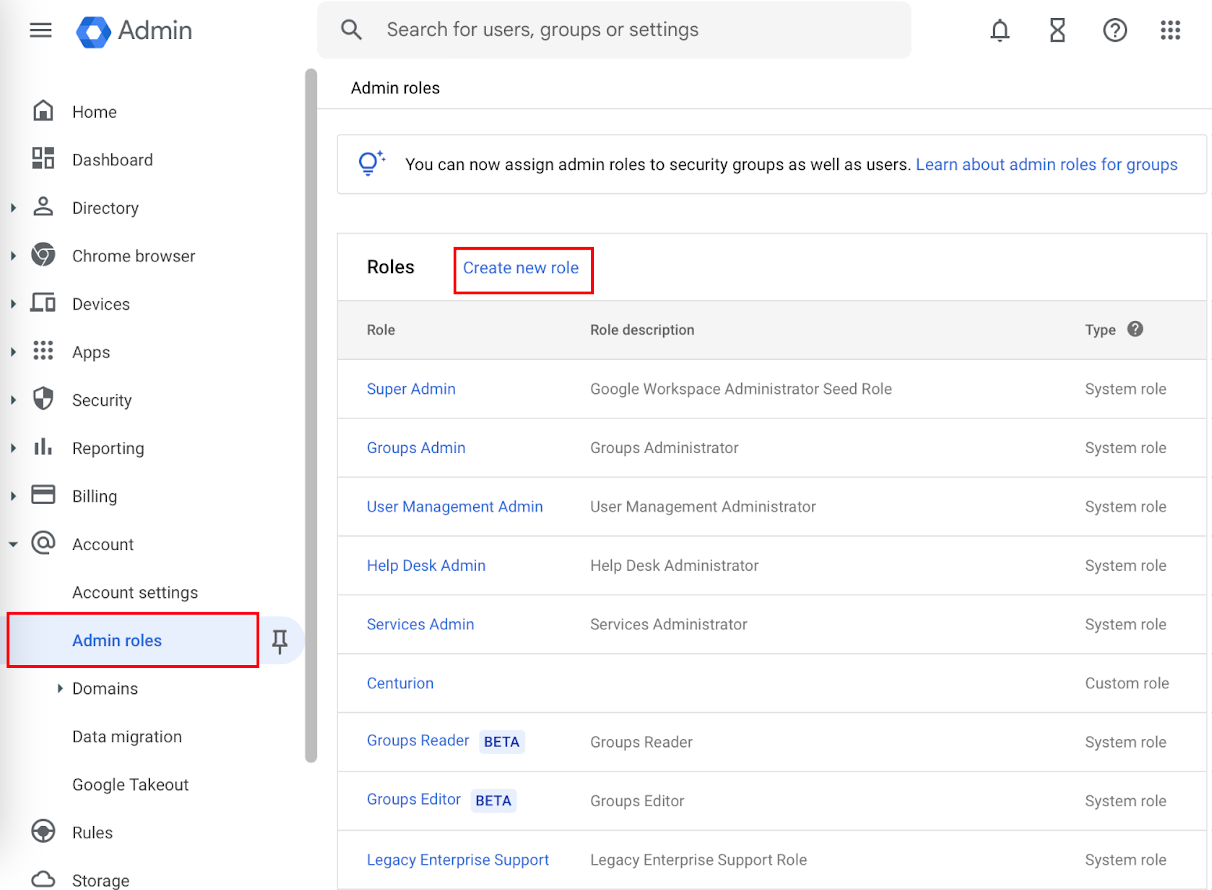
A role with read-only access privileges should be assigned to the created user. To create a role:
- Navigate to Accounts > Admin Roles.
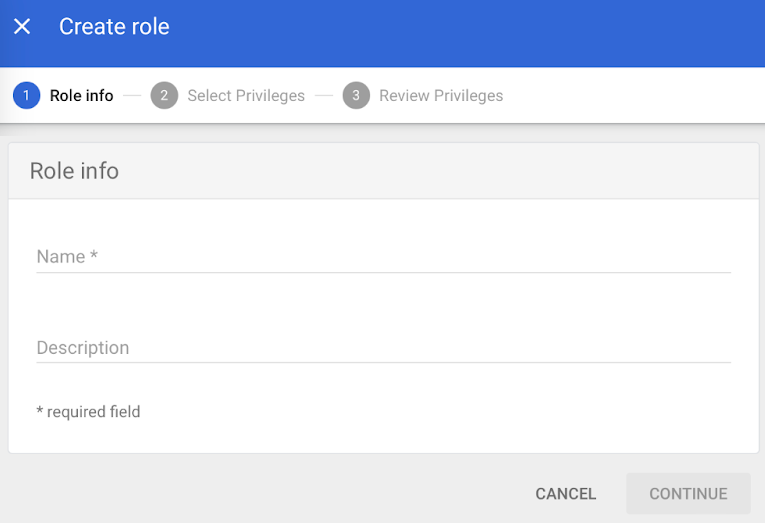
- Click Create new role. The Create role page opens.

- In the Role info tab, for the Name field, enter a name for the role.
- In the Description field, enter a description for the role.
- Click Continue.

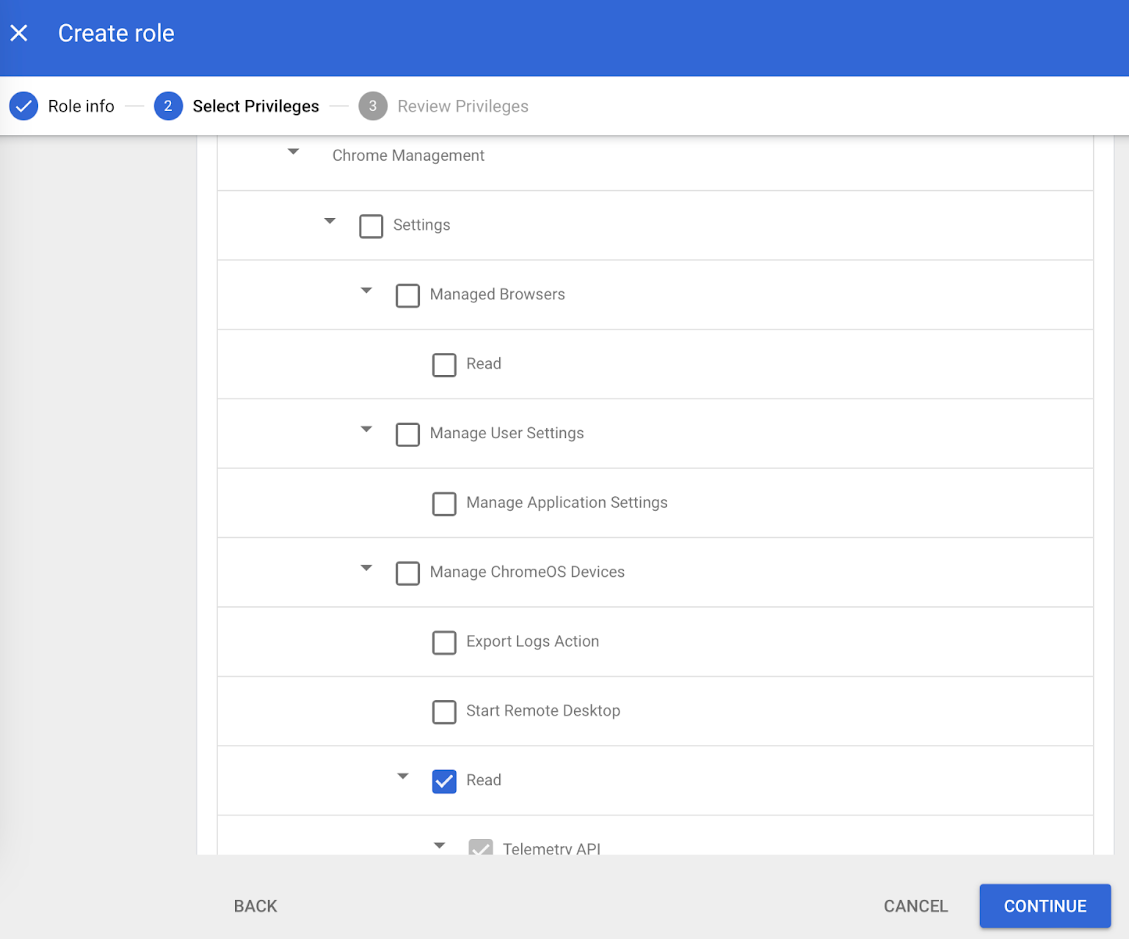
- In the Select Privileges tab, select the following access privileges;
- Admin console privileges:
- Chrome Management > Settings > Manage ChromeOS Devices > Read
- Admin API privileges:
- Users > Read
- Groups > Read
- Admin console privileges:
- Click CONTINUE. Review the privileges assigned and click DONE.

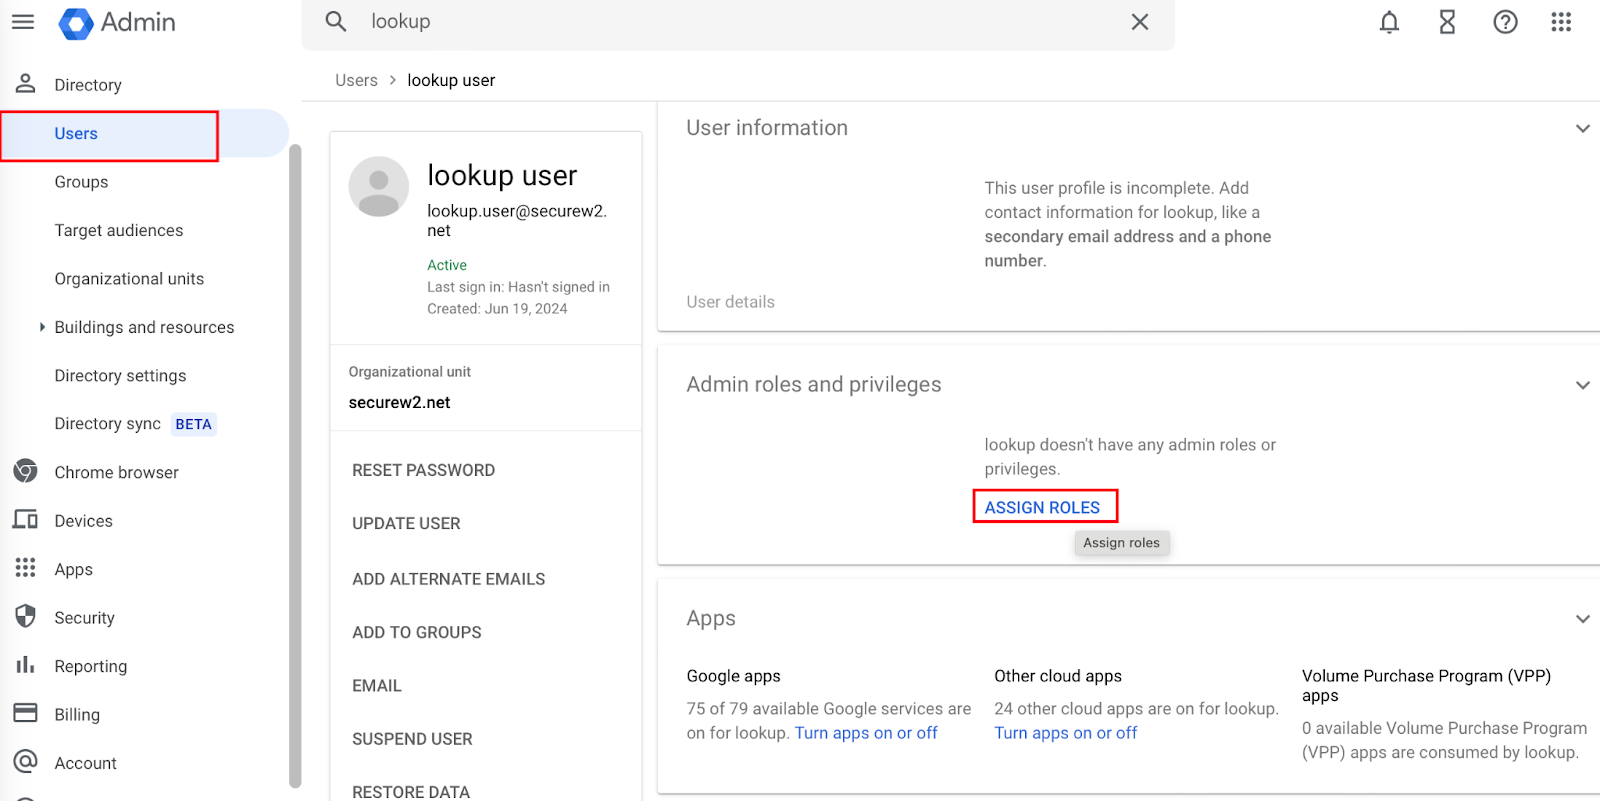
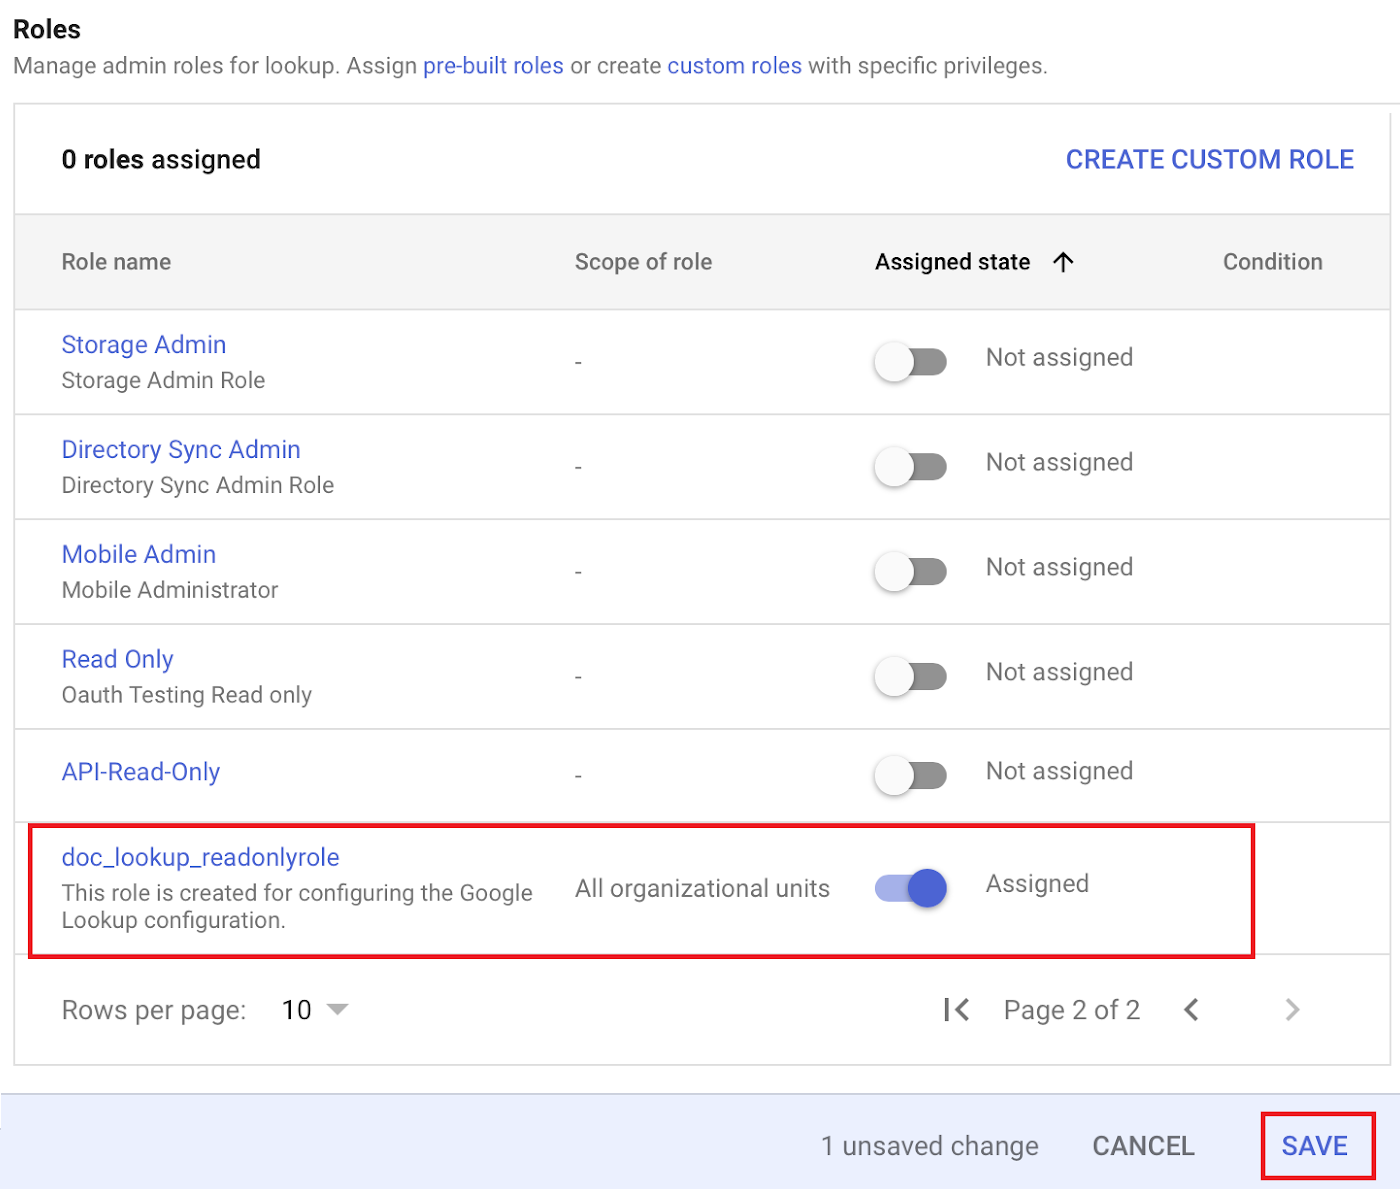
- Navigate to Users and select the user created in Creating a User in Google Admin Console section.
- Click ASSIGN ROLES.

- Assign the created role with read-only privileges to the user.

- Click SAVE.
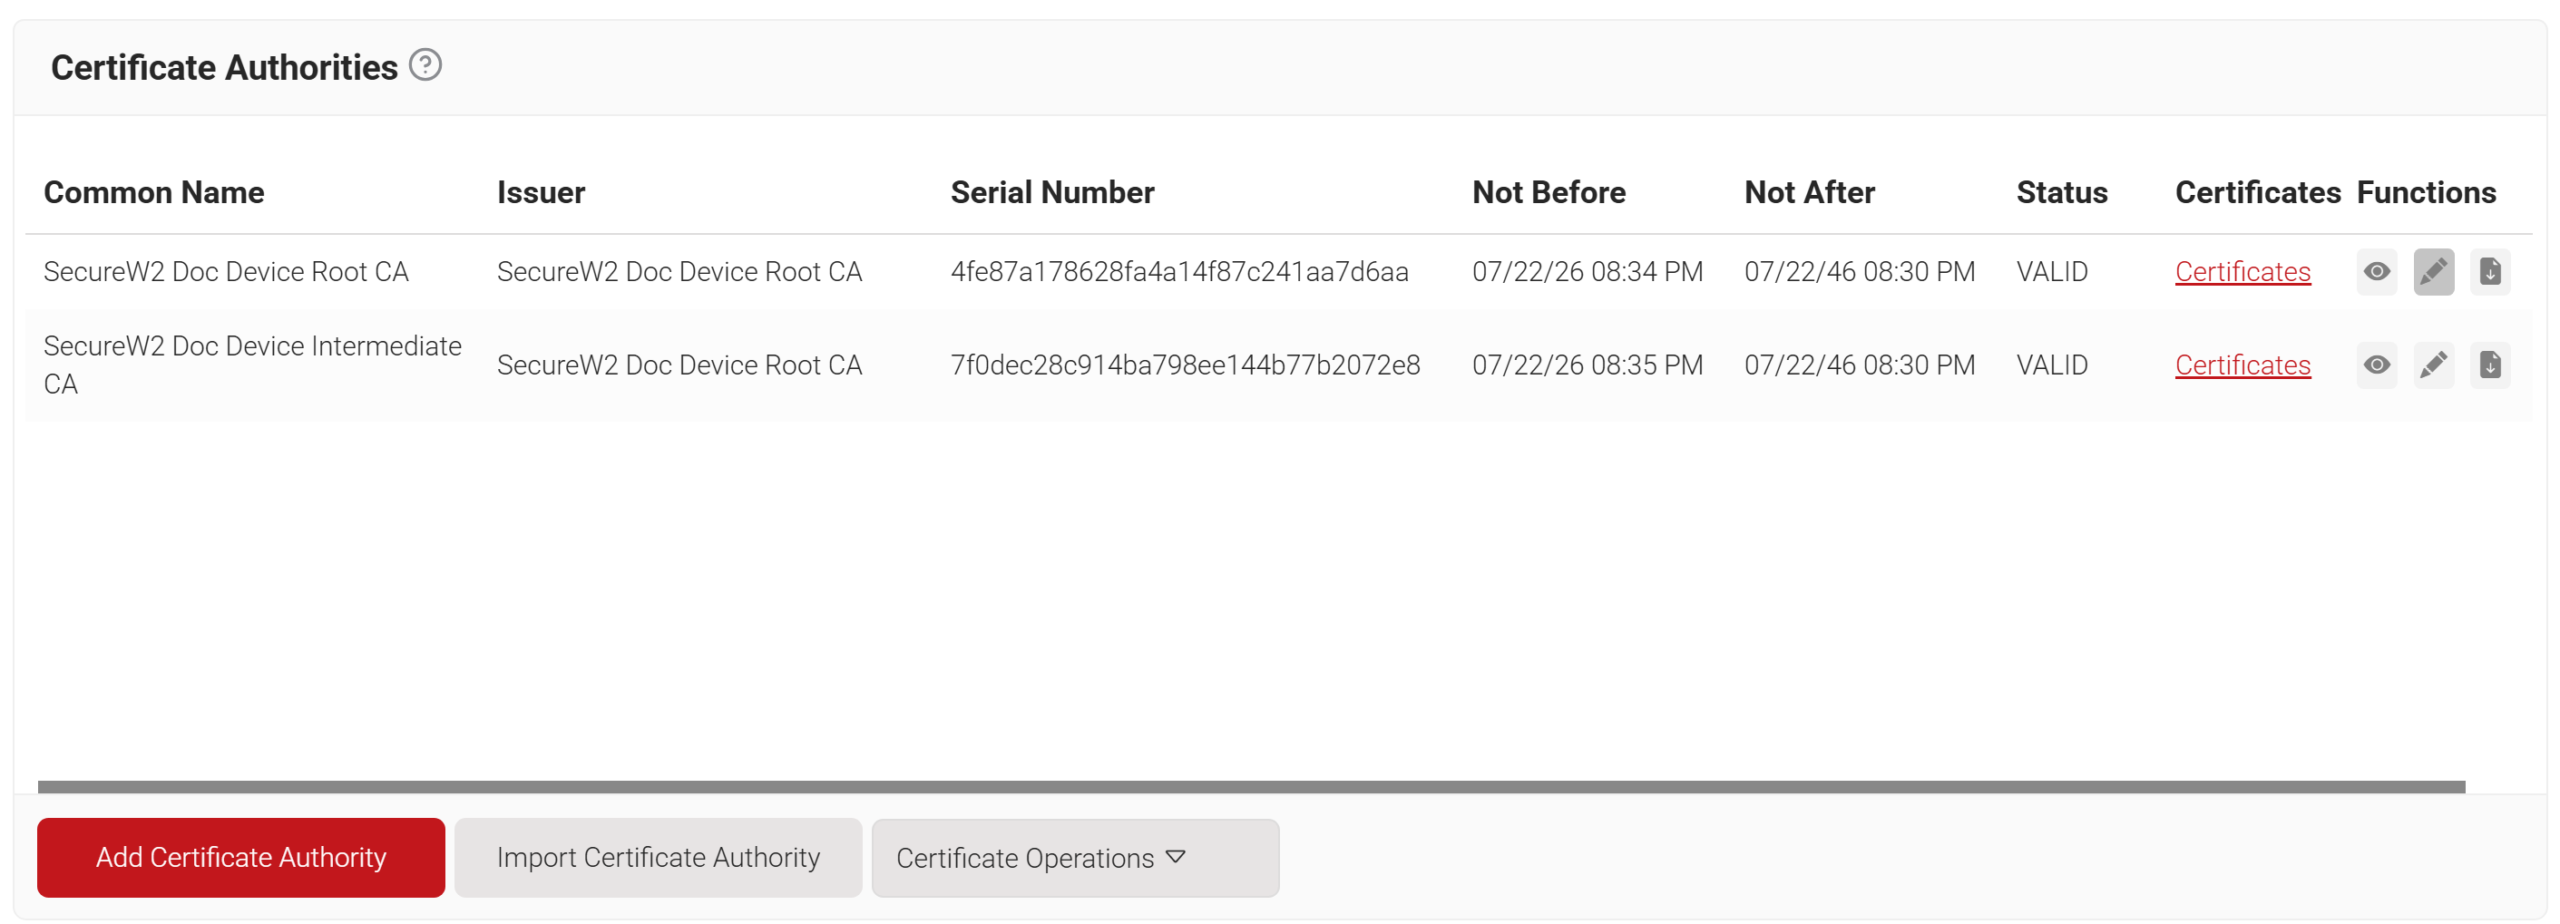
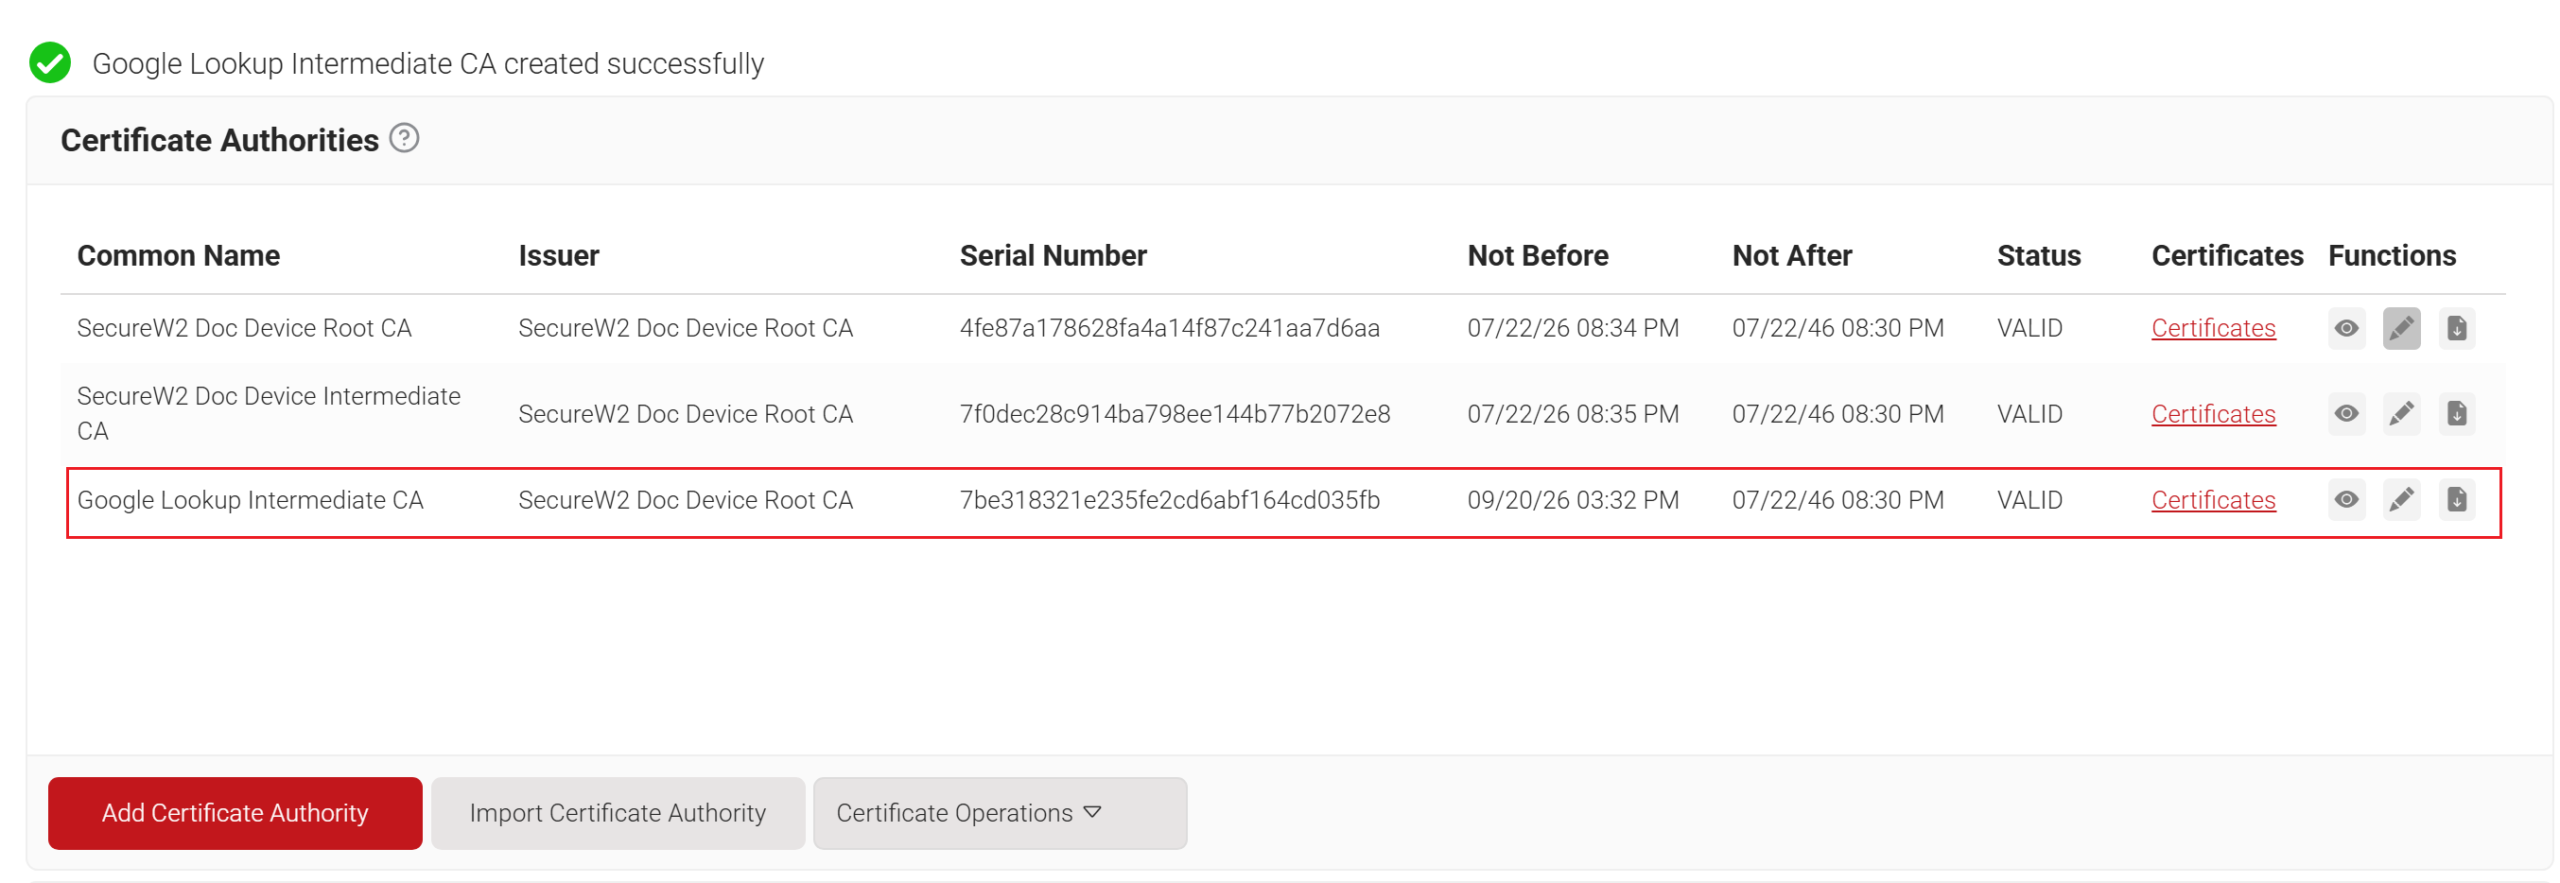
SecureW2 recommends the use of an Intermediate CA for Google lookup as a best practice for easy identification and management of your CAs
To create a new intermediate CA:
- Log in to the JoinNow Management Portal.
- Navigate to Dynamic PKI > Certificate Authorities.
- Click Add Certificate Authority.

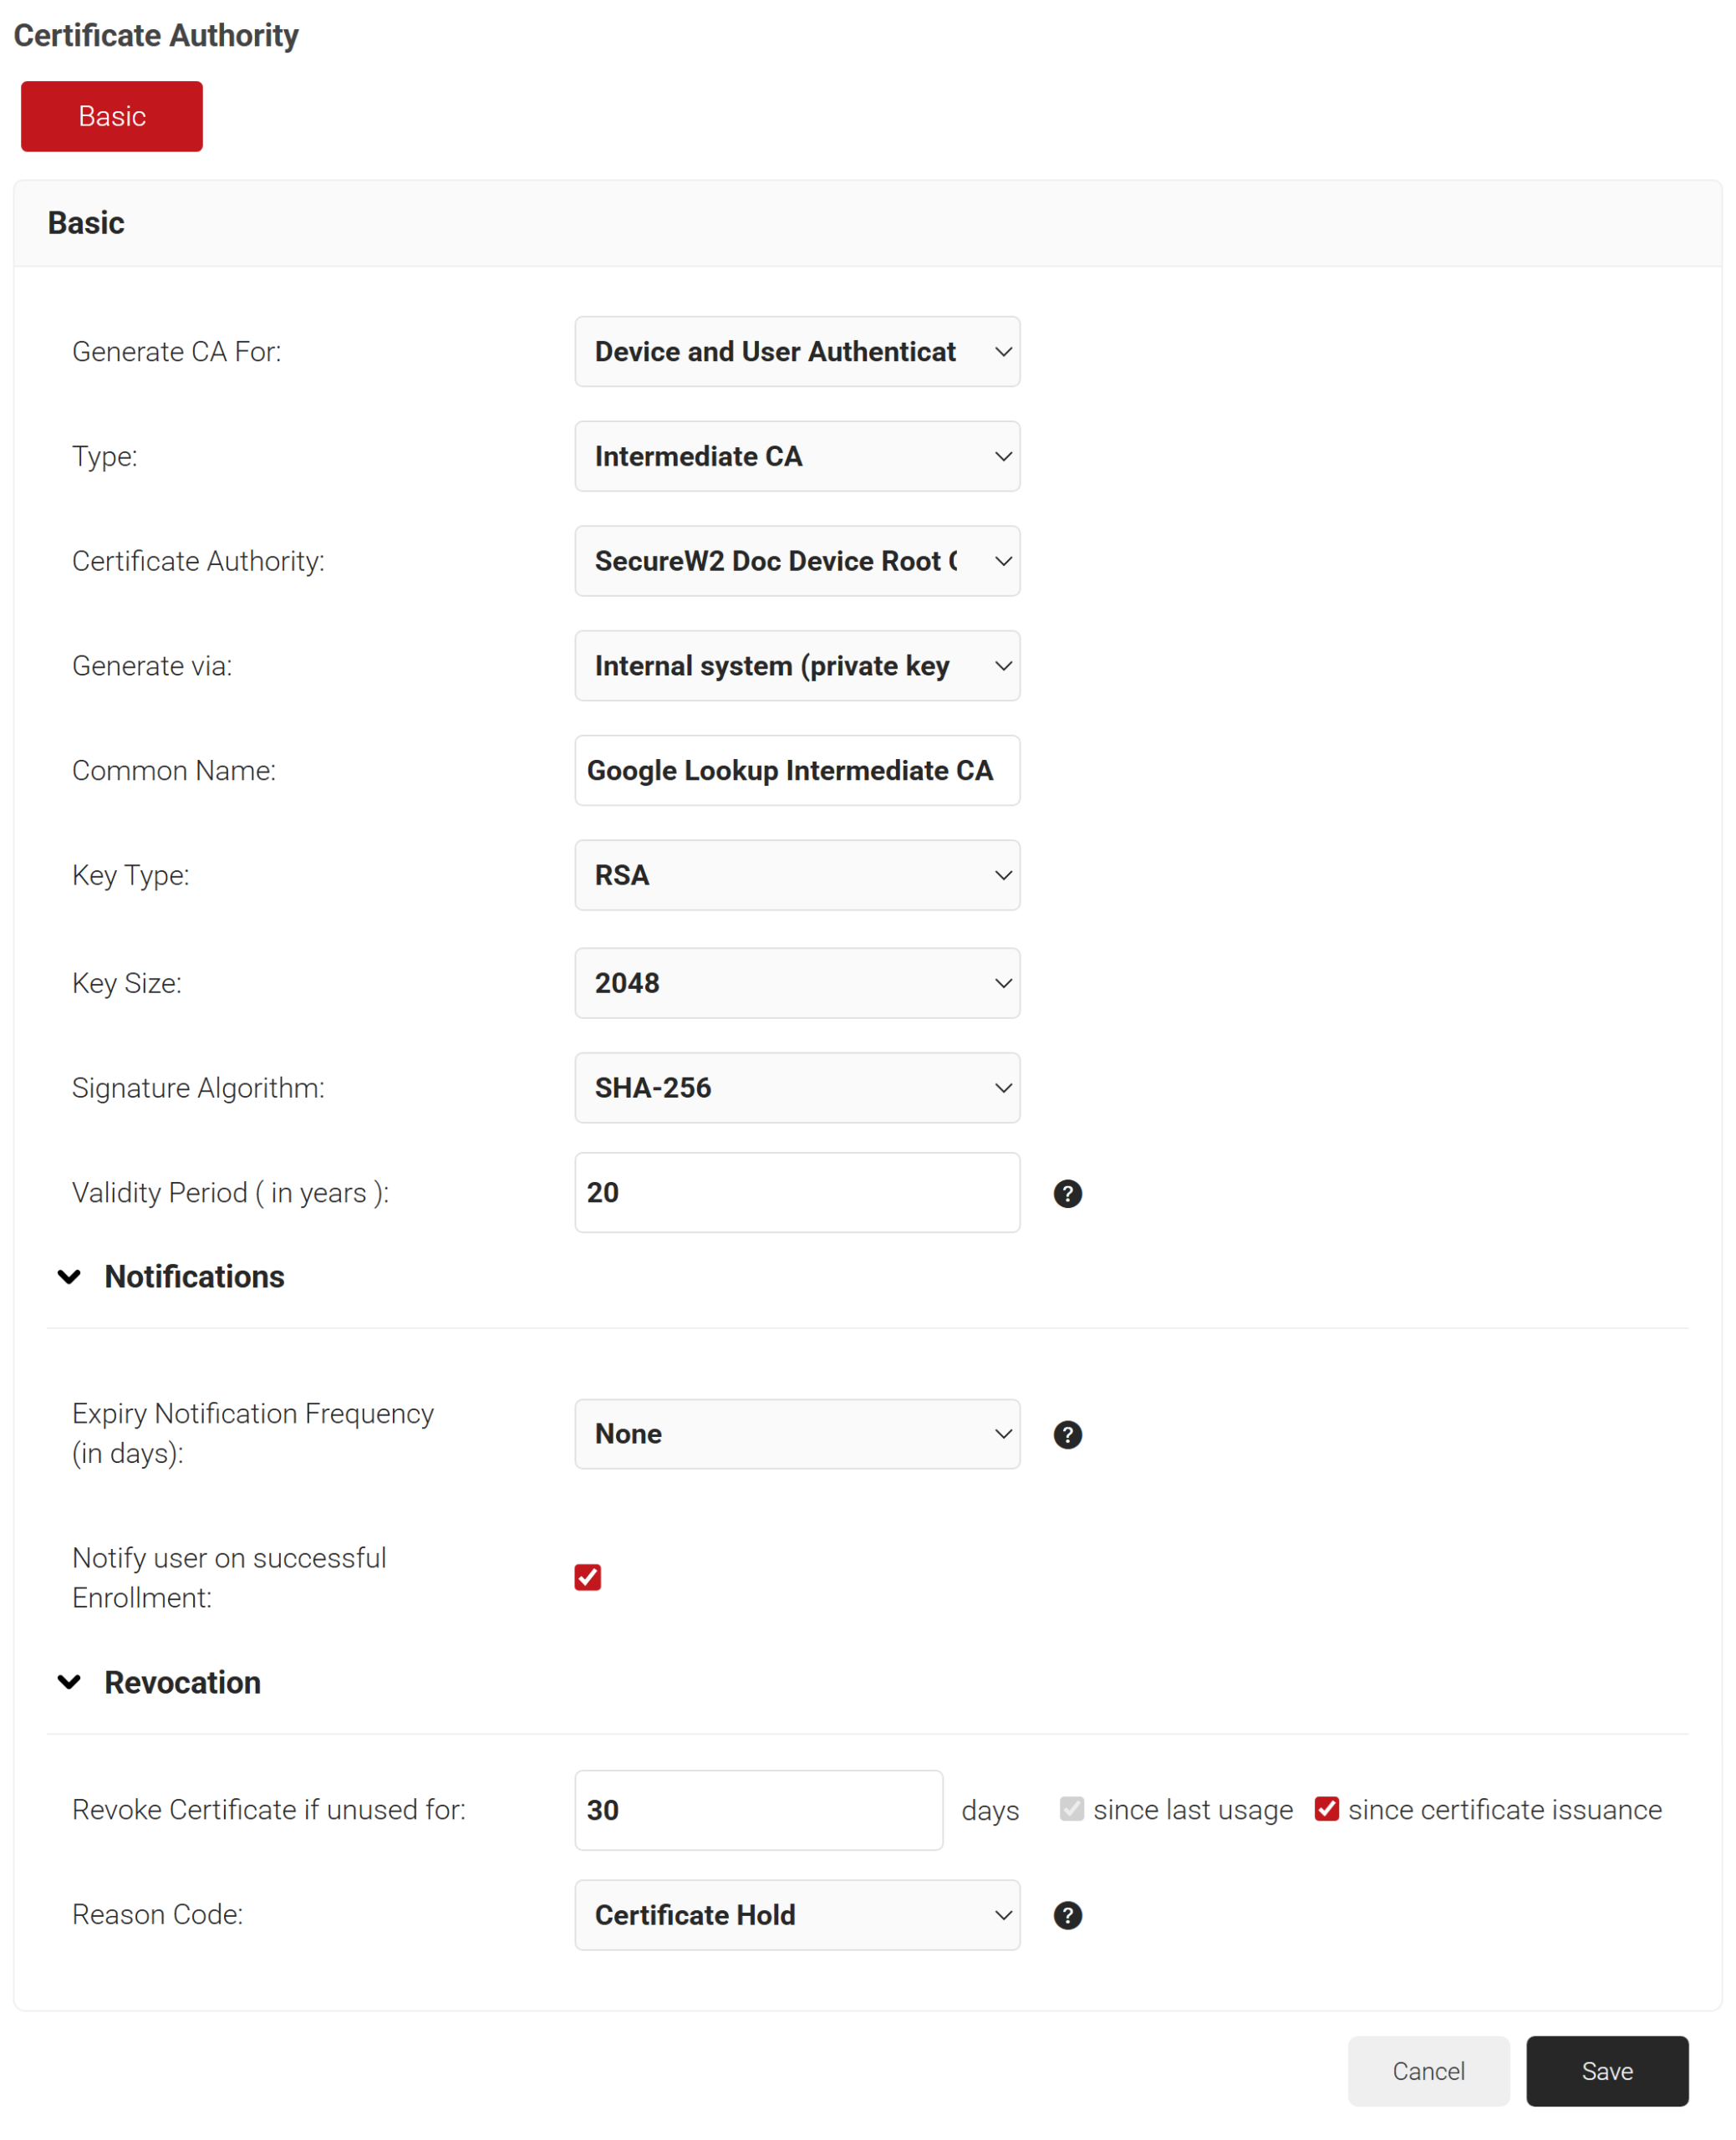
- In the Basic section, from the Generate CA For drop-down list, select the Device and User Authentication option to authenticate devices and users.
- From the Type drop-down list, select Intermediate CA.
- From the Certificate Authority drop-down list, select the default Root CA that comes with your organization.
- In the Common Name field, enter a common name for the CA certificate. SecureW2 recommends a name that includes “SCEP.”
- From the Key Size drop-down list, select 2048 for the CA certificate key pair.
- From the Signature Algorithm drop-down list, select the signature algorithm for the certificate signing request. The option available is SHA-256.
- In the Validity Period (in years) field, enter the validity period of the CA certificate.
- In the Notifications section:
- From the Expiry Notification Frequency (in days) drop-down list, select the frequency interval for which a certificate expiration notification should be sent to users.
- Select the Notify user on successful Enrollment check box to notify users after a successful enrollment.
- In the Revocation section:
- In the Revoke Certificate if unused for field, select the number of days after which an unused certificate can be revoked.
- From the Reason Code drop-down list, select any one of the following reasons for which the certificate is revoked.
- Certificate Hold
- AA Compromise
- Privilege Withdrawn
- Unspecified

- Click Save.

A certificate template determines how information is encoded in the certificate to be issued by the Certificate Authority. It includes a list of certificate attributes and how the information must be encoded in the attribute values. This information is provided by the organization administrator using the JoinNow Management Portal.
SecureW2 recommends creating multiple templates based on your business requirements to easily identify the different values being passed.
To create a Certificate Template for Google lookup:
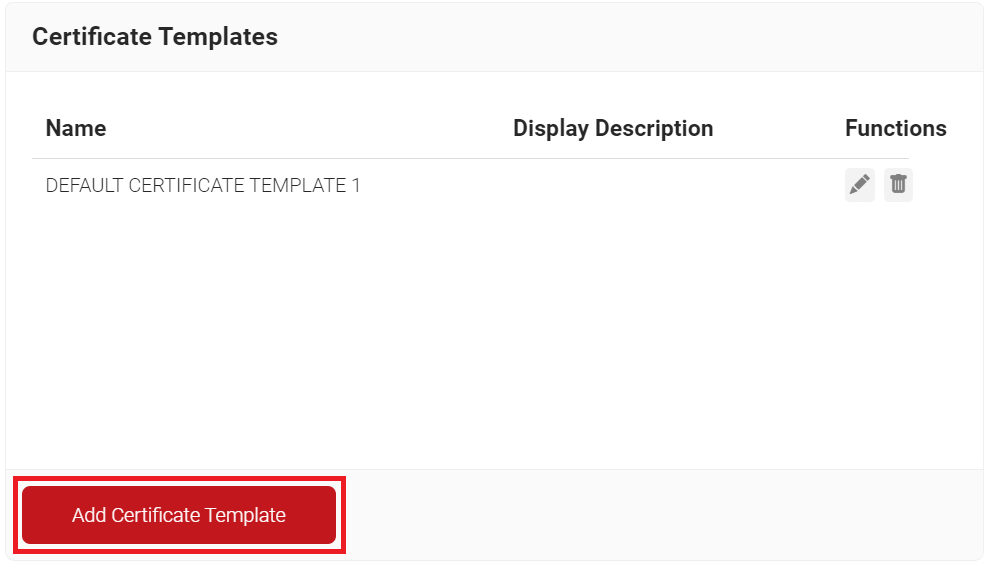
- Navigate to Dynamic PKI > Certificate Authorities.
- Scroll to the Certificate Templates section and click Add Certificate Template.

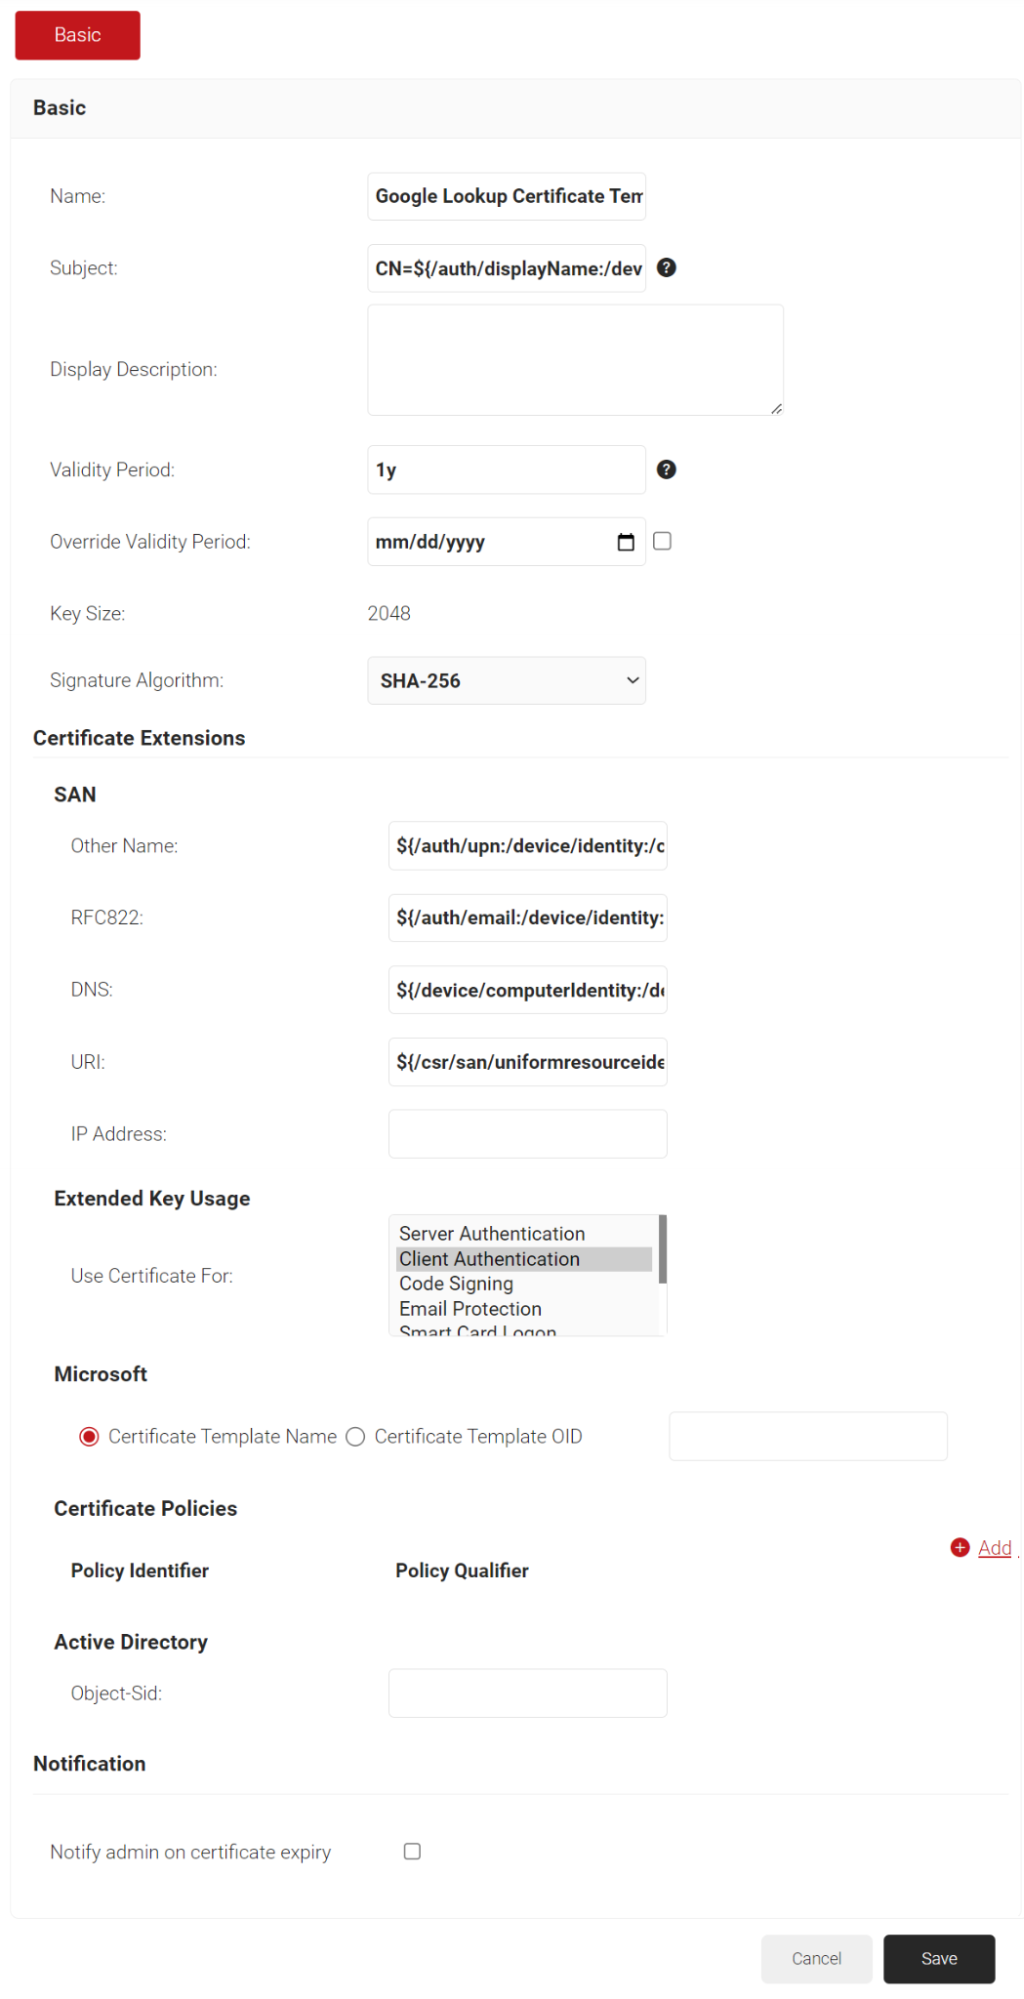
- In the Basic section, for the Name field, enter the name of the certificate template.
- In the Subject field, retain the default values hardcoded in the certificate template.
- In the Display Description field, enter a suitable description for the certificate template.
- In the Validity Period field, type the validity period of the certificate (based on the requirement).
- From the Signature Algorithm drop-down list, select the signature algorithm for the certificate signing request. The option available is SHA-256.
- In the SAN section, for Other Name, RFC822, DNS, and URI fields, retain the default values provided in the certificate.

- Click Save.
Before issuing the certificate and during the RADIUS authentication process, the Signal Source feature validates that a device/user is active within the organization by checking the identifying information against existing accounts in the Core Provider.
To create a Google Workspace Signal Source, perform the following steps:
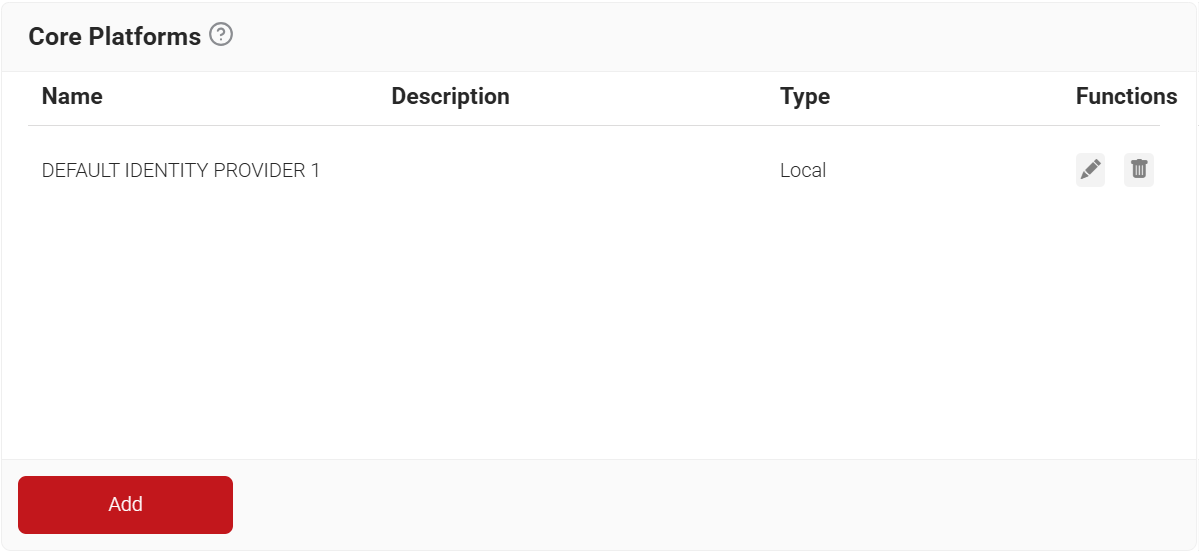
- Navigate to Integration Hub > Core Platforms.
- Click Add.
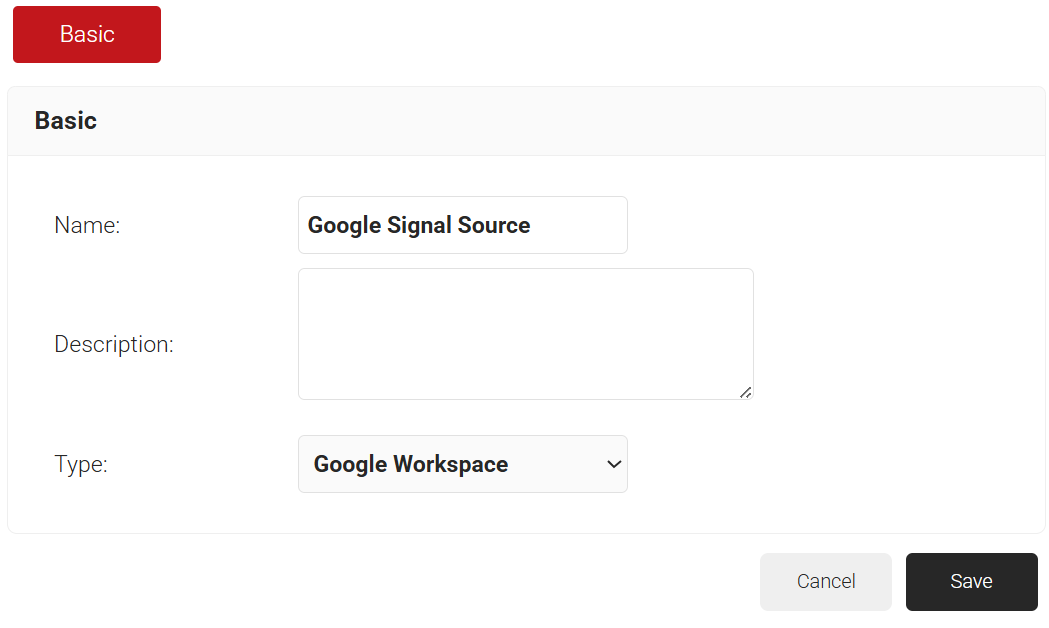
- In the Basic section, enter the name of the signal source in the Name field.
- In the Description field, enter a suitable description for the signal source.
- From the Type drop-down list, select Google Workspace.

- Click Save.
- The page refreshes, and the Configuration, Attribute Mapping, and Groups tabs appear.
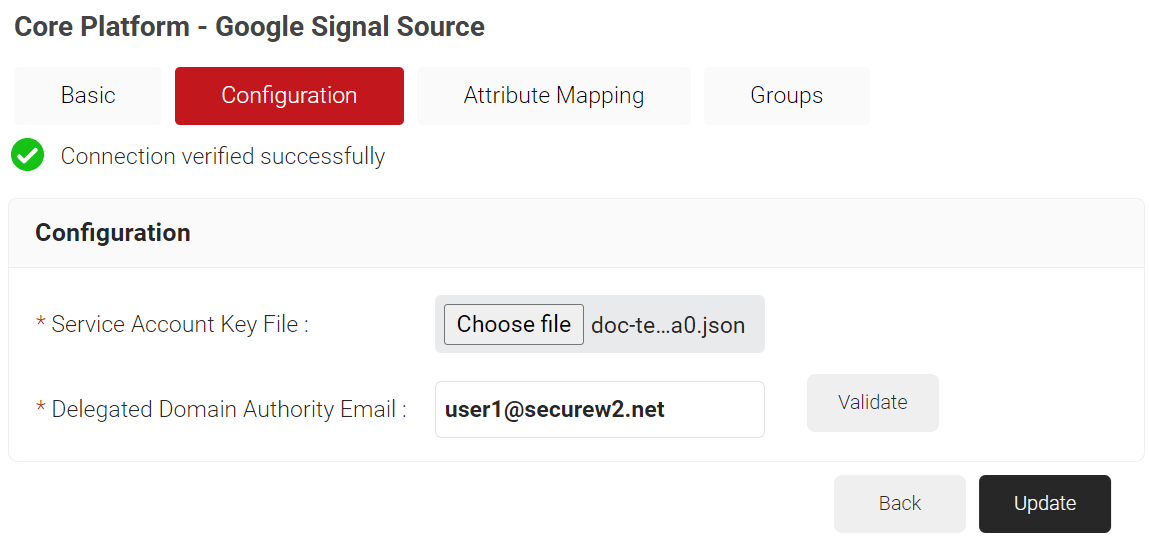
- Click the Configuration tab and provide the following information:
- In the Service Account Key File field, click Choose file. Select the JSON Key file created in the Creating A Service Account and a JSON Key File section and upload the file.
- In the Delegated Domain Authority Email field, enter the primary email for the user in the Creating a User in the Google Admin Console section.
- Click Validate to check the validity of the primary email entered.

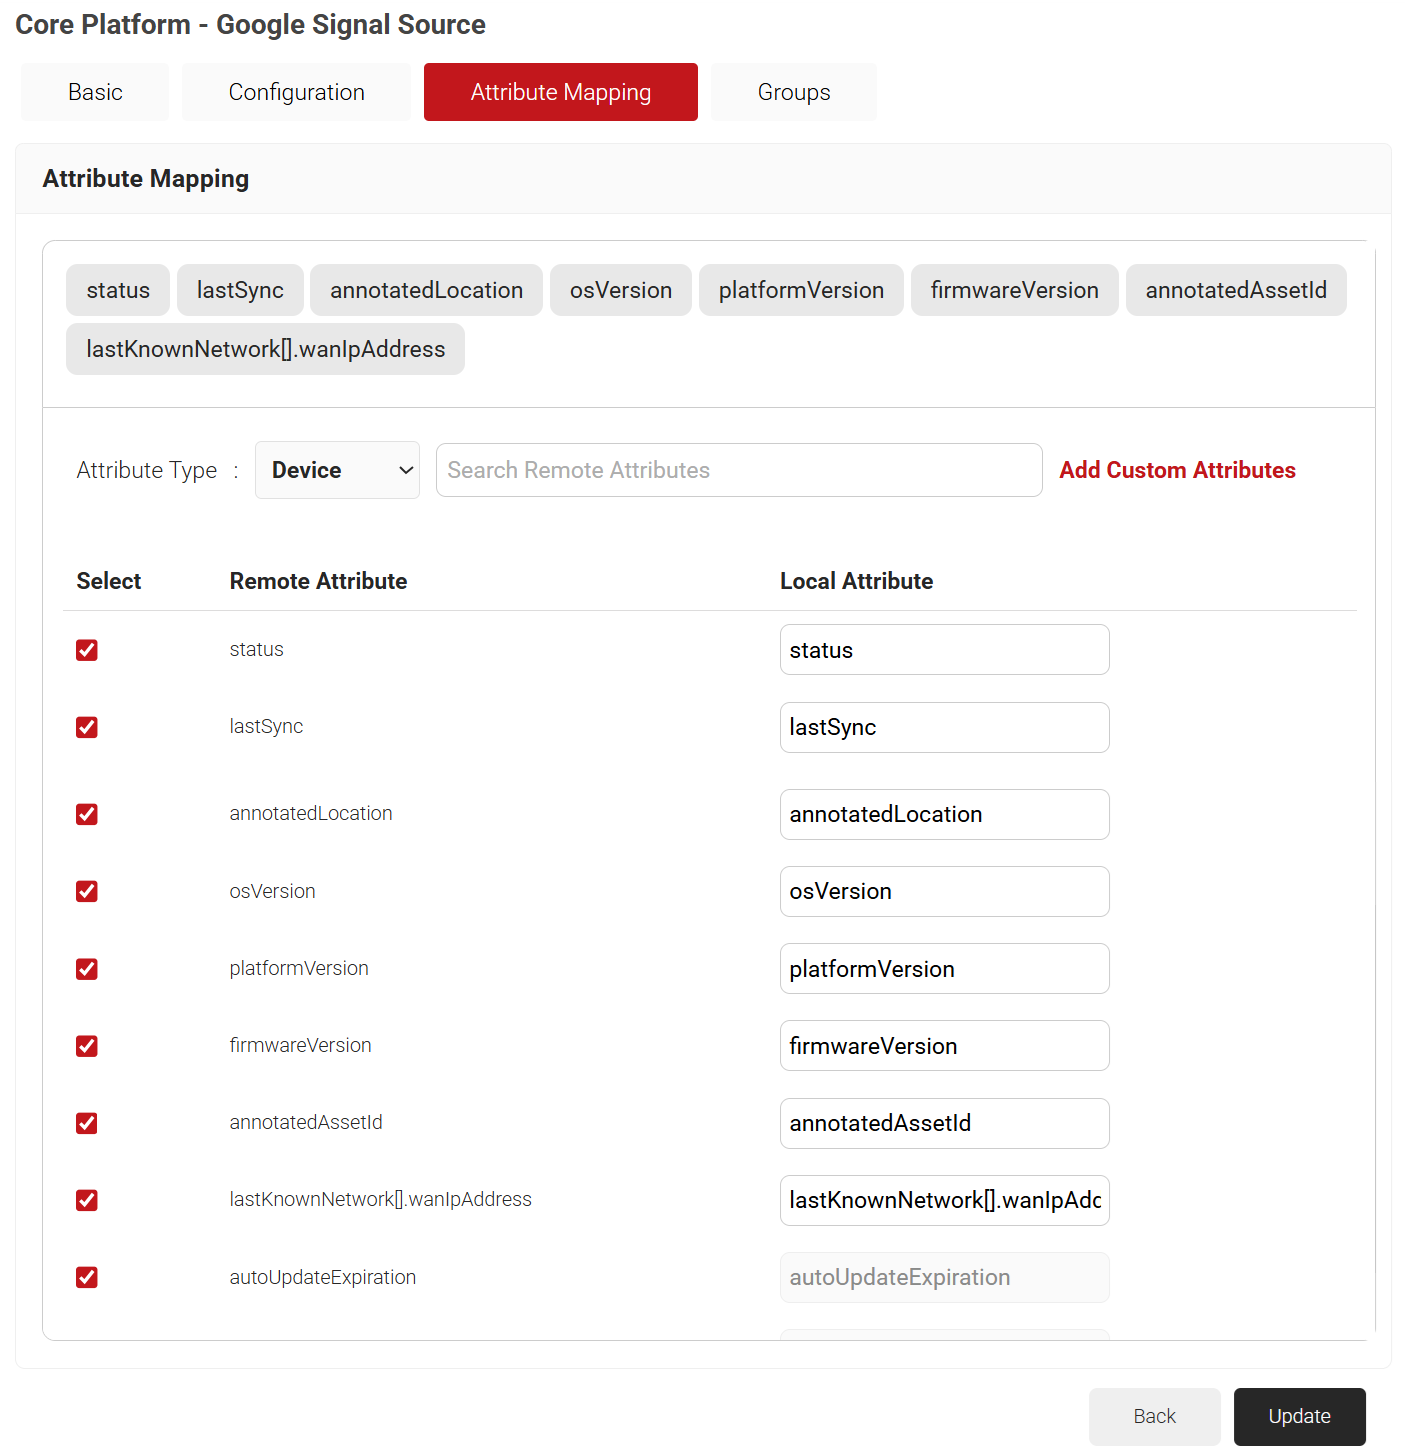
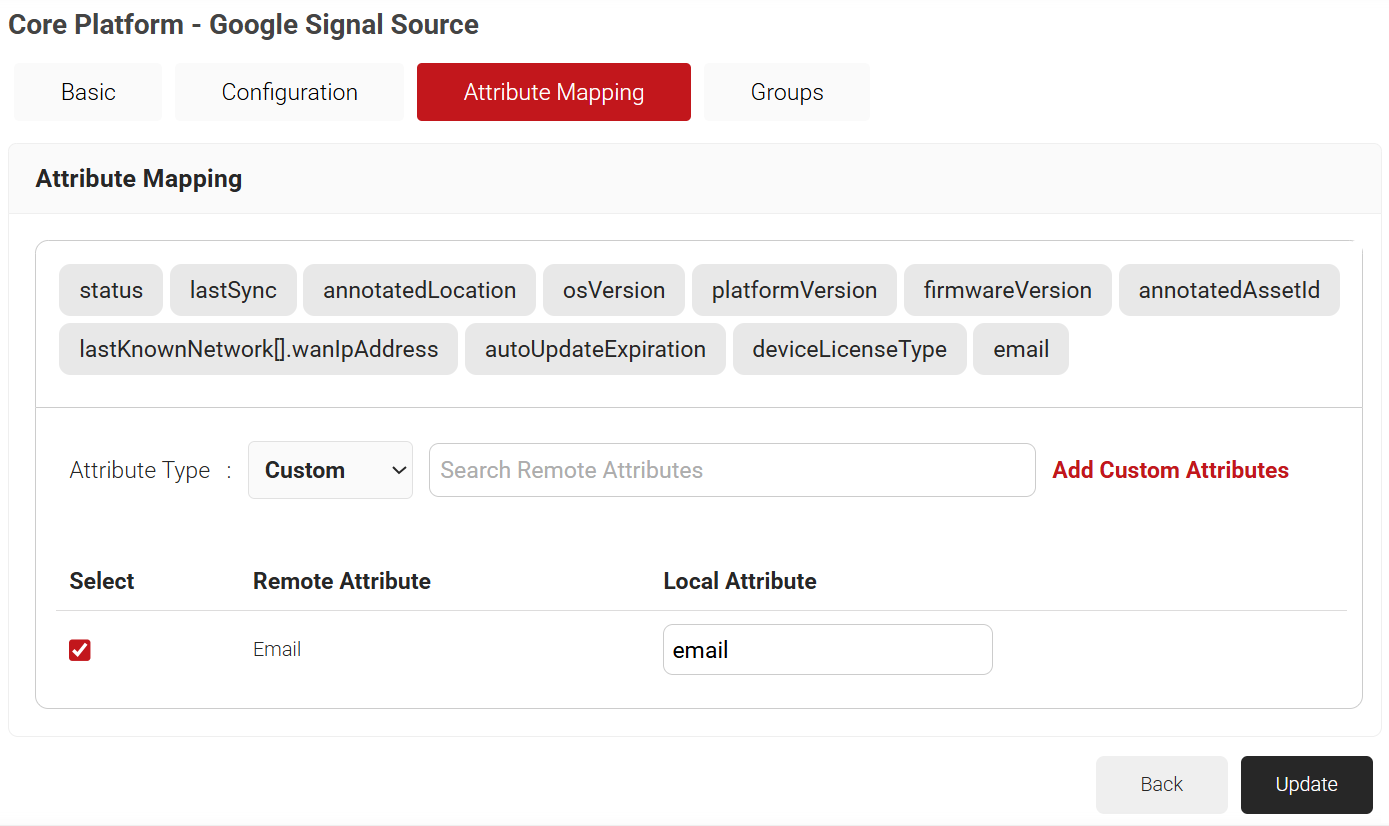
- Click the Attribute Mapping tab. The list of attributes supported by Google Workspace Signal Source and SecureW2 is displayed in the Attribute Mapping section.
- From the Attribute Type drop-down list, select any one of the following options based on your business requirements.
- Device
- User
- Custom
Admins can configure multiple Signal Source attributes by selecting the checkboxes next to the attributes.
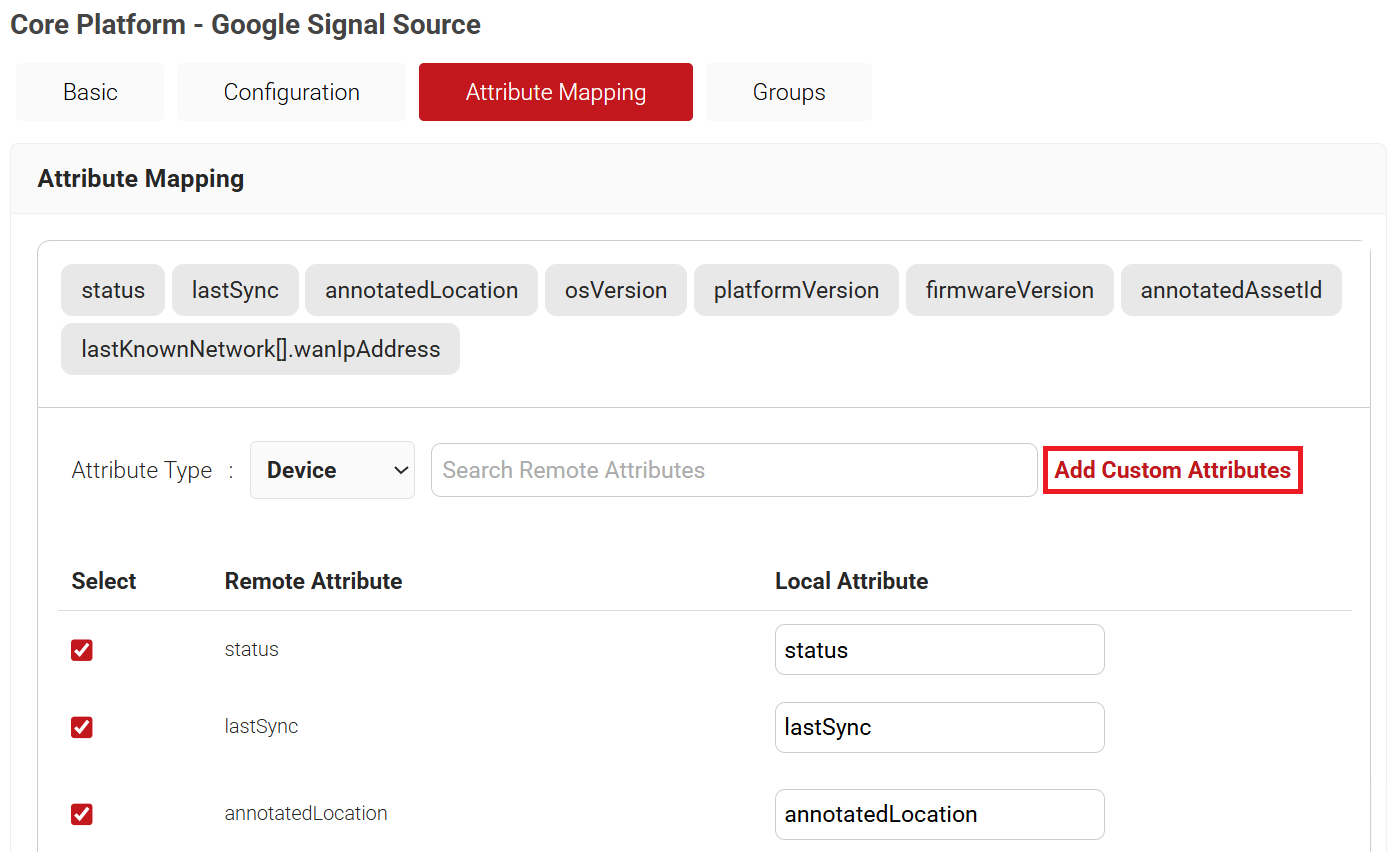
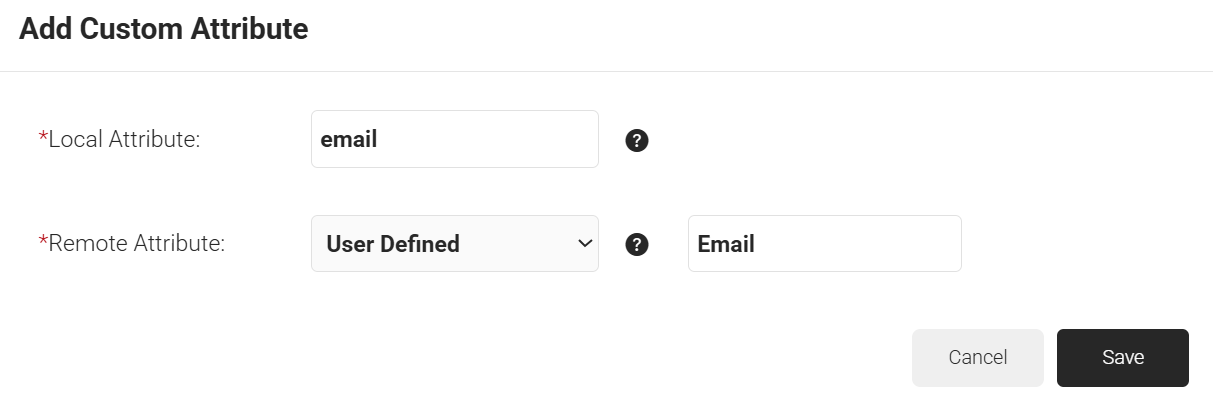
- To create custom attributes:
- Click the Add Custom Attributes link.

- In the Local Attribute field, enter the name to identify the attribute locally.
- In Remote Attribute, select the attribute to be mapped to the Local attribute. If you select User Defined, enter the attribute returned by the Core Provider that you want to map.

- Click Save.

- Click the Add Custom Attributes link.
- From the Attribute Type drop-down list, select any one of the following options based on your business requirements.
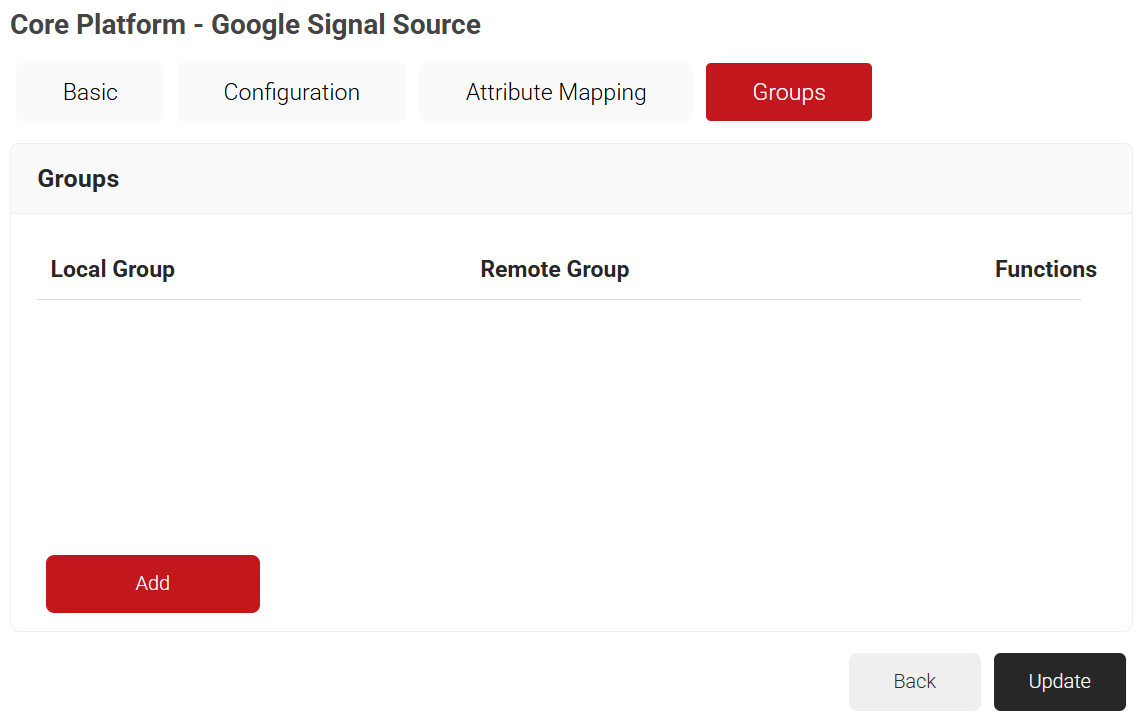
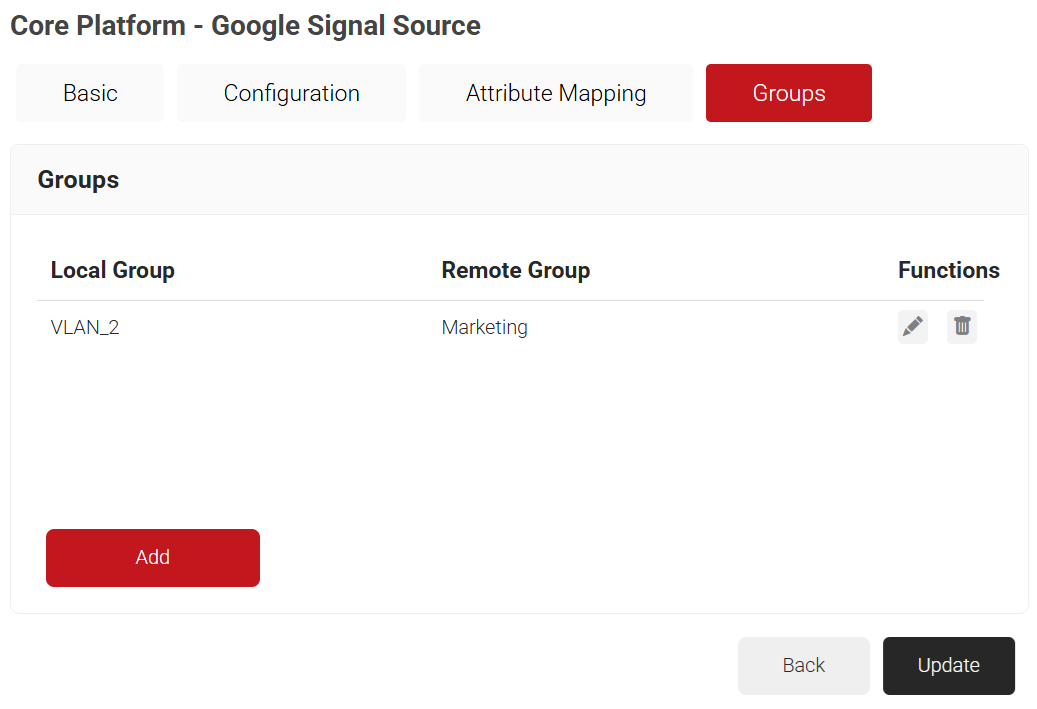
- Click the Groups tab.
- Click Add.

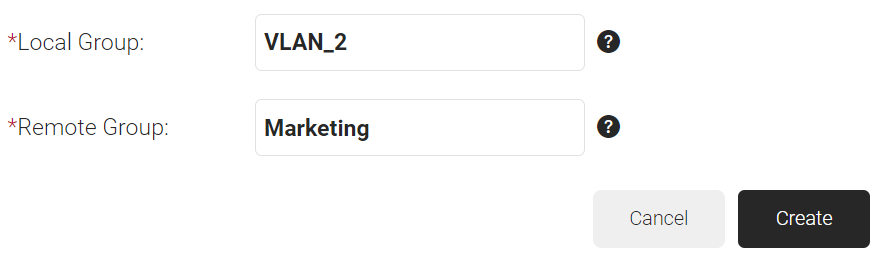
- In the Local Group field, enter the local group name. This group name can be used to configure network policies.
- In the Remote Group field, enter the group name as configured in Google Workspace.

- Click Create.

- Click Update.
- Repeat all the steps above as needed to create as many groups as required.
- Click Add.
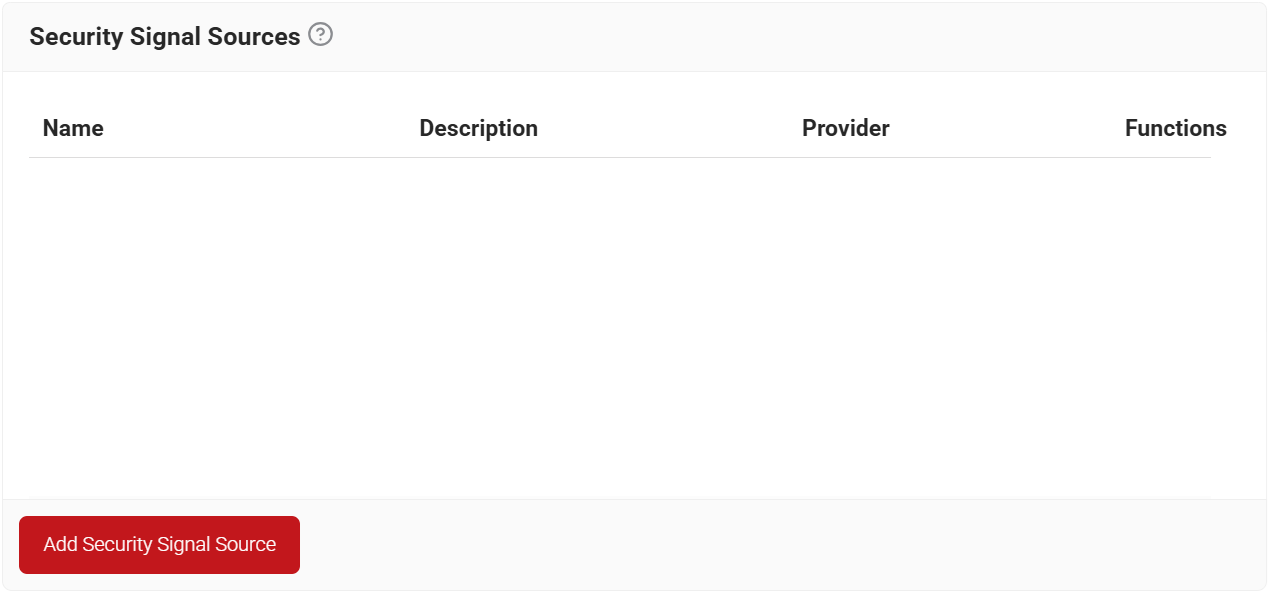
- Navigate to Policy Management > Security Signal Sources.
- Click Add Security Signal Source.

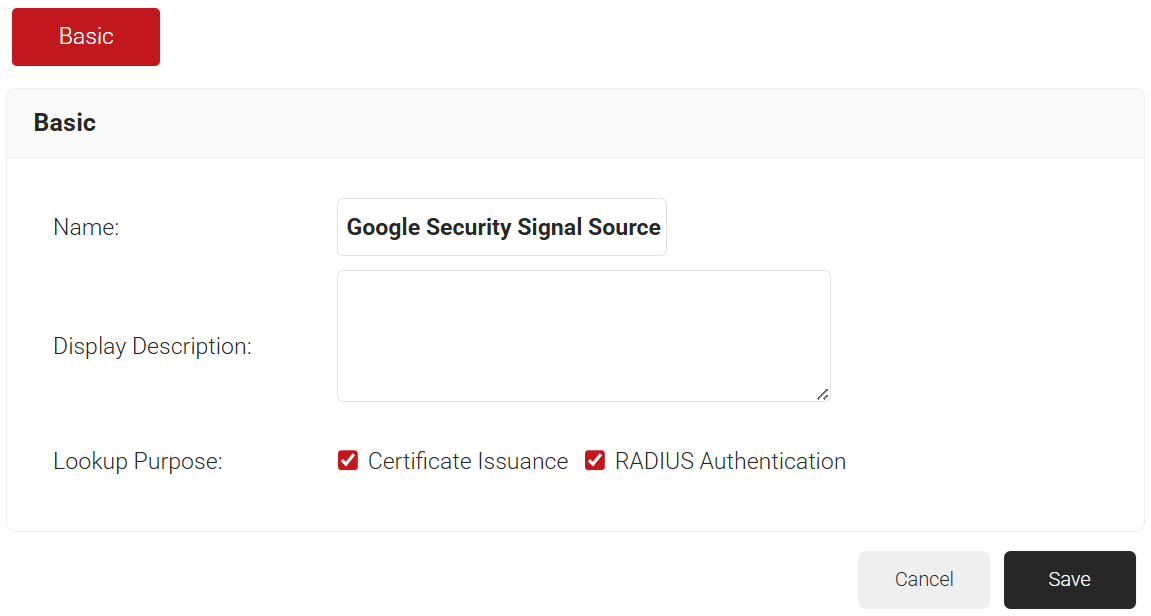
- In the Basic section, enter the name of the security signal source in the Name field.
- In the Display Description field, enter a suitable description for the security signal source.
- Lookup Purpose – Purpose of Account Lookup.
- Certificate Issuance – To look up a device or user account during enrollment.
- RADIUS Authentication – To look up a device or user account during RADIUS Authentication.

- Click Save.
- The page refreshes, and the Conditions and Settings tabs appear.
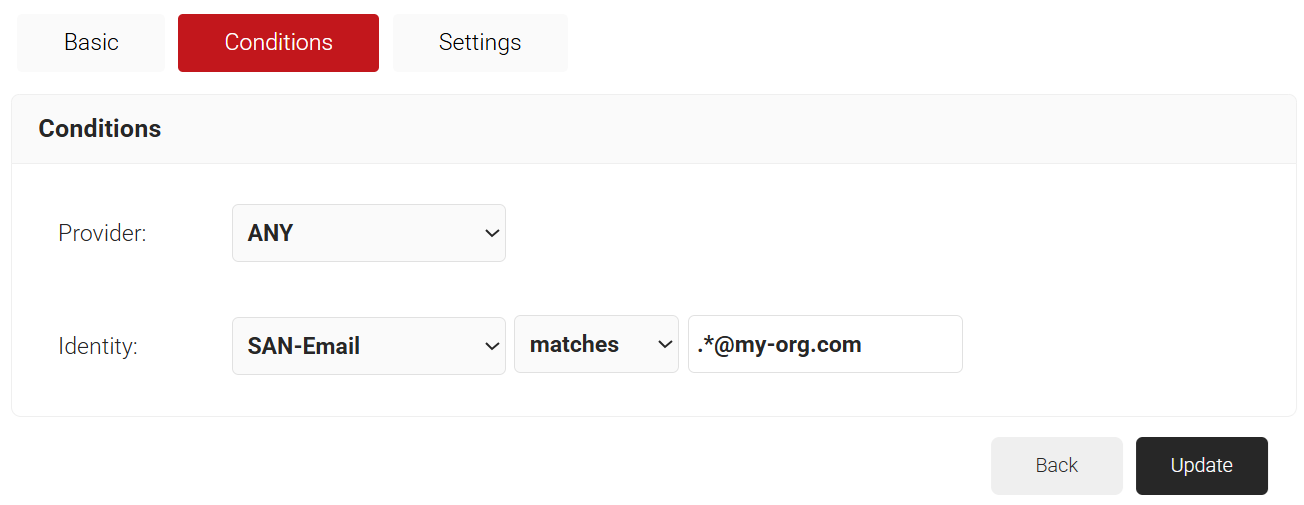
- Click the Conditions tab.
- From the Provider drop-down list, retain Any, or select a Core Platform to trigger conditions during the lookup.
- From the Identity drop-down list, select an attribute to trigger conditions based on specific lookup requirements. The displayed attributes depend on the Lookup purpose selected earlier. The attributes are
- Custom – Select this option to add custom lookup attributes for both Enrollment and RADIUS authentication during lookup, in addition to the listed attributes.
- CSR – Select a CSR attribute as the lookup attribute for Enrollment during lookup.
- Certificate – Select a certificate attribute as the lookup attribute for RADIUS authentication during lookup.

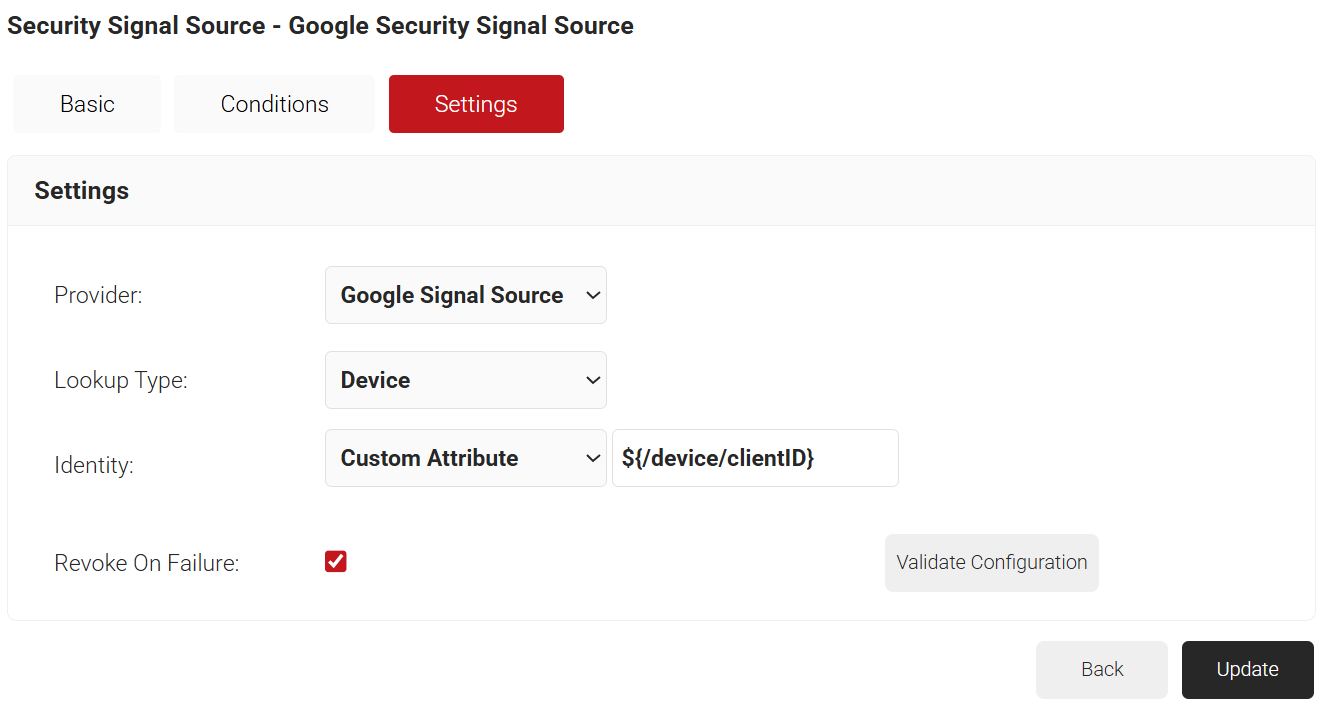
- Click the Settings tab.
- From the Provider drop-down list, select the Google Workspace Signal Source you created in the Creating a Google Workspace Signal Source section.
- From the Lookup Type drop-down list, choose one of the following options:
- Auto
- Device
- User
- From the Identity drop-down list, select one of the following attributes:
- Custom Attribute
- CSR
- Certificate
- If Custom Attribute is selected, enter ${/device/clientID} for device lookup or ${/user/auth} for user lookup.
- Select the Revoke On Failure checkbox to automatically revoke a certificate if an account lookup fails. Account Lookup will fail if the entity being looked up is not available in Google Workspace.

- Click the Validate Configuration button to check if the lookup is valid.
- On the Validate Configuration pop-up window, in the Enter a valid identity field, enter the identity (user/device) to validate the lookup, and click Validate.

- After successful validation, the associated attributes and groups of the Signal Source are displayed in the Lookup Details prompt. The admin can use this information to configure network policies and verify the validity of devices or users.

NOTE: When the Admin enters an invalid identity on the Validate Configuration pop-up window, an error message is displayed: “Account validation failed.” - Click Update.


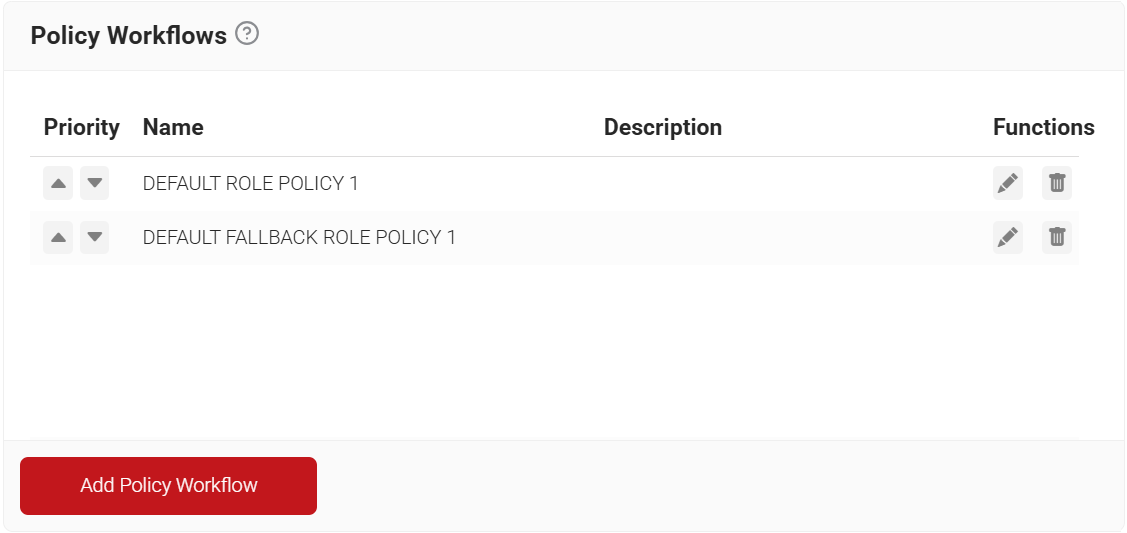
To create a policy workflow, perform the following steps:
- Navigate to Policy Management > Policy Workflows.
- Click Add Policy Workflow.
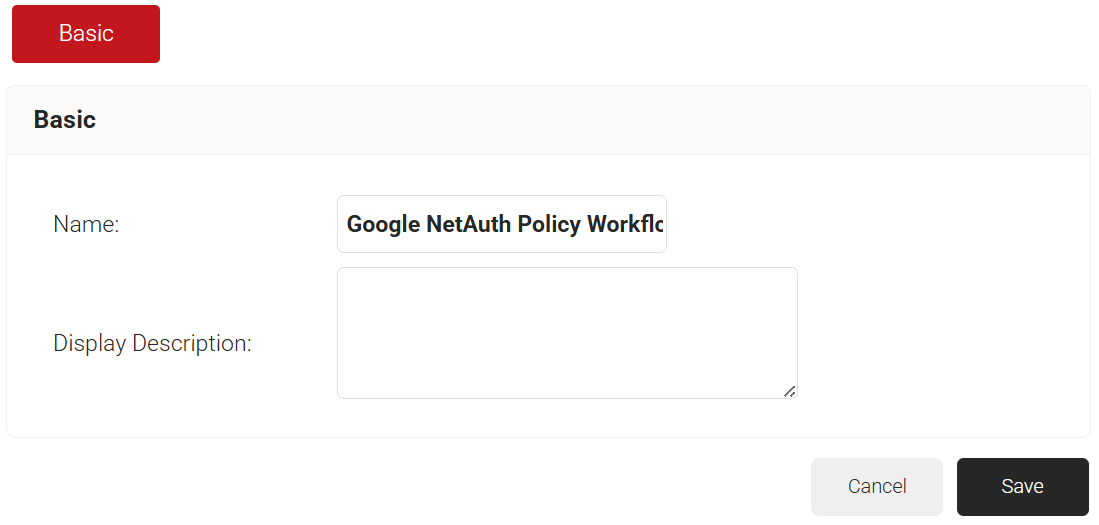
- In the Basic section, enter the name of the policy workflow in the Name field.
- In the Display Description field, enter a suitable description for the policy workflow.

- Click Save.
- The page refreshes, and the Conditions tab is displayed.
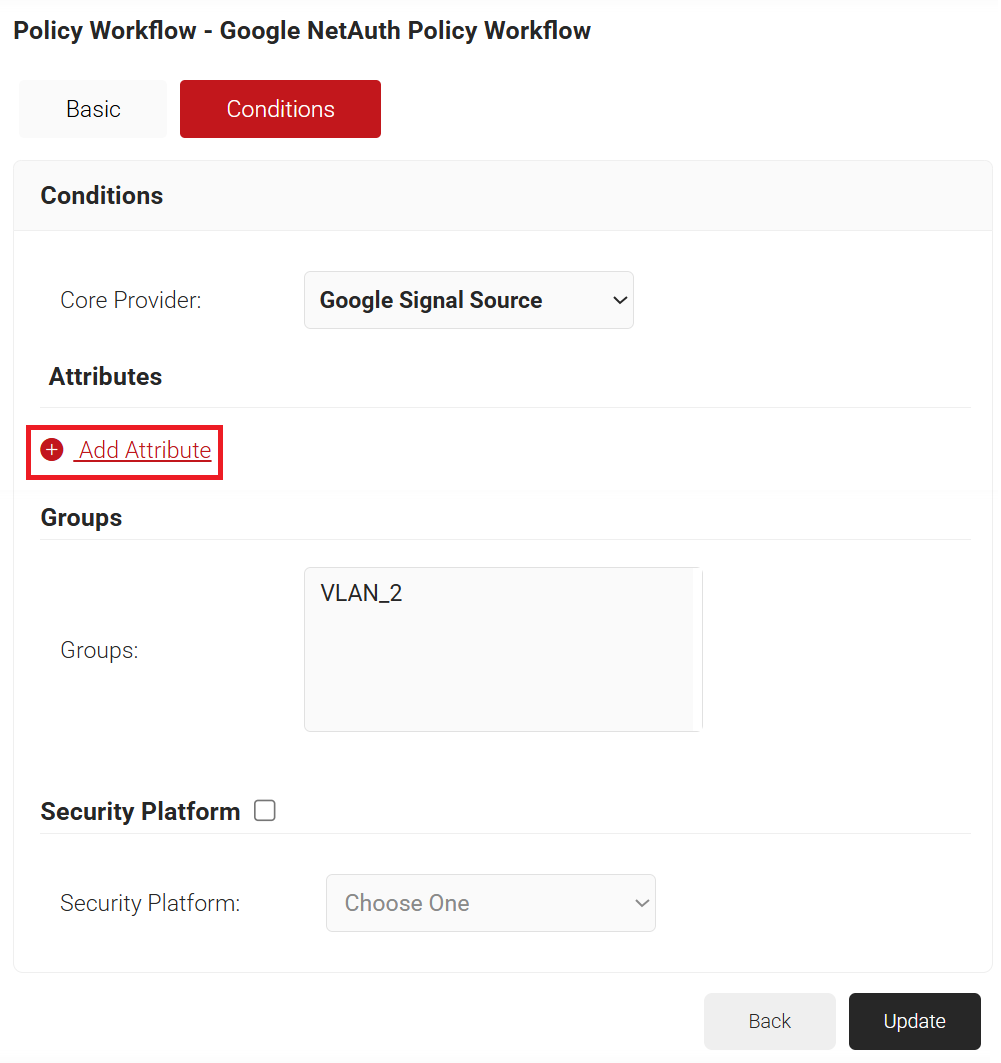
- Click the Conditions tab.
- From the Core Provider drop-down list, select the signal source you created in the Creating a Google Workspace Signal Source section.
- In the Attributes section, click + Add Attribute.

- From the Attribute drop-down list, select the required attribute for lookup.
- In Groups, select the required group to assign a network policy.

- Click Update.
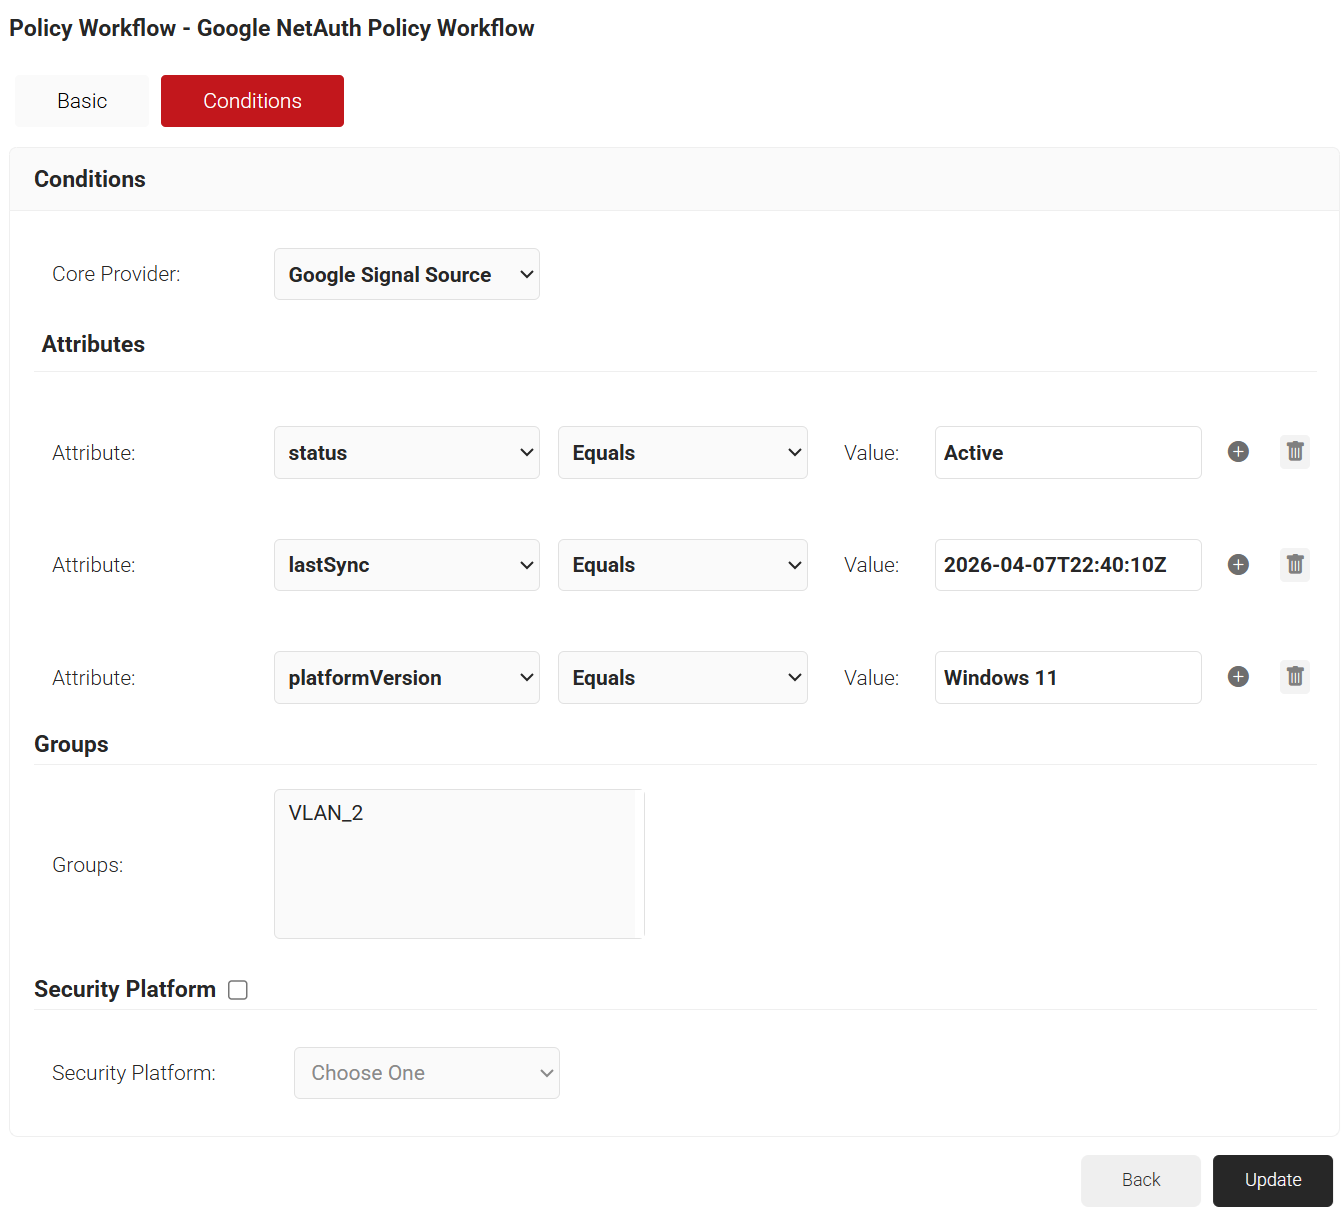
Similar to the check during certificate issuance, you can use lookup before RADIUS Authentication as a dynamic check. To trigger the lookup during RADIUS Authentication, map the policy engine workflow (created in the Creating a Policy Workflow section) in the Network Policy created below:
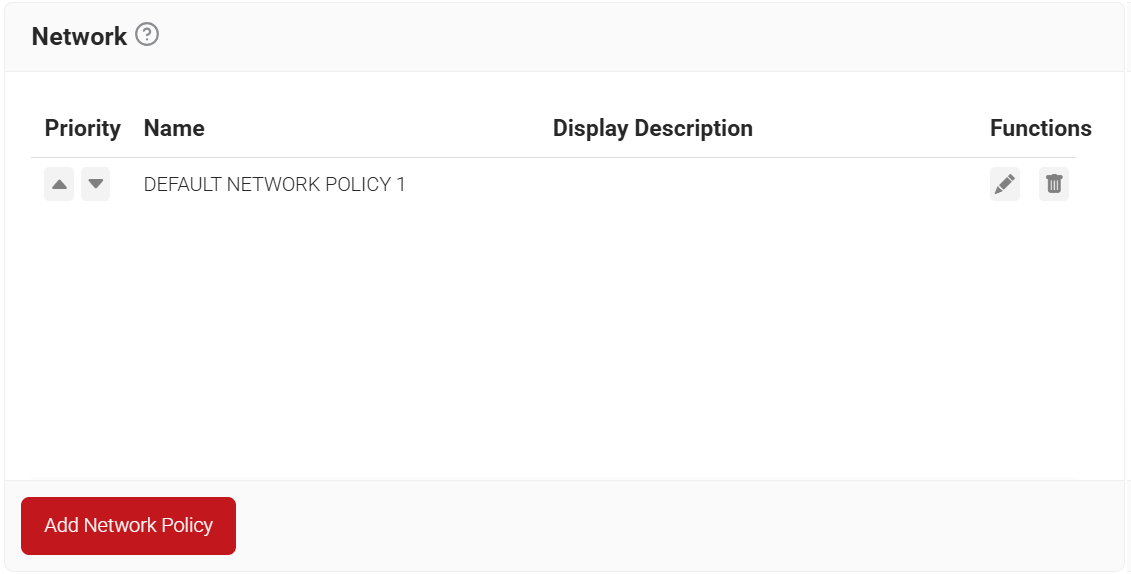
- Navigate to Policy Management > Network.
- Click Add Network Policy.

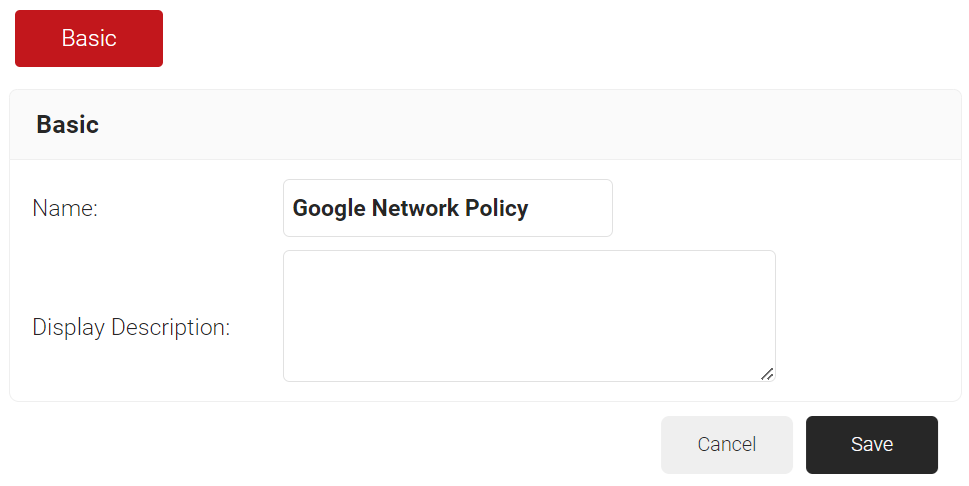
- Under the Basic section, in the Name field, enter the name of the network policy.
- In the Display Description field, enter a suitable description for the network policy.

- Click Save.
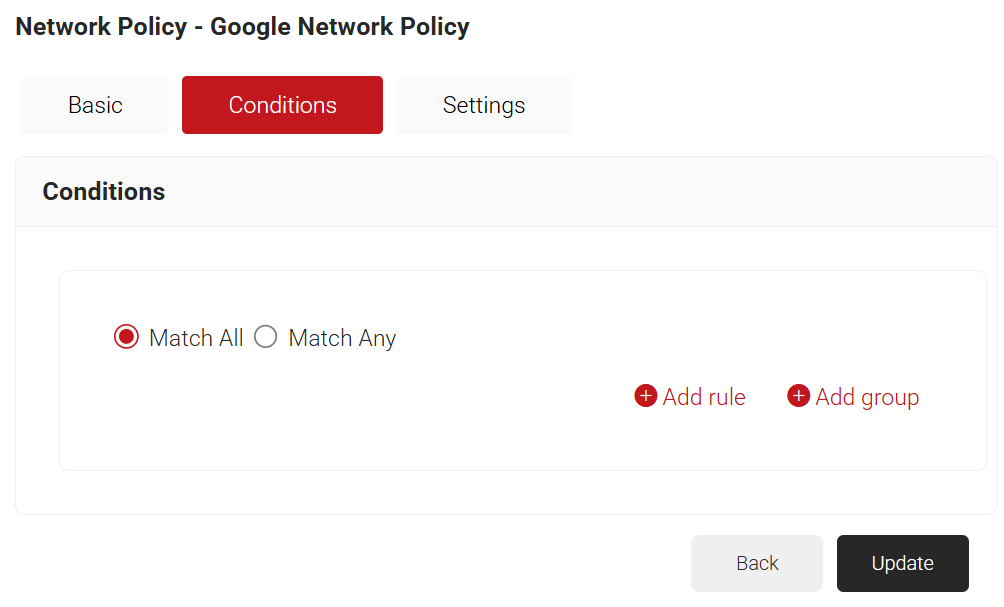
- Click the Conditions tab.
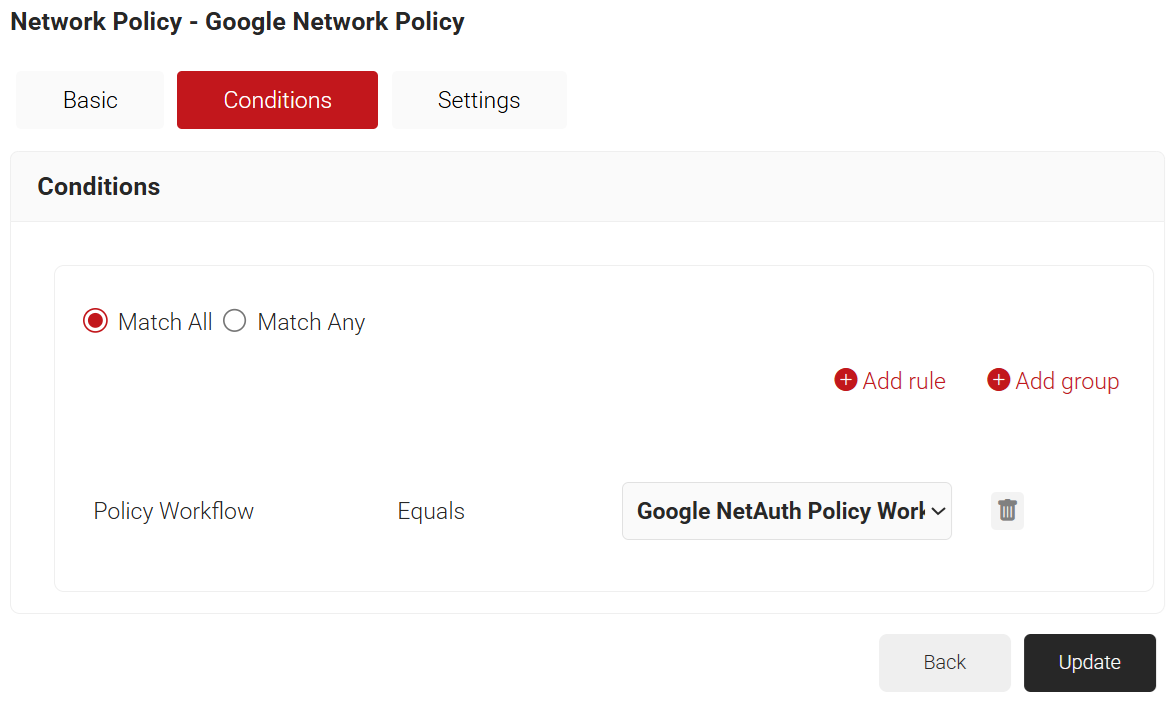
- Select Match All or Match Any based on your requirements to set authentication criteria.
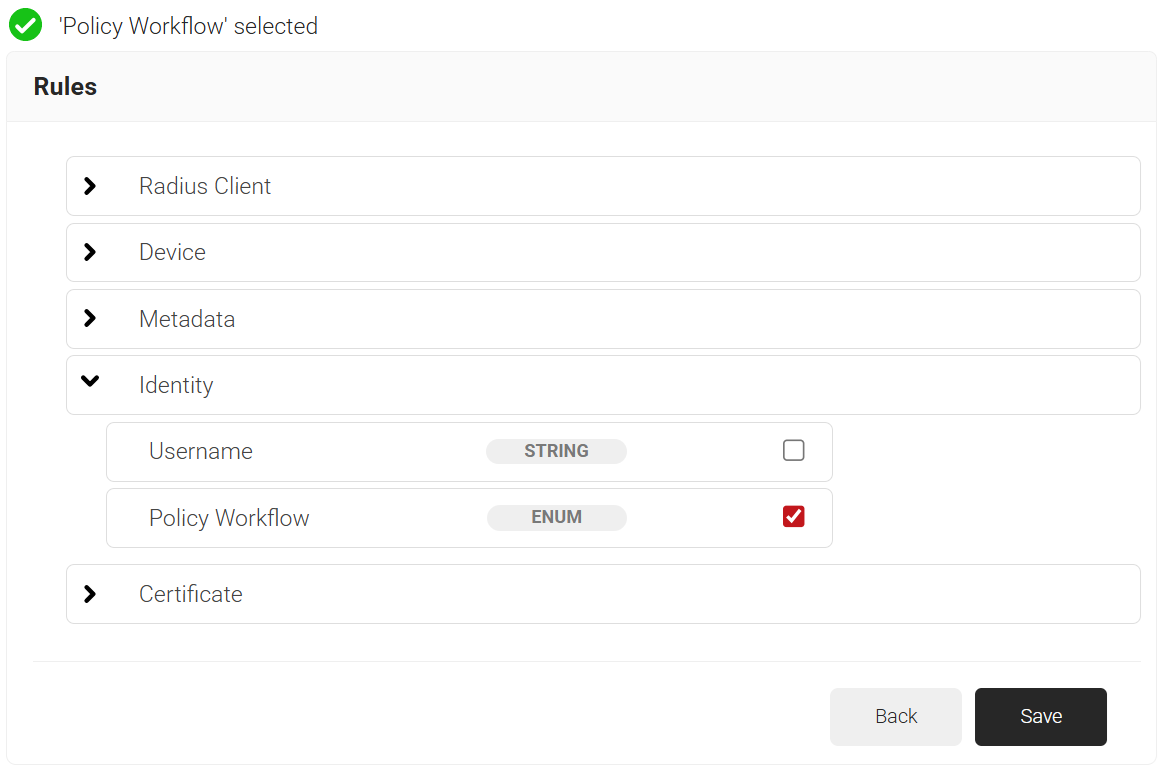
- Click Add rule and select the role you want to assign to this network policy. It is essential to select the appropriate role, as the network policy is triggered by the policy workflow. SecureW2 offers various rules that you can select based on your business requirements.


NOTE: You can assign a network policy to multiple user roles.
- Click the Settings tab.
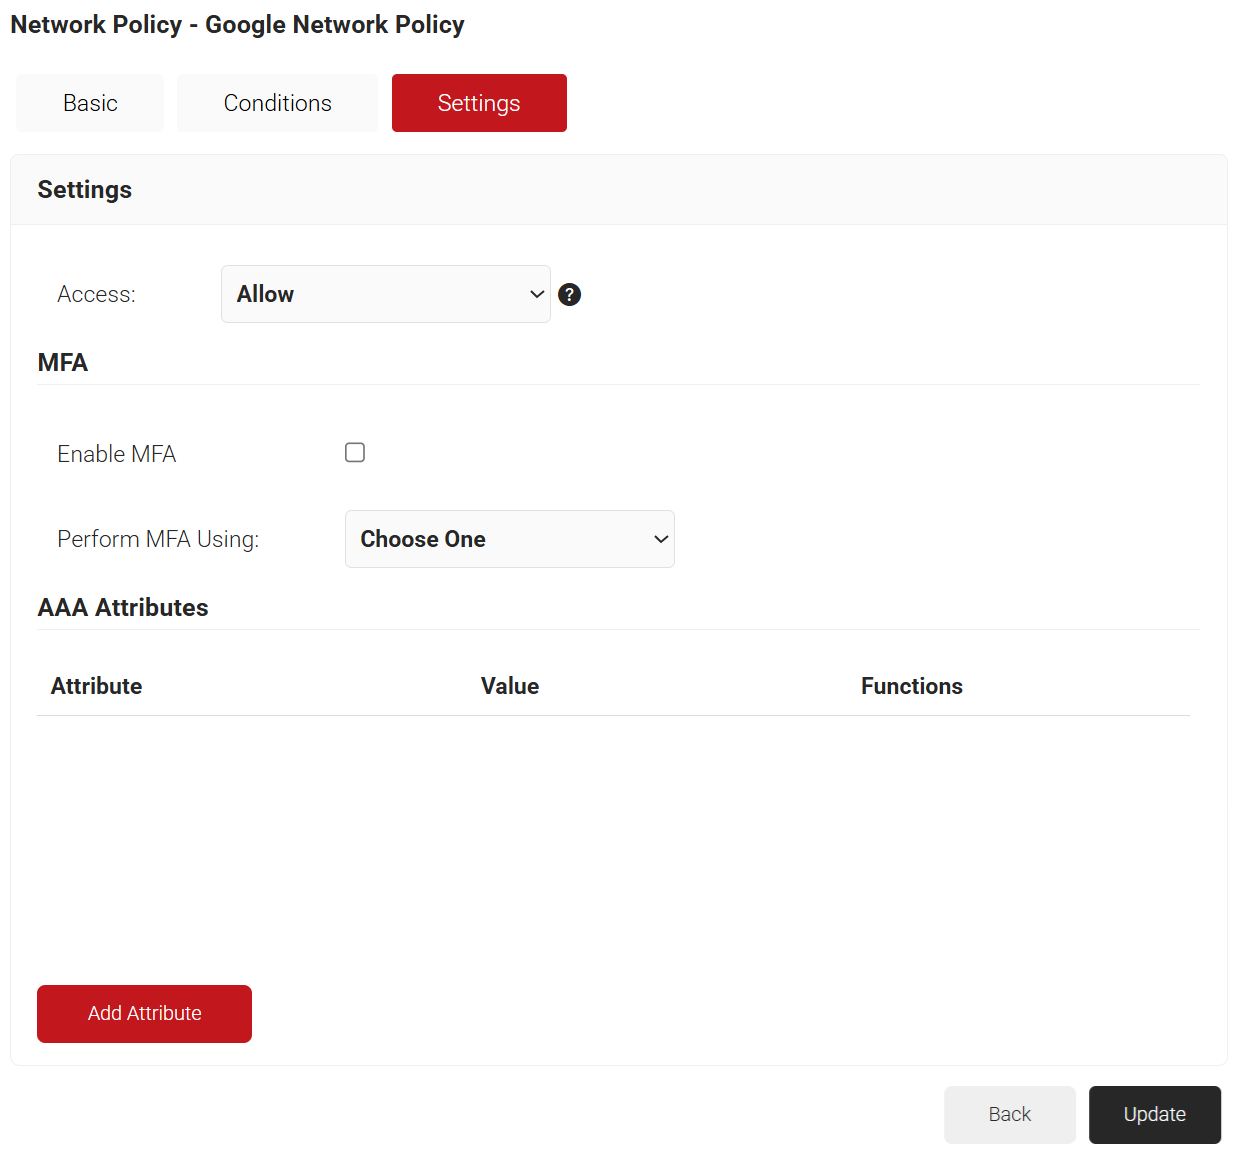
- From the Access drop-down list, select any one of the options to allow or deny authentication requests. The default value is “Allow”.
- To configure MFA, select the checkbox to enable MFA.
- From the Perform MFA Using drop-down list, select a Core Provider for MFA.

- Click Add Attribute.
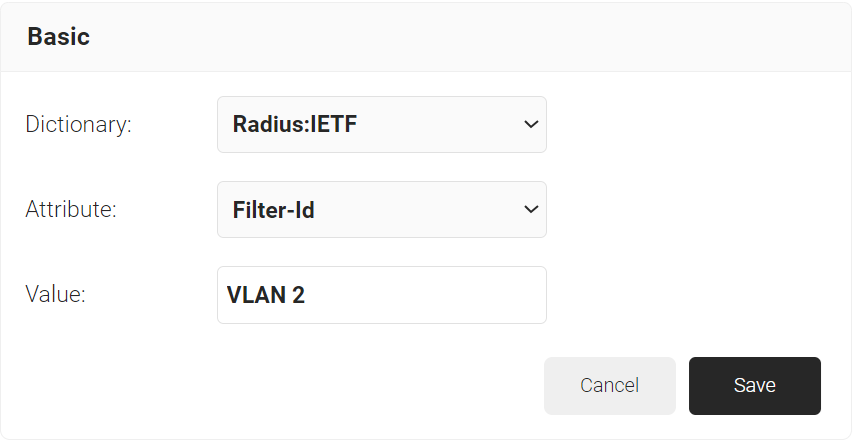
- From the Dictionary drop-down list, select an option: Radius: IETF or Custom.
- Radius: IETF – This is what we will use for the following attributes, as we are using standard RADIUS attributes for VLAN assignment.
- Custom: Used for any VSAs (Vendor-Specific Attributes).
- From the Attribute drop-down list, select an option.
- In the Value field, enter the appropriate value for the attribute.

- Click Save.

- From the Dictionary drop-down list, select an option: Radius: IETF or Custom.
- Click Update.
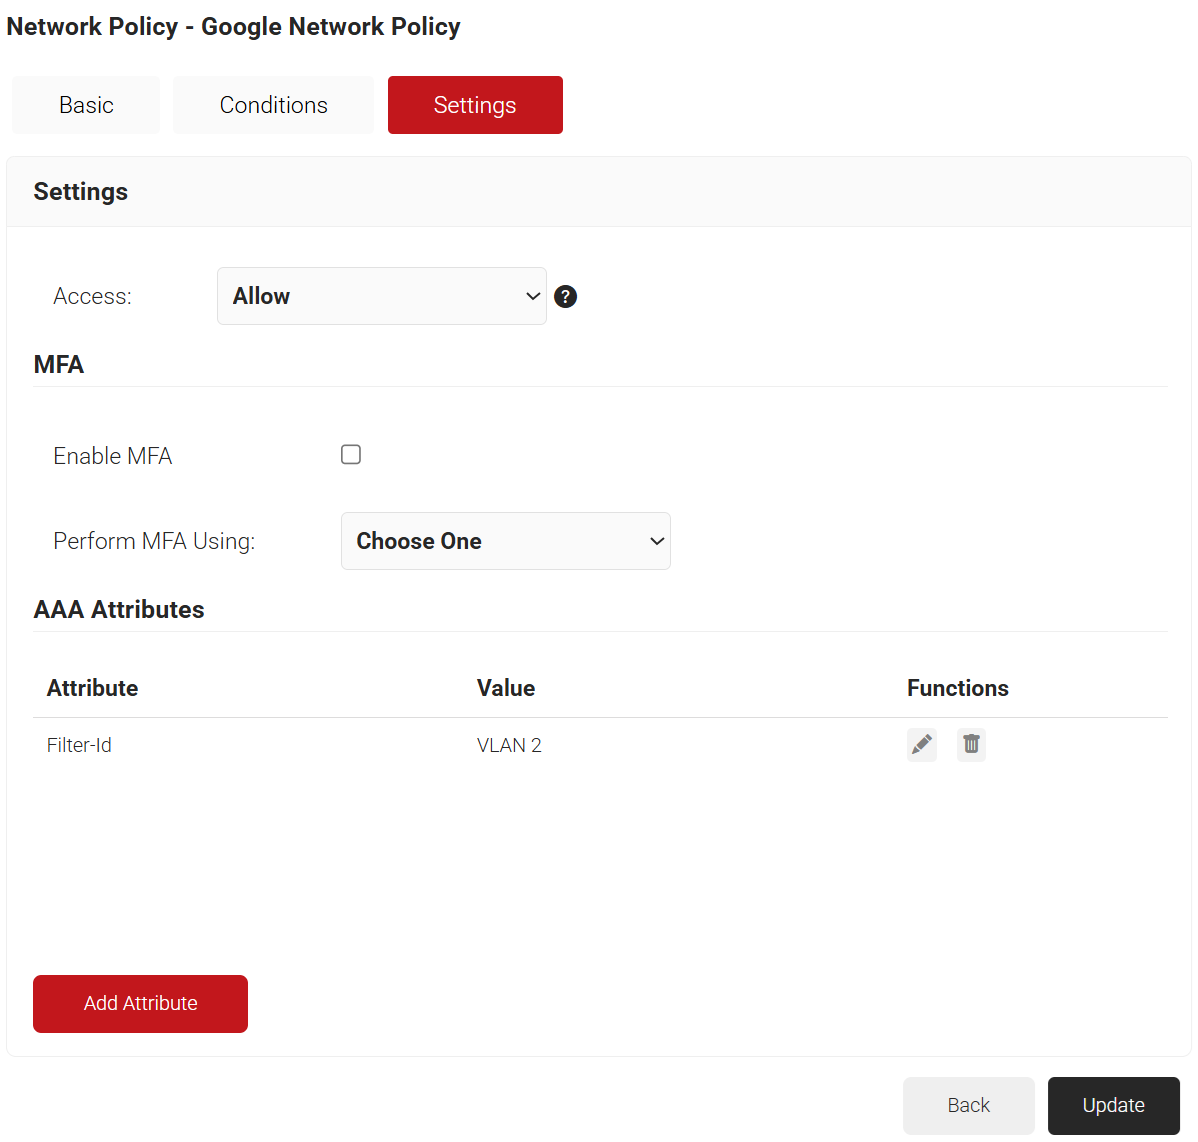
After successful network authentication, the controller applies the configured attributes to the device, and the device is assigned to the appropriate VLANs based on the configuration.