Configuring Certificate and SAML Based Authentication with Meraki AnyConnect VPN
Introduction
SecureW2’s JoinNow Connector PKI can be used to issue certificates to devices via SAML to enable secure, passwordless authentication with Meraki’s AnyConnect VPN.
This guide will show you how to configure AnyConnect VPN to use a certificate generated by SecureW2’s PKI services, in addition to authenticating against your SAML IDP provider to verify users, for secure VPN authentication.
Prerequisites
To set-up Anyconnect with credentials, the following conditions must be met:
- An active Meraki Cloud account subscription.
- The SAML Authentication feature has been enabled by Meraki Support.
- Active JoinNow Portal subscription.
Creating a SAML Application
SecureW2 acts as an authority to verify user identities and issue X.509 certificates. It integrates with the SAML provider’s user database and uses a Public Key Infrastructure (PKI) to authenticate user data that is contained in the SAML application. This ensures that users connect to the authentic SAML provider, and vice versa.
- Log in to Azure Portal and select Azure Active Directory.

- Select Enterprise Applications.
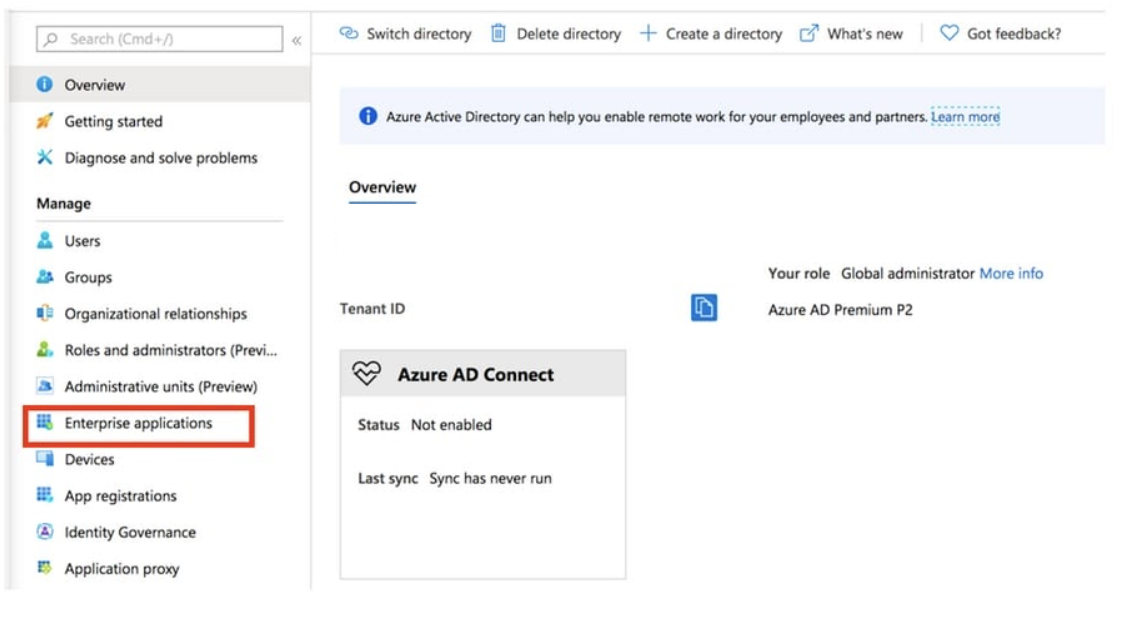
- Click New Application.

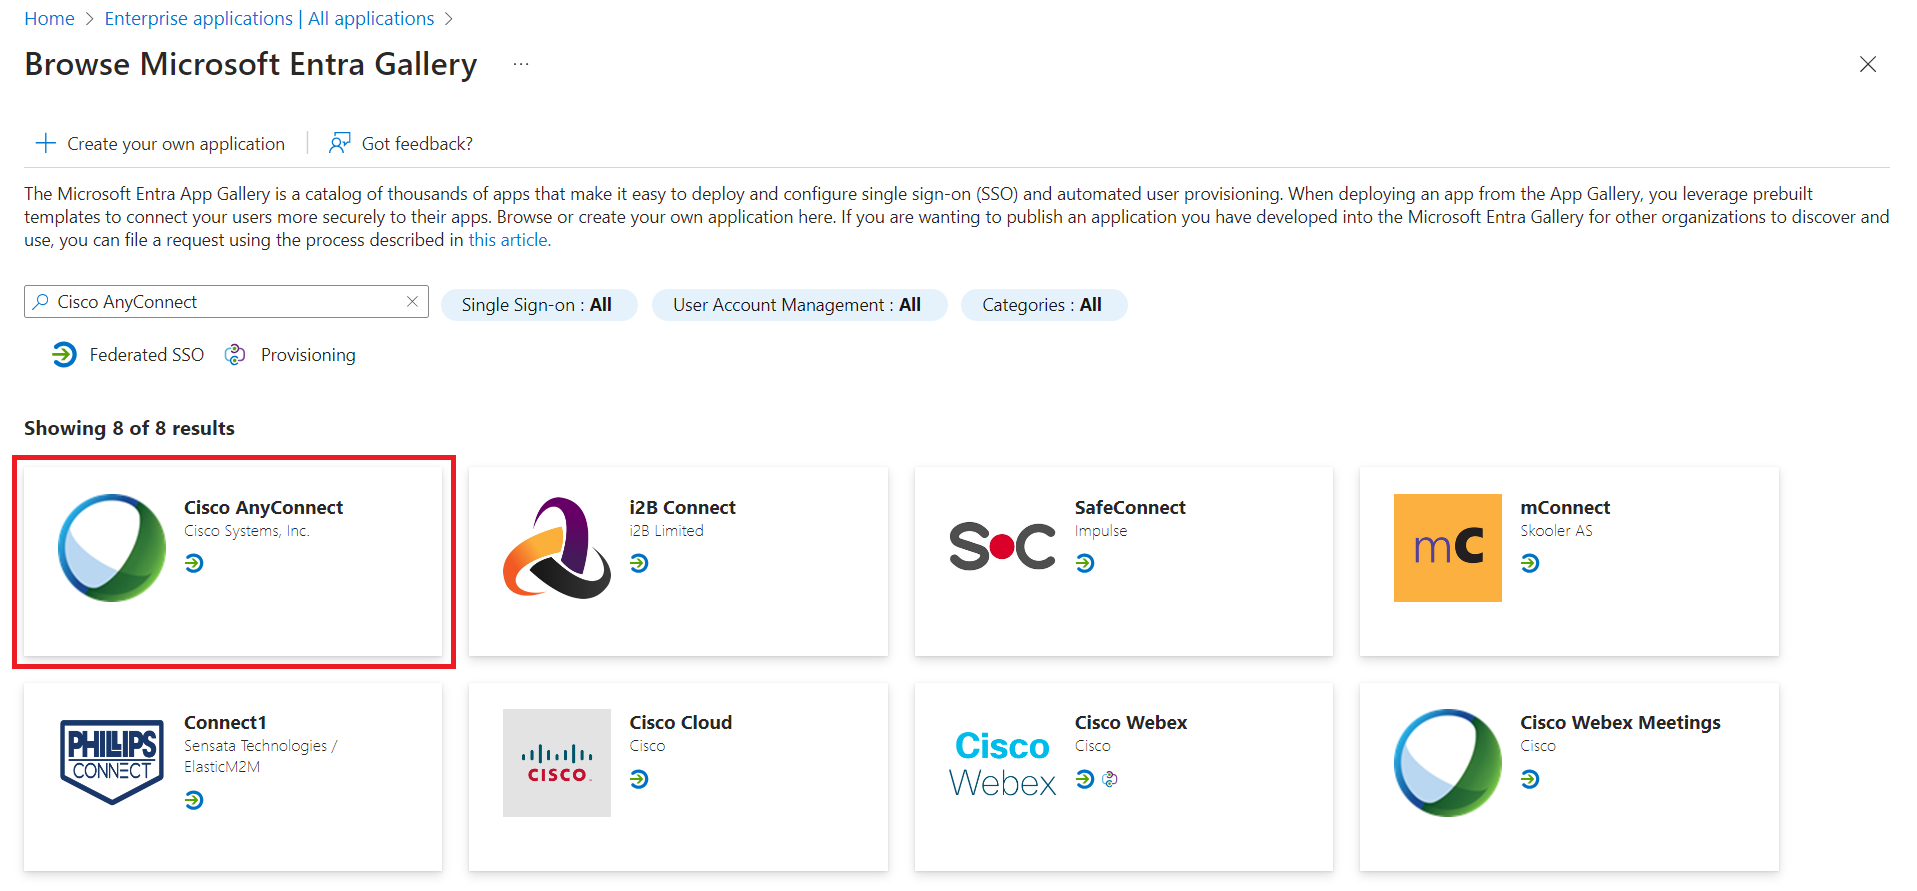
- Type AnyConnect in the search box, select Cisco AnyConnect from the results panel. Click the app.
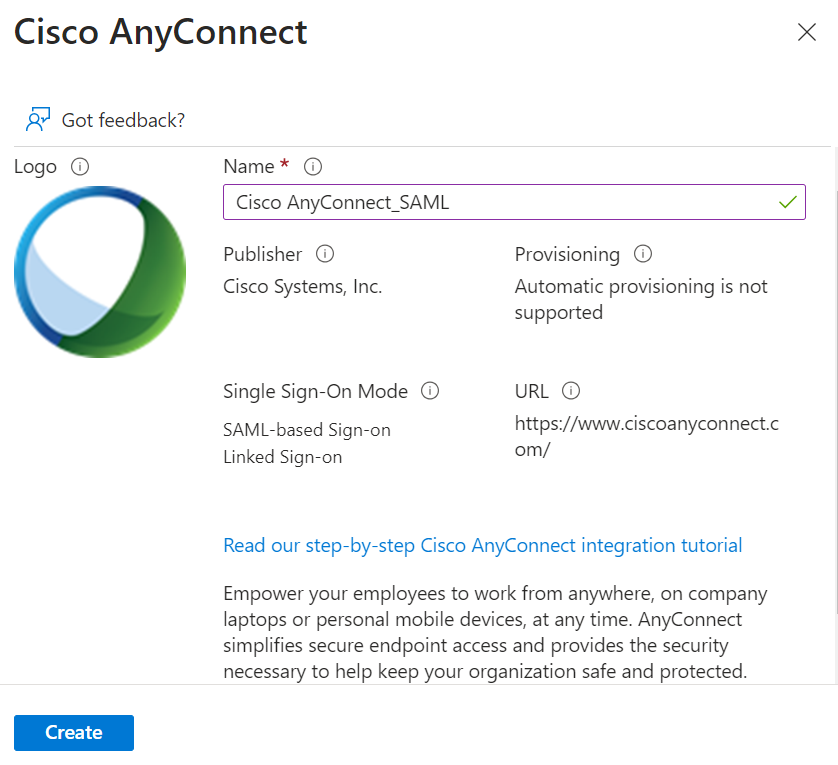
- Give a name for the App and click Create.
- Select the Set up single sign on.

- Click SAML.

- In the Basic SAML Configuration section, fill in the Entity ID and Reply URL as follows:
- If your AnyConnect Server URL is “vtk-qpjgjhmpdh.dynamic-m.com” (this URL is different for every network), the Entity ID and Reply URL will be configured as follows:
- Identifier (Entity ID) – https://vtk-qpjgjhmpdh.dynamic-m.com/saml/sp/metadata/SAML
- Reply URL (Assertion Consumer Service URL) – https://vtk-qpjgjhmpdh.dynamic-m.com/saml/sp/acs
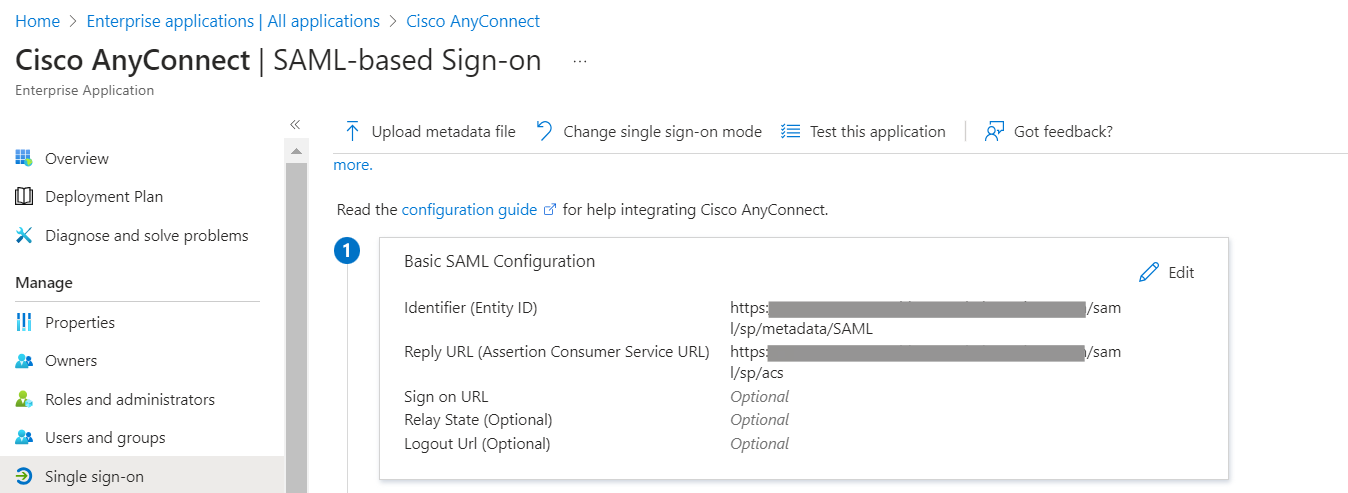
- If your AnyConnect Server URL is “vtk-qpjgjhmpdh.dynamic-m.com” (this URL is different for every network), the Entity ID and Reply URL will be configured as follows:
- In the SAML Certificates section, download the Federation Metadata XML file and save it on your computer. This file should be uploaded in the Meraki portal.

- On the left pane, click Users and groups.
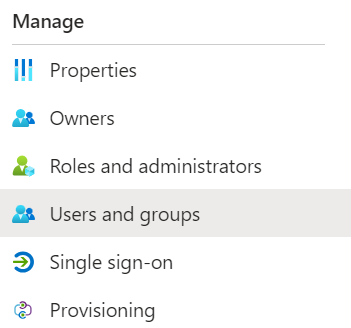
- Click Add user/group.

- Click None Selected.

- In the Search box, enter the name of the user and select the user. The users will be added to the application as below:

Certificate Enrollment for Devices
SecureW2’s PKI services provide certificate enrollment facilities by which devices can enroll for user and device certificates. Users can enroll for certificates via the following protocols:
- SAML based certificate enrollment: Click here to learn how to configure SecureW2 with Azure for SAML based enrollment
- MDM SCEP gateway for certificate enrollment: Click here to learn how to configure SecureW2 with Intune for SCEP based enrollment
Configuring Meraki for SAML based authentication
Log-in to the Meraki dashboard and follow the below steps to configure SAML based authentication with Meraki VPN.
- Under the AnyConnect Settings tab, follow the settings as displayed below in the screenshots:
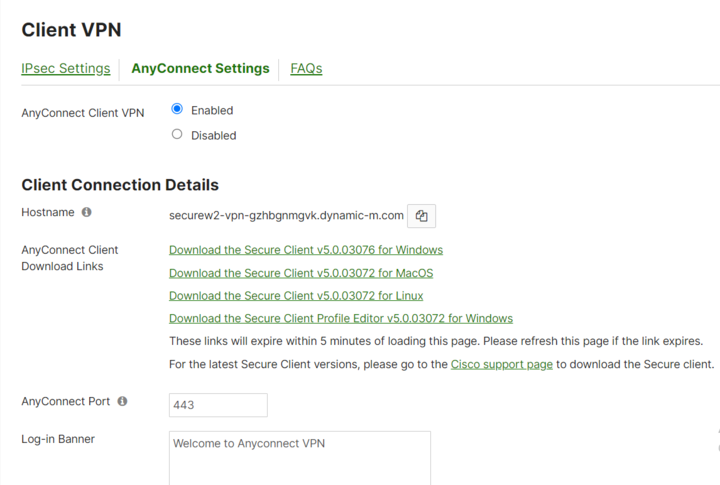
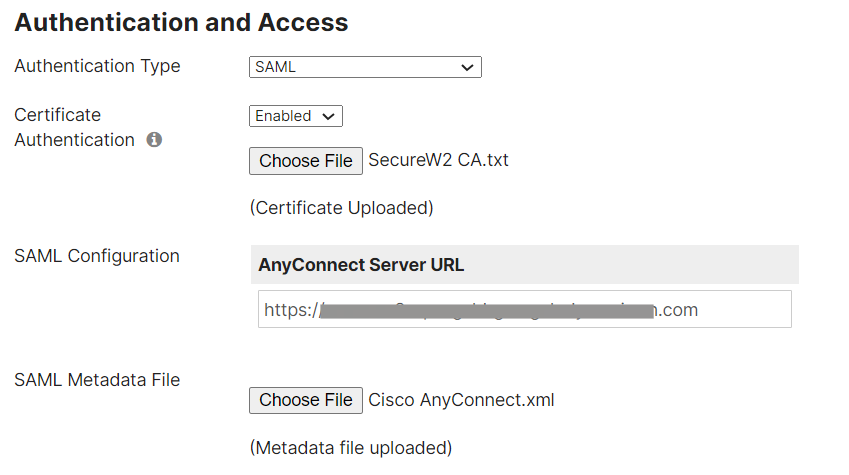
- Under the Authentication and Access section, select Authentication Type as SAML.
NOTE: SAML Authentication is not enabled by default. If you don’t see it in your Meraki Dashboard, you will need to reach out to Meraki Support and request it to be added.
- In the Certificate Authentication section, select Enabled.
- Navigate to PKI > Certificate Authorities in the JoinNow Management Portal. Download your Root CA and Intermediate CA certificates by clicking the Download button under Functions.
- Open the certificates in a textpad and copy the content, first from the intermediate certificate and then from the root certificate.
- Paste both certificate keys into a text file. Save the .txt file for upload to Meraki Anyconnect VPN.
- Click Choose File to select the certificate (text file) you created in the earlier step.
- Configure your AnyConnect URL – for example
https://vtk-qpjgjhmpdh.dynamic-m.com this URL is different for every network)
(add “:port” to the end of the URL if using a port other than the default port 443)
Please ensure your AnyConnect URL starts with “https://”
- In the SAML Metadata File section, click Choose File. Upload the metadata file saved from earlier.
- In the AnyConnect VPN subnet field, enter the subnet value for your VPN.
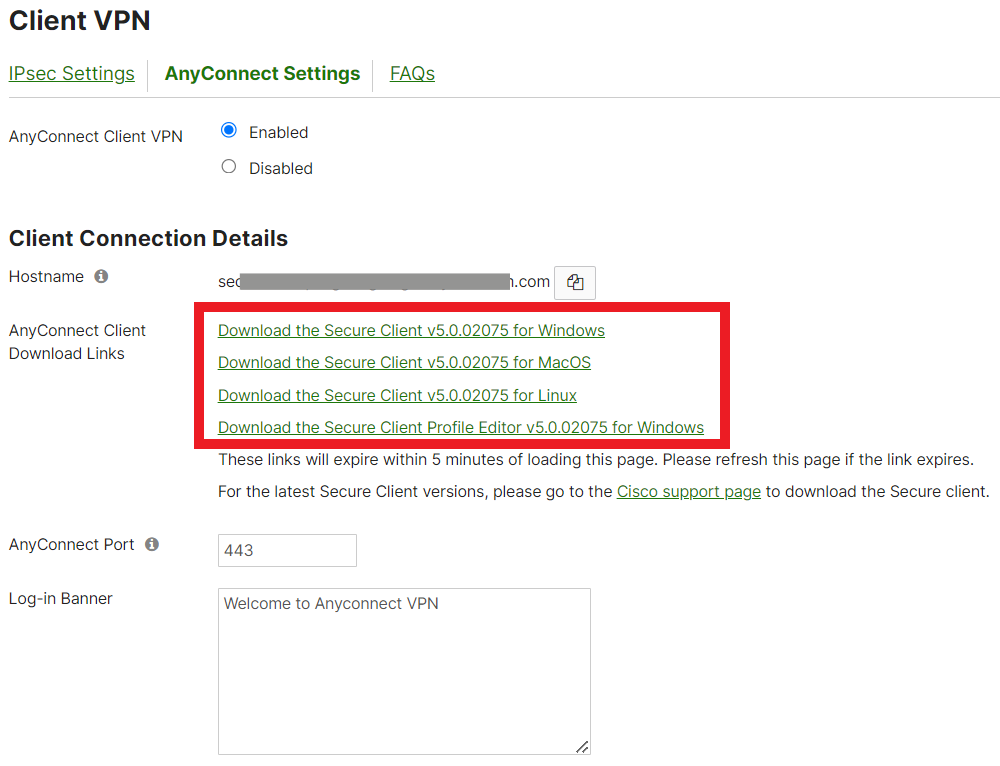
- Click Save.
- Navigate to the Downloads folder of your device and select the AnyConnect Secure Mobility Client zip package. Run the Setup as administrator.
- After the setup is complete, please open the AnyConnect Secure Mobility Client application.
- Under Client Connection Details, copy the URL adjacent to Hostname. Open the Cisco Secure Client and paste the URL in the AnyConnect VPN section. Click Connect.
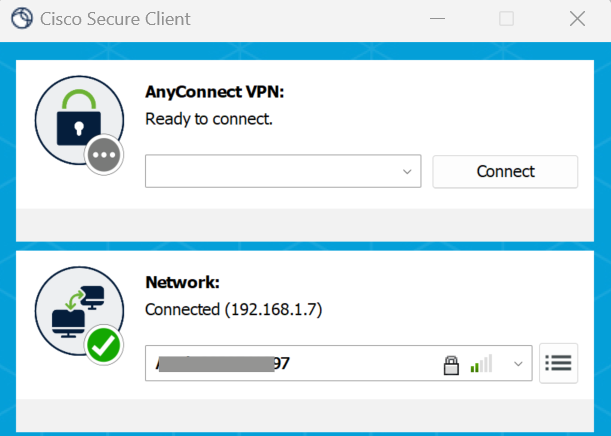
- A dialog box for entering Username and Password appears. Please enter your Meraki credentials and click OK.
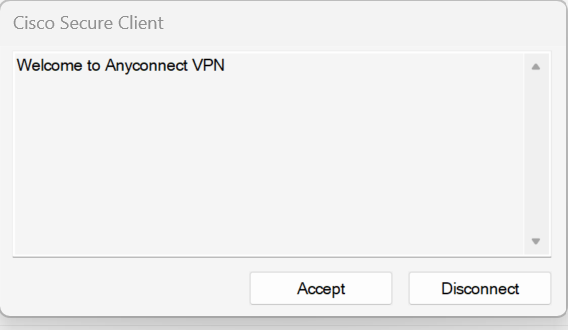
- After successful connection, the Cisco welcome dialog box opens. Click Accept.
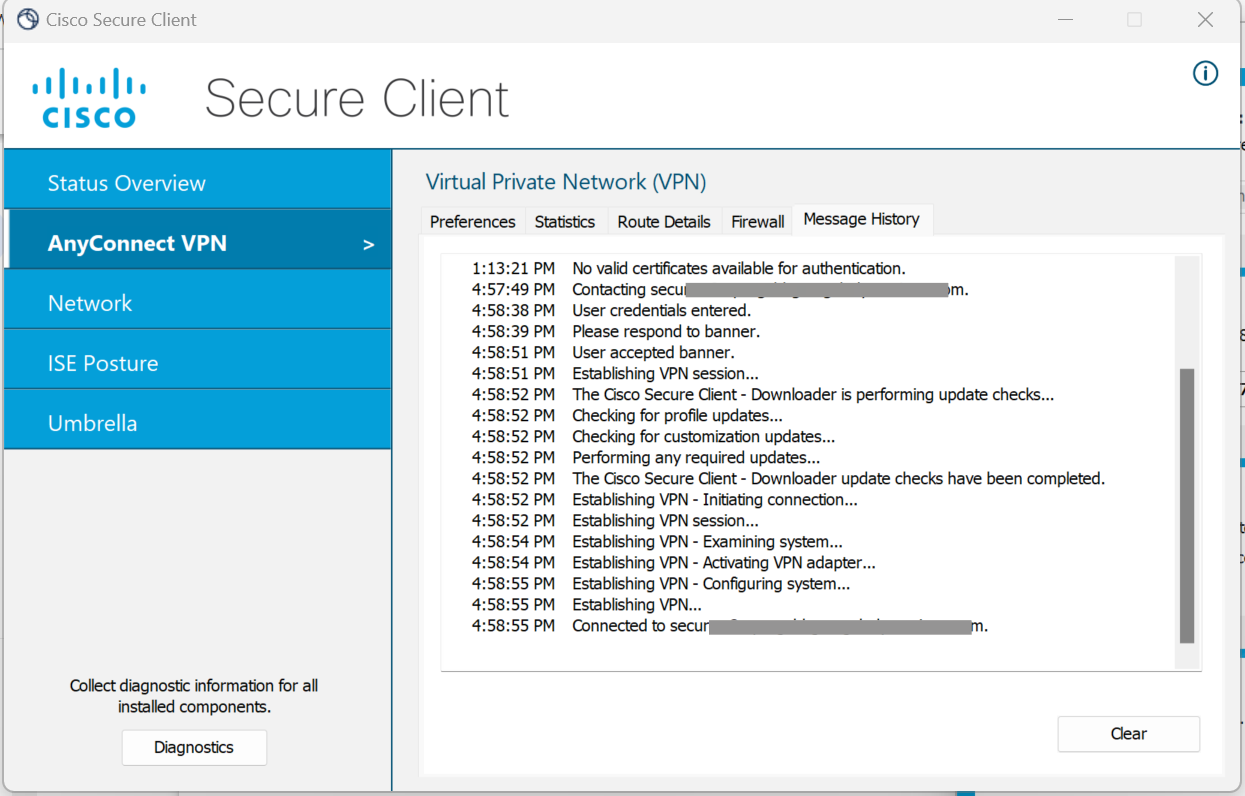
- By clicking on AnyConnect VPN, a widget opens. Click Message History. In the event of successful connection, a success message appears.
Schedule a Demo
Sign up for a quick demonstration and see how SecureW2 can make your organization simpler, faster, and more secure.
Schedule NowPricing Information
Our solutions scale to fit you. We have affordable options for organizations of any size. Click here to see our pricing.
Check Pricing