Follow the steps below to create a Core Provider in the JoinNow Management Portal and configure it for MAC Authentication:
- Log in to the JoinNow Management Portal.
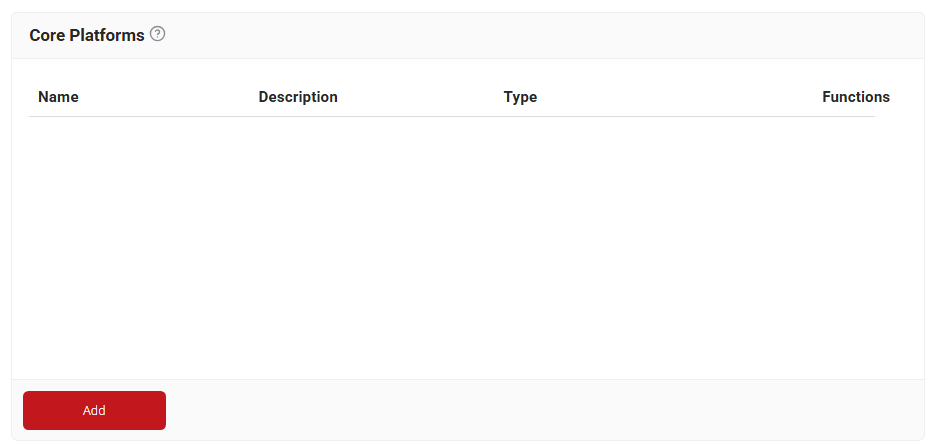
- Navigate to Integration Hub > Core Platforms.
- Click Add.

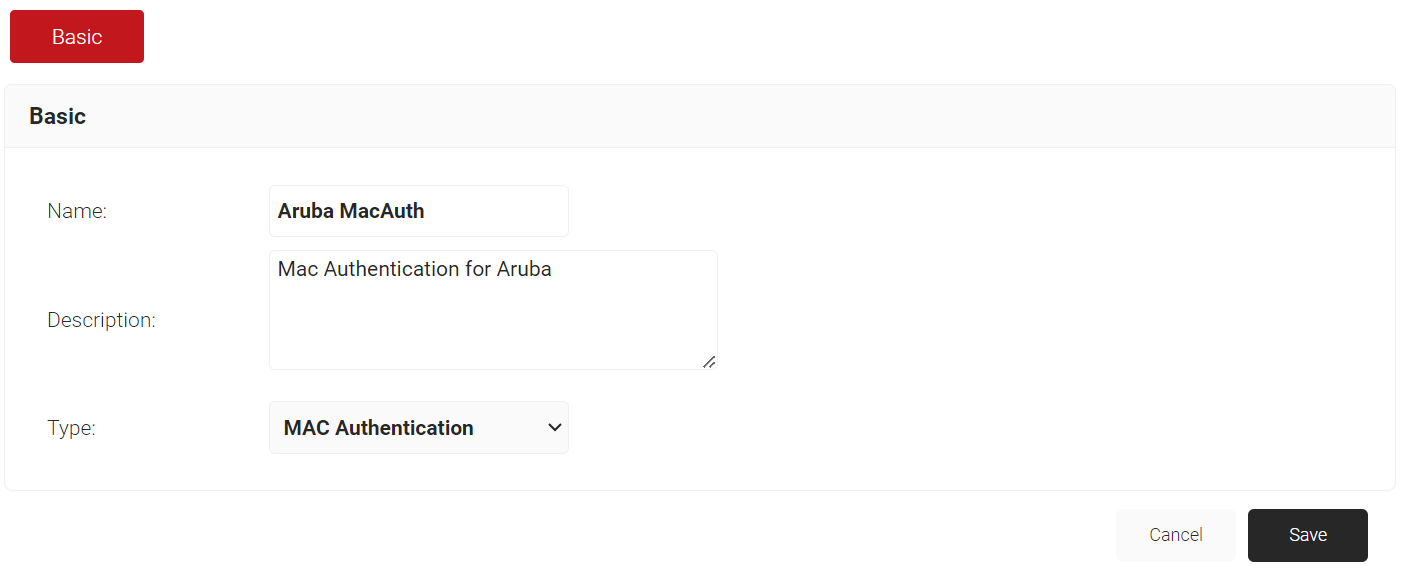
- In the Name field, enter a name for your Core Provider.
- In the Description field, enter a suitable description for your Core Provider.
- From the Type drop-down, select MAC Authentication.

- Click Save.
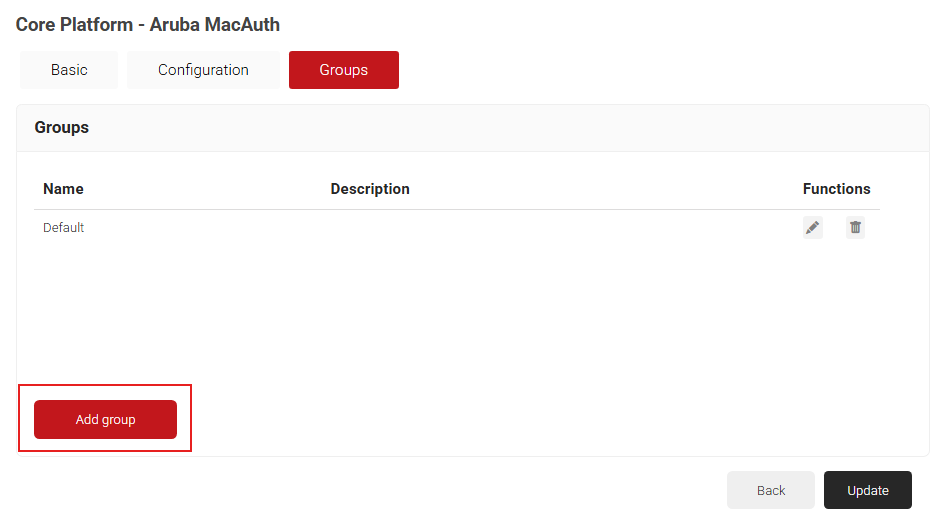
- The page refreshes and displays the Configuration and Groups tabs.
- Select the Groups tab.
- Click Add group.

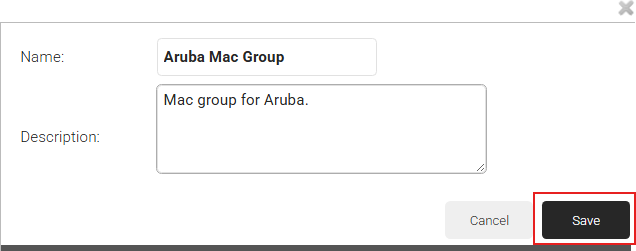
- On the displayed pop-up window, in the Name field, enter a name for your group.
- In the Description field, enter a suitable description for your group.

- Click Save.
- Then click Update.
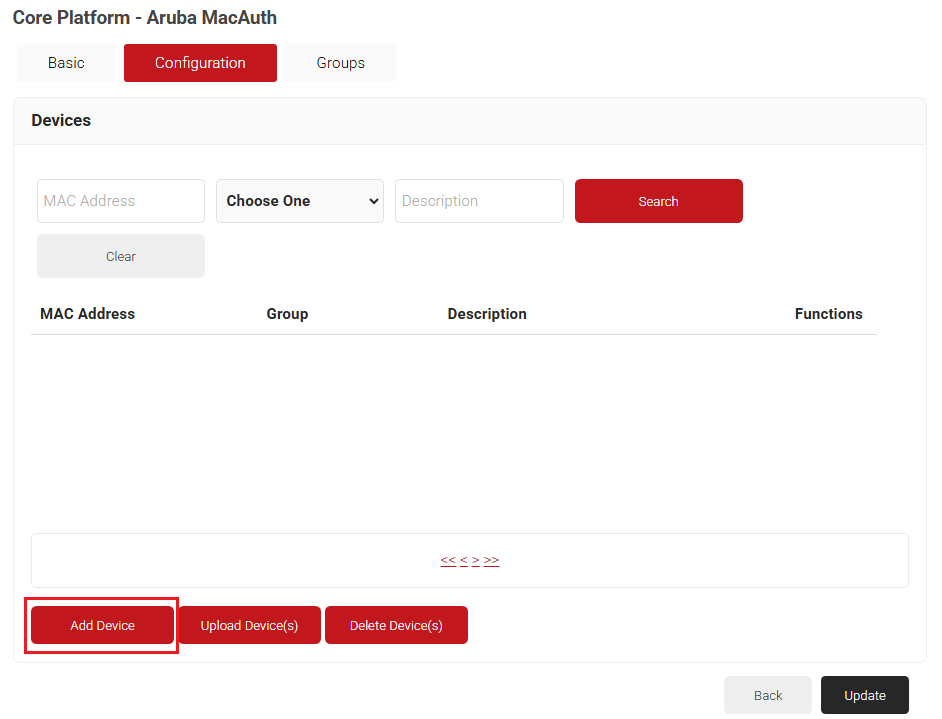
- Select the Configuration tab.
- Click Add Device.

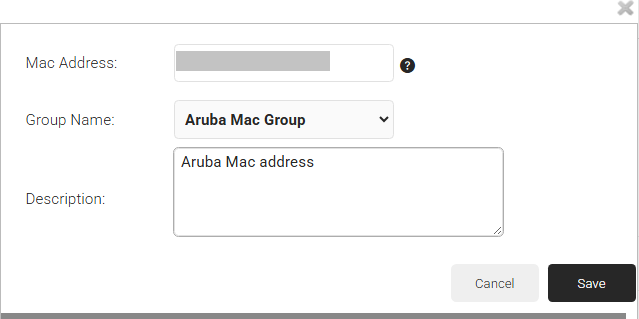
- In the pop-up window, in the MAC Address field, enter the MAC address of the device you want to authenticate.
- From the Group Name drop-down list, select the group name you created earlier.
- In the Description field, enter a suitable description for your device.

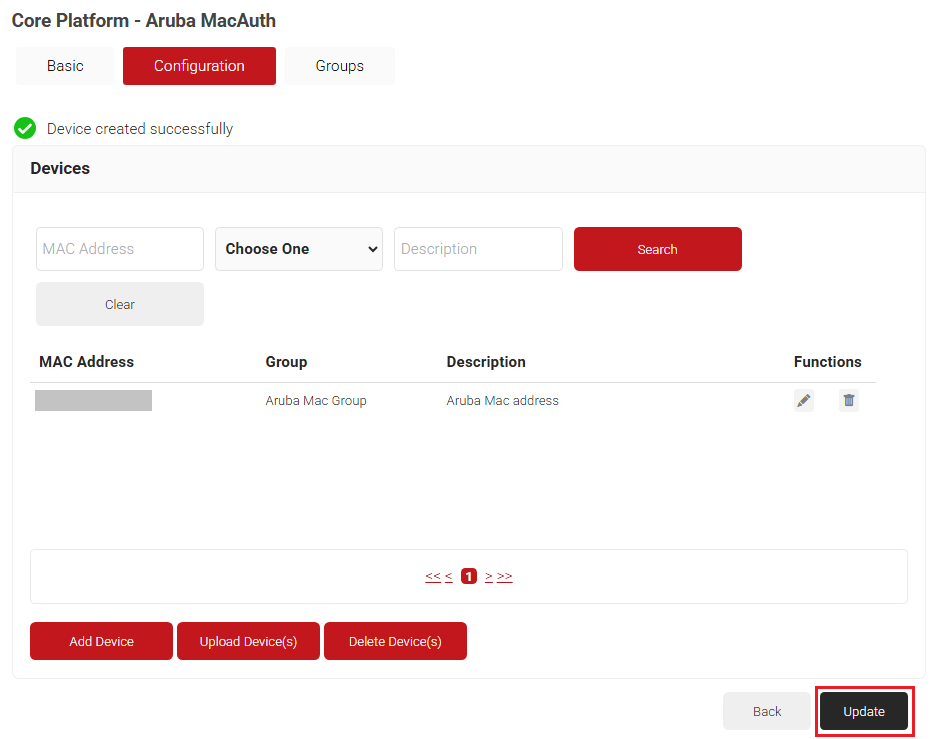
- Click Save.
- Click Update.

- Log in to the JoinNow Management Portal.
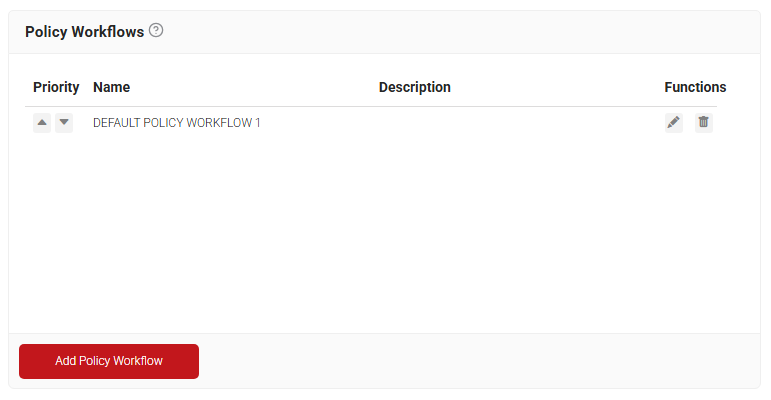
- Navigate to Policy Management > Policy Workflows.
- Click Add Policy Workflow.

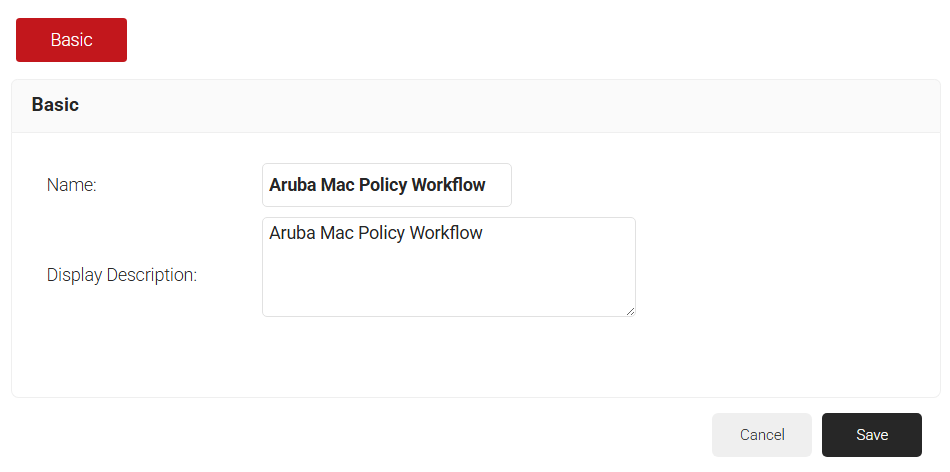
- In the Name field, enter a name for your policy workflow.
- In the Display Description field, enter a suitable description for your policy workflow.

- Click Save.
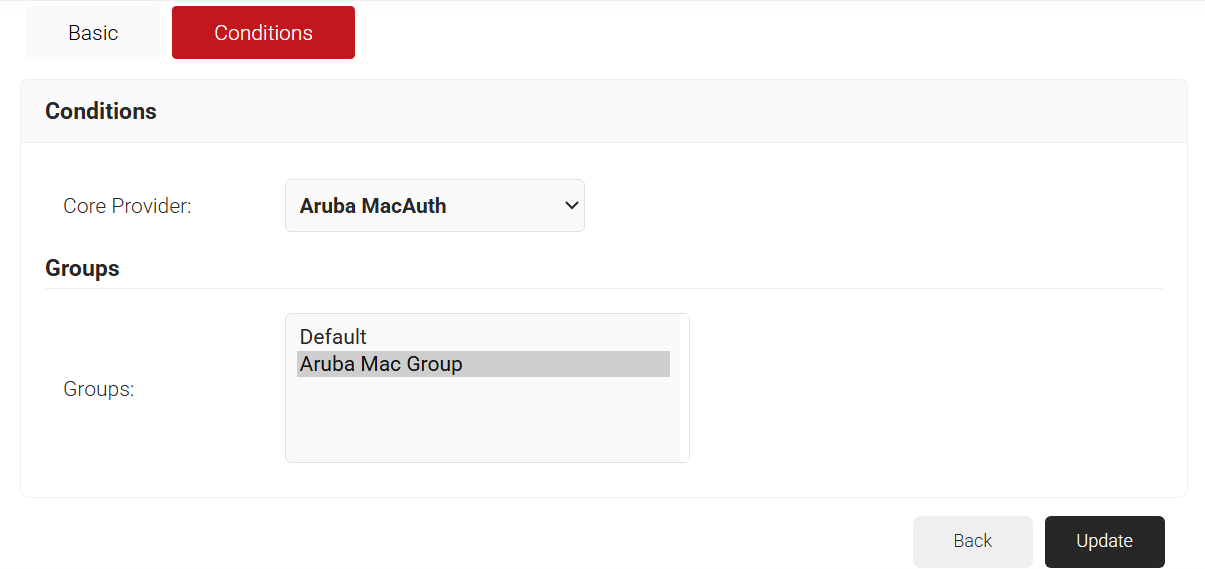
- The page refreshes, and the Conditions tab is displayed.
- Select the Conditions tab.
- In the Conditions section, from the Core Provider drop-down list, select the core provider you created with the MAC Authentication type.
- In the Groups field, select the group you created earlier (refer to the Creating a Core Provider in SecureW2 section).

- Click Update.
- Navigate to Policy Management > Network.
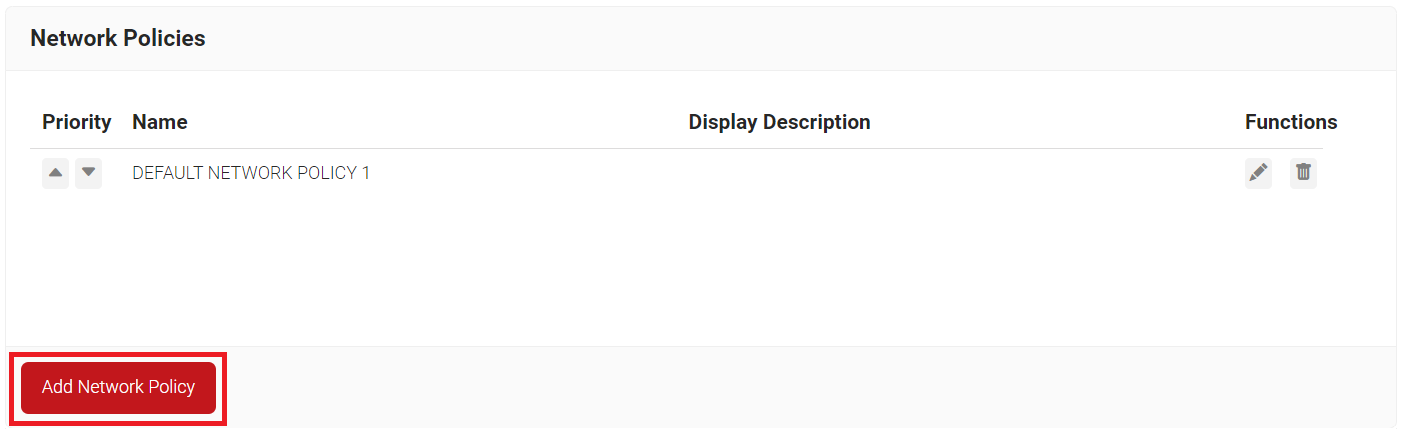
- Click Add Network Policy.

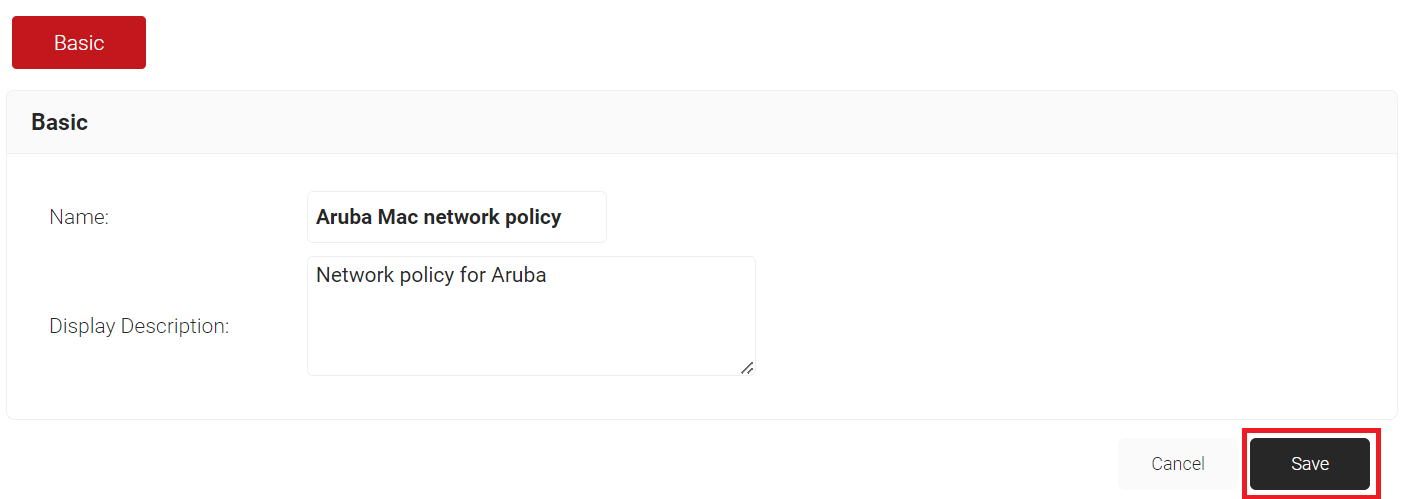
- In the Name field, enter a name for your network policy.
- In the Display Description field, enter a suitable description for your network policy.

- Click Save.
- The page refreshes and displays the Conditions and Settings tabs.
- Select the Conditions tab.
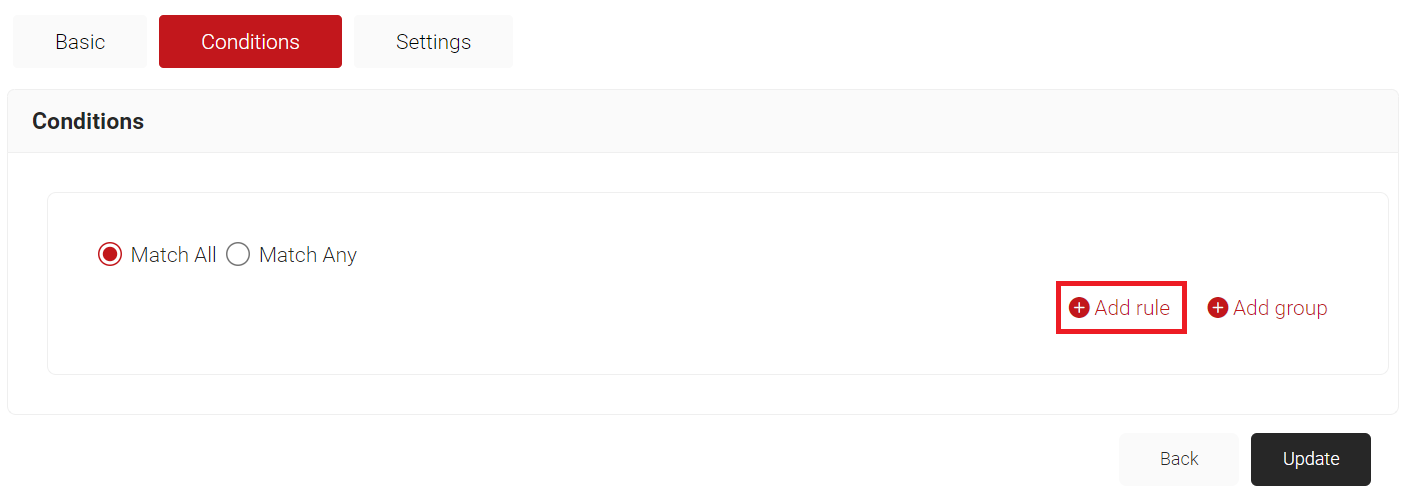
- In the Conditions section, select Match All or Match Any based on your requirement to set authentication criteria. In the case explained here, we are selecting Match All.
- Click Add rule.

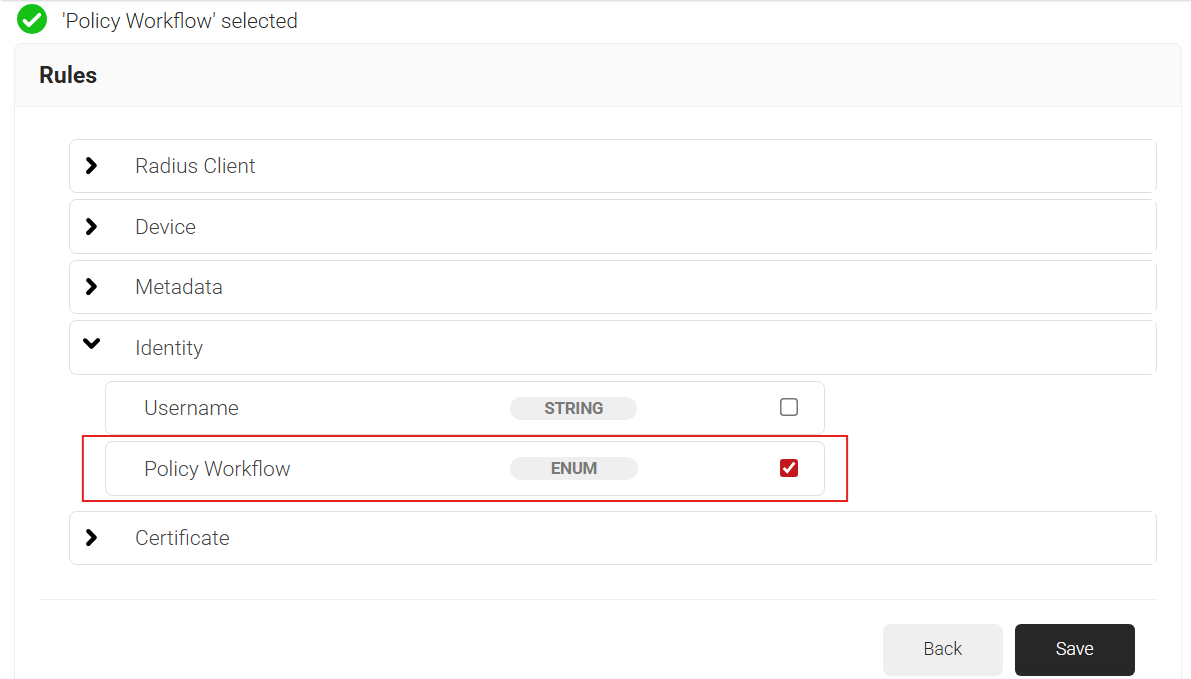
- Expand Identity and select the Policy Workflow option.

- Click Save.
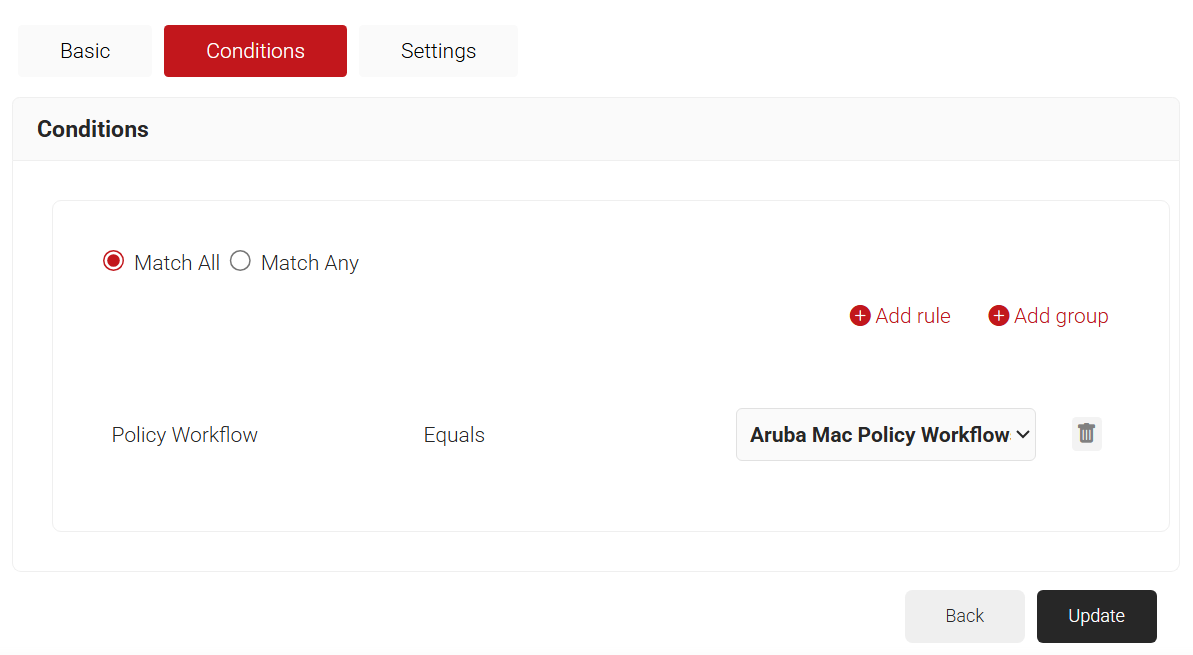
- The Policy Workflow option appears under the Conditions tab.
- From the Policy Workflow Equals drop-down list, select the policy workflow you created earlier (refer to the Creating a Policy Workflow section).

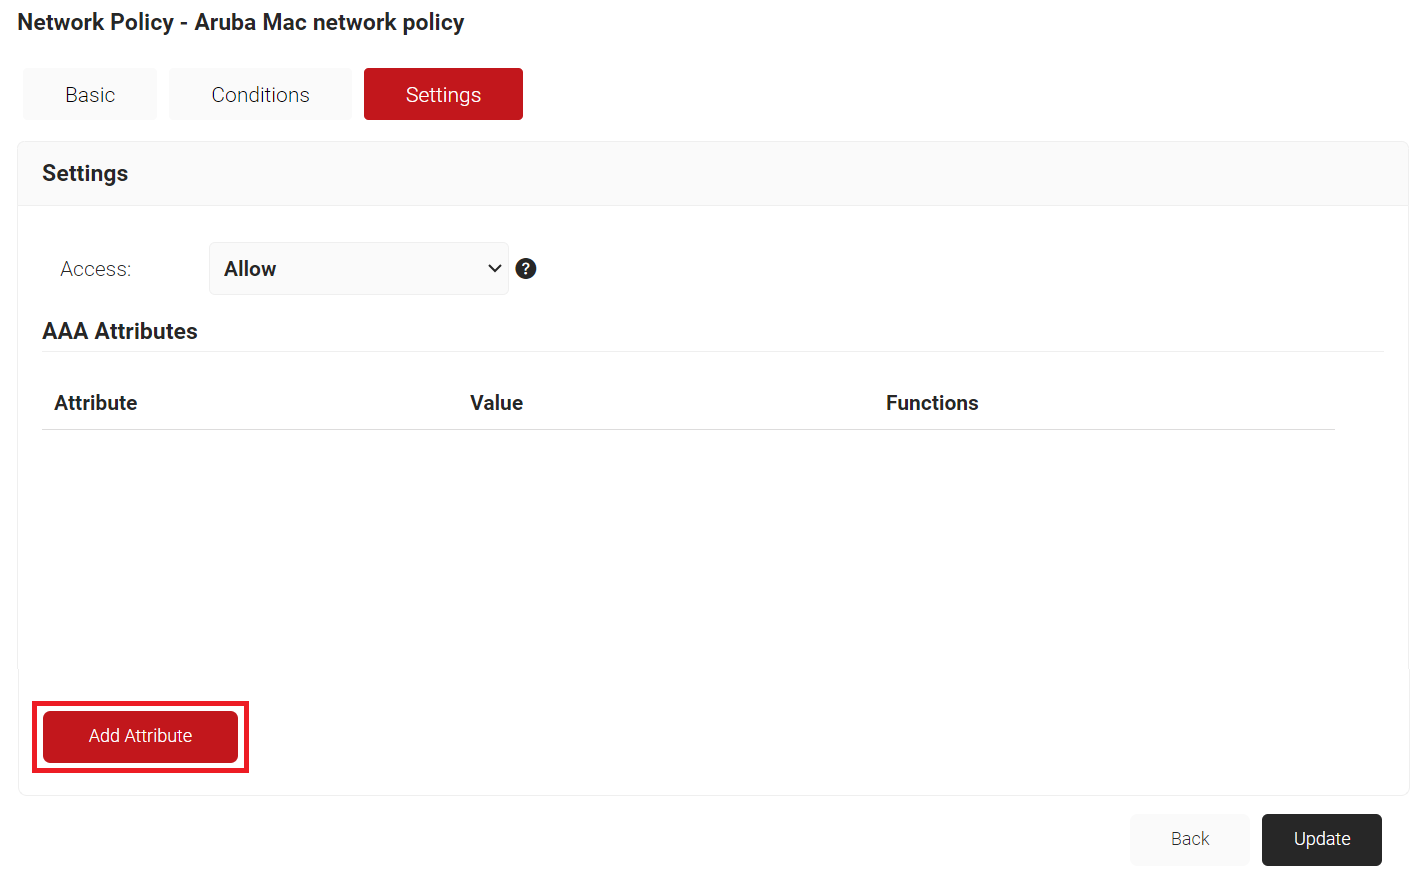
- Select the Settings tab.
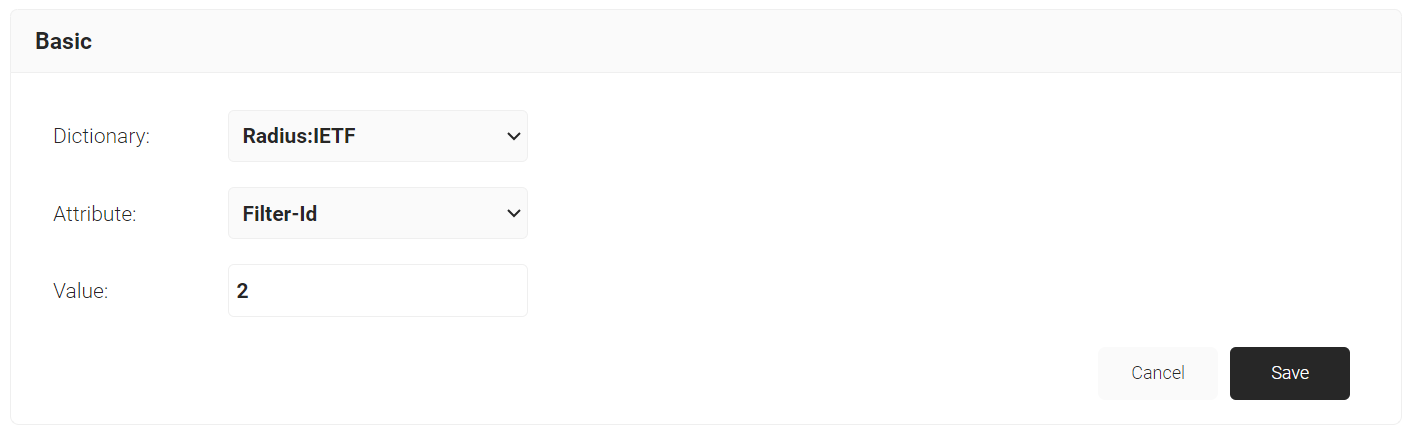
- Click Add Attribute..

- From the Dictionary drop-down list, select an option: Radius:IETF or Custom.
- From the Attribute drop-down, select Filter-Id.
NOTE: Filter-Id is created on your access point to form a VLAN range.
- In the Value field, enter the VLAN filter-ID you wish to connect to.

- Click Save.
- Click Update.
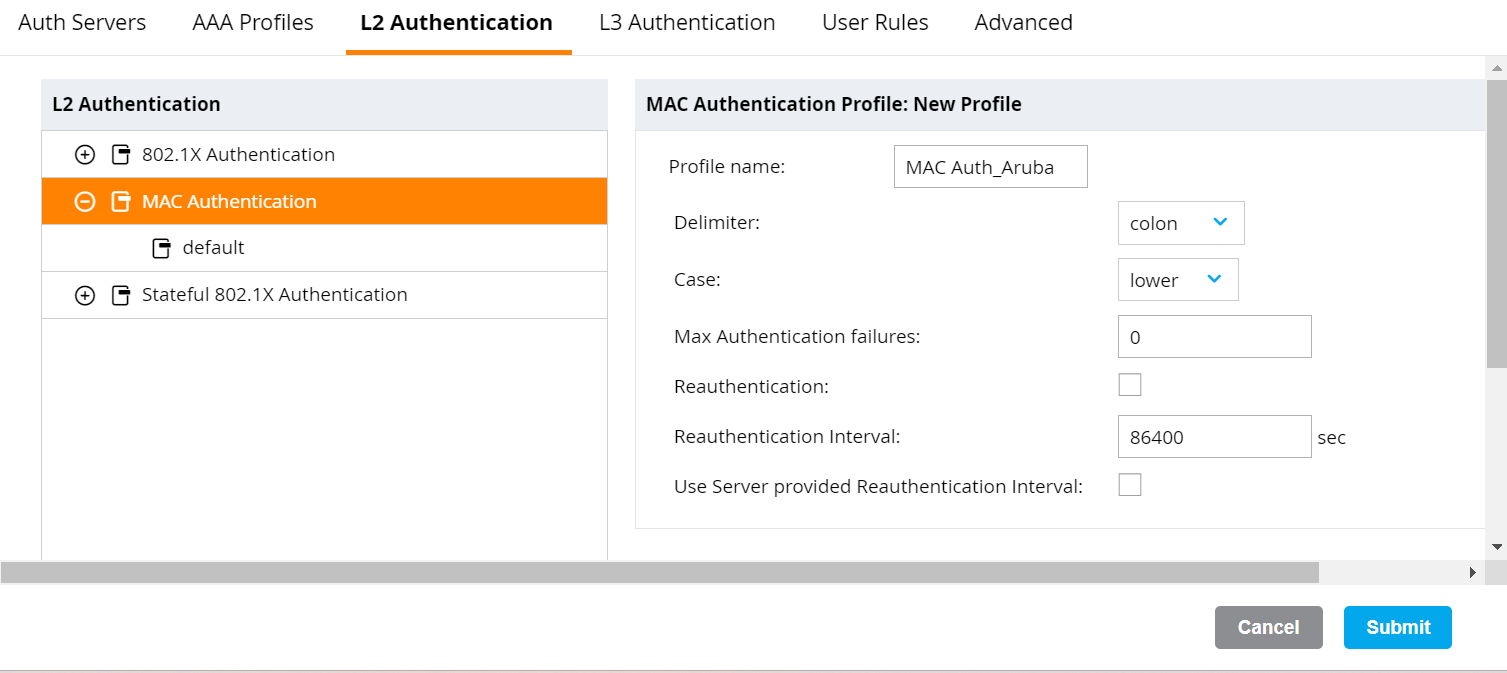
- On the left pane, navigate to Configuration > Authentication > L2 Authentication.

- Click MAC Authentication.
- In the MAC Authentication Profile: New Profile section, click + to create a MAC profile.

- In the Profile name field, enter a name for the profile.

- Click Submit.
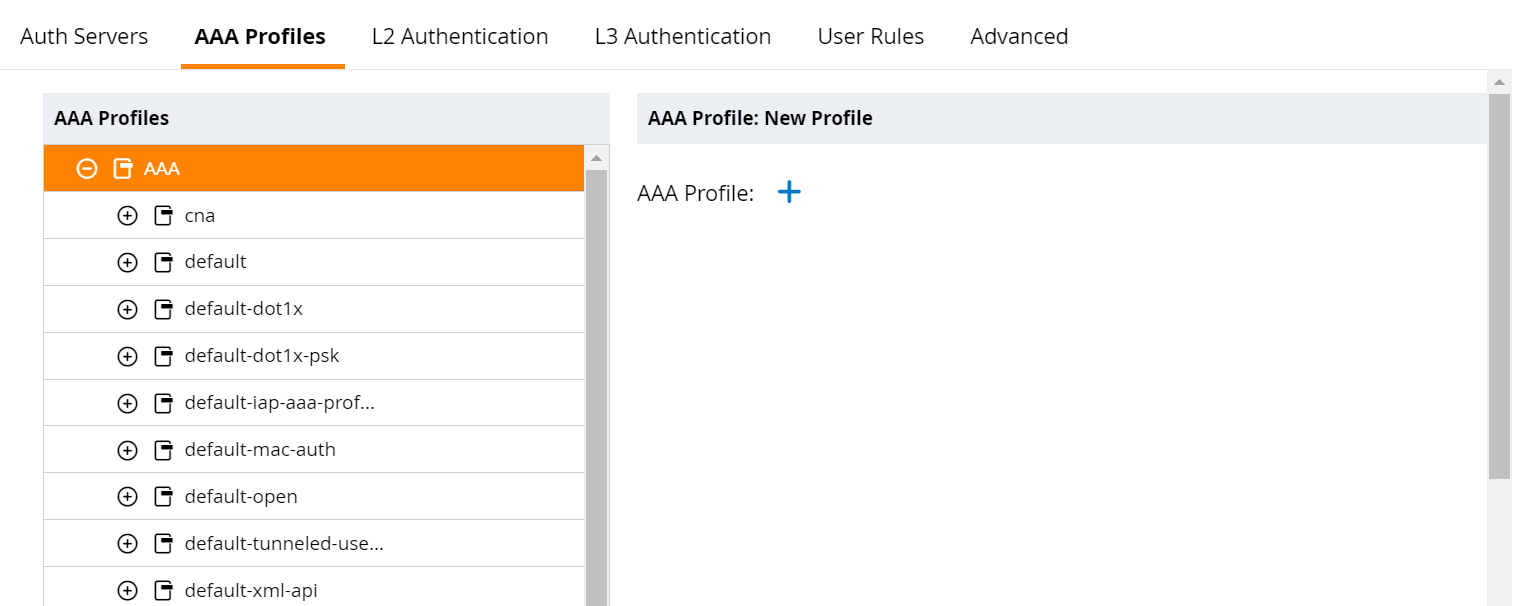
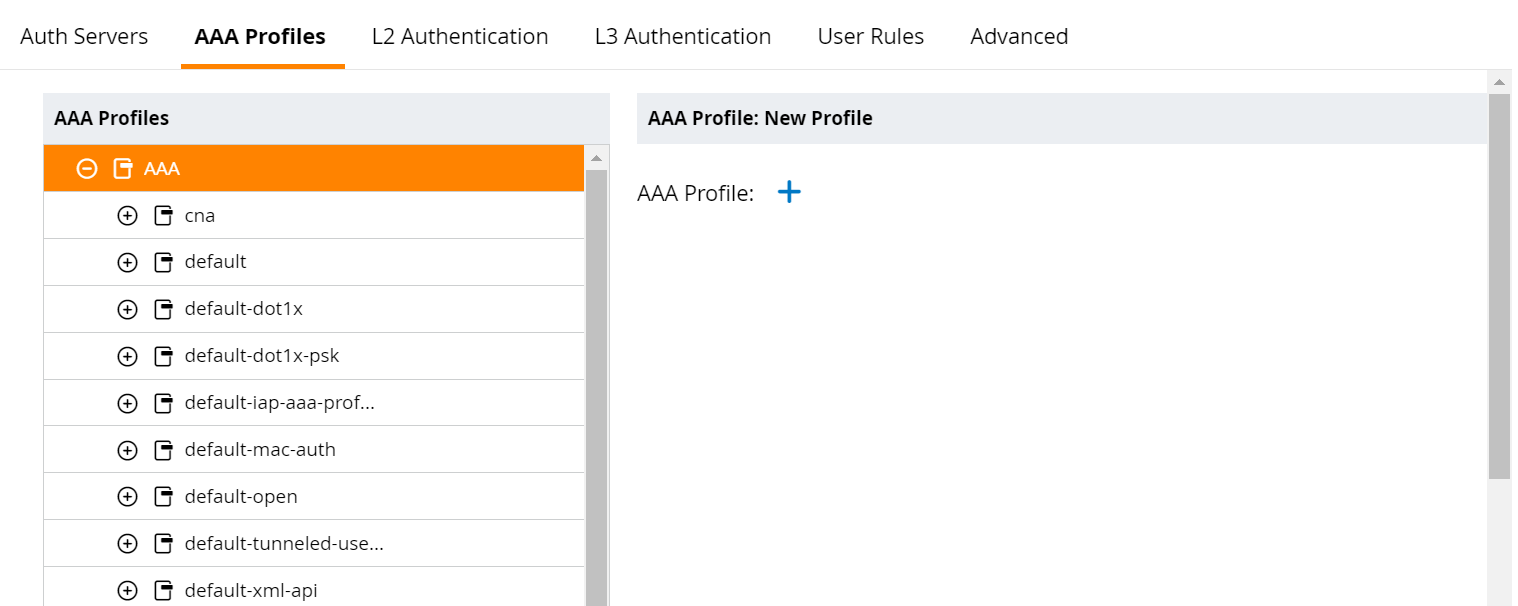
- Select the AAA Profiles tab.
- Expand AAA and in the AAA Profile: New Profile section, click + to create a new profile.

- In the Profile name field, enter a name for the profile.

- Click Submit.



- Log in to the JoinNow Management Portal.
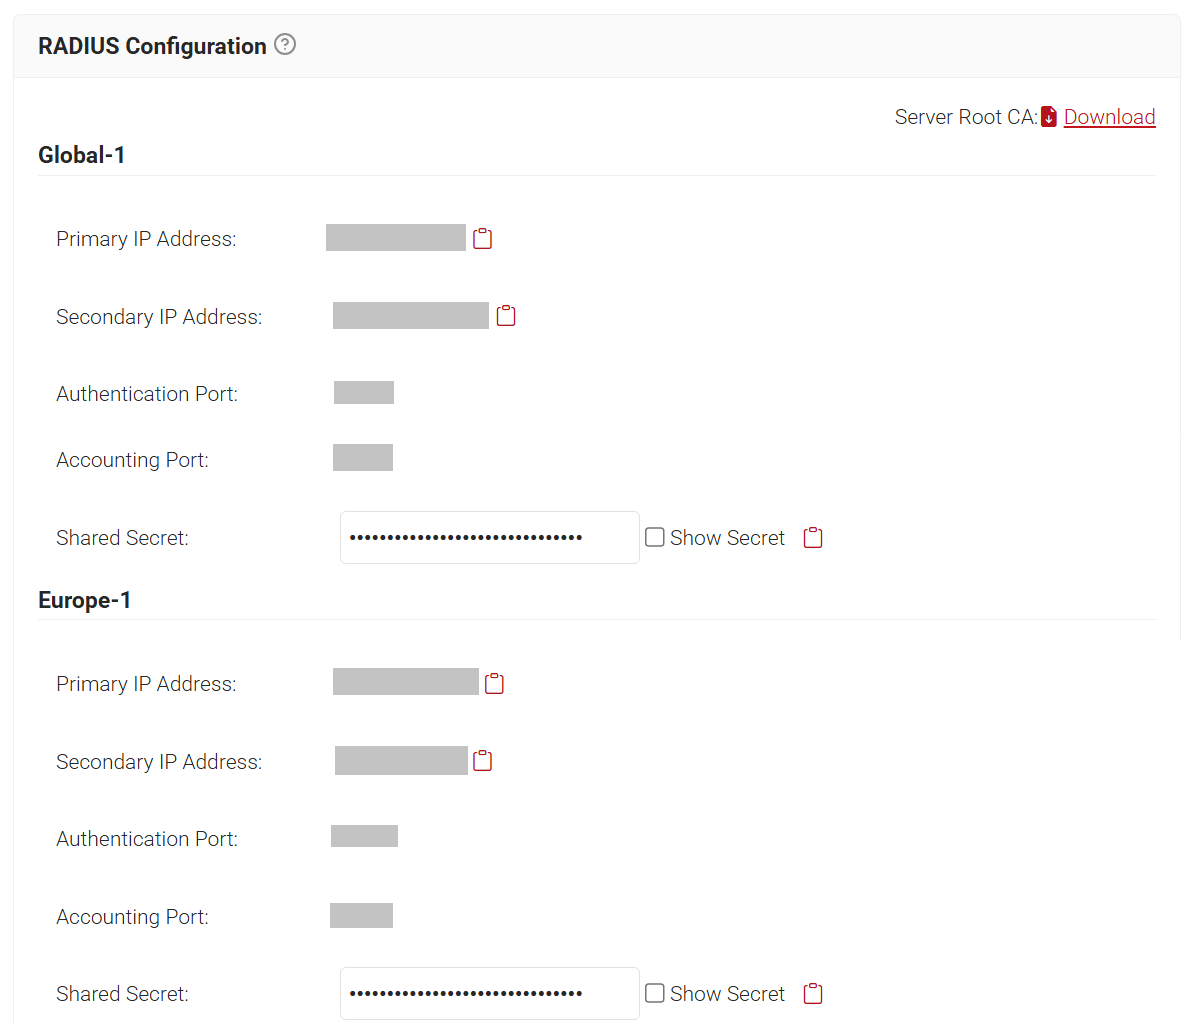
- Navigate to RADIUS > RADIUS Configuration.

- Copy the Primary IP address on your console.
To configure the Aruba IAP and the RADIUS server, follow the given steps.
- In the Aruba portal, on the left pane, navigate to Configuration > Authentication.

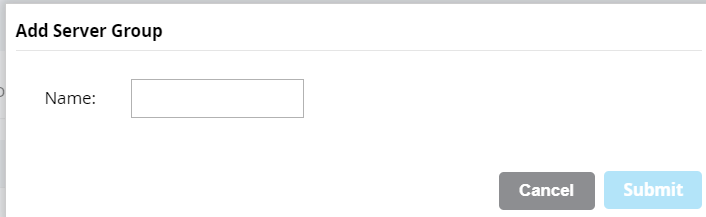
- Select the Auth Servers tab and click +.
- On the displayed page, in the Name field, enter a name.

- Click Submit.
- In the Server Groups section, click the group you just created.
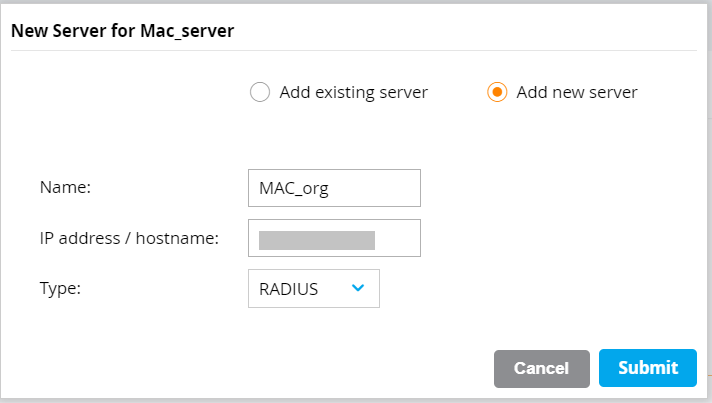
- Below the Server Group section, click the + sign to add server details.

- On the displayed page, select the Add new server option.
- In the Name field, enter a name for your server.

- In the IP address / hostname field, enter the RADIUS IP address that you obtain from the JoinNow Management Portal.
- From the Type drop-down list, select RADIUS.
- Click Submit.
- Navigate back to the AAA Profiles tab.
- Click the AAA profile you created earlier (refer to the Configuring Aruba IAP for MAC Authentication section).
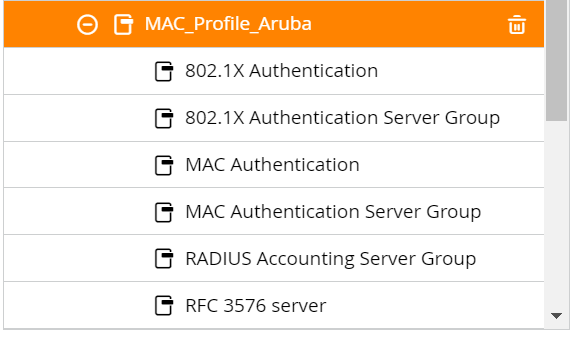
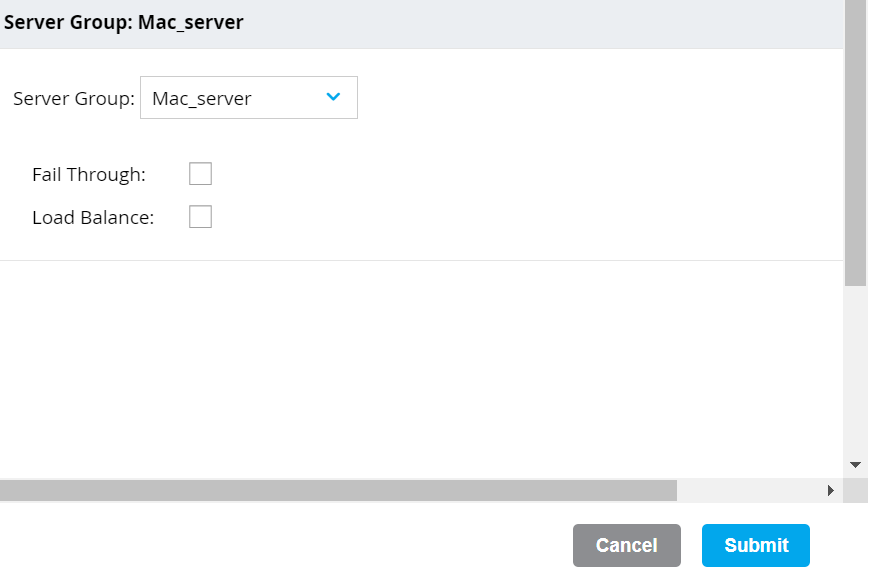
- Under the selected AAA Profile, click MAC Authentication Server Group.

- From the Server Group drop-down list, select the server group you created.

- Click Submit.
- Navigate to Configuration > WLANs.
- In the WLANs section, click +.

- On the General tab:
- In the Name (ssid) field, enter a name for the SSID.
- For Primary usage, select the Employee option.
- From the Select AP Groups drop-down list, select an option. According to the option, the Broadcast on field is displayed. Select the default option.
- From the Forwarding Mode drop-down list, select an option.

- Click Next.
- On the VLANs tab, select your VLAN ID.
- Click Next.
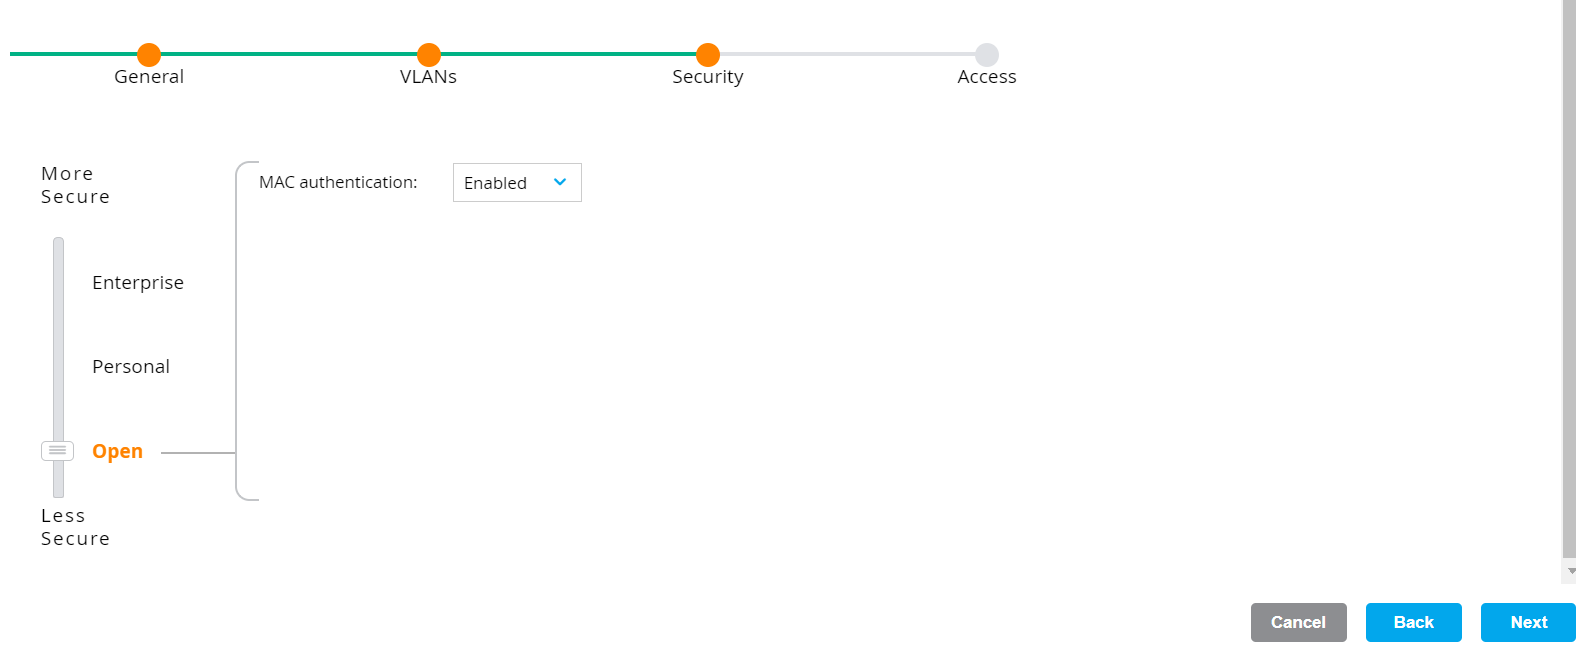
- On the Security tab:
- Move the dial to Open.
- From the MAC authentication drop-down list, select Enabled.
- Click Next.

- In the Access section, select the required roles.
- Click Finish.

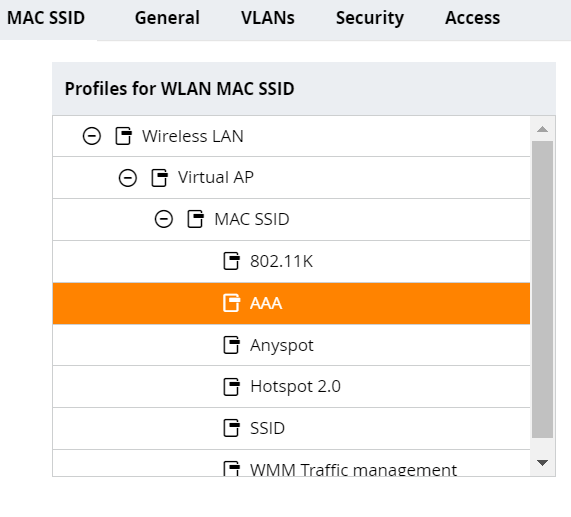
- Click the WLAN you created.

- Click Profiles.
- Navigate as shown below.

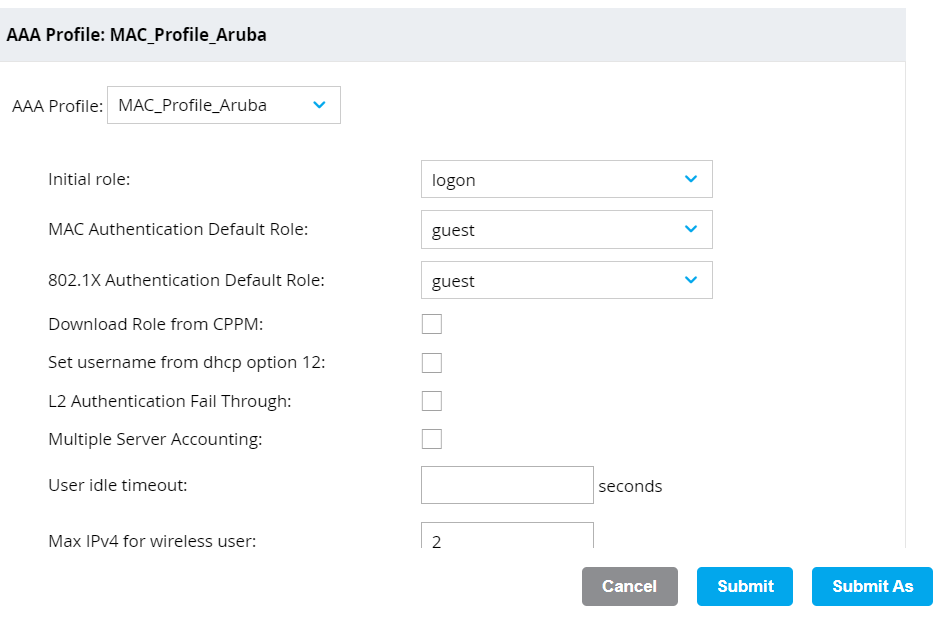
- An AAA Profile opens on the right side. From the AAA Profile drop-down list, select the AAA profile you created earlier (refer to the Configuring Aruba IAP for MAC Authentication section).
- Click Submit.






The security plan that scales with you.
Our solutions can scale from mid-market to global enterprises. Compare options and see how our solutions protect you from costly breaches and ensure peace of mind.