Google Certificate Provisioning is Google’s API-based implementation of a dynamic SCEP workflow. Unlike legacy SCEP, which uses a static challenge, Certificate Provisioning Connector generates a unique, dynamic challenge for each certificate request.
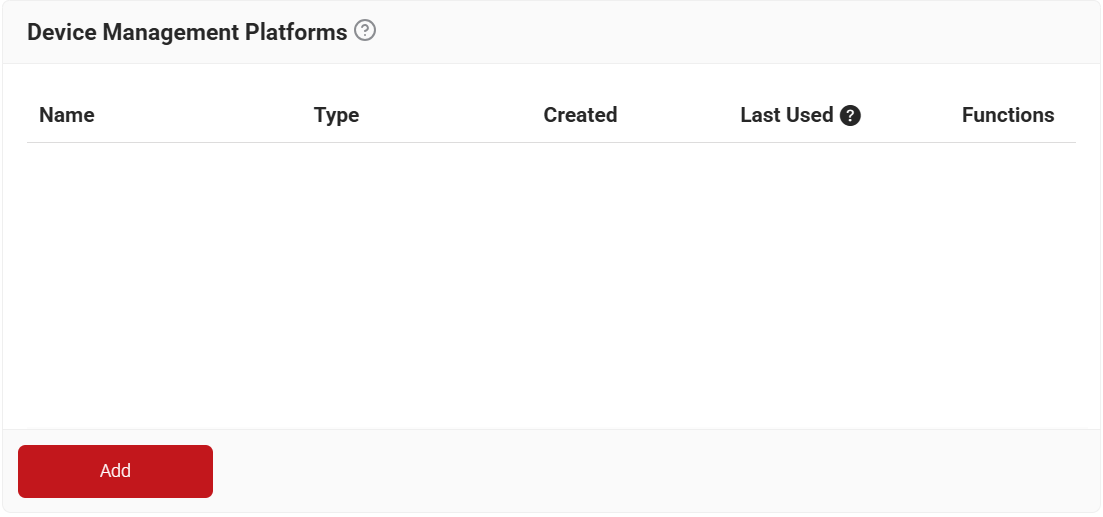
To create a Device Management Platform, perform the following steps:
- Log in to the JoinNow Management Portal.
- Navigate to Integration Hub > Device Management Platforms.
- Click Add.

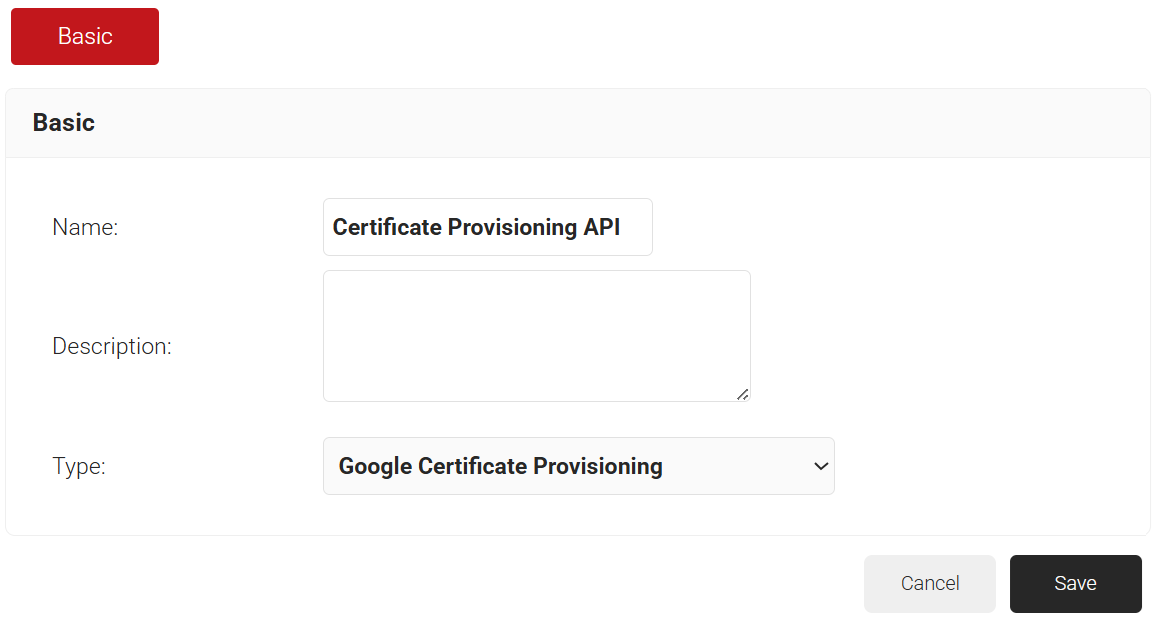
- In the Basic section, in the Name field, enter the name of the device management platform.
- In the Description field, enter the description for the device management platform.
- From the Type drop-down list, select Google Certificate Provisioning.

- Click Save.
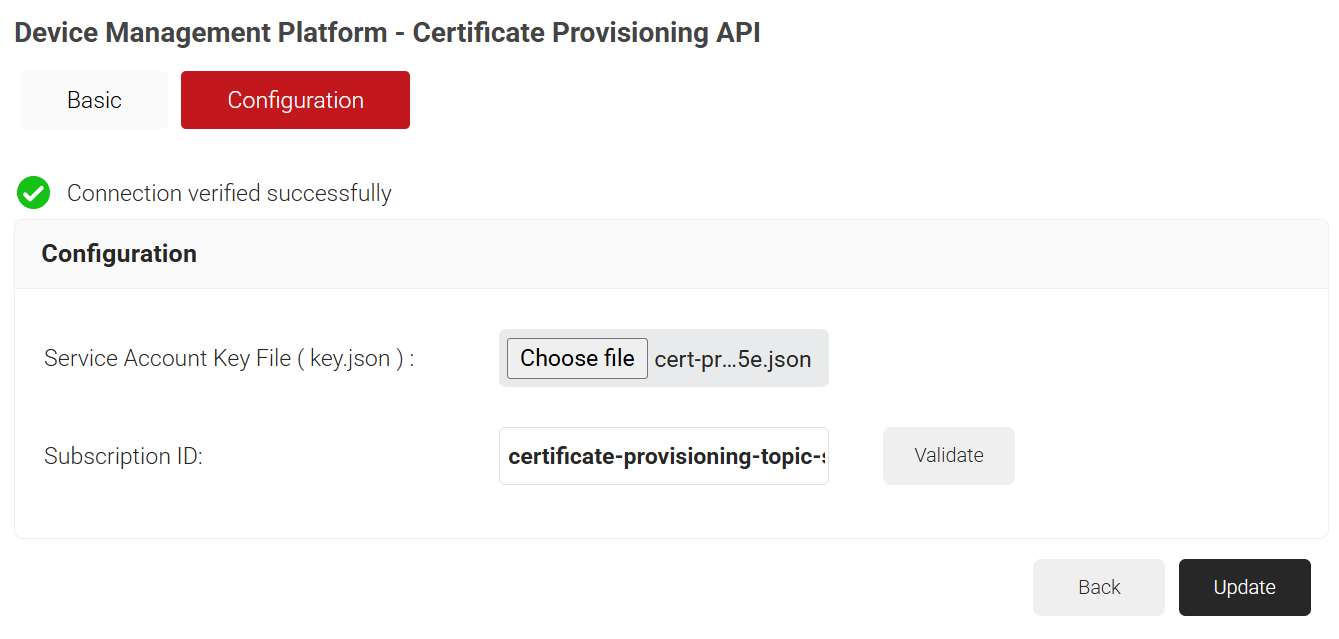
- Click the Configuration tab and configure the following settings:
- In the Service Account Key File (key.json) field, click Choose file to upload the key file obtained from the Creating a Service Account Key section.
- In the Subscription Name field, enter the subscription ID obtained from the Configuring a Pub/Sub Topic section.
- Click Validate to check your connection with Google.

- Click Update.
SecureW2 recommends using a new intermediate CA as a best practice for enrollments.
To create a new Intermediate CA, perform the following steps:
- Navigate to Dynamic PKI > Certificate Authorities.
- Click Add Certificate Authority.

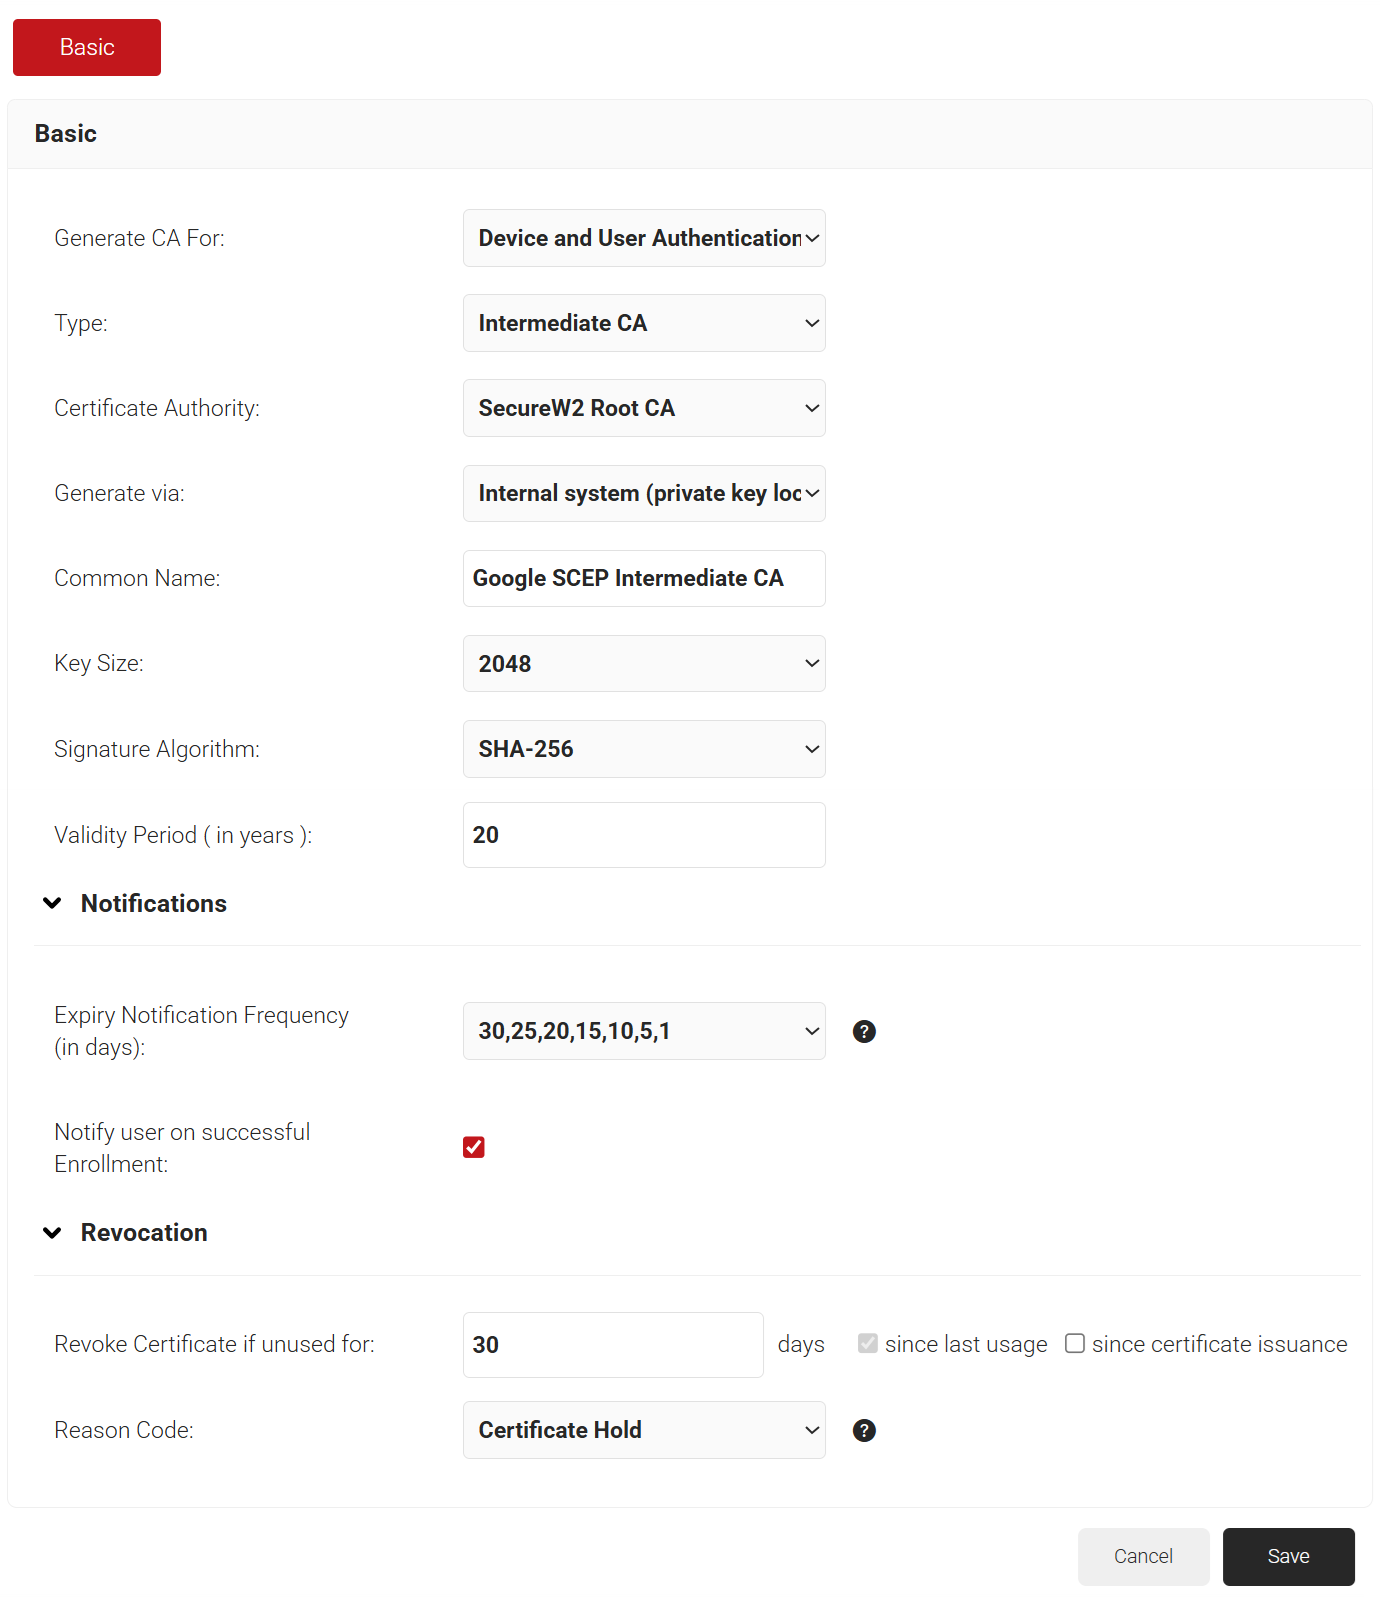
- In the Basic section, from the Generate CA For drop-down list, select the Device and User Authentication option to authenticate devices and users.
- From the Type drop-down list, select Intermediate CA.
- From the Certificate Authority drop-down list, select the default Root CA that comes with your organization.
- For the Common Name field, enter a name.
- From the Key Size drop-down list, select 2048 for the CA certificate key pair.
- From the Signature Algorithm drop-down list, select the signature algorithm for the certificate signing request. The option available is SHA-256.
- In the Validity Period (in years) field, enter the validity period for the Intermediate CA in terms of the number of years.
- In the Notifications section:
- From the Expiry Notification Frequency (in days) drop-down list, select the frequency interval for which a certificate expiration notification should be sent to users.
- Select the Notify user on successful Enrollment checkbox to notify users after a successful enrollment.
- If the RFC has a valid email address, the user will receive a certificate-issued or expired notification; otherwise, they will not.
- In the Revocation section:
- In the Revoke Certificate if unused for field, select the number of days after which an unused certificate can be revoked.
- Since last usage – Select this checkbox to revoke the certificate after a specified number of days if it remains unused.
- Since certificate issuance – Select this checkbox to revoke the certificate after a specified number of days after it is issued.
- From the Reason Code drop-down list, select any one of the following reasons for which the certificate is revoked.
- Certificate Hold
- AA Compromise
- Privilege Withdrawn
- Unspecified
- In the Revoke Certificate if unused for field, select the number of days after which an unused certificate can be revoked.
- Click Save. This generates the new intermediate CA.


A certificate template defines how information is encoded in certificates issued by the Certificate Authority. It includes a list of certificate attributes and specifies how each attribute’s value should be encoded.
To create a Google Certificate Template:
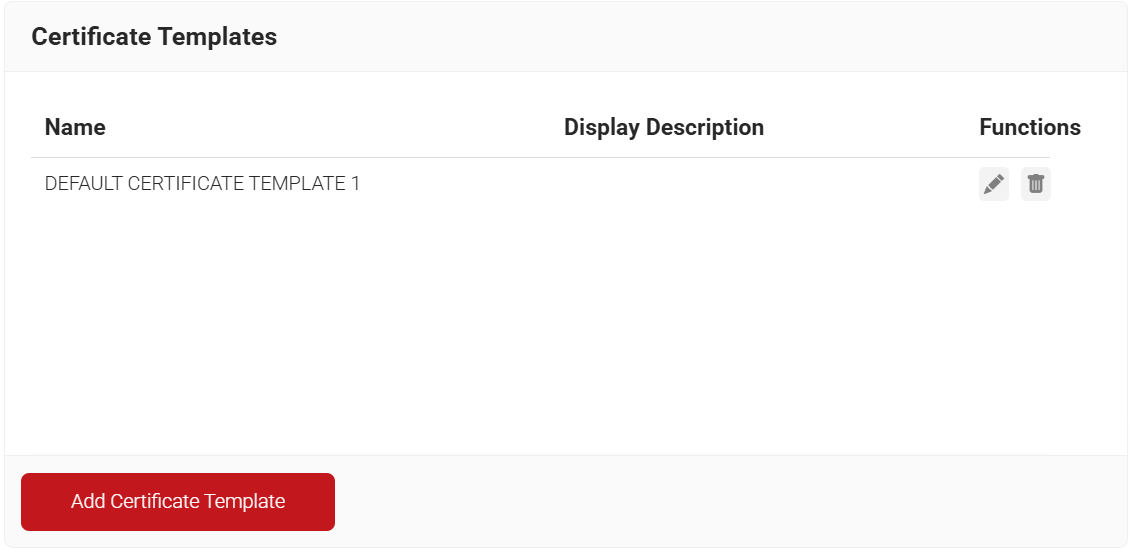
- Navigate to Dynamic PKI > Certificate Authorities.
- Scroll to the Certificate Templates section and click Add Certificate Template.

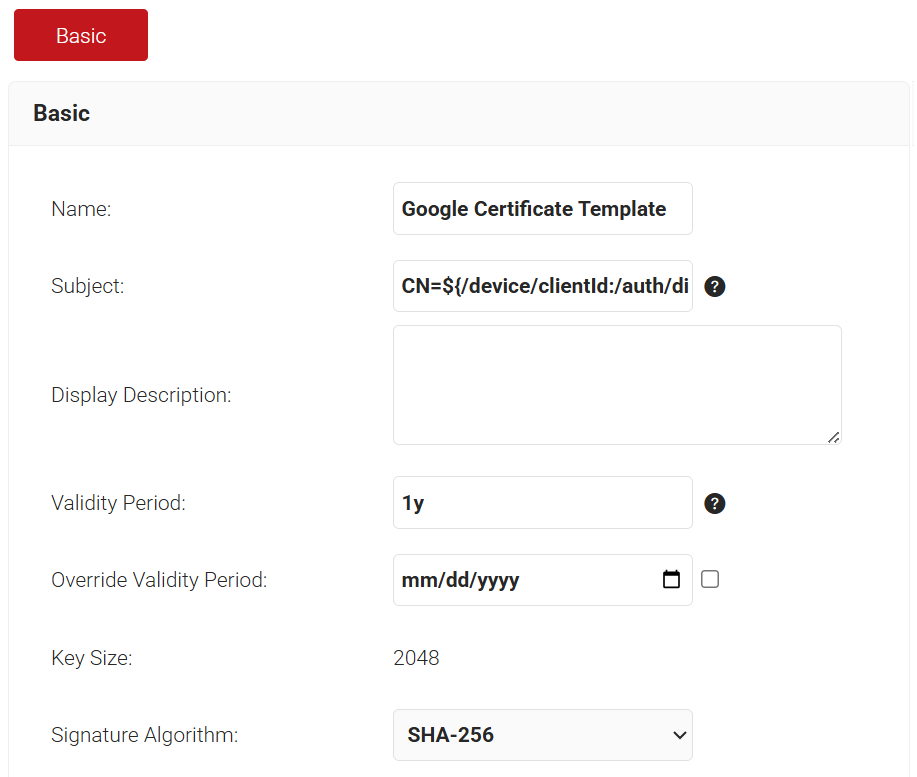
- In the Basic section, enter the name of the certificate template in the Name field.
- In the Subject field, retain the default value.
- In the Display Description field, enter a suitable description for the certificate template.
- In the Validity Period field, type the validity period of the certificate (based on the requirement).
- To override the Validity Period attribute, select the Override Validity Period checkbox and choose an end date from the date picker to set a hard-coded expiry date for a certificate.
- From the Signature Algorithm drop-down list, select SHA-256 as the signature algorithm for the certificate signing request.

- In the SAN section:
- In the DNS field, enter ${/device/clientId}
- In the Extended Key Usage section, from the Use Certificate For list, select Client Authentication.
- In the Notification section, select the Notify admin on certificate expiry checkbox to send certificate expiry email notifications to all Admins.

- Click Save.

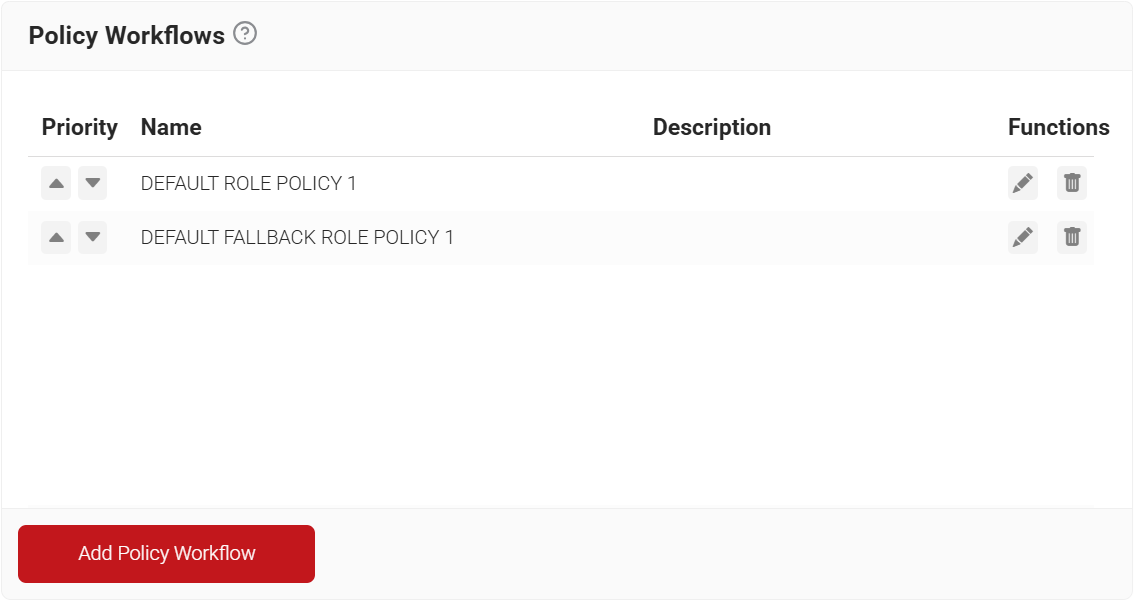
The Policy Workflow facilitates the segmentation of users and devices based on predefined criteria or associated attributes and groups, with each segment identified as a distinct Policy Workflow. This allows admins to configure the issuance of specific certificate types or formats for each Policy Workflow through an Enrollment Policy.
To create a policy workflow, perform the following steps:
- Navigate to Policy Management > Policy Workflows.
- Click Add Policy Workflow.

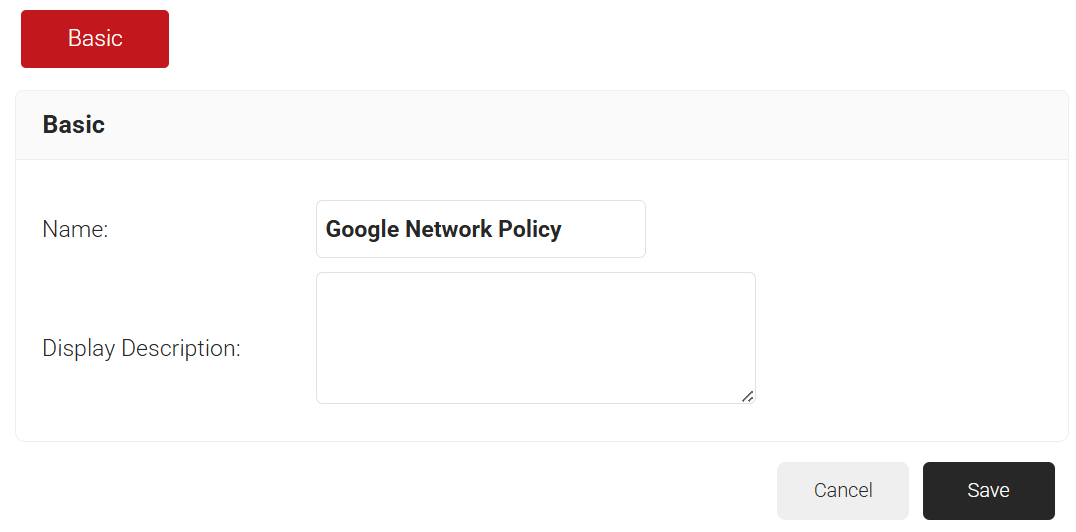
- In the Basic section, enter the name of the policy workflow in the Name field.
- In the Display Description field, enter a suitable description for the policy workflow.

- Click Save. The page refreshes, and the Conditions tab is displayed.
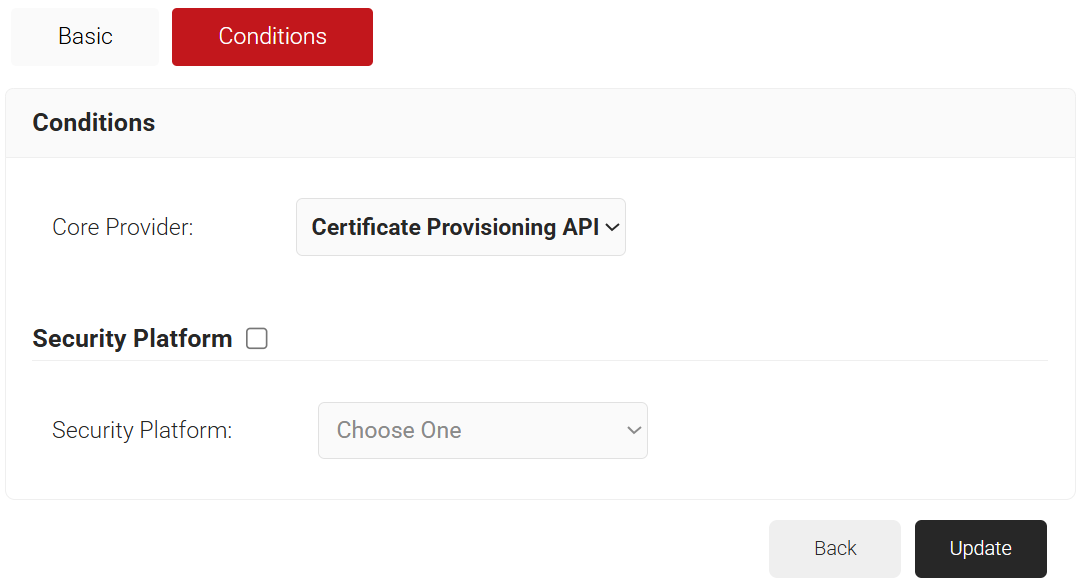
- Select the Conditions tab.
- From the Core Provider drop-down list, select the API token you created in the Creating a Device Management Platform section.

- Click Update.

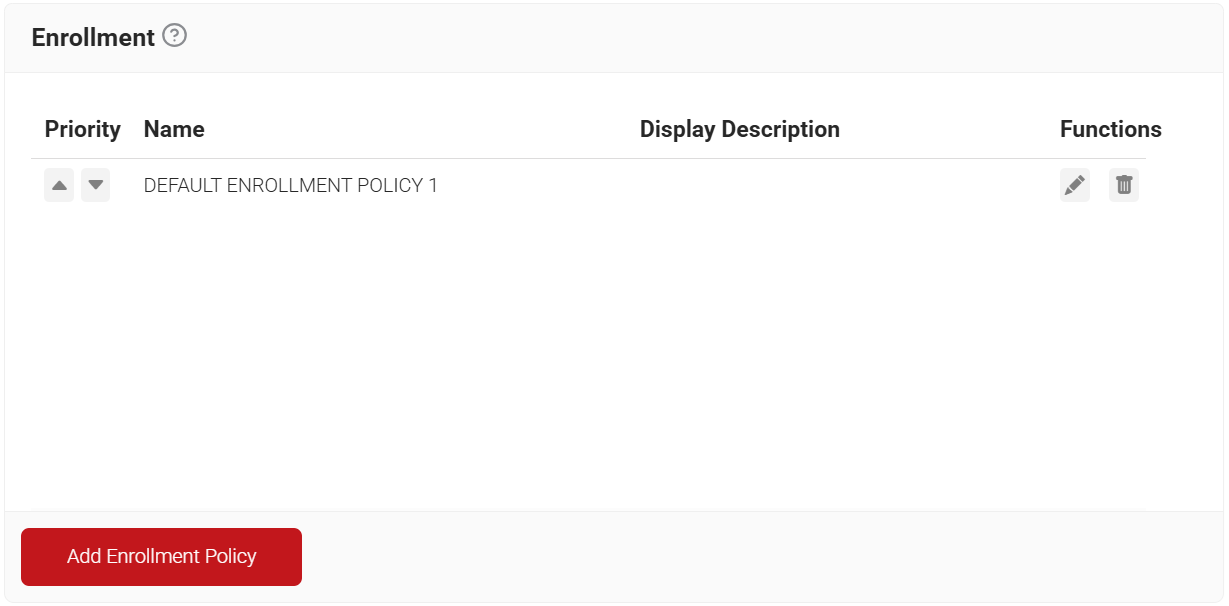
An Enrollment Policy defines the client certificate template and the Certificate Issuer to be used for each Policy Workflow. It leverages the segmentation established in the Policy Workflow to ensure that the appropriate client certificate template is issued for each workflow.
To create an Enrollment policy, perform the following steps:
- Navigate to Policy Management > Enrollment.
- Click Add Enrollment Policy.

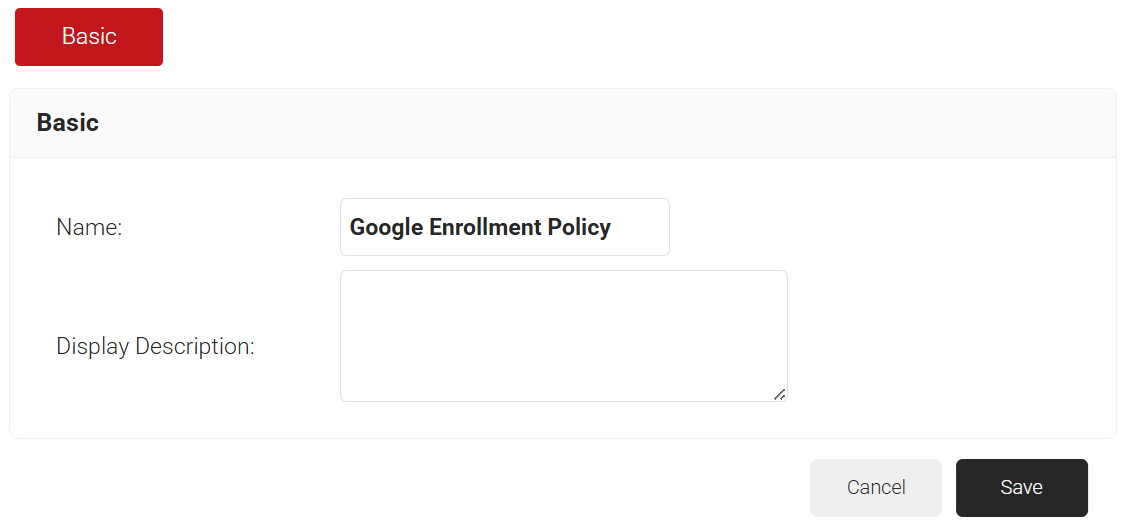
- In the Basic section, enter the name of the enrollment policy in the Name field.
- In the Display Description field, enter a suitable description for the enrollment policy.

- Click Save. The page refreshes, and the Conditions and Settings tabs are displayed.
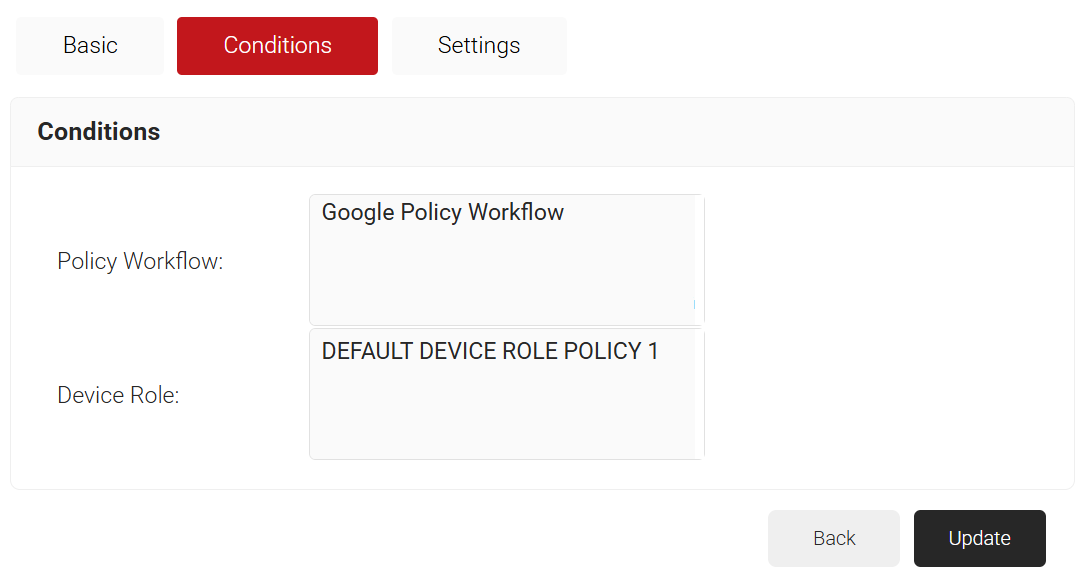
- Select the Conditions tab.
- From the Policy Workflow list, select the policy workflow you created earlier (see the Configuring a Policy Workflow section).
- From the Device Role list, select DEFAULT DEVICE ROLE POLICY 1.

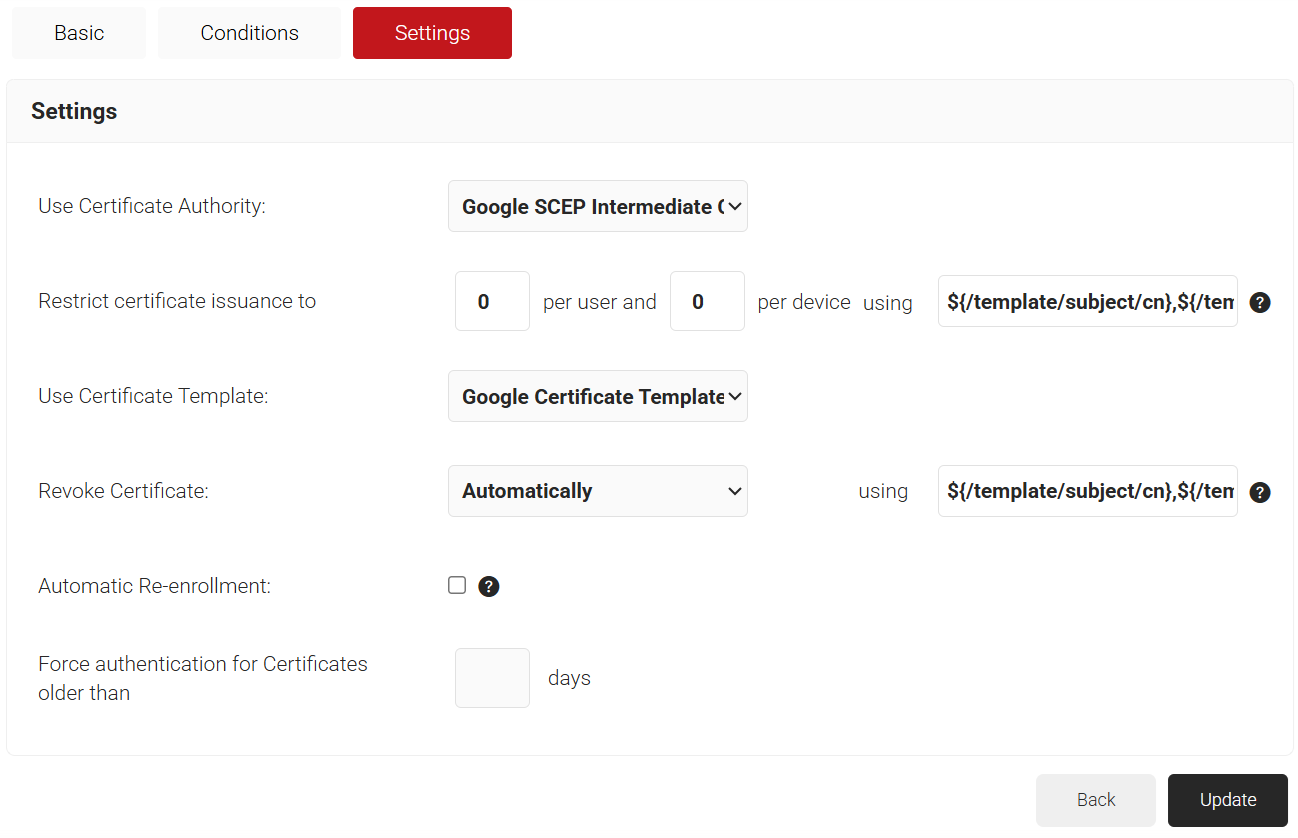
- Select the Settings tab.
- In the Settings section, from the Use Certificate Authority drop-down list, select the intermediate CA you created earlier (see the Creating a SecureW2 Intermediate CA section).
- From the Use Certificate Template drop-down list, select the template you created earlier (see the Creating a Google Certificate Template section).
- In the other settings, retain the default values.

- Click Update.
Similar to the Enrollment Policy, the Network Policy applies settings to a particular Policy Workflow. It allows us to specify whether the device will be granted or denied network access, along with other RADIUS attributes that can be sent, which are most commonly VLAN assignments.
Like with the Enrollment Policy, we are just going to show how to map our Policy Workflow (created in the Creating a Policy Workflow section) to our Network Policy.
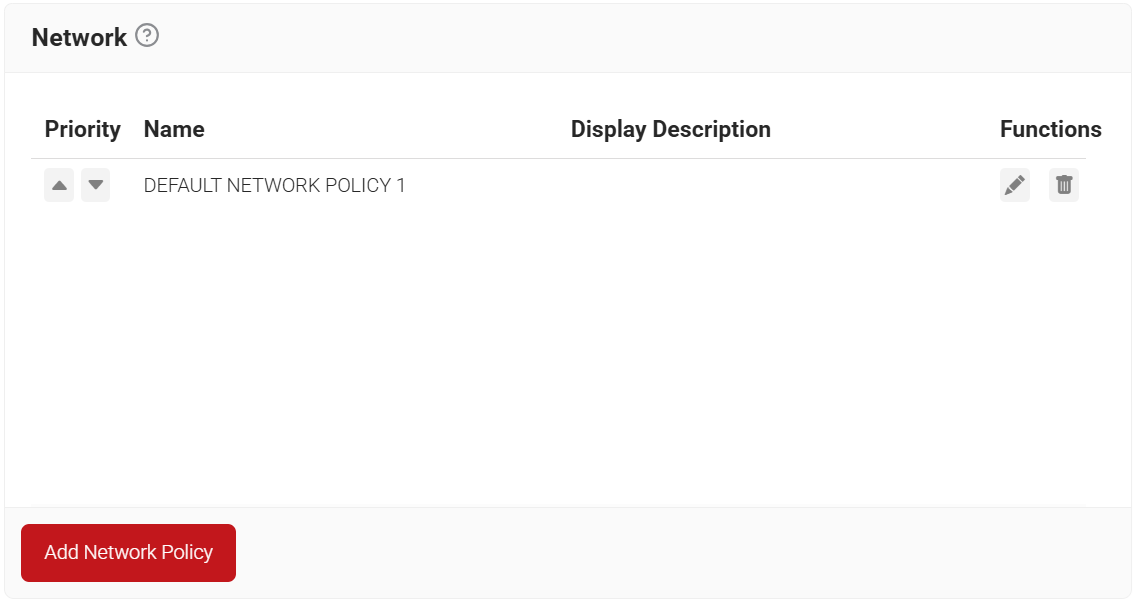
- Navigate to Policy Management > Network.
- Click Add Network Policy.

- Under the Basic section, in the Name field, enter the name of the network policy.
- In the Display Description field, enter a suitable description for the network policy.

- Click Save.
- The page refreshes, and the Conditions and Settings tabs appear.
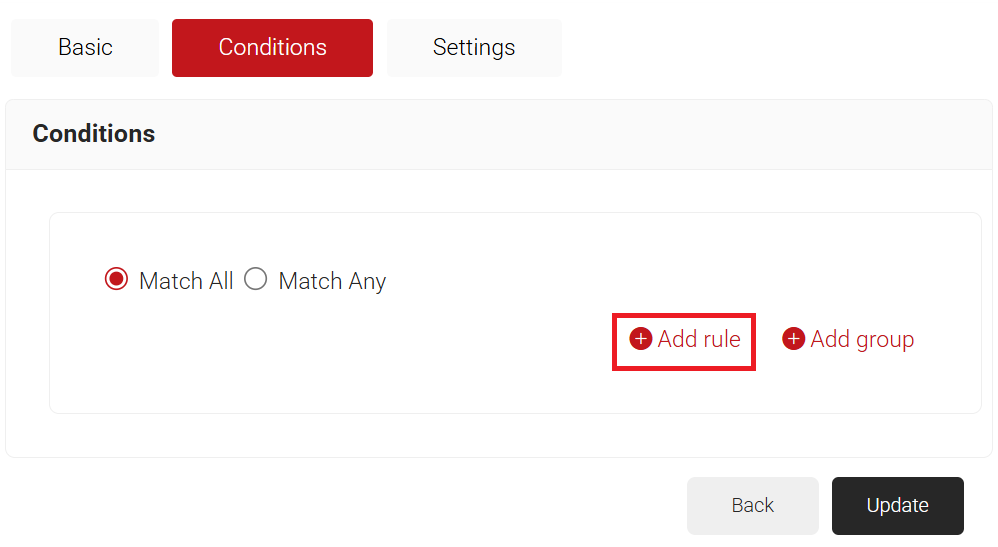
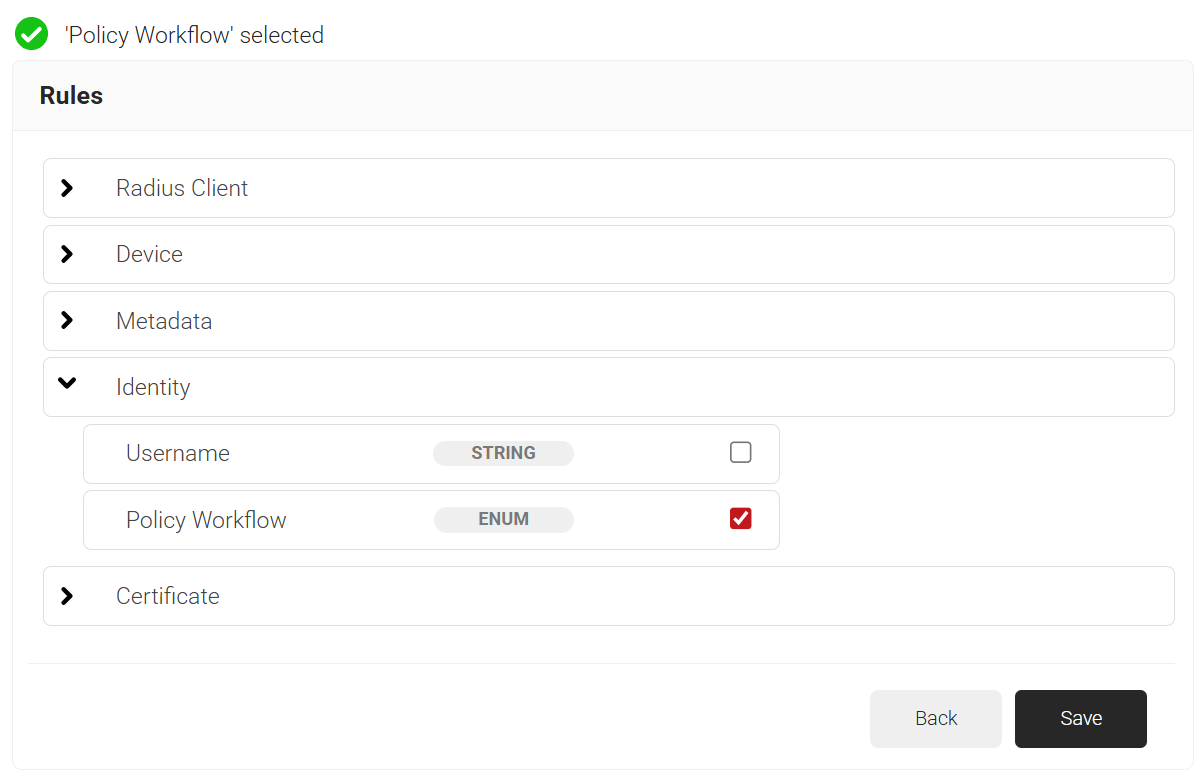
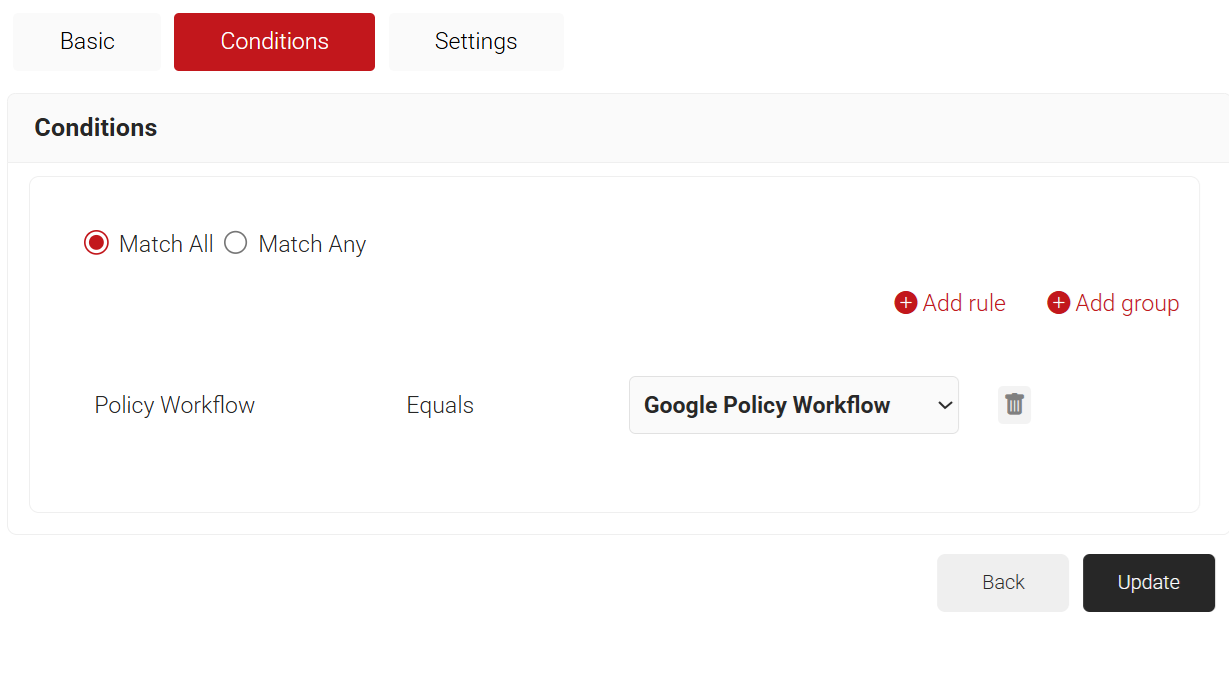
- Select the Conditions tab.
- Click the Add rule and select the policy workflow you want to assign to this network policy. It is essential to select the appropriate policy workflow to trigger the network policy. This menu offers various rules that you can select based on your business requirements.NOTE: You can assign a network policy to multiple user roles.


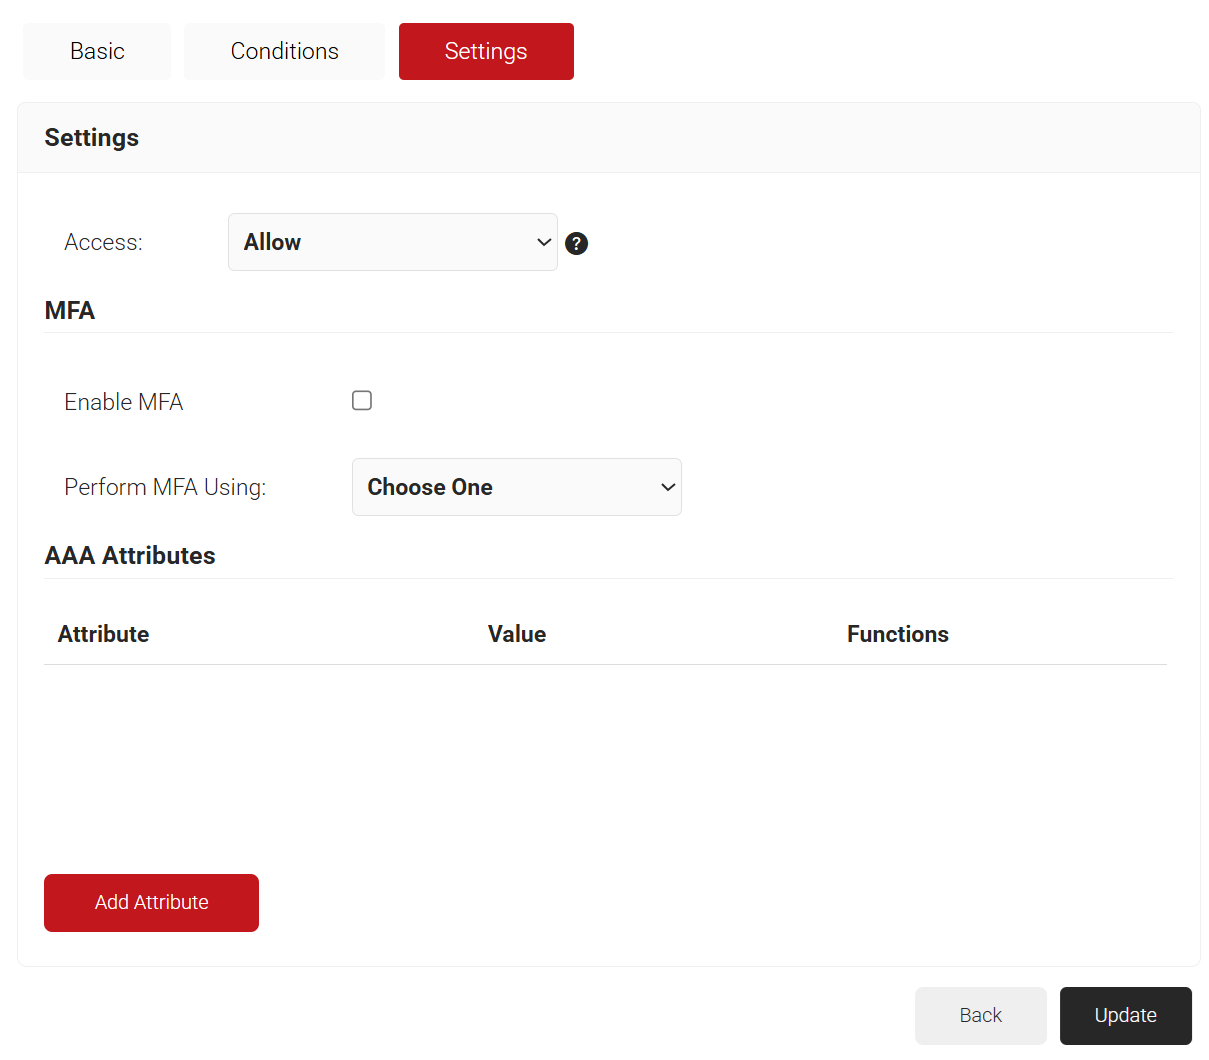
- Select the Settings tab.
- Click Add Attribute.

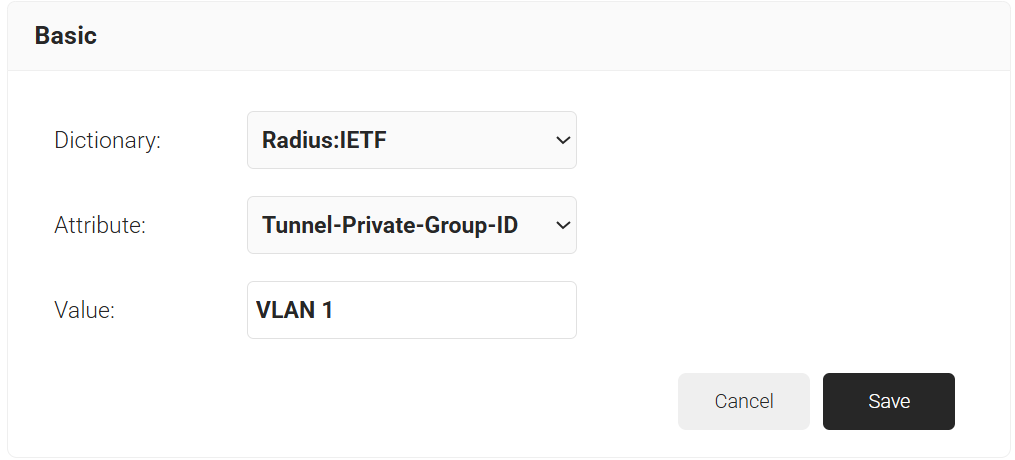
- From the Dictionary drop-down list, select an option:
- Radius: IETF: This is what we will use for the following attributes, as we are using standard RADIUS attributes for VLAN assignment.
- Custom: Used for any VSAs (Vendor-Specific Attributes).
- From the Attribute drop-down list, select an option.
- In the Value field, enter the appropriate value for the attribute.

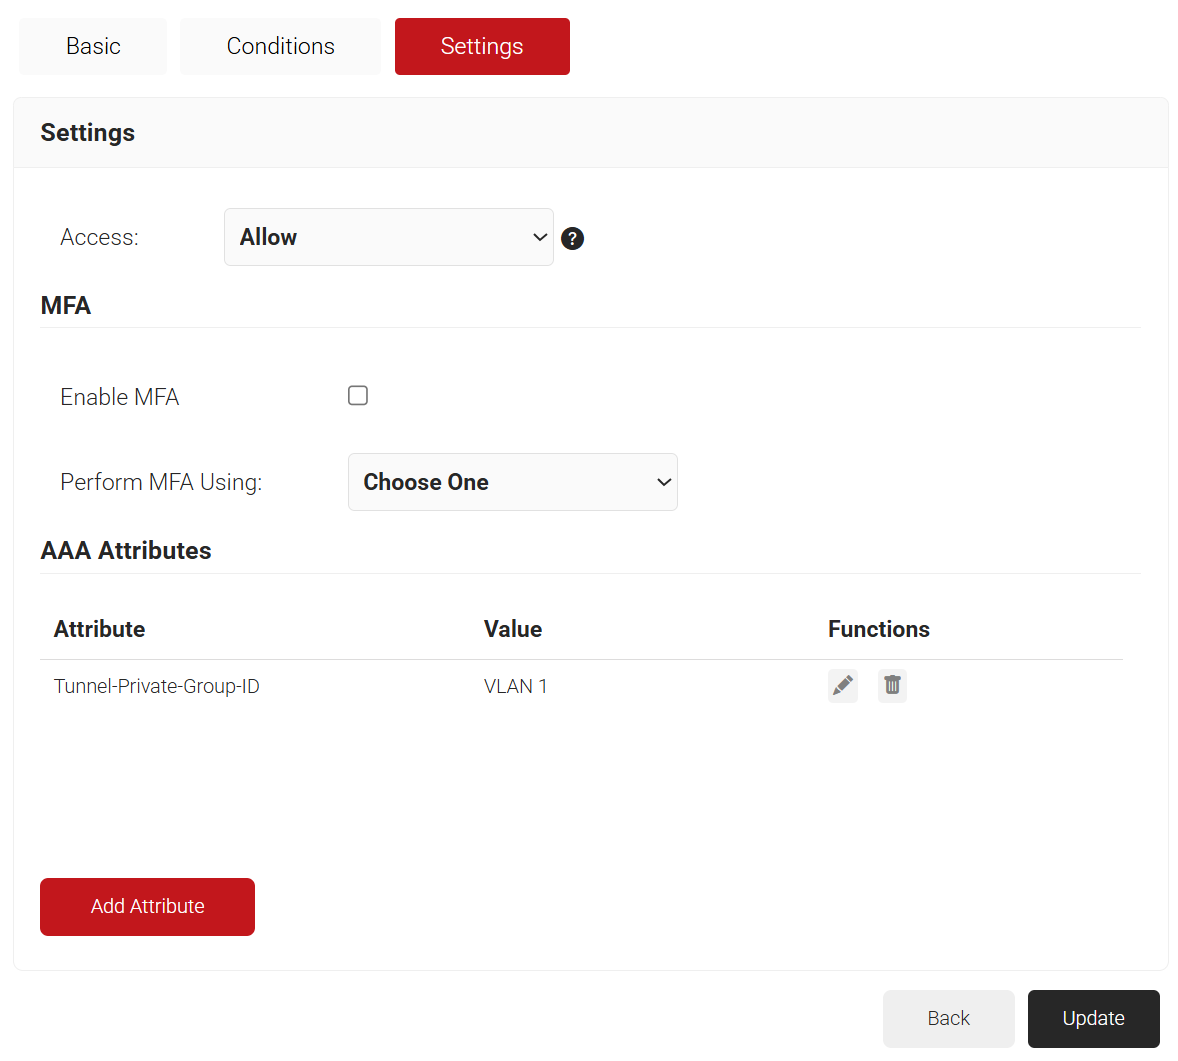
- Click Save.

- Repeat for any other RADIUS attribute you would like to send. For reference, here is what is commonly required for VLAN Assignment:
- Tunnel-Medium-Type: IEE-802
- Tunnel-Private-Group-ID: {VLAN Name}
- Server Tunnel-Type: VLAN
- Click Add Attribute.
- Click Update.
Every RADIUS Authentication request will run through the policies configured here. Now, when a device attempts to authenticate to the network, we will validate its attributes before deciding whether to grant it access and which VLAN to assign it to.
To create a new project, perform the following steps:
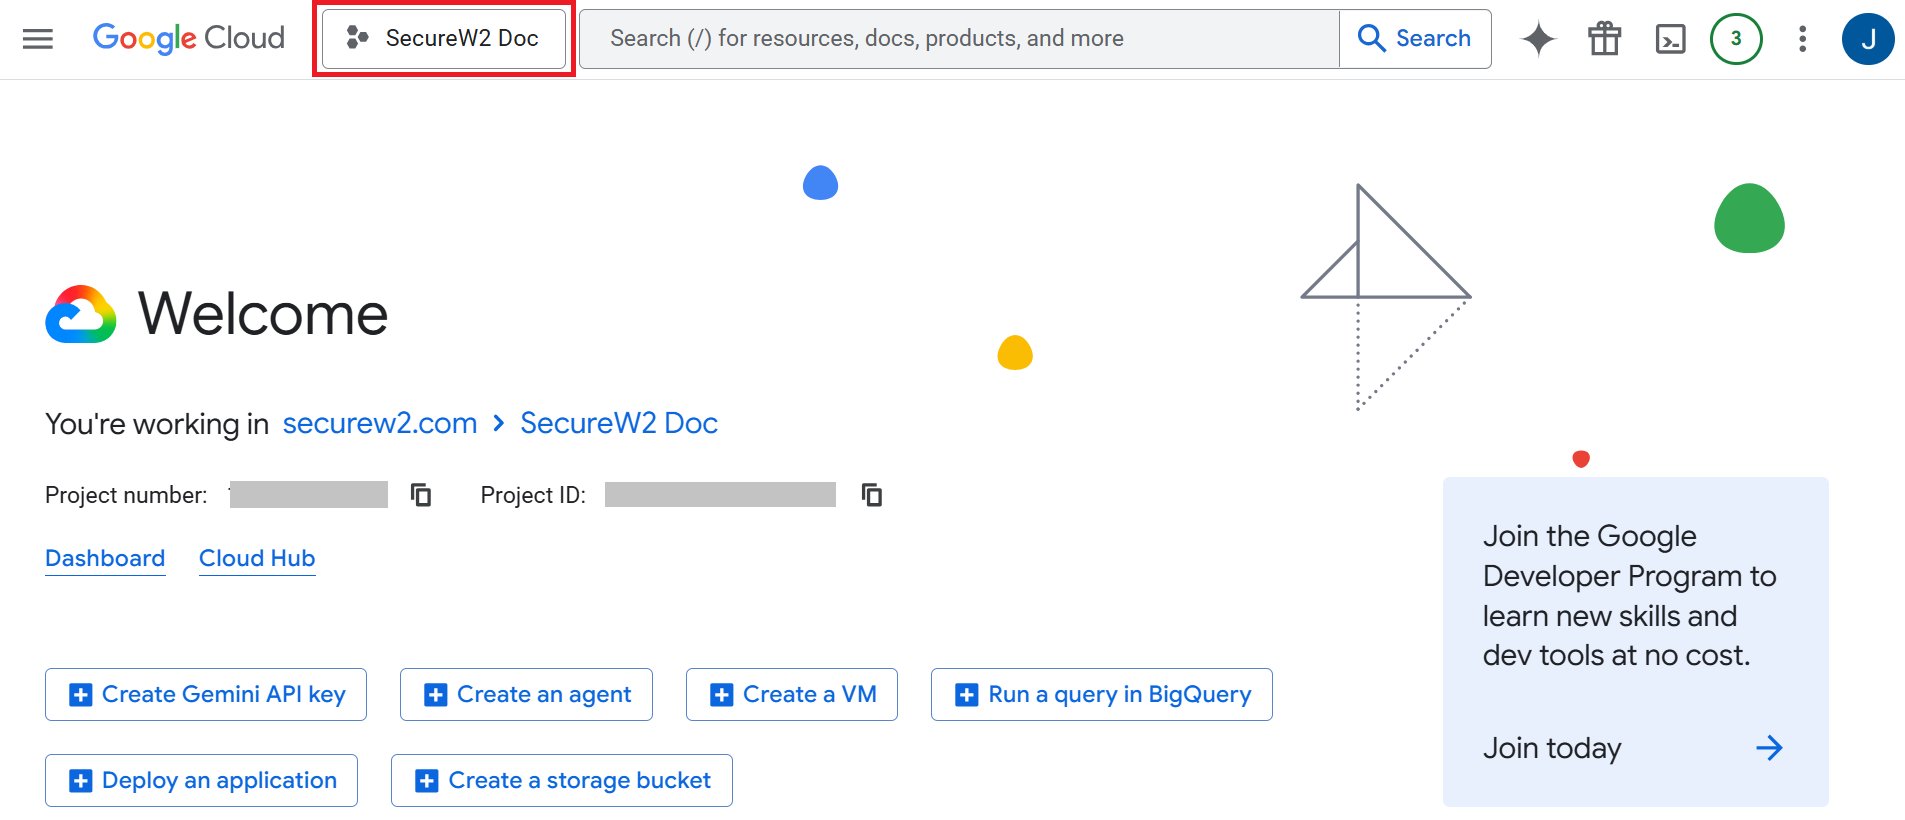
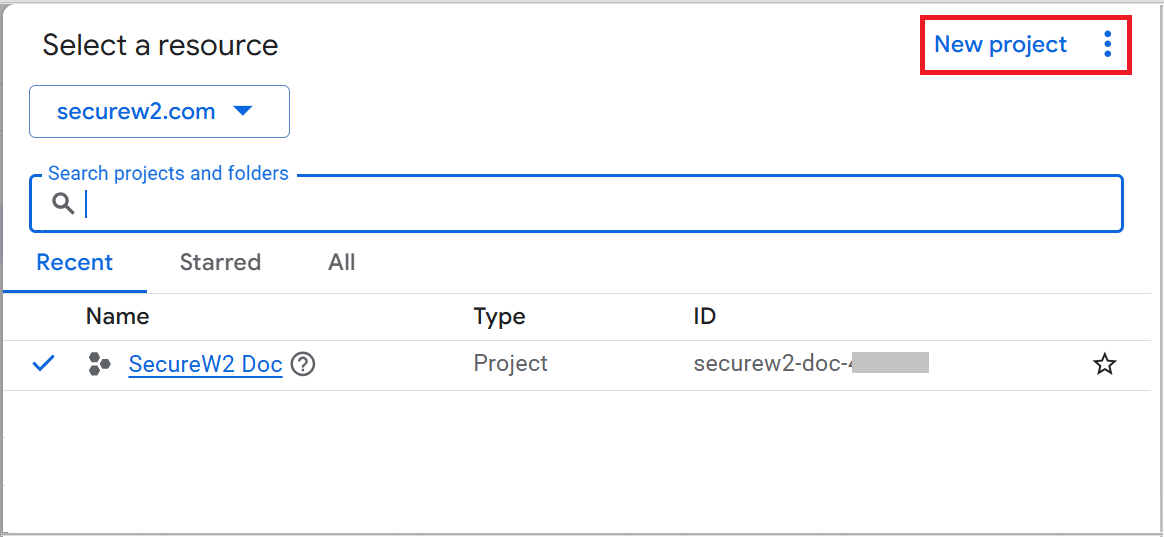
- Log in to Google Cloud.
- Open the project selector (top navigation bar), then click New Project.


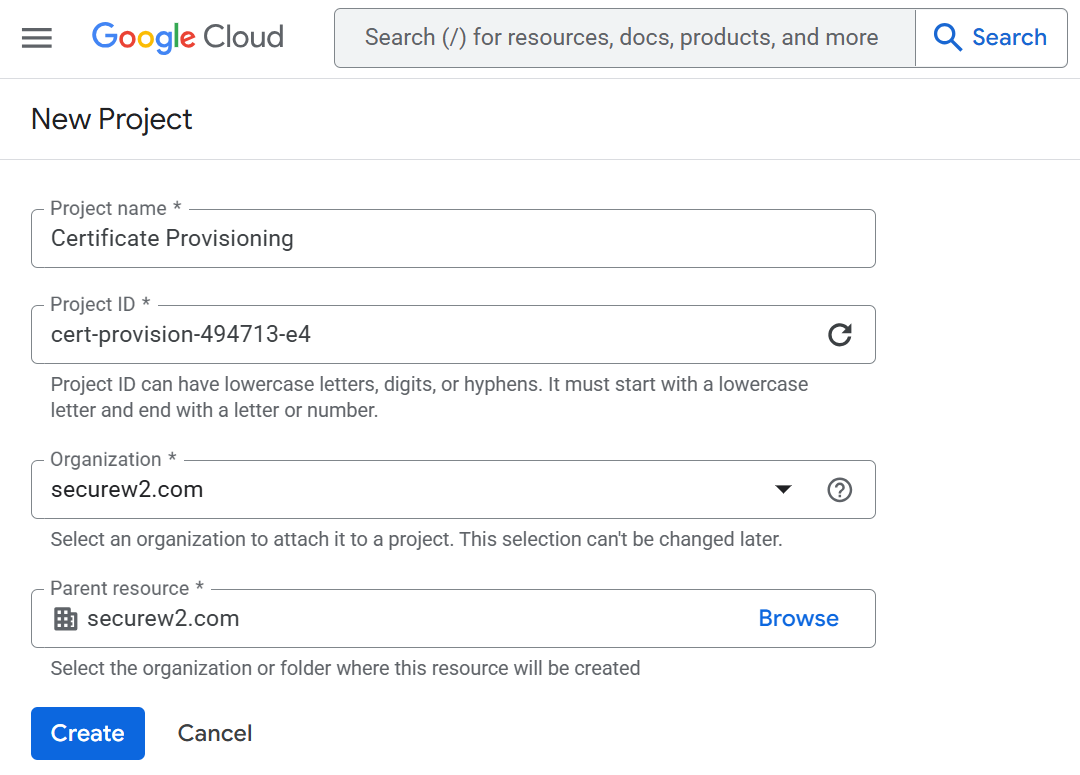
- In the Project Name field, enter a name for the project. The Project ID is automatically populated and serves as the globally unique identifier for the project. The Project ID is editable. You can modify it as required before creating the project.

- Click Create.
Pub/Sub is the messaging service that enables real-time communication between Google and SecureW2’s Certificate Provisioning Connector. When a ChromeOS device requests a certificate, Google publishes the request to the Pub/Sub topic. SecureW2’s Certificate Provisioning Connector subscribes to that topic, receives the request, and forwards it to the Dynamic PKI-driven policy engine to issue the certificate. The issued certificate is then returned to the device.
Pub/Sub is a core requirement of the Certificate Provisioning Solution. Without it, SecureW2’s Certificate Provisioning Connector cannot receive certificate requests from Google in real time.
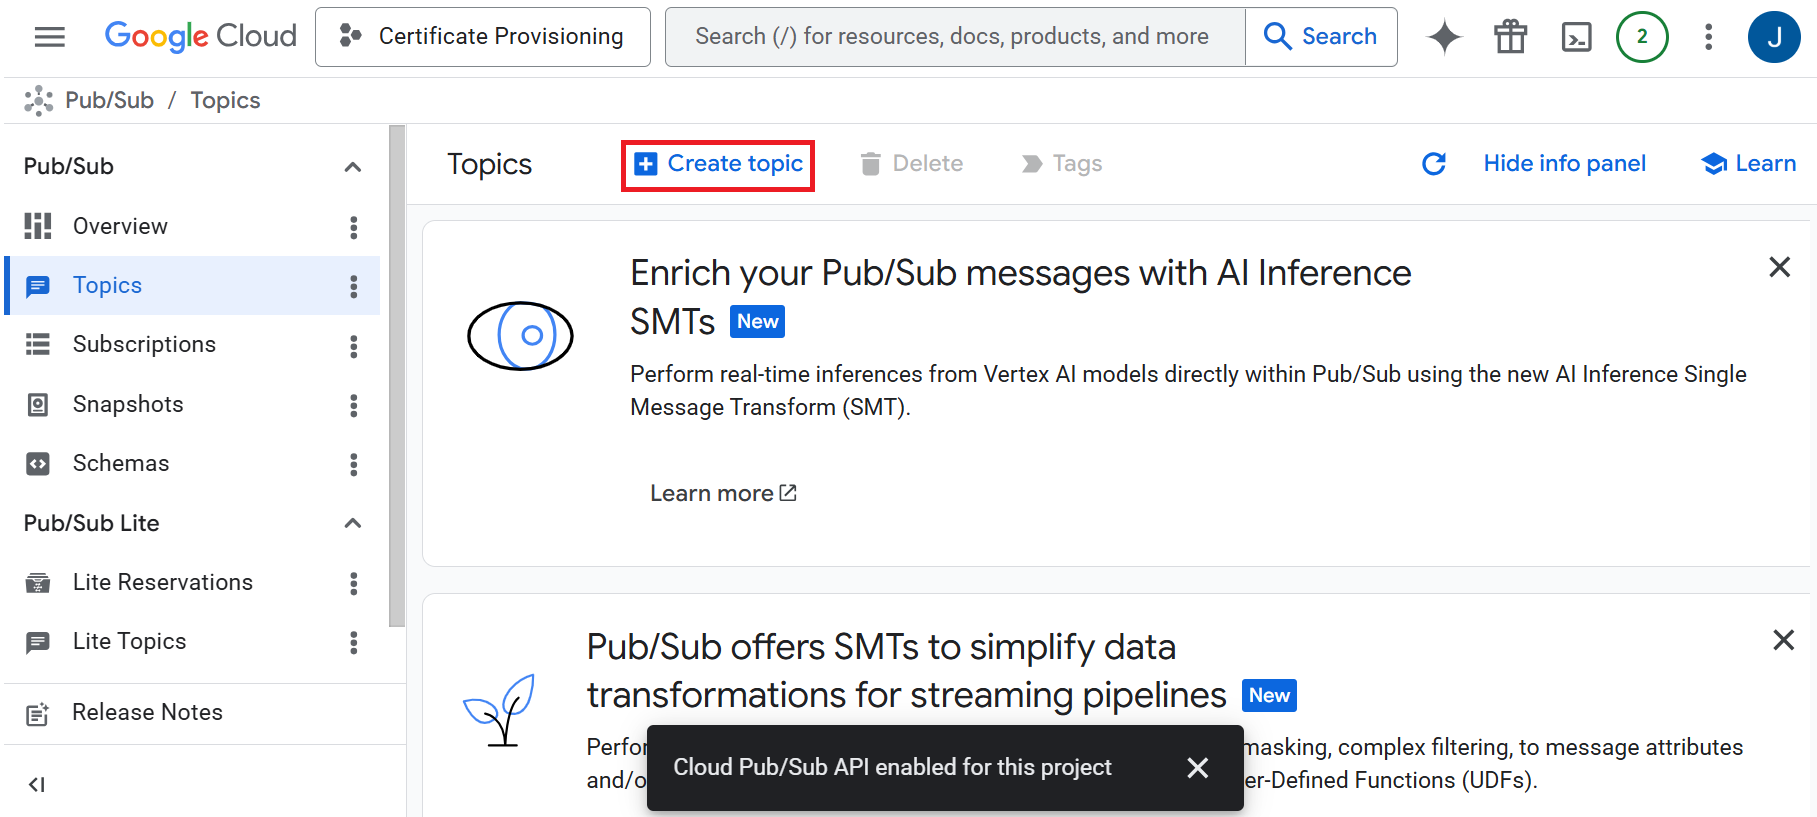
To configure Topic in the Pub/Sub, perform the following steps:
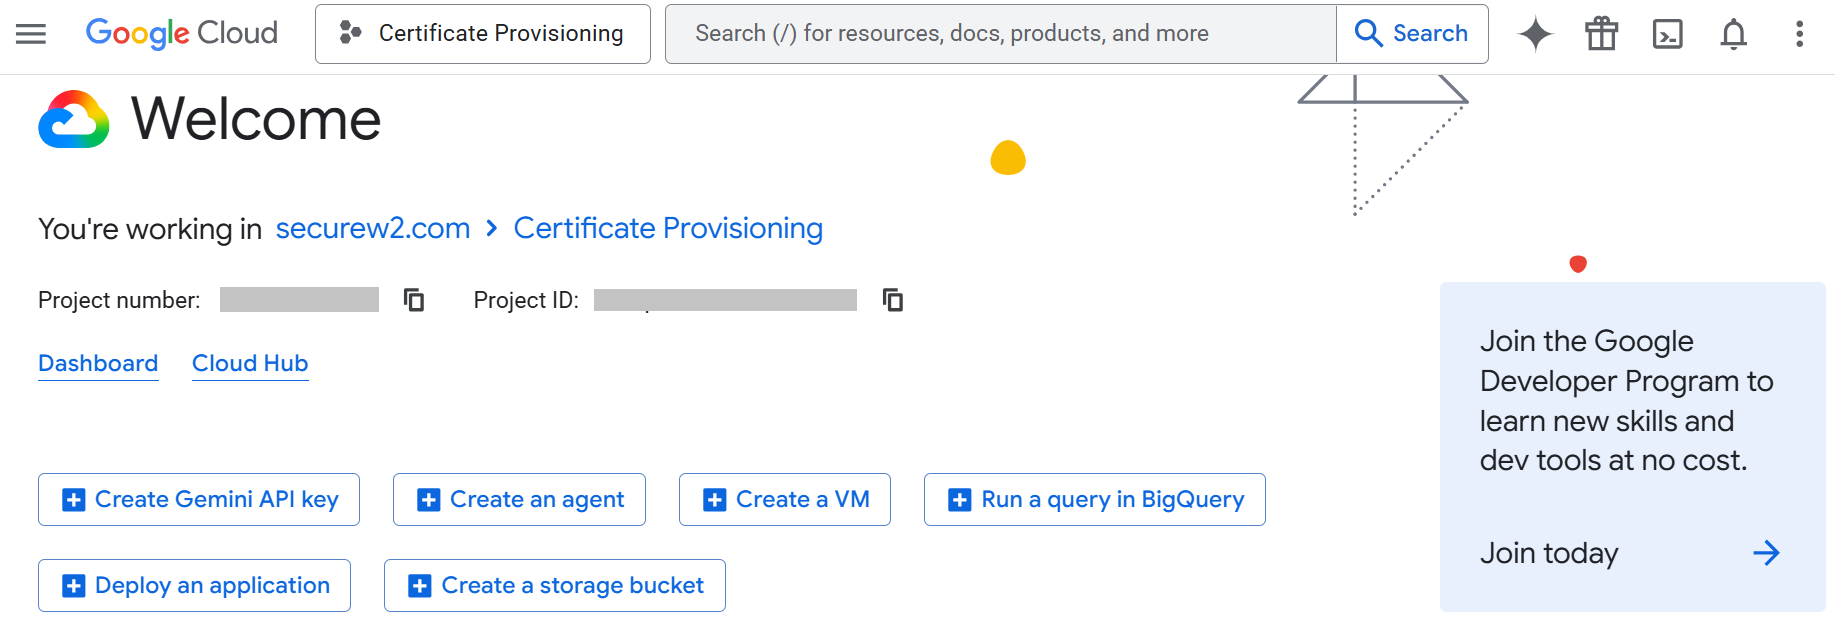
- Open the project selector and select the project that you created in the Creating a New Project section.

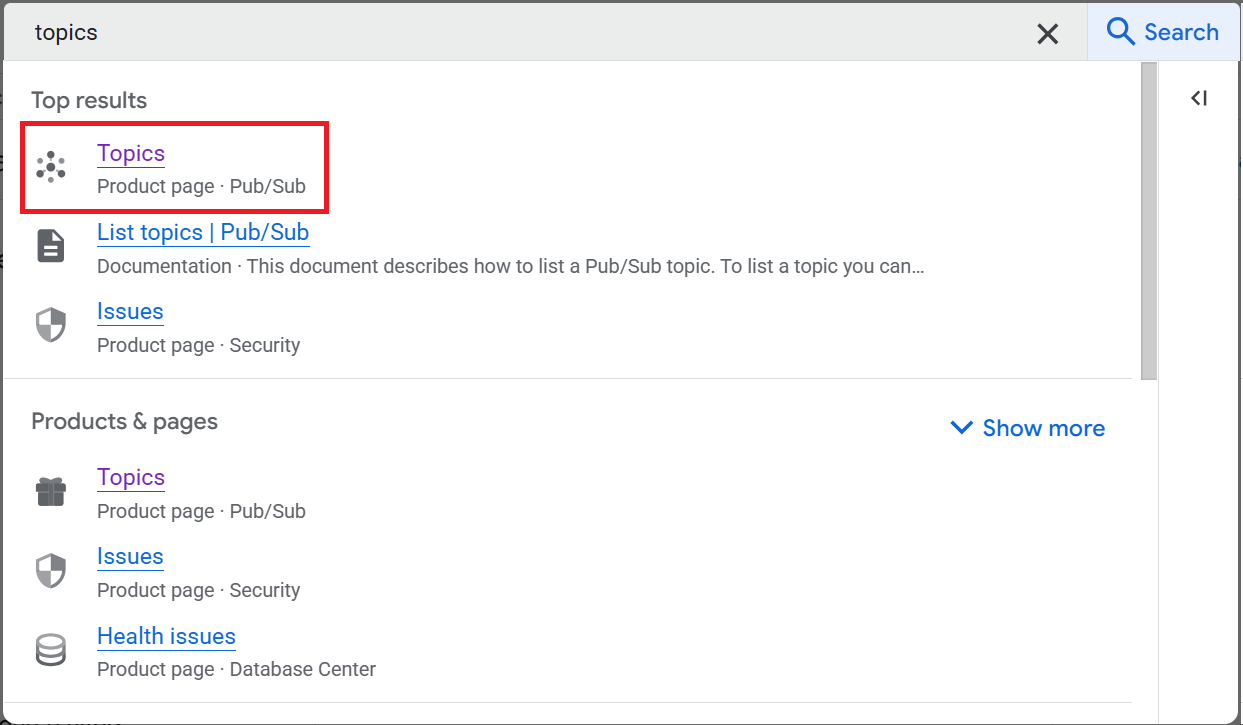
- In the search bar, search for Topics and select it.

- Click Create topic.

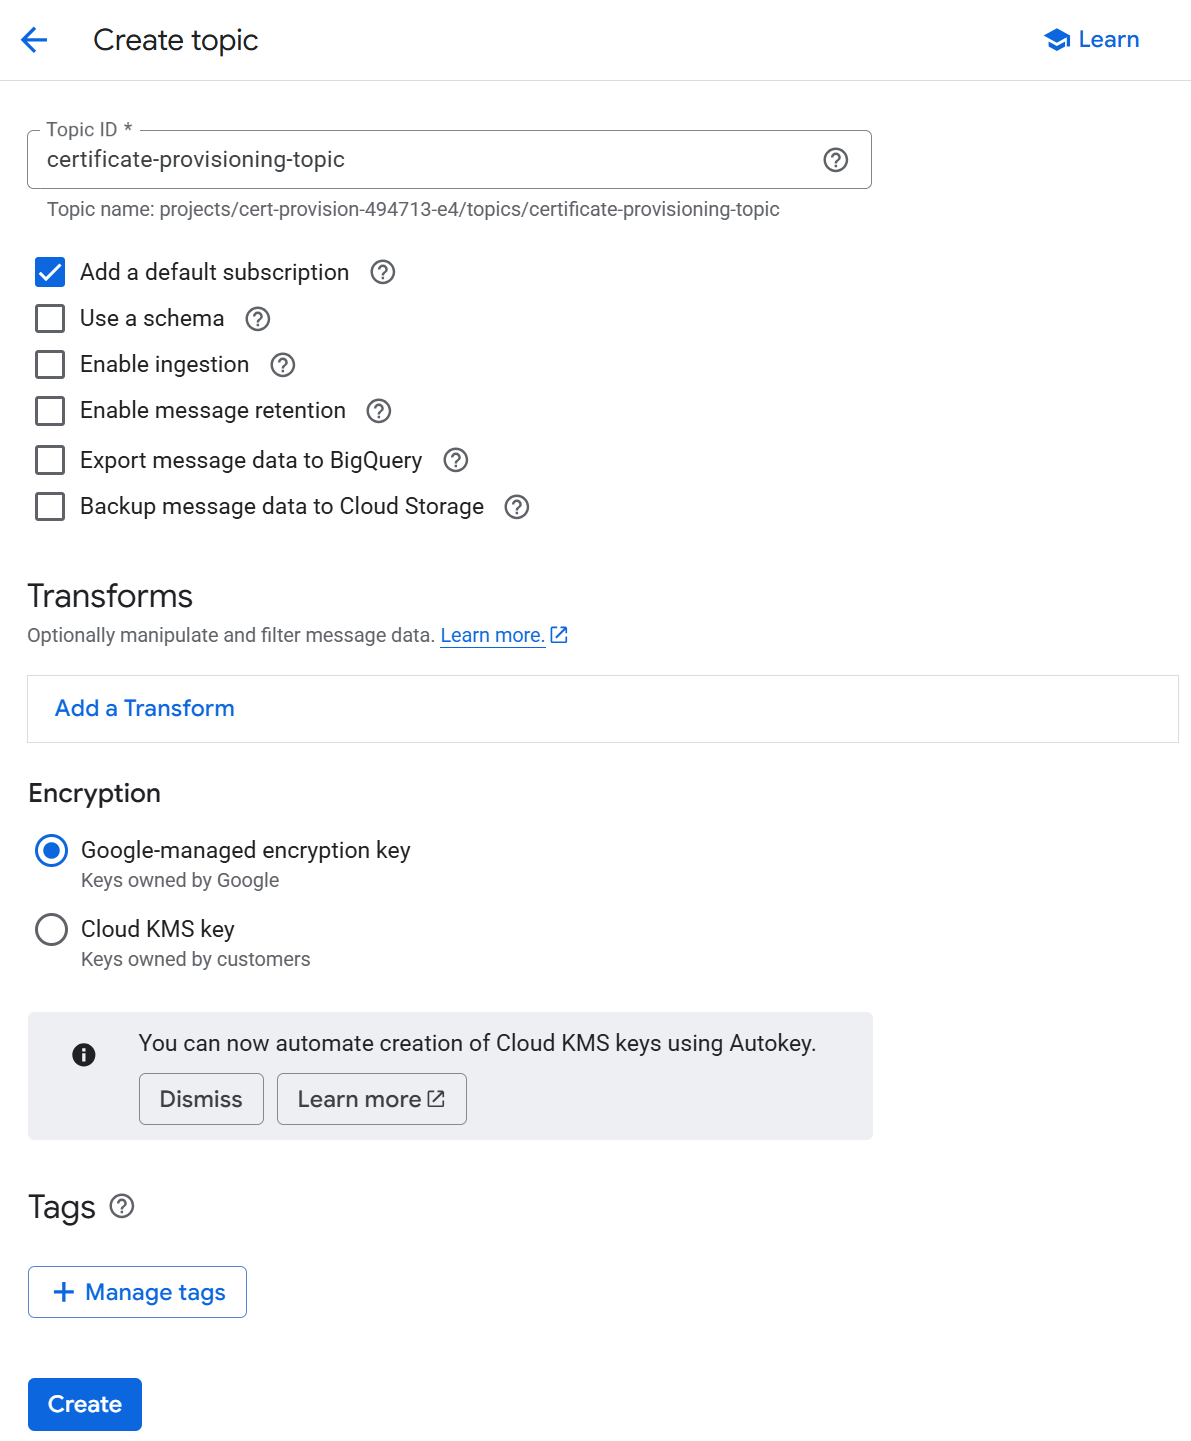
- On the Create topic page, enter a name in the Topic ID field. The Topic name is automatically populated and serves as the globally unique identifier for the topic. Copy the topic name to a text editor for later use.

- Click Create.
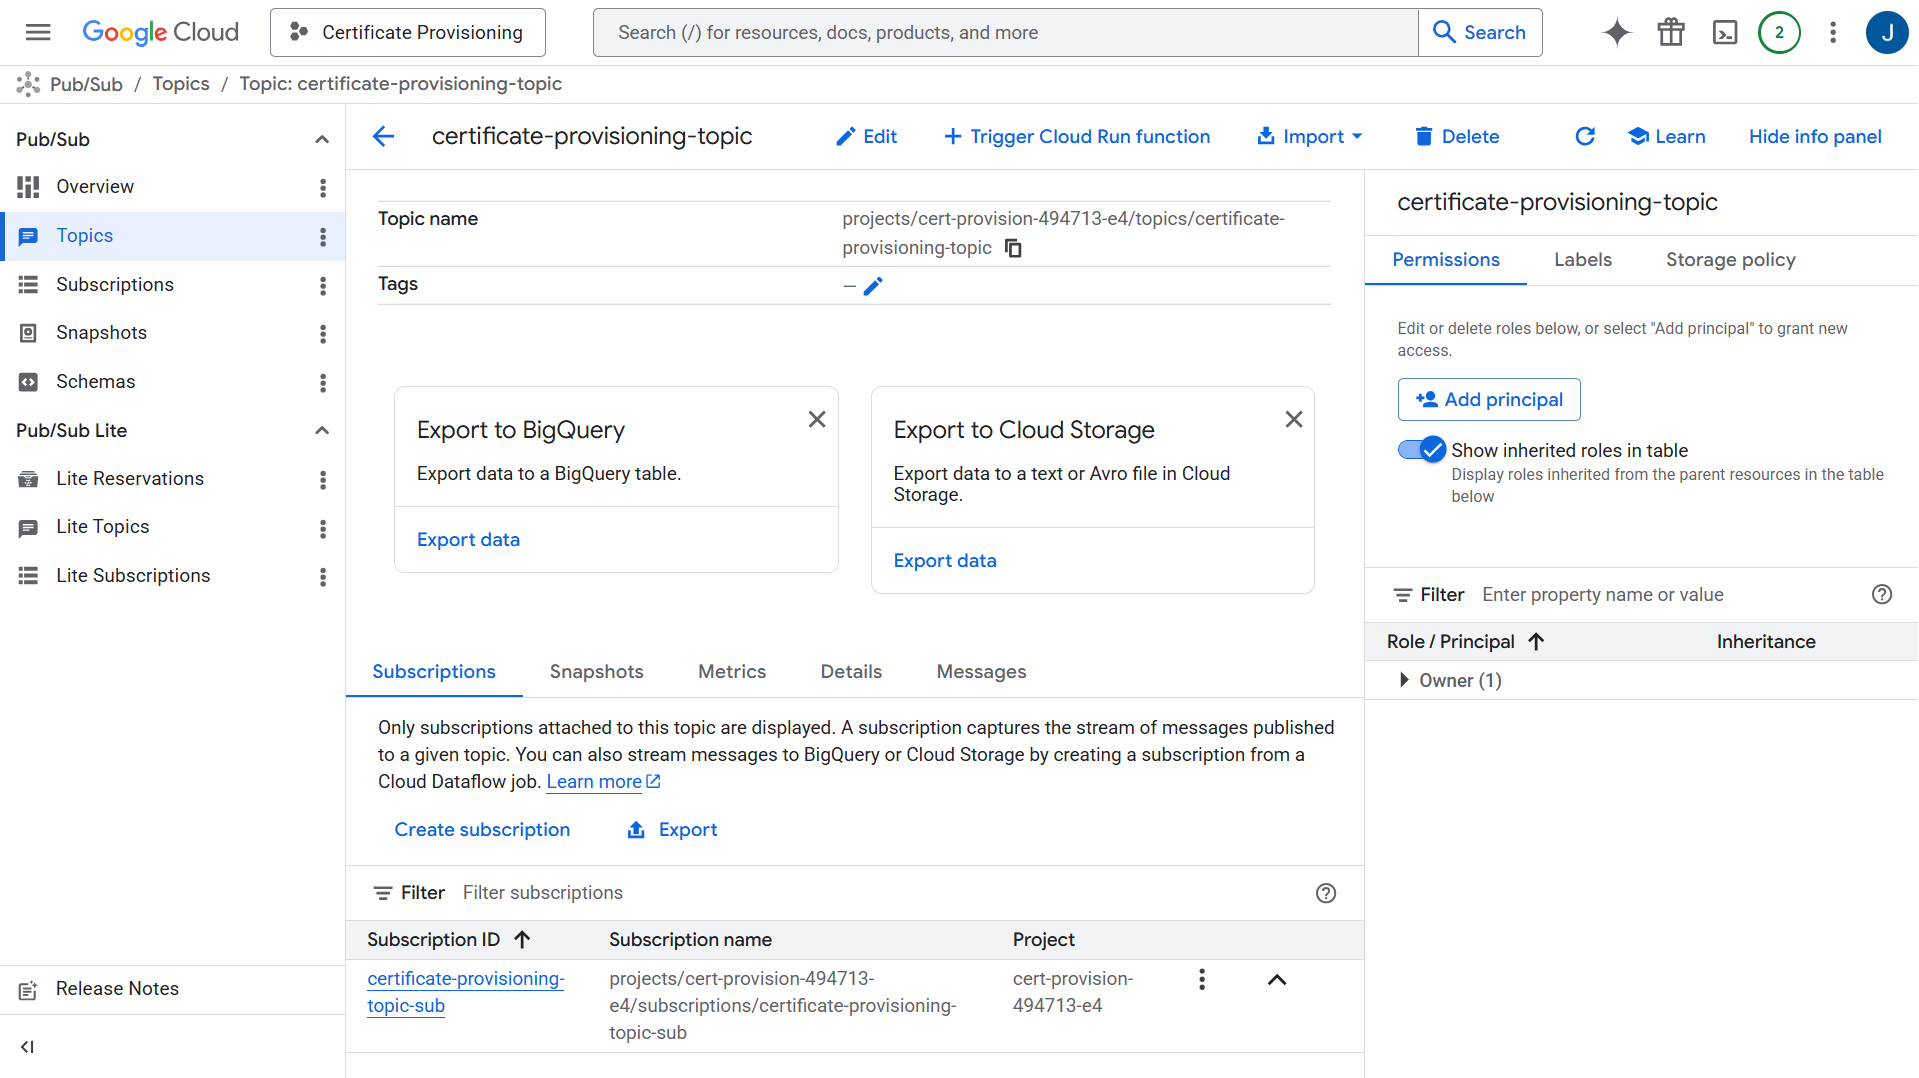
- Copy the Topic name to a text editor. You will need it when configuring the Certificate Authority Connection in the Google Admin Console.
- Copy the Subscription ID to a text editor. You will need it to configure the Certificate Provisioning Connector in the JoinNow Management Portal.

- On the Permissions tab, click Add principal.
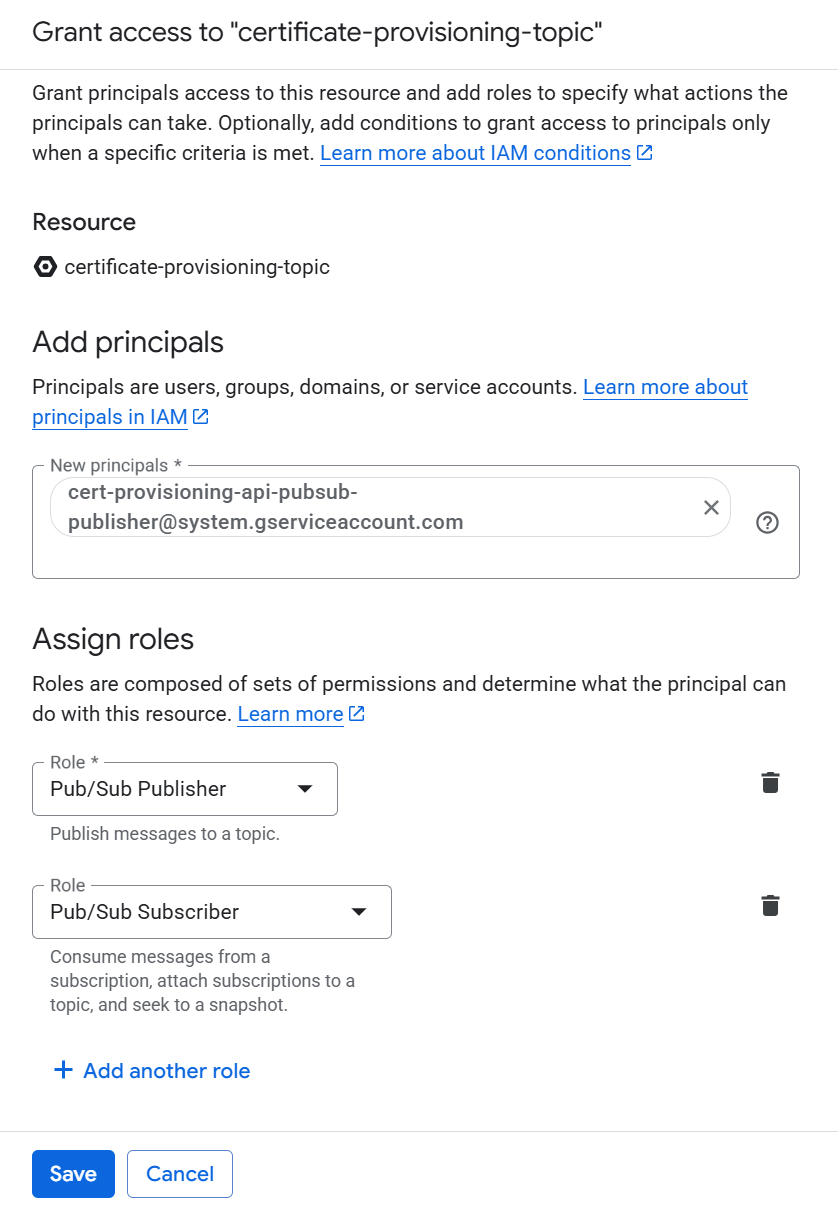
- On the Grant access to pane:
- In the Add principals field, enter cert-provisioning-api-pubsub-publisher@system.gserviceaccount.com
- In the Assign roles section:
- From the Role drop-down list, select Pub/Sub Publisher.
- Click Add another role.
- From the Role drop-down list, select Pub/Sub Subscriber.

- Click Save.
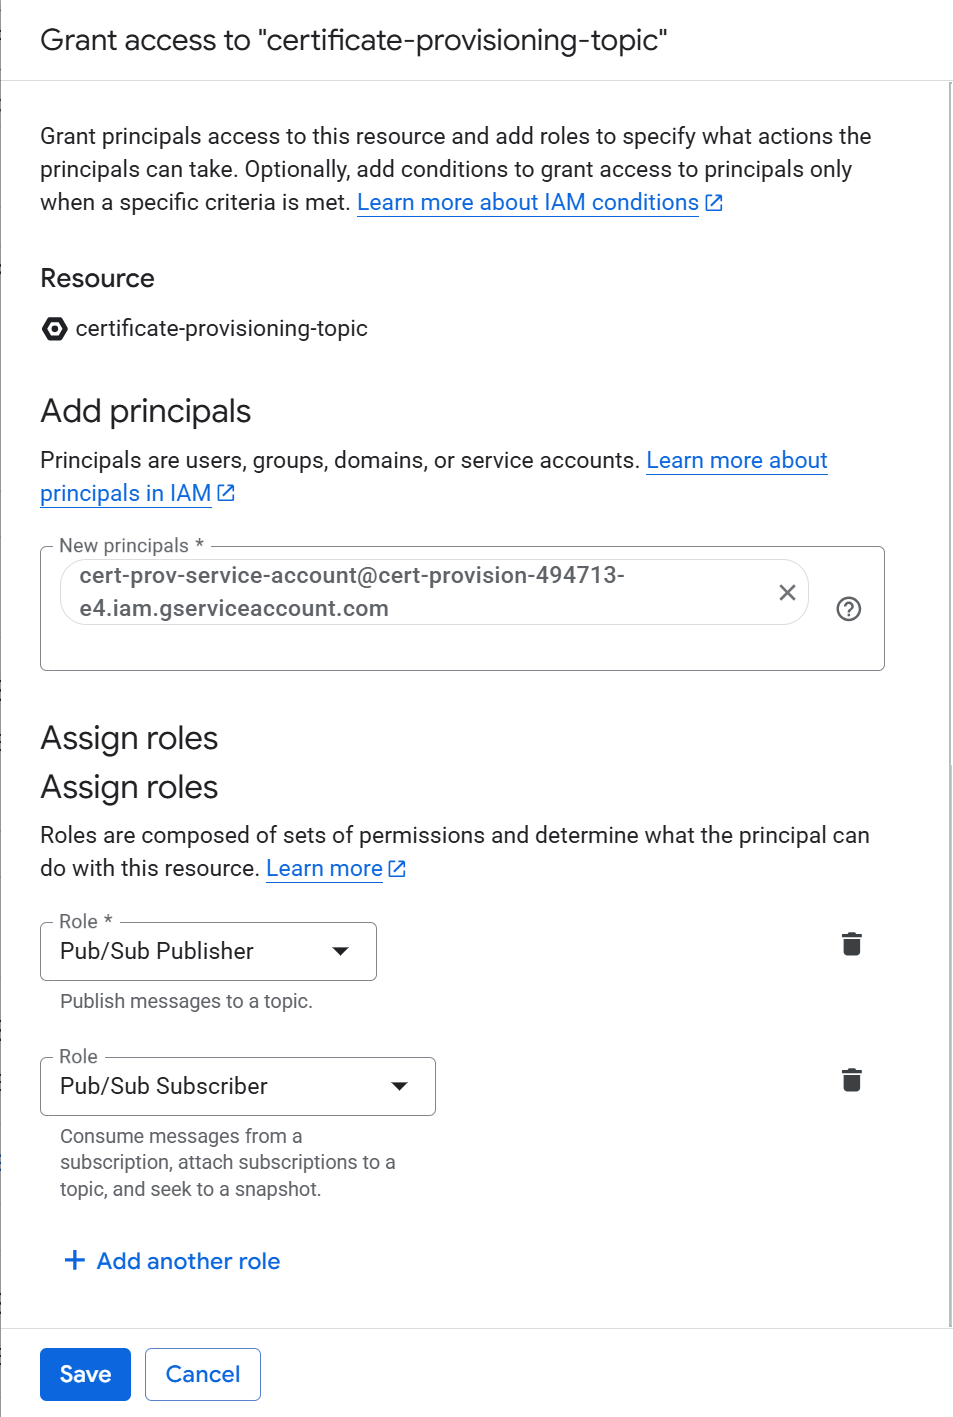
- Click Add Principal again to add the service account email address.
- On the Grant access to pane:
- In the Add principals field, enter the service account email address that you copied in the Creating a Service Account section.
- In the Assign roles section:
- From the Role drop-down list, select Pub/Sub Publisher.
- Click Add another role.
- From the Role drop-down list, select Pub/Sub Subscriber.

- Click Save.
This section describes how to create and configure a service account in Google Cloud.
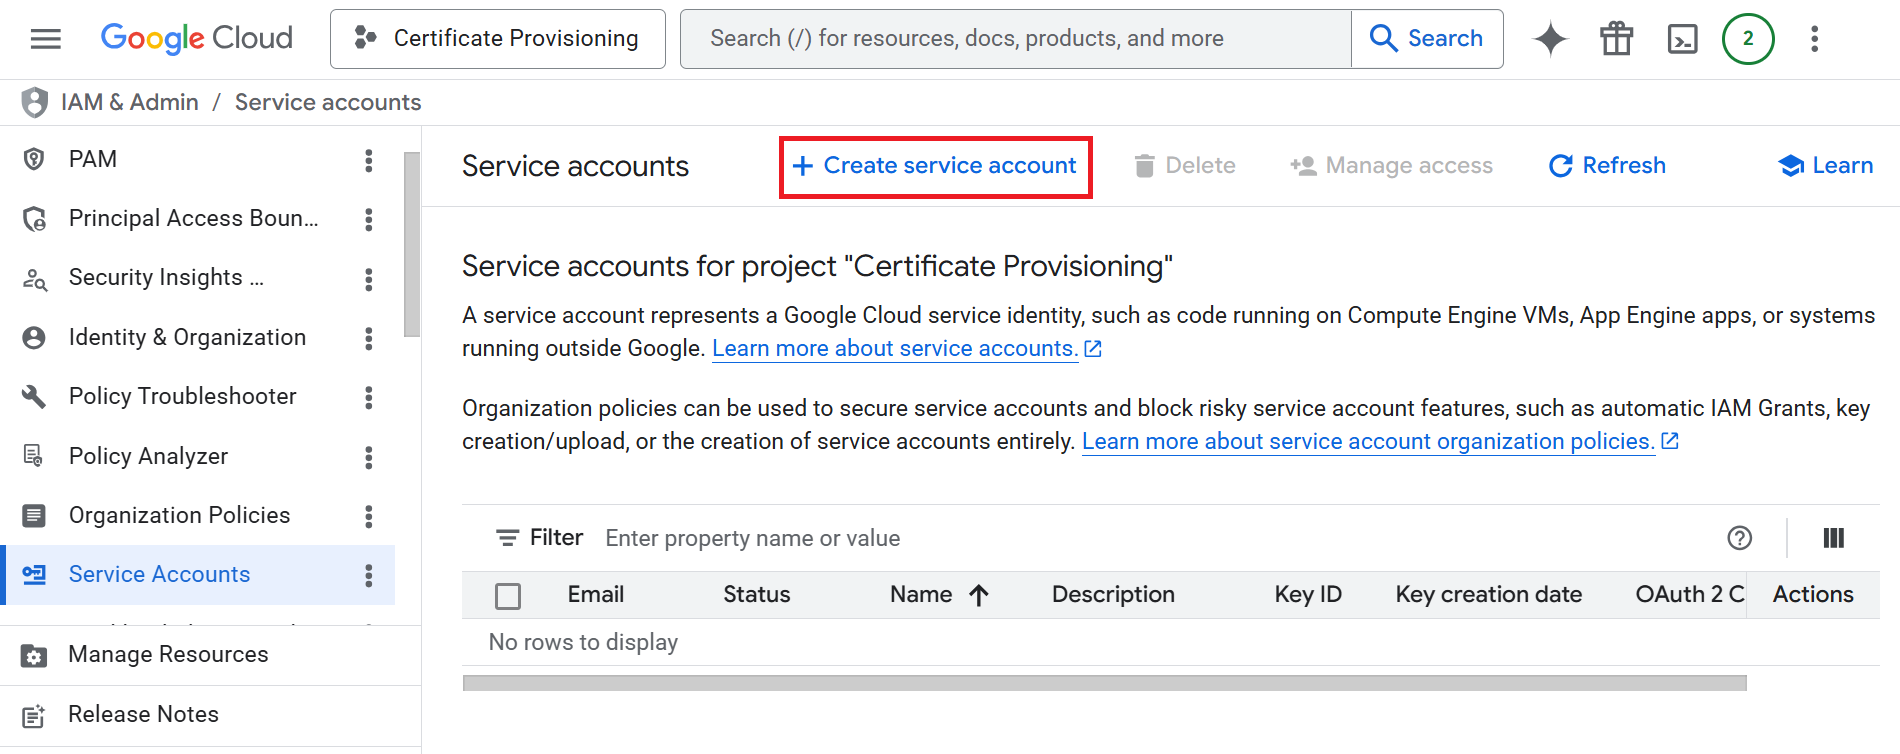
- Navigate to IAM & Admin > Service Accounts.
- Click Create service account.

- On the Create Service Account page:
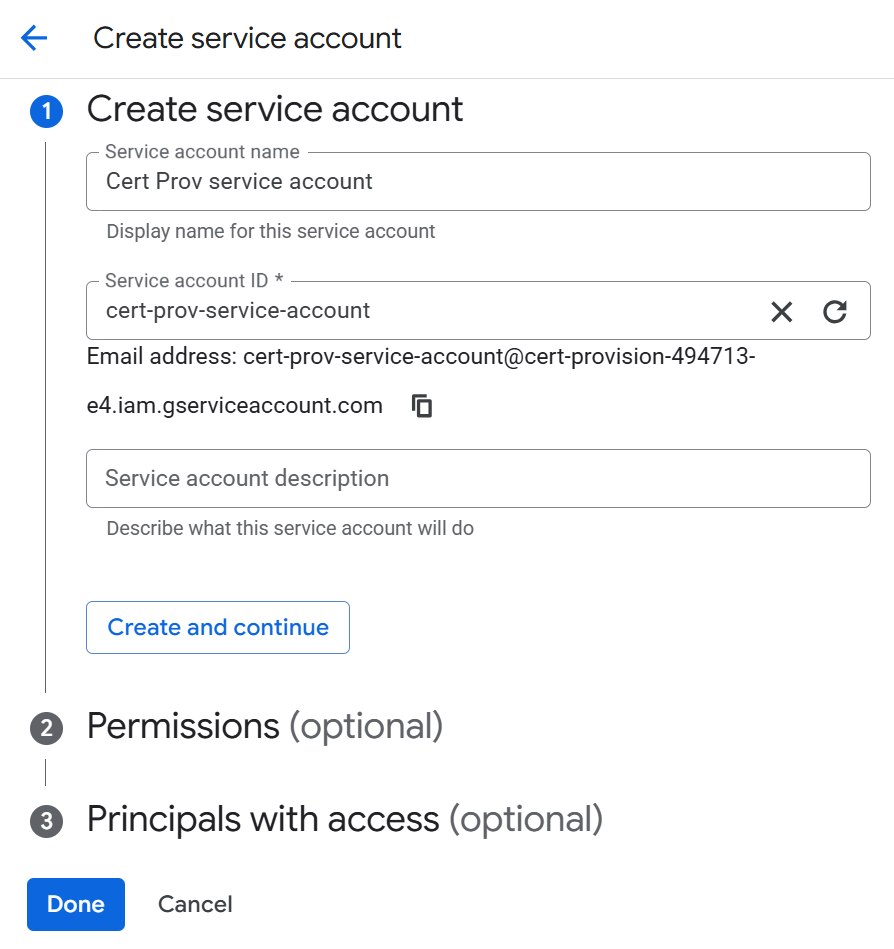
- In the Create Service Account section, provide the following details:
- In the Service account name field, enter a name for the service account. The name you enter also serves as the service account ID. Copy the service account email address to a text editor. You will need it in the Creating a Certificate Authority Connection section.

- Click Create and continue. The service account is created, and you are directed to the next step.
- In the Service account name field, enter a name for the service account. The name you enter also serves as the service account ID. Copy the service account email address to a text editor. You will need it in the Creating a Certificate Authority Connection section.
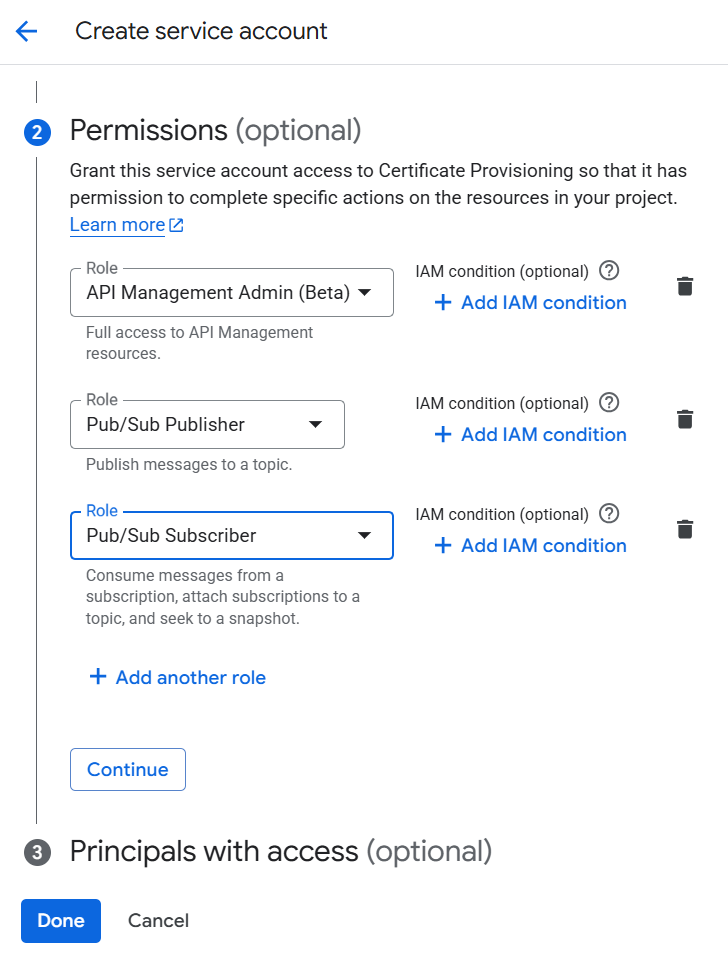
- In the Permissions (optional) section, assign the following roles to grant the service account access to the Certificate Provisioning project:
- From the Select a Role drop-down list, select API Management Admin (Beta).
- Click Add another role.
- From the Select a Role drop-down list, select Pub/Sub Publisher.
- Click Add another role.
- From the Select a Role drop-down list, select Pub/Sub Subscriber.
- Click Done to save the service account.

- In the Create Service Account section, provide the following details:
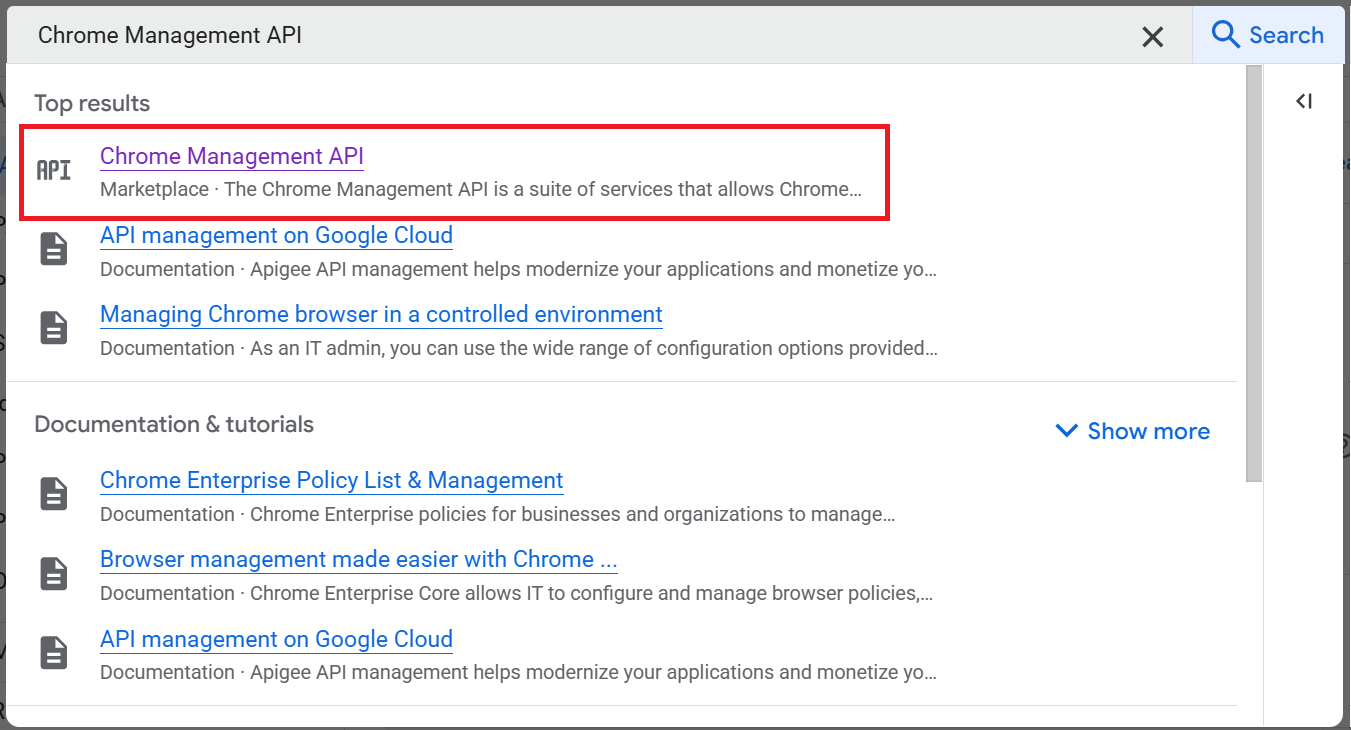
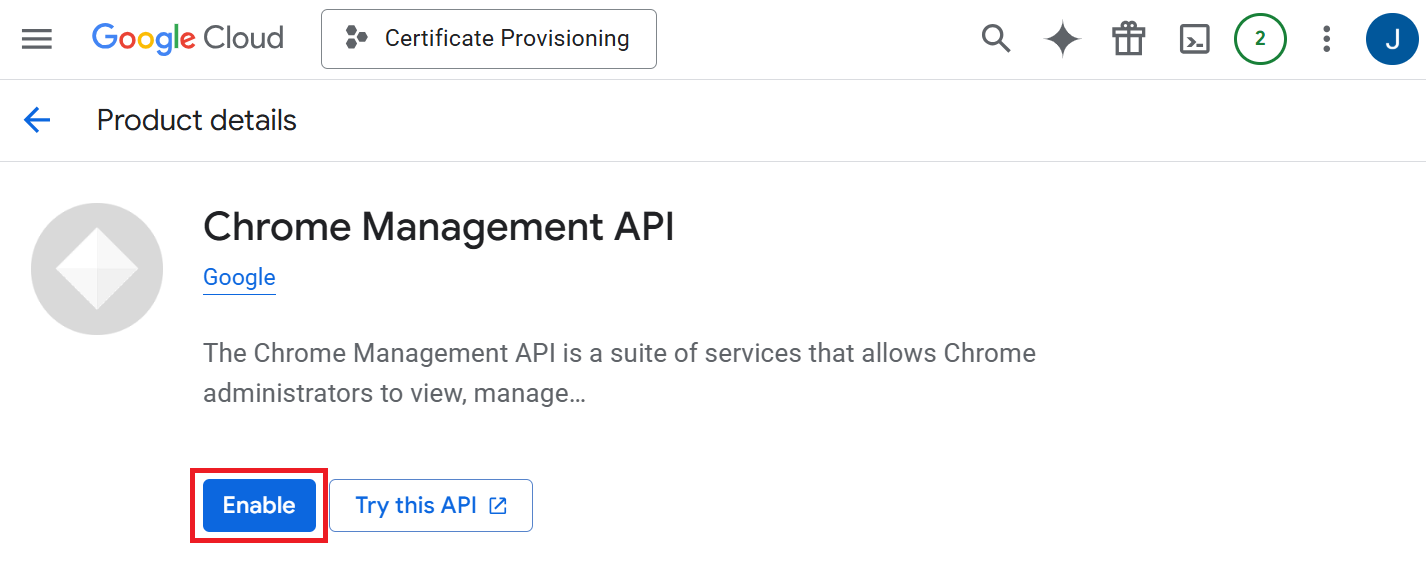
The Chrome Management API is enabled to allow the Google Cloud project to communicate with SecureW2 Certificate Provisioning Connector for ChromeOS device enrollment.
This section describes how to enable the Chrome Management API for your Google Cloud project.
- In the search bar, search for Chrome Management API and select it.

- Click Enable to activate the Chrome Management API for the project.

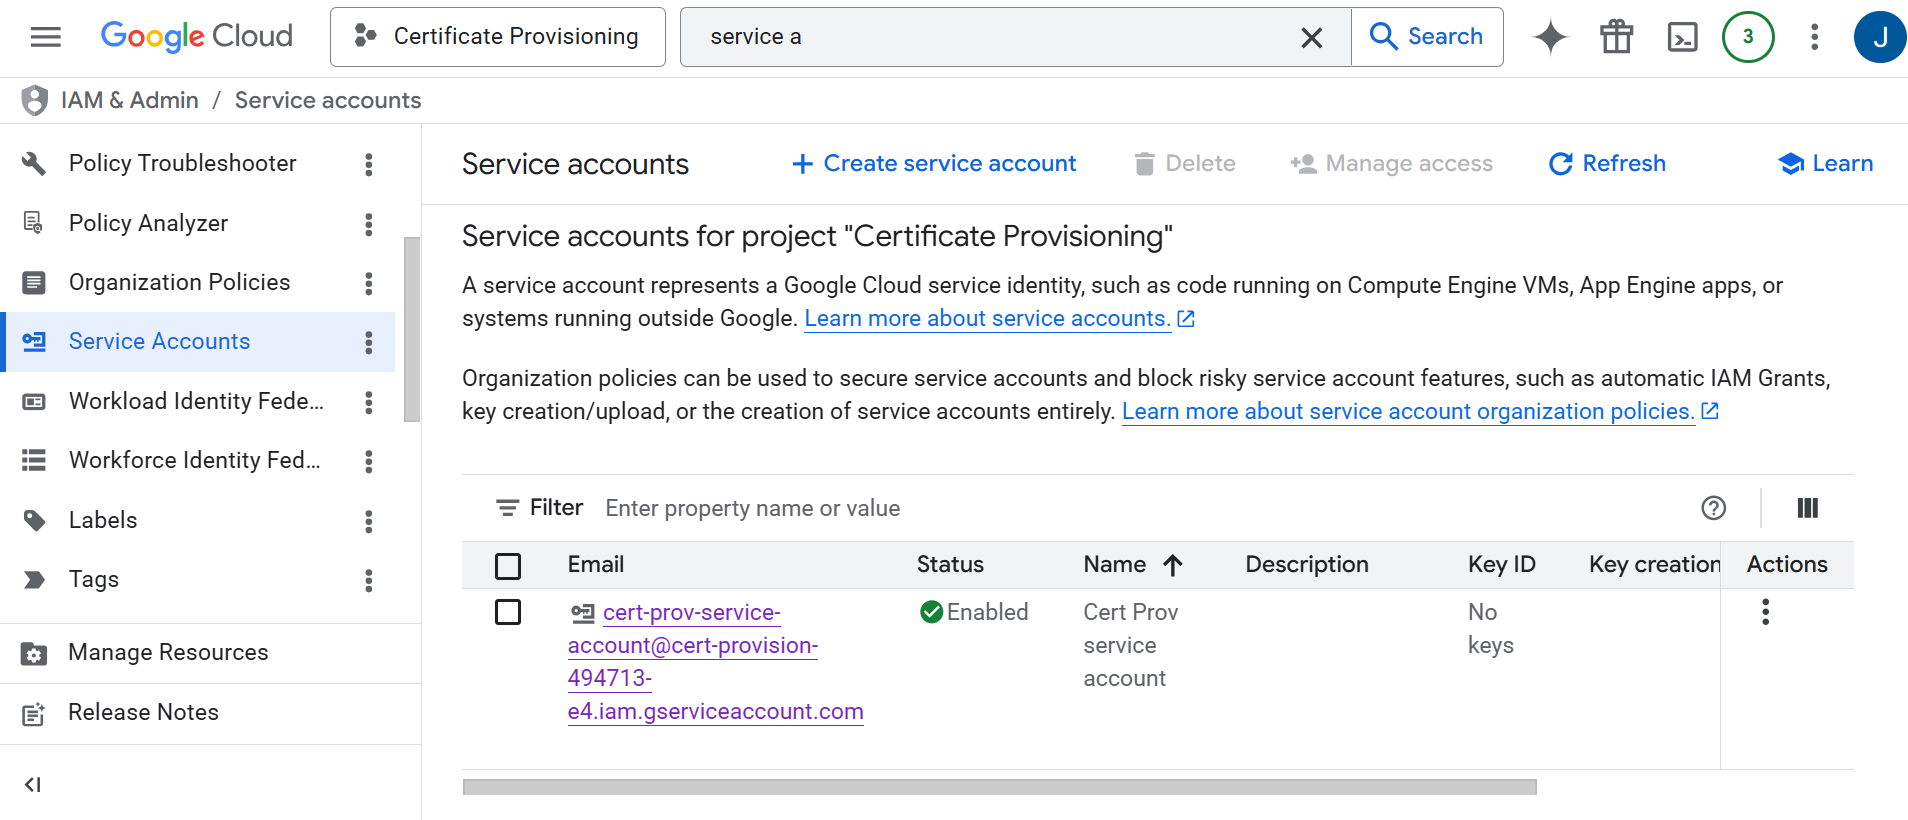
This section describes how to create and download a JSON key for the service account you created in the Creating a Service Account section.
- Navigate to IAM & Admin > Service Accounts and select the service account you created.

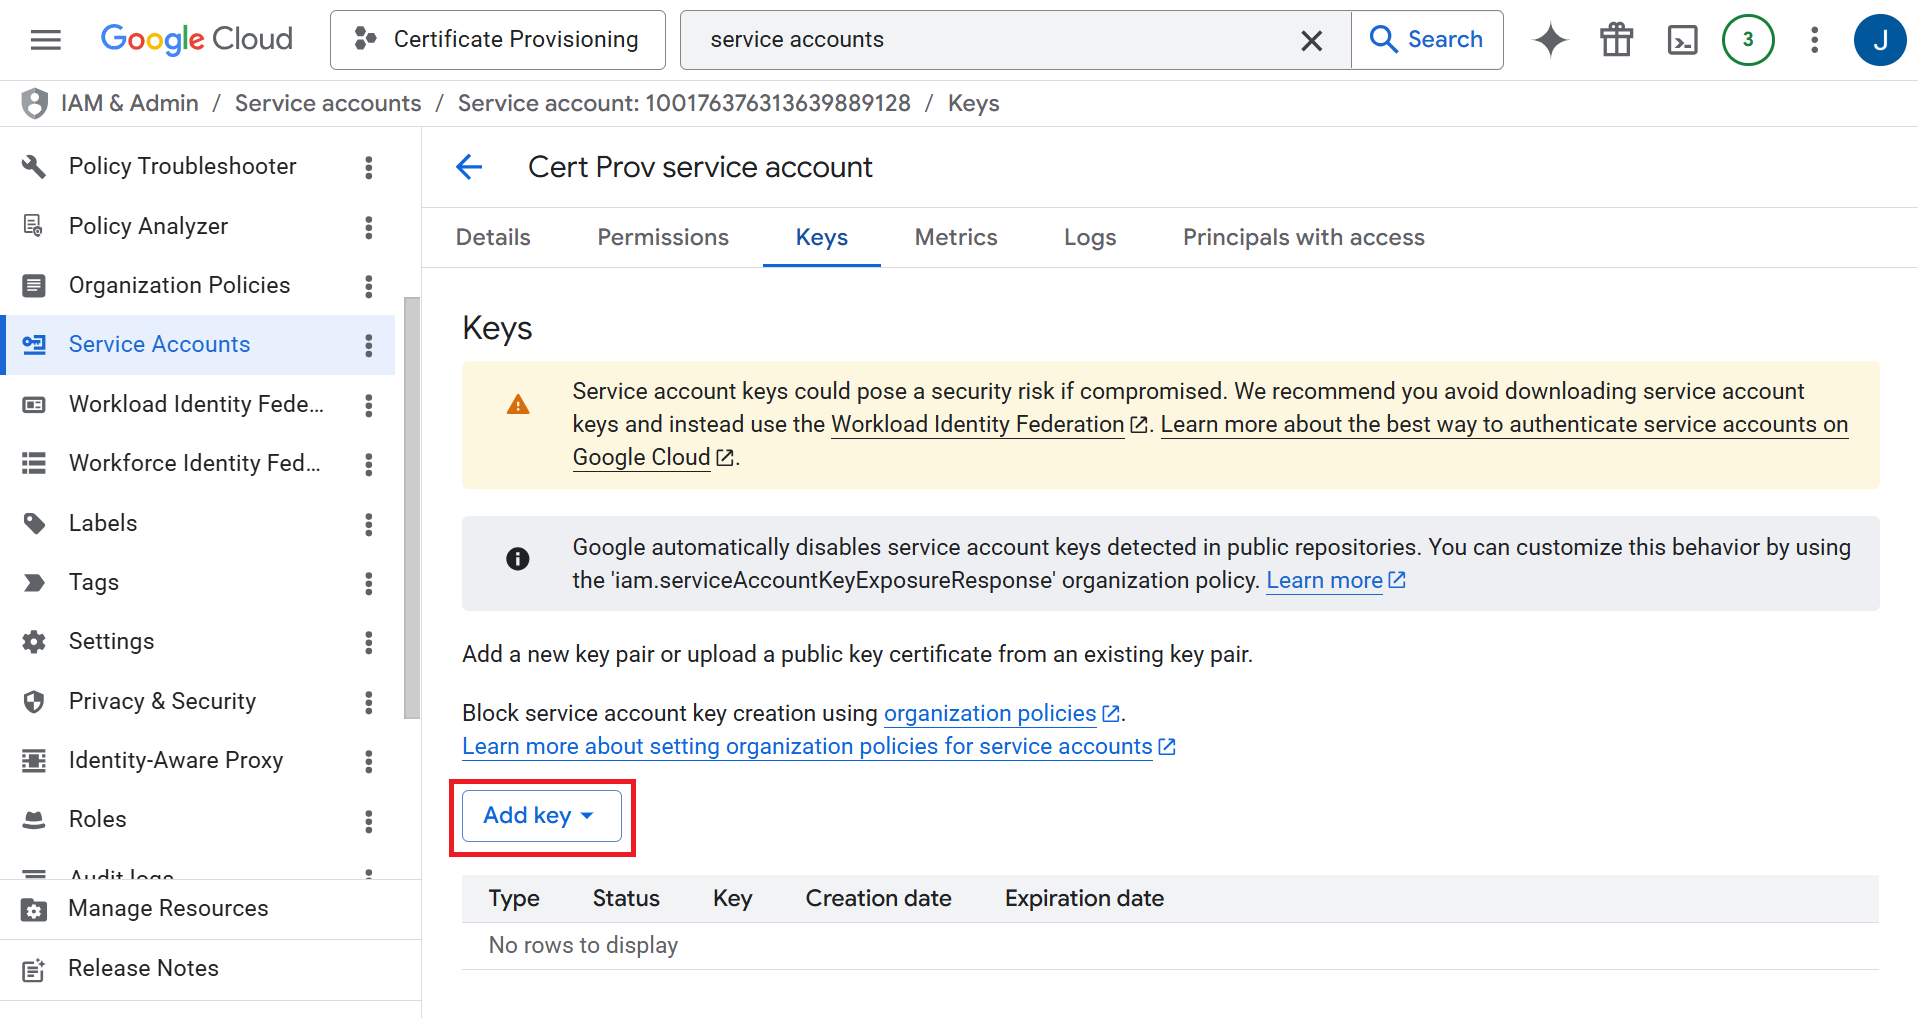
- Select the Keys tab.

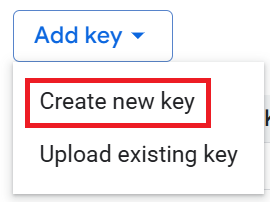
- Click Add Key and select Create new key.

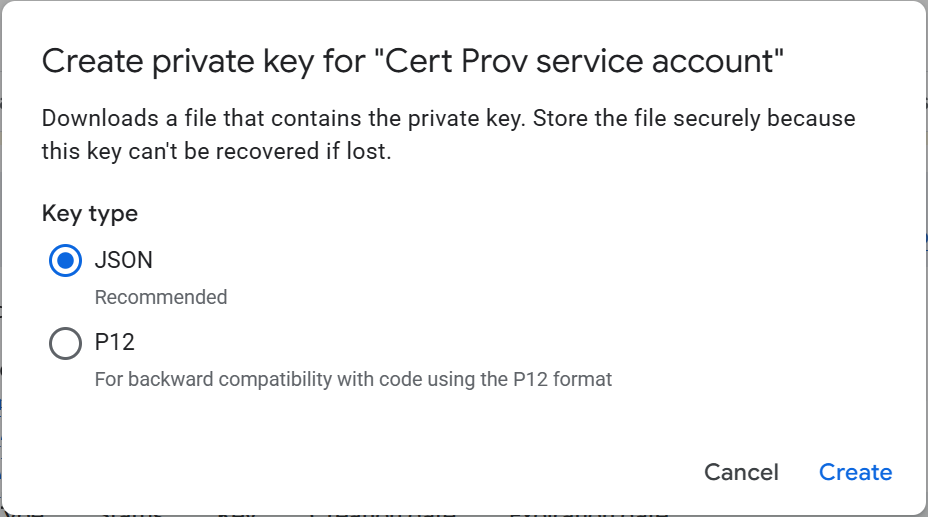
- Select JSON as the key type and click Create. The key file is downloaded to your machine.

NOTE: Store the downloaded JSON key file in a secure location. You will need it to configure the Certificate Provisioning Connector in the JoinNow Management Portal.
To upload the intermediate CA certificate from the JoinNow Management Portal to the Server CA certificates, perform the following steps:
- Log in to the Google Workspace Admin Console.
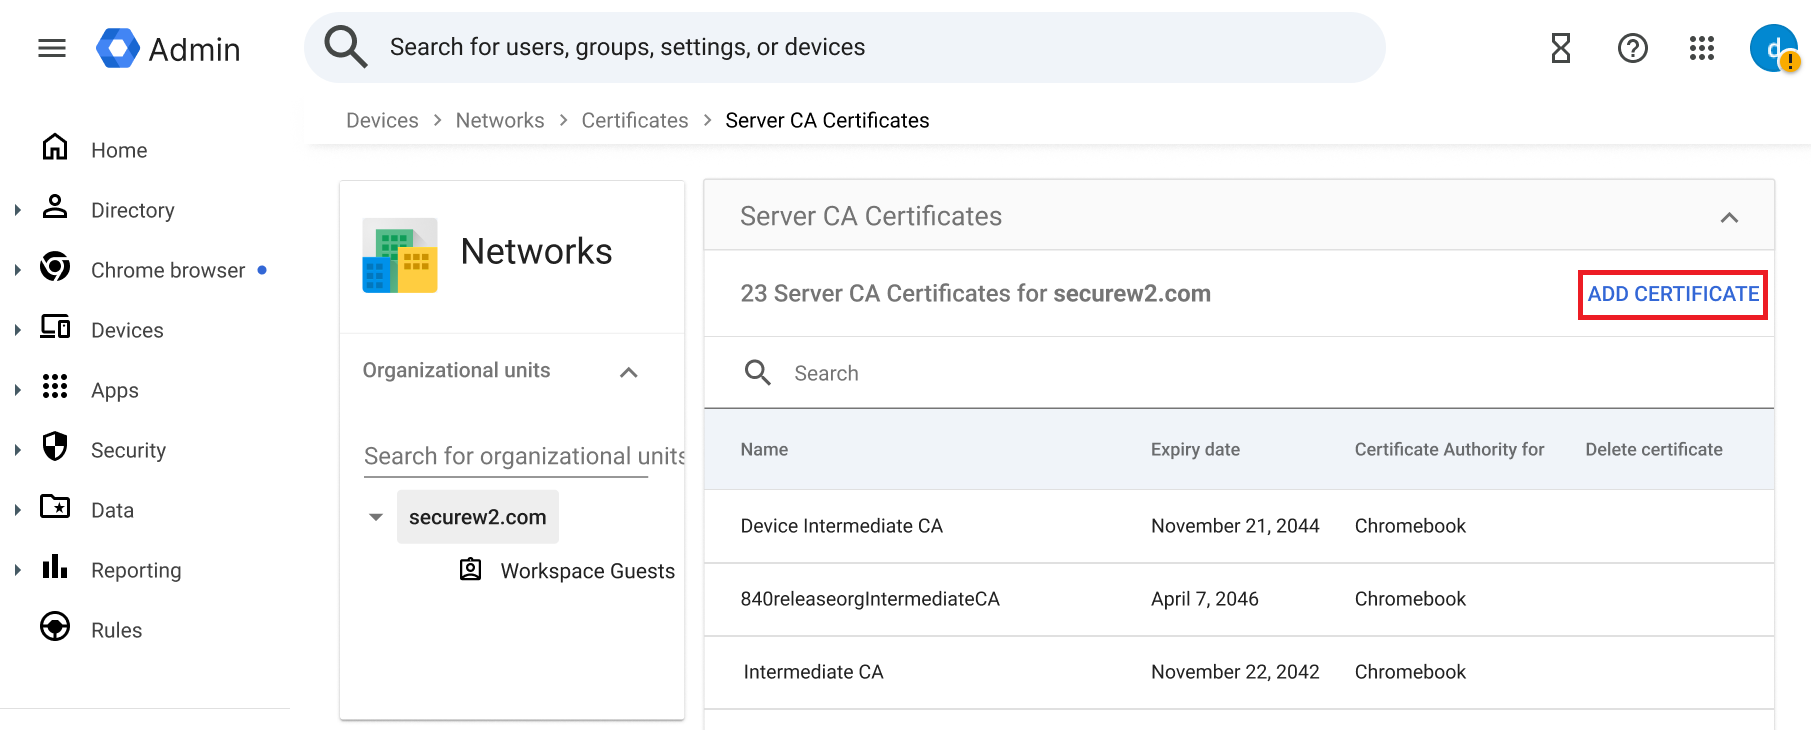
- Navigate to Devices > Networks > Certificates > Server Certificate Authority Certificates.
- To download the intermediate CA certificate from the JoinNow Management Portal:
- Log in to the JoinNow Management Portal.
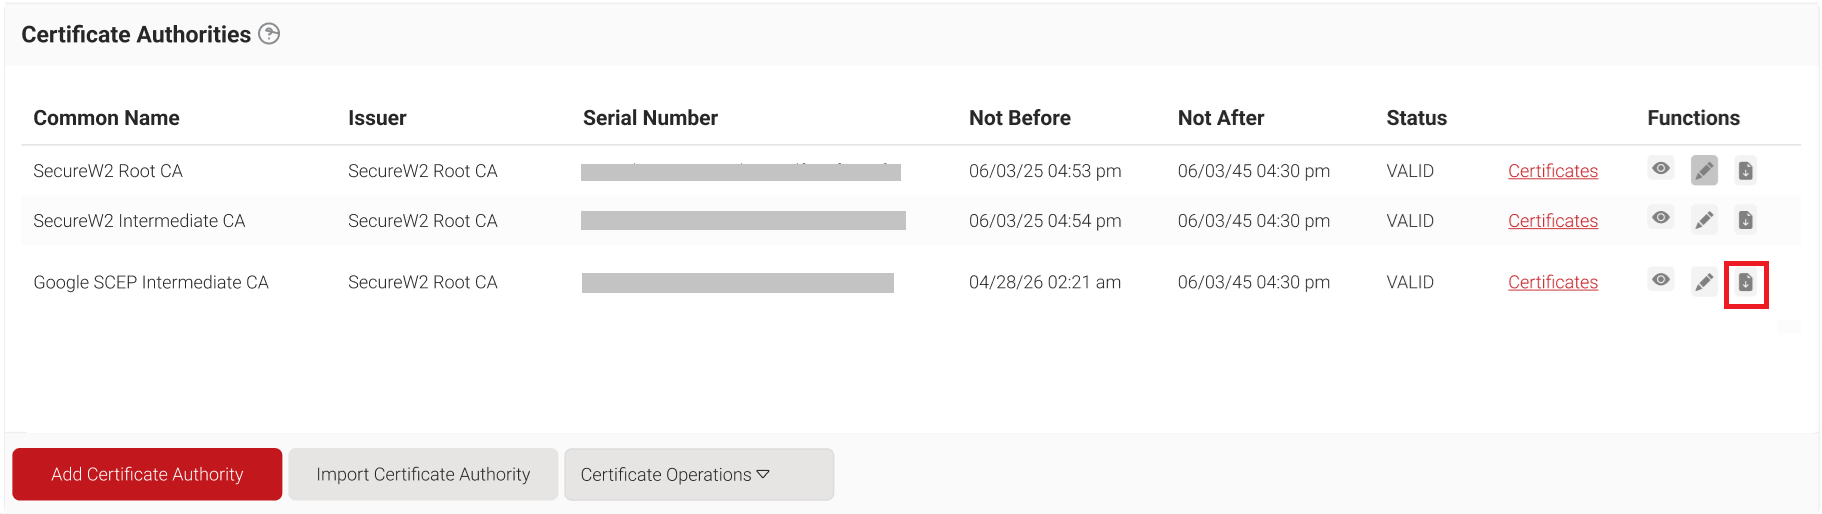
- Navigate to Dynamic PKI > Certificate Authorities.
- Click Download to save the intermediate CA certificate created in the Creating a SecureW2 Intermediate CA section.

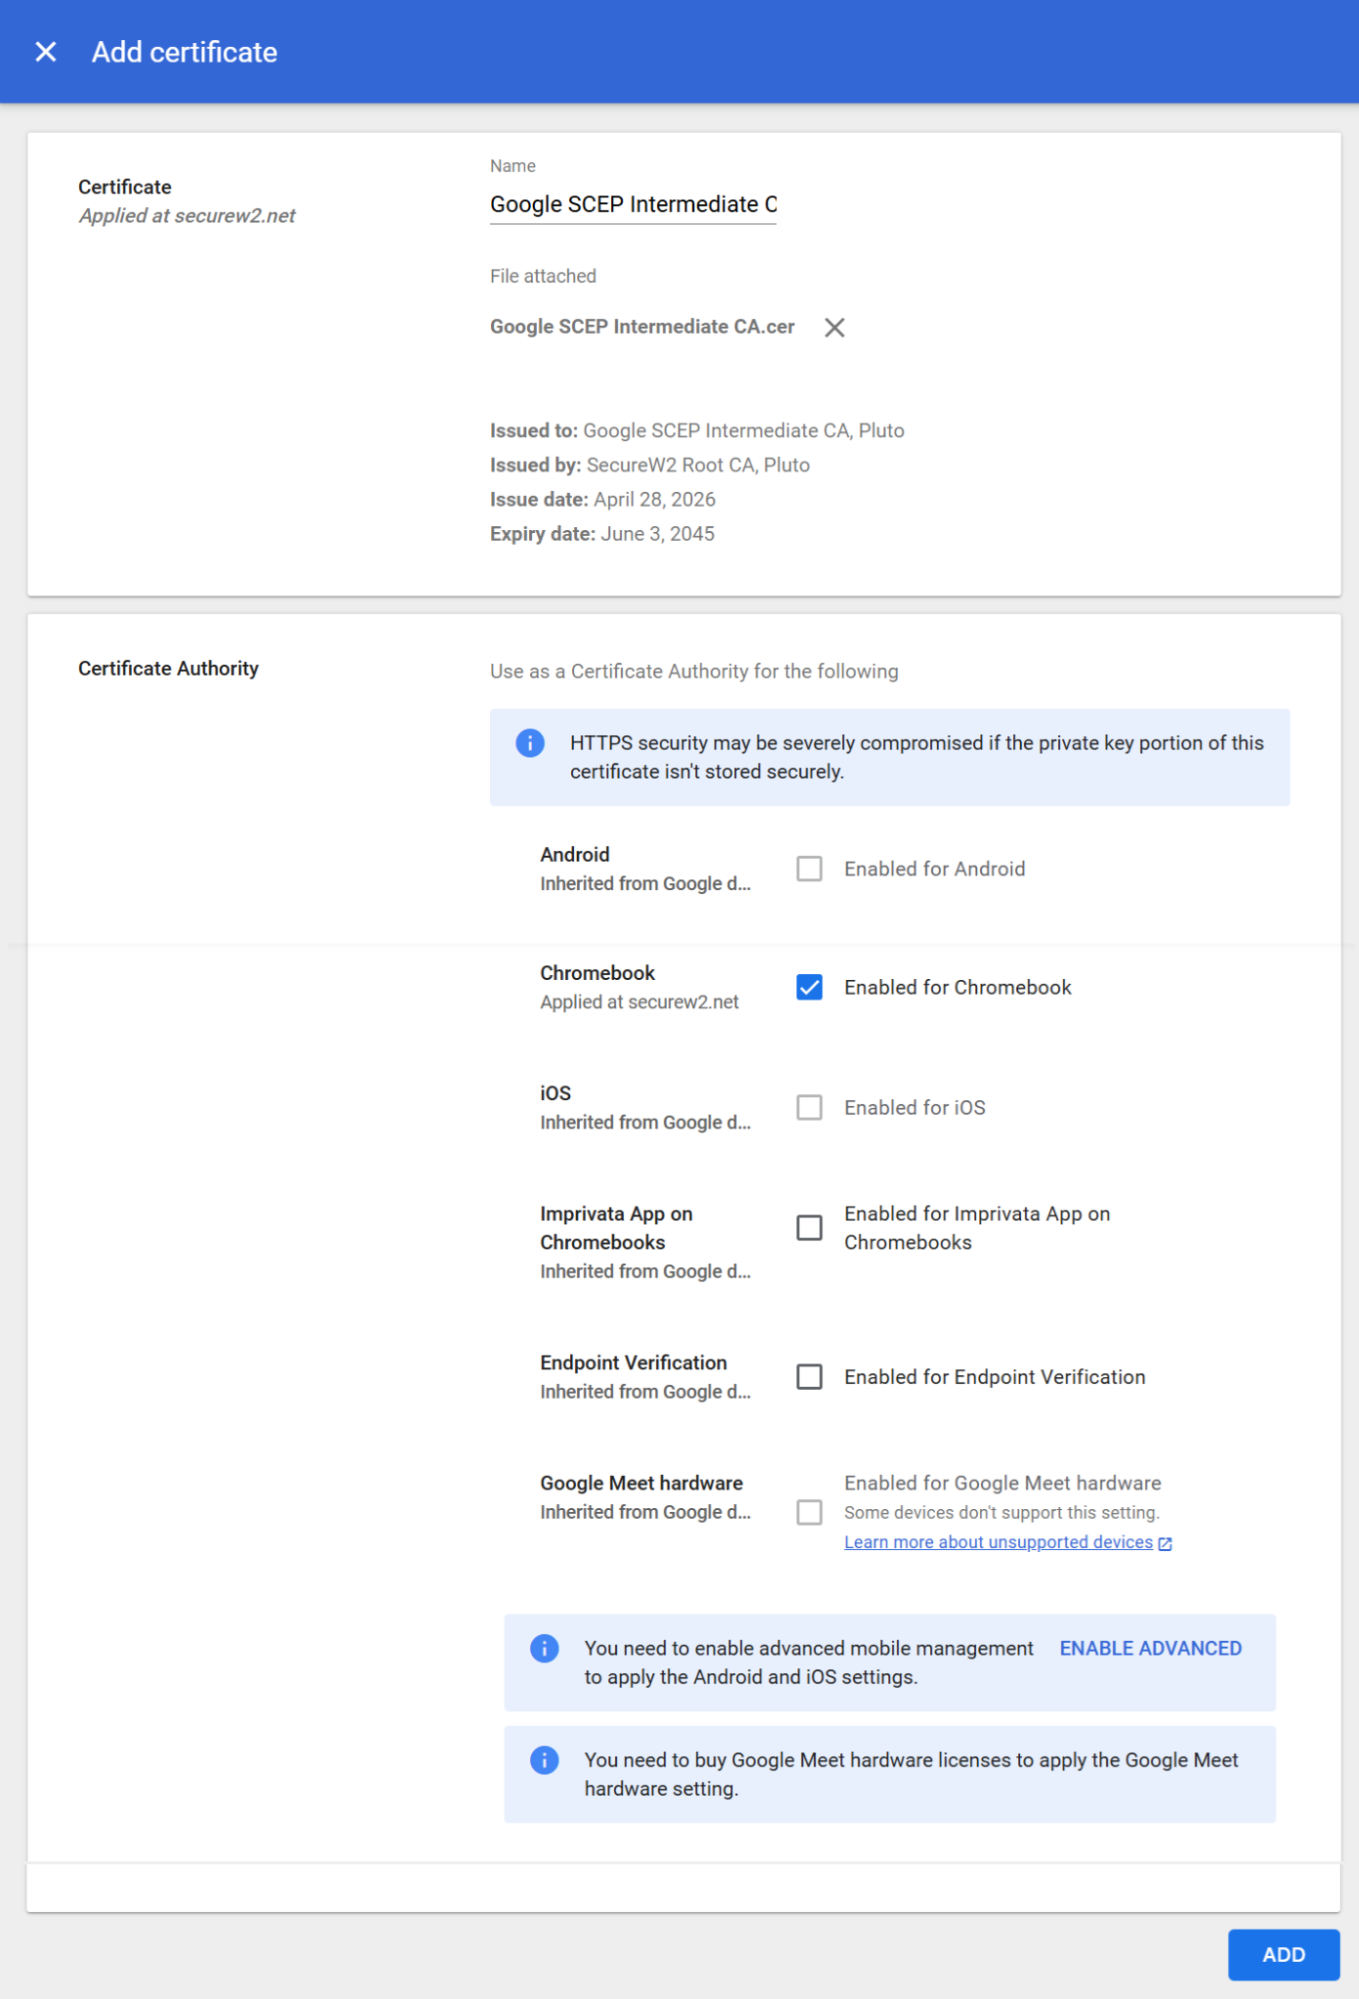
- Click ADD CERTIFICATE and upload the intermediate CA certificate from the JoinNow Management Portal.

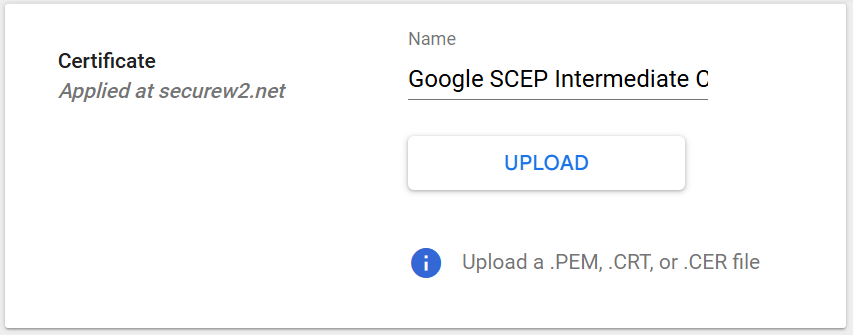
- On the Add certificate page:
- In the Name field, enter a name for the certificate.
- Click UPLOAD to upload the intermediate CA certificate downloaded from the JoinNow Management Portal.

- Select the Enabled for Chromebook option.

- Click Add.
To create a Certificate Authority Connection in the Google Admin Console, perform the following steps:
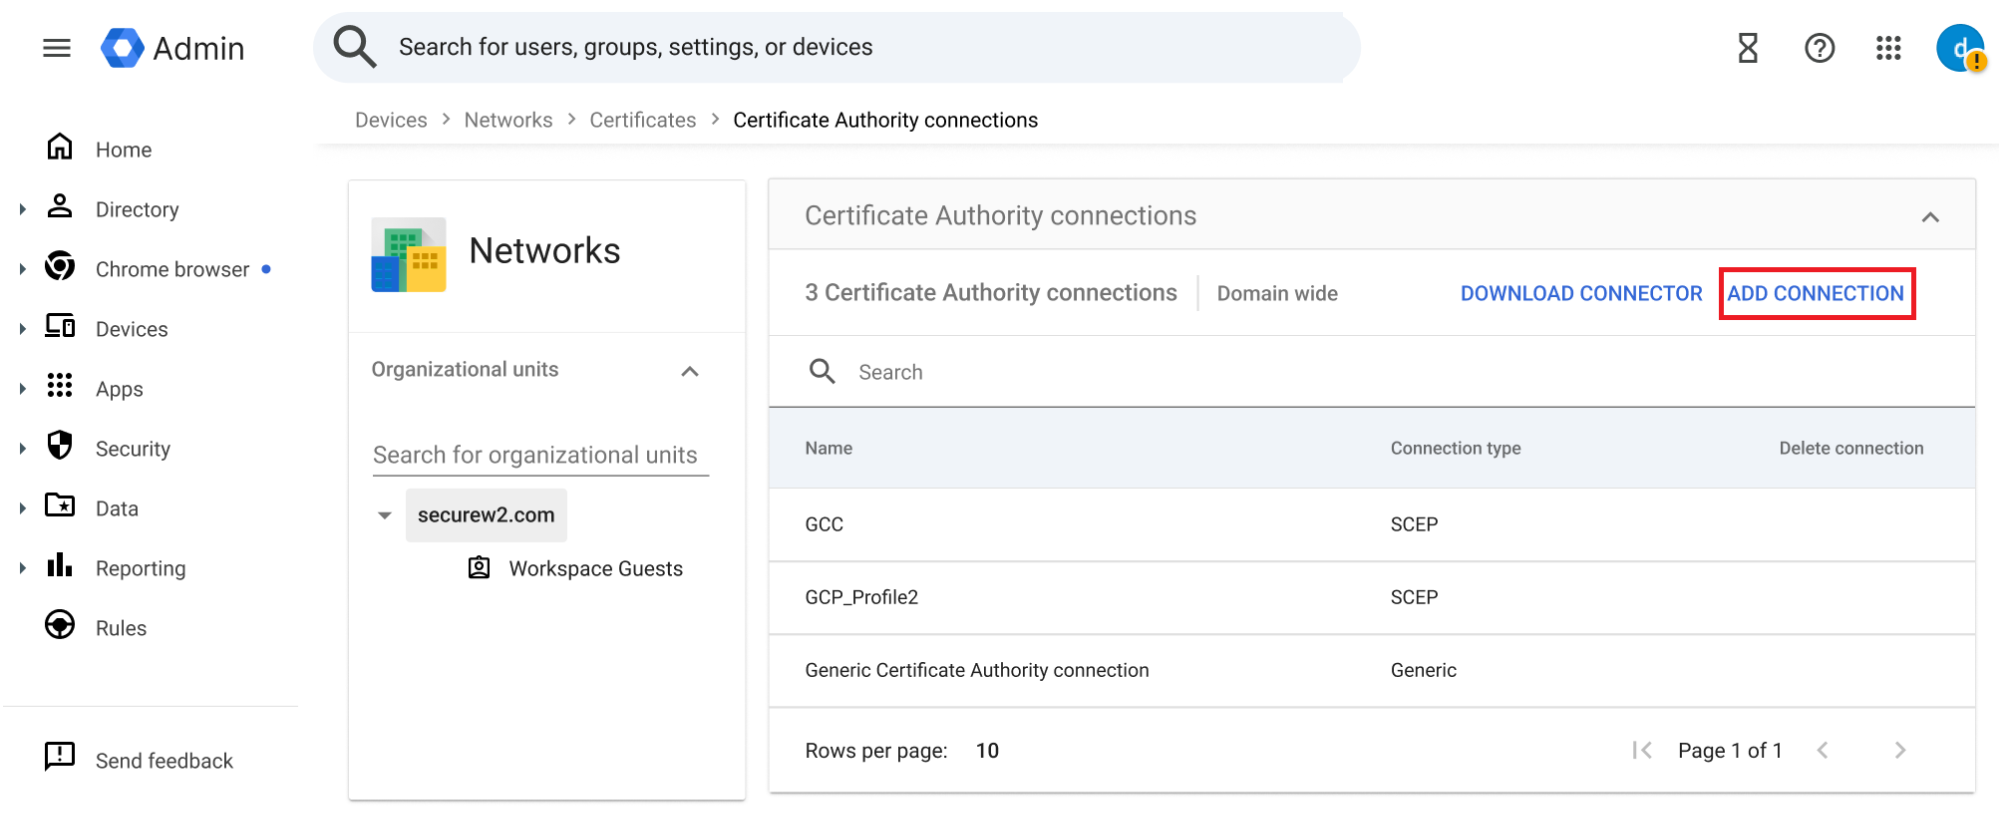
- Navigate to Devices > Networks > Certificates > Certificate Authority connections.
- Click ADD CONNECTION.

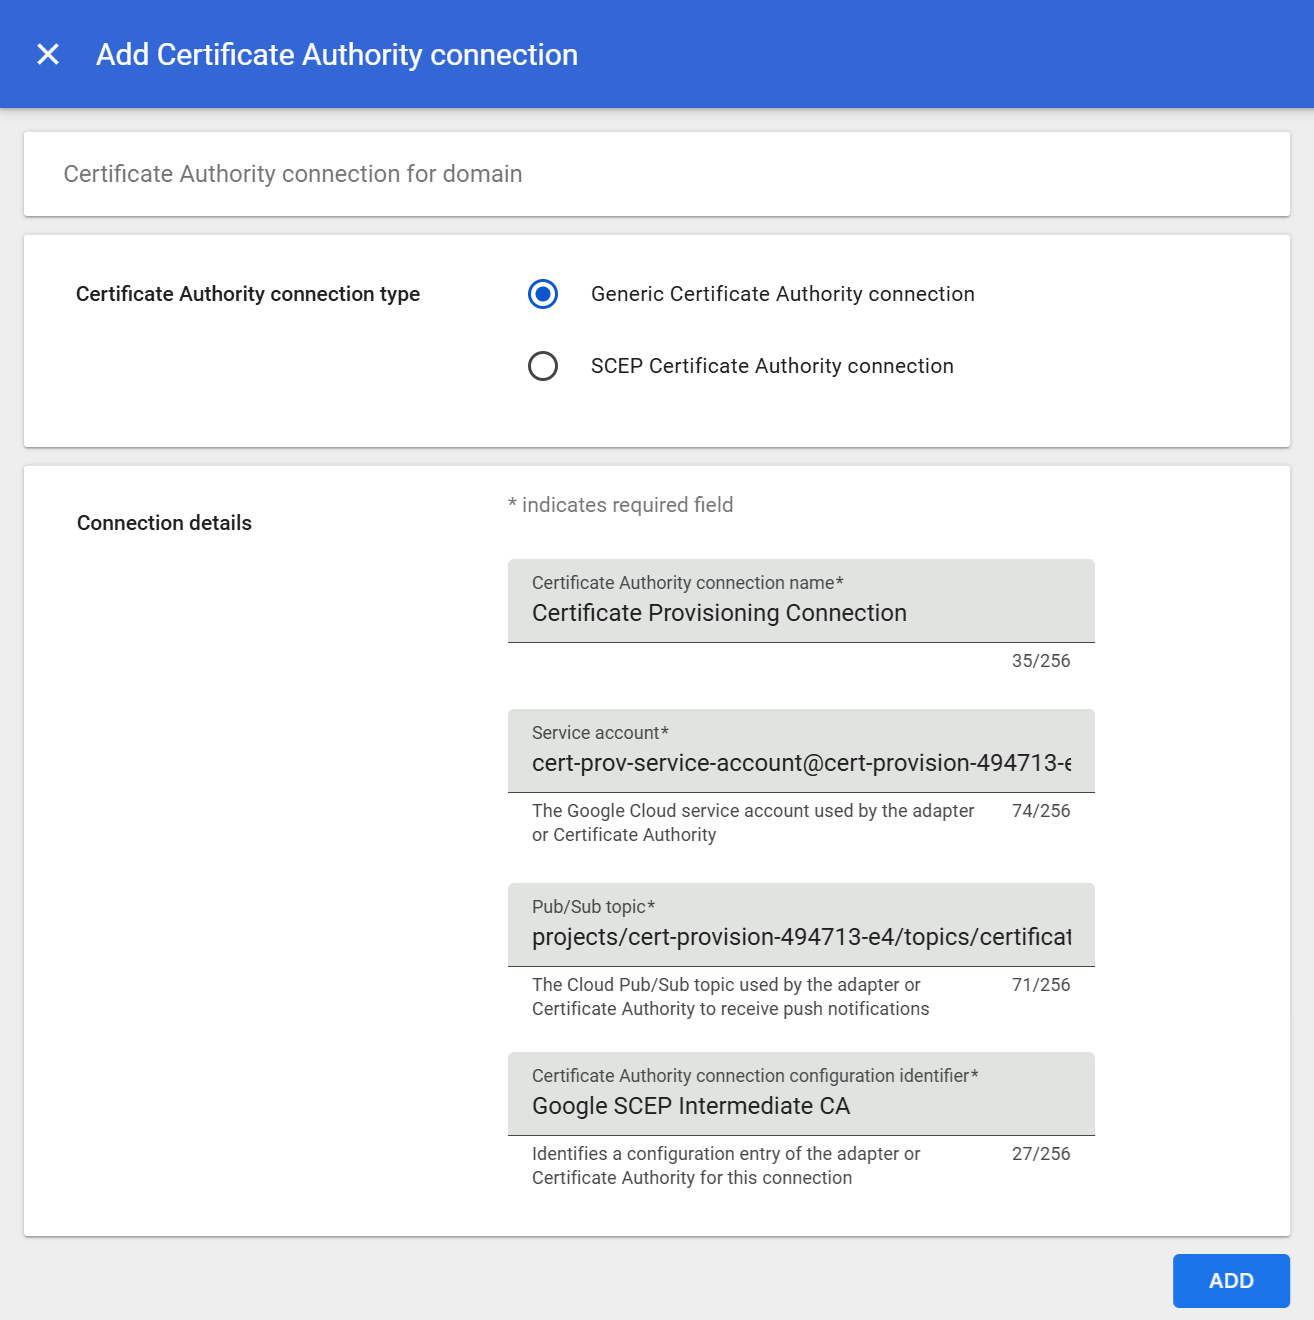
- On the Add Certificate Authority connection page:
- In the Certificate Authority Connection Type field, select Generic Certificate Authority connection.
- In the Certificate Authority connection name field, enter a name that identifies the purpose of the connection in the Google Admin Console.
- In the Service account field, enter the service account email address that you copied in the Creating a Service Account section.
- In the Pub/Sub topic field, enter the topic name that you copied in the Configuring a Pub/Sub Topic section.
- In the Certificate Authority connection configuration identifier field, enter the exact name of the intermediate CA certificate that you uploaded in the Adding the Intermediate CA Certificate to the Server CA Certificates section.
- Click Add.

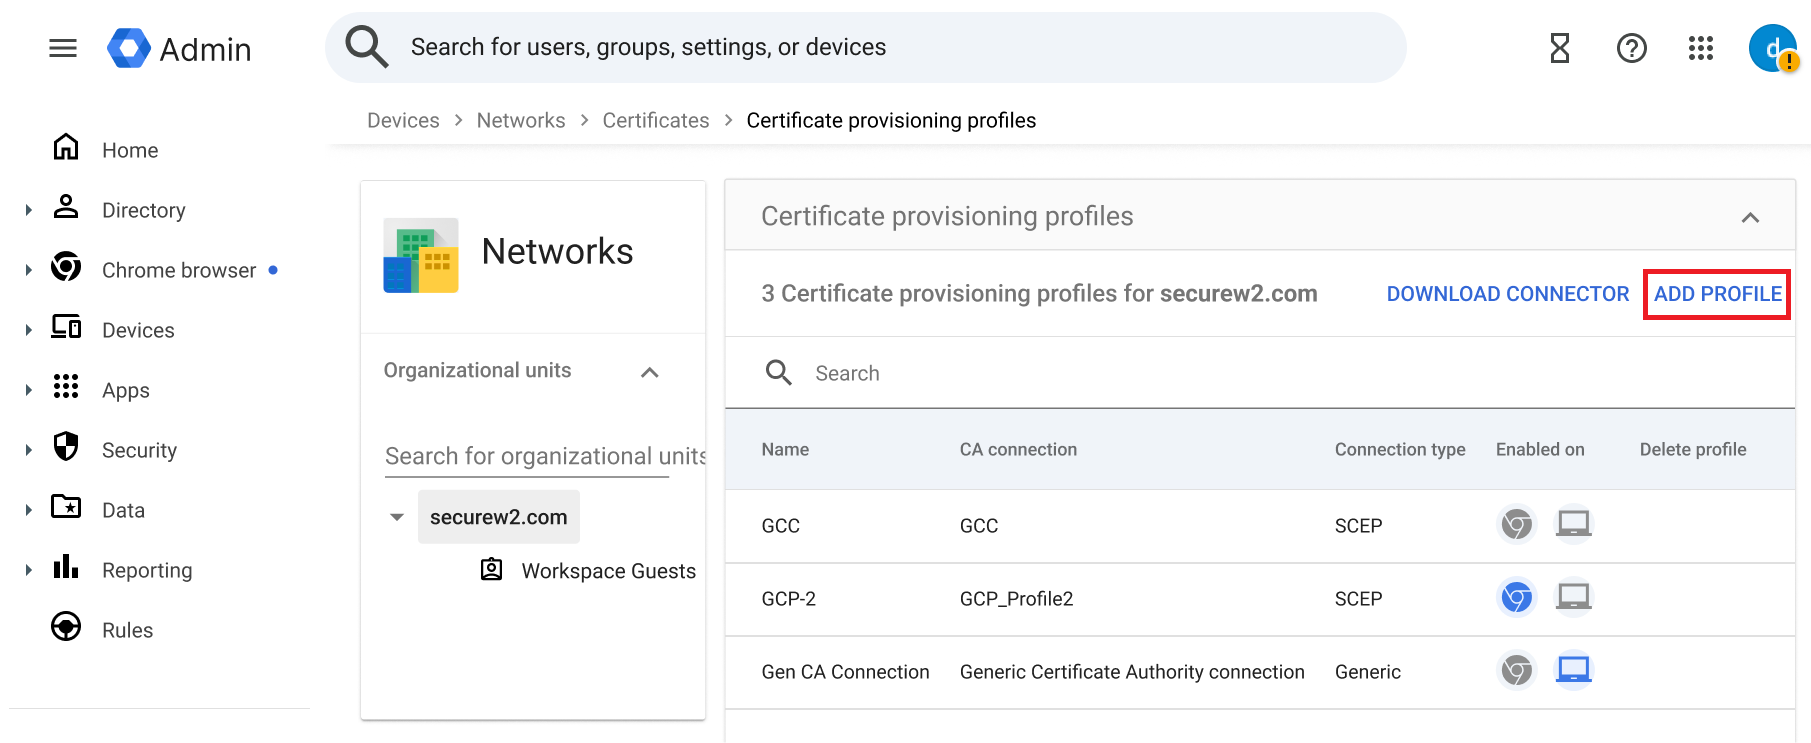
This section describes how to create a Certificate Provisioning Profile in the Google Admin Console.
- Navigate to Devices > Networks > Certificates > Certificate provisioning profiles.
- Click ADD PROFILE.

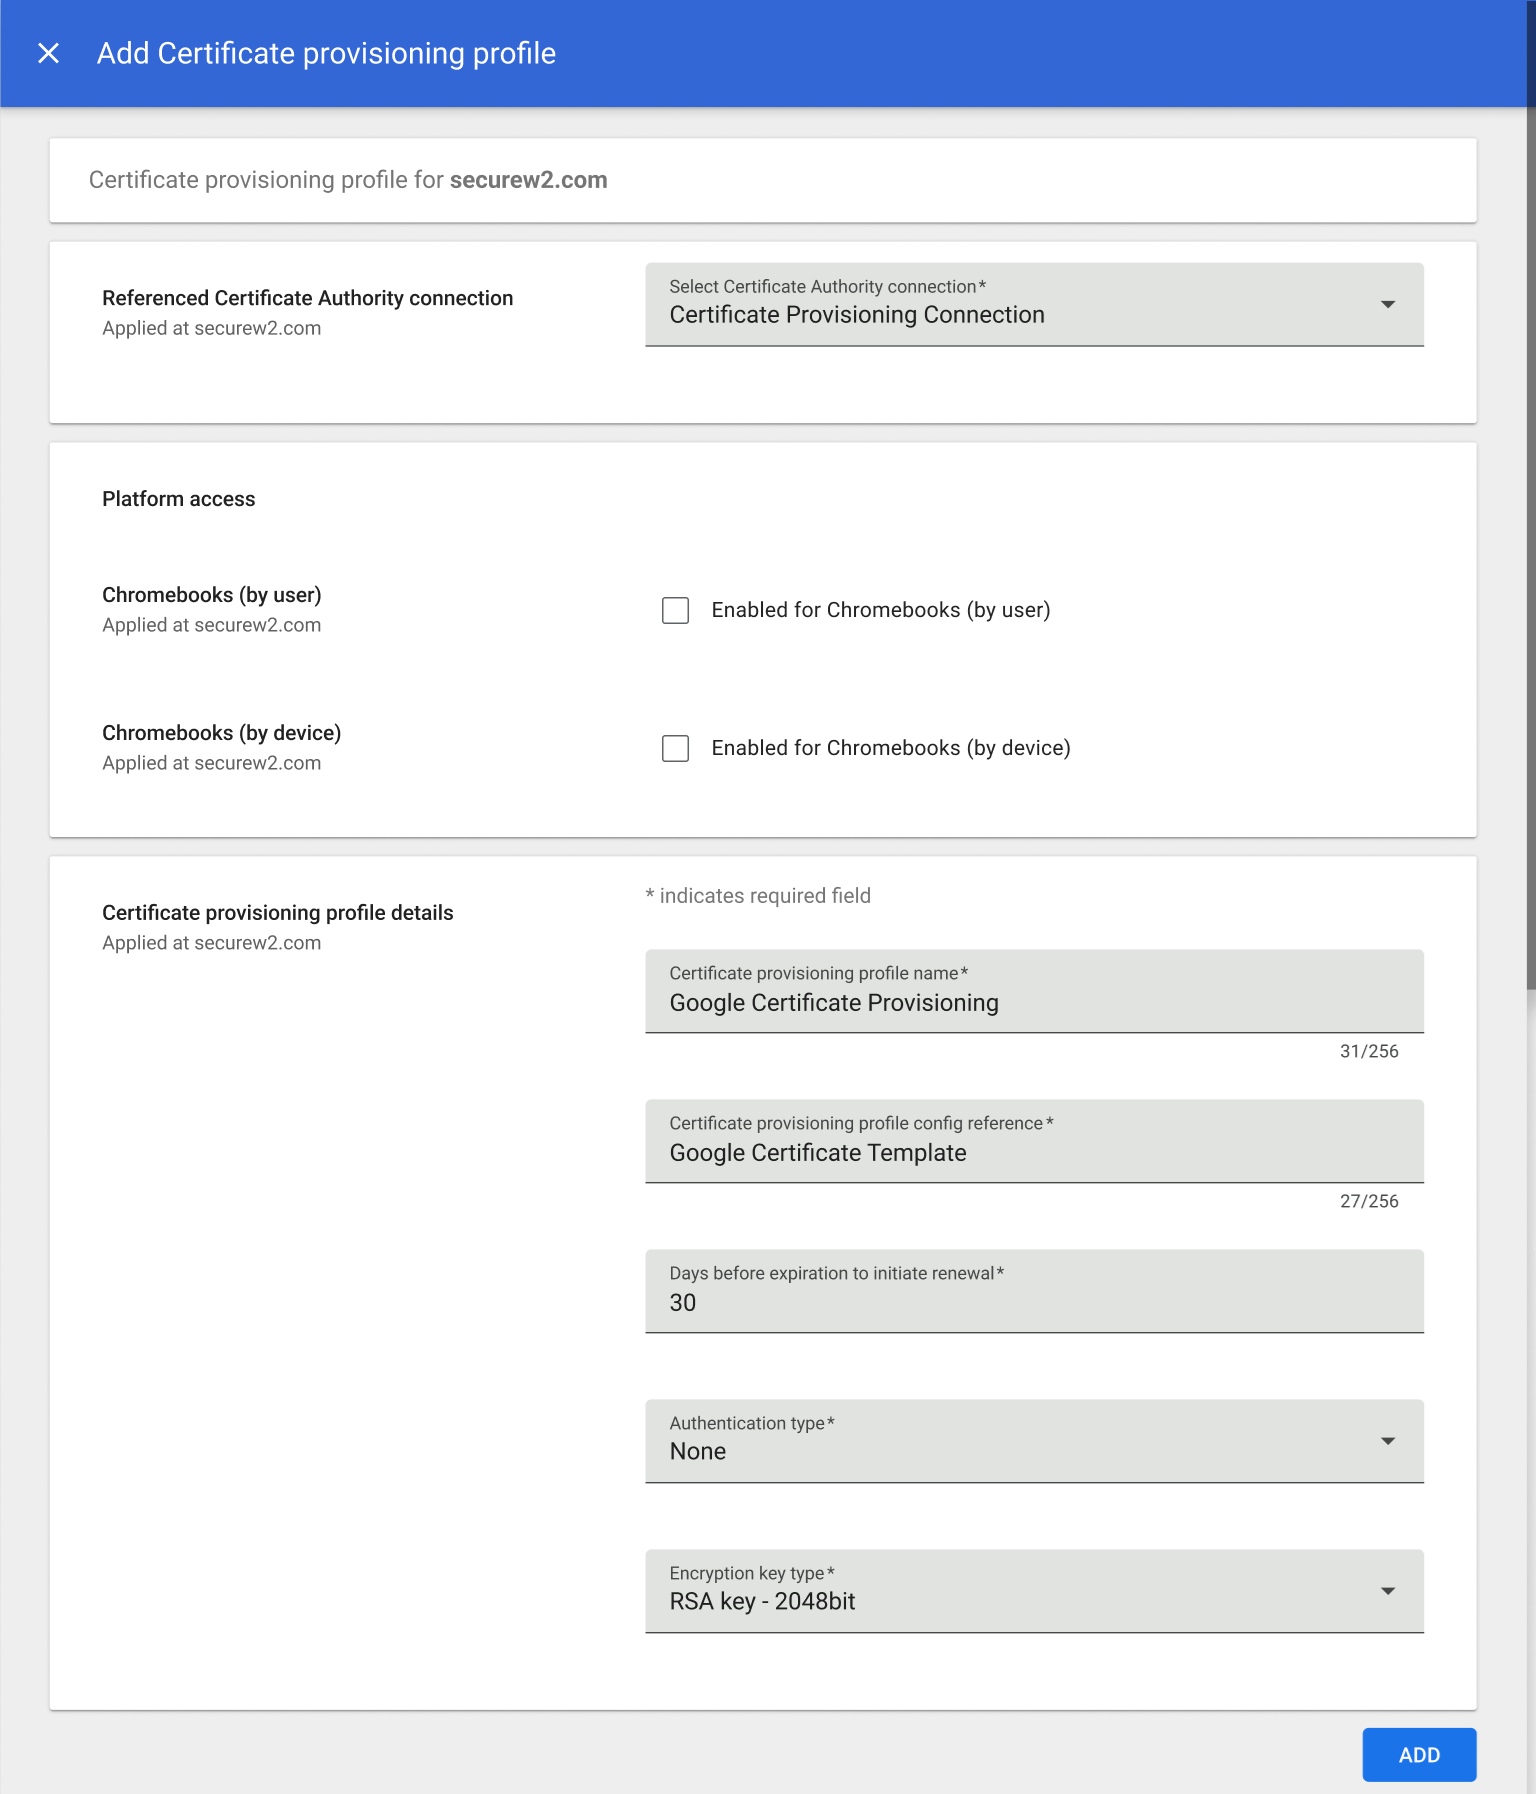
- On the Add Certificate provisioning profile page:
- From the Referenced Certificate Authority connection drop-down list, select the Certificate Authority Connection that you created earlier.
- In the Certificate provisioning profile name field, enter a name to identify the certificate provisioning profile in the Google Admin Console.
- In the Certificate provisioning profile config reference field, enter the exact name of the certificate template created in the JoinNow Management Portal.
- From the Encryption key type drop-down list, select RSA Key – 2048bit.
- Click ADD.

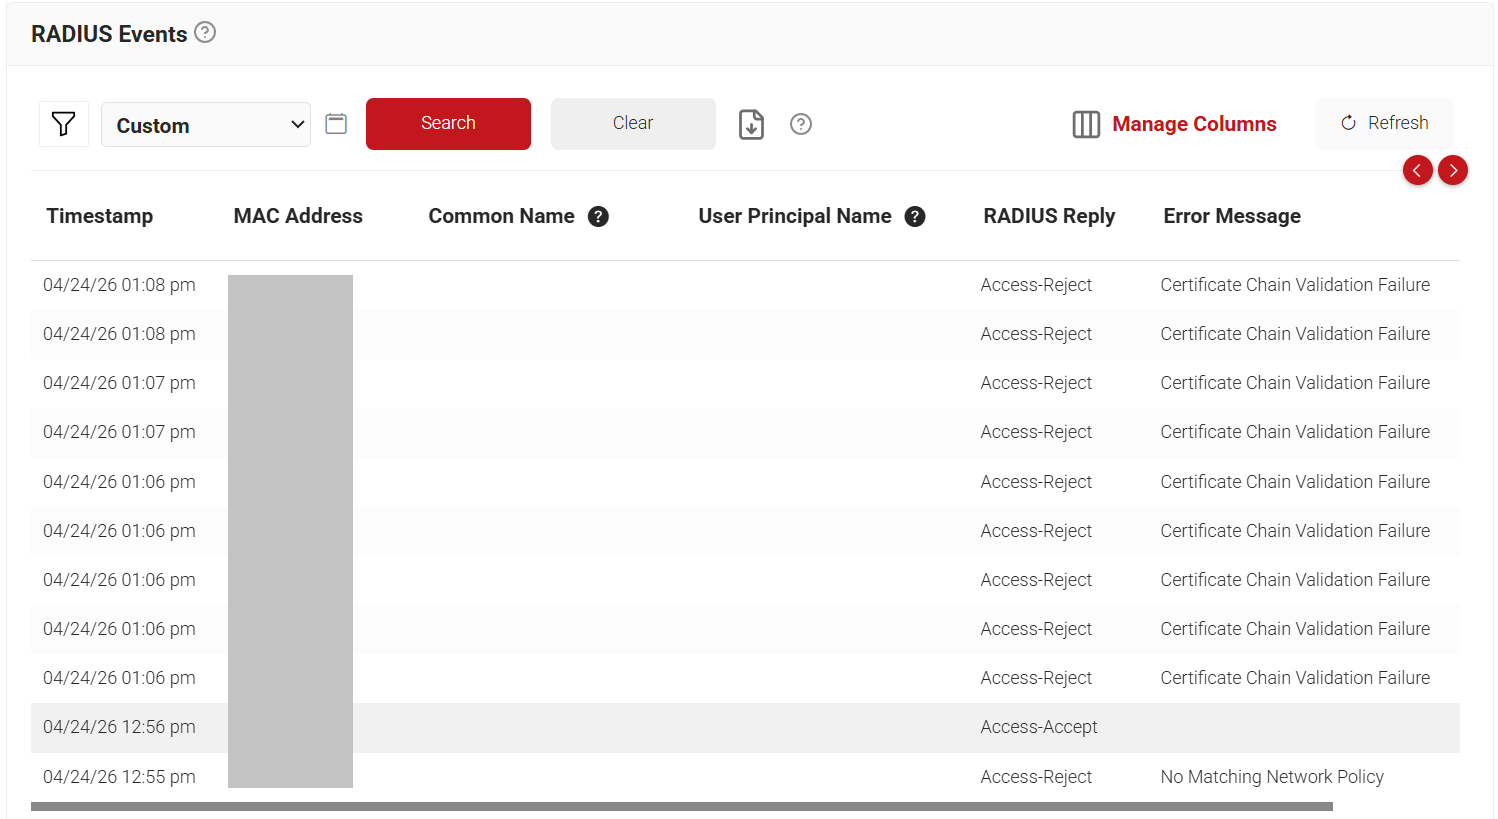
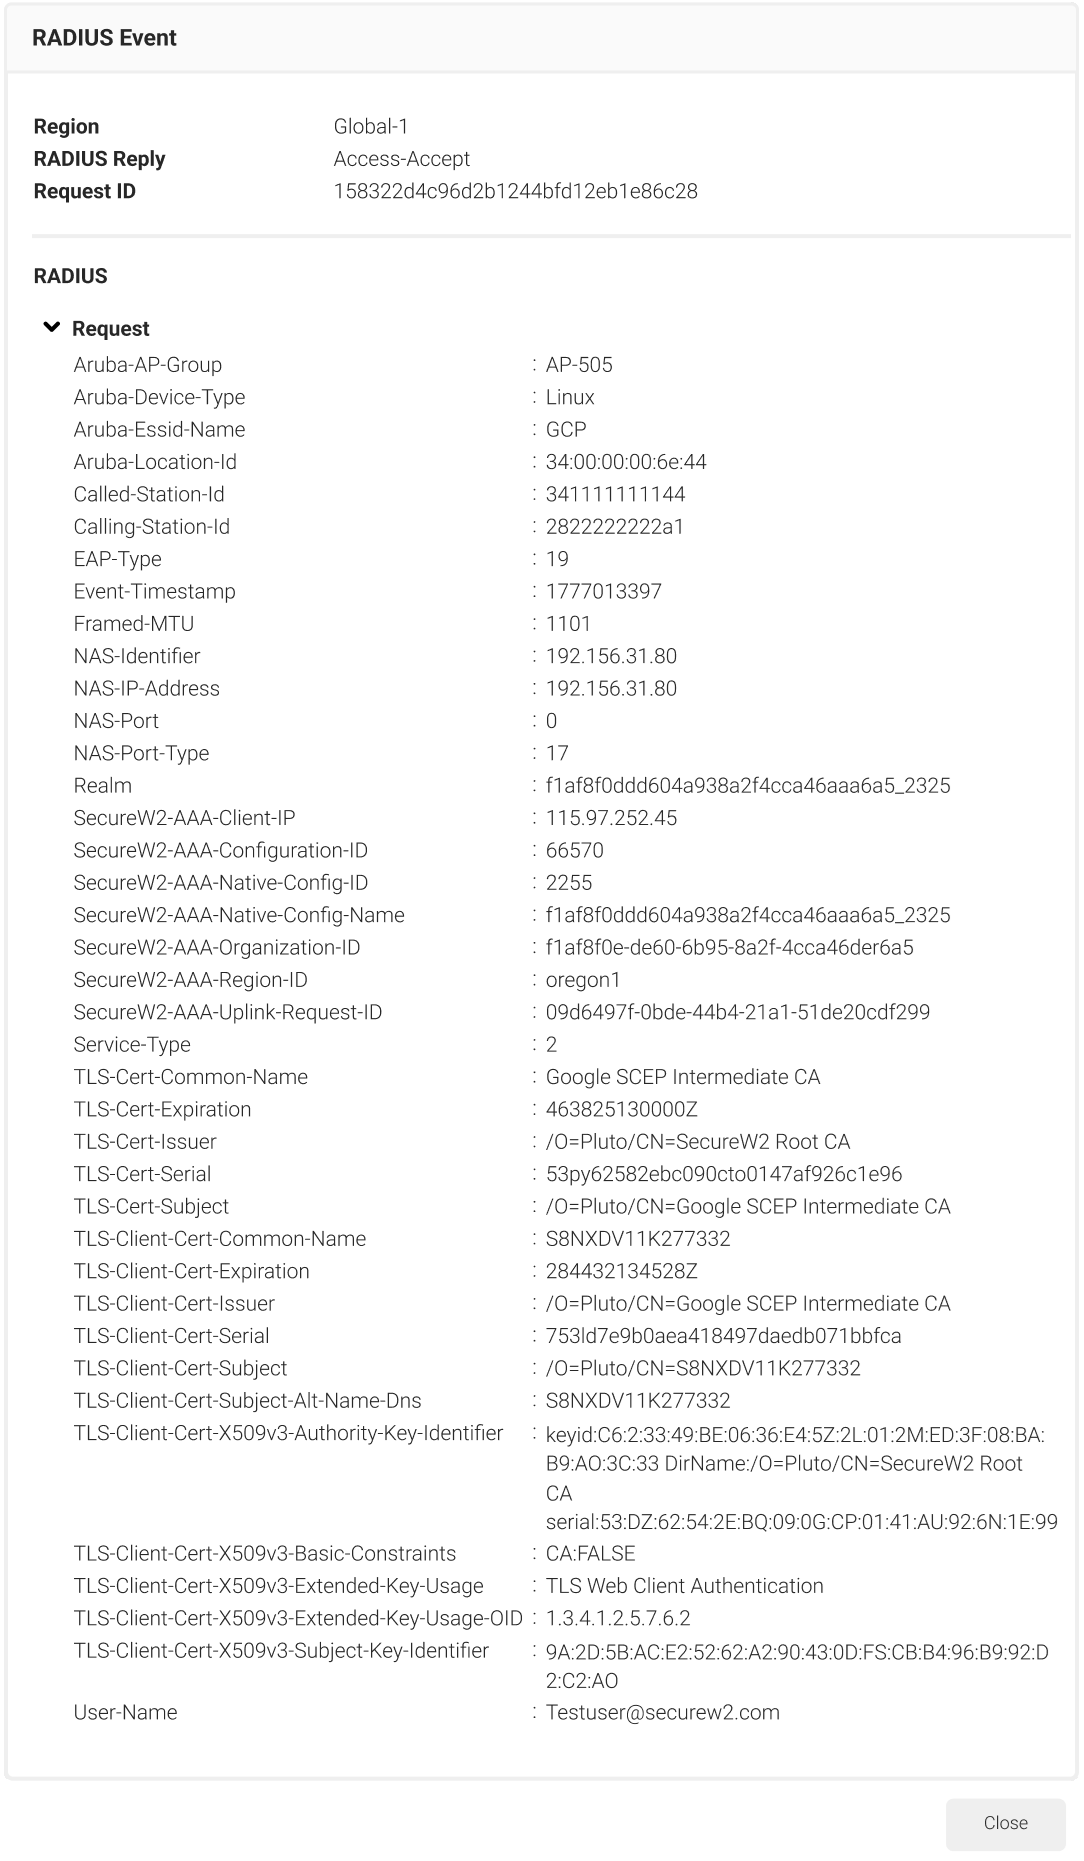
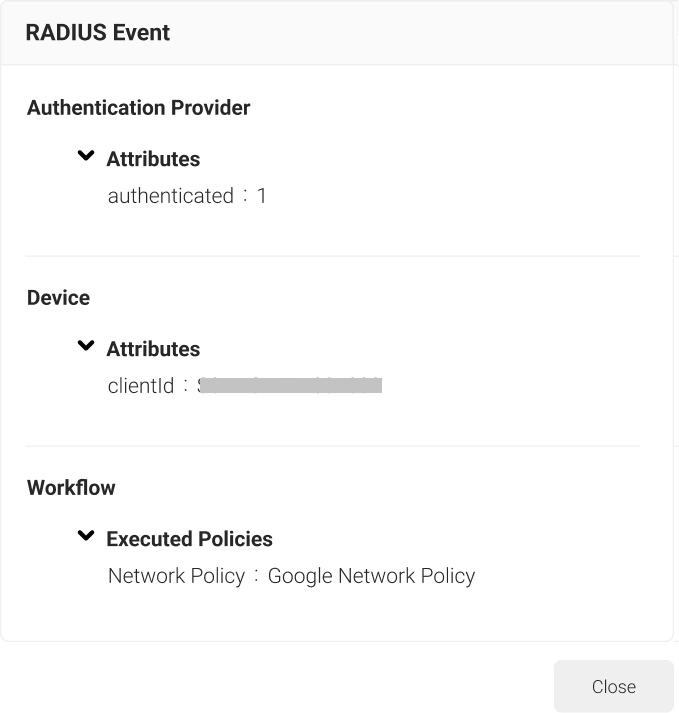
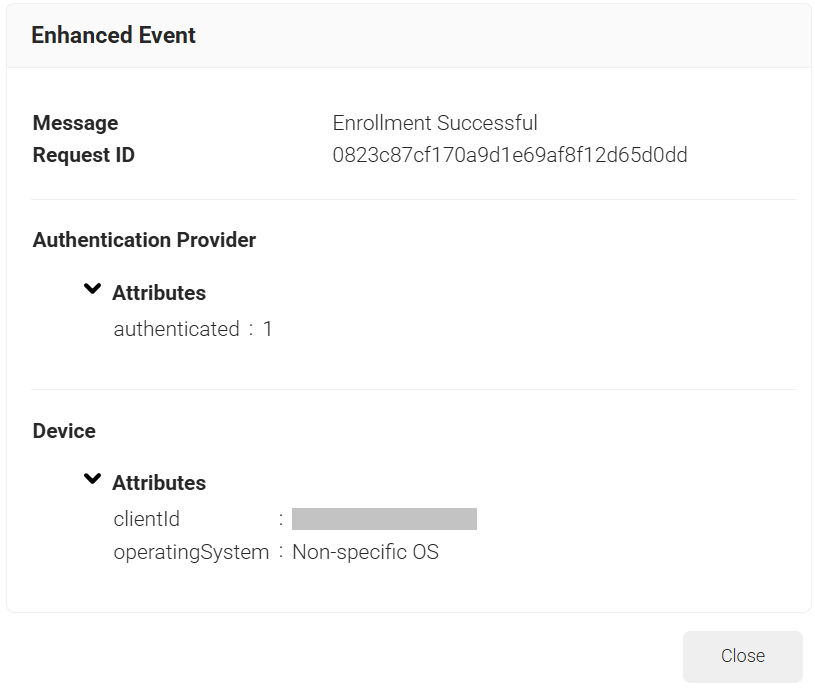
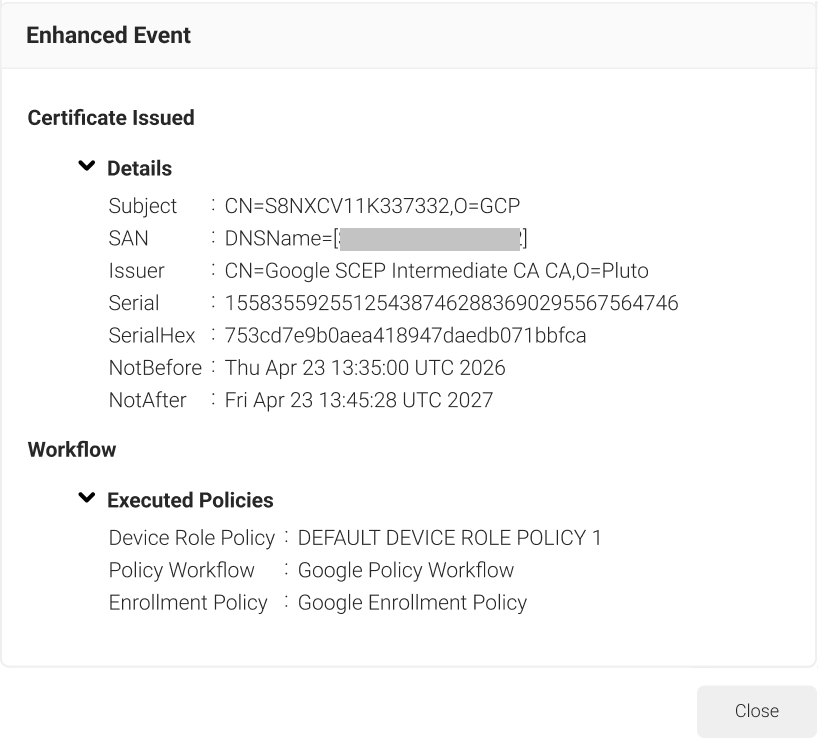
SecureW2 administrators can verify successful certificate enrollment by navigating to Data and Monitoring > Enhanced Events in the JoinNow Management Portal.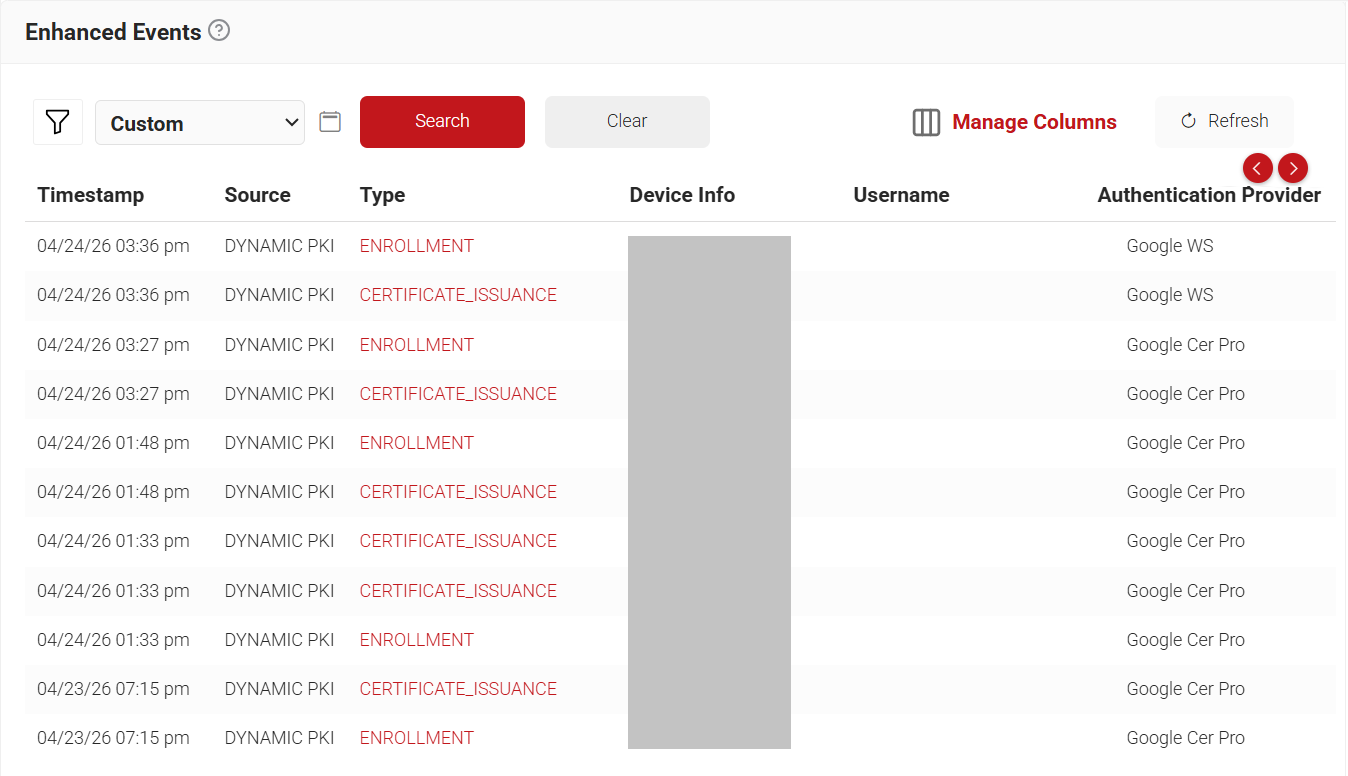
The RADIUS Events page details the device lookup attributes. To access the RADIUS Events page, log in to the JoinNow Management Portal and navigate to Data and Monitoring > RADIUS Events.