Key Takeaways
- Users need an accessible front door to self-onboard. A QR code, vanity URL and per-OS instructional guides make onboarding smooth.
- Extended certificate lifespans spare users from yearly re-onboarding and reduce the help desk’s workload.
- By implementing a hard cutover date for legacy networks, one university jumped from 10% to over 70% of users self-onboarded.
Ten Plays for BYOD in Education
Implementing BYOD in a university or K-12 environment requires a solid plan. That’s why we’ve put together 10 steps your team can follow to help students, staff and family members smoothly onboard their personal devices onto campus Wi-Fi.
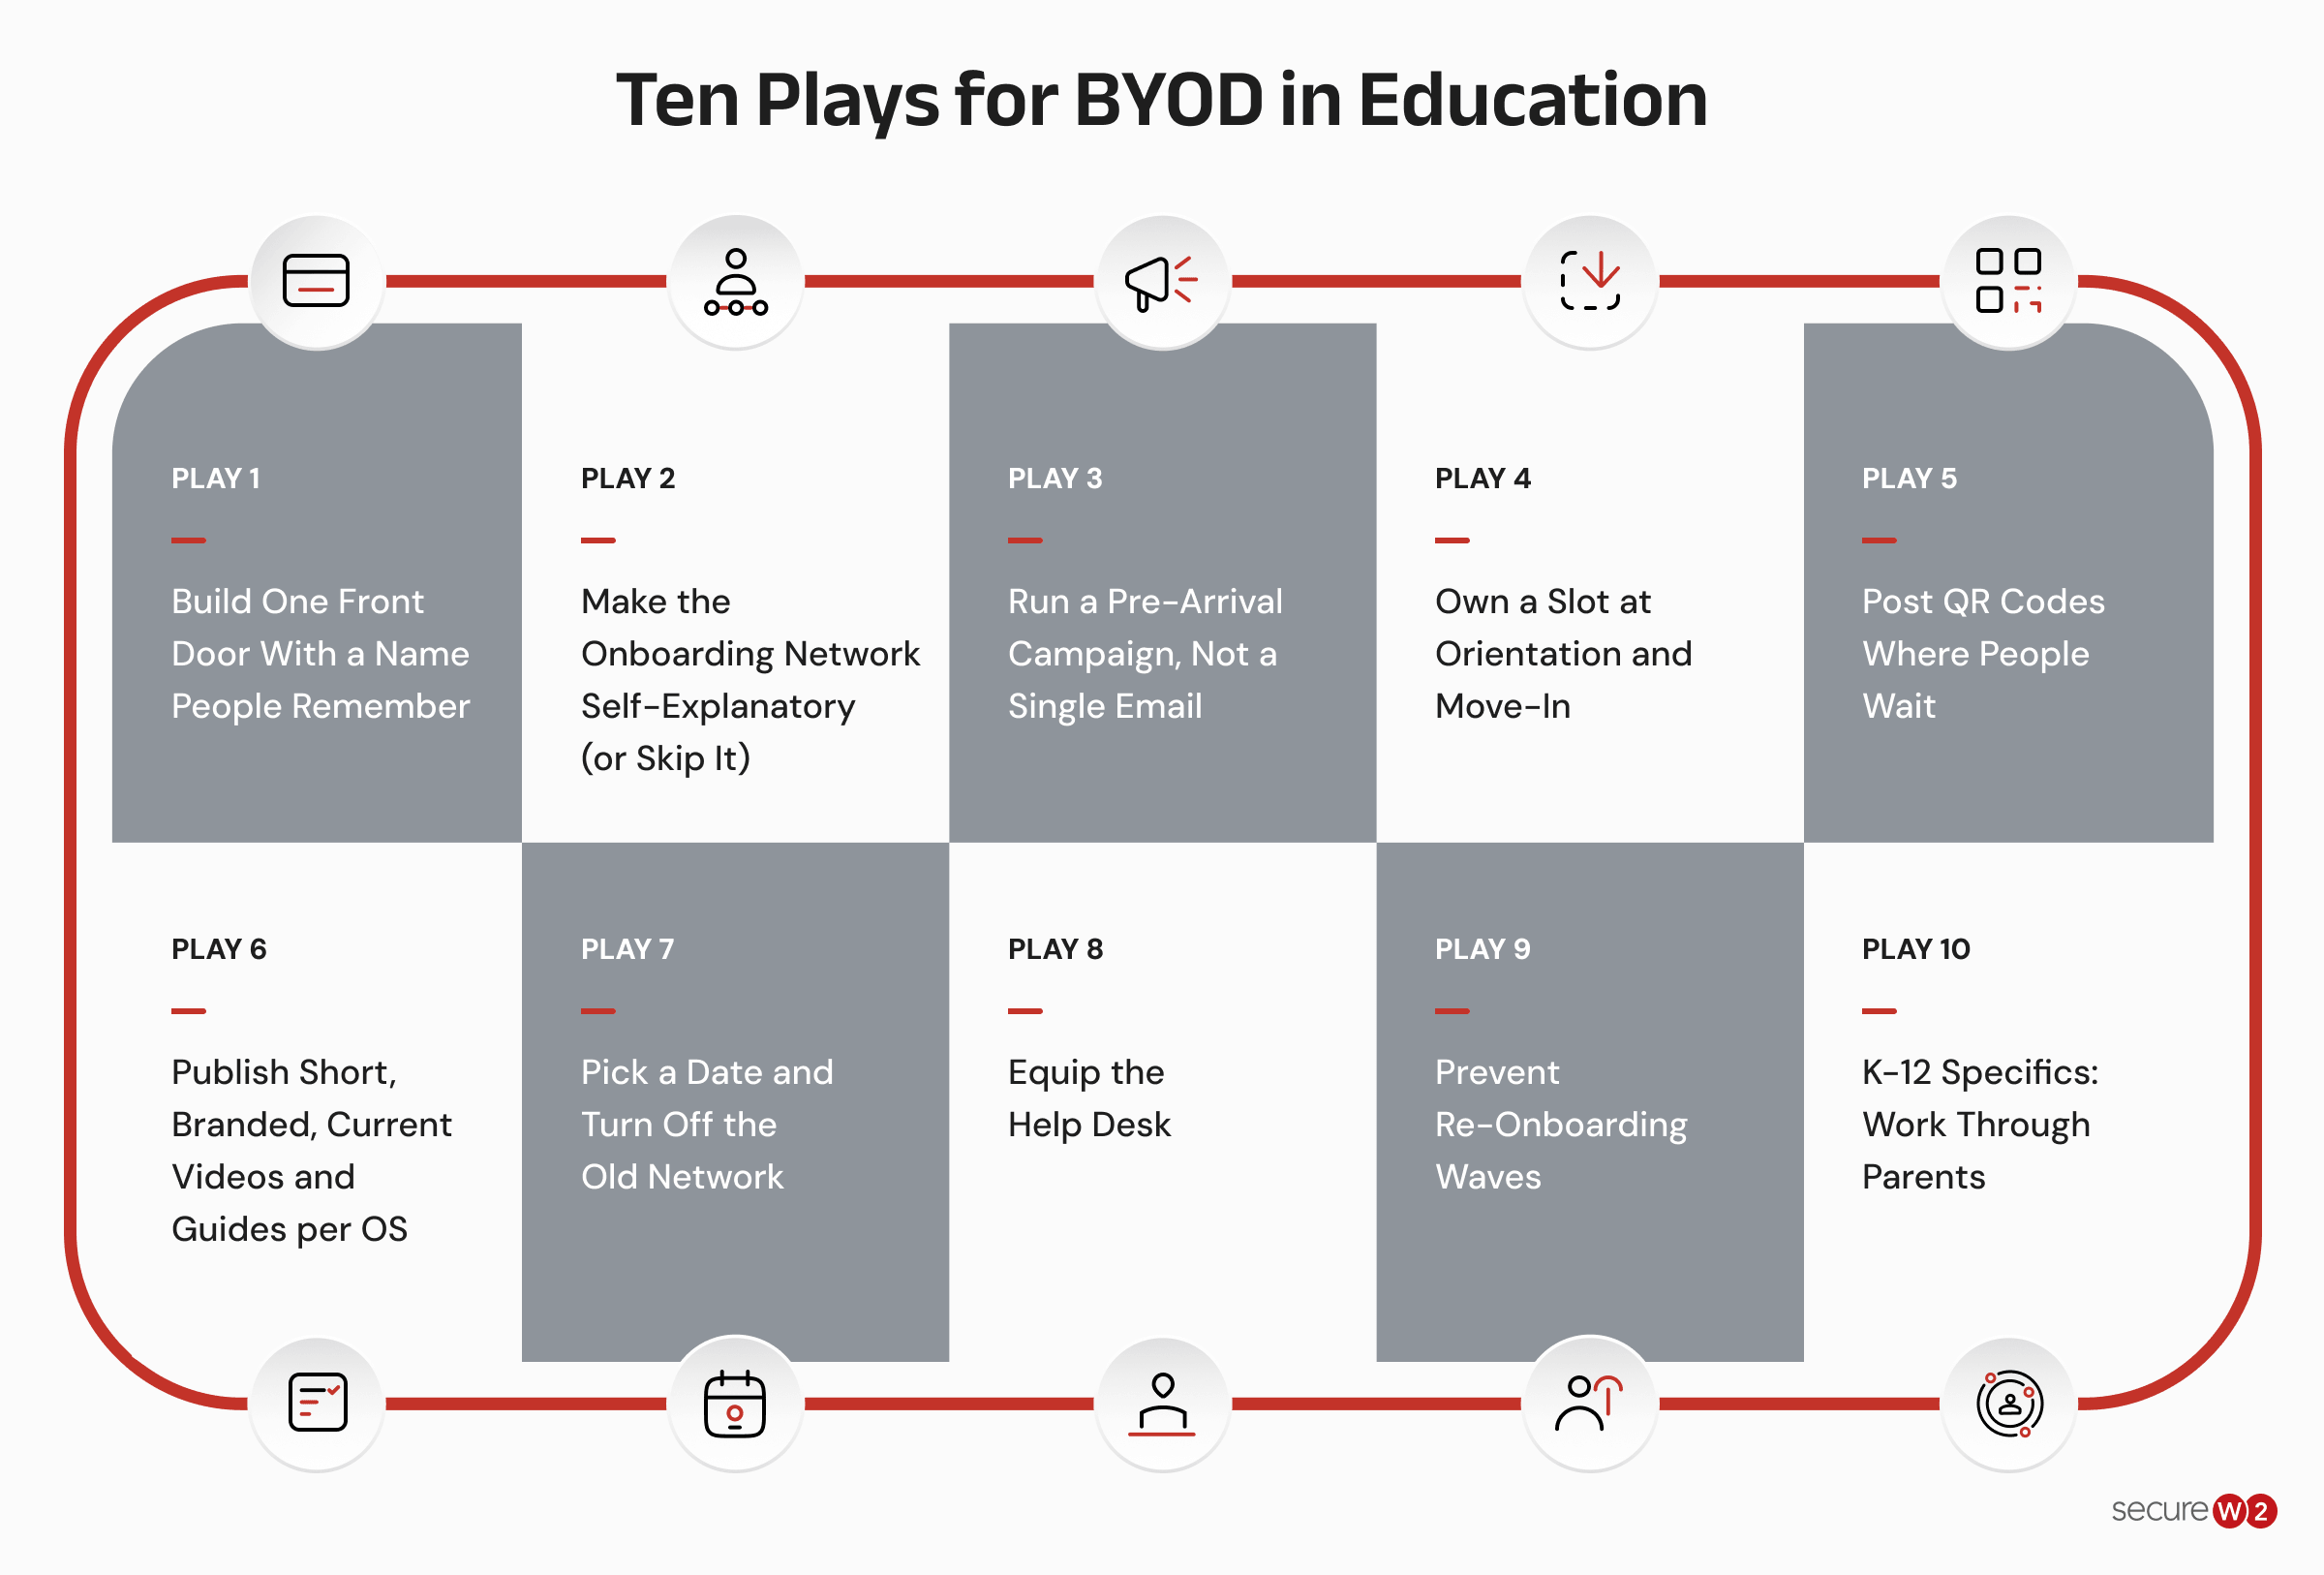
Plays 1 and 2 serve as the foundation, while plays 3 through 6 drive volume. Finally, plays 7 through 10 close the gap (and keep it closed). The image below gives a brief overview of each play.
Play 1: Build One Front Door With a Name People Remember
To start, you need to make sure every channel (emails, posters, help desk and orientation slide) sends users to the same place. Having different destinations can be confusing and derail BYOD self-onboarding; consistency is essential. Let’s look at the steps that make up play 1.
- Register a short vanity URL that redirects to your JoinNow landing page. For example, wifi.yourschool.edu or wifisetup.yourschool.edu are both good choices. That way, you can put the URL on every channel and never have to reprint if the underlying landing page changes.
- Customize the landing page. Edit the page’s design, instructions and which operating systems are offered. Adding your school’s logo can offer a sense of familiarity. Listing your help desk phone and hours offers a way to reach support. Finally, add one sentence explaining why users should onboard their devices to the BYOD network. Mention attractive advantages such as faster, more secure Wi-Fi that reconnects automatically every time.
- Link per-OS help from the page. SecureW2 hosts step-by-step guides and videos you can link to. Alternatively, you can link your own (see Play 6).
- Keep a separate path for gaming consoles, smart TVs and IoT. Point those users to device registration or an IoT network up front. That way, you can prevent attempts to BYOD onboard incompatible devices.
Tip: For play 1, the network team should plan it 4 to 6 weeks before the BYOD campaign is slated to start.
Play 2: Make the Onboarding Network Self-Explanatory (or Skip It)
Here’s an all-too-common problem: a user ignored every email you sent containing BYOD instructions. Despite this, if you make onboarding as simple as possible, even those users can manage it on their own. Play 2 is all about making BYOD onboarding as self-explanatory as possible.
- Name it as an instruction. SSIDs like YourSchool-StartHere, eduroam-setup, or Setup-Secure-Wi-Fi tell users what to do. Avoid generic names that lack a clear direction.
- Redirect to the landing page. Configure the open onboarding SSID with a captive portal or splash page that sends users straight to your JoinNow landing page.
- Get the walled garden right. Allow the SecureW2 domains (cloud.securew2.com, service.securew2.com, pkiservices.securew2.com, auth.securew2.com) plus the Apple, Google Play and Microsoft domains your OS mix needs. If the Google Play Store is blocked, unmanaged Chromebooks and Android devices cannot download the onboarding app. SecureW2 also offers Advanced Onboarding, which shrinks the walled garden to SecureW2 resources only.
- Plan for Apple's Captive Network Assistant. On iOS and macOS, the captive portal mini-browser can block the profile download. Tell users to open Safari if setup does not start. Or, use QR codes so phones onboard over cellular data instead.
- Size the DHCP scope. On large campuses, many people connect to an open SSID out of curiosity and exhaust addresses. Some high-traffic campuses skip the open SSID entirely and rely on a web page reached by QR code and the vanity URL.
Tip: Have someone outside IT onboard one iPhone, one Android phone, one Mac, one Windows laptop and one Chromebook from the onboarding SSID before launch.
Play 3: Run a Pre-Arrival Campaign, Not a Single Email
You should aim to get as many devices as possible onboarded at home, well before arrival. Play 3 helps you do that.
- Send at least three touches. SecureW2 engineers advise schools to be “persistent and borderline annoying.” A workable cadence: 4 weeks out (announce and link); 2 weeks out (reminder with video); 3 days out (last call, plus what to do on arrival).
- Write from a name students recognize. Rather than sending an email as IT, use a familiar name, such as Housing, Orientation or the Dean of Students. Users will be more likely to take notice and read the pre-arrival onboarding instructions.
- Lead with the benefit and the deadline. Avoid unnecessary technological jargon. Students do not need to know what EAP-TLS is. They need to know that onboarding offers a more secure, faster connection for their devices, as well as the timeframe for completion.
- Put the link where students already have to go. Put onboarding in the welcome packet, the new student checklist, the housing portal and the pre-arrival learning management system (LMS) course students complete before term starts. Make it impossible to miss.
- K-12: email parents. Families often own the device and hold the admin password. You can send account credentials to parents before day one, so the Wi-Fi profile is installed before the student gets to school.
Tip: See the email templates in the appendix. To measure your campaign’s impact, you can count onboarding events in the SecureW2 management portal each week.
Play 4: Own a Slot at Orientation and Move-In
This play helps catch students who ignored every email while you have their attention, in-person.
- Ask for 15 minutes in summer orientation. One university IT team gives a short talk and ends with a QR code to its onboarding page. Another said new students who got the orientation walkthrough had fewer problems than returning students.
- Onboard freshmen at orientation with long-lived certificates. If the certificate lasts for the duration of a student's full enrollment, they only set it up once. One university that raised certificate lifetime from 1 to 5 years said each year's campaign has gotten "much, much easier."
- Staff a help table during move-in in residence hall lobbies or next to the ID card office, with printed per-OS steps and a spare charger. Some schools recruit student workers or students from technical programs to staff it.
- Bring the onboarding QR code to every event where you already have the audience: ID pickup, new hire orientation for staff and student government meetings.
Play 5: Post QR Codes Where People Wait
Put the “front door” near users, wherever they are. This allows them to onboard the moment they need Wi-Fi.
- Generate a QR code from your vanity URL, not the raw landing page URL. That way, you can change the destination later without reprinting.
- Place posters where people stand and wait. Ideal locations include residence hall entrances and elevators, library and help desk counters, dining halls, staff rooms and classroom doors.
- Split posters by audience. One school uses a "Student Wi-Fi" poster in common areas and a separate staff poster only in staff rooms and the IT booth, so each group lands on the right page.
- Say why to scan. A line like "Scan to connect to Wi-Fi in a few minutes" gives people a reason to scan; a bare QR code does not. Include the vanity URL in text for users who cannot scan.
- In areas with poor cellular coverage, pair the QR code with the onboarding SSID name.
Tip: Print QR-containing materials 3 weeks before move-in begins.
Play 6: Publish Short, Branded, Current Videos and Guides per OS
Clear instructions designed for a diverse set of use cases help users onboard independently. If a user gets stuck during the process, they have the resources to fix it without calling the help desk.
- One page per OS (Windows, macOS, iOS and iPadOS, Android, ChromeOS, Linux), each listing the supported browser, every prompt the user will see and an example of what success looks like.
- Show the prompts users fear. The steps that cause abandonment are the ones users do not expect: "Allow" on the Android suggested-network notification, installing a profile in iOS Settings, keychain password prompts on macOS. Screenshot them and say, "This is normal, tap Allow."
- Keep videos under 2 minutes and re-record each summer. Apple and Google change their screens every year, and an outdated video can confuse users or send them the wrong way.
- State the browser rule up front. On iPhone, iPad, and Mac, open the onboarding page in Safari. Students who use Chrome or an in-app browser (for example, from an email app) commonly get stuck.
- Put a "Still stuck?" box at the bottom of every page with the help desk phone number, chat, hours and walk-up location.
SecureW2 hosts per-OS guides and videos you can link to directly. Some schools record their own walkthrough so the branding, SSID names, and help desk details match.
Tip: Refresh every July.
Play 7: Pick a Date and Turn Off the Old Network
Inevitably, some users will continue putting off onboarding. You need to give the remaining holdouts a reason to act.
One regional university had only 10% of campus onboarded after flyers, signs and QR codes. Once it turned off the legacy BYOD networks, more than 70% of users onboarded the next day.
SecureW2 engineers see more schools choosing a firm cutover, partly because Credential Guard on Windows 11 blocks PEAP-MSCHAPv2 by default. As one put it: "if you give too many options, the end user is not going to pick this one if they don't have to."
- Announce the date in every message from the start of the campaign. A deadline in the first email gives every later reminder weight.
- If a hard cutover is not possible, make the legacy network less attractive in steps. Schools often use shorter hours, lower bandwidth, no printing or a banner on the guest network pointing to secure Wi-Fi. A staged approach can also phase by cohort (staff and freshmen first, other students later).
- Do not leave guest Wi-Fi open to authenticated users indefinitely. Guest Wi-Fi becomes the default network for anyone who skipped onboarding.
- Avoid cutting over during the first two weeks of term. Do it before move-in, or after the add/drop period when the help desk has capacity.
Tip: Decide the date early. The cutover date drives the whole campaign calendar.
Play 8: Equip the Help Desk
If properly prepared, first-line staff can resolve most onboarding calls in one contact.
- Give the help desk a one-page triage sheet covering the top issues by OS (see the cheat sheet below).
- Train staff on the SecureW2 management portal. Onboarding event logs and per-user and per-device search show whether a user reached the page, got a certificate, or failed partway.
- Set an escalation path to the network team, and to SecureW2 Support for platform issues, before day one.
- Set device requirements early. Very old devices (for example, a decade-old Mac on an unsupported OS) may not run the onboarding client. Publish minimum OS versions in the pre-arrival email and have an answer ready (loaner, registration network, or a manual alternative).
Owner: IT service desk manager.
Play 9: Prevent Re-Onboarding Waves
Ideally, you want users to onboard once, not every year. Certificate expiration and re-enrollment is the most common onboarding topic in education support tickets, and it has grown every year since 2024.
- Match certificate lifetime to the enrollment period. A certificate that expires mid-year forces every user back through onboarding. Several universities we work with issue certificates that last four to five years, covering a student's full program.
- Warn users before expiration with a message that links the vanity URL, the per-OS guides and help desk contacts. Have communications staff review the wording.
- Schedule certificate authority (CA) or profile changes away from back-to-school. Any change that forces a re- onboard will collide with move-in if it lands in August.
- Set the per-user device limit with your users in mind. Students arrive with several devices. If the limit is too low, enrolling a new device can revoke an old one and generate tickets.
Play 10: K-12 Specifics: Work Through Parents
The more students who onboard at home, the better. Home is where the admin password lives.
- Parents usually hold the admin password and parental controls. Macs with parental controls or a parent-owned keychain will block the install at school. Ask families to complete setup at home, together, before the first day.
- Send device requirements weeks in advance. One district only reminded parents of system requirements the last week before school, and students showed up with laptops too old to run the client.
- Answer the privacy question before it is asked. Parents ask whether the onboarding software can see files or passwords. Include one plain sentence in the parent email: the app installs a Wi-Fi certificate and network settings; it does not read files, browsing or passwords.
- Make it a checklist item alongside the acceptable use agreement families already sign.
- Use managed onboarding wherever devices are school-owned. Chromebooks and iPads under a mobile device management (MDM) platform such as Google Workspace, Intune or Jamf can receive certificates automatically, which takes them out of the BYOD queue entirely.
- Keep a short-term fallback network for the first week if your IT team is small. Turn it off on a published date (Play 7).
Owner: District or school IT, with the front office for family communications.
Campaign Timeline
|
When |
Actions |
Plays |
|---|---|---|
|
12 weeks before |
Decide the cutover date, certificate lifetime and device limit. Book orientation time. |
7, 9, 4 |
|
8 weeks before |
Vanity URL live, landing page branded, onboarding SSID and walled garden tested on every OS. |
1, 2 |
|
6 weeks before |
Per-OS guides and videos recorded or refreshed. Help desk triage sheet drafted. |
6, 8 |
|
4 weeks before |
First email to students (and parents for K-12). Posters printed. |
3, 5, 10 |
|
2 weeks before |
Reminder email with video. Help desk trained on the management portal. |
3, 8 |
|
Move-in and orientation |
Help tables staffed. QR codes posted. Orientation talk delivered. Last-call email. |
4, 5 |
|
Weeks 1 to 3 |
Watch onboarding counts and top ticket reasons daily. Fix guide gaps fast. |
6, 8 |
|
Cutover date |
Legacy network off or restricted, as announced. |
7 |
|
End of term |
Review: percent onboarded, ticket volume, what to change next year. |
All |
OS Cheat Sheet for the Help Desk
|
OS |
What Users Trip On |
What to Tell Them |
|---|---|---|
|
iOS and iPadOS |
Profile will not download in Chrome, in-app browsers or the captive portal pop-up. Do not know what a profile is or where to install it. |
Open the page in Safari. After download, go to Settings, tap "Profile Downloaded," and install. Use cellular data via QR code if the portal popup blocks the download. |
|
macOS |
Several system and keychain password prompts. Parental controls or a parent-owned admin account. Very old OS versions. |
Use Safari. Enter the Mac login password at each prompt (it is normal). K-12: complete at home with whoever holds the admin password. |
|
Android |
Declining or missing the "Allow suggested network" notification. Play Store blocked on the onboarding network. No screen lock set. |
Forget the onboarding SSID, set a screen lock, run the app again and tap “Allow” when prompted. |
|
Windows |
Admin rights or user account control (UAC) prompts. Wireless adapter not detected. |
Run the downloaded app and accept the prompt. Confirm Wi-Fi is on. |
|
ChromeOS (unmanaged) |
The hardest BYOD flow. Can require the Android app via Play Store or manual import steps. |
Follow your Chromebook guide step by step. Use managed onboarding for school-owned Chromebooks. |
|
Consoles, TVs, IoT |
Cannot run the onboarding client. |
Use the device registration or IoT network. |
Metrics to Track
Tracking the following metrics is important for planning and execution both:
- Percent of expected users onboarded weekly, from the start of the campaign. Compare devices onboarded in the SecureW2 portal to enrolled students and staff.
- Onboarded before arrival versus during the first week. A rising pre-arrival share year over year is the clearest sign the campaign is working.
- Onboarding tickets in the first three weeks of term, by OS and where Wi-Fi ranks among all ticket categories.
- Users still on guest or legacy networks after the cutover date.
How SecureW2 Can Help
SecureW2 can review your landing page, onboarding SSID design, walled garden, certificate lifetime and campaign calendar with you before term starts, and connect you with SecureW2 Support for any platform issues during move-in. Book that review 12 weeks before your first day of term, so there is time to change anything that needs it.
Appendix: Templates
Template A: Pre-Arrival Email to Students (Higher Ed)
Subject: Set up campus Wi-Fi before you arrive (takes a few minutes)
Hi {First name},
Before you arrive on {move-in date}, take a few minutes to set up {School} Wi-Fi on your laptop and phone.
Once it is set up, your devices connect automatically every time you are on campus, with no password prompts.
Set up now: {wifi.yourschool.edu}
Use your {School} username and password.
On iPhone, iPad, or Mac, open the link in Safari.
Set up each device you will bring: laptop, phone, tablet.
Gaming consoles and smart TVs: register them at {device registration URL} instead.
Step-by-step videos for every device: {guides URL}
Heads up: {Old network name} will be turned off on {cutover date}.
Questions? {Help desk} at {phone}, {chat or email}, or visit us at {location} during move-in.
{Sender name}, {Office}
Template B: Pre-Arrival Email to Parents (K-12)
Subject: Action needed before the first day: set up school Wi-Fi on your child's device
Dear families,
Your child's laptop will need a one-time Wi-Fi setup before the first day of school on {date}. Please complete it together at home, because it may ask for the device's admin password.
Before you start:
Check that the device meets our requirements: {minimum OS versions}.
Have the device's admin password ready.
If you use parental controls on a Mac, you may need to approve the install.
Set up now: {wifi.yourschool.org} using your child's school username and password. On a Mac or iPad, use Safari.
Setup takes a few minutes.
About privacy: The setup app installs a Wi-Fi certificate and network settings so the device can connect securely. It does not read files, browsing history, or passwords.
Videos for each device type: {guides URL}. Questions? Contact {help desk} at {phone or email}.
{Sender name}, {School} Technology
Template C: Poster Copy
Connect to {School} Wi-Fi in a few minutes
{QR code}
Scan with your phone camera, or visit {wifi.yourschool.edu}
On iPhone, iPad, or Mac? Use Safari.
Need help? {Help desk location, hours, phone}
