MDMs can use the Simple Certificate Enrollment Protocol (SCEP) to automate the certificate life cycle for Managed devices. This saves administrators time compared to manually enrolling managed devices for certificates.
Iru is an MDM platform that supports Apple devices, including macOS, iOS, iPadOS, and tvOS. It also supports security and productive global work with the help of an advanced automation system. When it comes to certificate enrollment with SCEP, Iru provides the SCEP URL and key, which the device can use to request a certificate from the PKI.
In this document, we will show you how to configure the SecureW2 SCEP Gateway API to auto-enroll Iru-managed devices for certificates and configure the user device for Certificate-Based Wi-Fi authentication.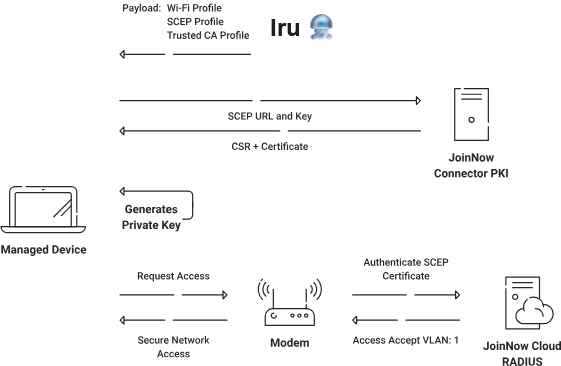
As a best practice, SecureW2 recommends creating a dedicated intermediate CA for each SCEP Gateway API. Using a separate CA for each gateway simplifies certificate management and allows you to create enrollment and network policies based on the issuing CA.
To create a new intermediate CA, perform the following steps:
- Log in to the JoinNow Management Portal.
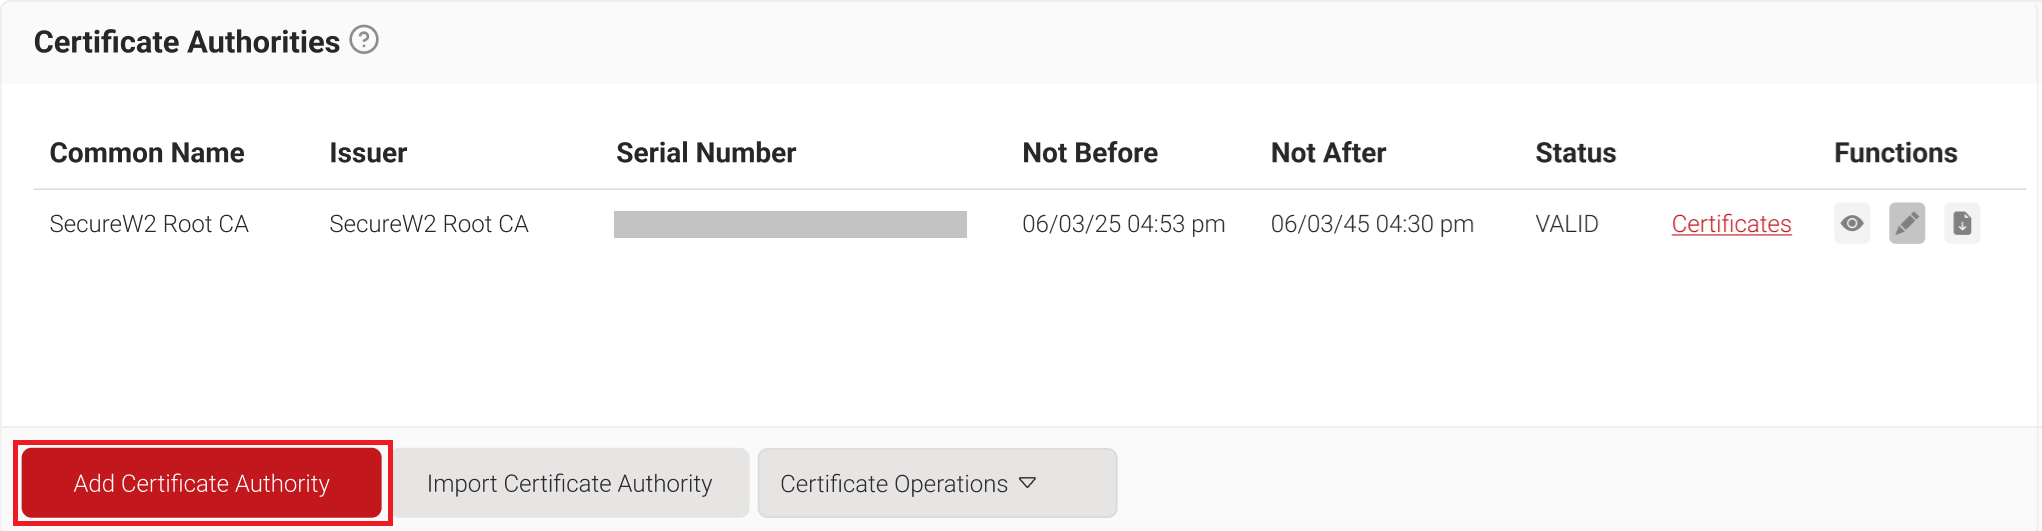
- Navigate to Dynamic PKI > Certificate Authorities.
- Click Add Certificate Authority.

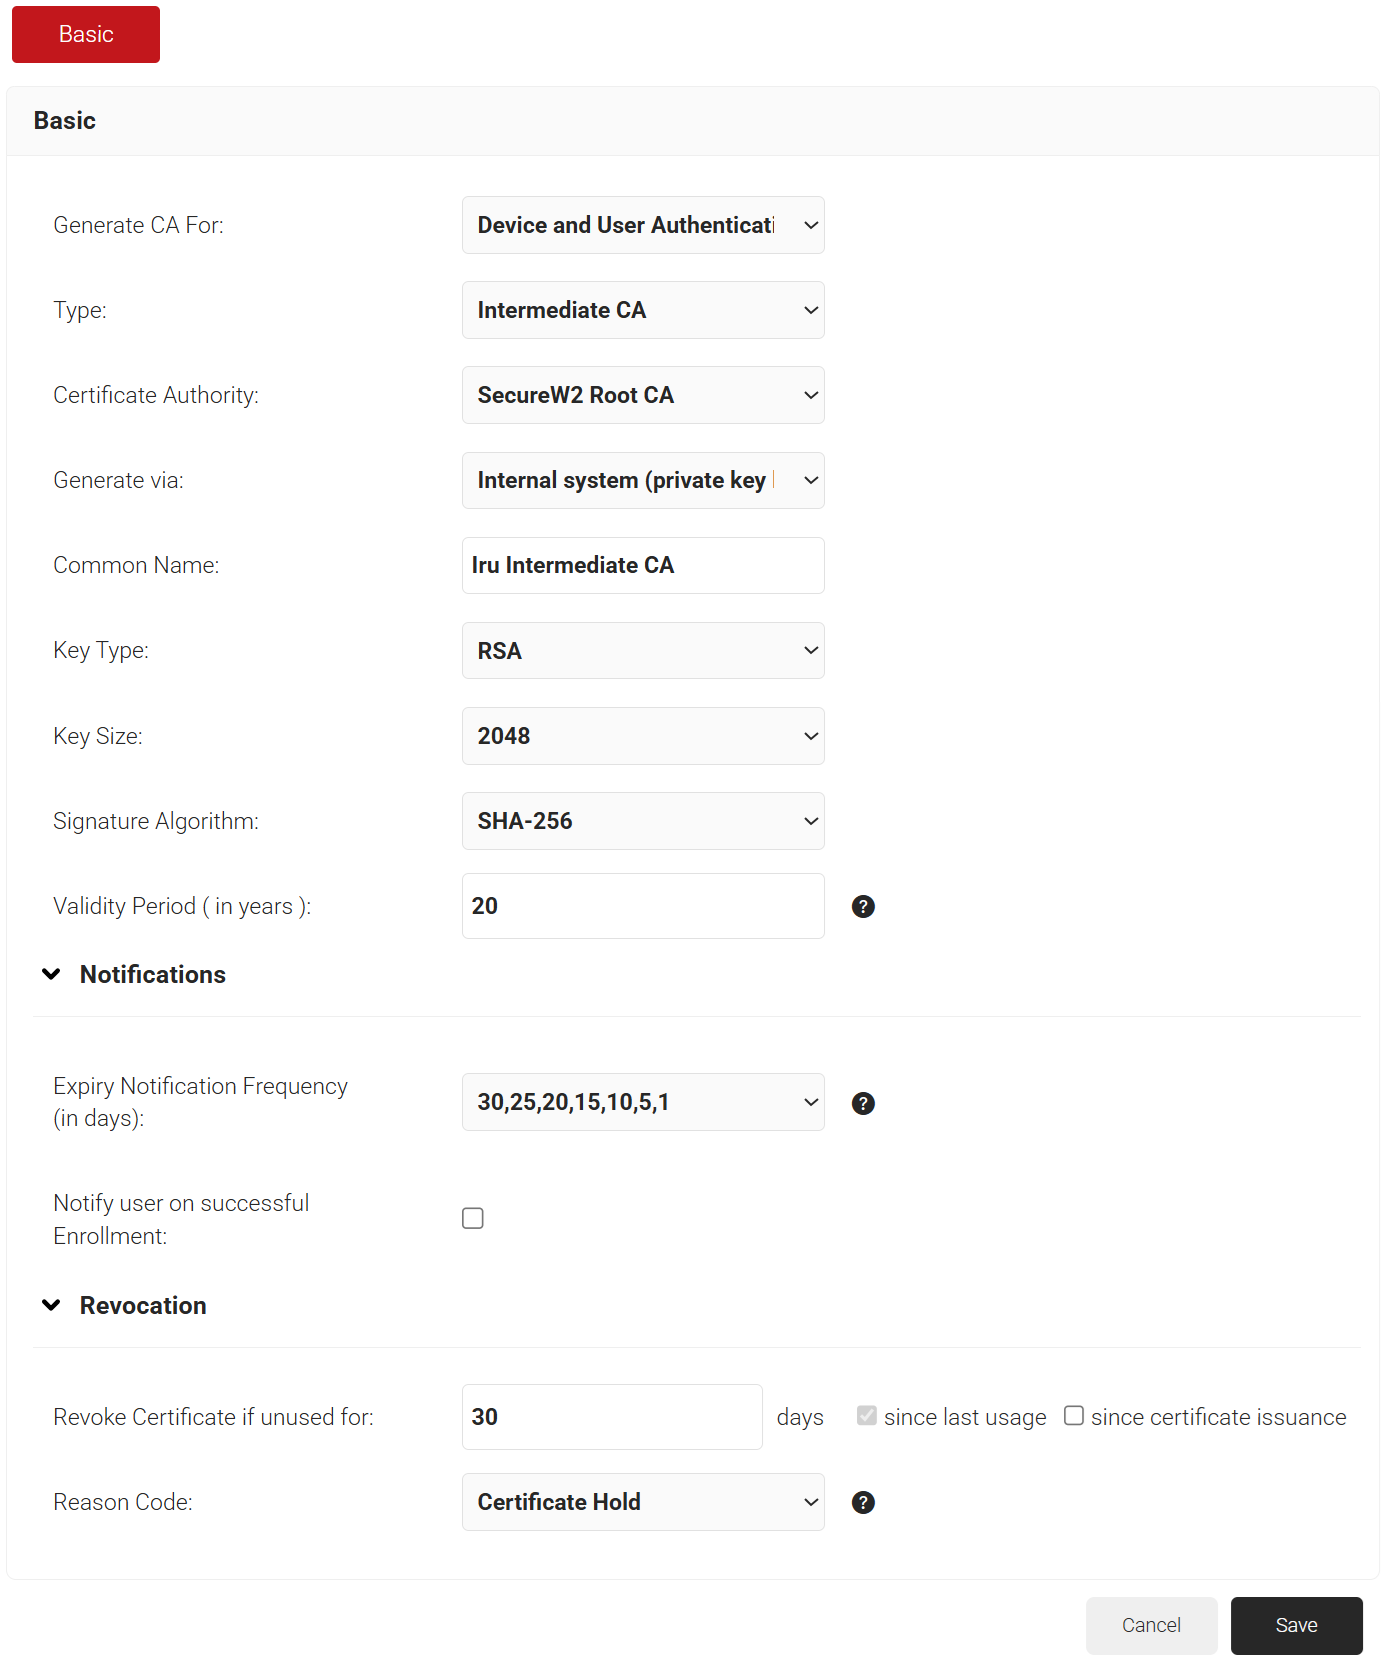
- In the Basic section, from the Generate CA For drop-down list, select Device and User Authentication to authenticate devices and users.
- From the Type drop-down list, select Intermediate CA.
- From the Certificate Authority drop-down list, select the default Root CA that comes with your organization.
- In the Common Name field, enter a common name for the CA certificate. SecureW2 recommends a name that includes “SCEP.”
- From the Key Size drop-down list, select 2048 for the CA certificate key pair.
- From the Signature Algorithm drop-down list, select the signature algorithm for the certificate signing request. The option available is SHA-256.
- In the Validity Period (in years) field, enter the validity period of the CA certificate.
- In the Notifications section:
- From the Expiry Notification Frequency (in days) drop-down list, select the frequency interval for which a certificate expiration notification should be sent to users.
- Select the Notify user on successful Enrollment check box to notify users after a successful enrollment.
- In the Revocation section:
- In the Revoke Certificate if unused for field, select the number of days after which an unused certificate can be revoked.
- Since last usage – Select this checkbox to revoke the certificate after a specified number of days if it remains unused.
- Since certificate issuance – Select this checkbox to revoke the certificate after a specified number of days after it is issued.
- From the Reason Code drop-down list, select any one of the following reasons for which the certificate is revoked.
- Certificate Hold
- AA Compromise
- Privilege Withdrawn
- Unspecified
- In the Revoke Certificate if unused for field, select the number of days after which an unused certificate can be revoked.
- Click Save. The new intermediate CA is generated.

A certificate template is a blueprint for the attributes that must be encoded on a certificate and its intended use case.
To create a certificate template, perform the following steps:
- Navigate to Dynamic PKI > Certificate Authorities.
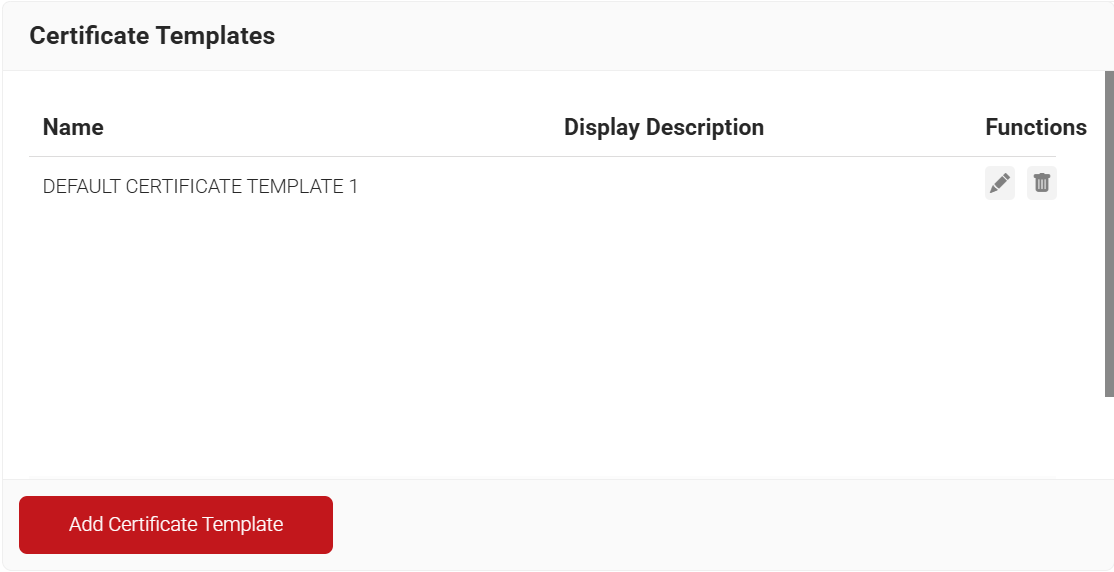
- Scroll down to the Certificate Templates section.
- Click Add Certificate Template.

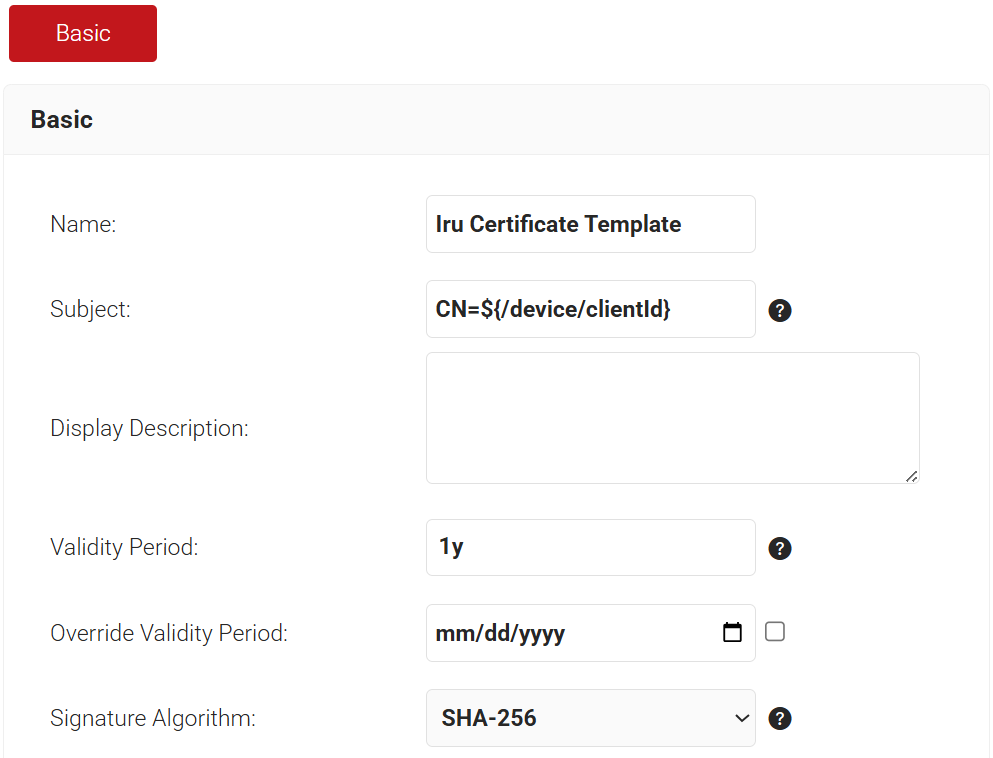
- In the Basic section, enter the name of the certificate template in the Name field.
- In the Subject field, enter CN=${/device/clientId}
- In the Display Description field, enter a suitable description for the certificate template.
- In the Validity Period field, type the validity period of the certificate (based on the requirement).
- From the Signature Algorithm drop-down list, select the signature algorithm for the certificate signing request. The option available is SHA-256.

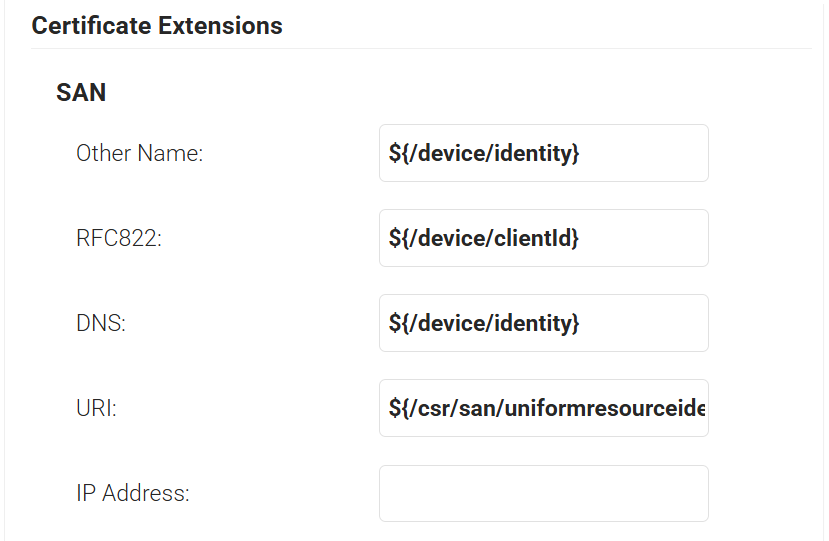
- In the SAN section:
- In the Other Name field, enter ${/device/identity}
- In the RFC822 field, enter ${/device/clientId}
- In the DNS field, enter ${/device/identity}

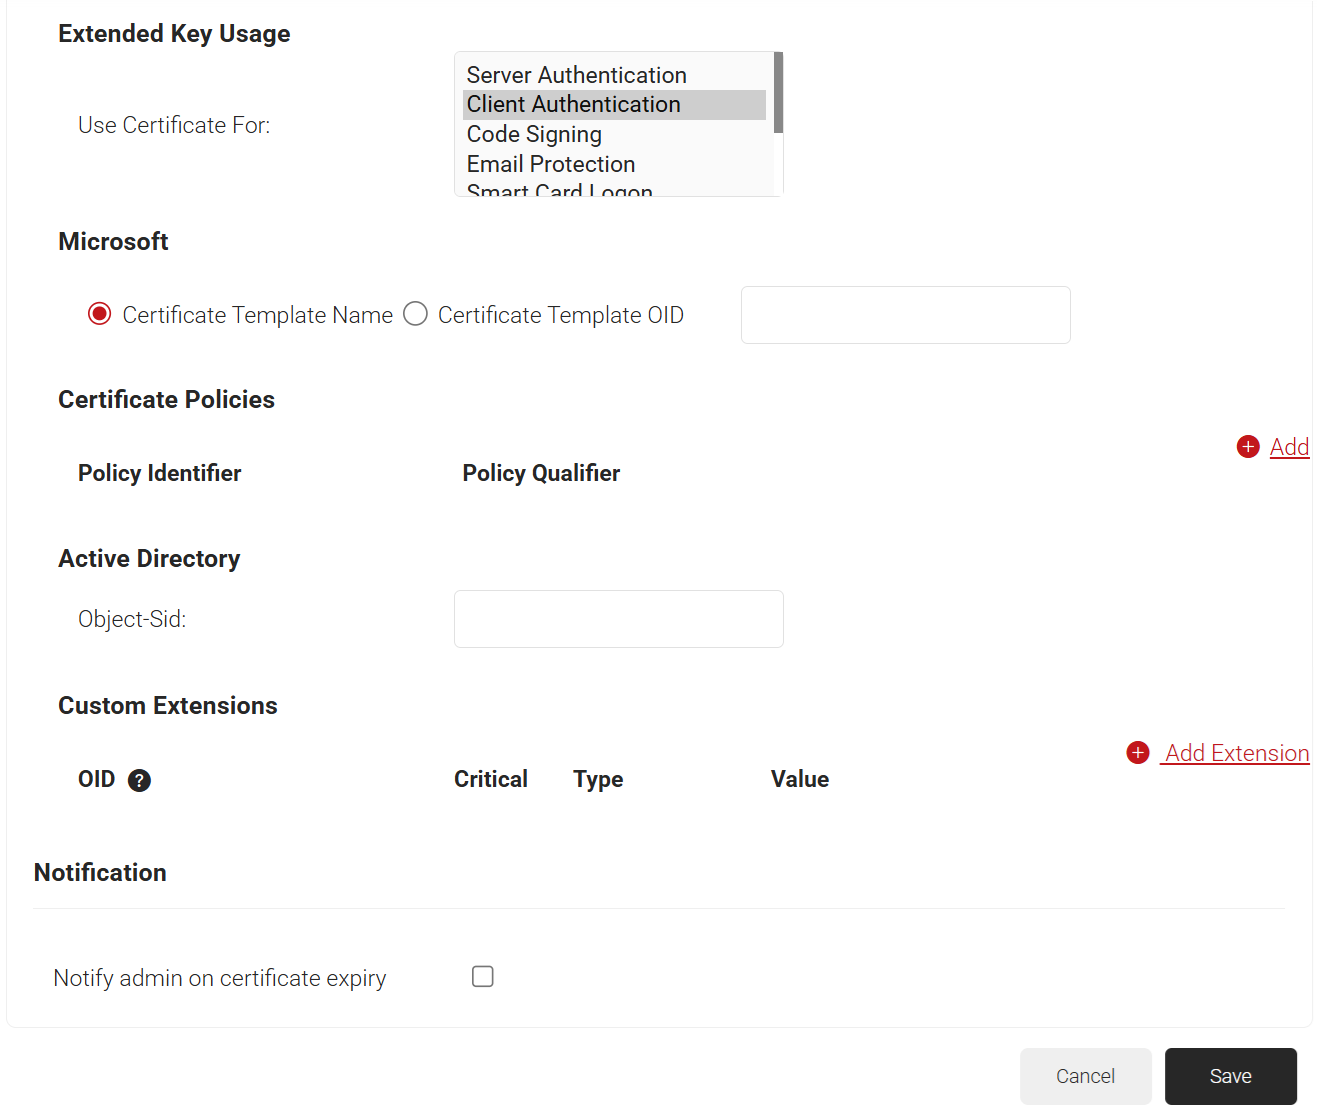
- In the Extended Key Usage section, from the Use Certificate For list, select Client Authentication.

- Click Save.
In this section, we create a Device Management Platform, which generates a .csv file containing the Enrollment URL and API Secret. These values are configured in Iru’s SCEP Profile, where the Enrollment URL serves as an endpoint that allows managed devices to connect with the SecureW2 SCEP server and enroll for certificates.
To create a device management platform, perform the following steps:
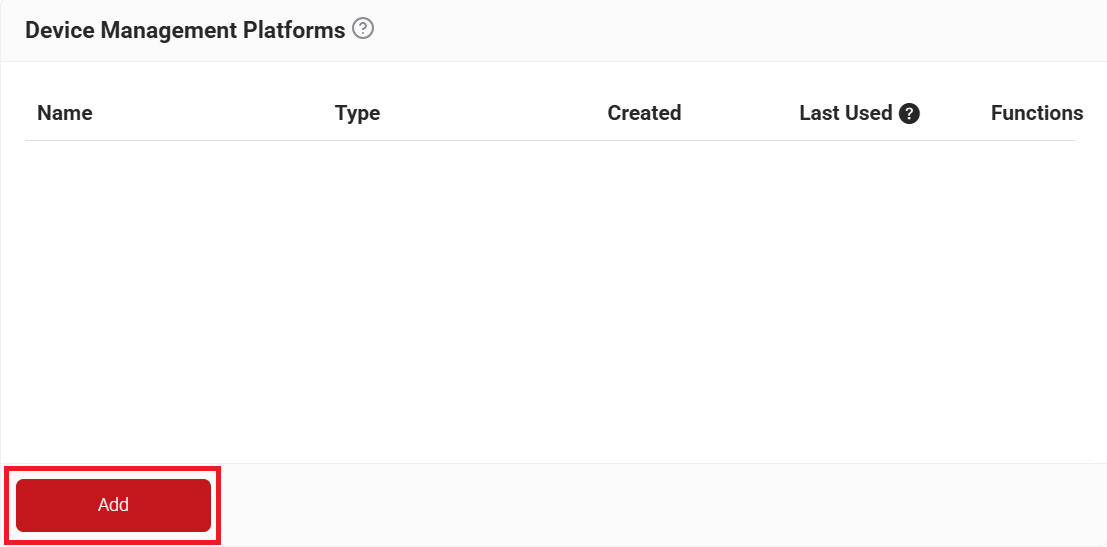
- Navigate to Integration Hub > Device Management Platforms.
- Click Add.

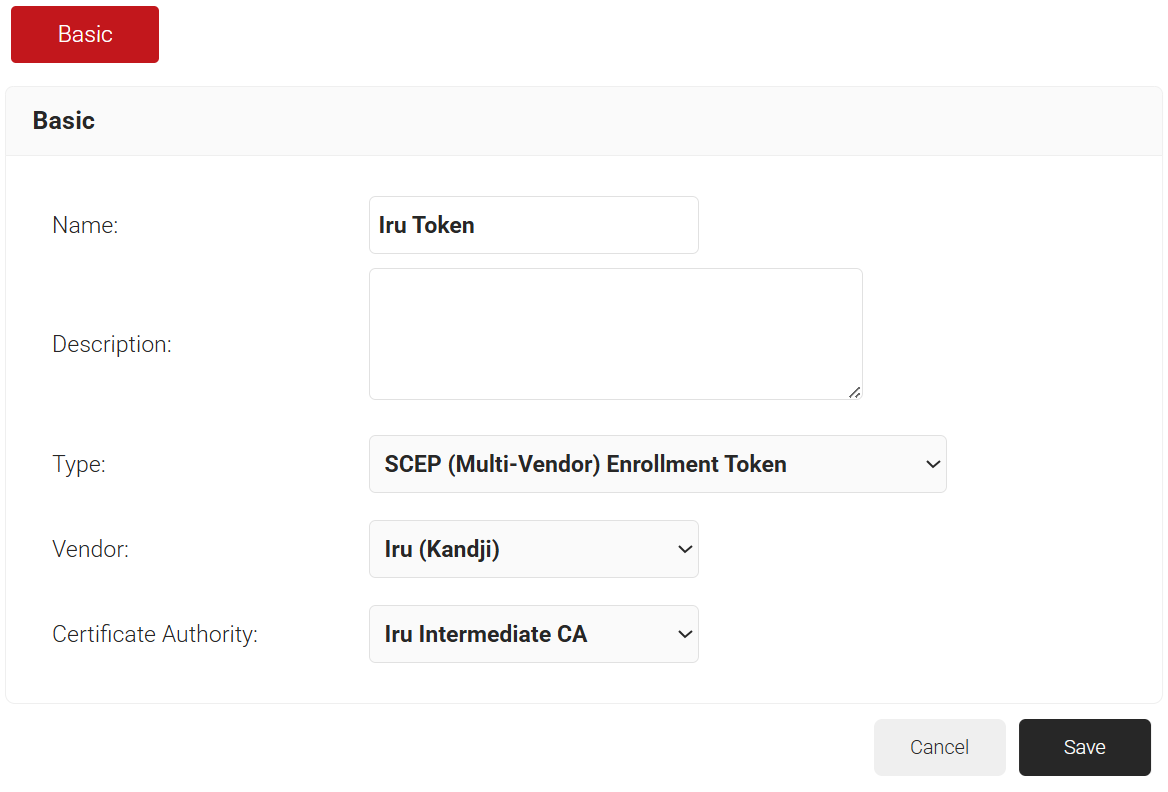
- In the Basic section, enter the name of the Device Management Platform in the Name field.
- In the Description field, enter a suitable description for the Device Management Platform.
- From the Type drop-down list, select SCEP (Multi-Vendor) Enrollment Token.
- From the Vendor drop-down list, select Kandji.
- From the Certificate Authority drop-down list, select the intermediate CA you created in the Creating an Intermediate CA for Iru Integration section.

- Click Save. A .csv file containing the API Secret and Enrollment URL is downloaded. In addition, the Enrollment URL is displayed on the page.
 NOTE: Save the file securely. This file is downloaded only once during token creation. If lost, the token and secret cannot be retrieved.
 NOTE: Save the file securely. This file is downloaded only once during token creation. If lost, the token and secret cannot be retrieved.
Policy Workflow segments users and devices based on defined criteria or attributes. It allows you to define and create roles based on attributes and groups retrieved from the Device Management Platform. These roles can then be assigned a unique Enrollment Policy for certificate issuance and used to trigger a Network Policy.
To create a policy workflow, perform the following steps:
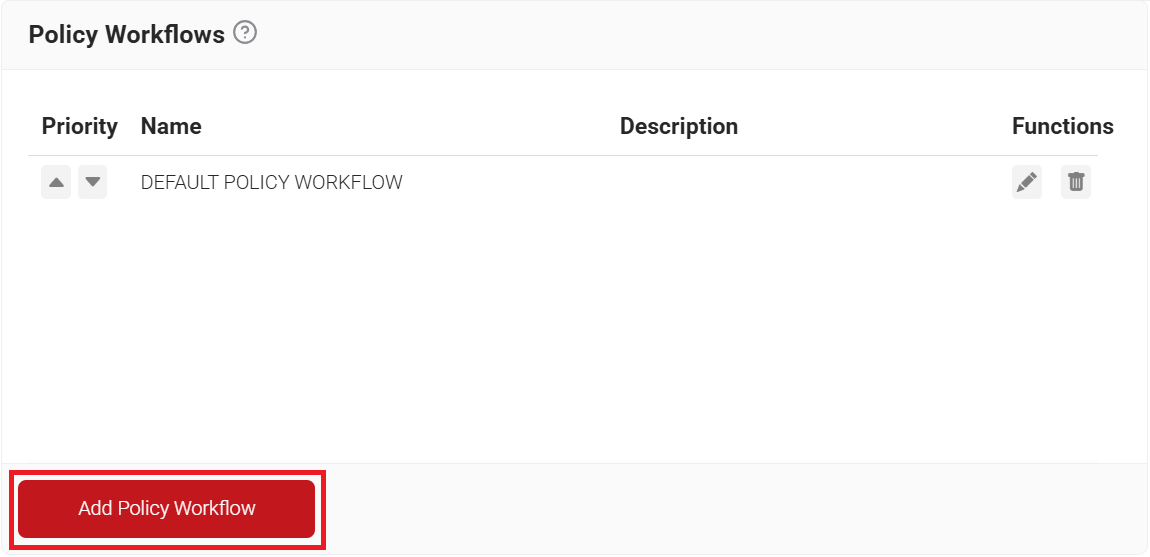
- Navigate to Policy Management > Policy Workflows.
- Click Add Policy Workflow.

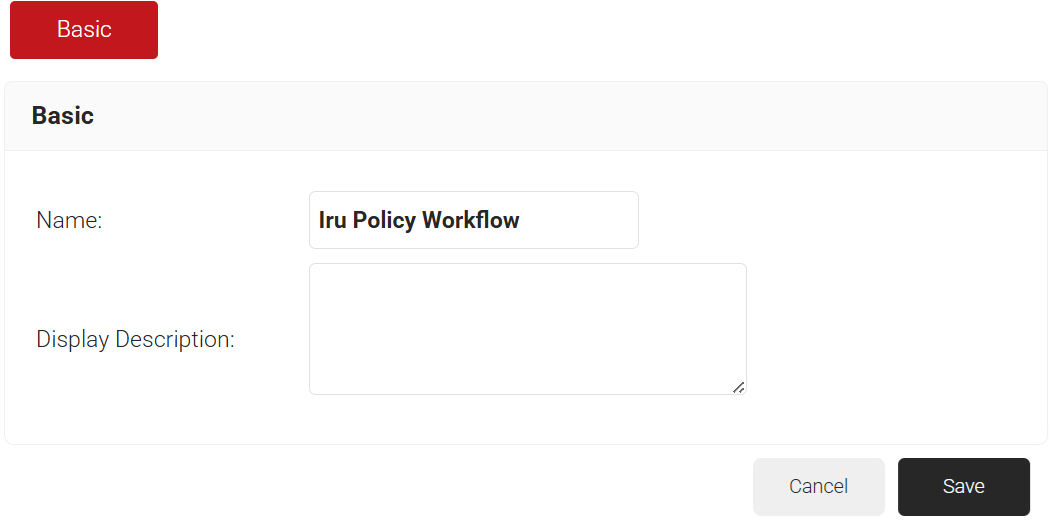
- In the Basic section, enter the name of the policy workflow in the Name field.
- In the Display Description field, enter a suitable description for the policy workflow.

- Click Save.
- The page refreshes, and the Conditions tab is displayed.
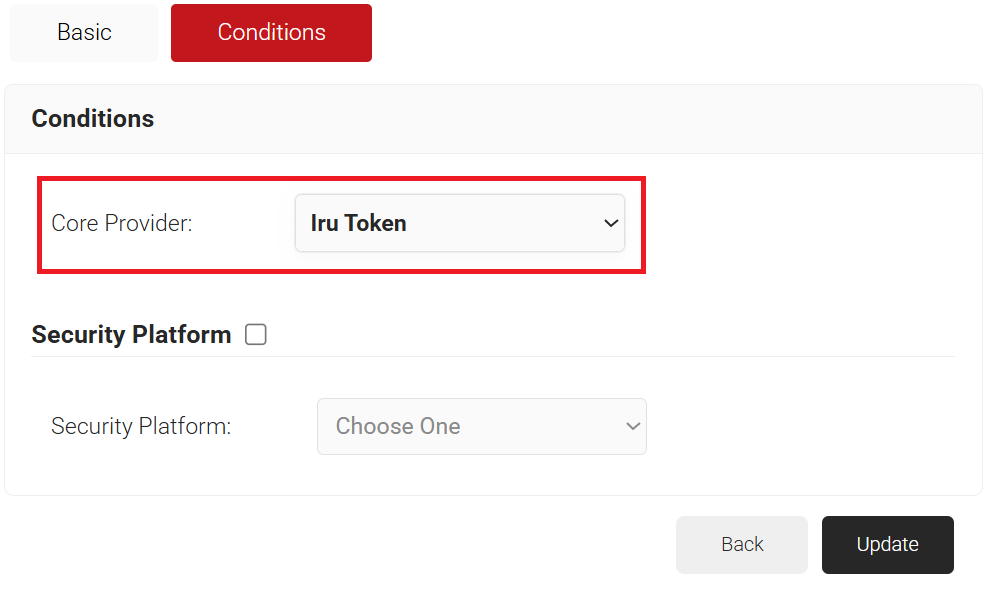
- Select the Conditions tab.
- From the Core Provider drop-down list, select the Device Management Platform you created earlier.

- Click Update.
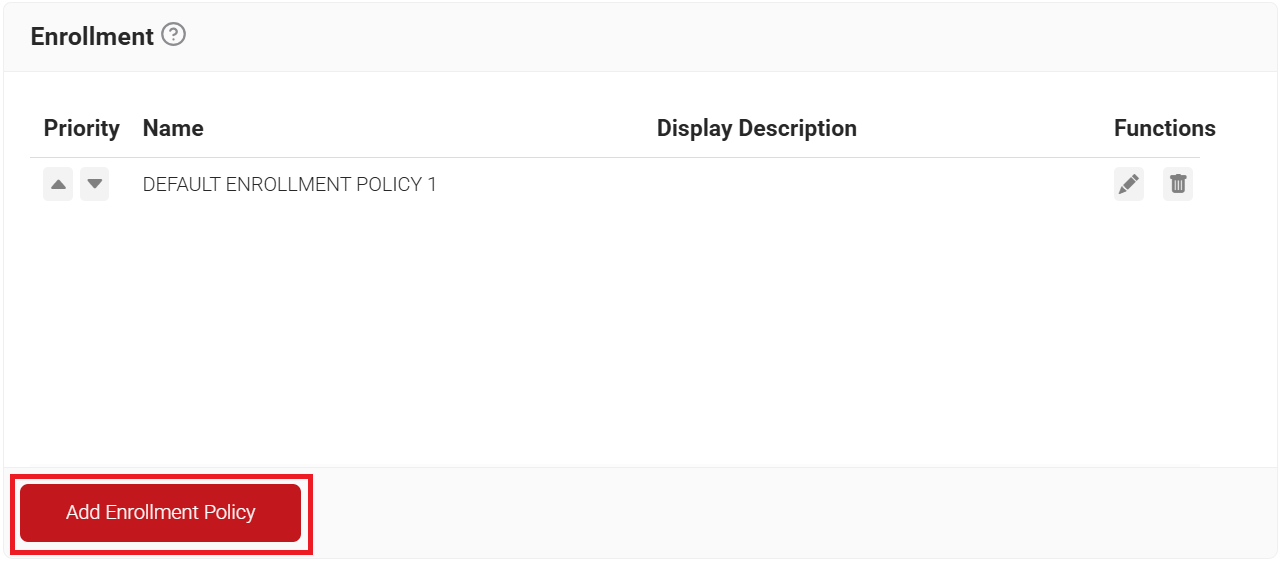
An Enrollment Policy defines the client certificate template and the Certificate Issuer to be used for each Policy Workflow. It leverages the segmentation established in the Policy Workflow to ensure the appropriate template and issuer are applied to each workflow.
To configure an enrollment policy, perform the following steps:
- Navigate to Policy Management > Enrollment.
- Click Add Enrollment Policy.

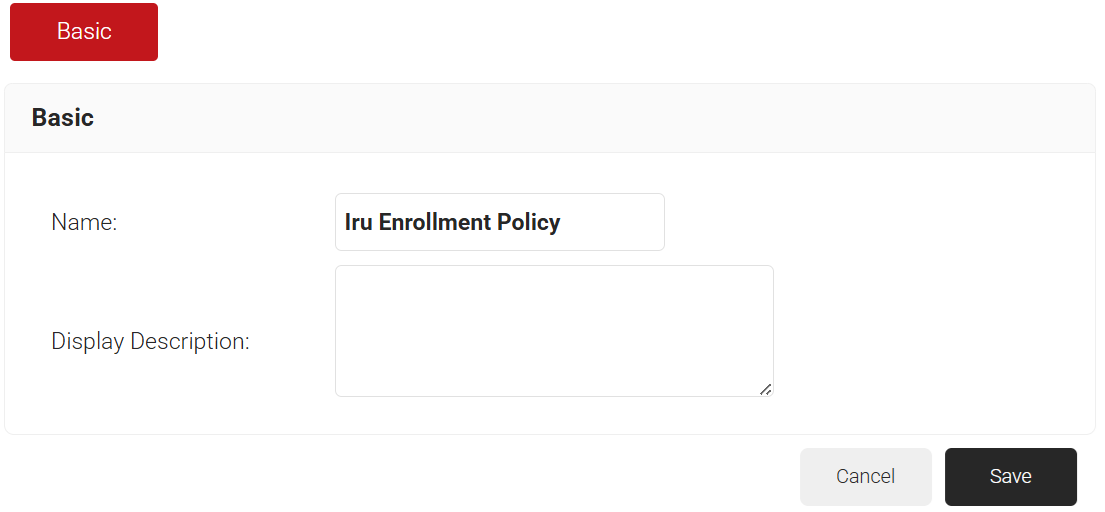
- In the Basic section, enter the name of the enrollment policy in the Name field.
- In the Display Description field, enter a suitable description for the enrollment policy.

- Click Save. The page refreshes, and the Conditions and Settings tabs are displayed.
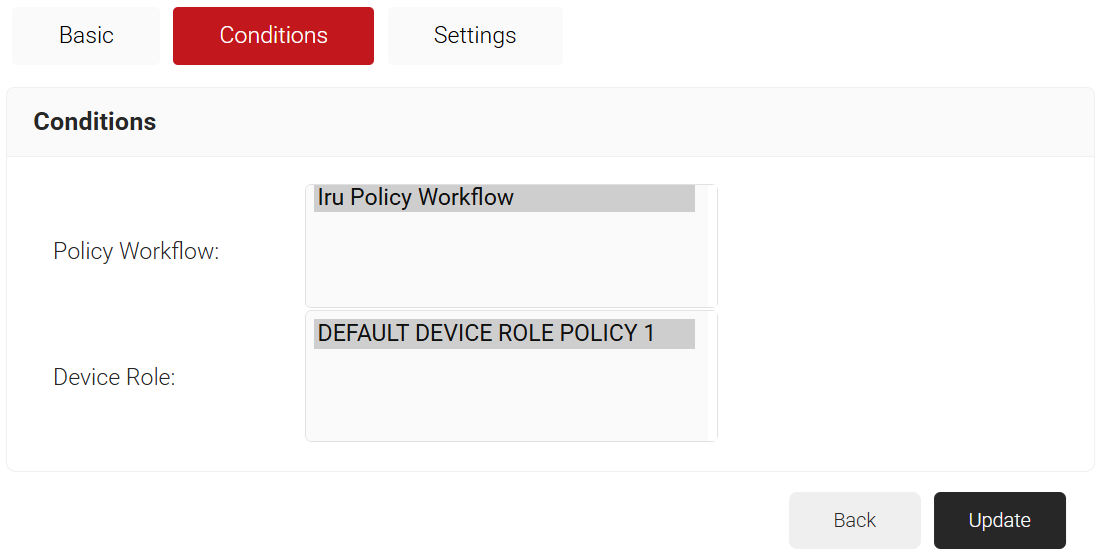
- Select the Conditions tab.
- In the Policy Workflow list, select the Policy Workflow you created earlier.
- From the Device Role list, select DEFAULT DEVICE ROLE POLICY 1.

- Select the Settings tab.
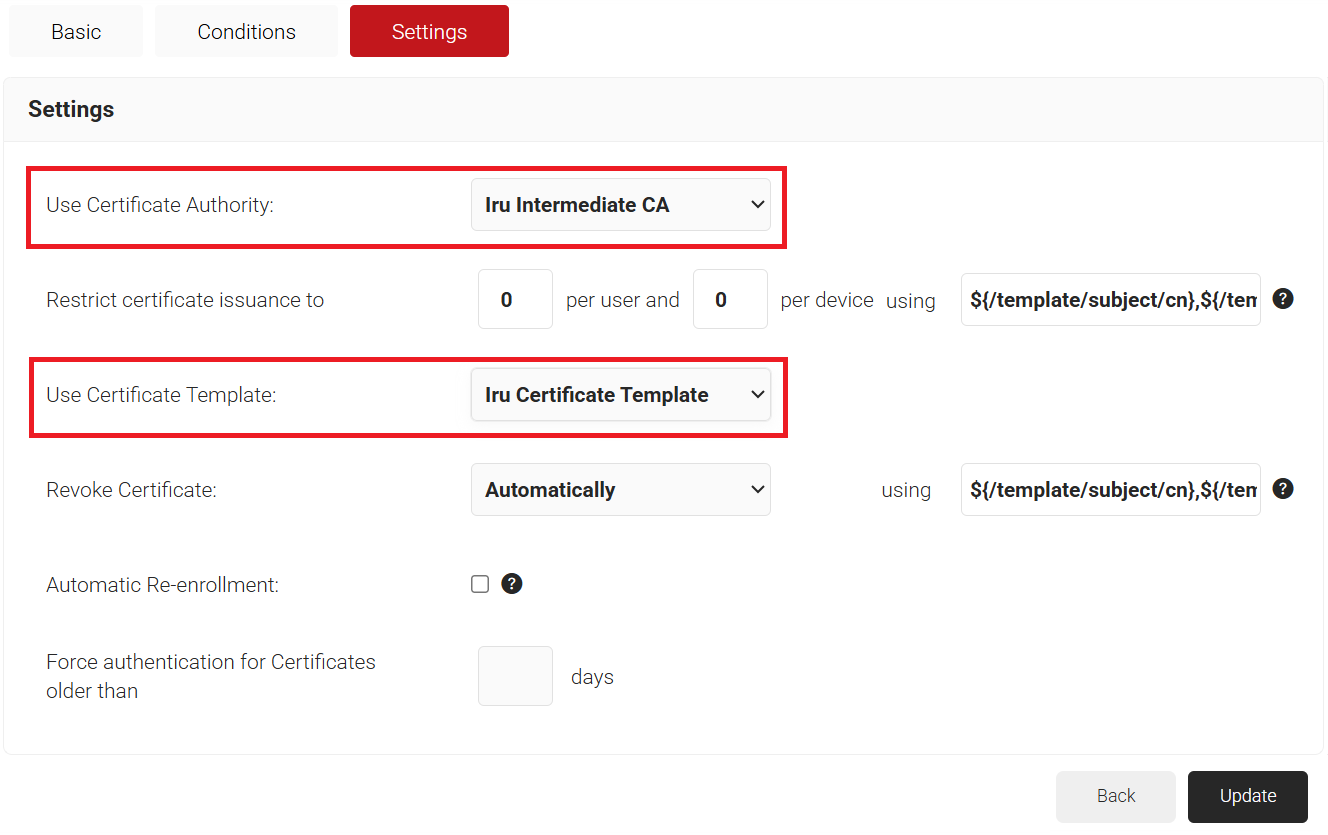
- From the Use Certificate Authority drop-down list, select the intermediate CA you created earlier (refer to the Creating an Intermediate CA for Iru Integration section).
- From the Use Certificate Template drop-down list, select the template you created earlier (refer to the Creating an Iru Certificate Template section).
- Retain the default values for the other settings.

- Click Update.
A Network Policy defines how device connection decisions are made based on device information obtained from the Policy Workflow. It allows you to specify whether the device will be granted or denied network access, along with other RADIUS attributes that can be sent, which are most commonly VLAN assignments.
NOTE: Configure a Network Policy only if your organization uses SecureW2 CloudRADIUS as its RADIUS server.
To configure a network policy, follow these steps:
- Navigate to Policy Management > Network.
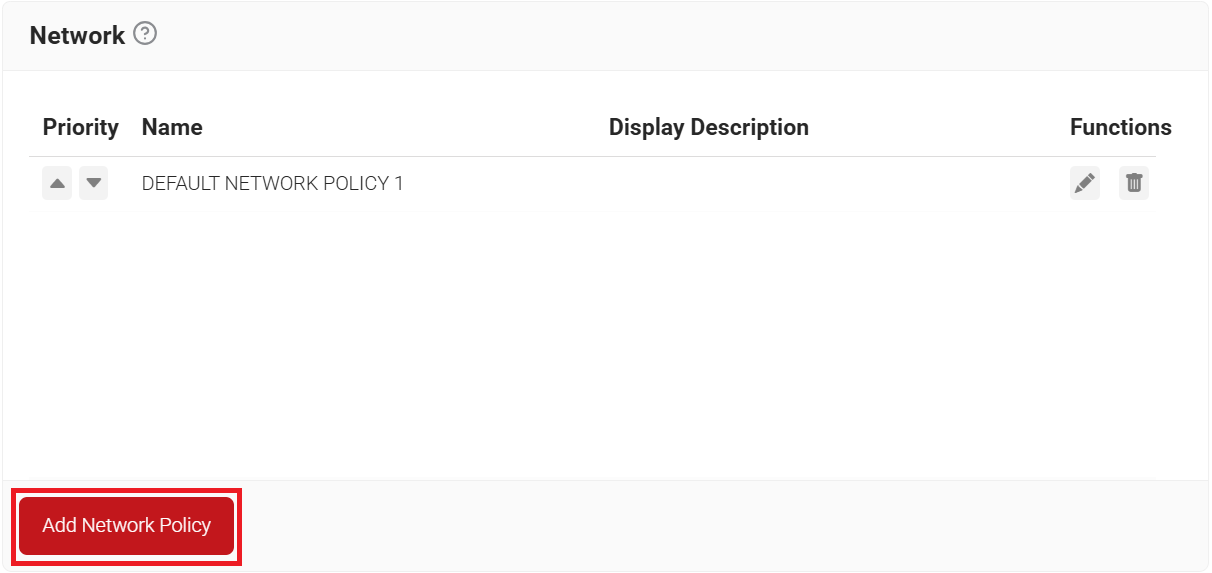
- Click Add Network Policy.

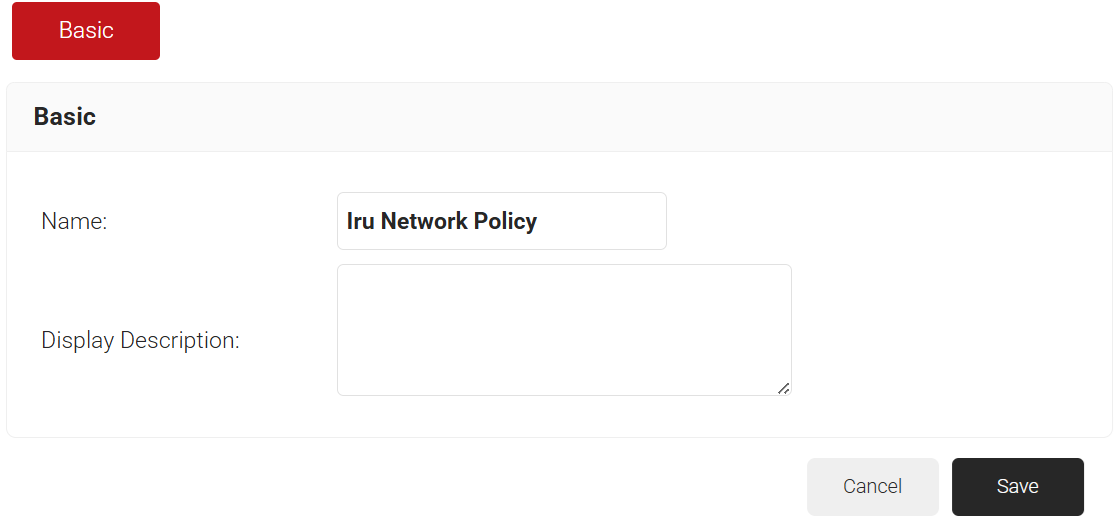
- In the Basic section, enter the name of the network policy in the Name field.
- In the Display Description field, enter a suitable description for the network policy.

- Click Save. The page refreshes, and the Conditions and Settings tabs are displayed.
- Select the Conditions tab.
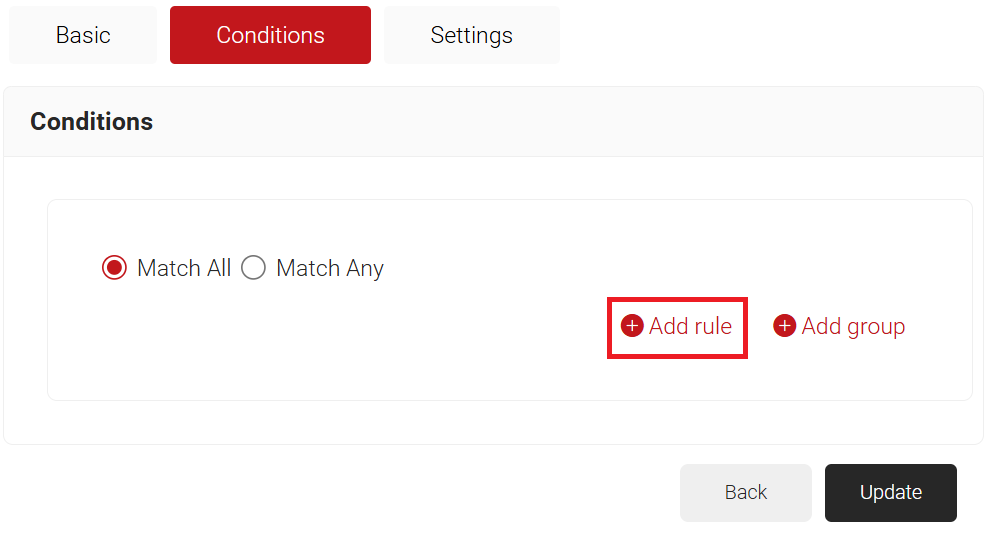
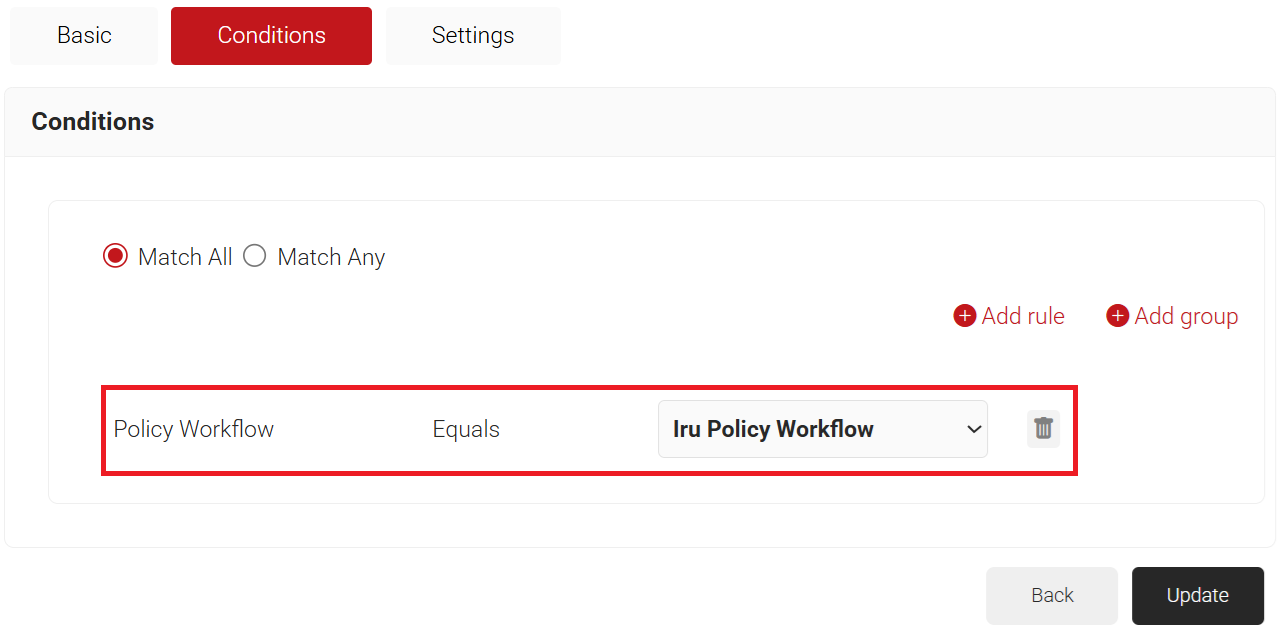
- Select Match All or Match Any based on your requirement to set authentication criteria. In the case explained here, we are selecting Match All.

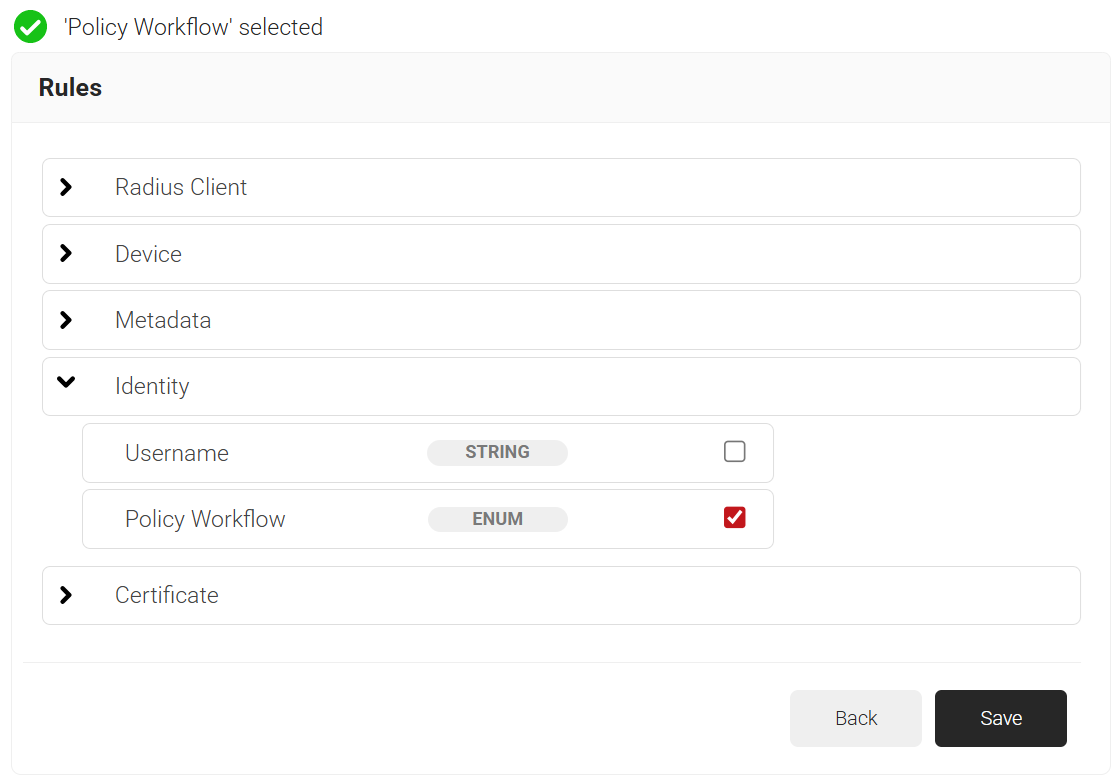
- Click Add rule and select the Policy Workflow you want to assign to this network policy. It is essential to select the appropriate policy workflow, as it triggers the network policy. This menu offers various rules that you can select based on your business requirements.

- Click Save.
- The Policy Workflow option appears under the Conditions tab.
- From the Policy Workflow Equals drop-down list, select the user role policy you created earlier (refer to the Configuring a Policy Workflow section). You can select multiple User Roles to assign to a Network Policy.

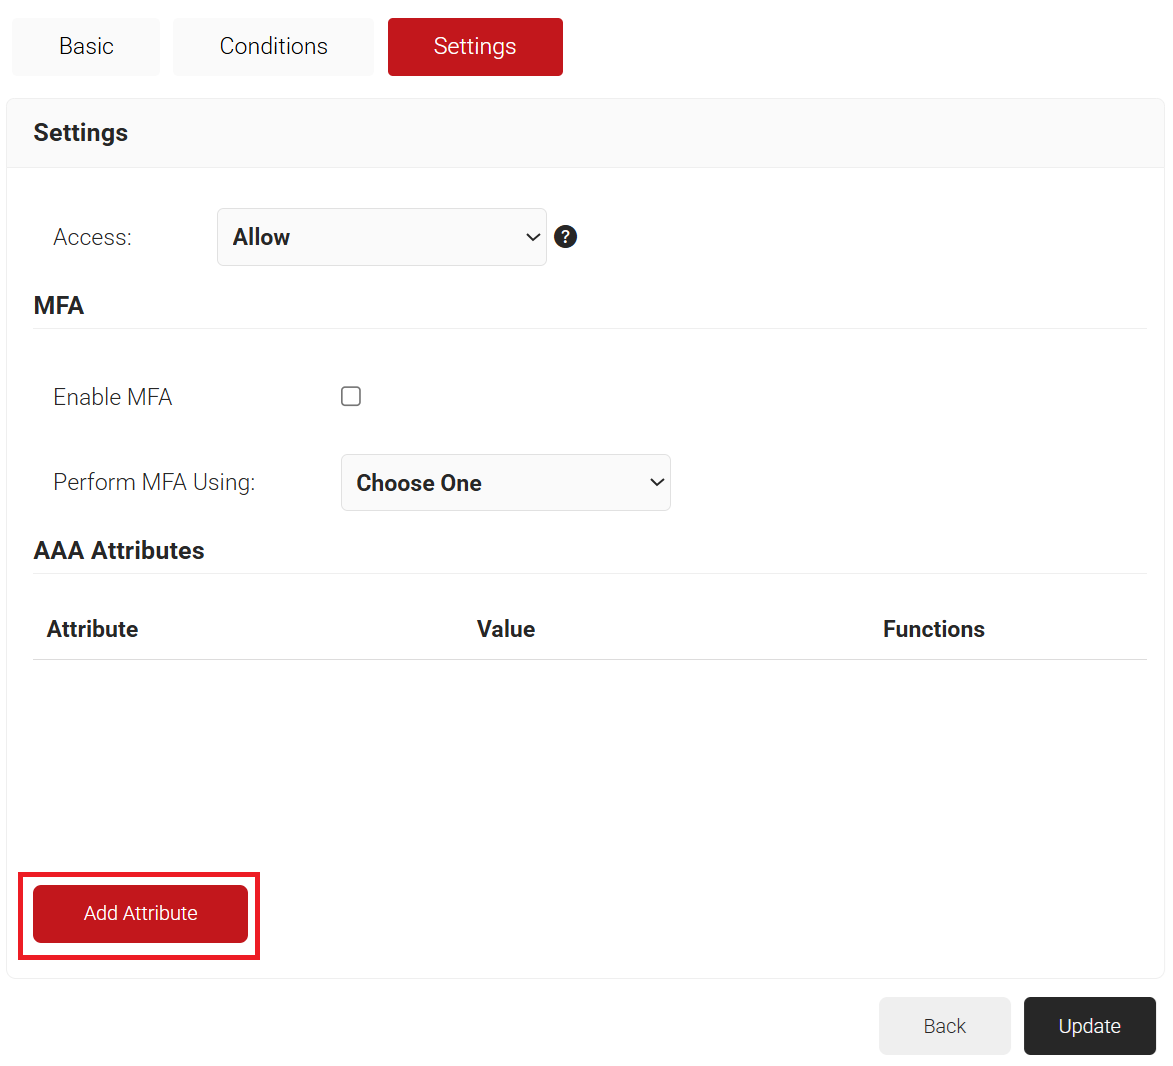
- Navigate to the Settings tab.
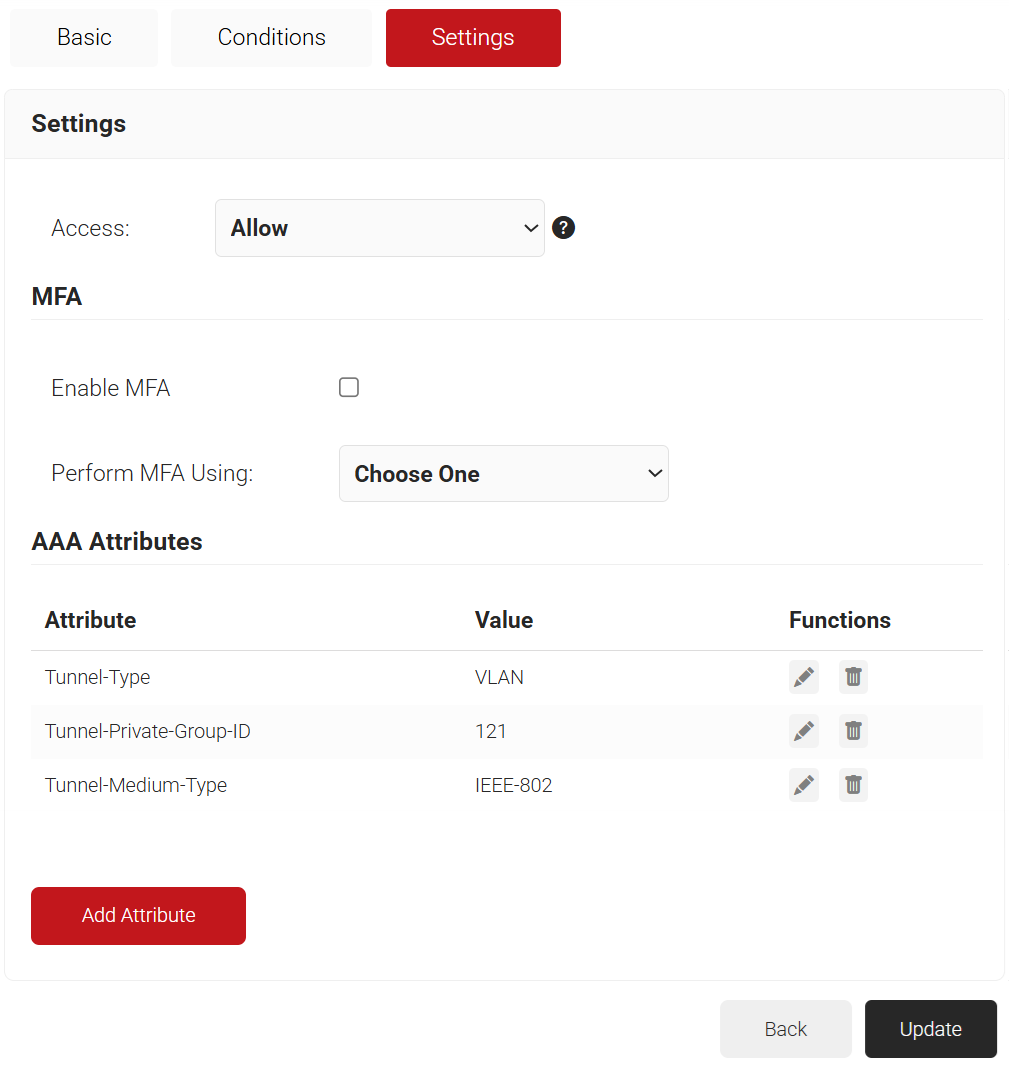
- From the Access drop-down list, select any one of the options to allow or deny authentication requests. The default value is Allow.

- Click Add Attribute.
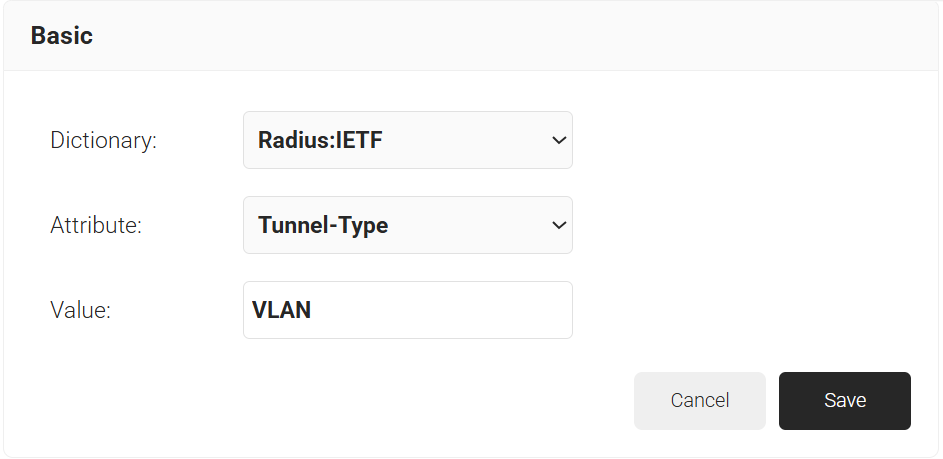
- From the Dictionary drop-down list, select an option:
- Radius: IETF – Uses standard RADIUS attributes for VLAN assignment.
- Custom: Uses Vendor-Specific Attributes (VSA).
- Add the RADIUS attributes required for VLAN assignment. For reference, here is what is commonly required for VLAN Assignment:
- Tunnel-Medium-Type: IEEE-802
- Tunnel-Private-Group-ID: {VLAN Name}
- Tunnel-Type: VLAN

- Click Save.

- From the Dictionary drop-down list, select an option:
- Click Update.
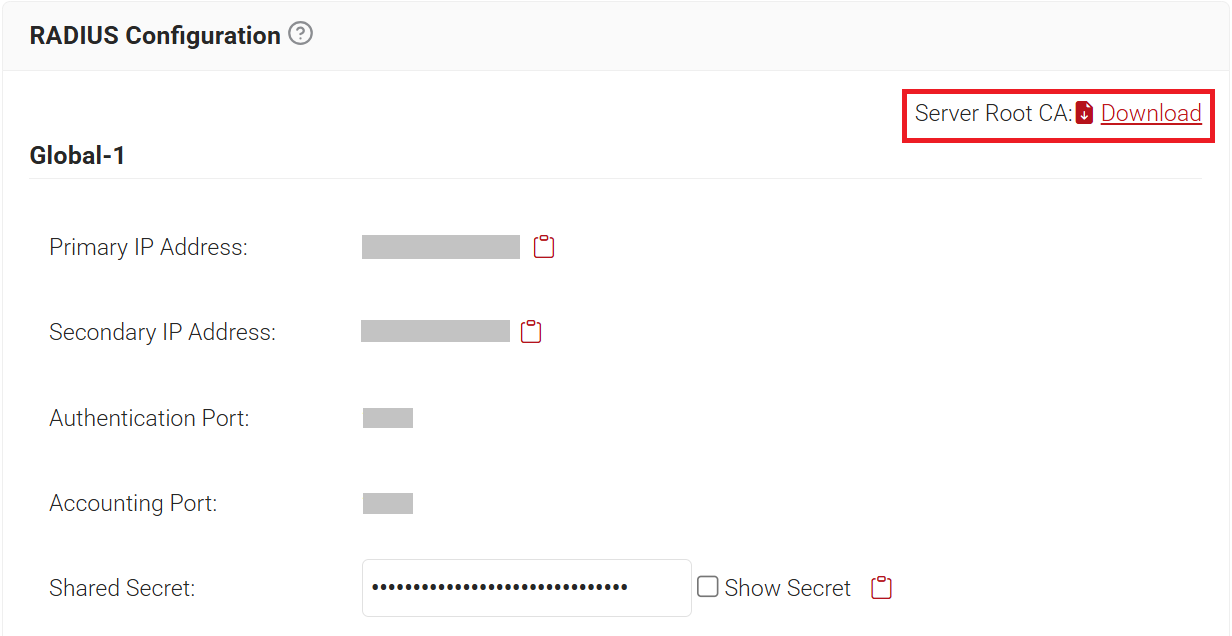
To allow managed devices to trust the RADIUS server during authentication, you’ll need to export the RADIUS Root CA (DigiCert Global Root G3). This certificate is later uploaded to the Certificate Trust section of the SCEP Profile configuration as the Specify Trusted Certificate, allowing devices to validate the RADIUS server’s certificate during EAP-TLS authentication.
To export the RADIUS Root CA, perform the following steps:
- Navigate to RADIUS > RADIUS Configuration.
- Click Download to save the server root CA.

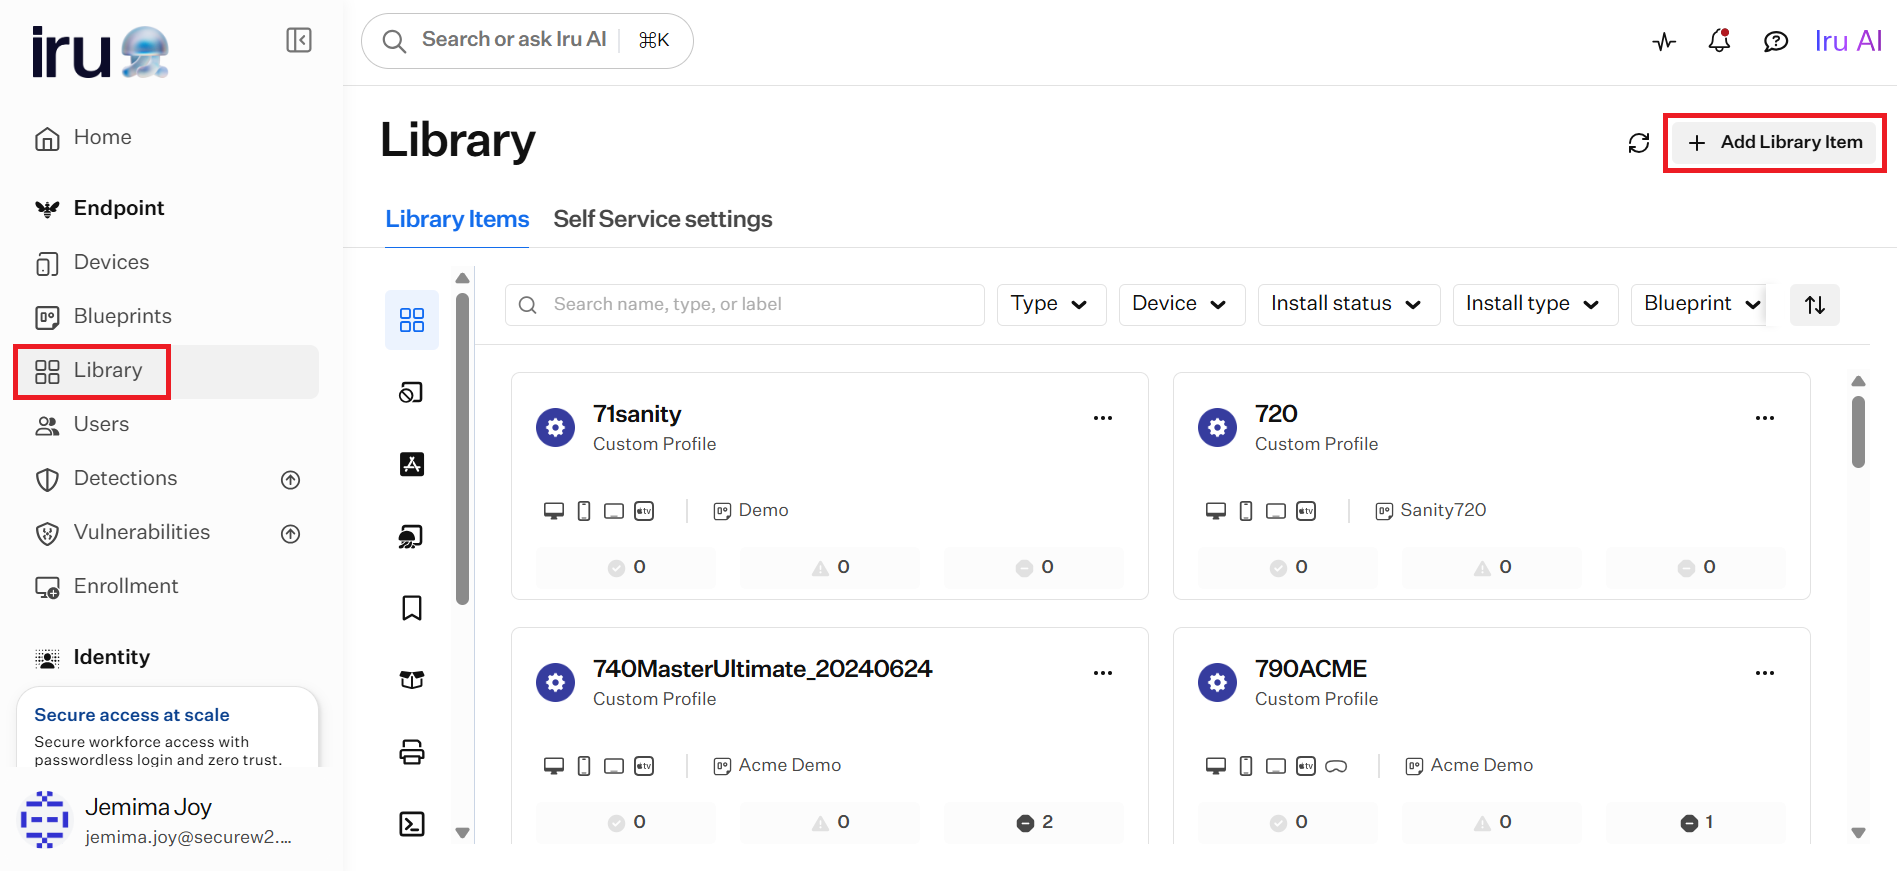
A Wi-Fi Library Item defines the network profile that Iru pushes to managed devices. This section walks through creating the item and assigning it to a blueprint.
- On the left navigation bar, click Library.
- Click + Add Library Item on the top-right.

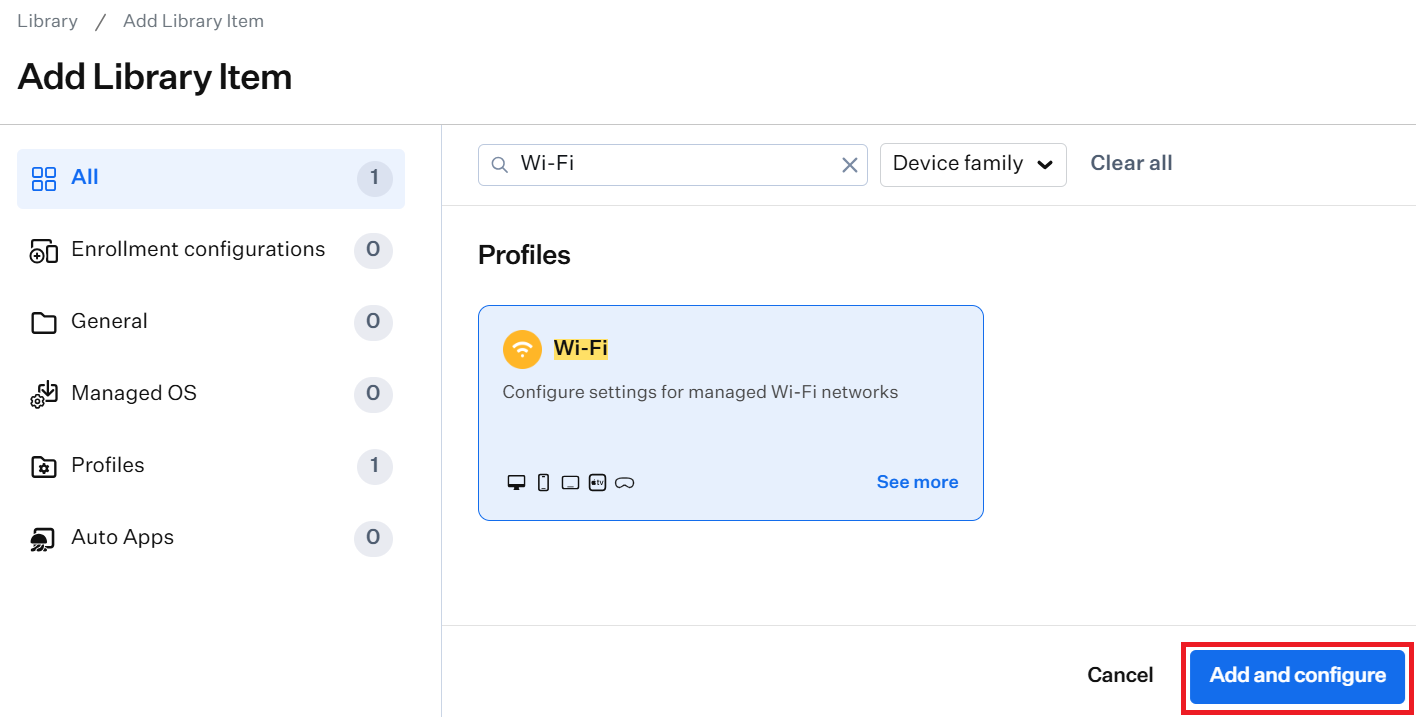
- In the Search Library Item field, enter Wi-Fi and select it from the results.

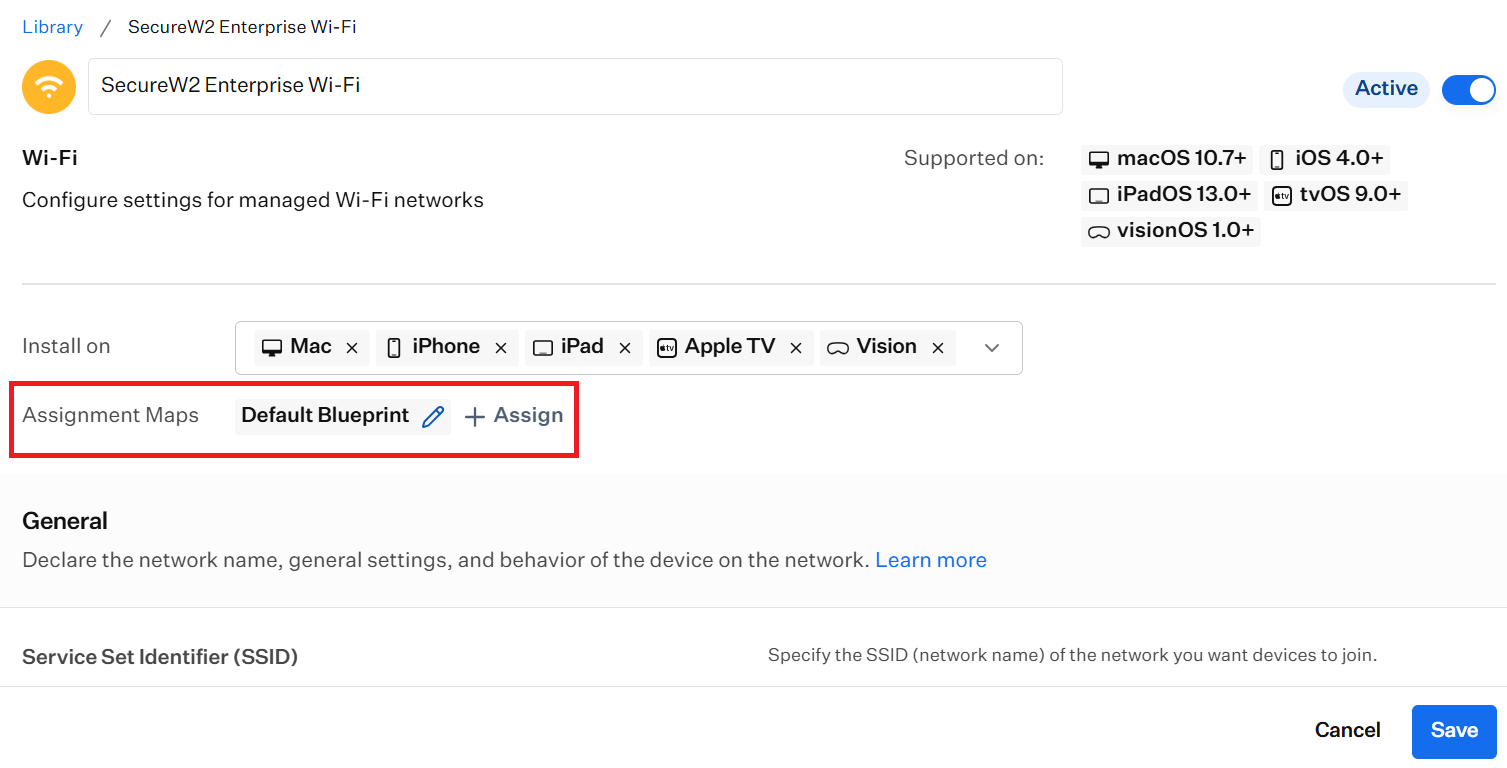
- Click Add and configure. A new Wi-Fi Library Item will be opened for configuration.
- In the Add a title field, enter a name for the new Wi-Fi Library Item.
NOTE: Use the title to differentiate this Library Item from other Wi-Fi Library Items. Use a name that identifies the item — for example, the title might include the SSID or the location where the Wi-Fi configuration is used. - In Assignment Maps, click + Assign and select the blueprint you want to deploy to.

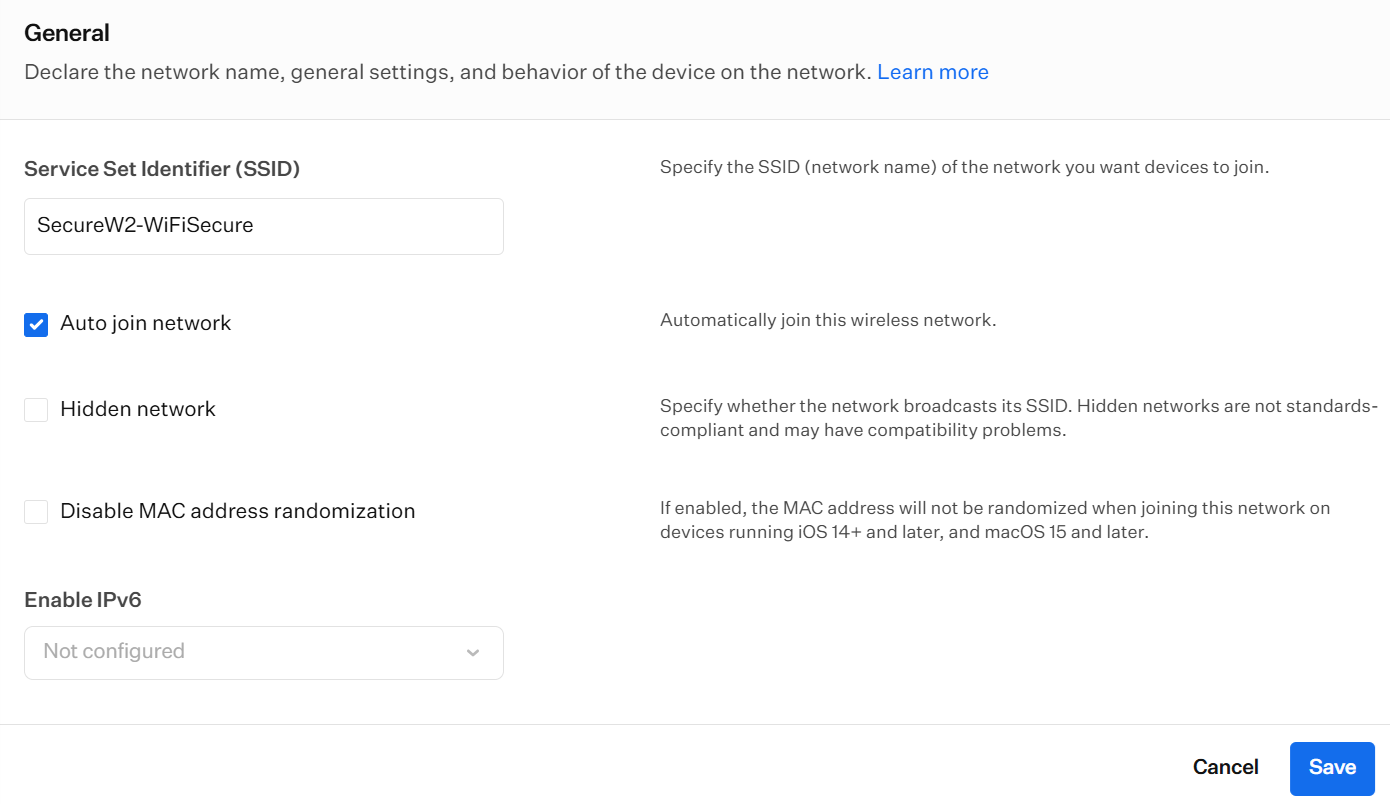
These settings define the network’s SSID and how devices connect to it.
- In the General section, in the Service Set Identifier (SSID) field, enter a name for your network.
- Select Auto join network to enable devices to automatically connect to this network when it is available.
NOTE: If you do not select Auto Join Network, devices will have the configuration required to connect to the network; however, users must manually choose to connect. - Select Hidden network if the network does not broadcast its SSID. Hidden networks are neither standards-compliant nor recommended for use.
- If you wish to turn off MAC address randomization, select Disable MAC address randomization.

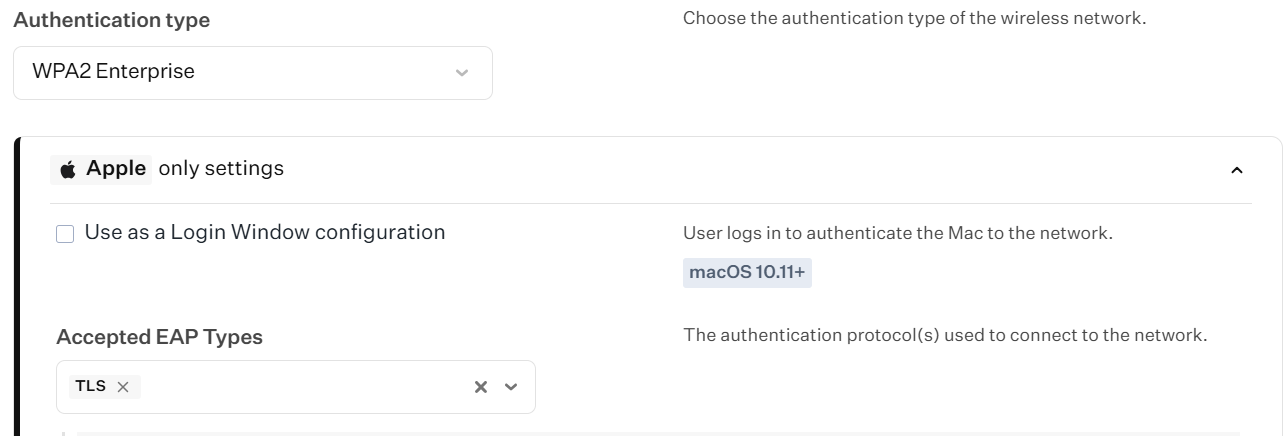
- From the Authentication type drop-down list, choose WPA2-Enterprise.
- From the Accepted EAP Types drop-down list, select TLS.

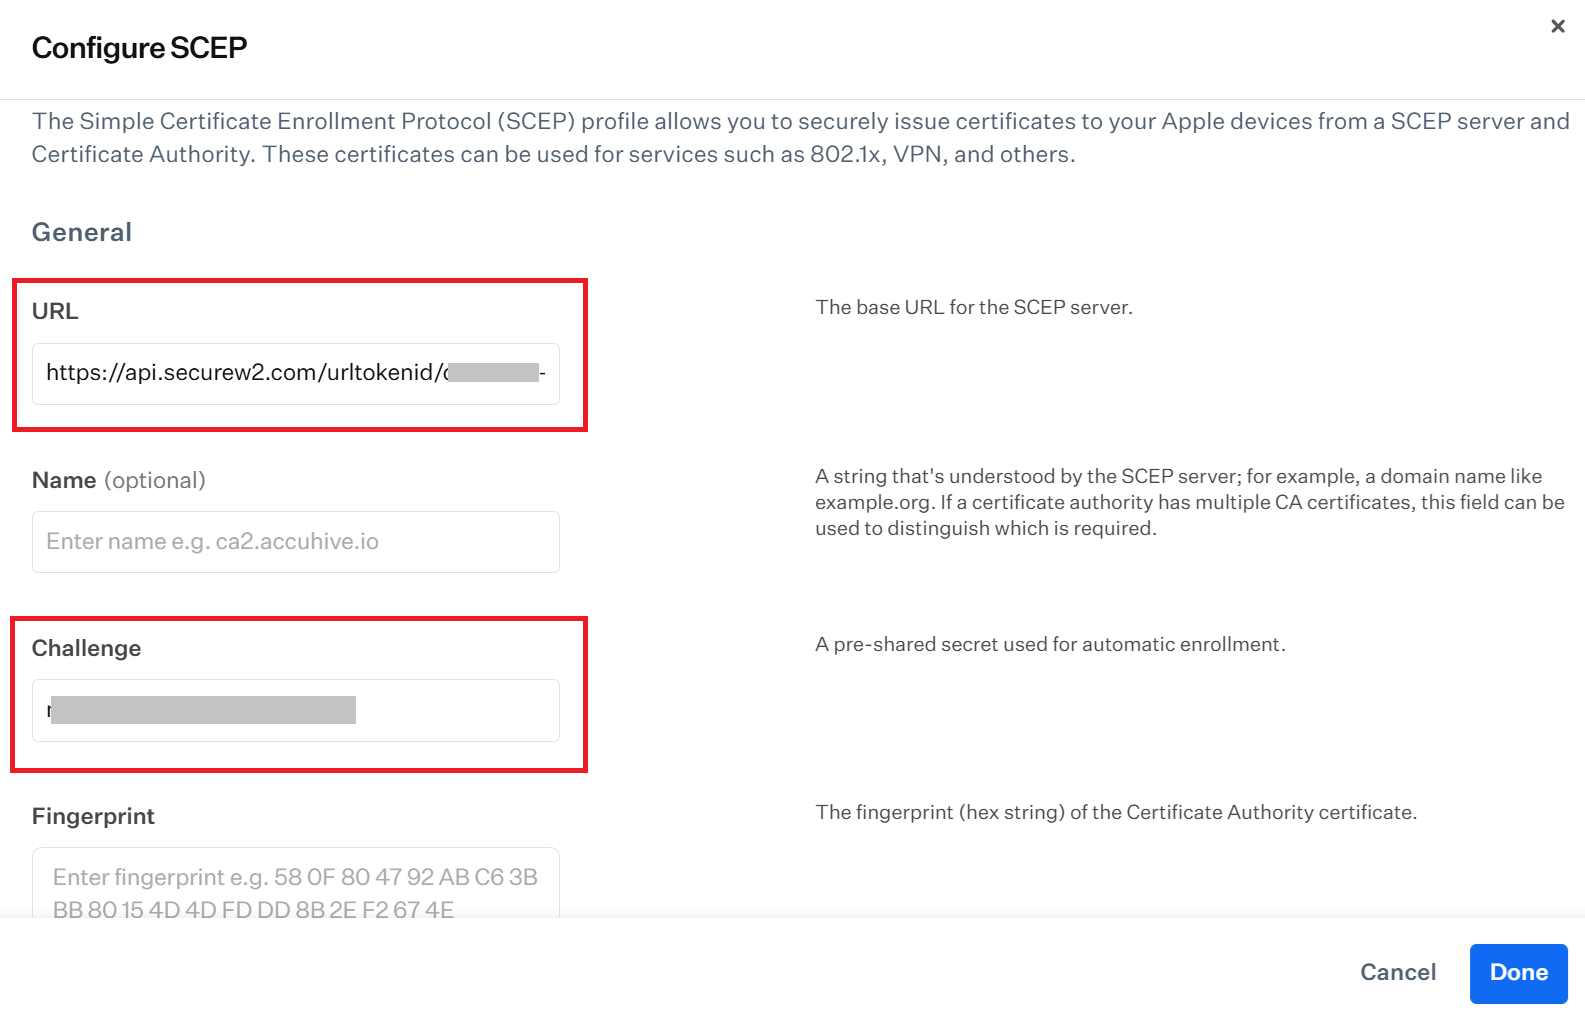
This section configures the SCEP profile that allows managed devices to automatically request and receive a certificate from SecureW2 during enrollment.
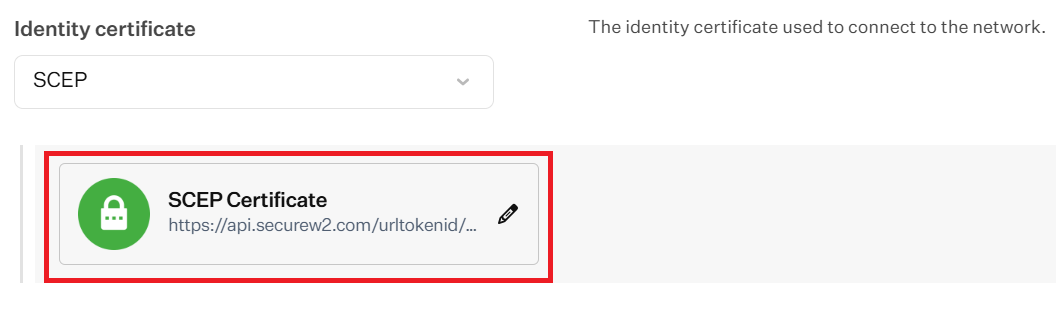
- From the Identity certificate drop-down list, select SCEP. The Configure SCEP page is displayed.
- On the Configure SCEP page, enter the Enrollment URL from the .csv file created in the Creating a Device Management Platform section in the URL field.
- In the Challenge field, enter the API Secret Key obtained from the .csv file created in the Creating a Device Management Platform section.

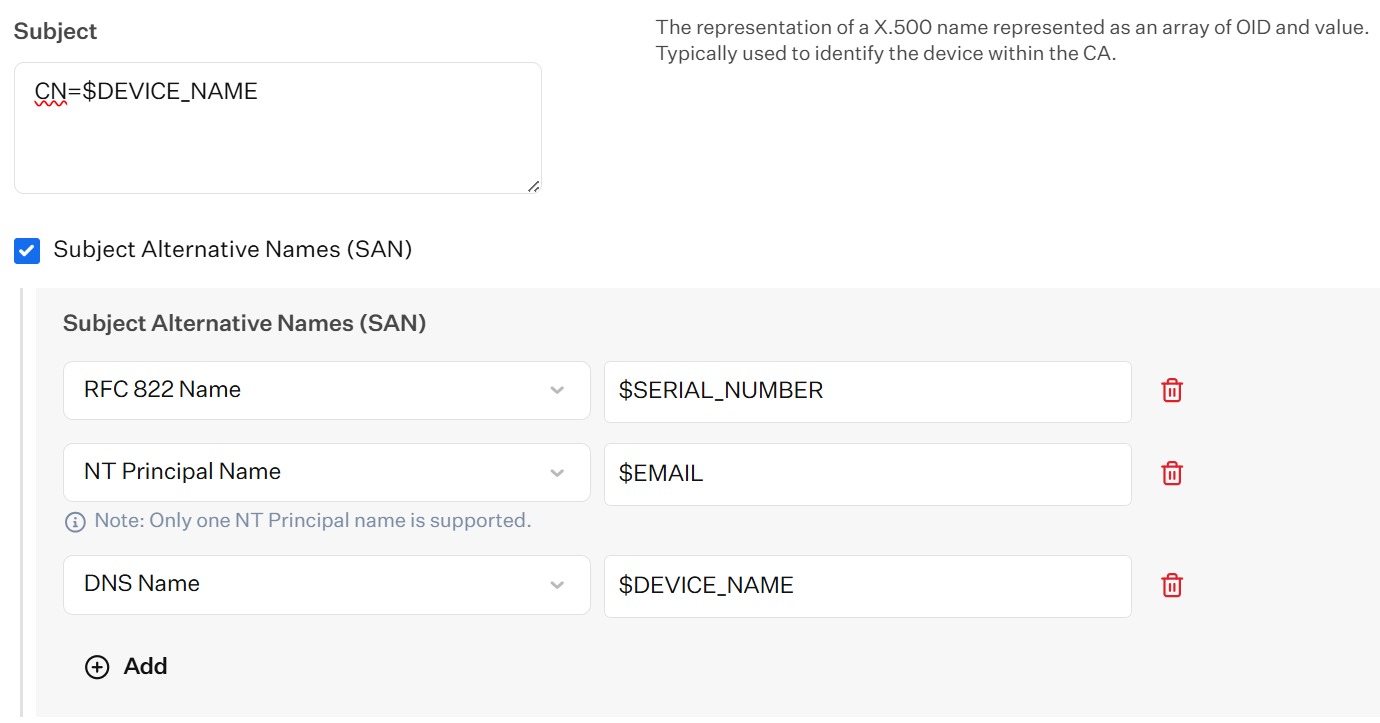
- In the Subject field, enter CN=$DEVICE_NAME
- Select the Subject Alternative Names (SAN) checkbox.
- In the Subject Alternative Names (SAN) section:
- From the Select SAN Type drop-down list, select RFC 822 Name. In the adjacent field, enter $SERIAL_NUMBER.
- Click Add.
- From the Select SAN Type drop-down list, select NT Principal Name. In the adjacent field, enter $EMAIL.
- Click Add.
- From the Select SAN Type drop-down list, select DNS Name. In the adjacent field, enter $DEVICE_NAME.

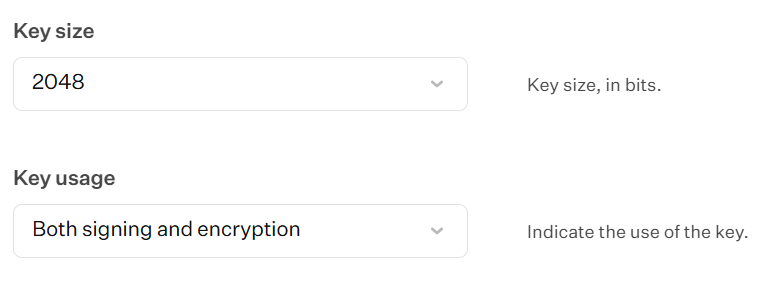
- In the Key section:
- From the Key size drop-down list, select 2048.
- From the Key usage drop-down list, select Both signing and encryption.

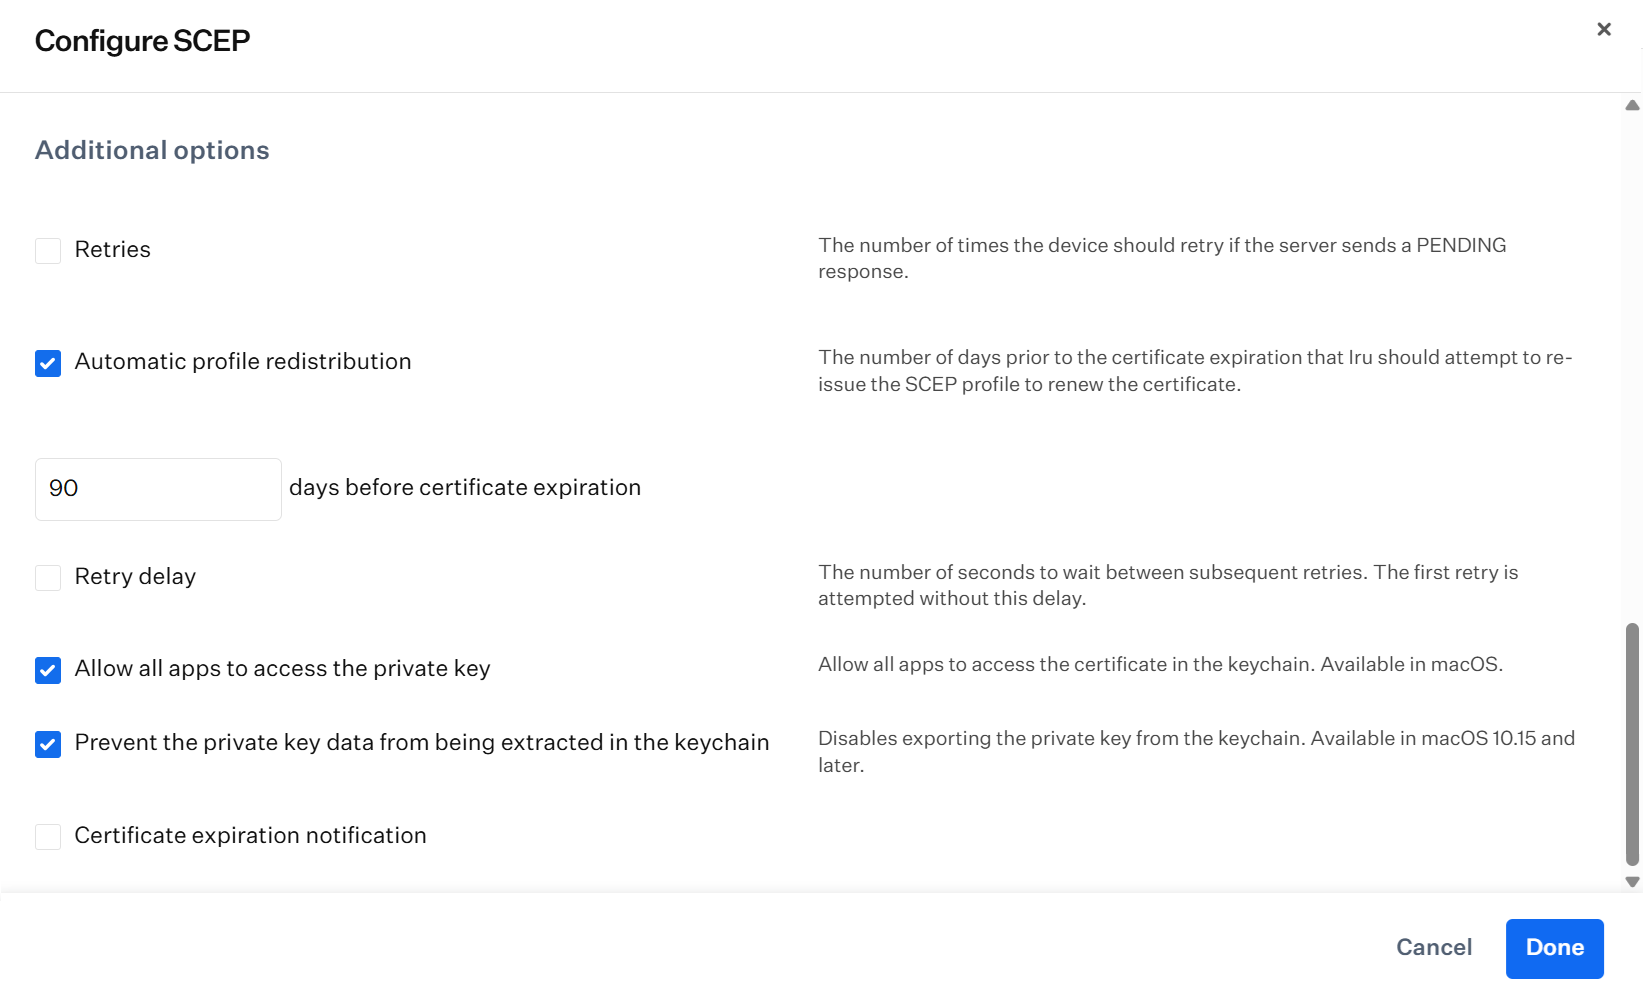
- In the Additional options section:
- Select the Automatic profile redistribution checkbox, then specify how many days before the certificate’s expiration Iru should reissue the SCEP profile for renewal.
- Select the Allow all apps to access the private key checkbox to allow all apps to access the certificate in the keychain.
- Select the Prevent the private key data from being extracted in the keychain checkbox. This disables the export of the private key from the keychain.

- Click Done.

- In the Certificate trust section:
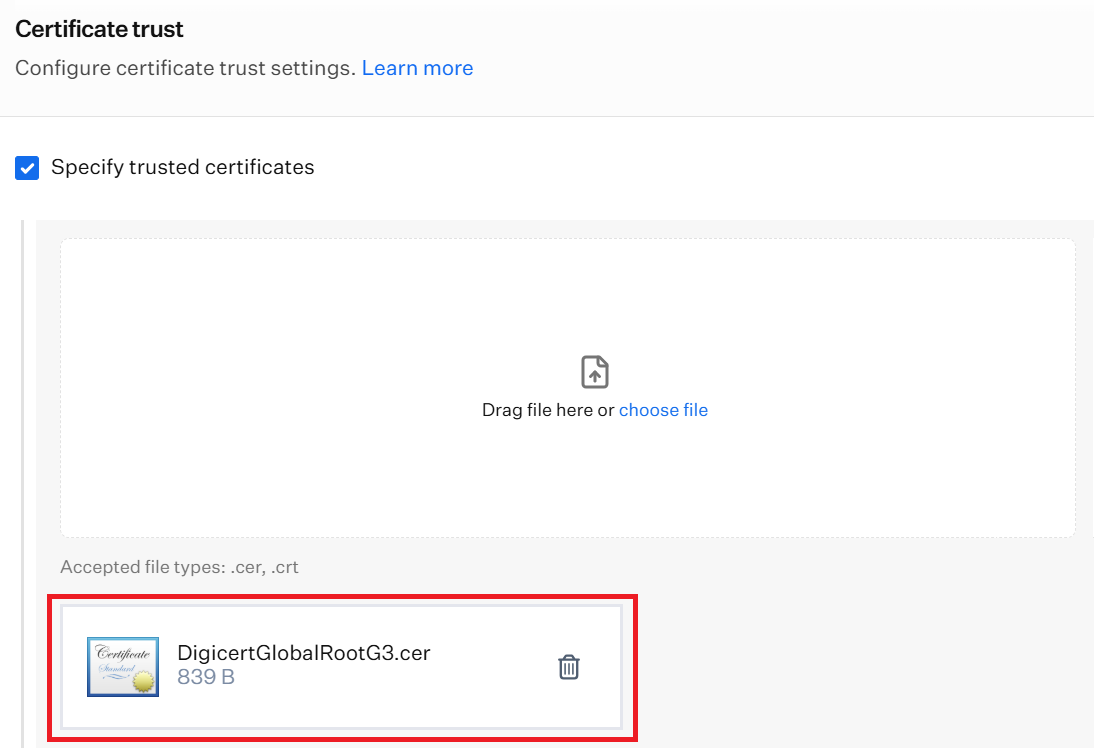
- Select the Specify trusted certificates checkbox and click Choose file to upload the DigiCert Global Root G3 RADIUS Root CA obtained from the Exporting RADIUS Root CA section.

- Select the Specify trusted certificates checkbox and click Choose file to upload the DigiCert Global Root G3 RADIUS Root CA obtained from the Exporting RADIUS Root CA section.
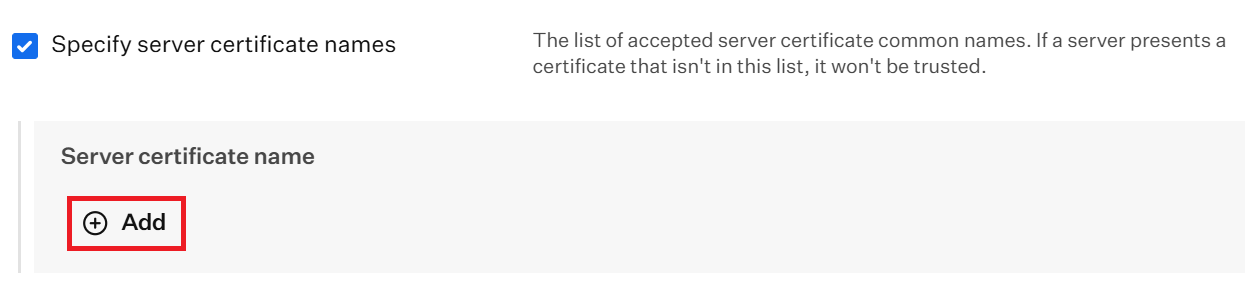
- Select the Specify server certificate names checkbox and click + Add.

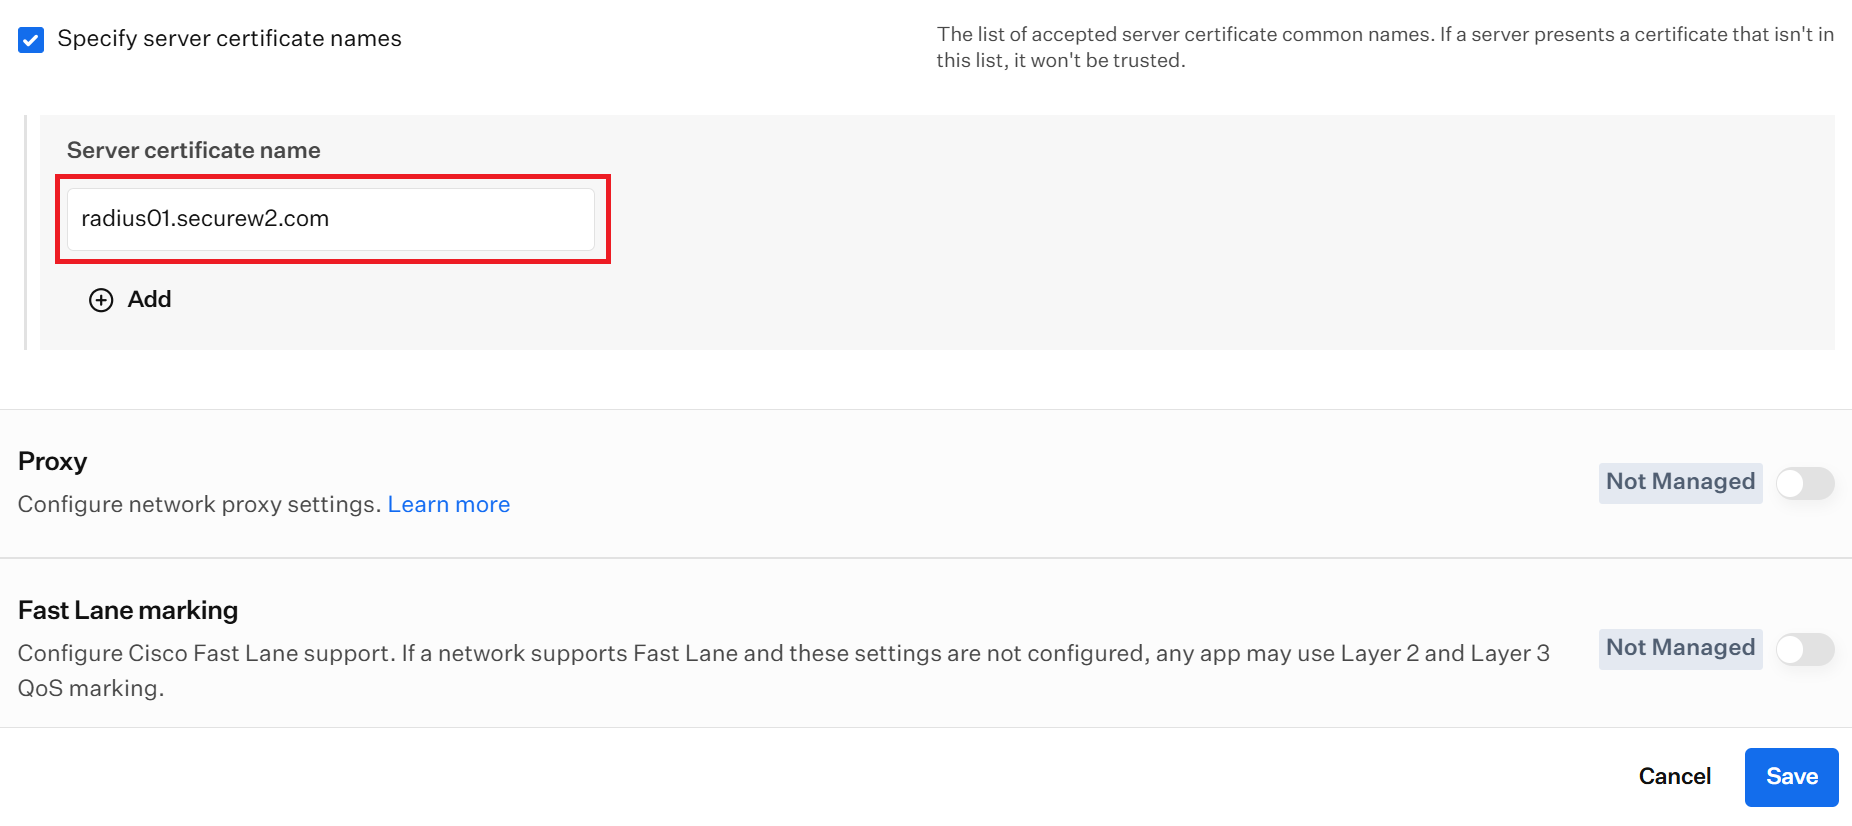
- In the Server certificate name field, enter radius01.securew2.com

- Click Save, then click Close.
Once the Root CA, Intermediate CA, and Wi-Fi Library Items are created, assign all three to the blueprint so they are pushed to your managed devices.
To assign the Library Items to the blueprint, perform the following steps:
- On the left navigation bar, click Blueprints and select the blueprint to which you want to assign the Library Items.
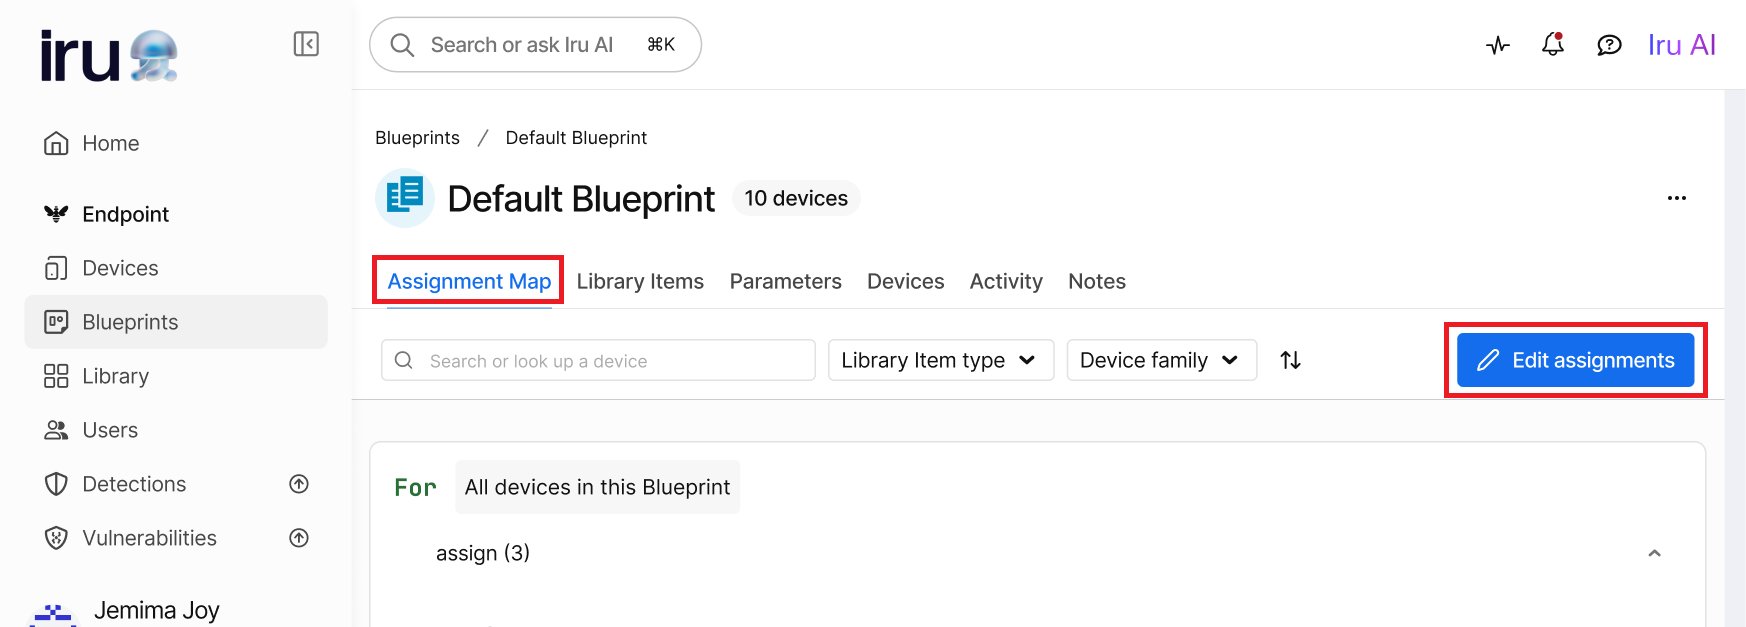
- Select the Assignment Map tab and click Edit assignments.

- In Library Items, search for the two certificate library items created in the Creating Certificate Library Item section and the Wi-Fi library item created in the Configuring the Wi-Fi Library Item section. Drag all three items onto the map to assign them to devices.

- Click Save.
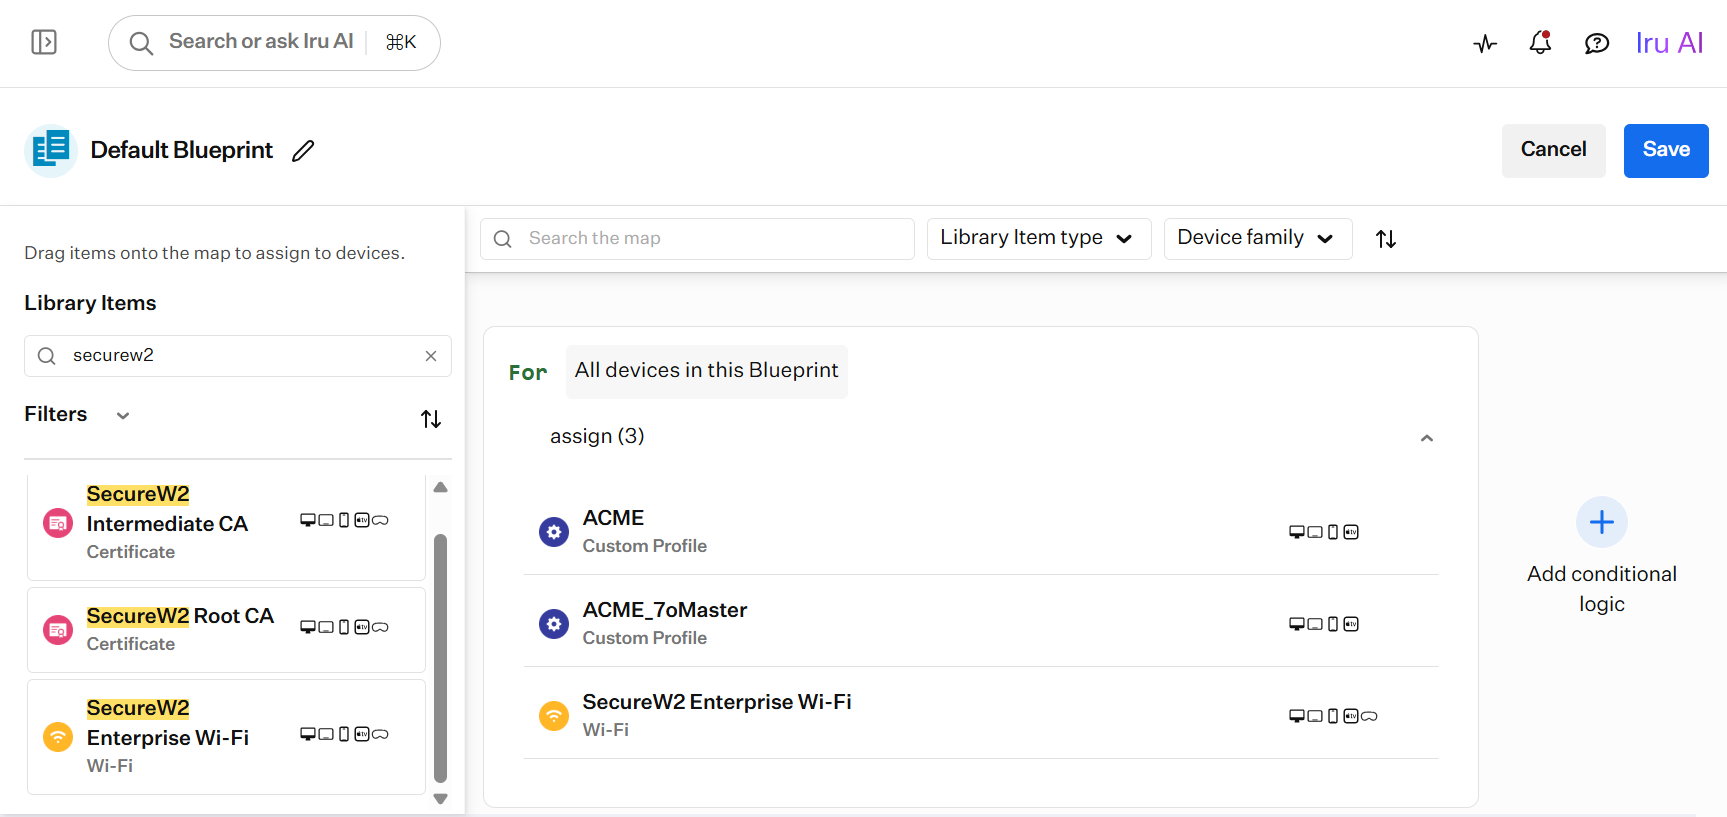
After completing the steps above, the profile is pushed to the device, triggering certificate enrollment.
JoinNow Admins can check for successful certificate enrollment under Data and Monitoring > Enhanced Events. A Certificate Issued event should be displayed when device certificate enrollment is successful.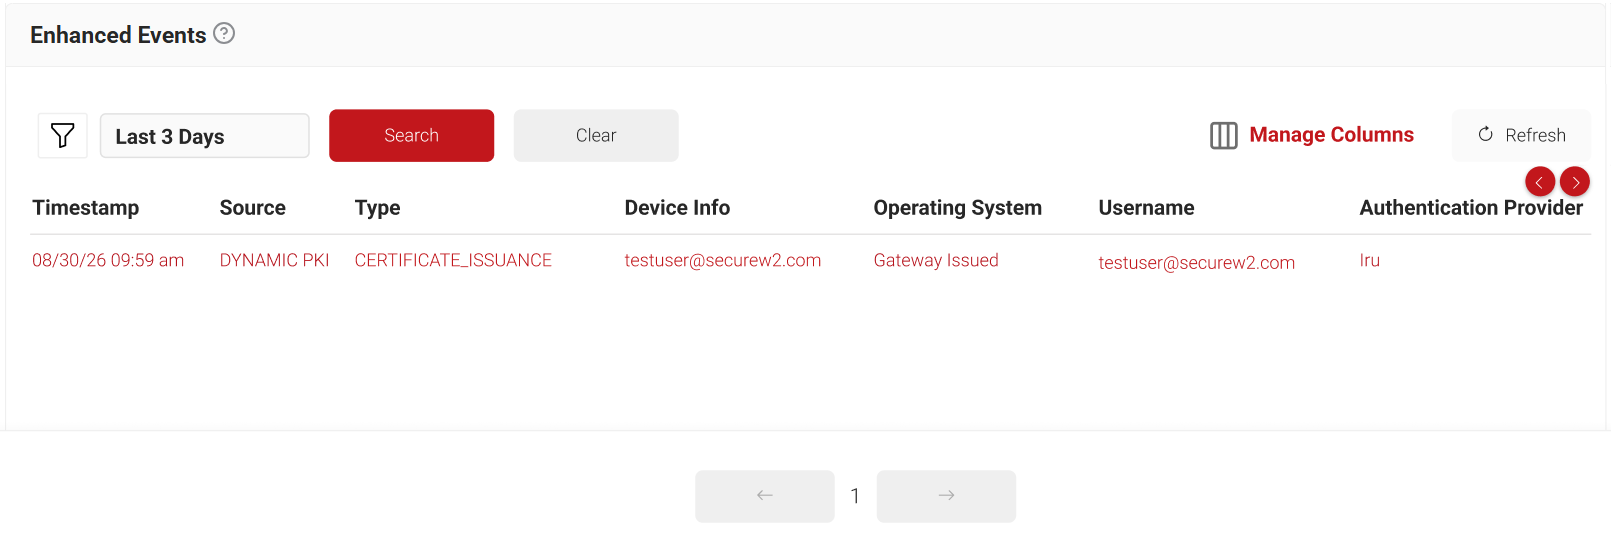
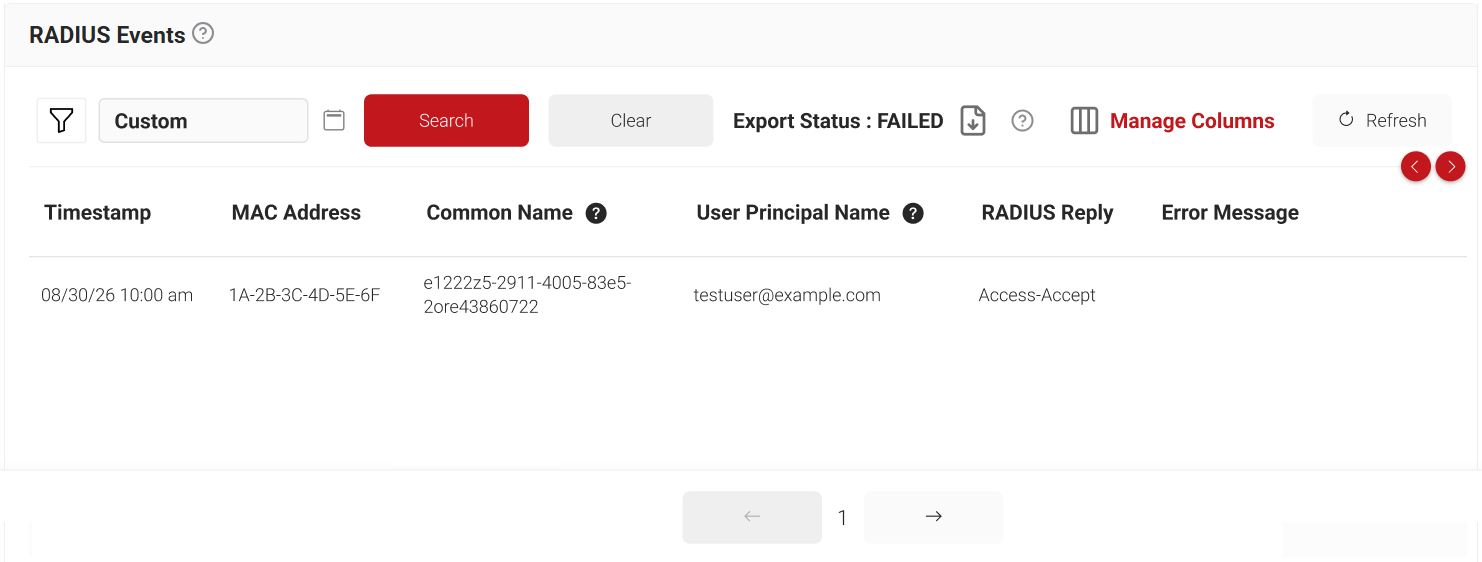
The RADIUS Events page details the device lookup attributes. To access the RADIUS Events page, log in to the JoinNow Management Portal and navigate to Data and Monitoring > RADIUS Events.