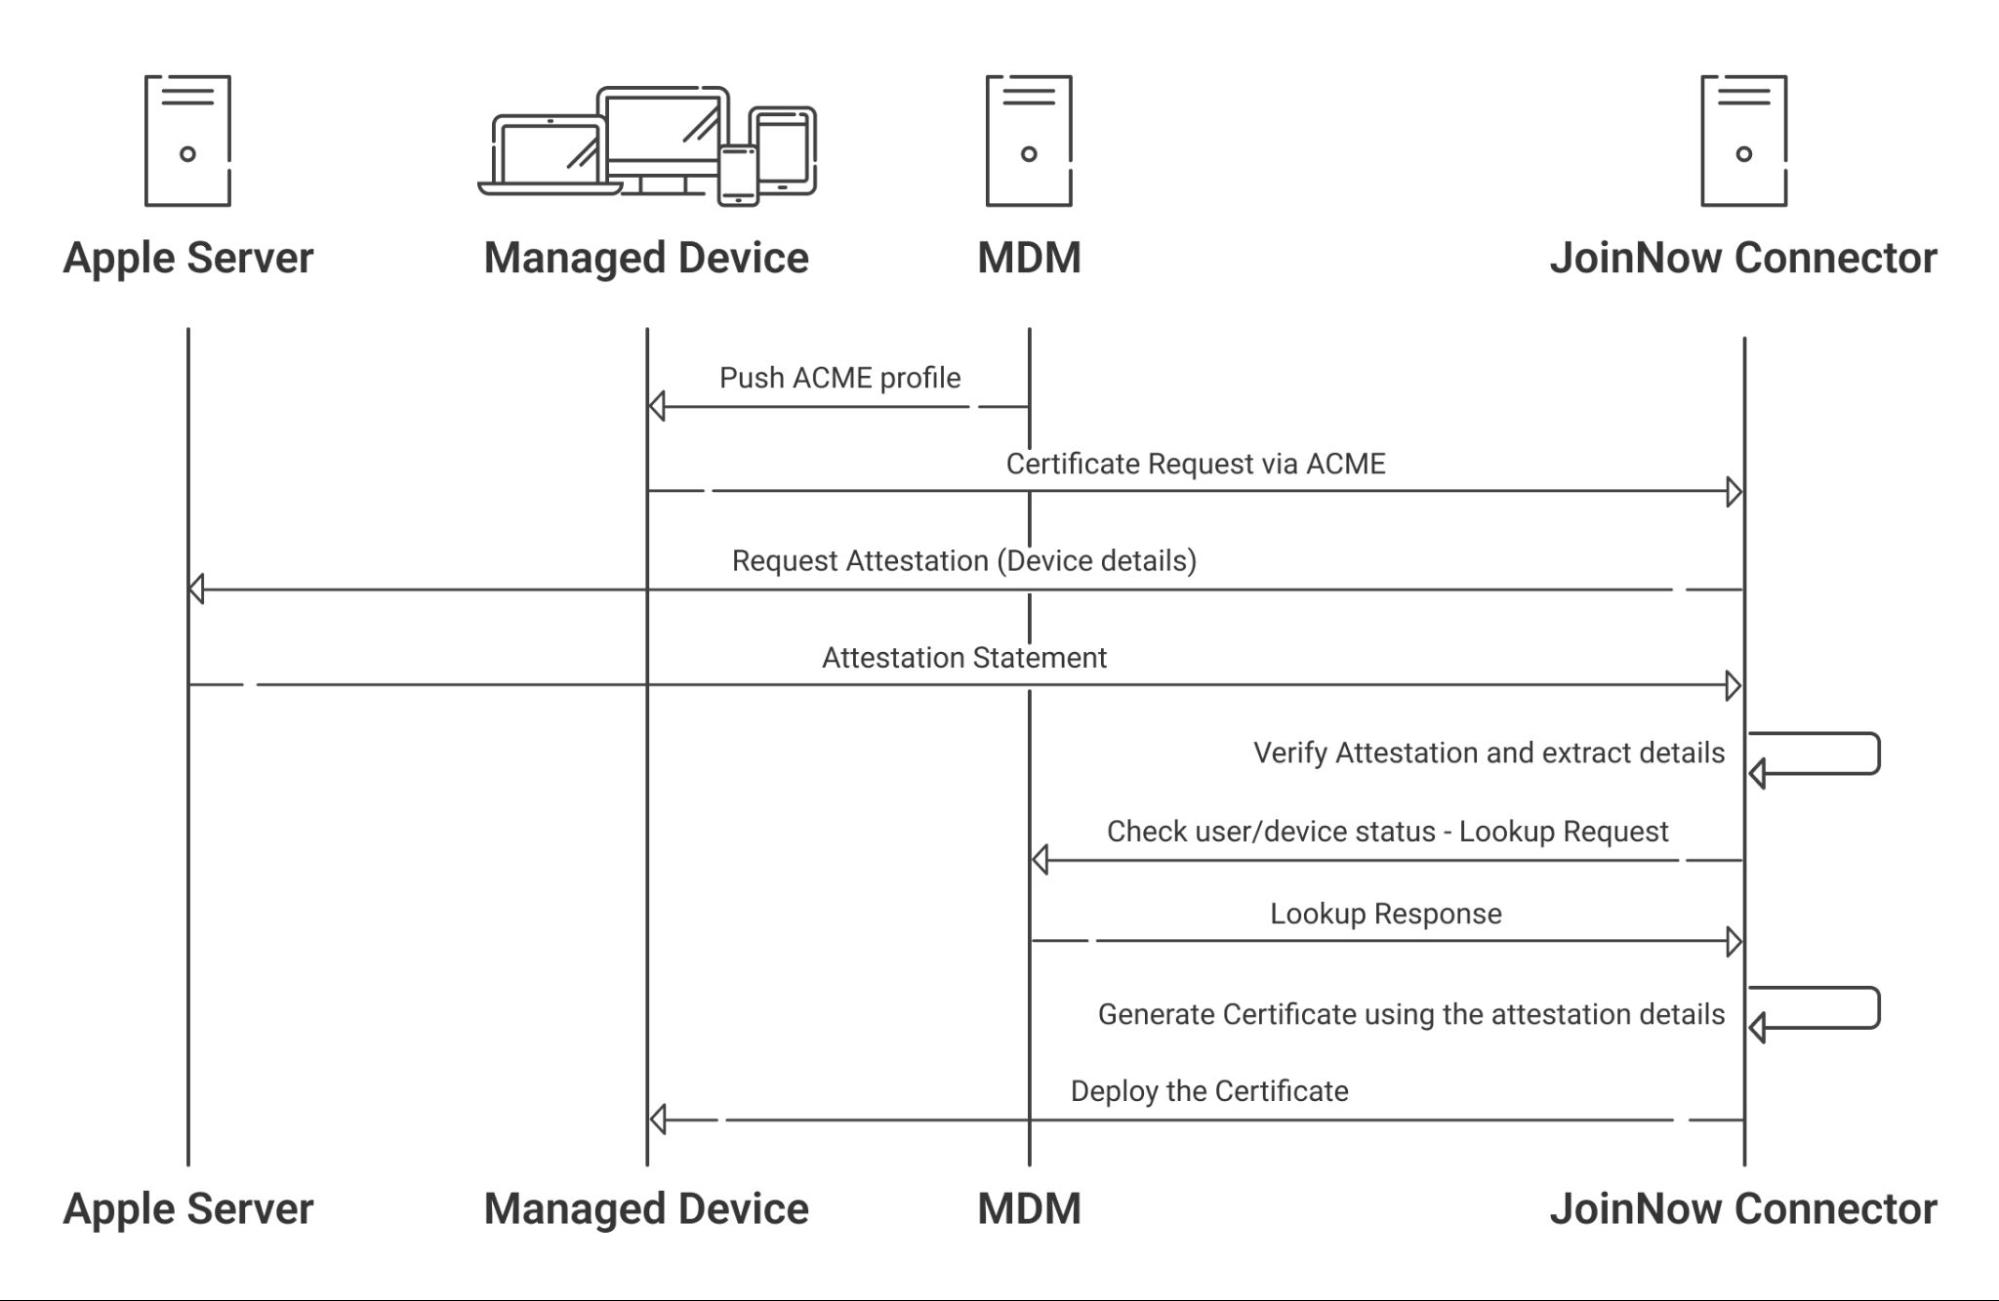
SecureW2 ACME service can enroll Apple devices with certificates. It can cryptographically prove that a device is a genuine Apple product and confirm its serial number using Apple Managed Device Attestation (MDA). MDA enables JoinNow CloudConnector to validate a device’s identity and cross-reference it with your MDM to ensure only trusted devices can enroll for certificates.
This guide describes how to integrate Iru MDM with the JoinNow Cloud Connector to enable devices running macOS, iOS, iPadOS, and tvOS to enroll for digital certificates via ACME.
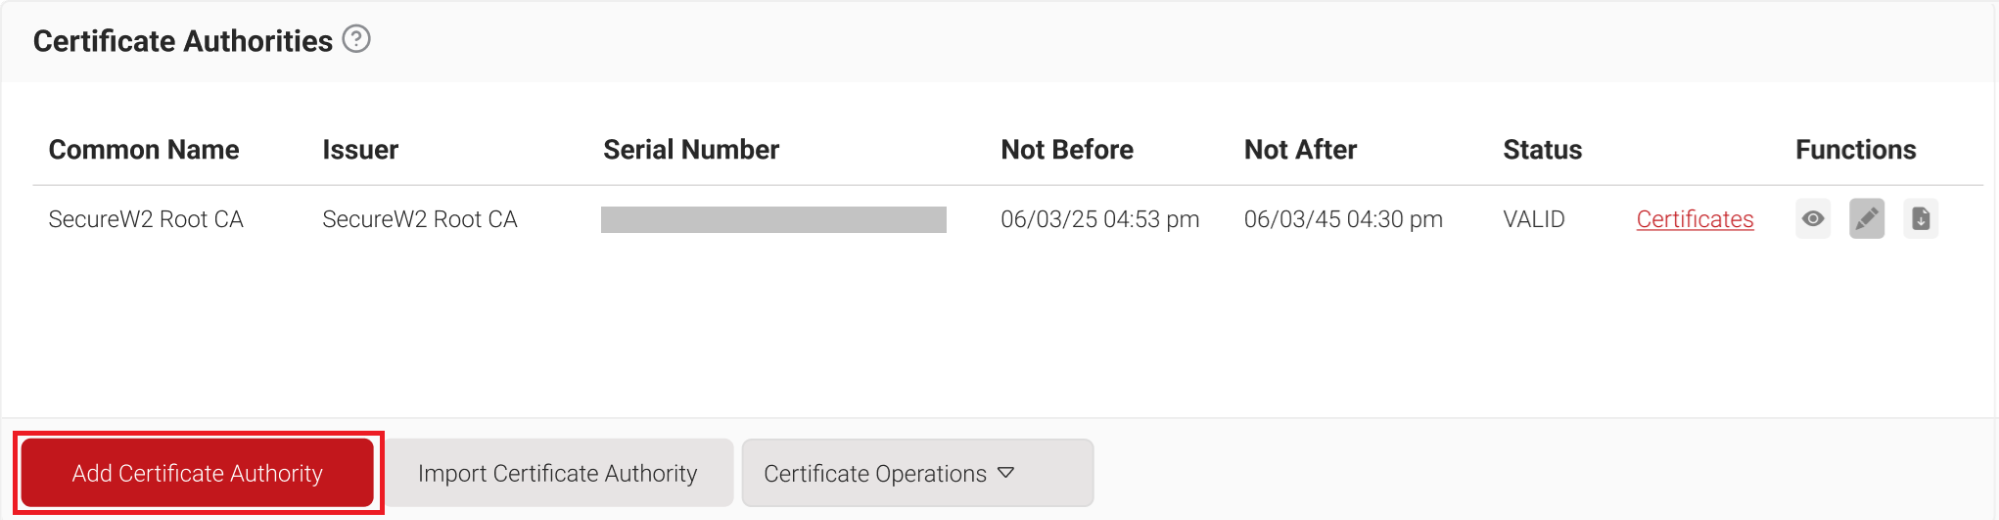
As a best practice, it is recommended to have a new intermediate CA for ACME Gateway-based integrations with Iru.
To create a new intermediate CA:
- Log in to the JoinNow Management Portal.
- Navigate to PKI > Certificate Authorities.
- Click Add Certificate Authority.
- In the Basic section, from the Generate CA For drop-down list, select the Device and User Authentication option to authenticate devices and users.
- From the Type drop-down list, select Intermediate CA.
- From the Certificate Authority drop-down list, select the default Root CA that comes with your organization.
- From the Generate via drop-down list, select Internal system.
- For the Common Name field, enter a name. It is recommended to use a name that includes ‘ACME’.
- From the Key Size drop-down list, select 2048 for the CA certificate key pair.
- From the Signature Algorithm drop-down list, select the signature algorithm for the certificate signing request. The option available is SHA-256.
- In the Validity Period (in years) field, enter the validity period of the CA certificate.
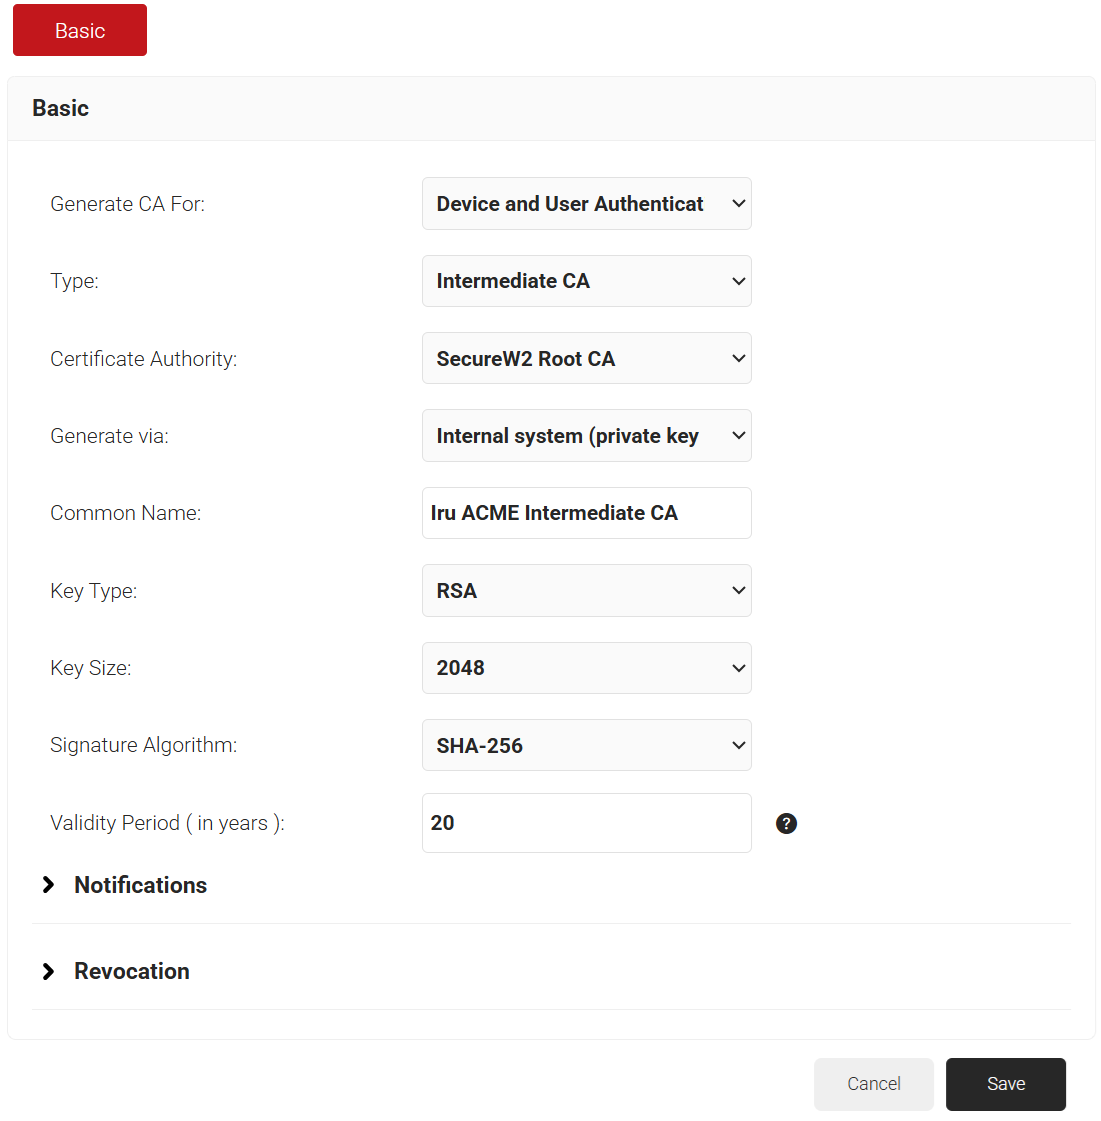
- Click Save.
The new intermediate CA is generated.
A certificate template determines how information is encoded in the certificate to be issued by the Certificate Authority. The template consists of a list of certificate attributes and the encoding required for their values. This information is provided by the Admin in the JoinNow Management Portal.
It is recommended to create a separate template for each MDM platform to make it easier to identify the different values being passed.
To create an Iru certificate template, perform the following steps:
- Navigate to Dynamic PKI > Certificate Authorities.
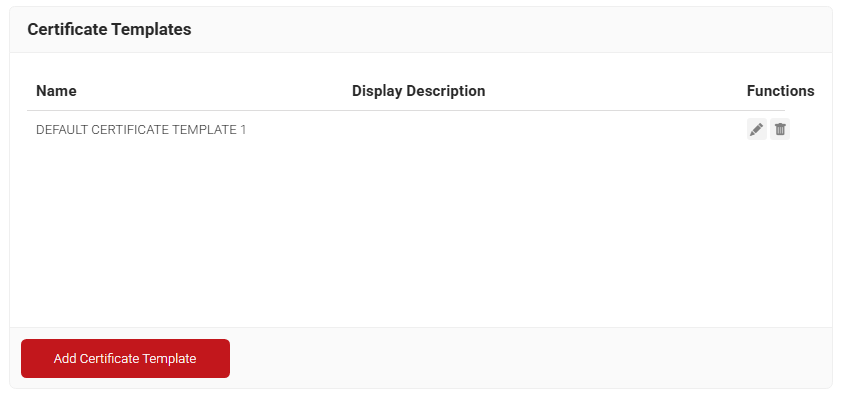
- Scroll down to the Certificate Templates.
- Click Add Certificate Template.
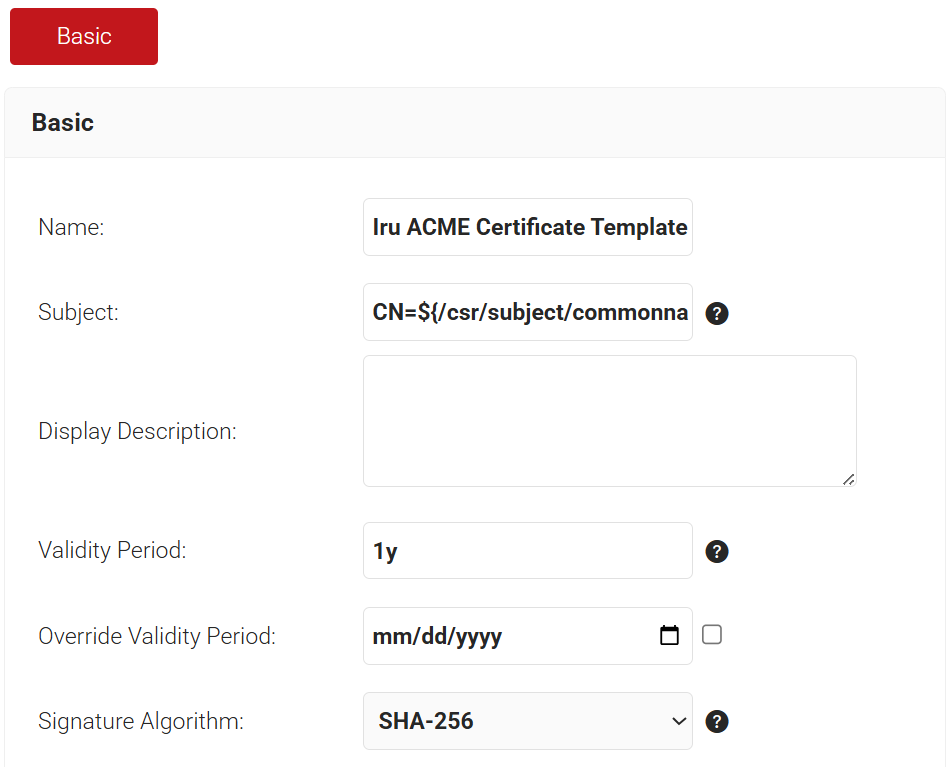
- Under the Basic section, in the Name field, enter the name of the certificate template.
- In the Subject field, enter CN=${/csr/subject/commonname} to source attributes from Iru.
- In the Display Description field, enter a suitable description for the certificate template.
- In the Validity Period field, type the validity period of the certificate (based on the requirement).
- From the Signature Algorithm drop-down list, select the signature algorithm for the certificate signing request.
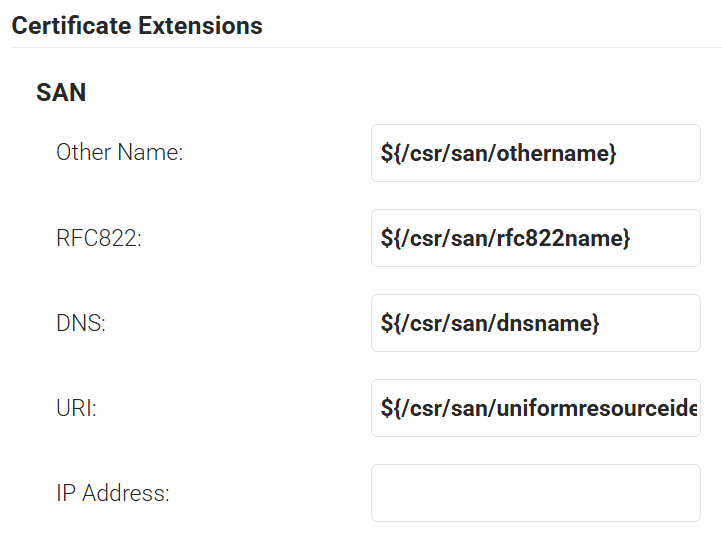
- In the SAN section:
- In the Other Name field, enter ${/csr/san/othername}
- In the RFC822 field, enter ${/csr/san/rfc822name}
- In the DNS field, enter ${/csr/san/dnsname}
- In the Extended Key Usage section, from the Use Certificate For list, select Client Authentication.
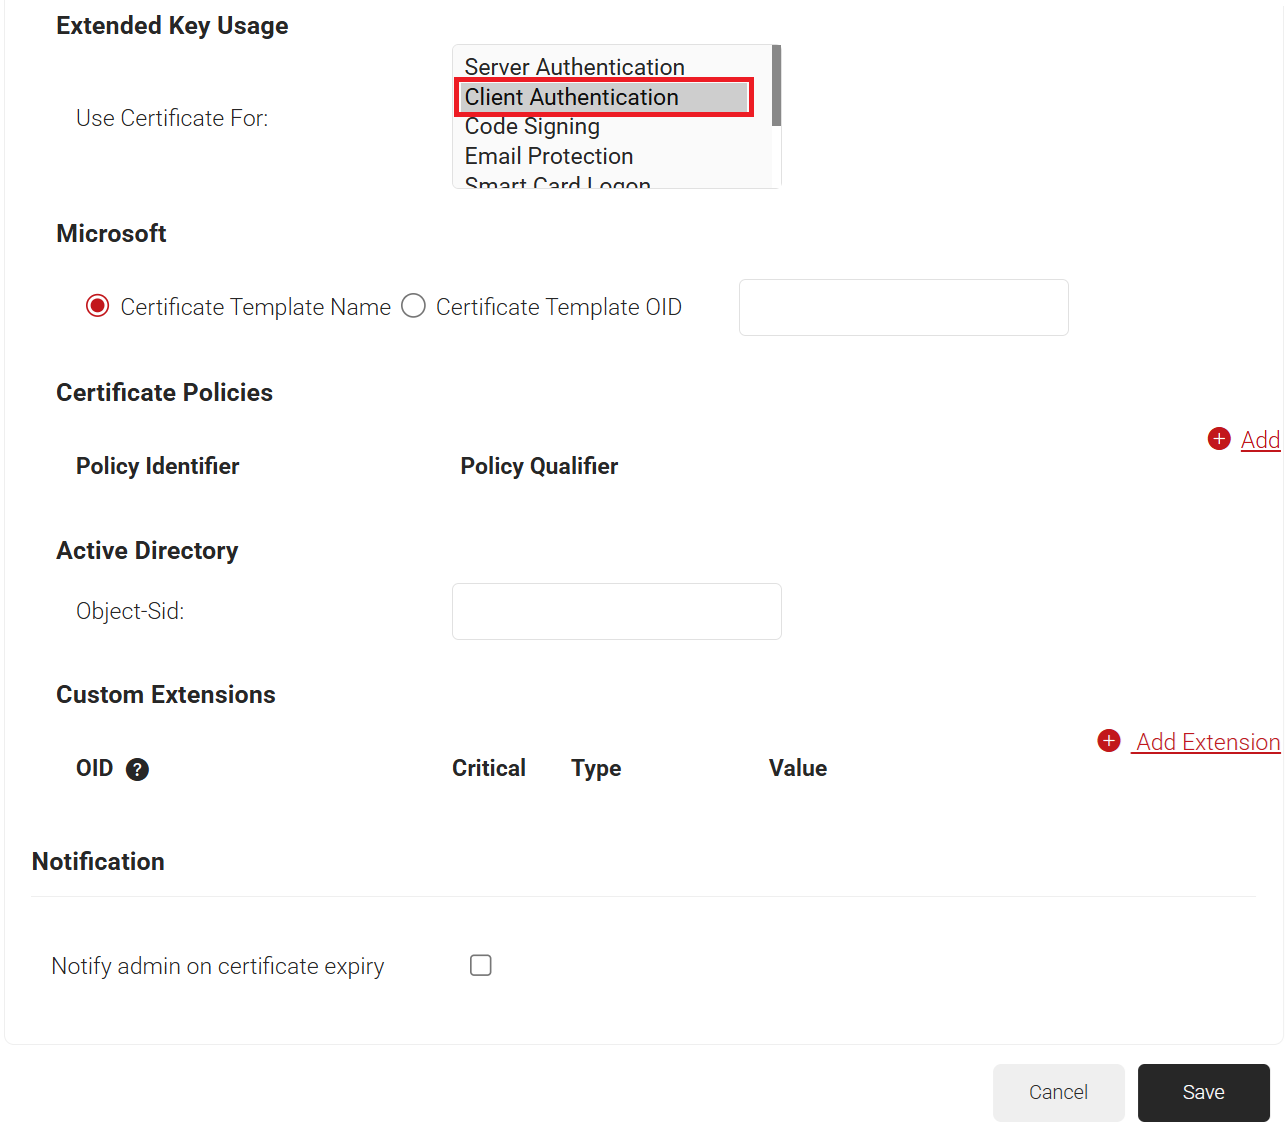
- Click Save.
In this section, we create a Device Management Platform, which generates a .mobileconfig file containing the configuration required for ACME certificate enrollment. This file is uploaded to Iru as a custom profile, where it configures managed devices to obtain certificates through the SecureW2 ACME service.
- Navigate to Integration Hub > Device Management Platforms.
- Click Add.
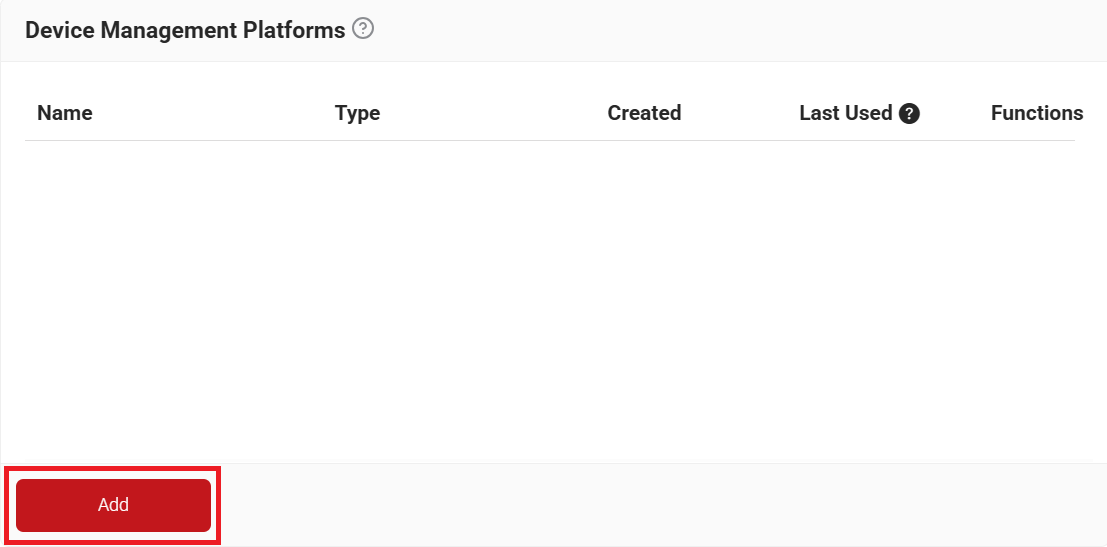
- In the Basic section, enter the name of the device management platform in the Name field.
- In the Description field, enter a suitable description for the device management platform.
- From the Type drop-down list, select ACME Client Certificate Enrollment Token.
- From the Vendor drop-down list, select Iru (Kandji).
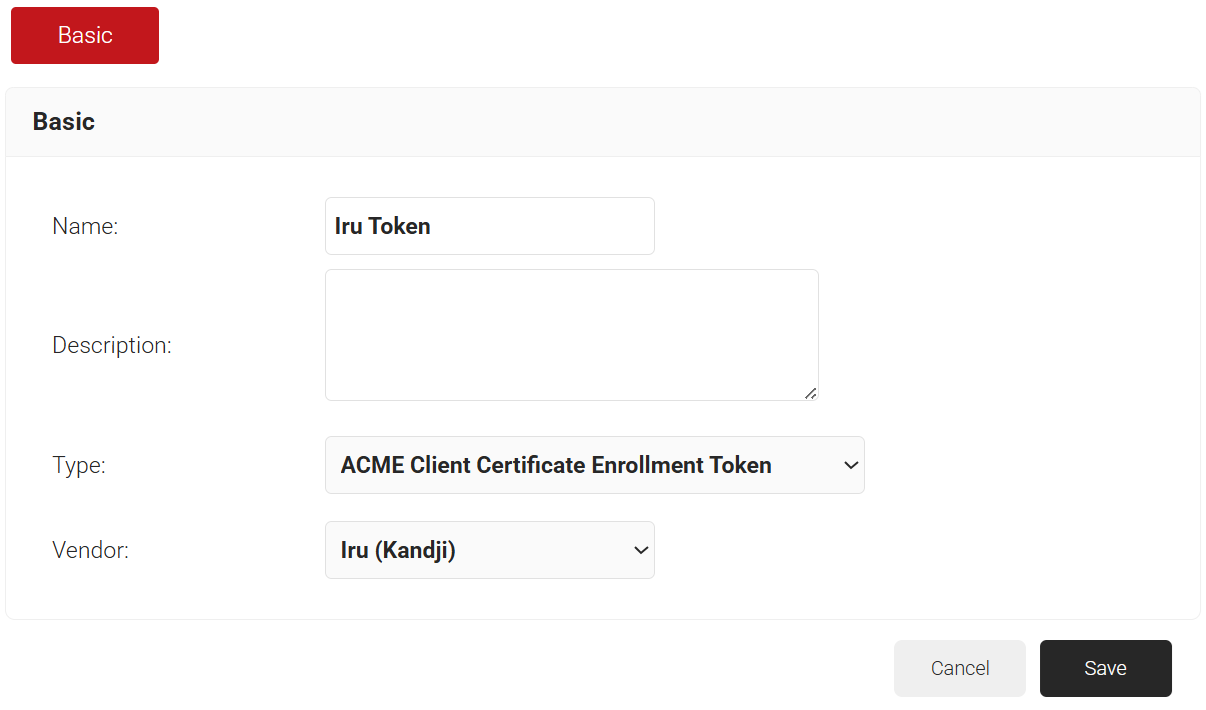
- Click Save. A .mobileconfig file containing the ACME enrollment configuration is downloaded.
In this section, create a Generic HTTP Signal Source, which is used to perform a device lookup with Iru during ACME certificate enrollment.
To create a generic HTTP signal source, perform the following steps:
- Navigate to Integration Hub > Core Platforms.
- Click Add.
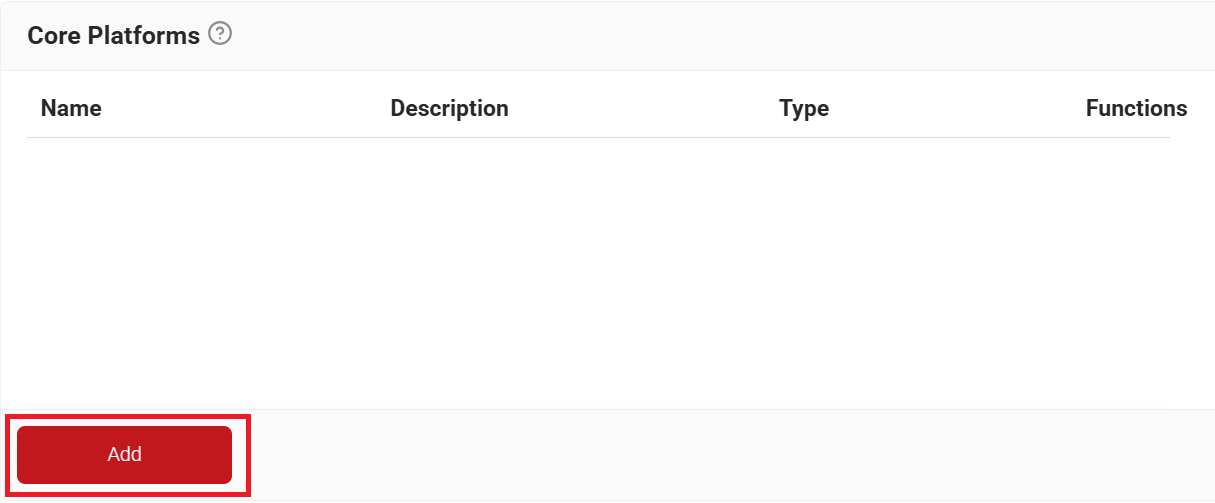
- In the Basic section, enter the name of the signal source in the Name field.
- From the Type drop-down list, select Generic HTTP under the Signal Source category.
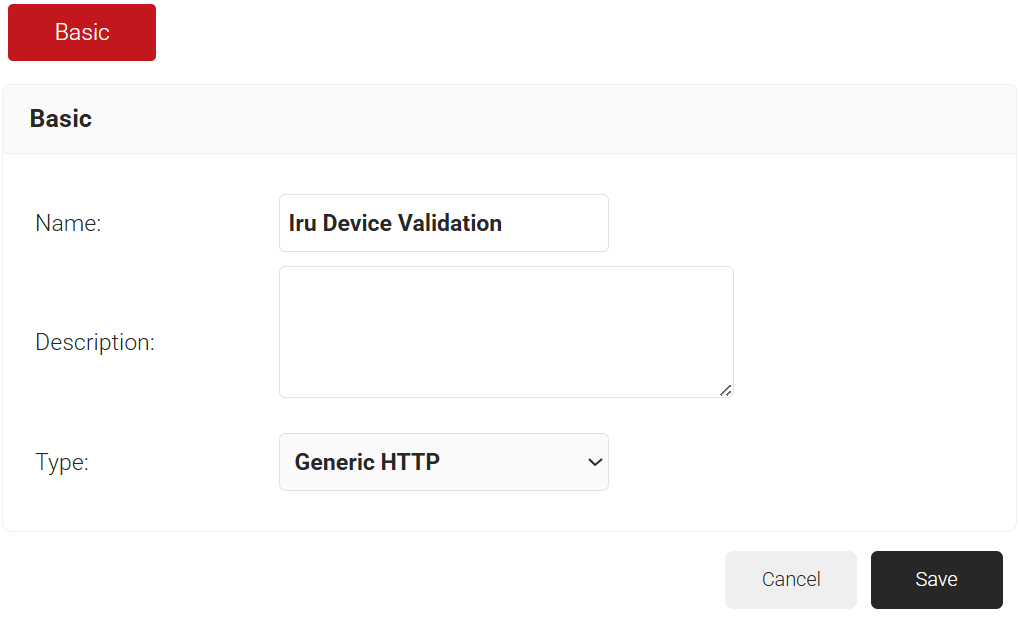
- Click Save. The page refreshes, and the Configuration, API, Attribute Mapping, and Groups are displayed.
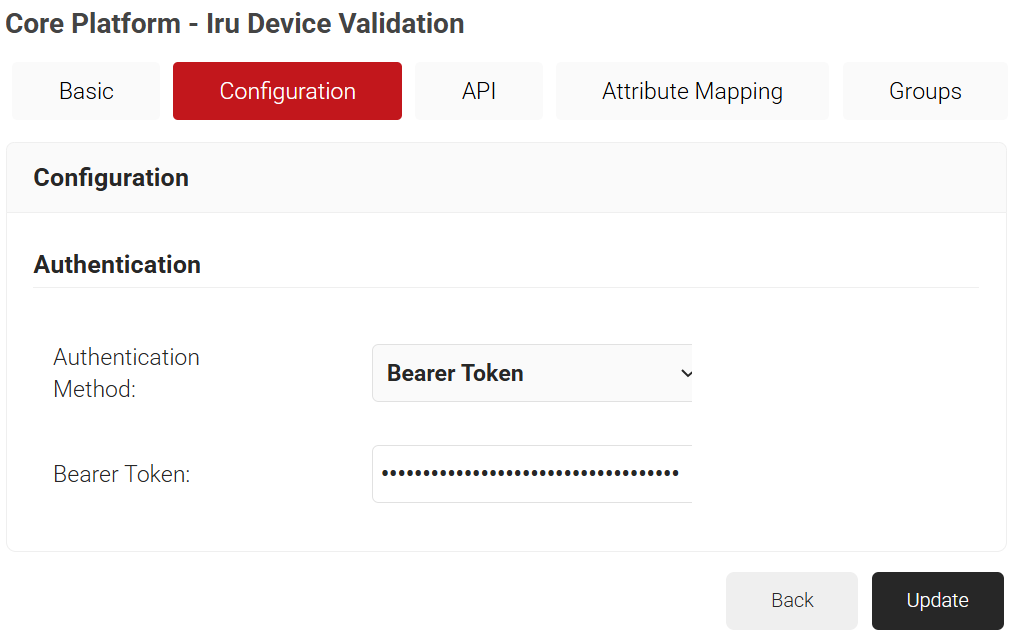
- Click the Configuration tab.
- From the Authentication Method drop-down list, select Bearer Token.
- In the Bearer Token field, enter the token value obtained in the Creating a Token in Iru section.
- Click the API tab.
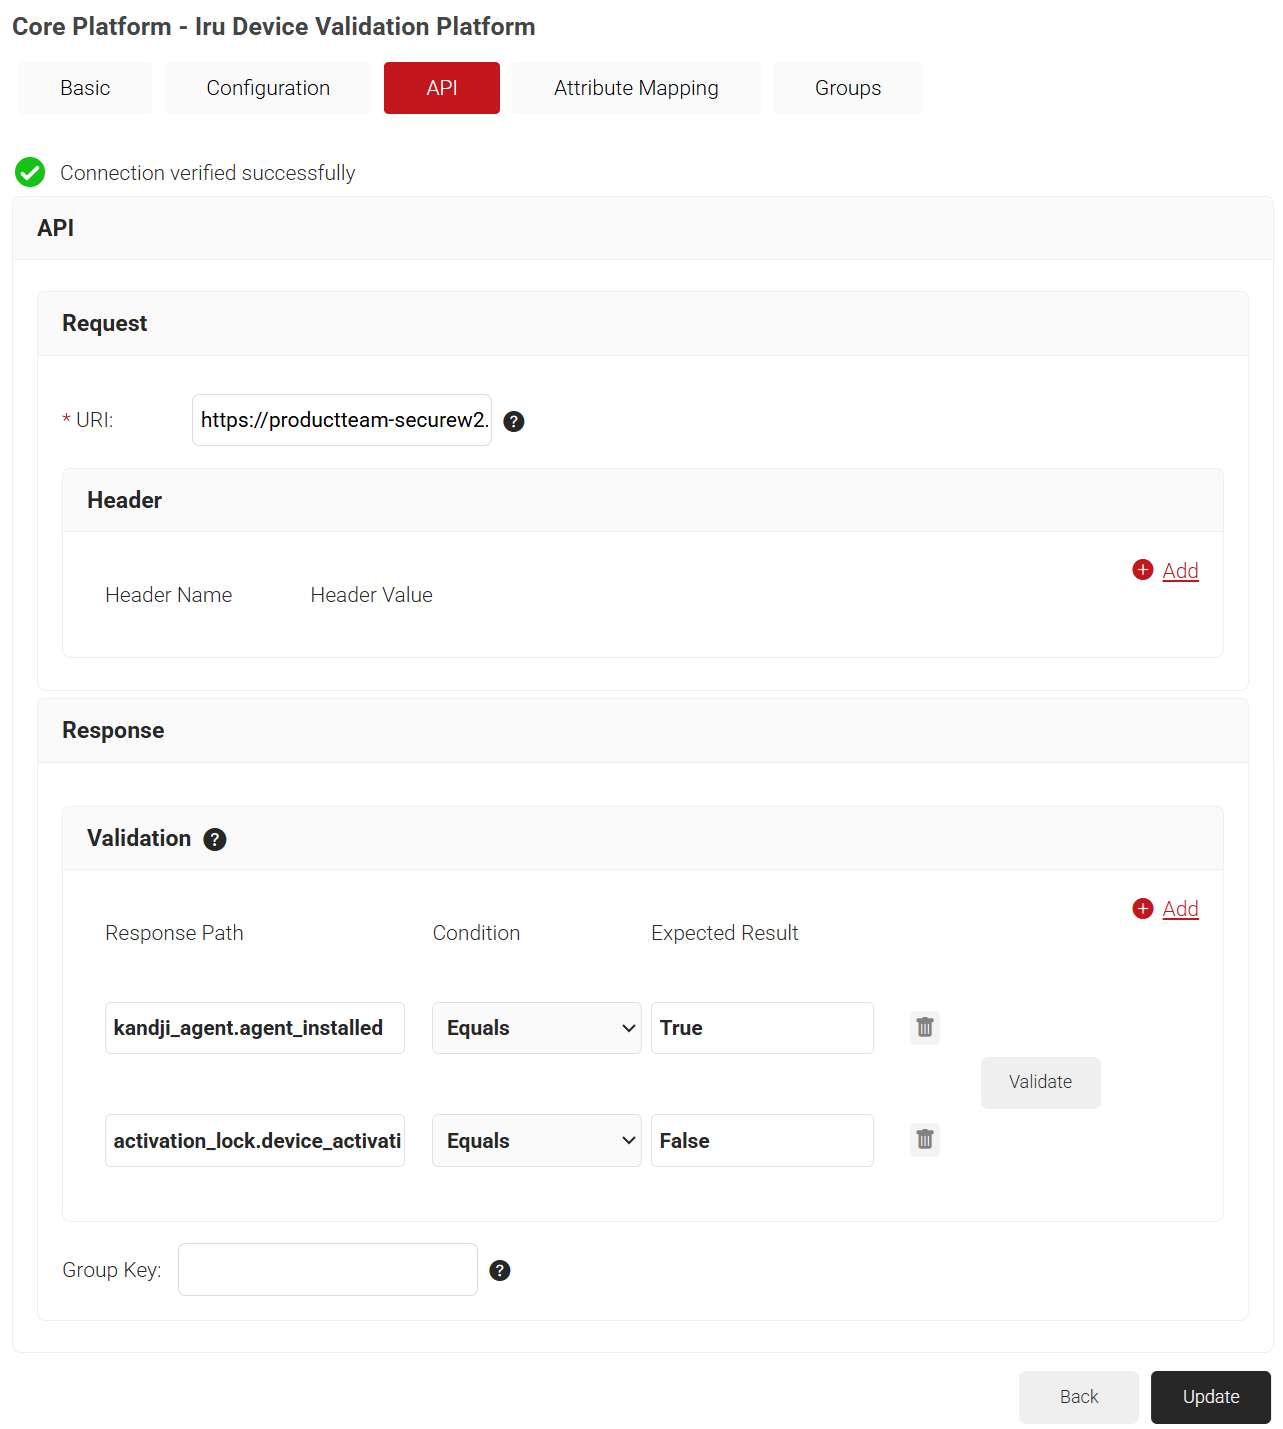
- In the URI field, enter your tenant’s API host URL (copied from Iru), and append the following path: /api/v1/devices/${identity}/details. So the URI value will be https://productteam-securew2.api.kandji.io/api/v1/devices/${identity}/details
- In the Validation section, click Add, then add the attributes required for device validation based on your business requirements. For example:
Response Path
Condition
Expected Result
kandji_agent.agent_installed
Equals
True
automated_device_enrollment
Equals
True
- Click Validate. The Validate pop-up window appears.
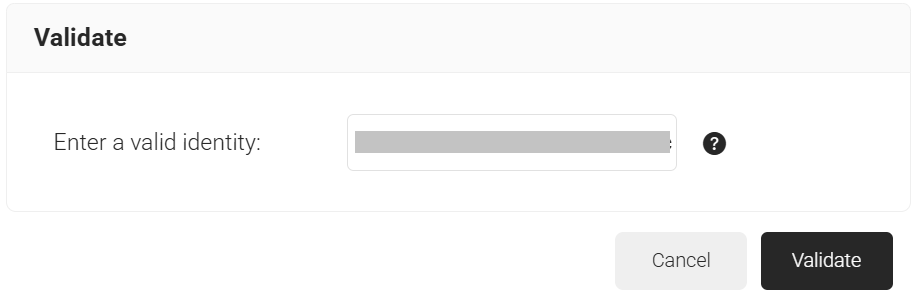
- In the Validate pop-up window, enter the device ID and click Validate. The message Connection verified successfully is displayed, confirming that the configuration is reachable and can identify and parse the specified return attributes. This configuration is used each time device validation is triggered during enrollment or authentication.
- Click Update.
In this section, you configure device attestation for iOS devices. To create a key attestation provider, perform the following steps:
- Navigate to Integration Hub > Key Attestation Platforms.
- Click Add.
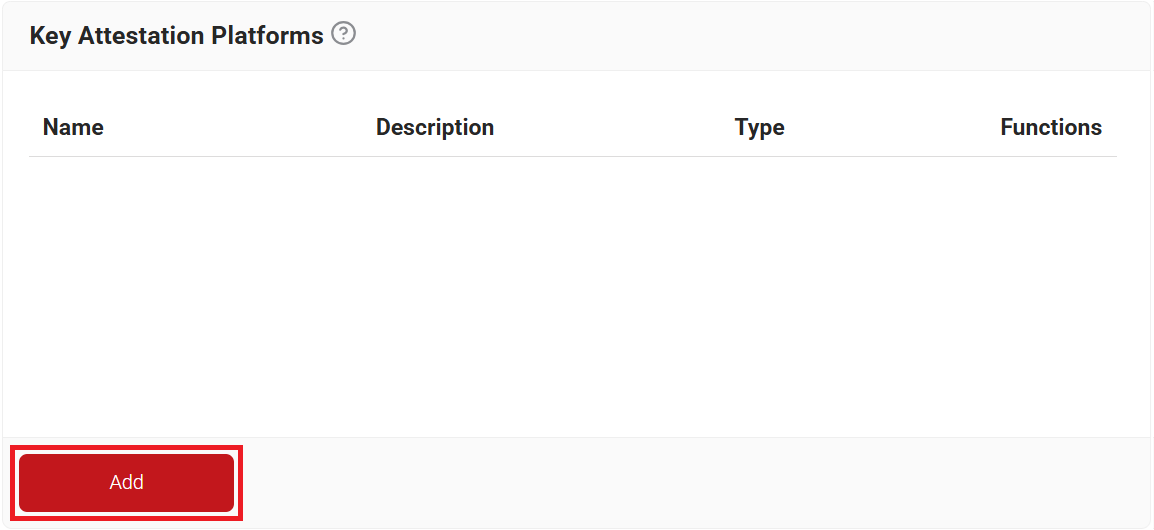
- In the Name field, enter a name for your key attestation provider.
- In the Display Description field, enter a description (Optional).
- From the Type drop-down list, select Apple.
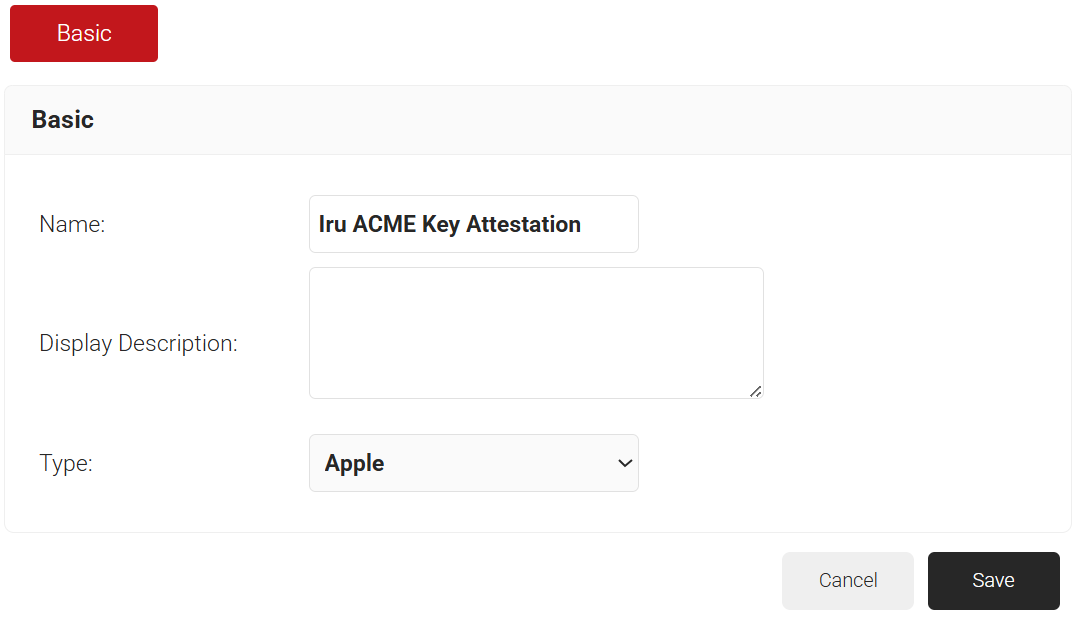
- Click Save.
A Security Signal Source acts as a filter that determines whether a device exists before deciding whether to invoke an Enrollment policy.
Here, you specify which field in the certificate contains the device’s identifying attribute, and instruct SecureW2 to use the Generic HTTP Signal Source configured earlier to look up whether the device exists.
To create a security signal source, perform the following steps:
- Navigate to Policy Management > Security Signal Sources.
- Click Add Security Signal Source.
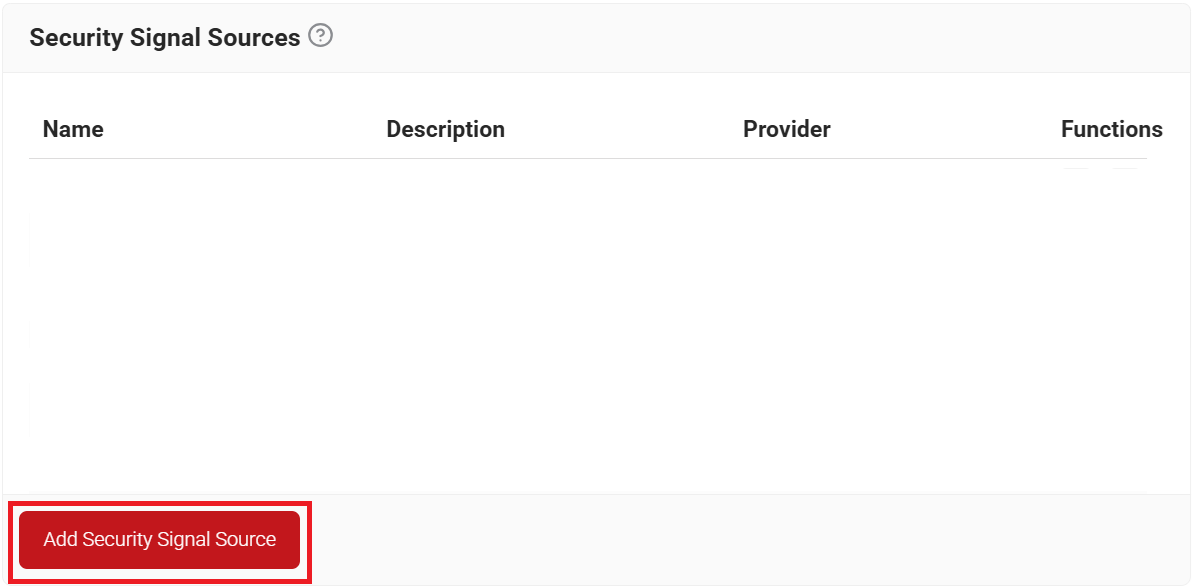
- In the Lookup Purpose field, select Certificate Issuance to look up the device account during enrollment.
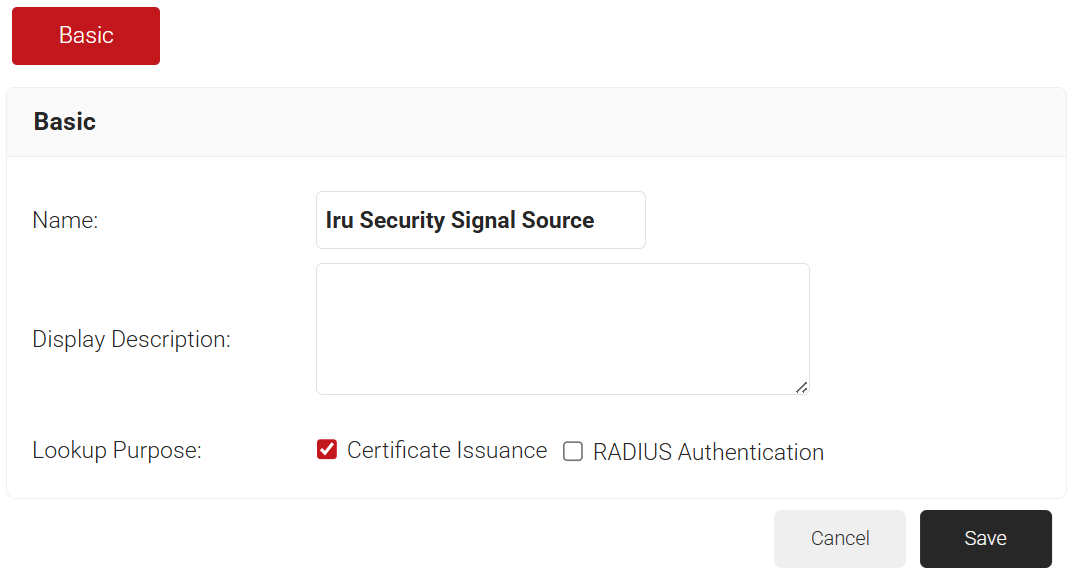
- Click Save. The page refreshes, and the Conditions and Settings tabs are displayed.
- Click the Settings tab.
- From the Provider drop-down list, select the signal source created earlier in the Creating a Signal Source section.
- From the Lookup Type drop-down list, select Device to perform a device-based lookup.
- From the Identity drop-down list, select the attribute where the device ID is encoded. The displayed attributes depend on the Lookup Type selected earlier.
- Select the Revoke On Failure checkbox to automatically revoke a certificate if an account lookup fails.
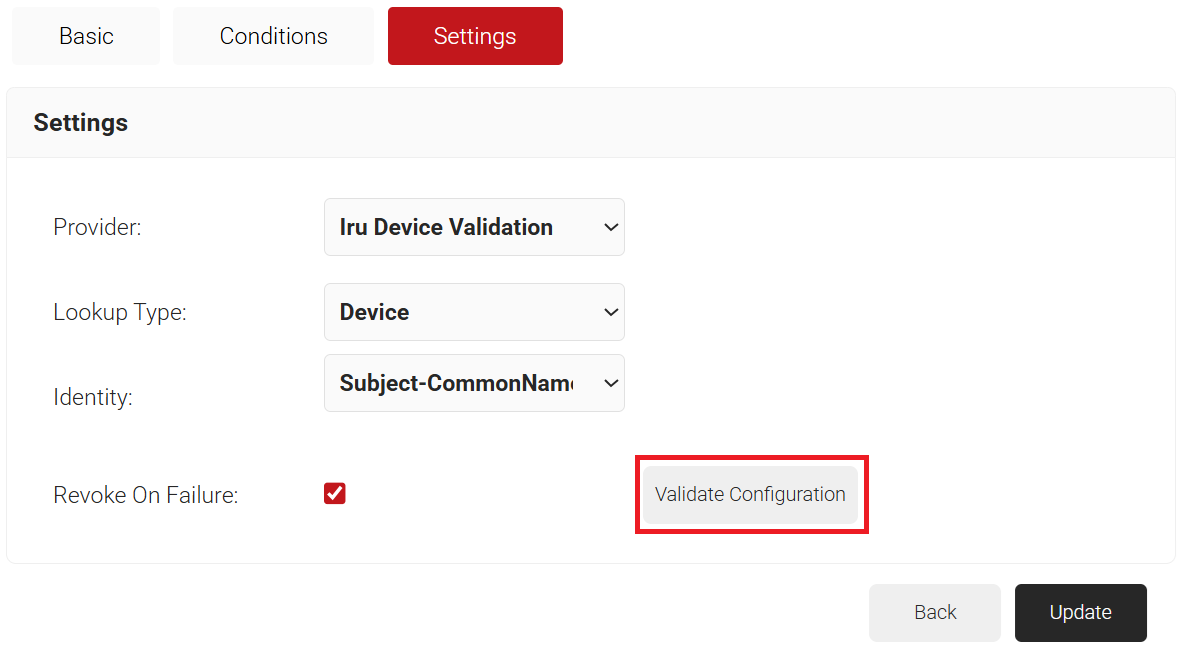
- Click Validate Configuration.
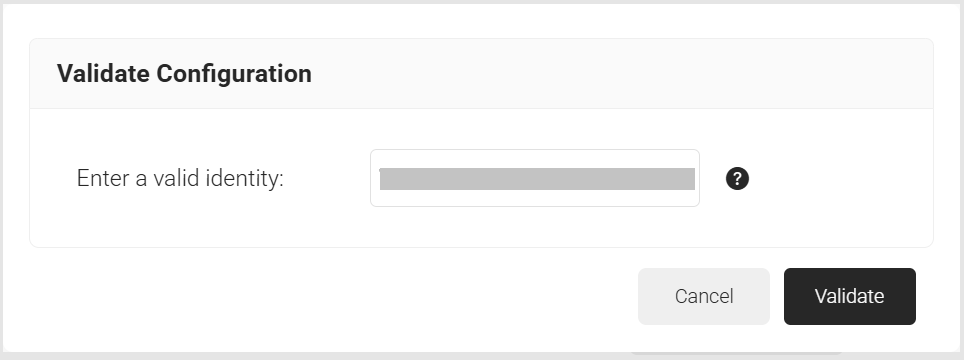
- On the Validate Configuration dialog, enter the device ID and click Validate.
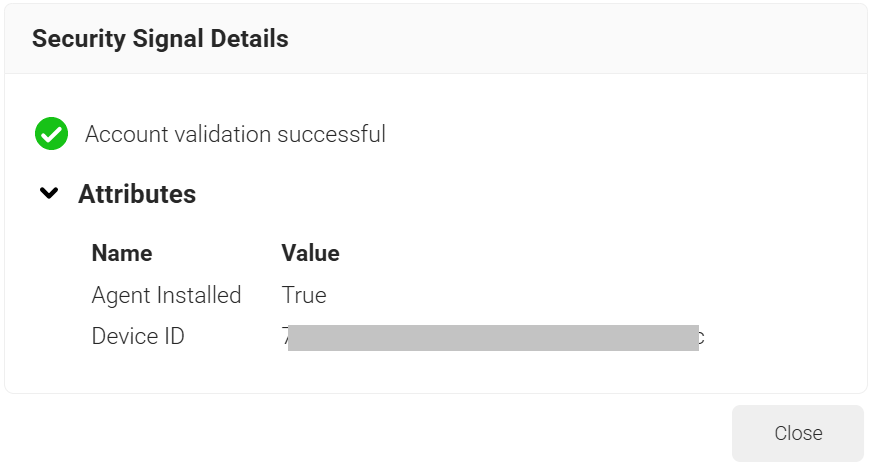
- On the Security Signal Details dialog box, the “Account validation successful” message is displayed, and the Attributes section displays the device attributes being looked up.
- Click Update.
A Policy Workflow segments devices based on predefined criteria and associated attributes, with each segment identified as a distinct Policy Workflow.
To create a policy workflow, perform the following steps:
- Navigate to Policy Management > Policy Workflows.
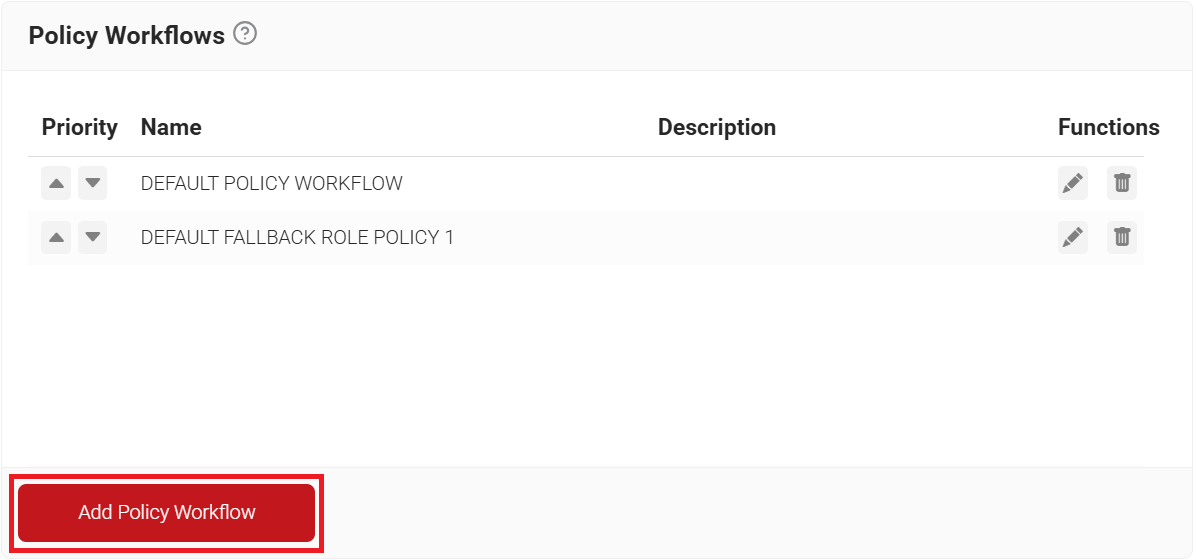
- Click Add Policy Workflow.
- In the Basic section, enter the name of the policy workflow in the Name field.
- In the Display Description field, enter a suitable description for the policy workflow.
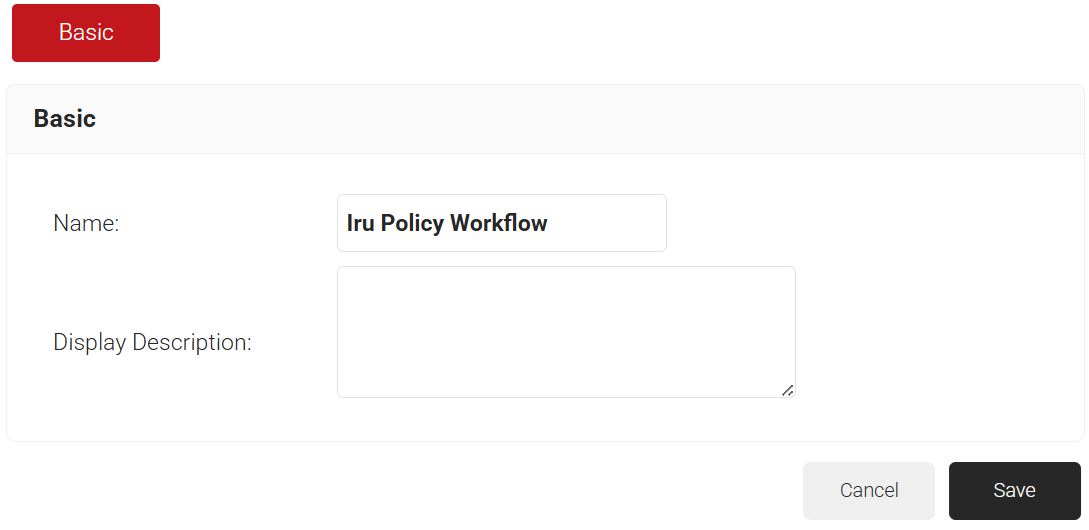
- Click Save. The page refreshes, and the Conditions tab is displayed.
- Select the Conditions tab.
- From the Core Provider drop-down list, select the signal source you created earlier in the Creating a Signal Source section.
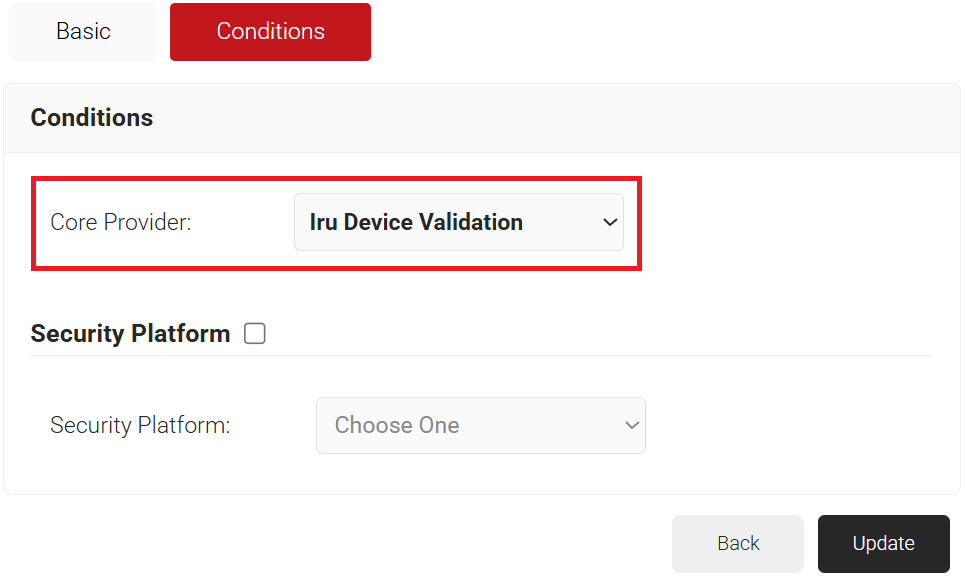
- From the Core Provider drop-down list, select the signal source you created earlier in the Creating a Signal Source section.
- Click Update.
A Device Role Policy maps the Key Attestation Provider for device attestation. To create a device role policy, perform the following steps:
- Navigate to Policy Management > Device Role.
- Click Add Device Role Policy.
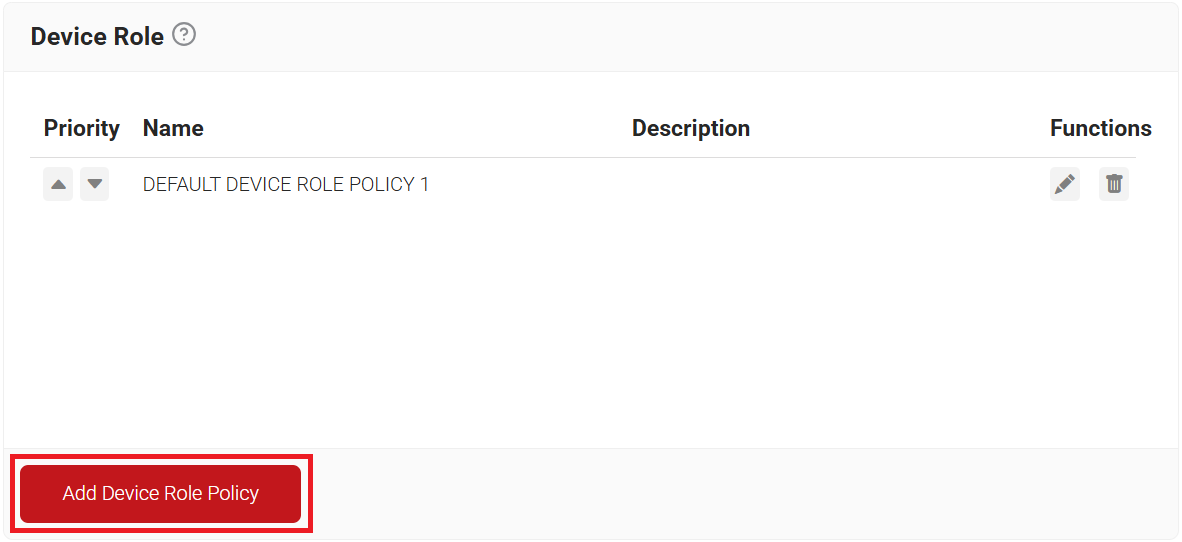
- In the Basic tab, enter a name for the device role policy in the Name field.
- In the Description field, enter a description for the device role policy.
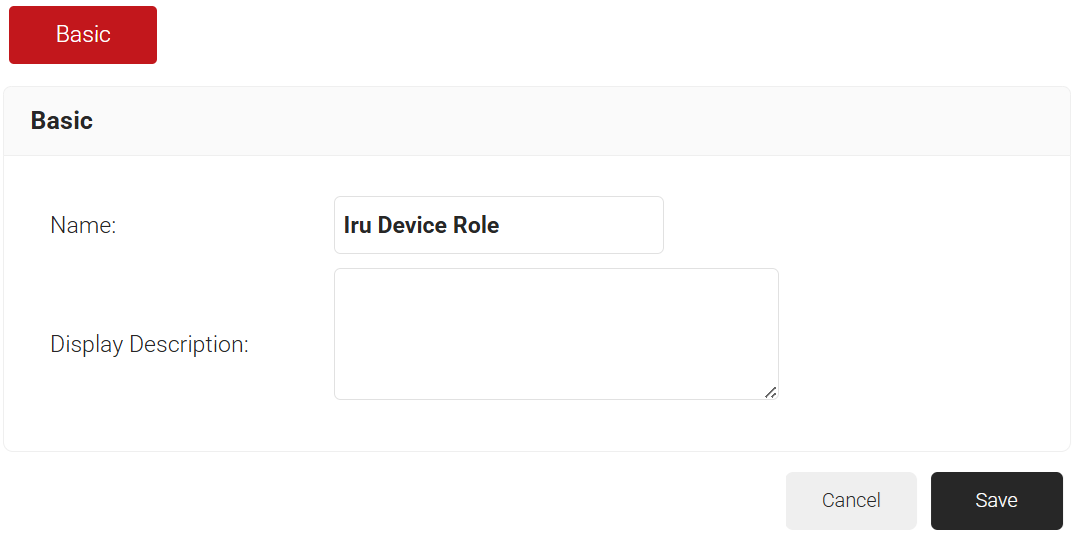
- Click Save. The page refreshes, and the Conditions tab opens.
- Select the Conditions tab.
- From the Identity drop-down list, select the key attestation provider created earlier in the Creating a Key Attestation Provider section.
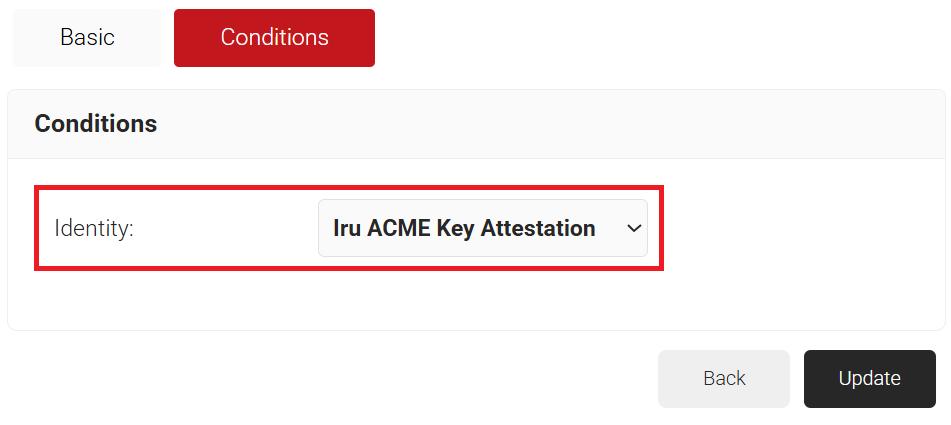
- Click Update.
An Enrollment Policy defines the certificate template and Certificate Authority used for each Policy Workflow. It leverages the segmentation established in the Policy Workflow to ensure the appropriate certificate template is issued for each workflow.
To create an enrollment policy, perform the following steps:
- Navigate to Policy Management > Enrollment.
- Click Add Enrollment Policy.
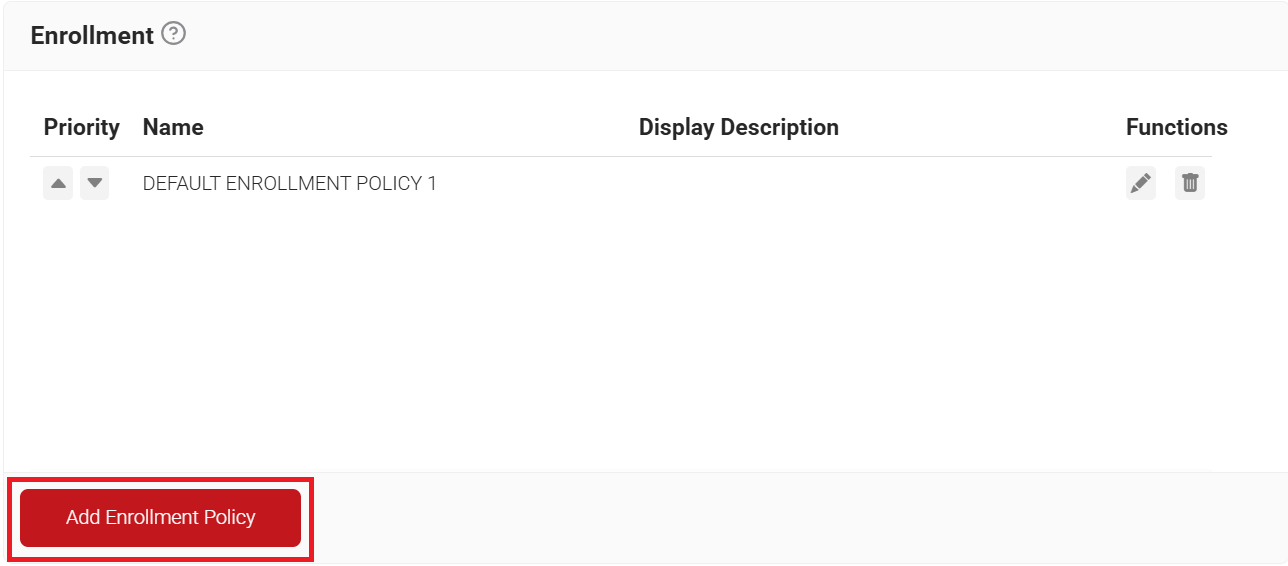
- In the Basic section, in the Name field, enter a name for the enrollment policy.
- In the Description field, enter a description for the enrollment policy.
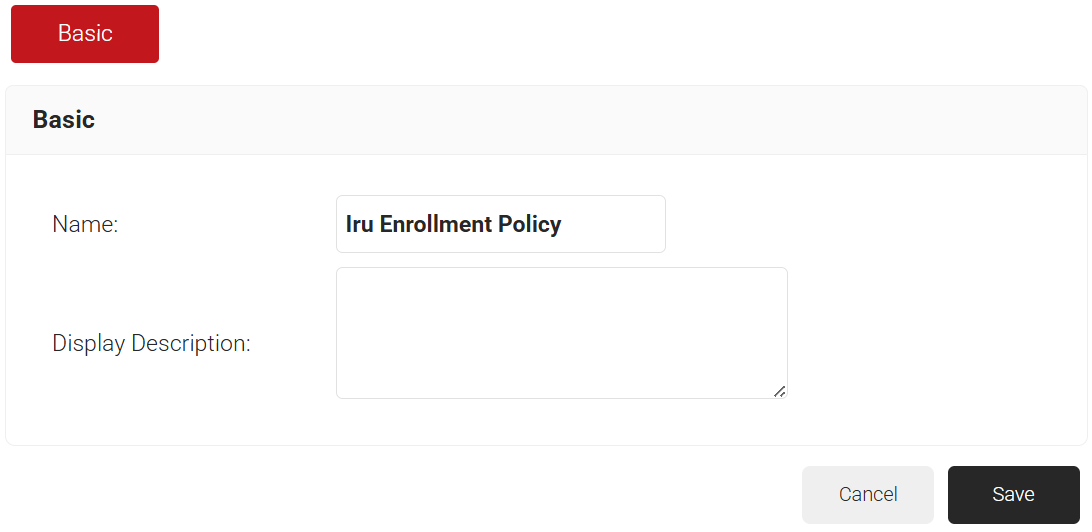
- Click Save. The page refreshes, and the Conditions tab is displayed.
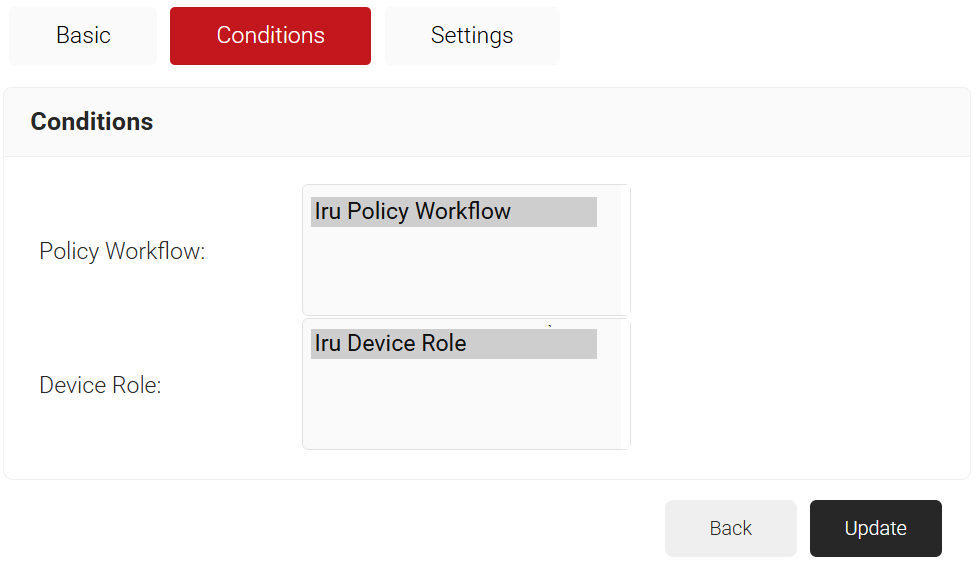
- Click the Conditions tab.
- In the Policy Workflow list, select the policy workflow created earlier in the Creating a Policy Workflow section.
- In the Device Role list, select the device role policy created earlier in the Creating a Device Role Policy section.
- Click the Settings tab.
- From the Use Certificate Authority drop-down list, select the intermediate CA created earlier in the Creating an Intermediate CA for Iru section.
- From the Use Certificate Template drop-down list, choose the certificate template created earlier in the Creating a Certificate Template for Iru section.
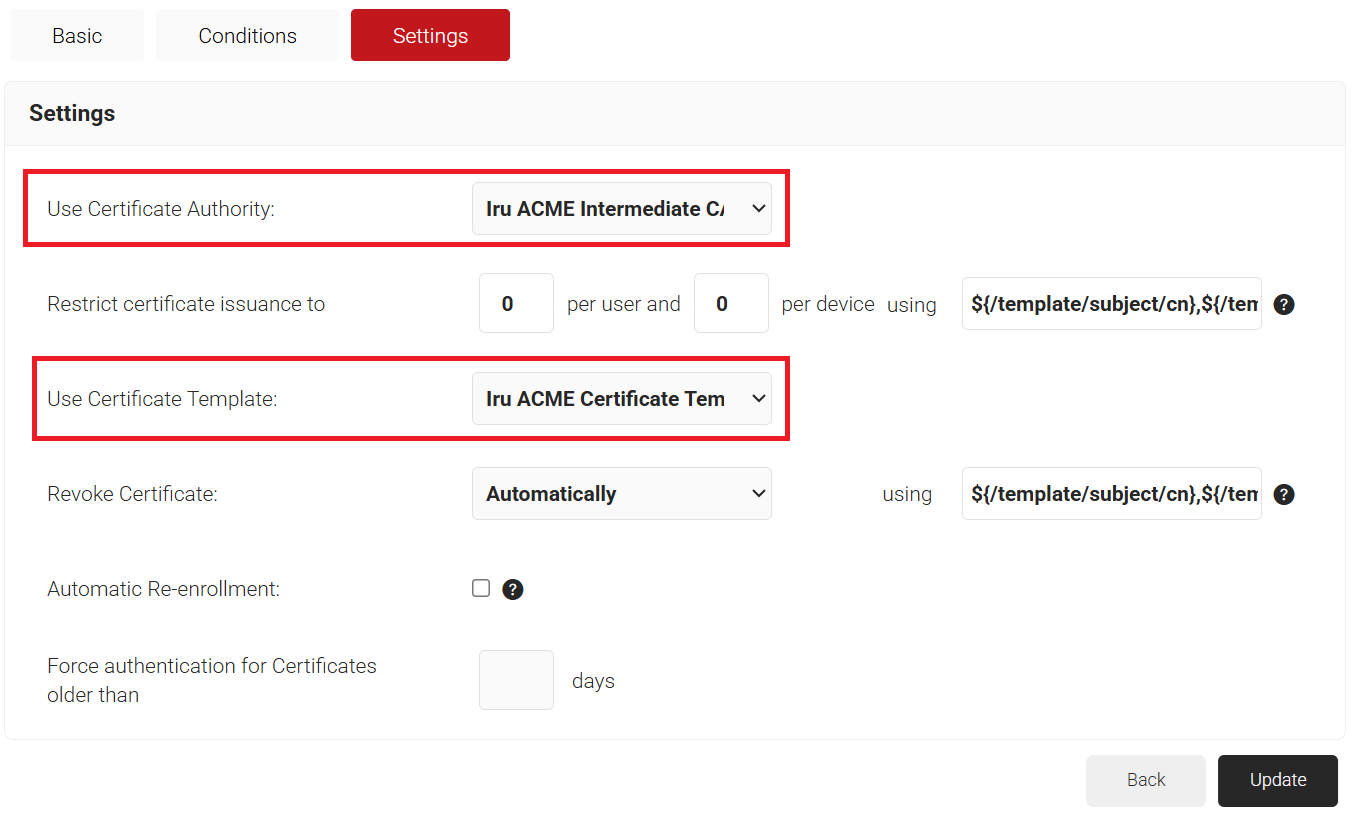
- Click Update.
In this section, create a scoped API token in Iru, which allows SecureW2 to query device attributes during ACME certificate enrollment.
To create a new token, perform the following steps:
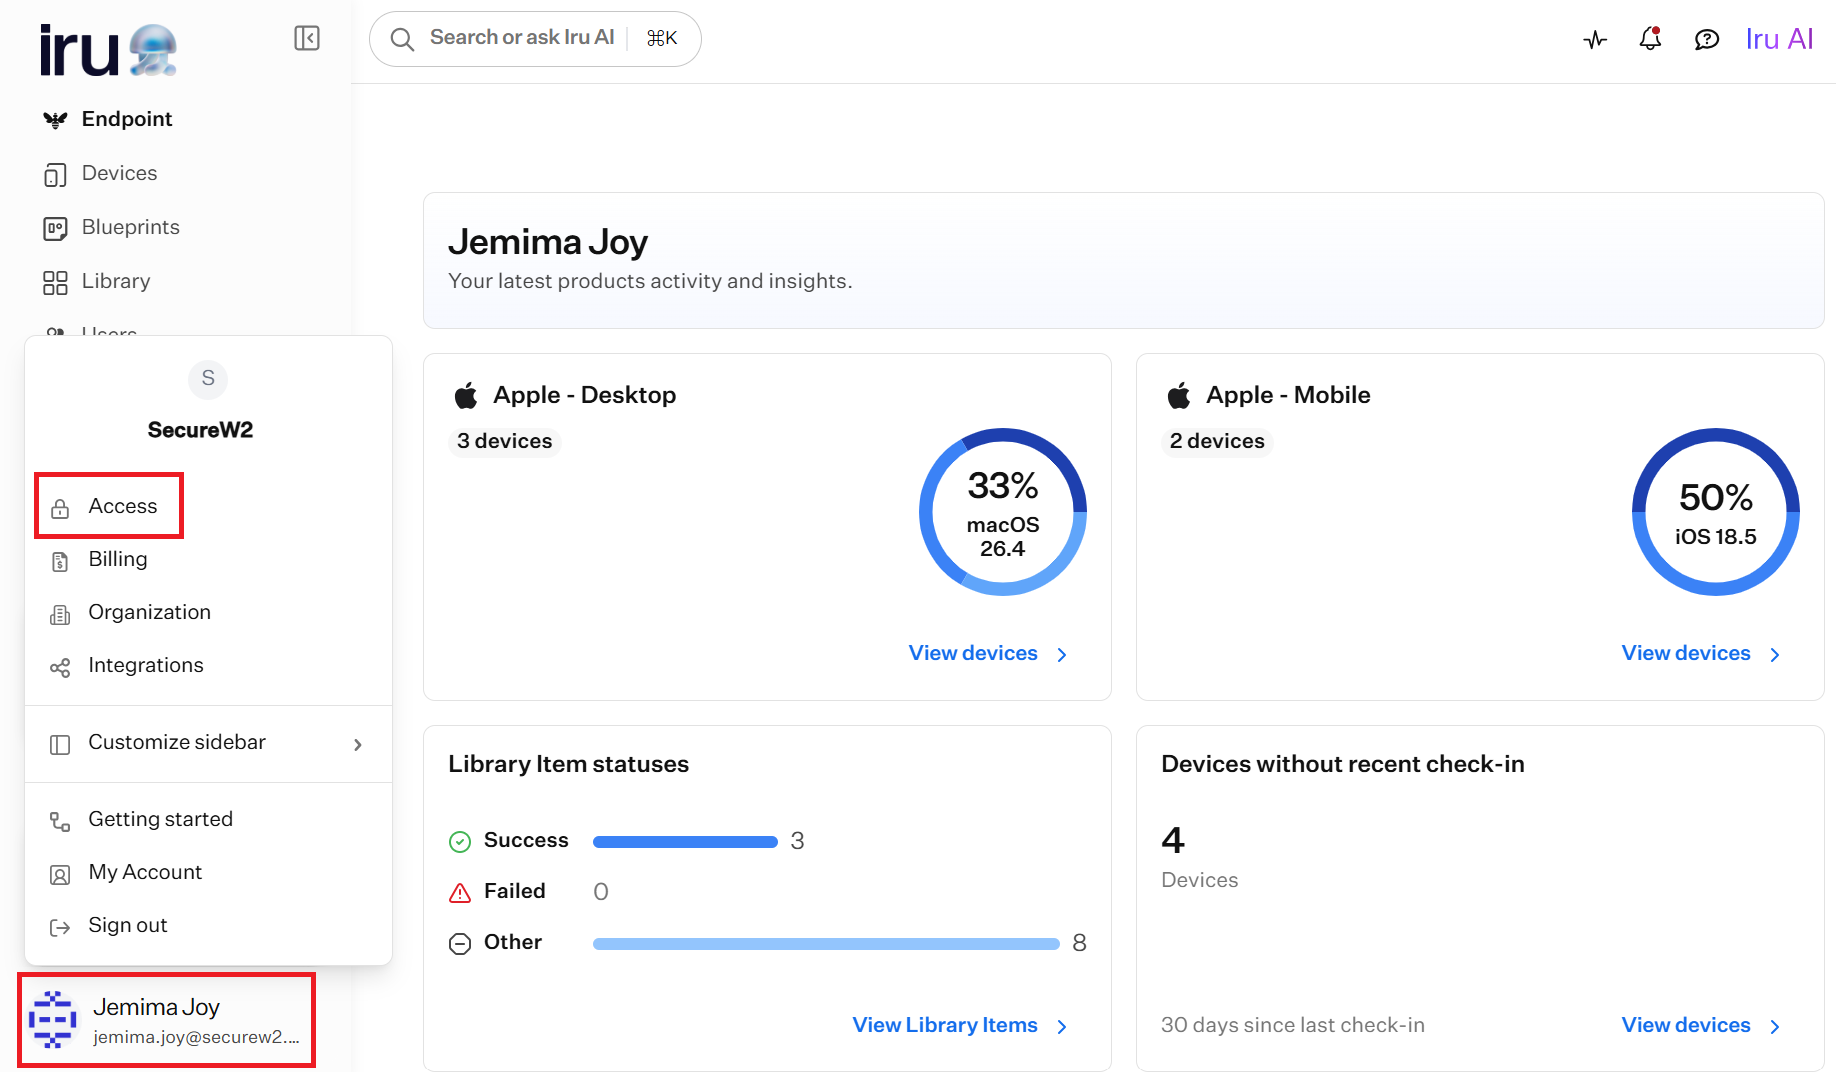
- Log in to the Iru portal.
- In the bottom-left corner, click your profile icon, then select Access.
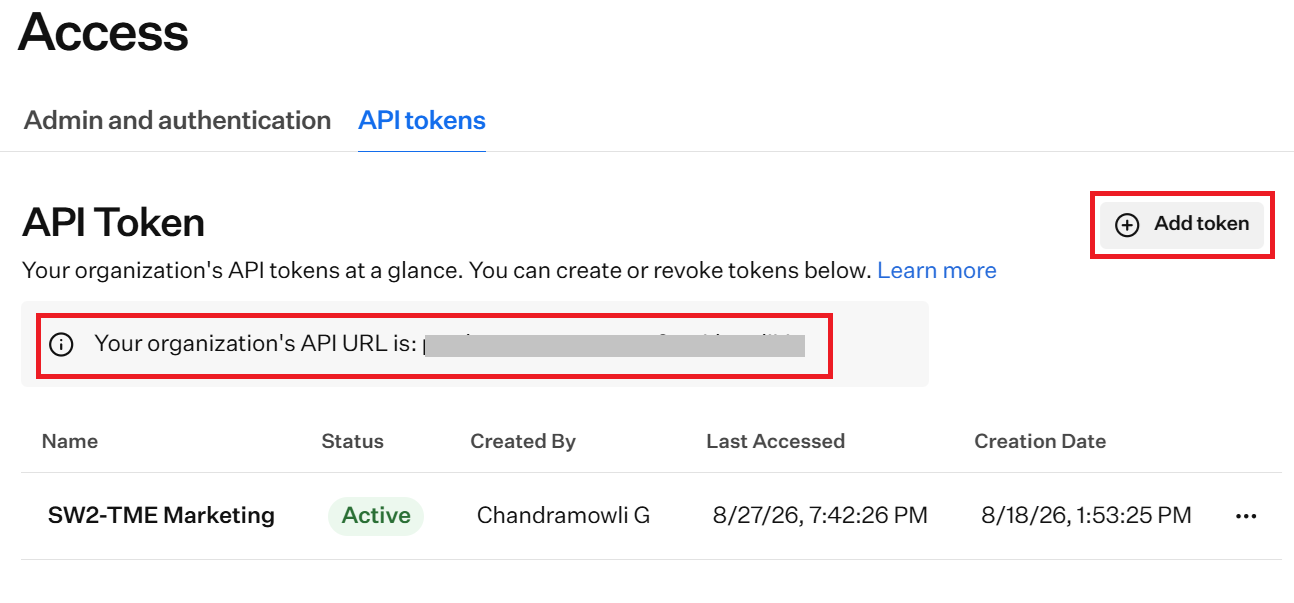
- On the Access page, select the API tokens tab.
- Copy the API URL for your organization. This URL is used later when configuring the Generic HTTP Signal Source.
- Click Add token.
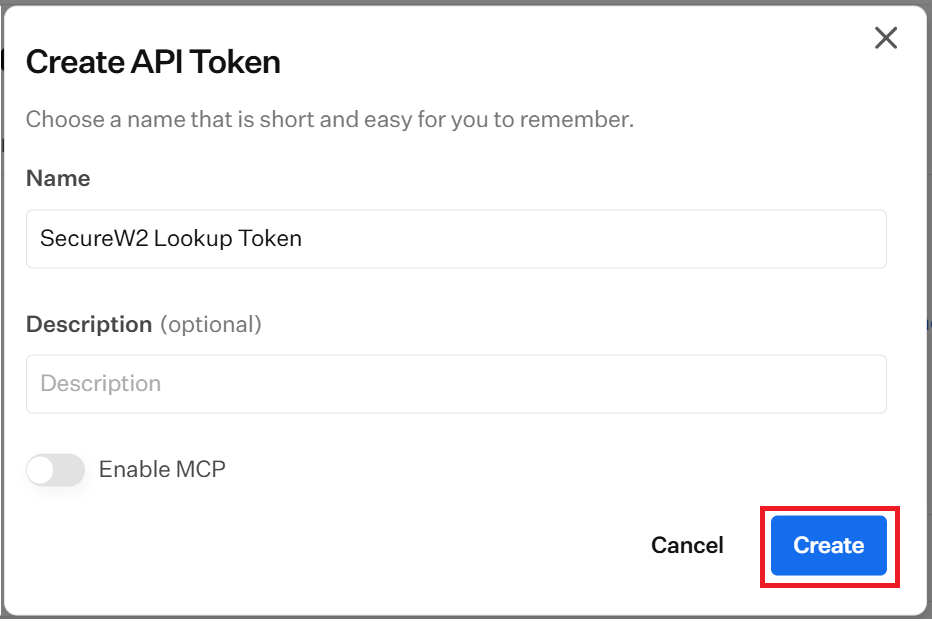
- In the Name field, enter a name for the API token.
- In the Description field, enter a description (optional).
- Click Create.
- Copy the token and save it in a text editor. You’ll use this token when configuring the Generic HTTP Signal Source.
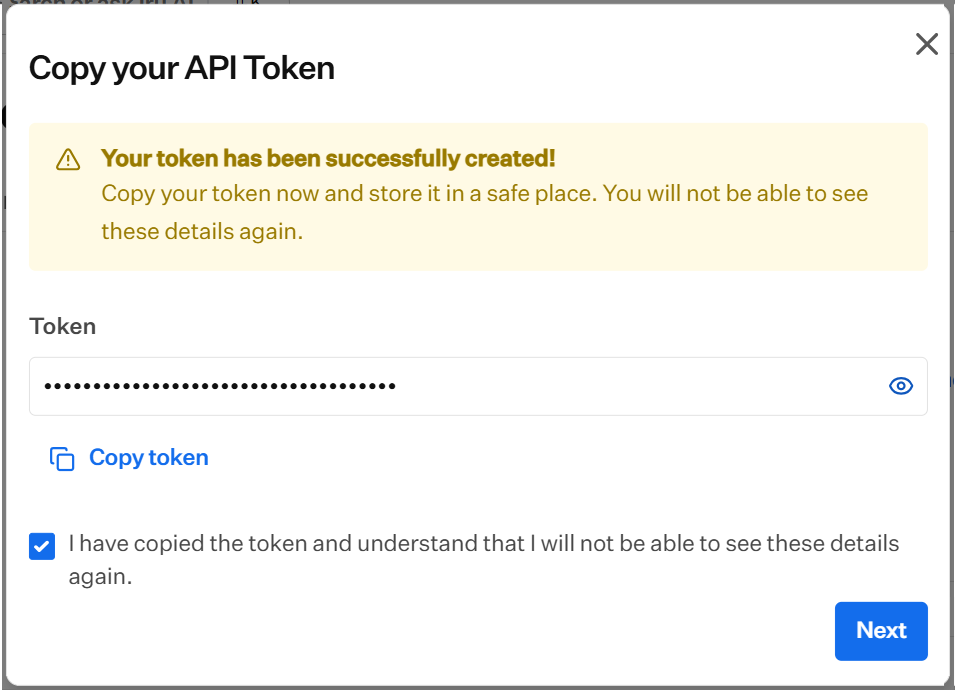
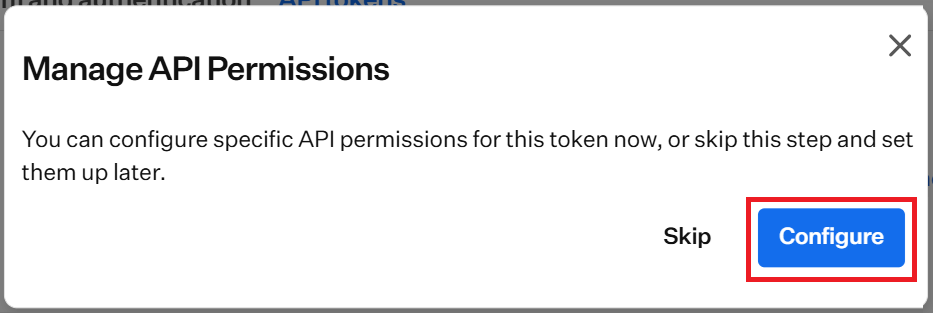
- Click Next. The Manage API Permissions pop-up window opens.
- On the Manage API Permissions pop-up window, click Configure.
- On the token’s details page, click Configure Permissions.
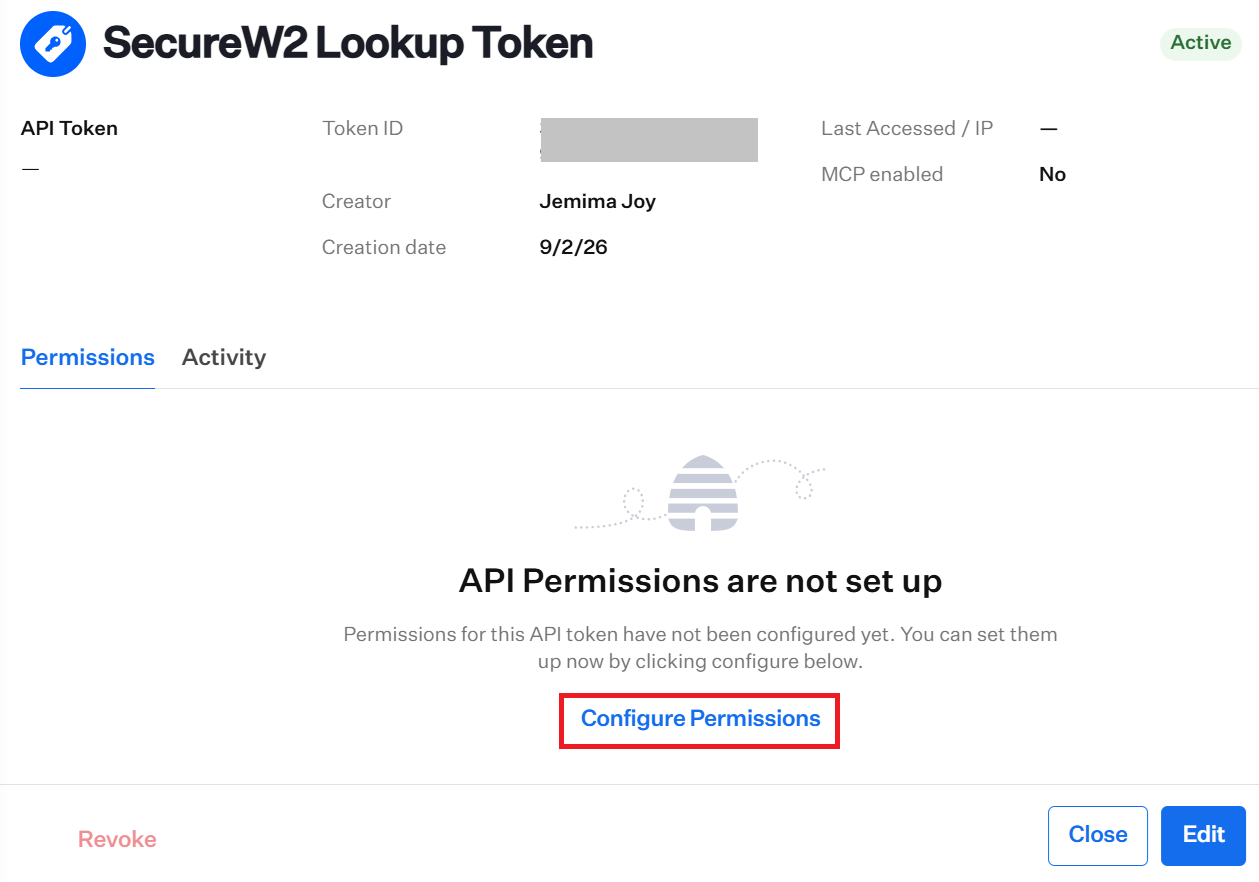
- Select the Permissions tab.
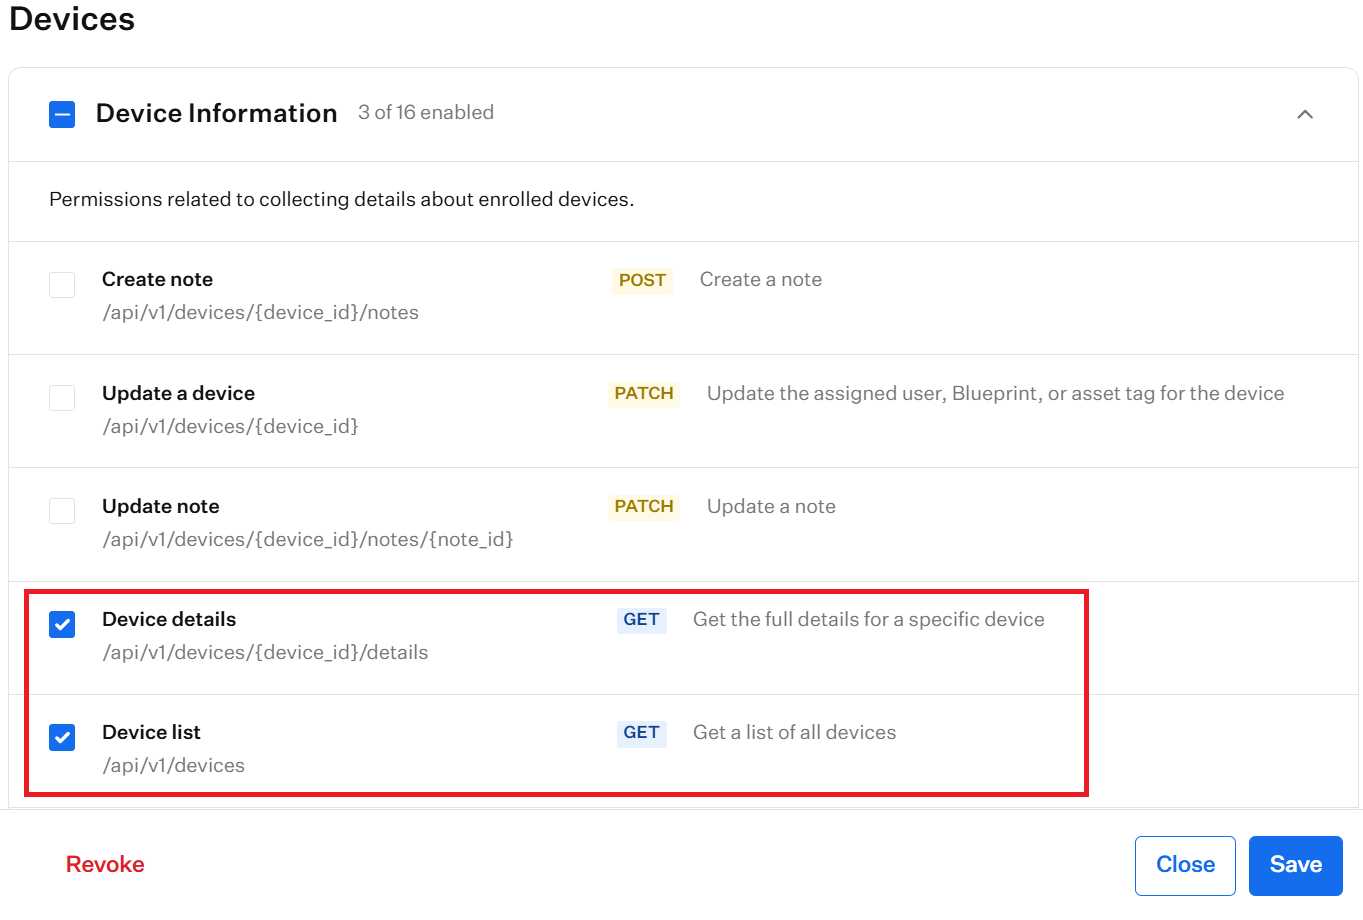
- In the Devices section, expand Device Information and select the following permissions:
Permission
Endpoint
Description
Device details
/api/v1/devices/{device_id}/details
Get the full details for a specific device
Device list
/api/v1/devices
Get a list of all devices
Device Status
/api/v1/devices/{device_id}/status
Get Library Items and Parameters for device
- Click Save, then Close.
In this section, create a new Blueprint. This step is optional — if a Blueprint already exists for your organization, you can use it instead. To create a new one, start from scratch or choose from a pre-filled template.
To create a new Blueprint, perform the following steps:
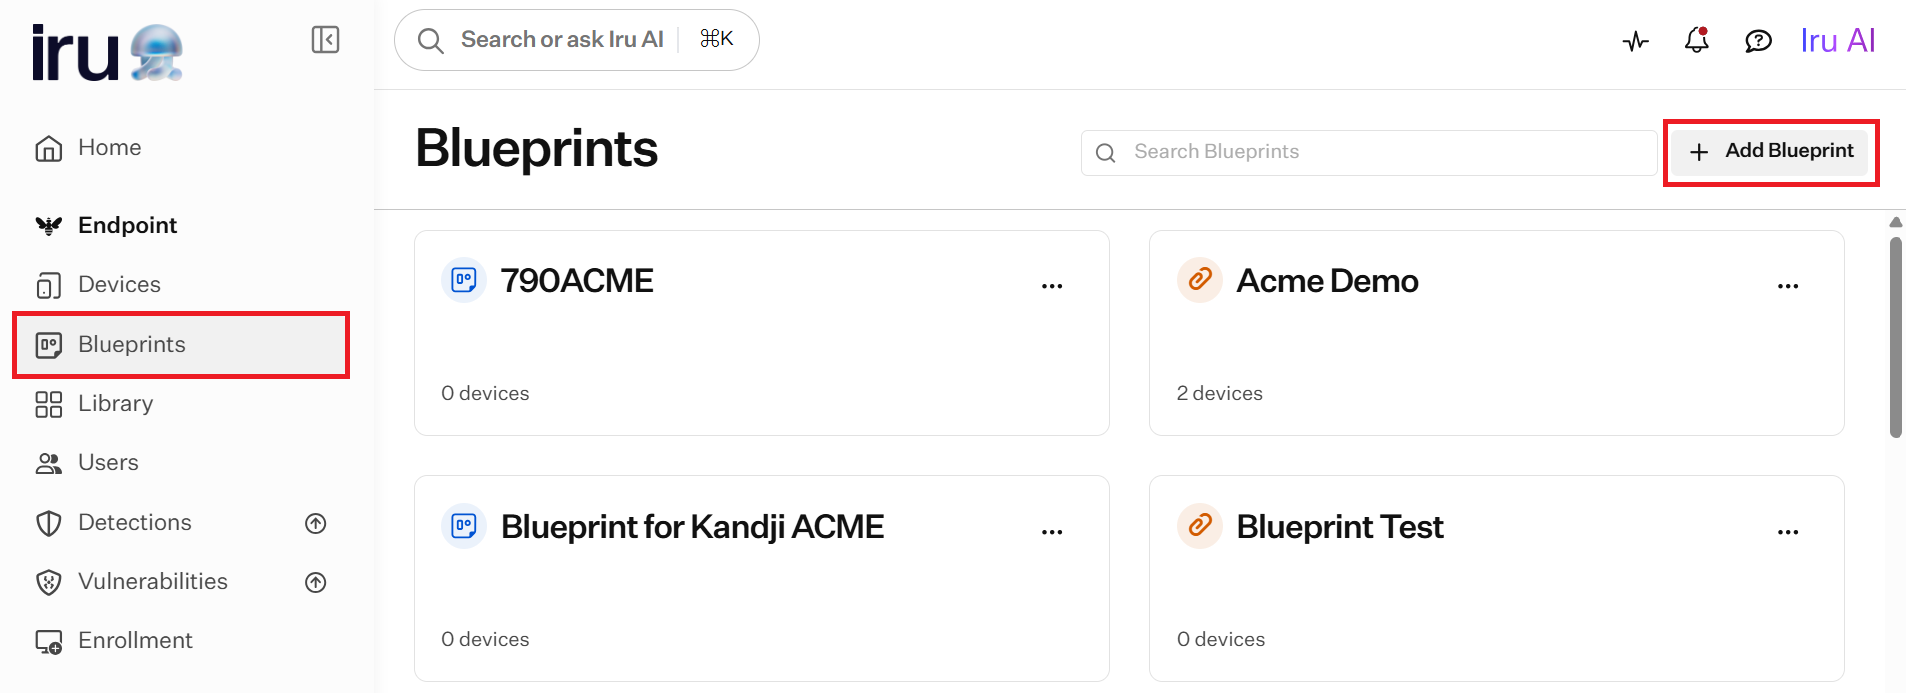
- On the left pane, navigate to Blueprints.
- In the top-right corner, click + Add Blueprint.
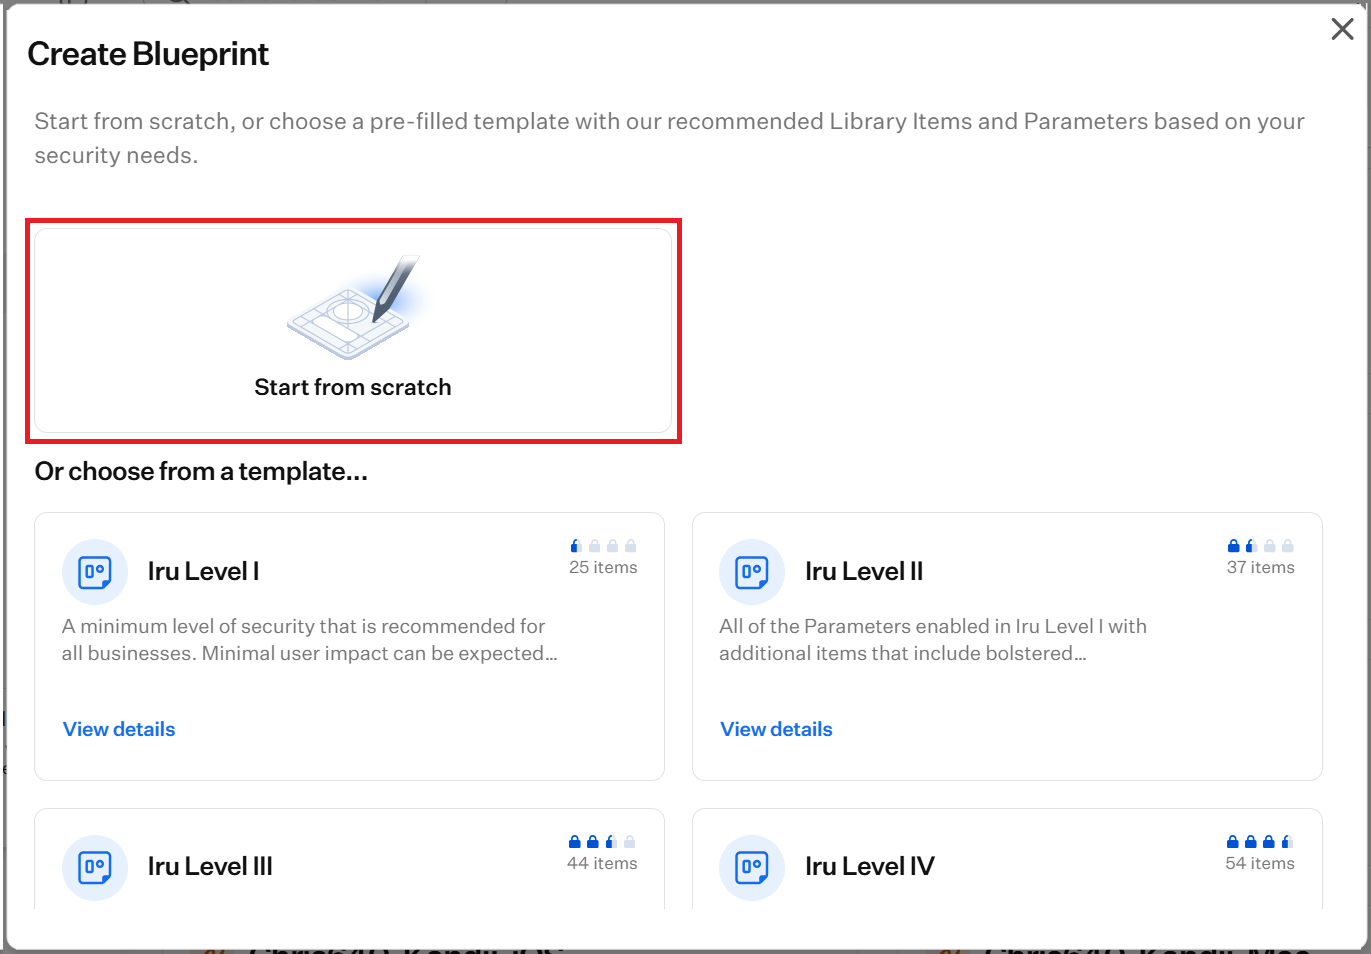
- On the Create Blueprint pop-up window, click Start from scratch.
- On the Create Blueprint pop-up window, enter a name in the Blueprint name field, and a description in the Description field (optional).
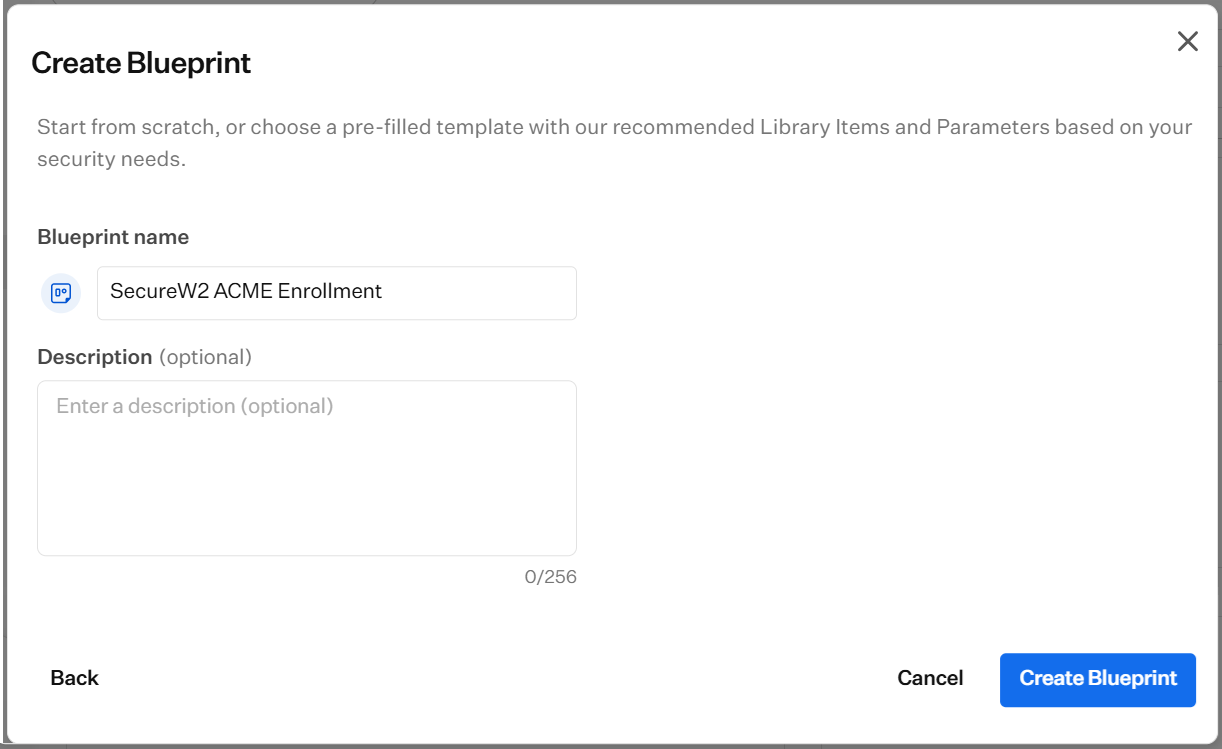
- Click Create Blueprint.
This section adds the .mobileconfig file obtained from the JoinNow Management Portal as a Custom Profile in the Iru Library and maps it to the Blueprint created earlier for device deployment.
To add a custom profile to the Iru Library, perform the following steps:
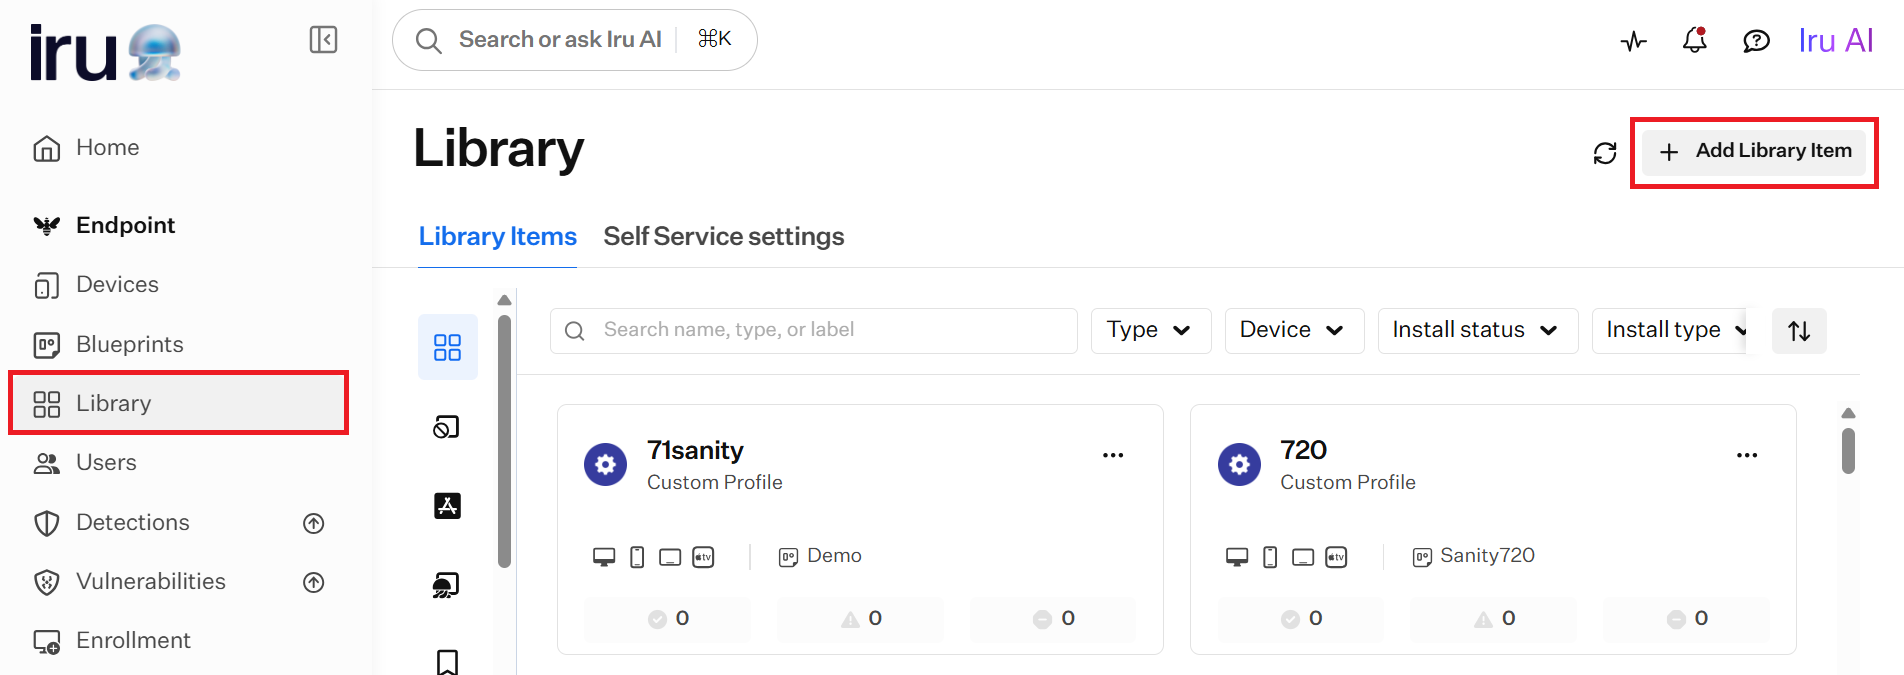
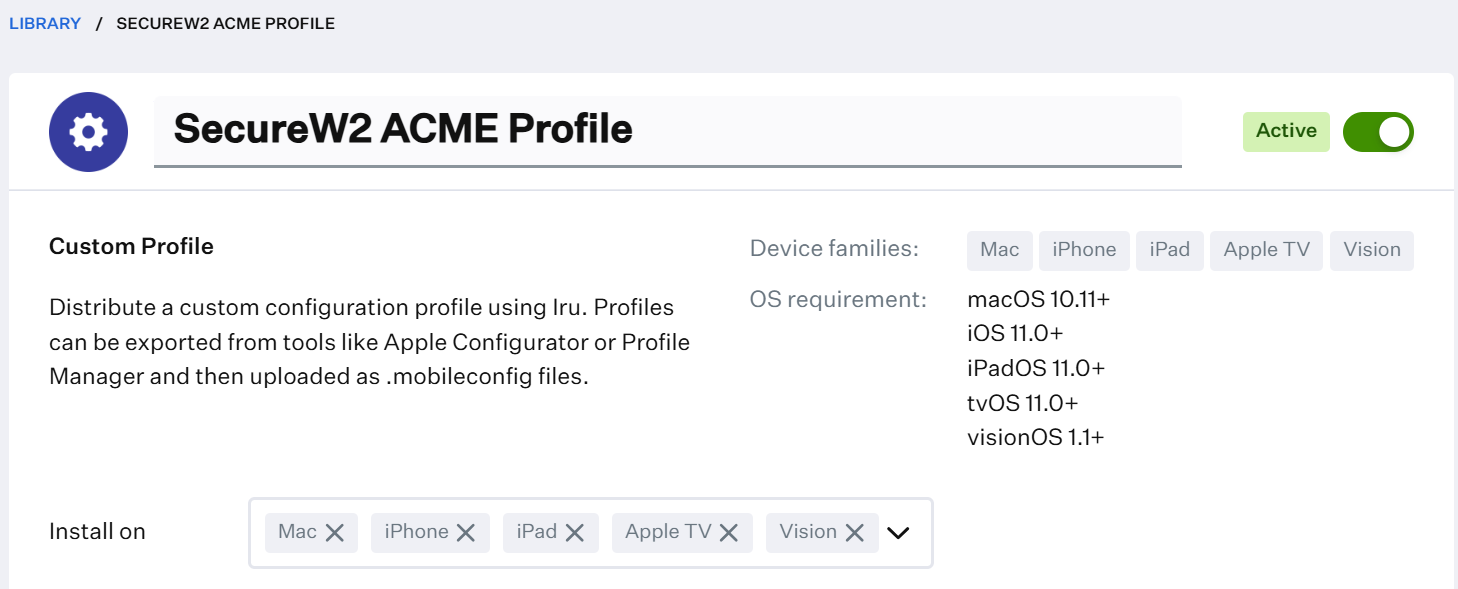
- On the left pane, click LIBRARY, and then click + Add Library Item.
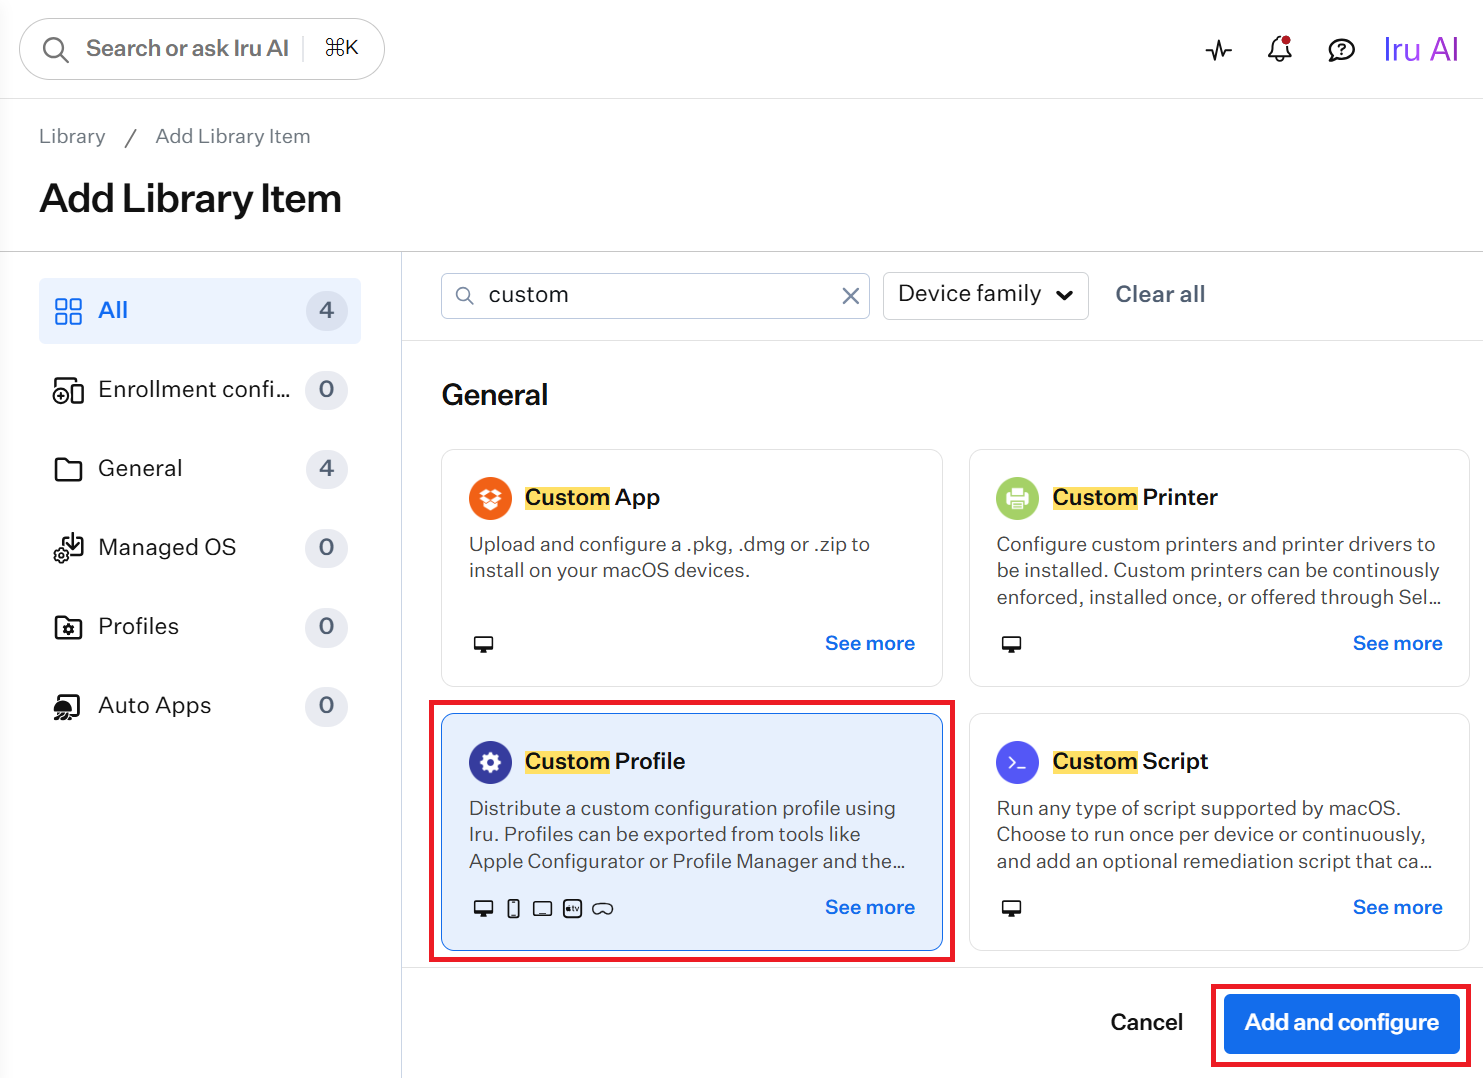
- On the Add Library Item page, in the search bar, search for Custom Profile.
- Select Custom Profile, and click Add and Configure.
- On the displayed page, in the Add a title field, enter a name for the Custom Profile.
- From the Install on drop-down list, select the devices for enrollment.
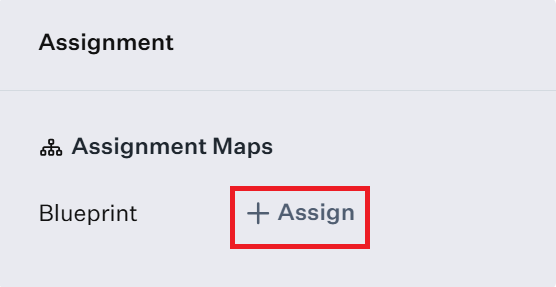
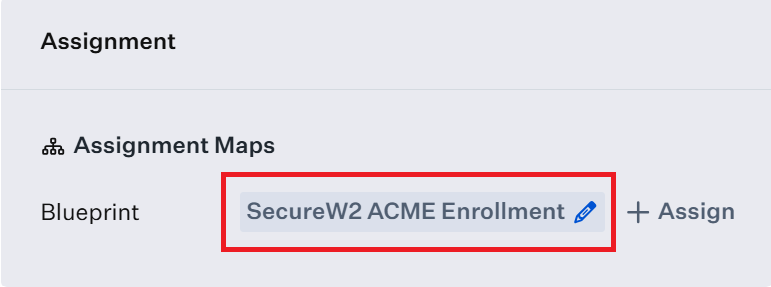
- In the Assignment section, click + Assign and select the Blueprint created earlier in the Creating a New Blueprint section.
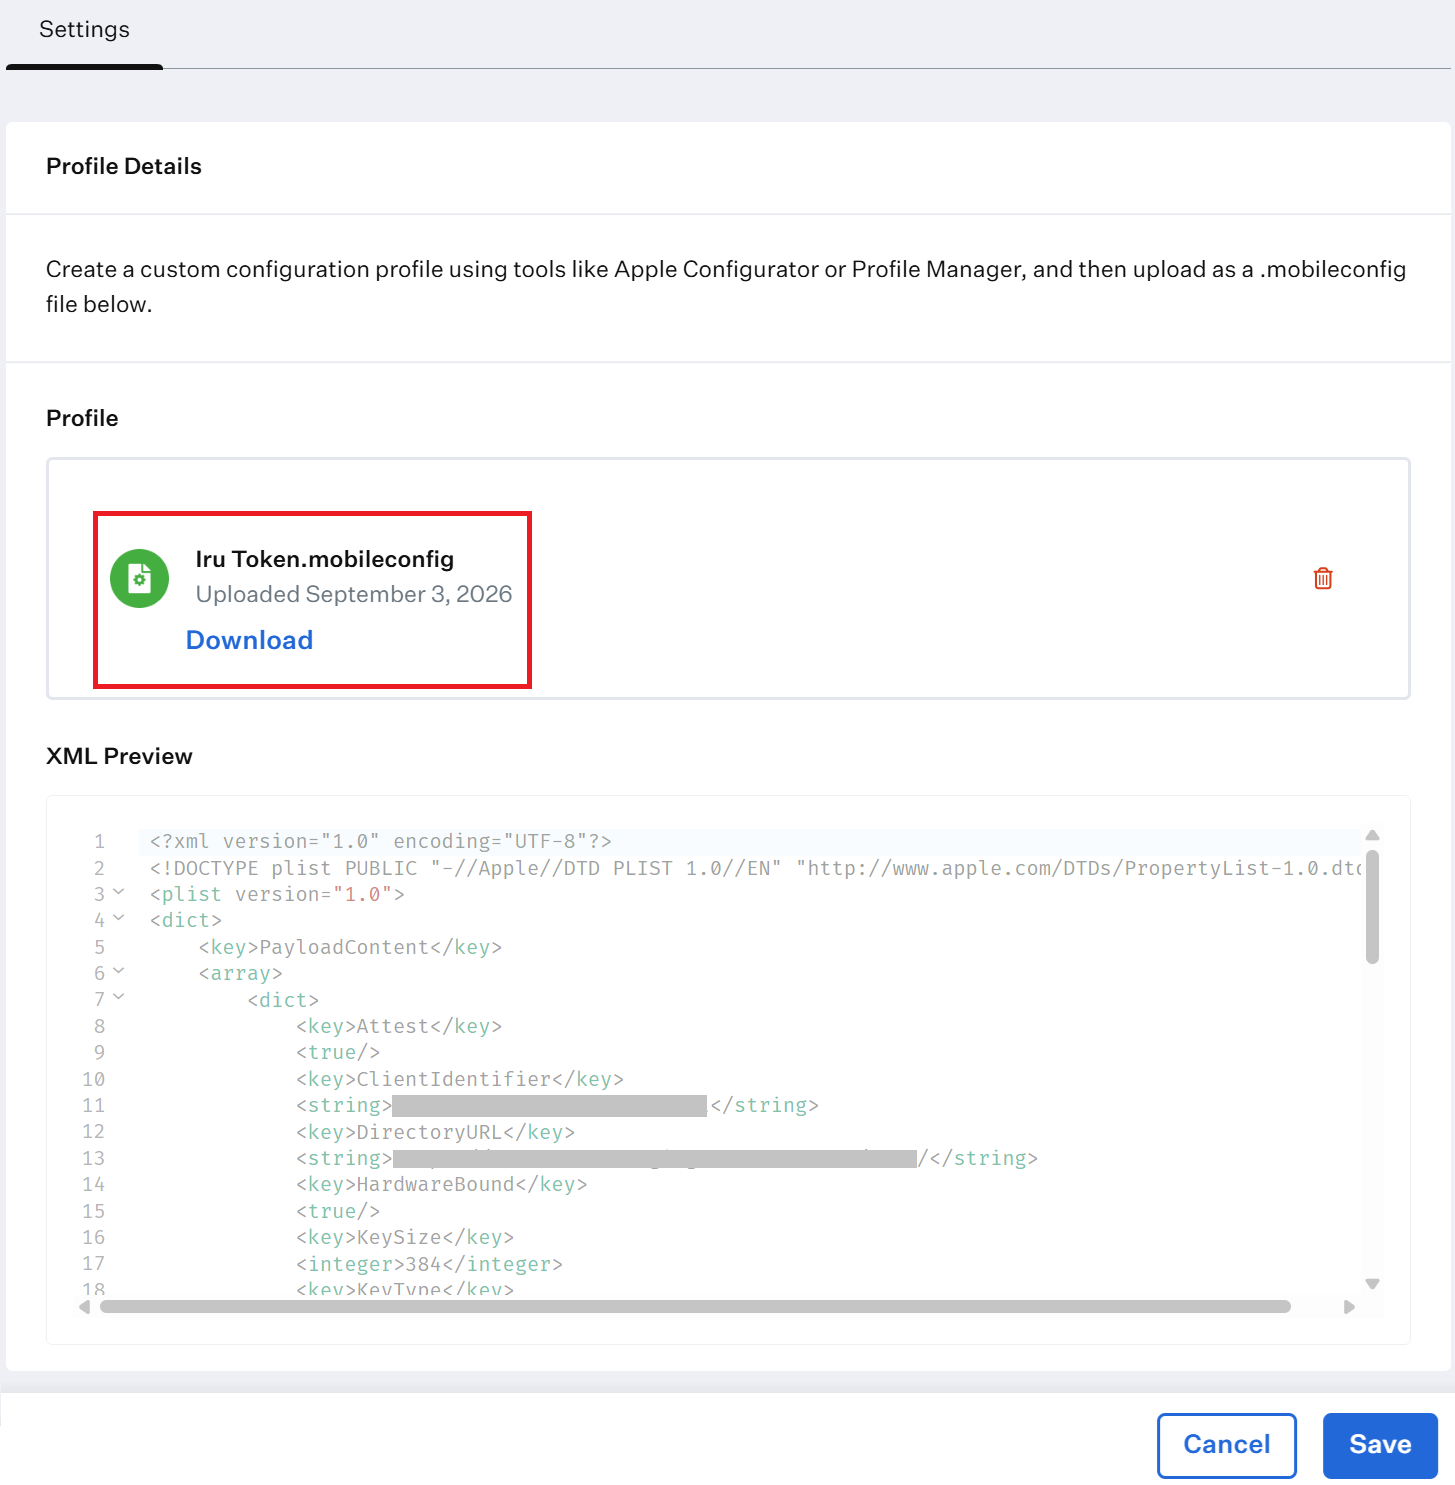
- In the Settings section, under Profile, upload the .mobileconfig file obtained from the JoinNow Management Portal (refer to the Creating a Device Management Platform section).
- Click Save, then Close.
This section generates the Enrollment Portal link and Enrollment code, which users use to self-enroll their devices in Iru.
To add devices to Iru MDM, perform the following steps:
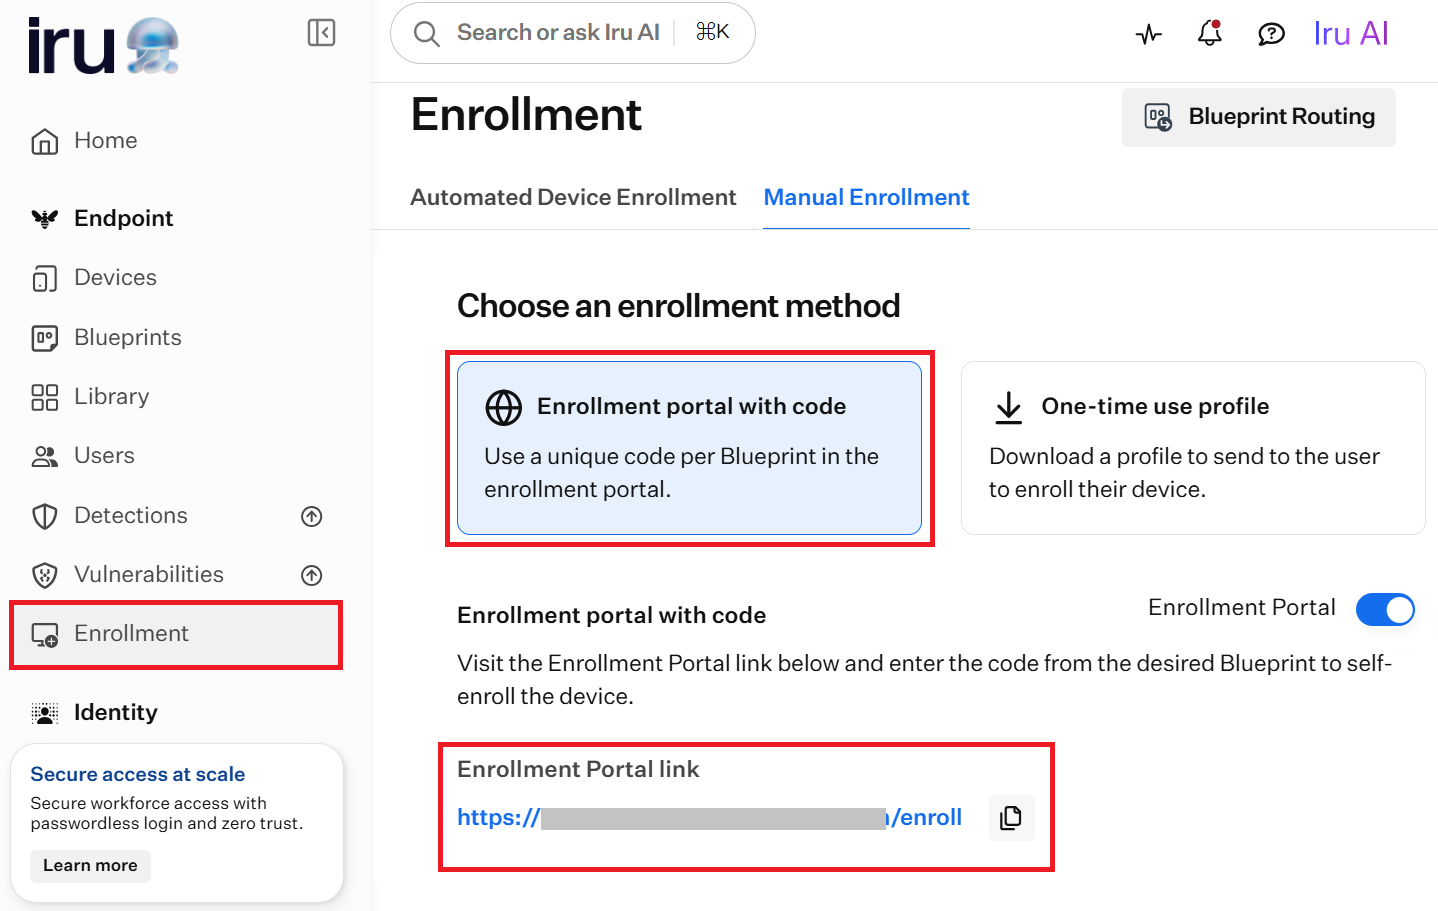
- On the left pane, click Enrollment.
- Click the Manual Enrollment tab.
- Under Choose an enrollment method, select Enrollment portal with code.
- Copy the Enrollment Portal link.
- Under Select Blueprint to enroll the device into, search for the Blueprint created earlier, and copy its Enrollment code.
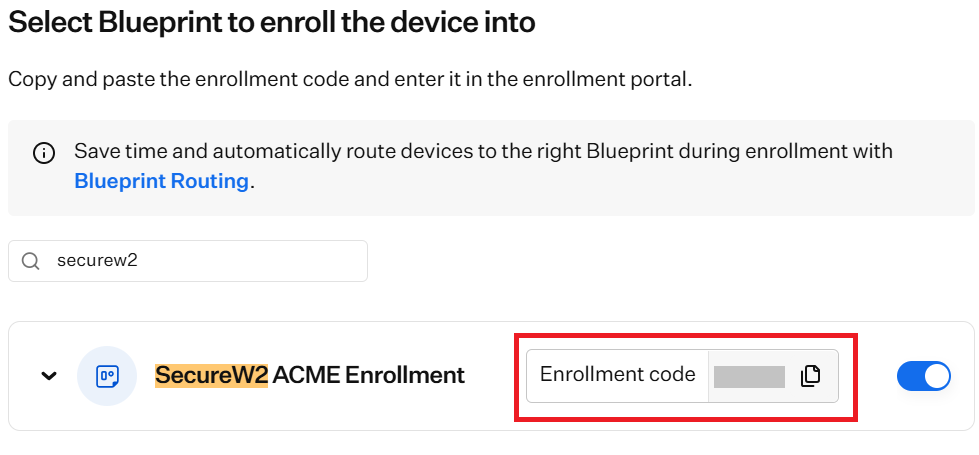
- Share the Enrollment Portal link and Enrollment code with users.
The user accesses the Enrollment Portal link and enters the Enrollment Code to enroll their device in the corresponding Blueprint.
This section maps an enrolled device to the Blueprint, so the ACME certificate profile is pushed to the device.
To assign a device to the Blueprint, perform the following steps:
- On the left pane, click Devices. The devices added to the Blueprint are displayed on the page.
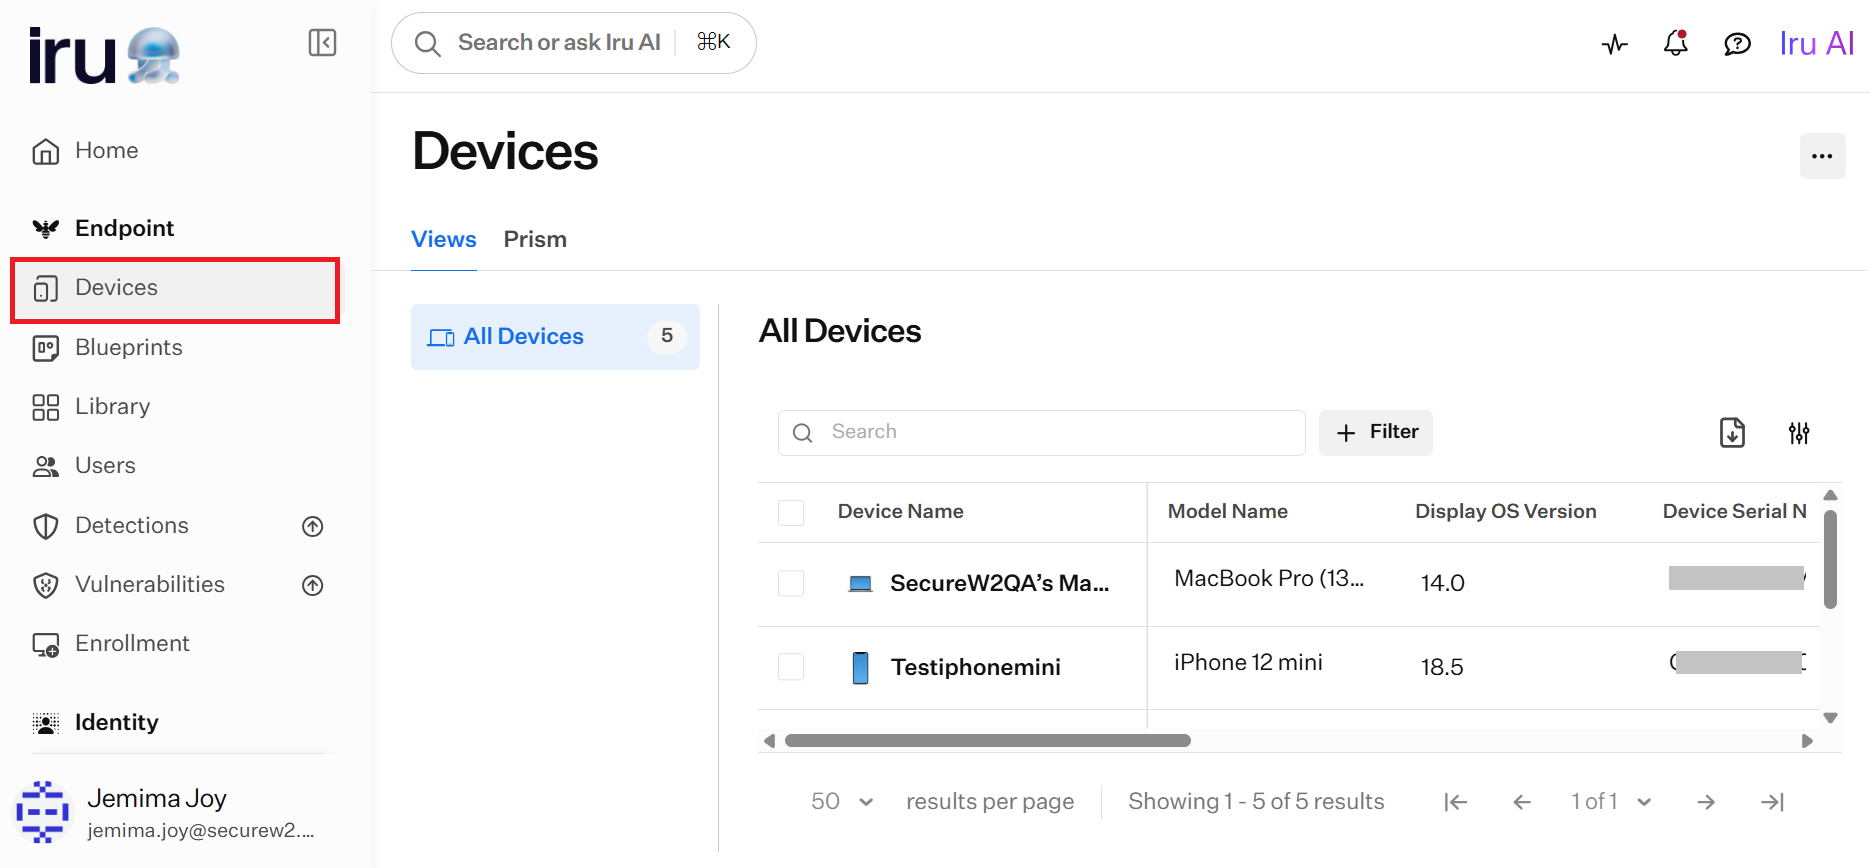
- Click the added device.
- On the displayed page, click Edit device details.
- Click Edit Blueprint.
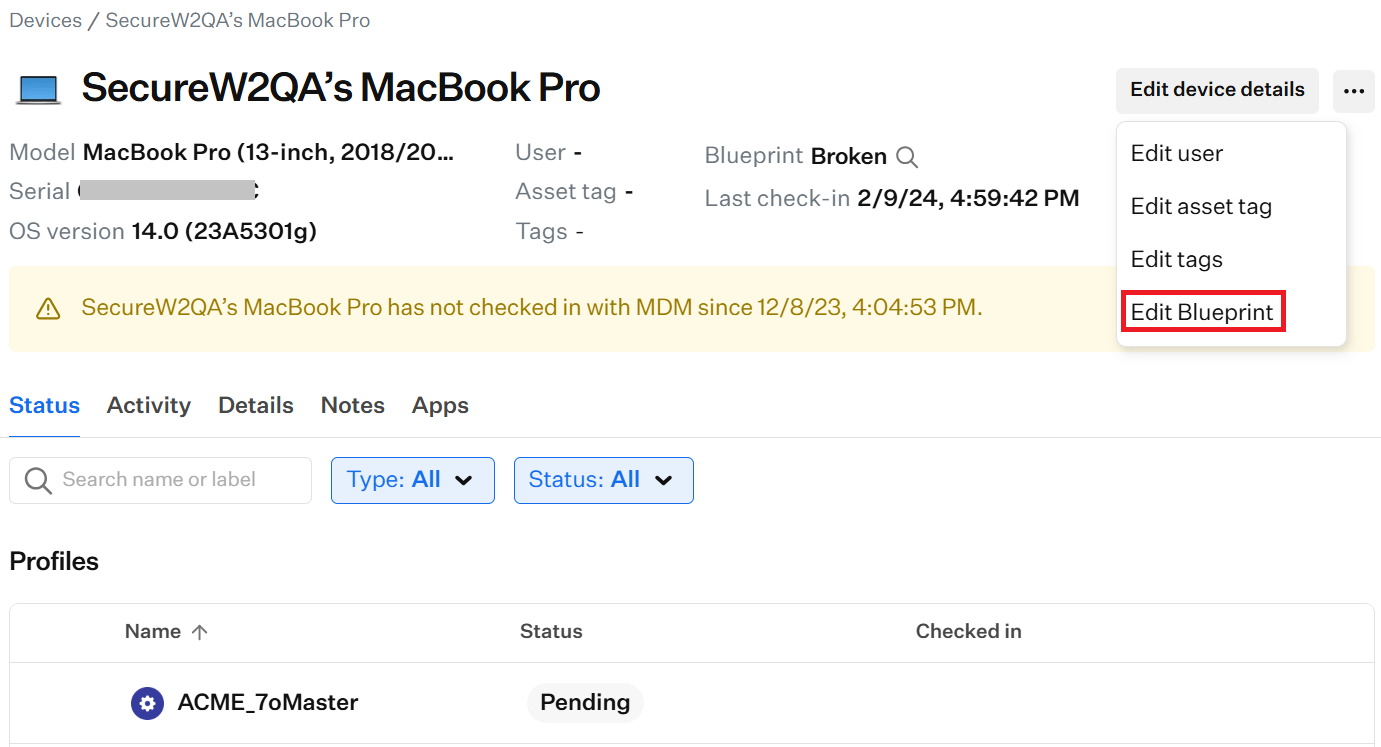
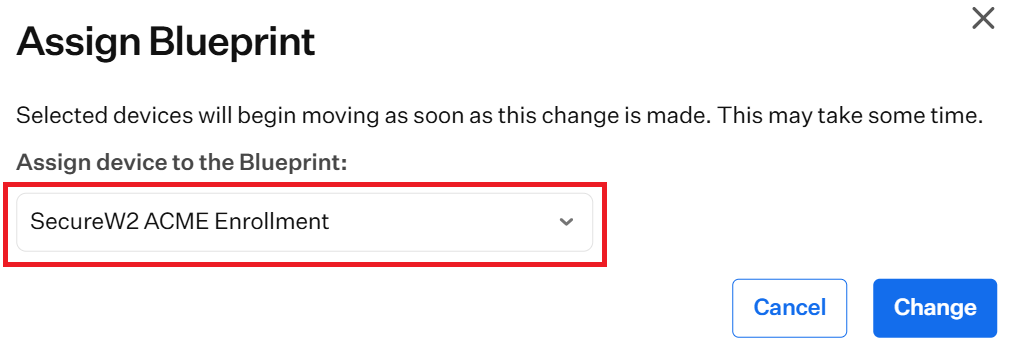
- On the Assign Blueprint pop-up window, from the Assign device to the Blueprint drop-down list, select the Blueprint created earlier in the Creating a New Blueprint section.
- Click Change. The profile is automatically pushed to the device, and a success message is displayed.
After completing the steps above, the profile is pushed to the device, followed by certificate enrollment.
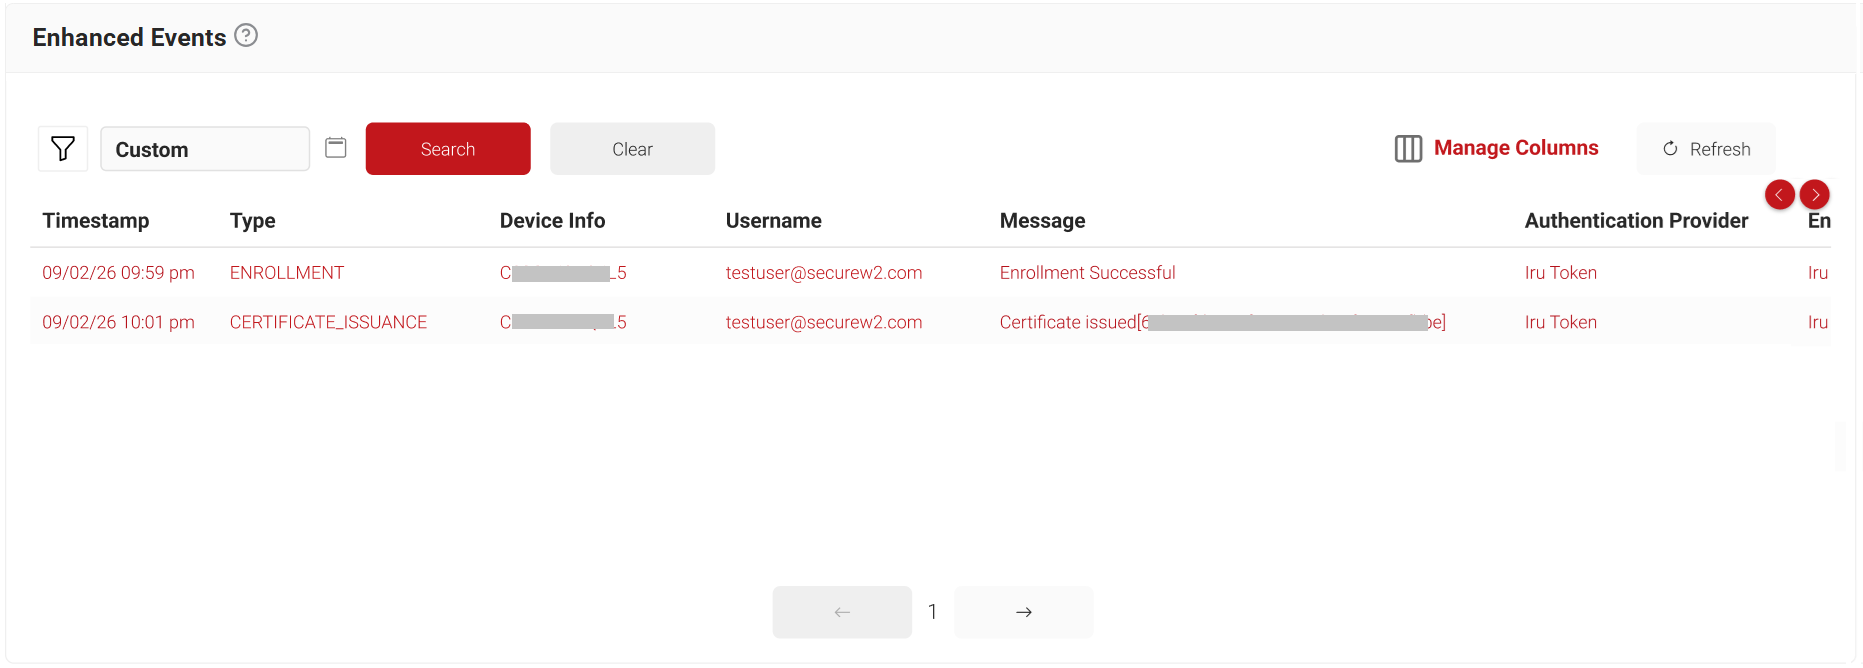
Admins can verify successful certificate enrollment under Data and Monitoring > Enhanced Events, where a Certificate Issued event is displayed once the device certificate is successfully issued.