SecureW2 acts as an authority to verify user identities and issue X.509 certificates. It integrates with the SAML provider’s user database and uses a Public Key Infrastructure (PKI) to authenticate user data that is contained in the SAML application. This ensures that users connect to the authentic SAML provider, and vice versa.
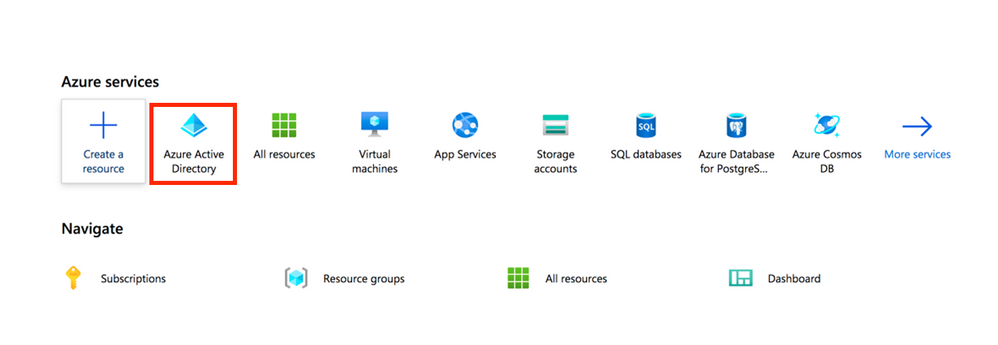
- Log in to the Azure Portal and select Azure Active Directory.

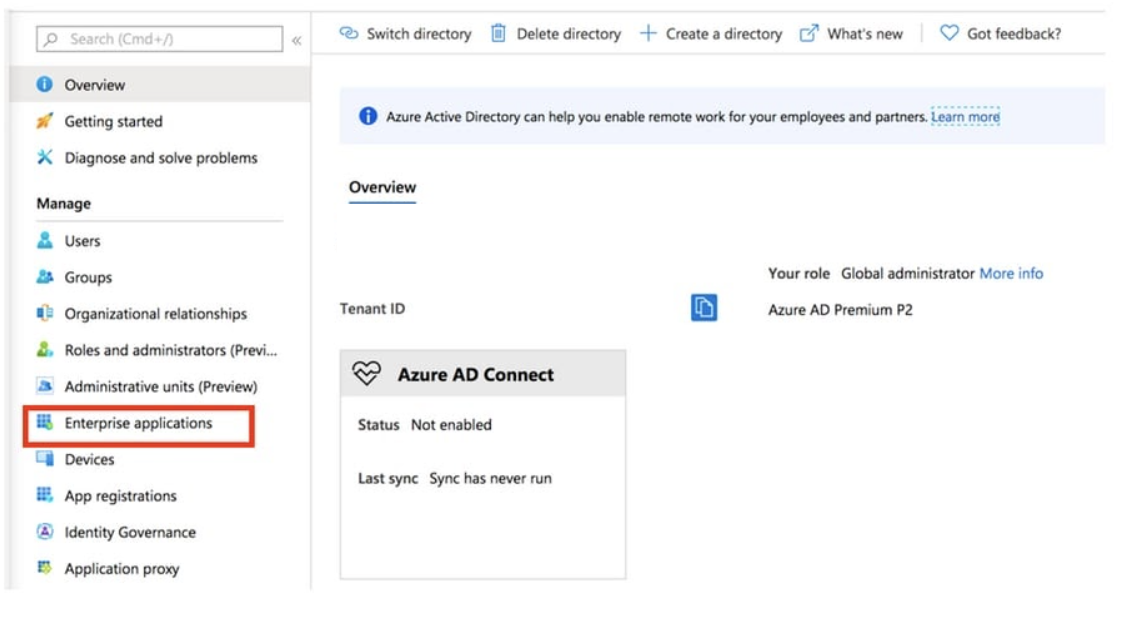
- Select Enterprise Applications.

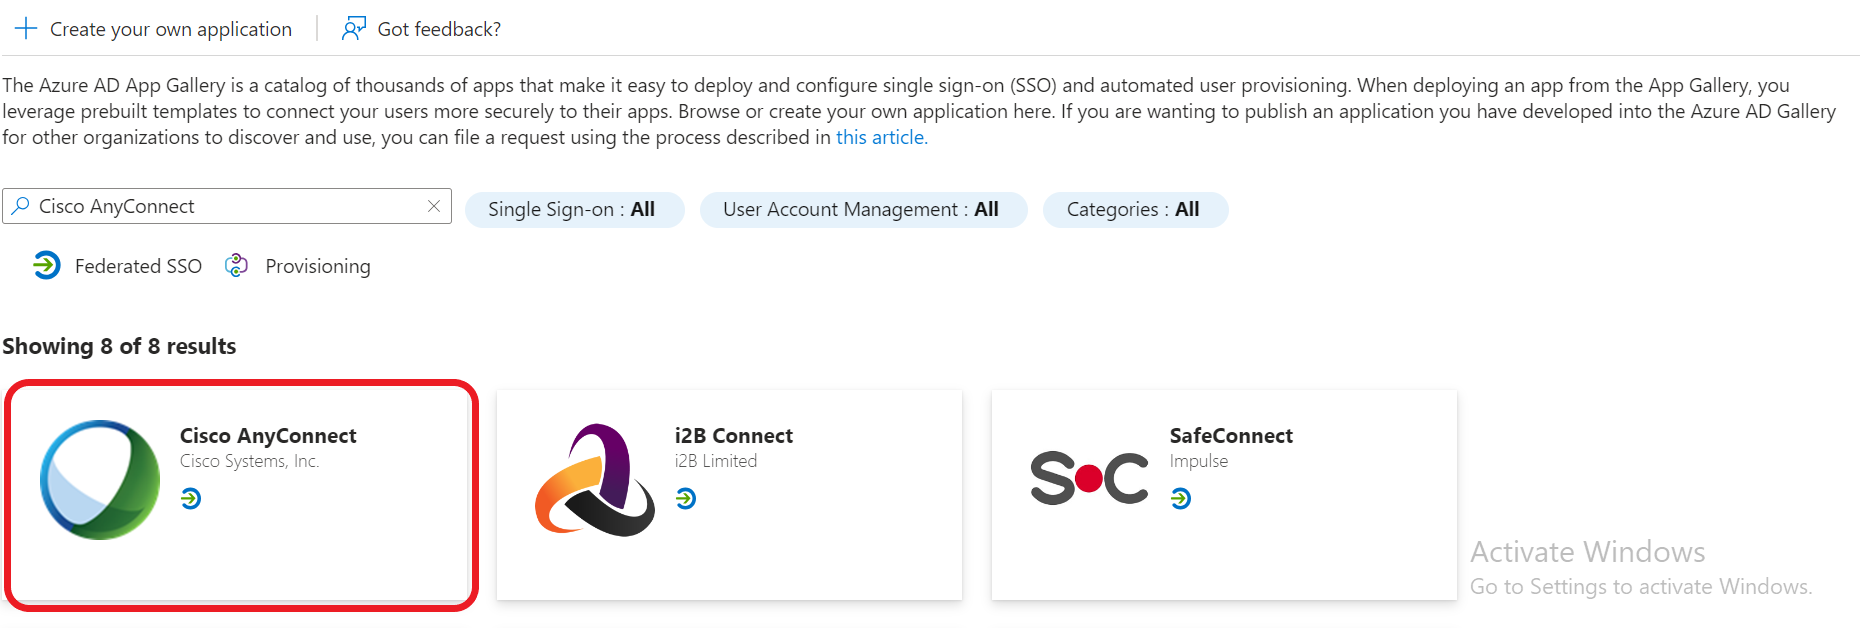
- Click New Application.

- Type AnyConnect in the search box, select Cisco AnyConnect from the results panel. Click the app.

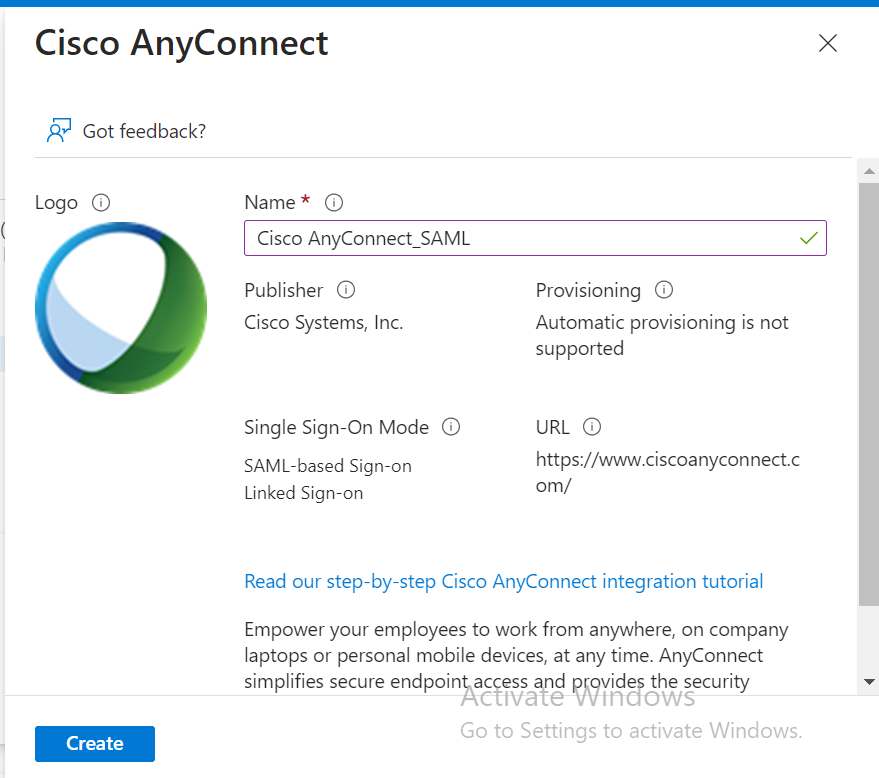
- Give a name for the App and click Create.

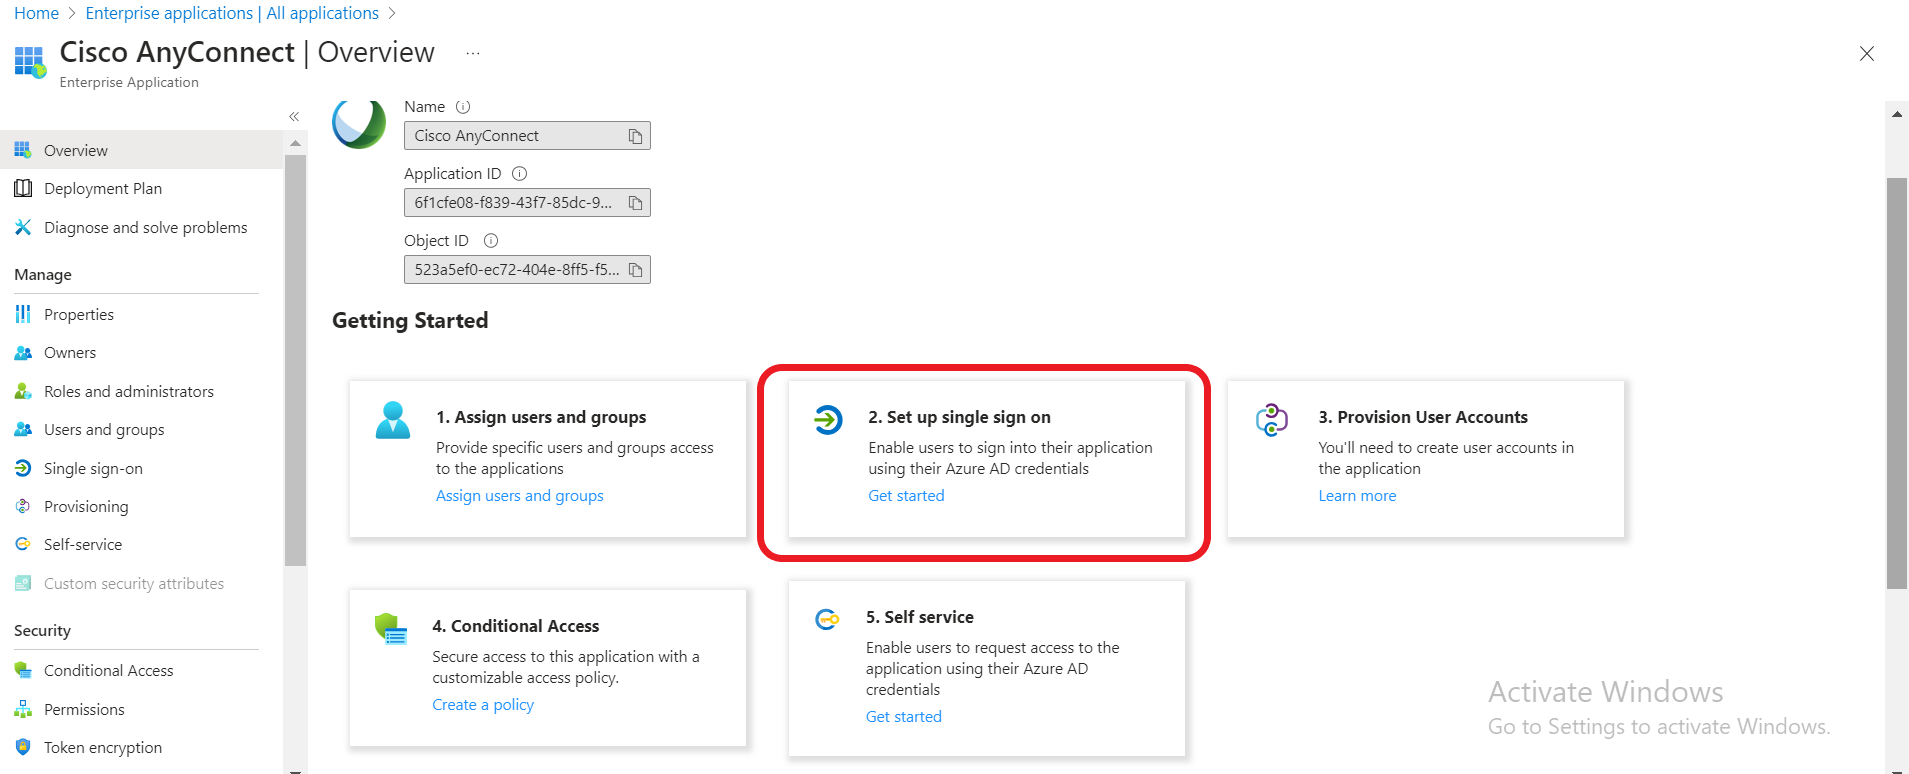
- Select the Set up single sign on.

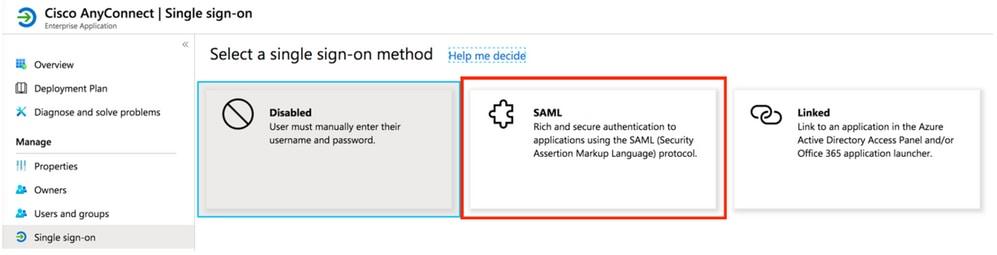
- Click SAML.

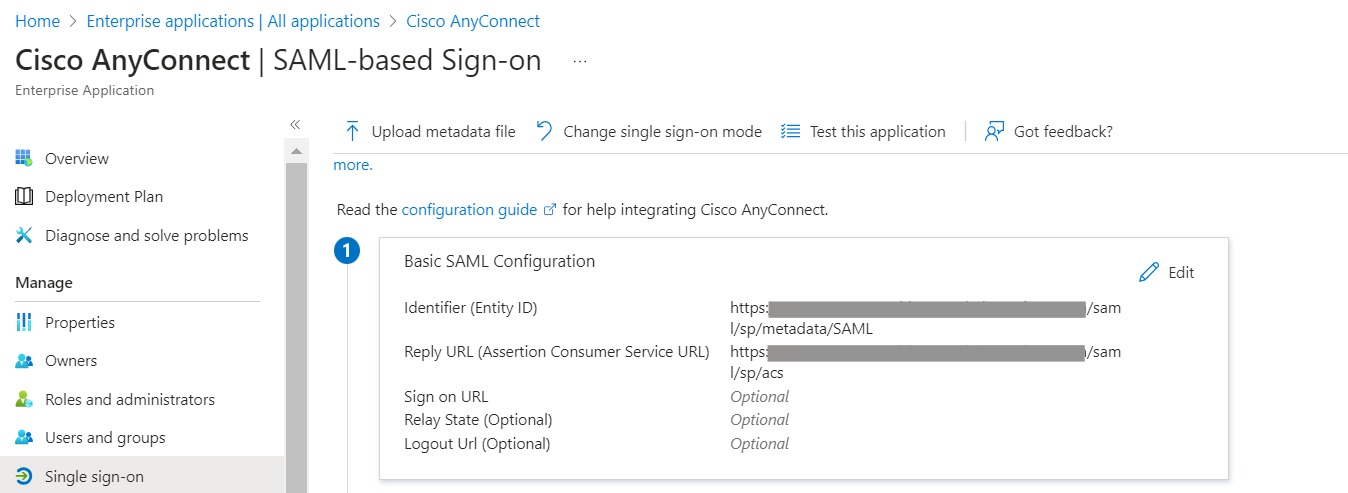
- In the Basic SAML Configuration section, fill in the Entity ID and Reply URL as follows:
- If your AnyConnect Server URL is “vtk-qpjgjhmpdh.dynamic-m.com” (this URL is different for every network), the Entity ID and Reply URL will be configured as follows:
- Identifier (Entity ID) – https://vtk-qpjgjhmpdh.dynamic-m.com/saml/sp/metadata/SAML
- Reply URL (Assertion Consumer Service URL) – https://vtk-qpjgjhmpdh.dynamic-m.com/saml/sp/acs

- If your AnyConnect Server URL is “vtk-qpjgjhmpdh.dynamic-m.com” (this URL is different for every network), the Entity ID and Reply URL will be configured as follows:
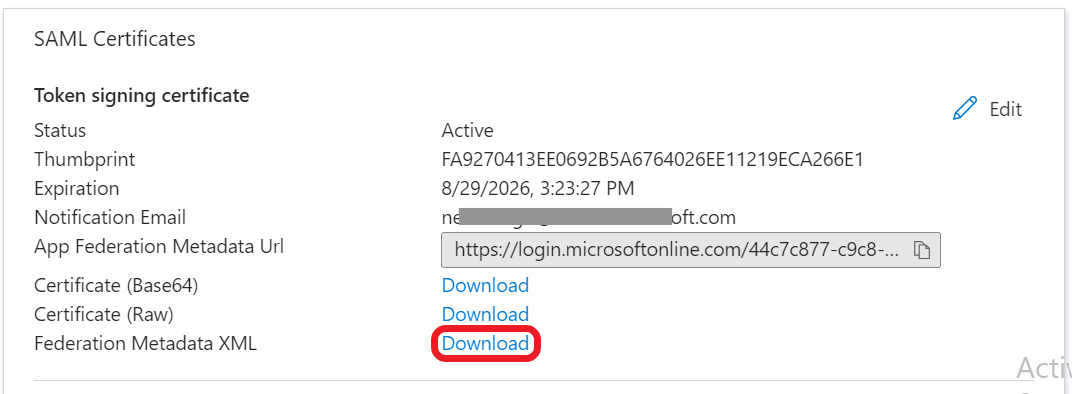
- In the SAML Certificates section, Download the Federation Metadata XML file and save it on your computer. This file should be uploaded to the Meraki portal.

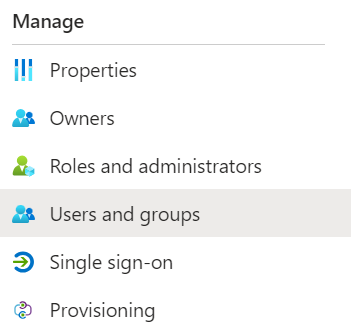
- Click Users and groups on the side-menu.

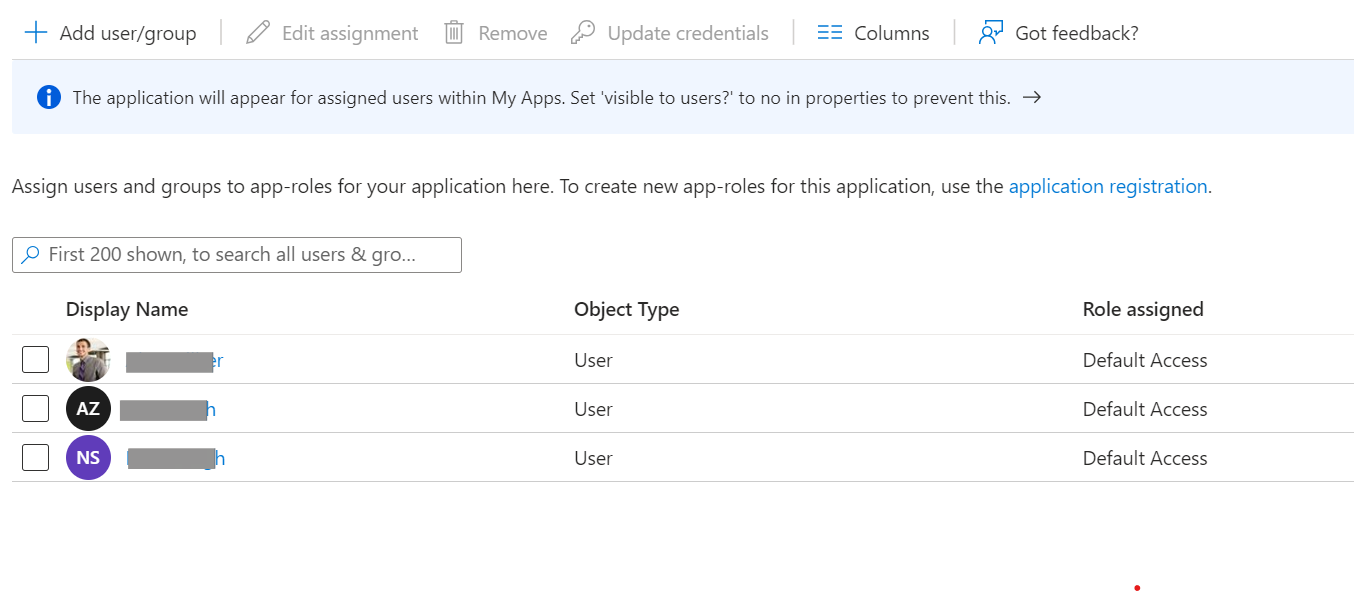
- Click Add user/group.

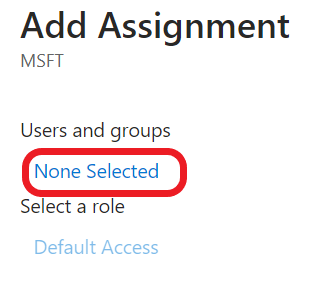
- Click None Selected.

- In the Search box, enter the name of the user and Select the user. The users will be added to the application as follows:



Log in to the Meraki dashboard and follow the steps below to configure SAML-based authentication with Meraki VPN.
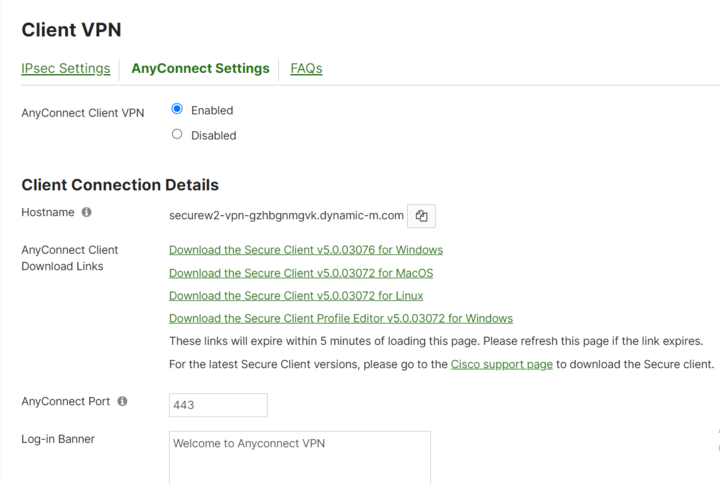
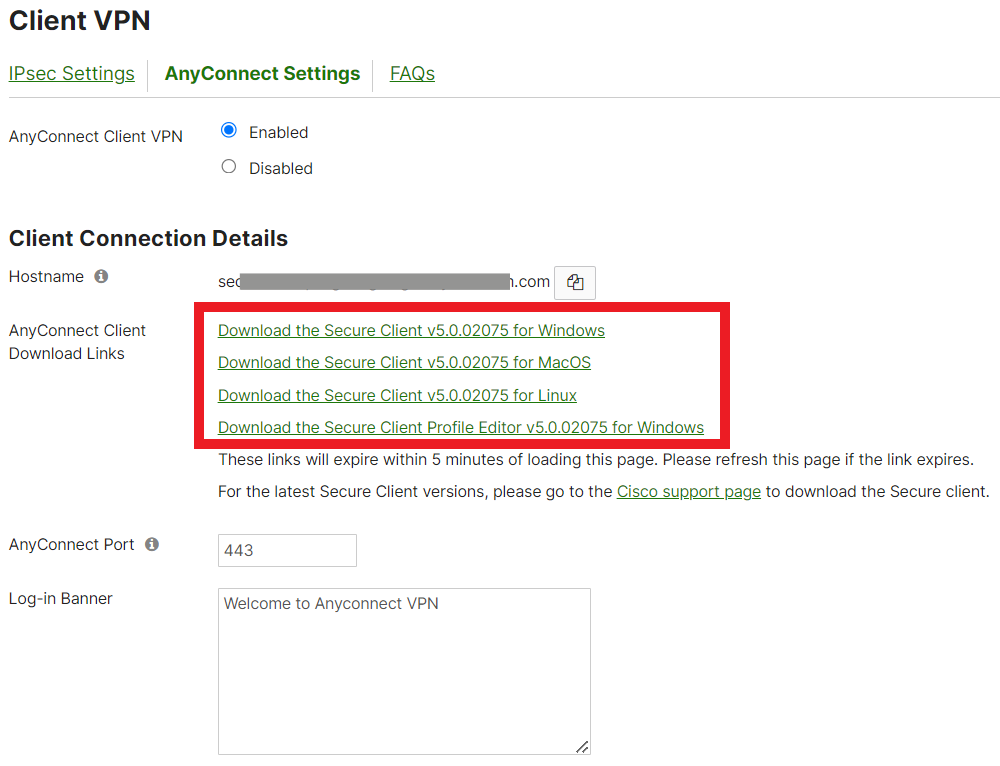
- Under the AnyConnect Settings tab, follow the settings as displayed below in the screenshots:

Some key attributes include:- Select the Enabled button for AnyConnect Client VPN.
- Under Client Connection Details, click on the download link suitable for your OS Platform. The AnyConnect Secure Mobility Client will be downloaded to your device. Please refer to steps 8 and onwards in this section for further configuration.
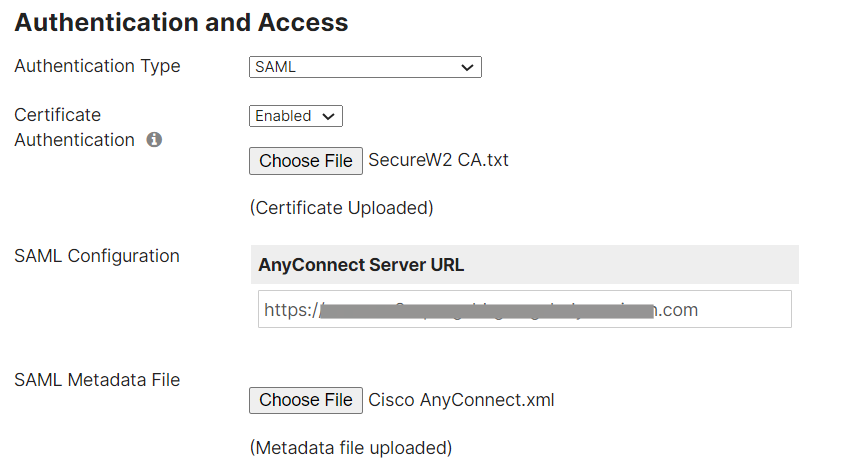
- Under the Authentication and Access section, select Authentication Type as SAML.
NOTE: SAML Authentication is not enabled by default. If you don’t see it in your Meraki Dashboard, you will need to reach out to Meraki Support to request its addition.
- In the Certificate Authentication section, select Enabled.
- Navigate to Dynamic PKI > Certificate Authorities in the JoinNow portal. Download your Root CA and Intermediate CA certificates by clicking on the download button under Functions.
- Open the certificates in a text editor and copy the contents, first from the intermediate certificate, then from the root certificate.
- Paste both certificate keys into a text file. Save the .txt file for upload to Meraki AnyConnect VPN.
- Click Choose File to select the certificate (text file) you created in the previous step.
- Configure your AnyConnect URL – for example https://vtk-qpjgjhmpdh.dynamic-m.com (this URL is different for every network)
(add “:port” to the end of the URL if using a port other than the default port 443)
Please ensure your AnyConnect URL starts with “https://”
- In the SAML Metadata File section, click Choose File. Upload the metadata file saved earlier.

- In the SAML Metadata File section, click Choose File. Upload the metadata file saved earlier.
- In the AnyConnect VPN subnet field, enter the subnet value for your VPN.

- Click Save.
- Navigate to the Downloads folder of your device and select the AnyConnect Secure Mobility Client ZIP package. Run the Setup as administrator.
- After the setup is complete, please open the AnyConnect Secure Mobility Client application.
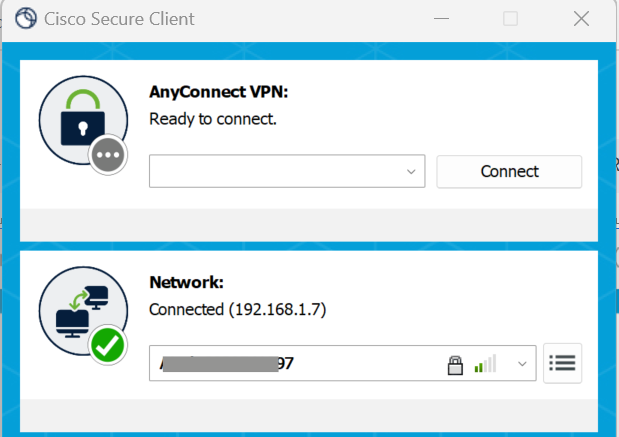
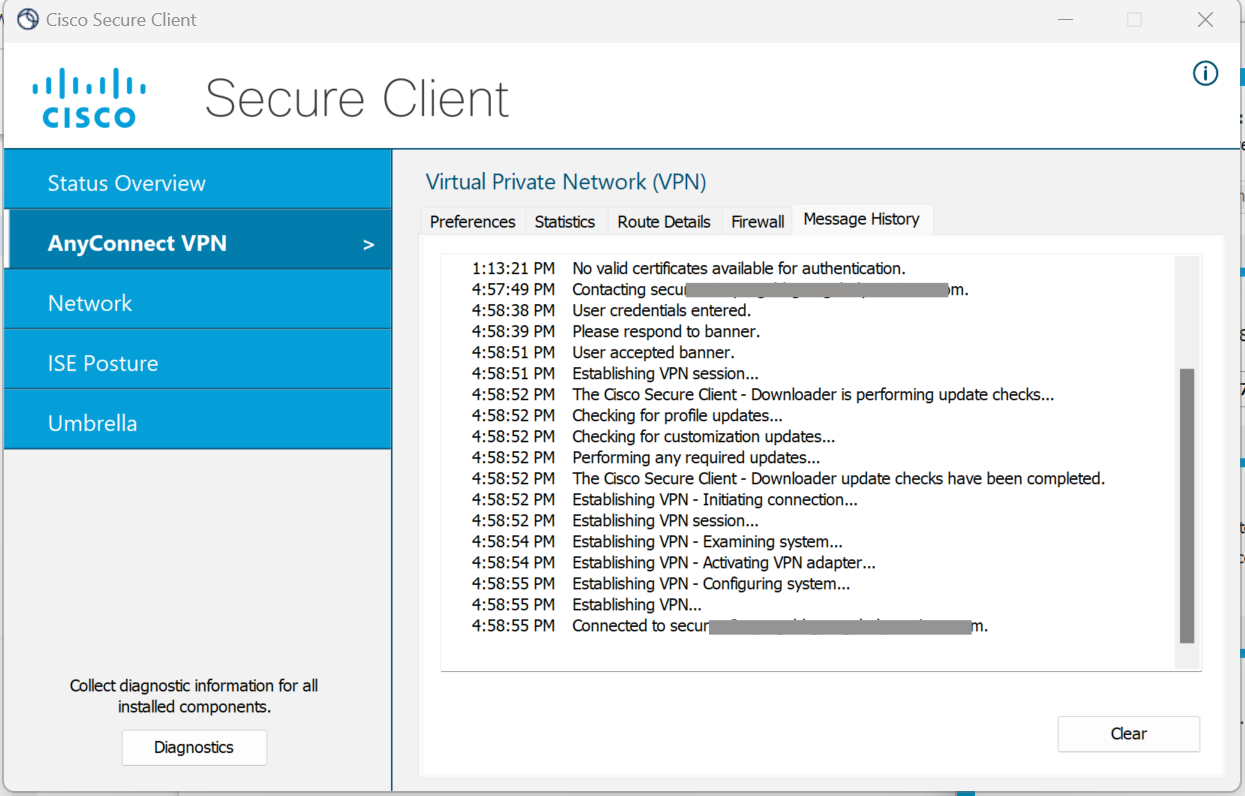
- Under Client Connection Details, copy the URL adjacent to Hostname. Open the Cisco Secure Client and paste the URL in the AnyConnect VPN section. Click Connect.

- A dialog box for entering Username and Password appears. Please enter your Meraki credentials and click Ok.
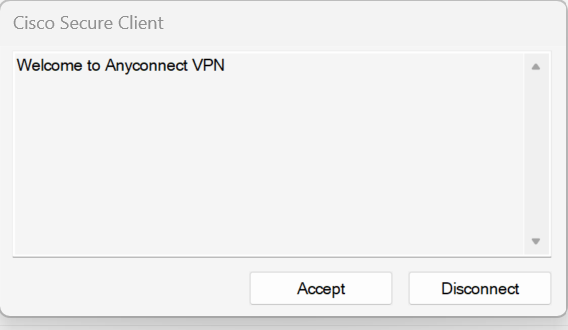
- After successful connection, the Cisco welcome dialog box opens. Click Accept.

- When you click AnyConnect VPN, a widget opens. Click Message History. Upon a successful connection, a success message appears.


The security plan that scales with you.
Our solutions can scale from mid-market to global enterprises. Compare options and see how our solutions protect you from costly breaches and ensure peace of mind.