How to Set Up EAP-TLS Authenticated Wi-Fi Network with Aerohive
Introduction
Implementing a certificate-based 802.1X network using the EAP-TLS authentication protocol may seem intimidating, but the SecureW2 cloud-based solution allows you to easily transition from passwords to certificates with minimal changes needed to your infrastructure.
SecureW2 PKI services enable you to seamlessly set up certificate-based EAP-TLS network authentication, offering far greater security than credential-based authentication. Certificates eliminate over-the-air credential theft and password-related disconnects. No longer will the IT department have to worry about support tickets caused by password changes, and hackers will no longer be able to farm network credentials over the air.Since SecureW2 can work with any Wi-Fi infrastructure, integrating with Aerohive to set up EAP-TLS, certificate-based Wi-Fi authentication for 802.1X, has never been easier. Not only will security be enhanced, but authentication management will be streamlined, as you can remotely identify connection issues using our best-in-class device onboarding software. The guide below shows how to integrate Aerohive with SecureW2 in just a few hours.
Key Points:
Access the Aerohive dashboard to create an Open SSID and direct traffic to the SecureW2 Landing Page, where users can be configured for 802.1X.
Configure the Default RADIUS Server Group by inputting Cloud RADIUS’s IP addresses and Shared Secret from the JoinNow Management Portal.
Paired with Aerohive, SecureW2 PKI, and Cloud RADIUS, these solutions offer opportunities to automate and optimize 802.1X using real-time data from your identity and security systems.
Tech Overview
Configure SecureW2 PKI Services:
Configuring and managing a PKI is not a simple task, so SecureW2 provides a cloud PKI to streamline the process. Our turnkey PKI services include all the necessary tools to secure and distribute certificates to 802.1X network users.
Configure a Secure SSID as a WPA2-Enterprise EAP-TLS:
Configuring and managing EAP-TLS was historically mislabeled as more work than it’s worth. Today, SecureW2 PKI and Device Onboarding solutions simplify the process so you can set up the certificate-based authentication on your network in a few short hours.
Add the SecureW2 RADIUS Server to the Secure SSID:
SecureW2 PKI Services integrate with all major RADIUS vendors, but our Cloud RADIUS is ideal for those without existing infrastructure.
Configure the Onboarding SSID and Landing Page:
Users must navigate to the SecureW2 Onboarding Solution to enroll and configure their devices for certificates. A common solution is the use of an onboarding SSID. Once connected, users will be redirected to a customizable landing page that guides them through the onboarding process.
To complete this setup, you will need to have configured:
A SecureW2 RADIUS Server.
A SecureW2 Network Profile.
A Core Provider.
Configuring the WPA2-Enterprise Network Policy
In the Aerohive dashboard, click Configure > Network Policies > Edit (the Edit icon for the SecureW2 Policy).
Click the Wireless Networks tab and click Add > All other Networks (Standard).
In the Name (SSID) and Broadcast Name fields, enter a name for the network.
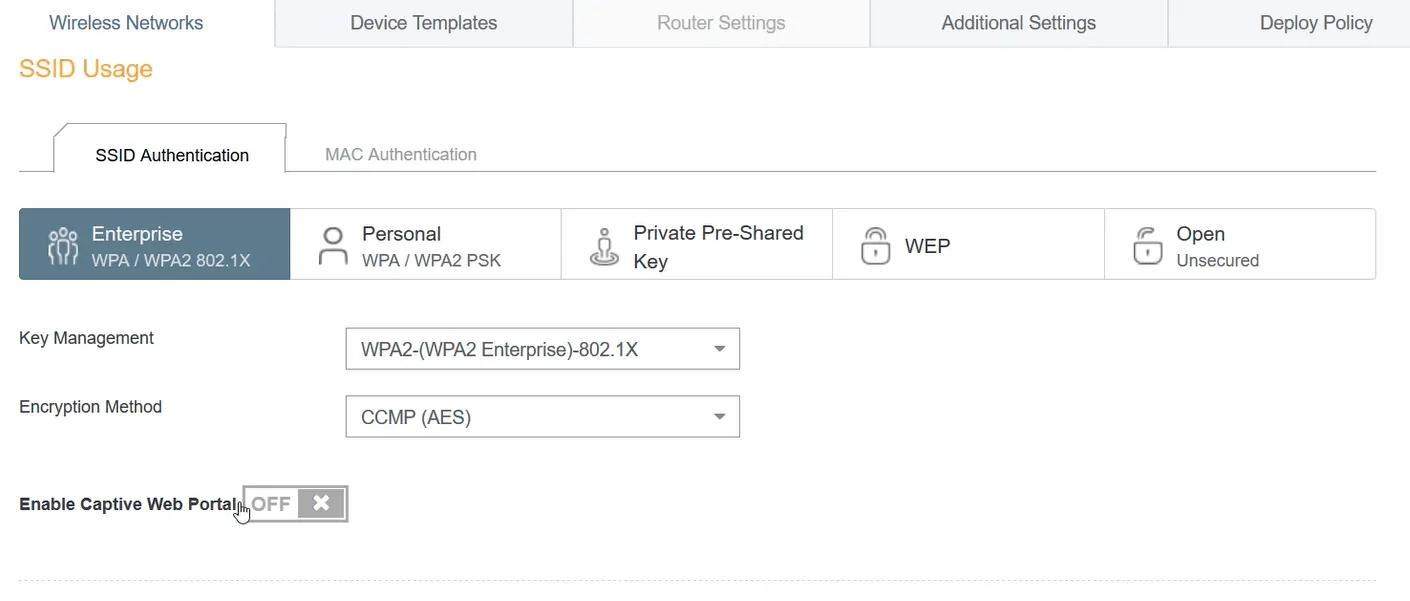
In the SSID Usage section, ensure that Enterprise WPA/WPA2 802.1X is the selected SSID Authentication:
Key Management should be set to WPA2-(WPA2 Enterprise)-802.1X.
Encryption Method should be set to CCMP (AES).
Enable Captive Web Portal should be set to OFF.
Integrating SecureW2 Cloud RADIUS with Aerohive
Next to Default RADIUS Server Group, click the + symbol to add a RADIUS server.
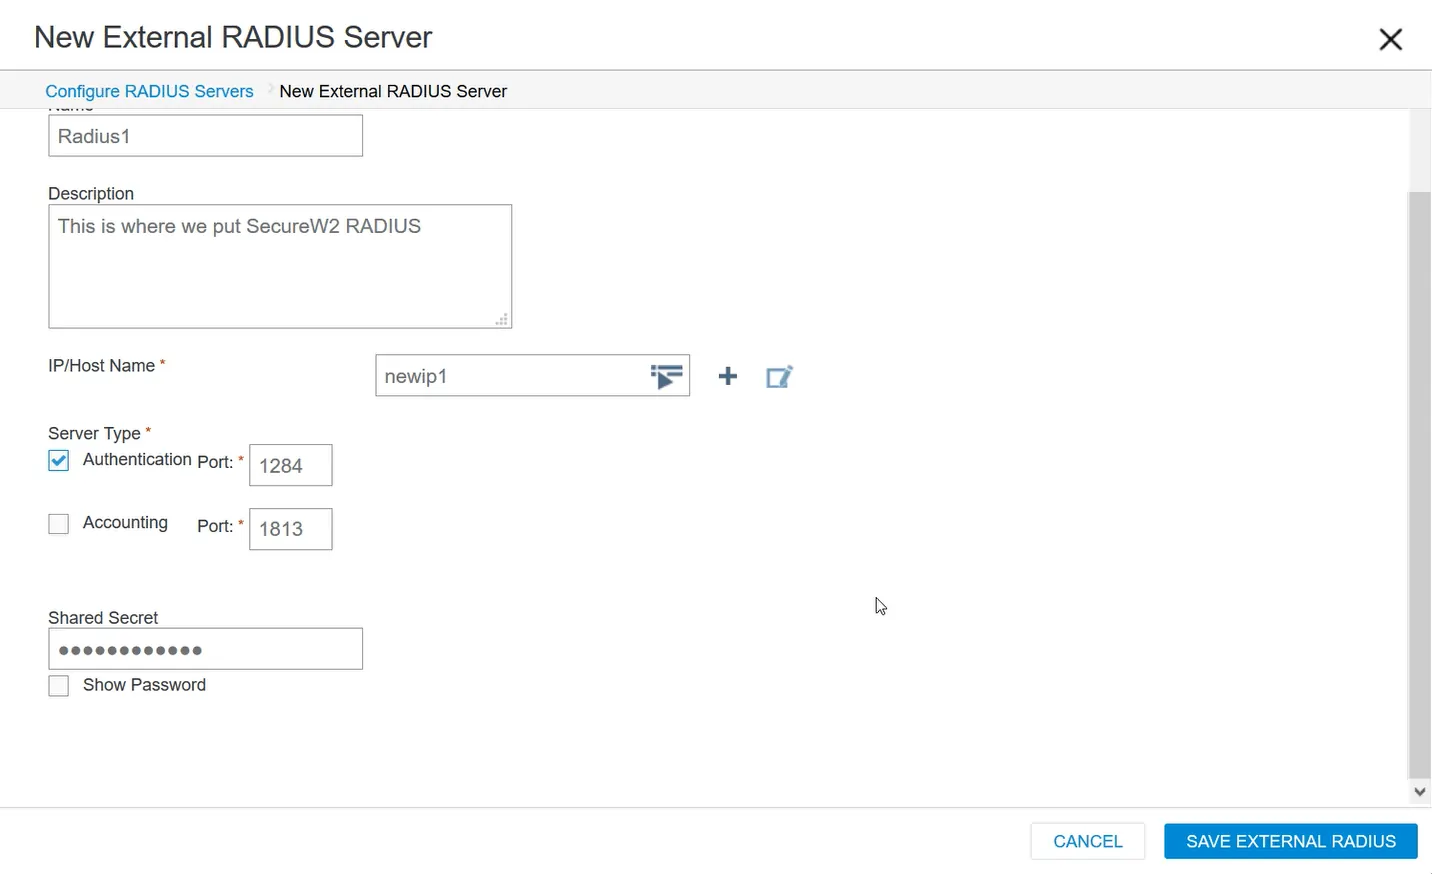
Enter a Name (and Description, if desired), click Add, and select External RADIUS Server.
Enter a Name:
This is where we will connect the SecureW2 RADIUS.
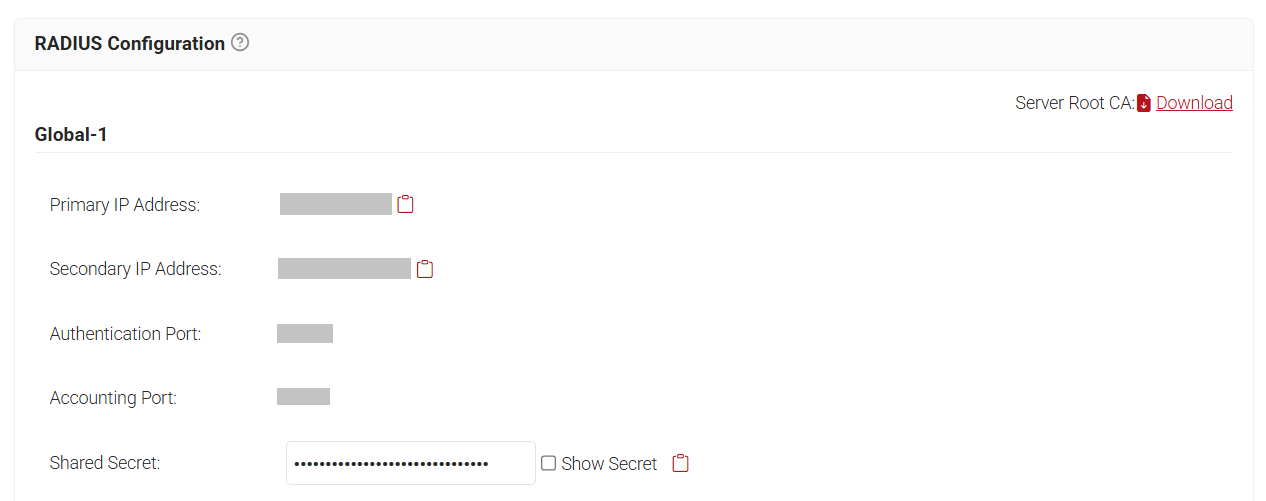
Navigate to the JoinNow Management Portal, then RADIUS > RADIUS Configuration.
Copy the Primary IP Address, then navigate back to the Aerohive dashboard where we were configuring RADIUS.
In the IP/Host Name field, click the + symbol and select IP Address.
Enter a Name and paste the Primary IP Address in the IP Address field, and click SAVE IP.
Navigate to the JoinNow Management Portal, copy the Authentication Port, then paste it into the Authentication Port field.
Ensure that the Authentication Port is checked and the Accounting Port is unchecked.
Do the same for the Shared Secret in the JoinNow Management Portal.
Click SAVE EXTERNAL RADIUS, and you will be directed back to the Configure RADIUS Servers window.
Click Add and select External RADIUS Server.
Enter a new name in the Name field and repeat steps 4-10, copy and paste the Secondary IP Address in the IP Address field instead of Primary IP Address.
In the Configure RADIUS Servers window, click Save RADIUS.
In the Authenticate via RADIUS Server section, you will see both configured RADIUS servers.
Click SAVE.
Click the Deploy Policy tab, select the checkbox for the device listed, then navigate to Upload > Perform Update.
Secure Your 802.1x Aerohive Network with EAP-TLS
Once completed, network users will be able to securely connect to a WPA2-Enterprise network. An organization’s risk of credential leaks, MITM attacks, and Evil Twin attacks will drop dramatically with the security benefits of certificates. Network administrators will be able to remotely diagnose potential connection issues for users on the network and increase visibility by tying each user and device to every network connection.
This setup for a certificated-based authentication network can be completed in as little as hours. If you’d like to try SecureW2 or have any questions about our integration with Aerohive, drop us a line!
We have affordable solutions for organizations of all sizes. Check out our pricing page to see how you can bring your 802.1X WPA2-Enterprise network to the next level.
Aerohive is either a registered trademark or trademarks of Aerohive Networks in the United States and/or other countries. Other trademarks, logos, and service marks used in this site are the property of SecureW2 or other third parties.