SecureW2 recommends configuring a dedicated Intermediate CA for this integration, so it can be identified and managed separately from other Certificate Authorities (CAs).
To create a new Intermediate CA, perform the following steps:
- Log in to the JoinNow Management Portal.
- Navigate to Dynamic PKI > Certificate Authorities.
- Click Add Certificate Authority.

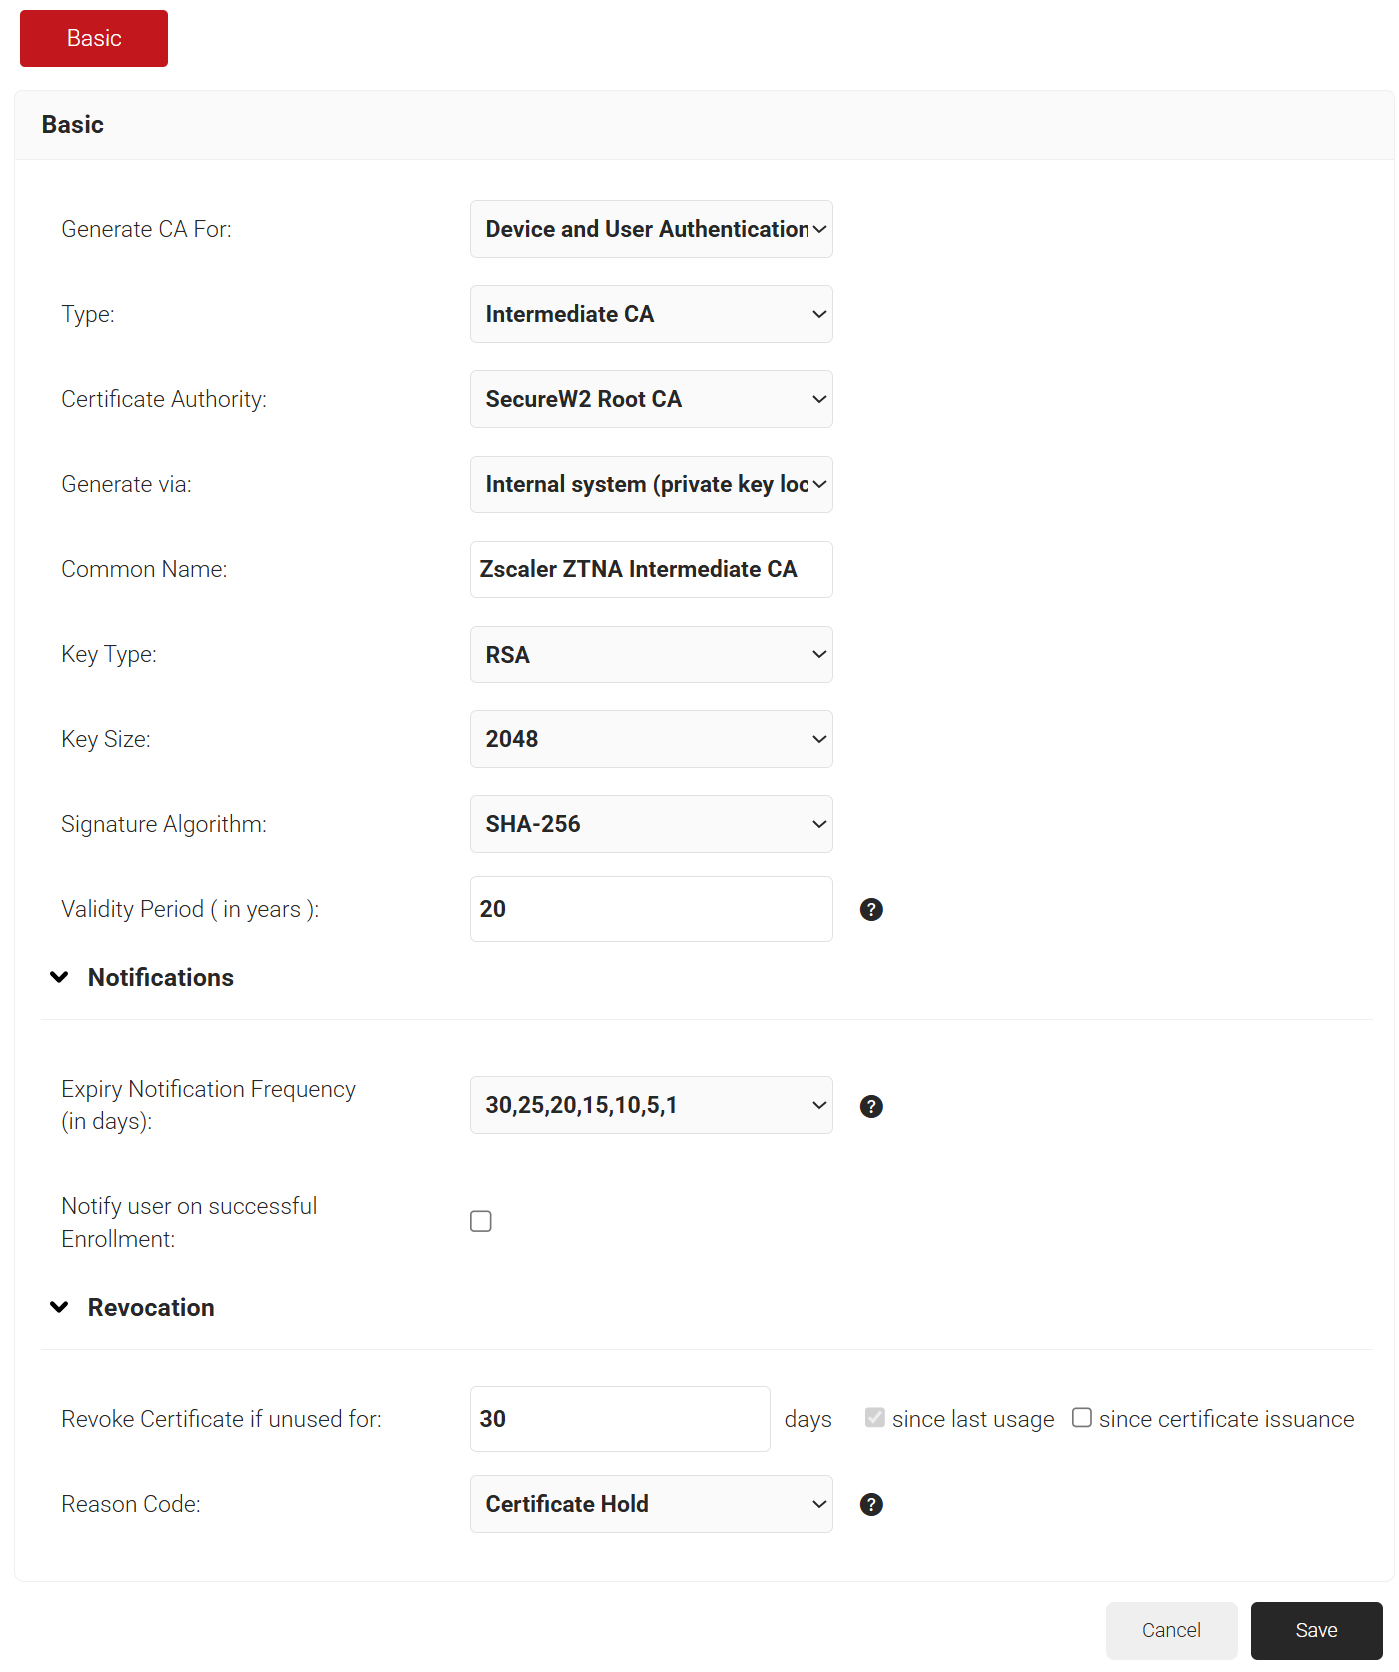
- In the Basic section, from the Generate CA For drop-down list, select the Device and User Authentication option to authenticate devices.
- From the Type drop-down list, select Intermediate CA.
- From the Certificate Authority drop-down list, select the default Root CA provided by your organization.
- For the Common Name field, enter a name that identifies this CA.
- From the Key Size drop-down list, select 2048 for the CA certificate key pair.
- From the Signature Algorithm drop-down list, select the signature algorithm for the certificate signing request. The option available is SHA-256.
- In the Validity Period field, enter the validity period for the Intermediate CA in terms of the number of years.
- In the Notifications section:
- From the Expiry Notification Frequency (in days) drop-down list, select the frequency interval for which a certificate expiration notification should be sent to users.
- Select the Notify user on successful Enrollment checkbox to notify users after enrollment.
- In the Revocation section:
- In the Revoke Certificate if unused for field, select the number of days after which an unused certificate can be revoked.
- Since last usage – Select this checkbox to revoke the certificate after a specified number of days if it remains unused.
- Since certificate issuance – Select this checkbox to revoke the certificate after a specified number of days after it is issued.
- From the Reason Code drop-down list, select any one of the following reasons for which the certificate is revoked.
- Certificate Hold
- AA Compromise
- Privilege Withdrawn
- Unspecified
- In the Revoke Certificate if unused for field, select the number of days after which an unused certificate can be revoked.
- Click Save. This generates the new intermediate CA.


A certificate template defines how information is encoded in a certificate issued by the Certificate Authority (CA).
To create a certificate template, perform the following steps:
- Navigate to Dynamic PKI > Certificate Authorities.
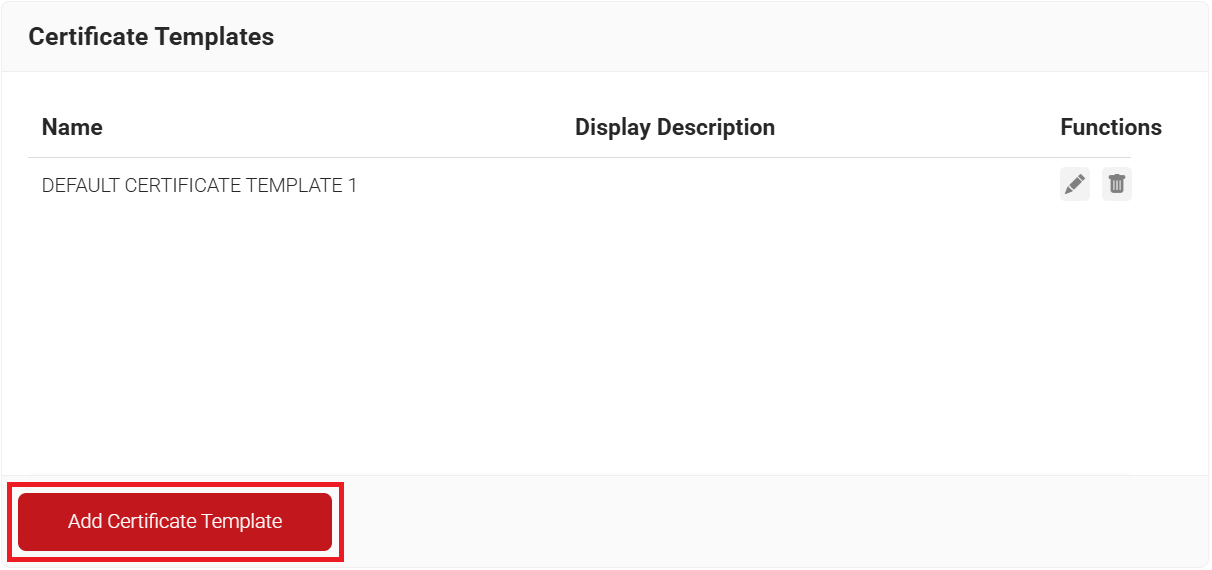
- Scroll to the Certificate Templates section and click Add Certificate Template.

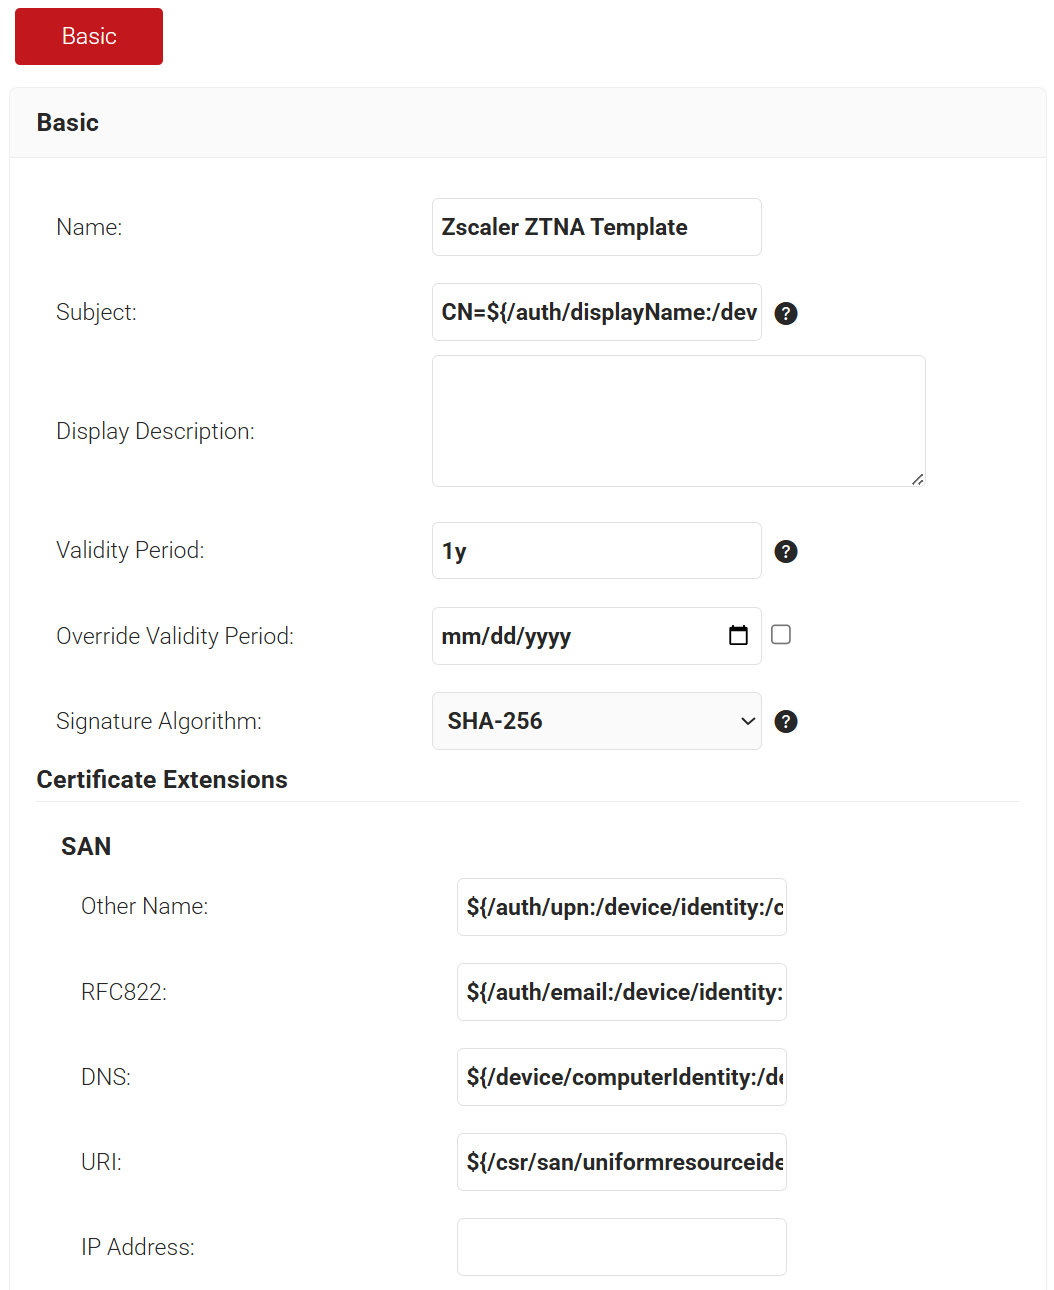
- In the Basic section, enter the name of the certificate template in the Name field.
- In the Subject field, retain the default value CN=${/auth/displayName:/device/identity:/csr/subject/commonname}.
- In the Display Description field, enter a suitable description for the certificate template.
- In the Validity Period field, type the validity period of the certificate (based on the requirement).
- To override the Validity Period attribute, select the Override Validity Period checkbox and choose an end date from the date picker to set a hard-coded expiry date for a certificate.
- From the Signature Algorithm drop-down list, select SHA-256 as the signature algorithm for the certificate signing request.
- In the SAN section, retain the default values unless your organization requires a specific Subject Alternative Name format.

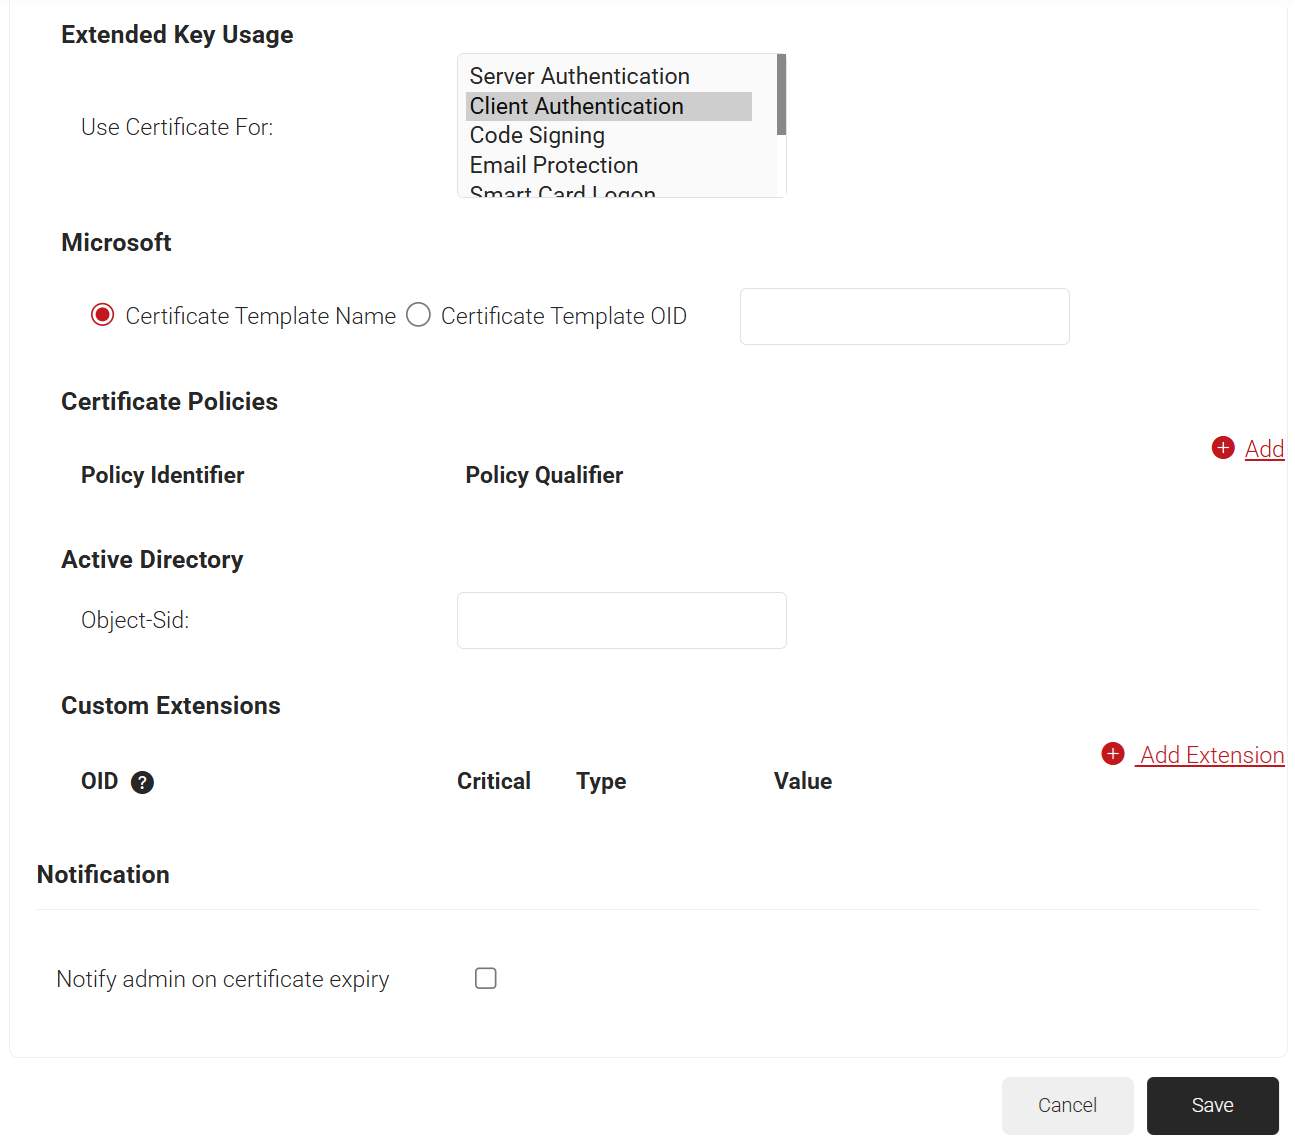
- In the Extended Key Usage section, from the Use Certificate For list, select Client Authentication. This is required for Zscaler to accept the certificate as a client certificate during posture evaluation.
- In the Notification section, select the Notify admin on certificate expiry checkbox to send certificate expiry email notifications to all Admins.

- Click Save.
After creating the Intermediate CA and Certificate Template, create a client certificate. This certificate is installed on the endpoint and is used by Zscaler Client Connector during device posture evaluation.
To create a client certificate, perform the following steps:
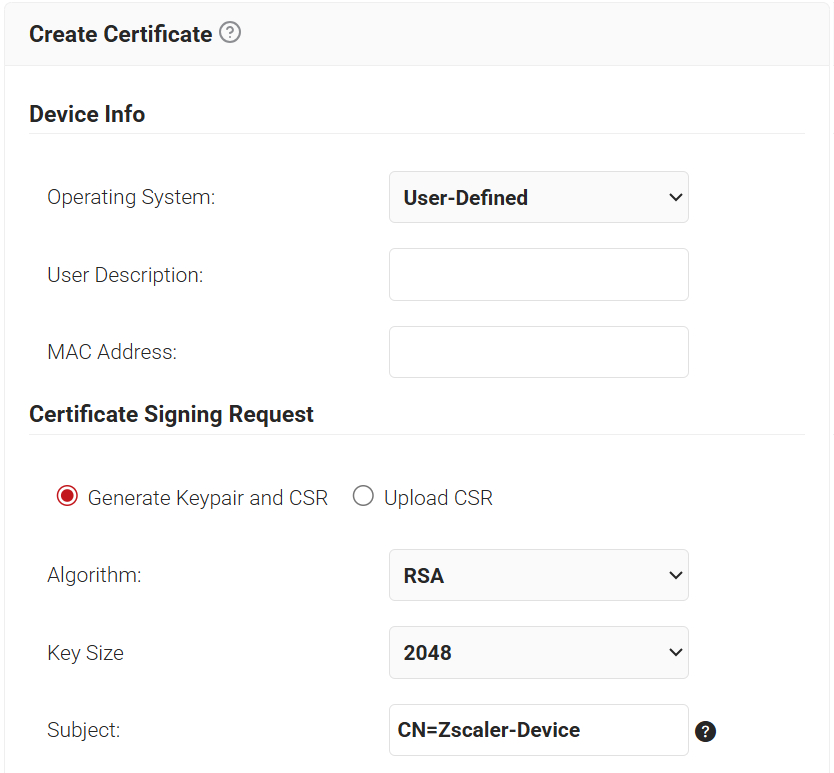
- Navigate to Dynamic PKI > Create Certificate.
- In the Device Info section, select the device’s operating system from the Operating System drop-down list.

- In the Certificate Signing Request section:
- Select Generate Keypair and CSR.
- In the Subject field, type the client certificate’s common name of the Client Certificate.
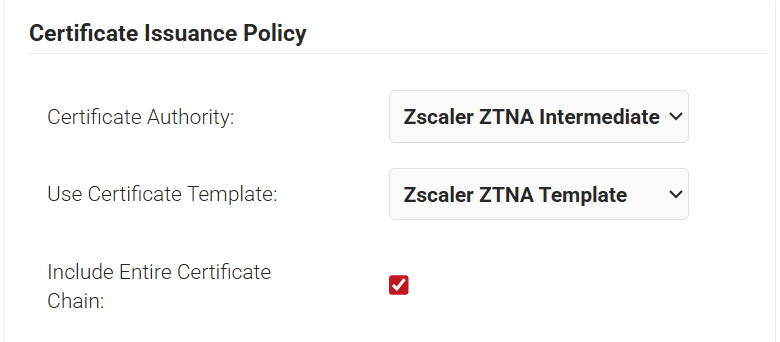
- In the Certificate Issuance Policy section:
- From the Certificate Authority drop-down list, select the Intermediate CA created in the Creating an Intermediate CA section.
- From the Use Certificate Template drop-down list, select the Client Template created in the Creating a Certificate Template section.
- Select the Include Entire Certificate Chain option.

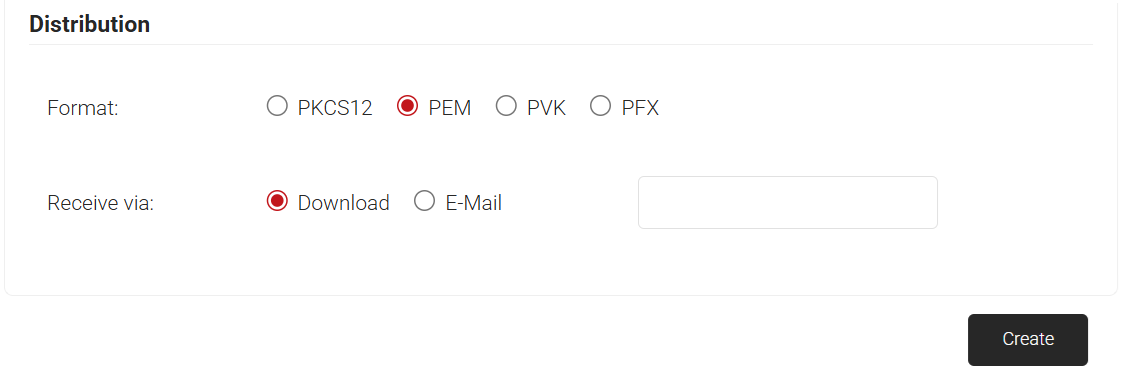
- In the Distribution section:
- In the Format field, select PEM.
- In the Receive via field, select Download.

- Click Create.
After the client certificate is created, deploy it to the target endpoints. The client certificate must be installed in the device’s certificate store before Zscaler Client Connector can validate the device using the configured Client Certificate posture profile.
Zscaler needs a copy of the CA certificate to validate that a device’s client certificate chains up to a CA it trusts.
To export the CA certificate, perform the following steps:
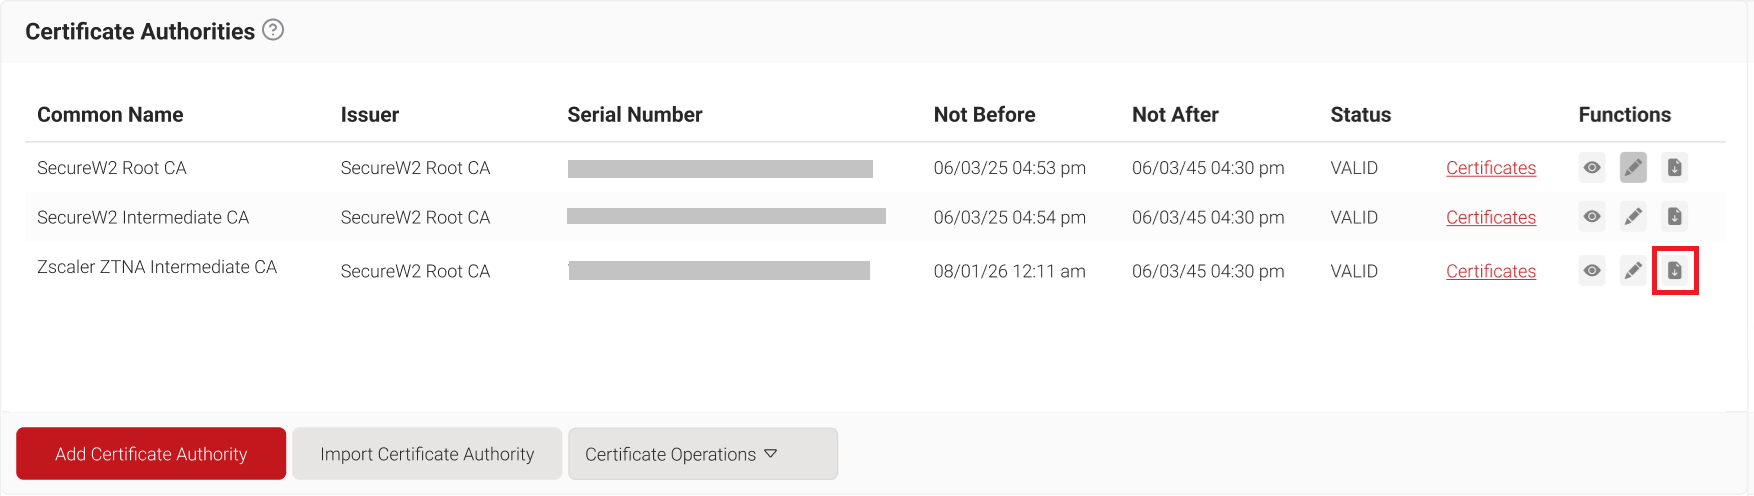
- Navigate to Dynamic PKI > Certificate Authorities.
- Select the Intermediate CA created in the Creating an Intermediate CA section and download the CA certificate.

A Device Posture Profile defines the criteria Zscaler Client Connector evaluates on a device. For the Client Certificate posture type, the CA certificate is uploaded directly as part of creating the profile. There is no separate certificate-upload step beforehand.
To create the Device Posture Profile, perform the following steps:
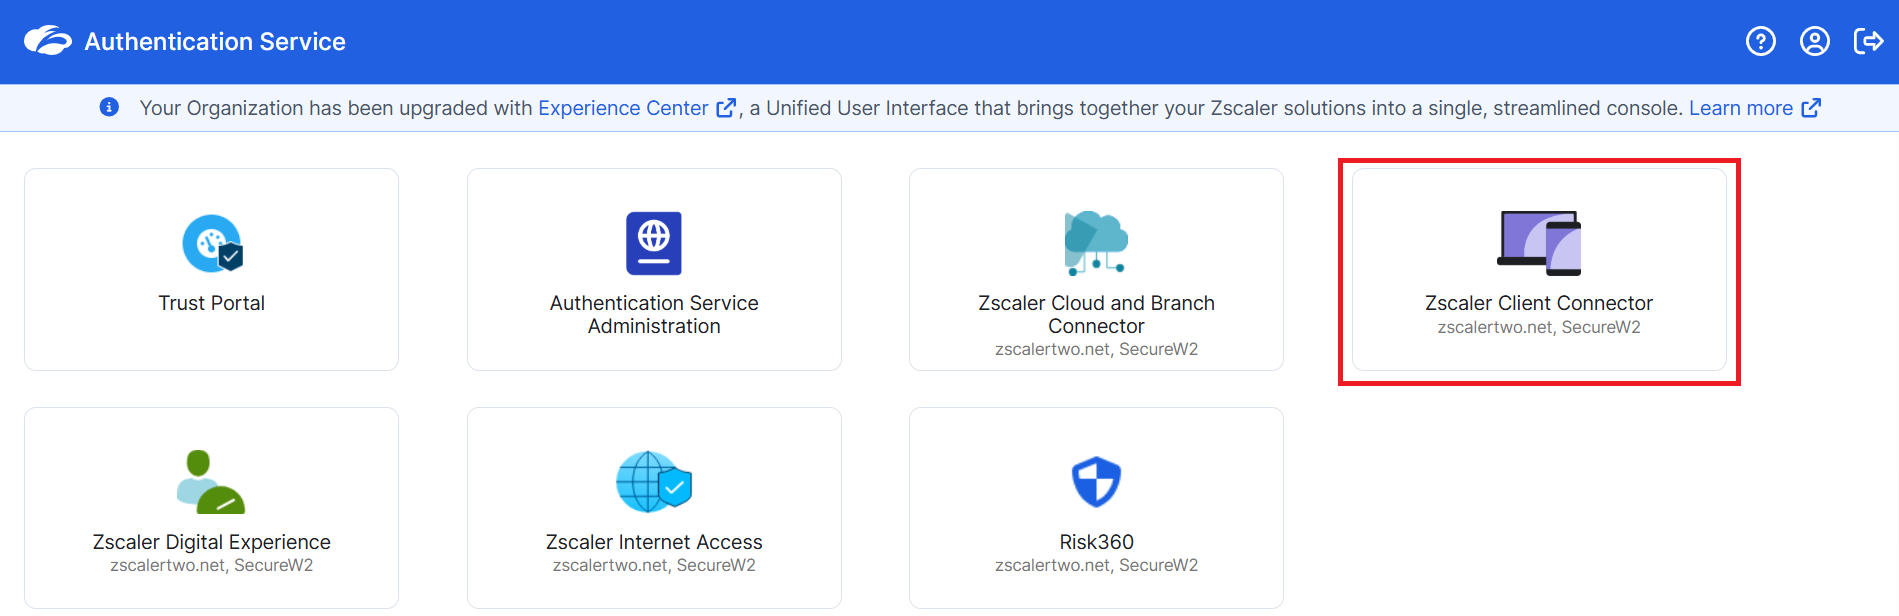
- From the Authentication Service landing page, click Zscaler Client Connector.

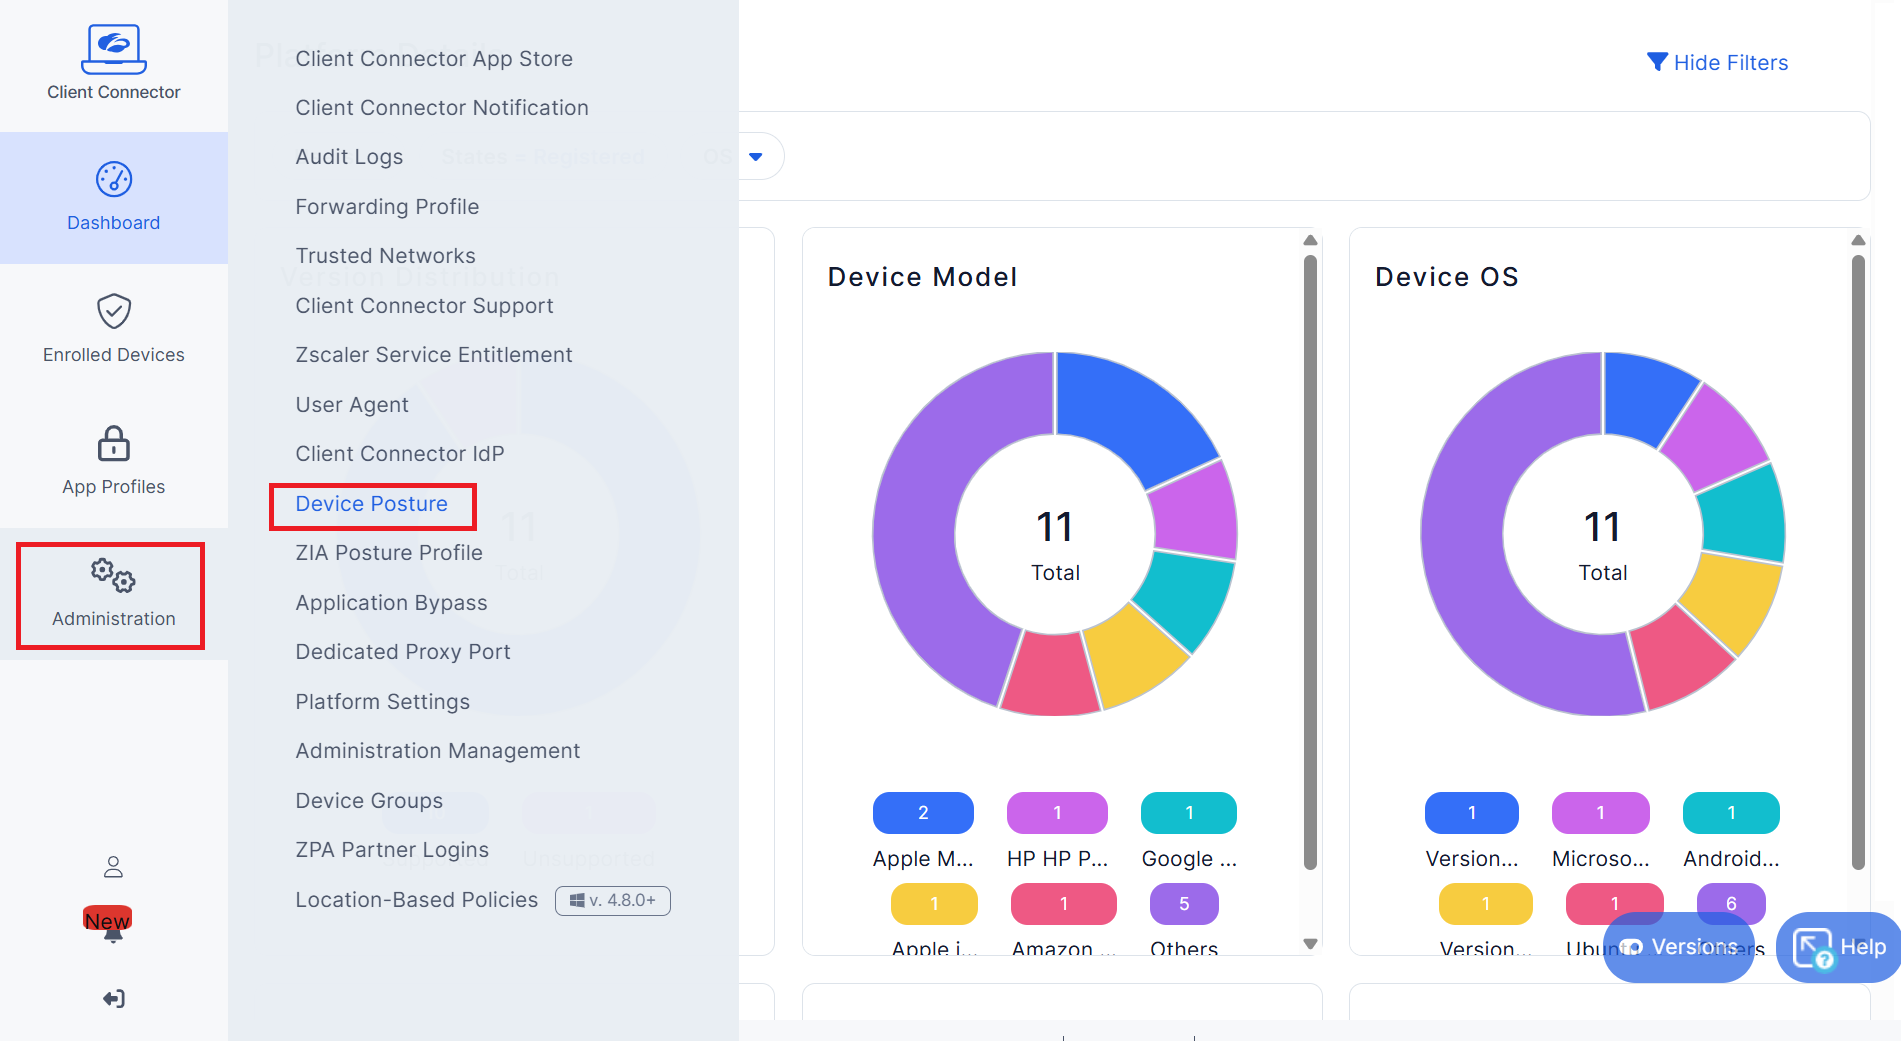
- In the left navigation, click Administration and select Device Posture.

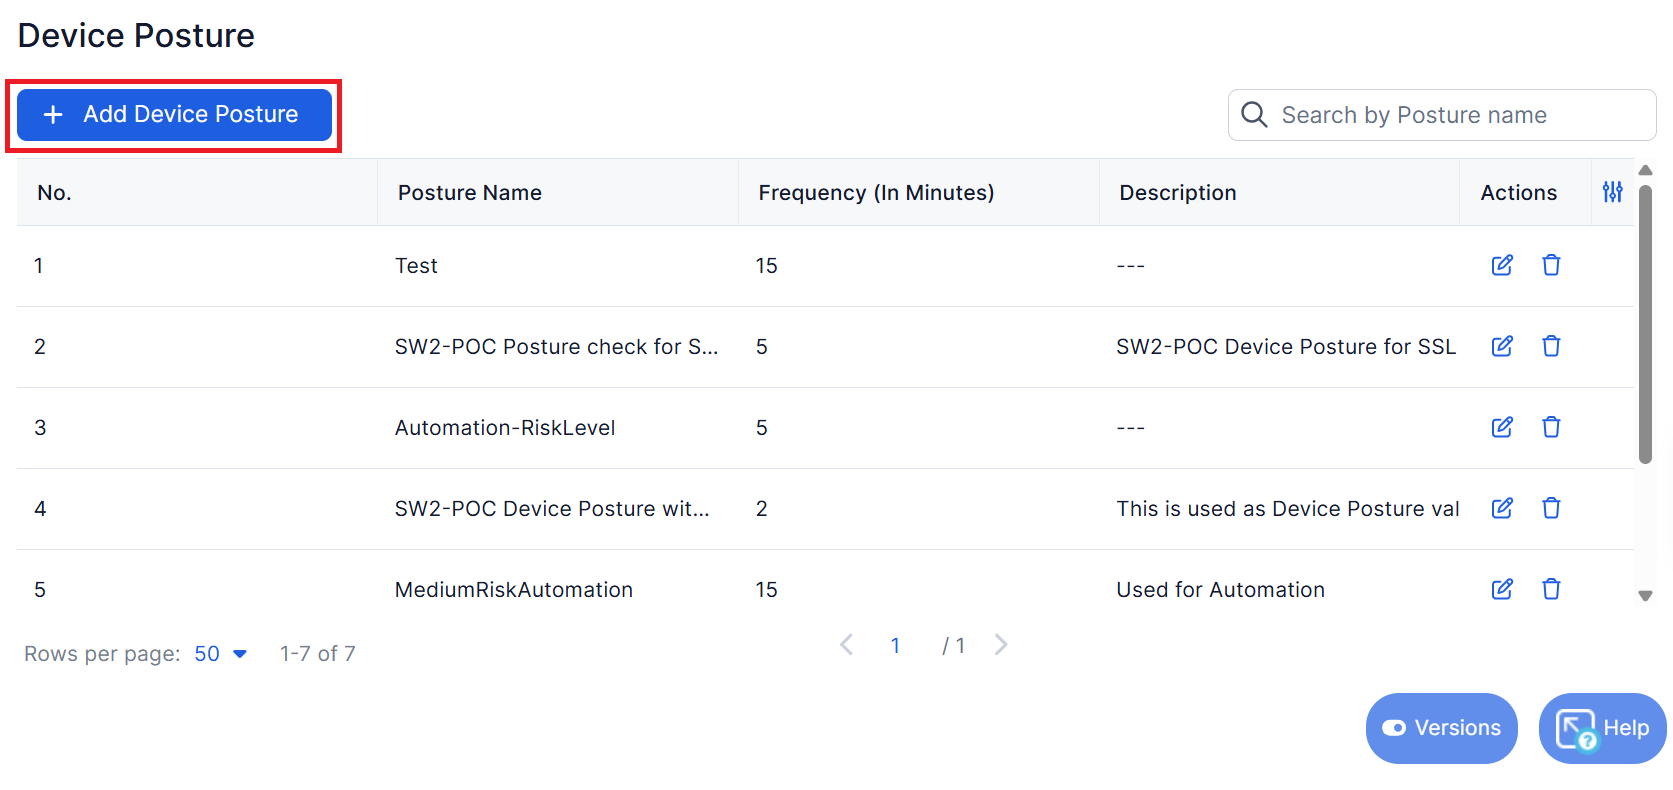
- Click Add Device Posture.

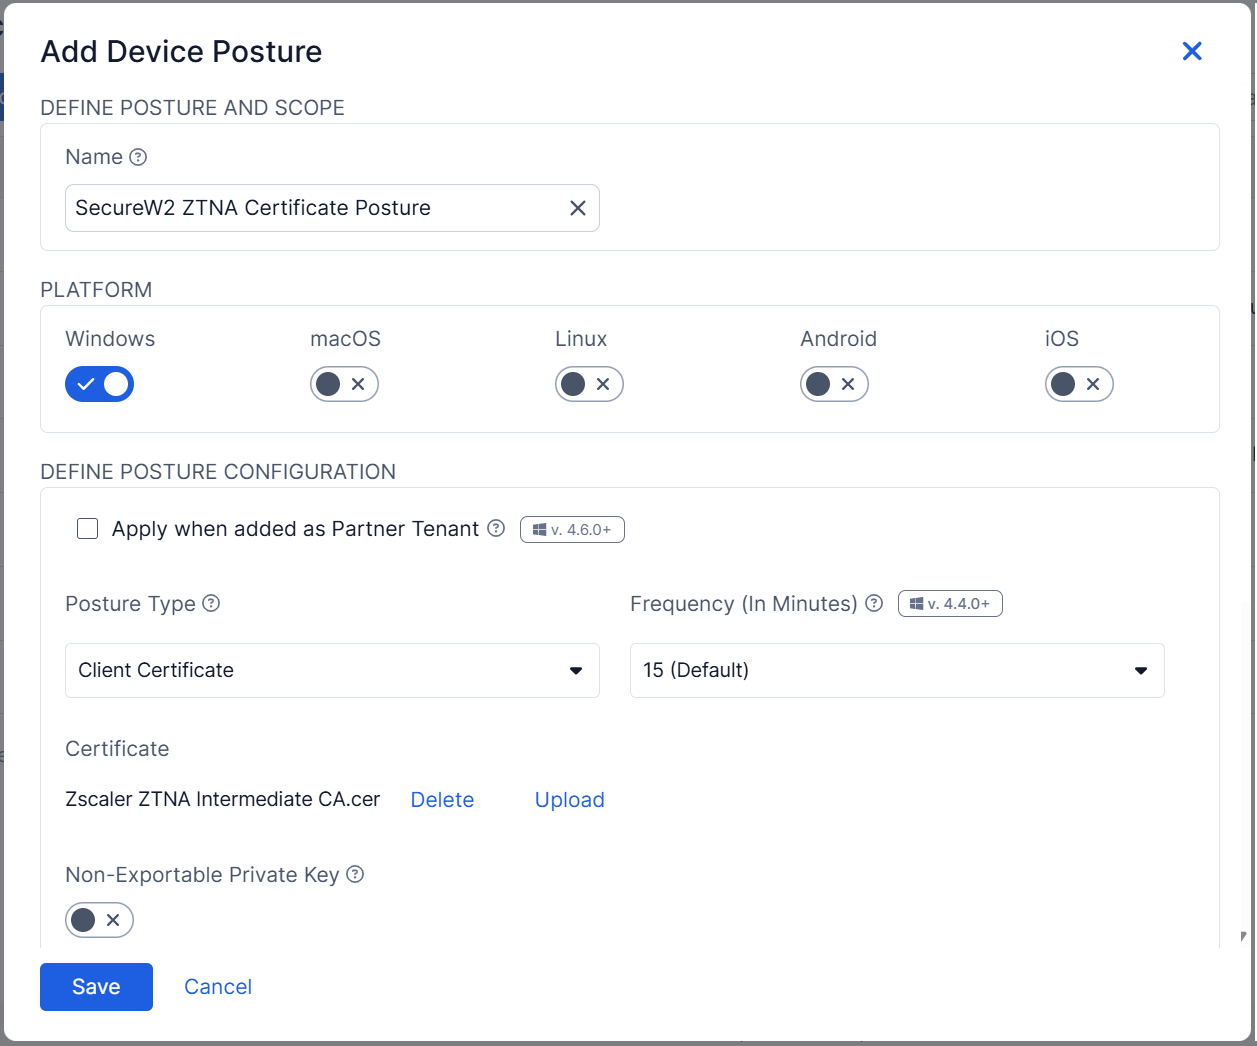
- Configure the posture profile:
- In the Name field, enter a name for the posture profile.
- Under PLATFORM, enable the toggle for each platform this profile applies to.
- From the Posture Type drop-down list, select Client Certificate.
- From the Frequency (In Minutes) drop-down list, select how often the posture check is re-evaluated.
- Under Certificate, click Upload and select the SecureW2 CA certificate exported in the Exporting the CA Certificate section, so Zscaler knows which issuing CA to trust.
- Click Save.