Before an AI agent can enroll for an SVID via ACME, you need to create a pre-authorized Server Certificate Enrollment token with External Account Binding (EAB). This token allows the ACME client (acme.sh) to authenticate with JoinNow and request a certificate on behalf of the agent.
To create an ACME (Pre-authorized) Server Certificate Enrollment token, perform the following steps:
- Log in to the JoinNow Management Portal.
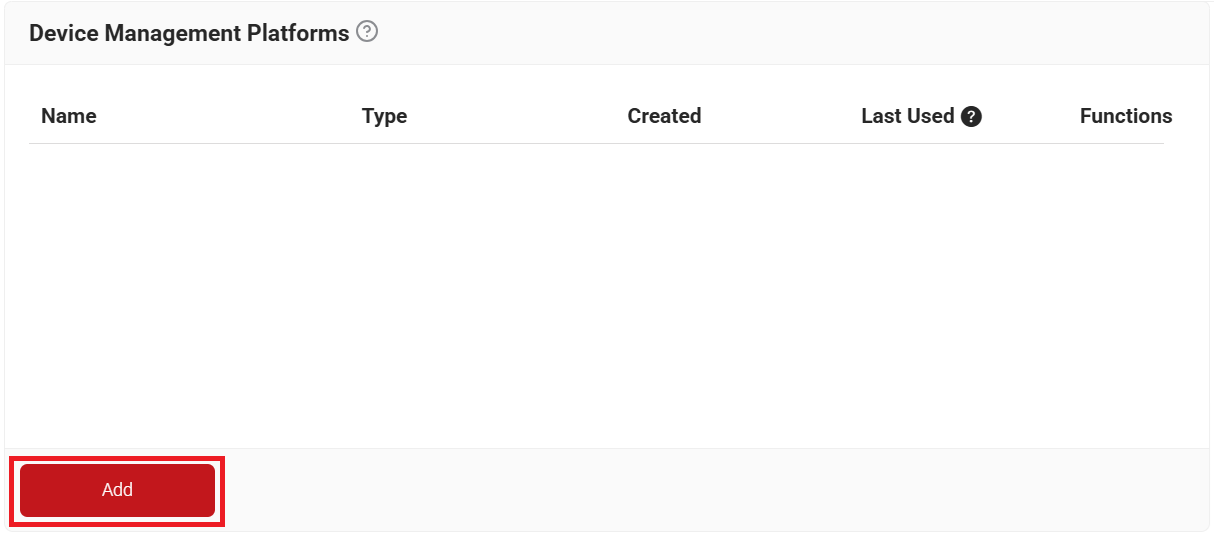
- Navigate to Integration Hub > Device Management Platforms.
- Click Add.

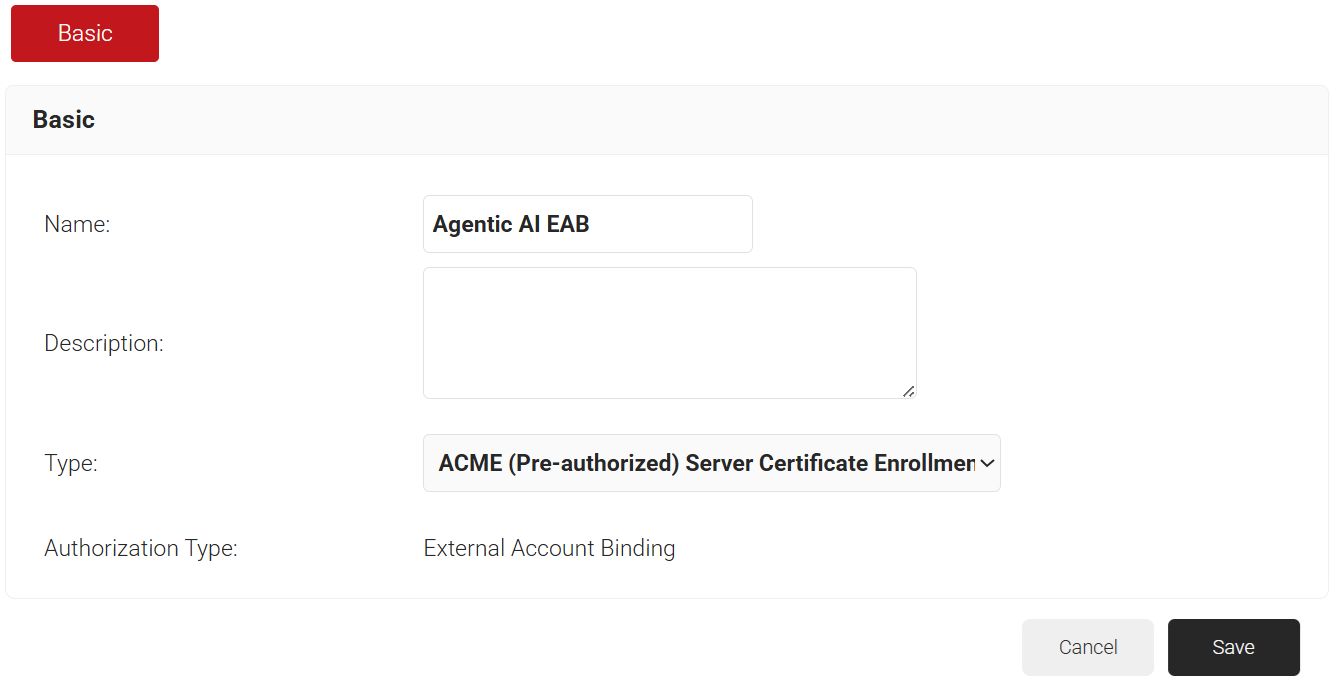
- In the Basic section, enter the name of the token in the Name field.
- In the Description field, enter the description for the token.

- From the Type drop-down list, select ACME (Pre-authorized) Server Certificate Enrollment Token.
- Click Save. A .csv file downloads containing the Key ID, HMAC Key, and Server URL. You’ll use these values to install the certificate on AI agents via the acme.sh client, using this EAB token.
SecureW2 supports any platform you configure as the lookup source to verify AI agent devices during enrollment. CrowdStrike is featured throughout this guide to illustrate the setup. Configuring CrowdStrike as a Security Vendor allows SecureW2 to retrieve the device’s system_serial_number attribute, which is used to populate the SPIFFE URI in the issued certificate.
To create a CrowdStrike security vendor, perform the following steps:
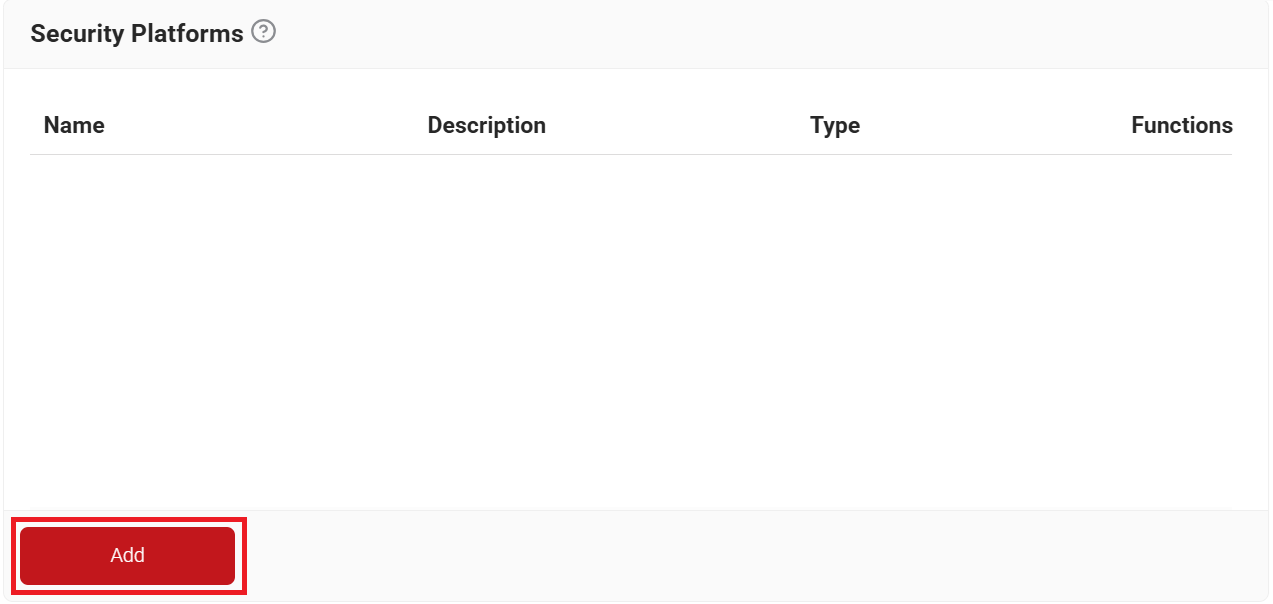
- Navigate to Integration Hub > Security Platforms.
- Click Add.

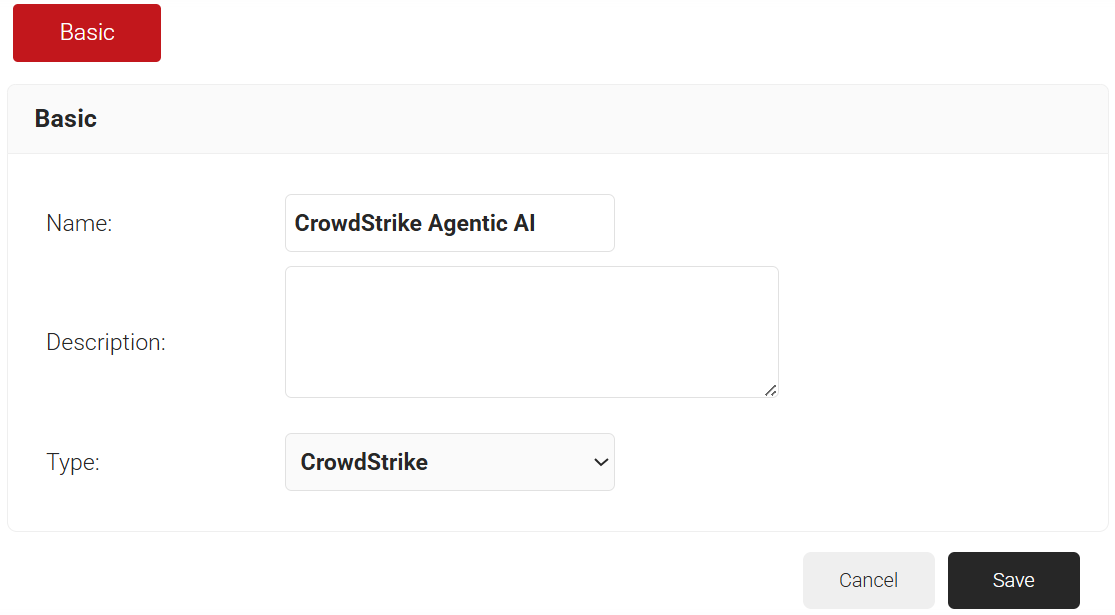
- In the Basic section, enter the name of the security vendor in the Name field.
- In the Description field, enter the description for the security vendor.

- Click Save. The page refreshes, and the Configuration, Risk Configuration, and Attribute Mapping tabs are displayed.
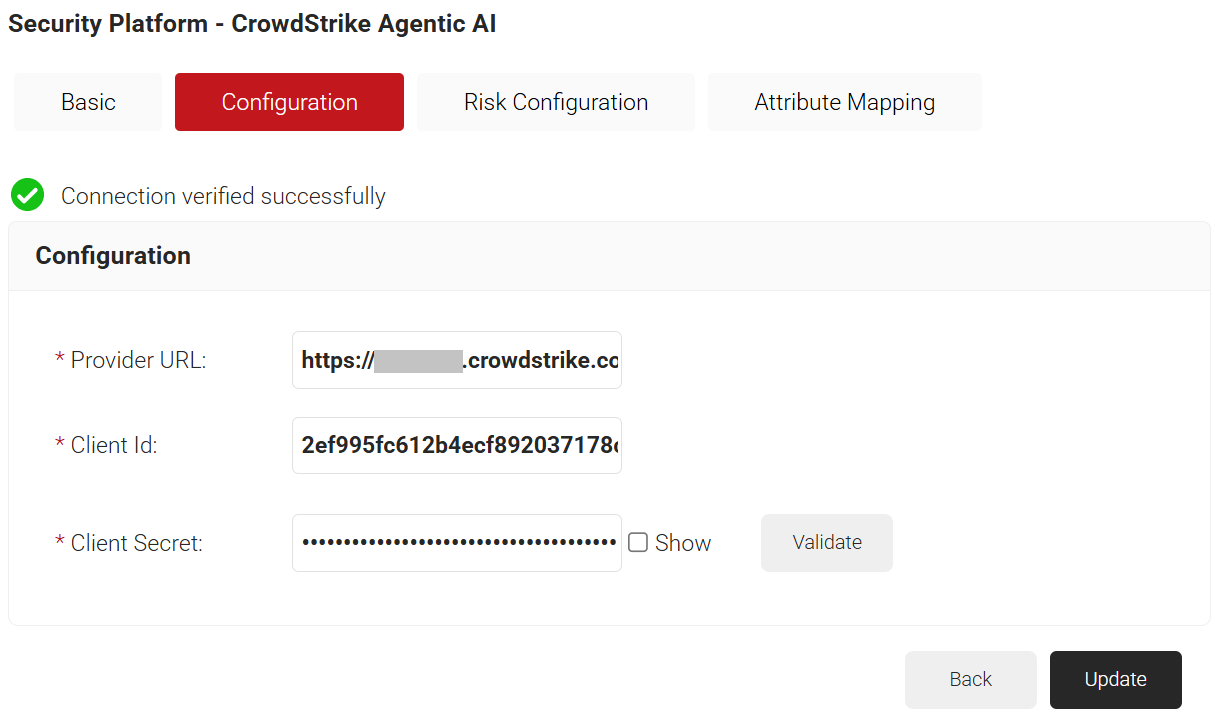
This section describes how to configure the connection settings for the CrowdStrike security vendor. You’ll provide the Provider URL, Client ID, and Client Secret obtained from the CrowdStrike console, then validate the connection to ensure JoinNow can communicate with CrowdStrike.
To establish the CrowdStrike integration, perform the following steps:
- Select the Configuration tab:
- In the Provider URL field, enter the base URL obtained from the CrowdStrike console.
- In the Client ID field, enter the client ID obtained from the CrowdStrike console.
- In the Client Secret field, enter the secret obtained from the CrowdStrike console.
- Click Validate to check for a successful connection.

By default, the JoinNow Management Portal provides predefined risk scores and risk levels. You can create a new risk score to define custom risk thresholds based on your business requirements.
To create a new risk score, perform the following steps:
- Select the Risk Configuration tab.
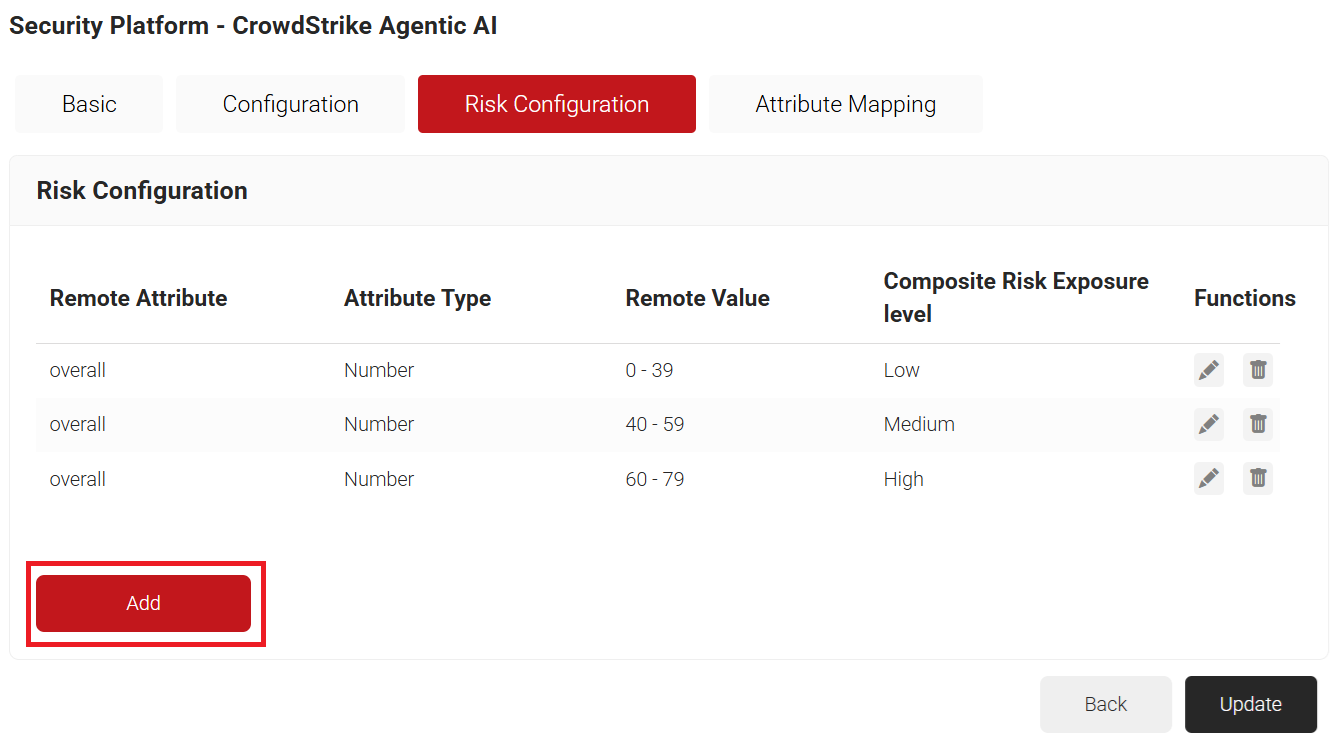
- On the Risk Configuration page, click Add.

- In the Remote Attribute field, the overall option is selected by default. The CrowdStrike security vendor specifically uses this attribute to return the risk score value from the Overall assessment section in the CrowdStrike console to the JoinNow Management Portal.
- In the Attribute Type field, the type of risk score value returned by the CrowdStrike security vendor to the JoinNow Management Portal is displayed. The default value displayed is the Number type.
- In the Remote Value field, enter the risk score range for the required risk level (1-100).
- From the Composite Risk Exposure level drop-down list, select the required risk level.
- Click Next.
To modify a default risk score instead of creating a new one, click the edit icon for the corresponding remote attribute on the Risk Configuration page and follow the same steps as above.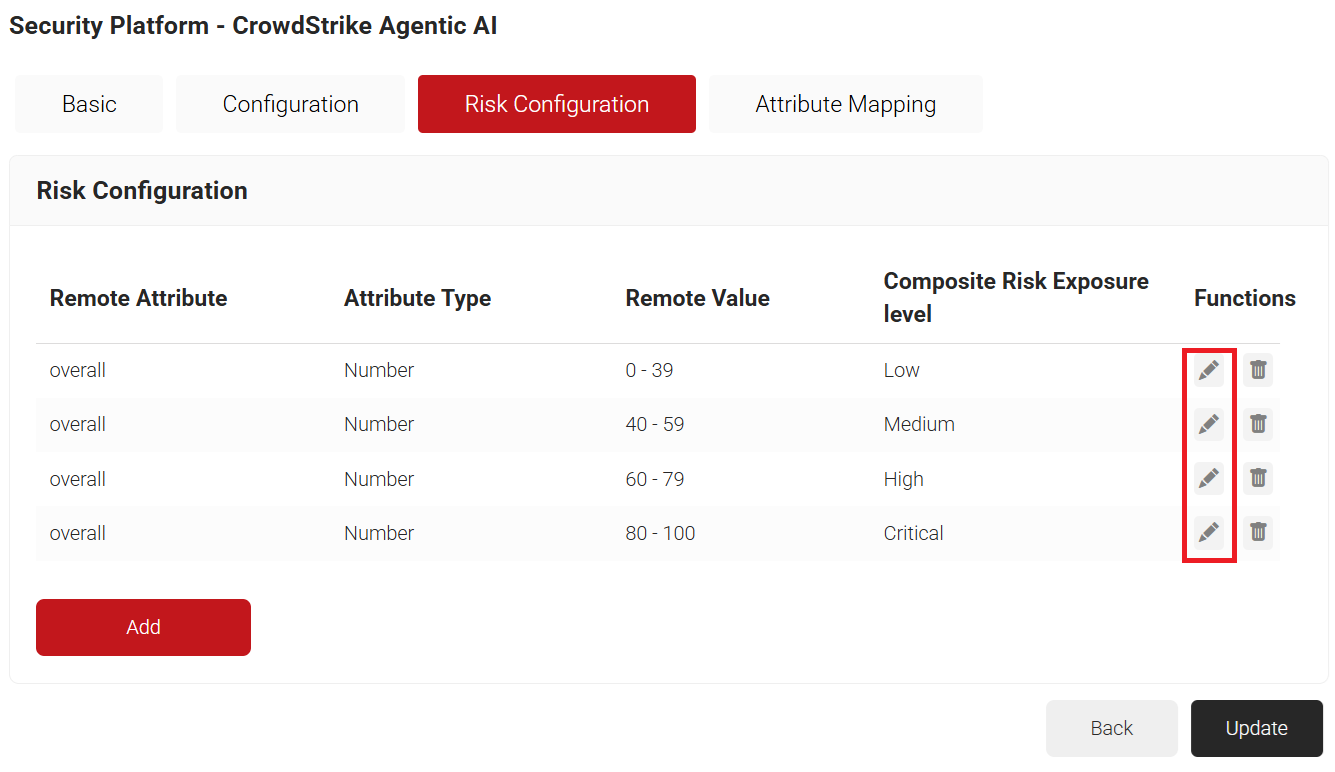
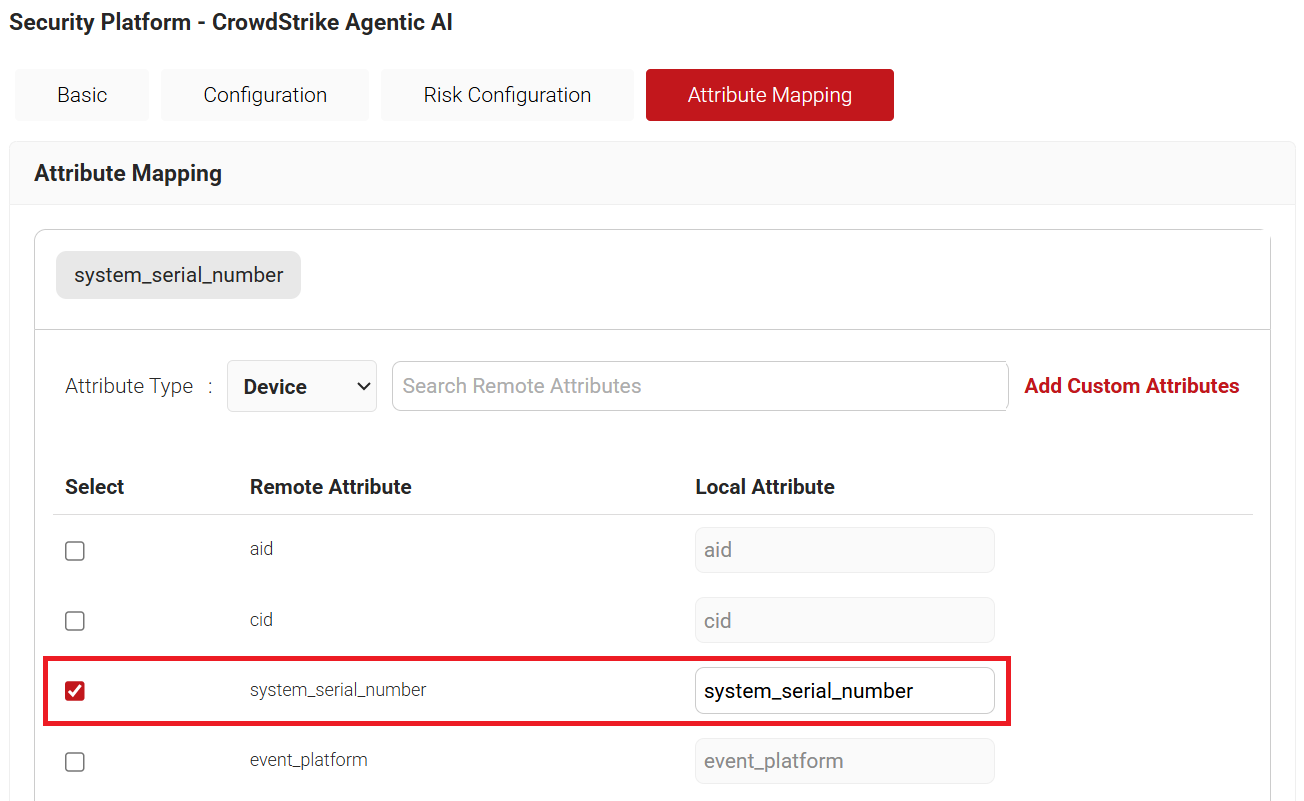
For SVID issuance to AI agents, select the system_serial_number attribute in the Attribute Mapping section. This attribute is used to populate the SPIFFE URI in the issued certificate.
To enable the system_serial_number attribute, perform the following steps:
- Select the Attribute Mapping tab.
- From the Attribute Type drop-down list, retain the Device option, select the system_serial_number attribute, and click Update. You can add multiple attributes as needed.

A Security Signal Source links the ACME EAB token with the lookup platform you configure — CrowdStrike, as featured in this guide — so SecureW2 can verify a device’s identity before issuing an SVID. This ensures that certificates are issued only to recognized devices; if a device isn’t found, enrollment is rejected.
To create a Security Signal Source, perform the following steps:
- Navigate to Policy Management > Security Signal Sources.
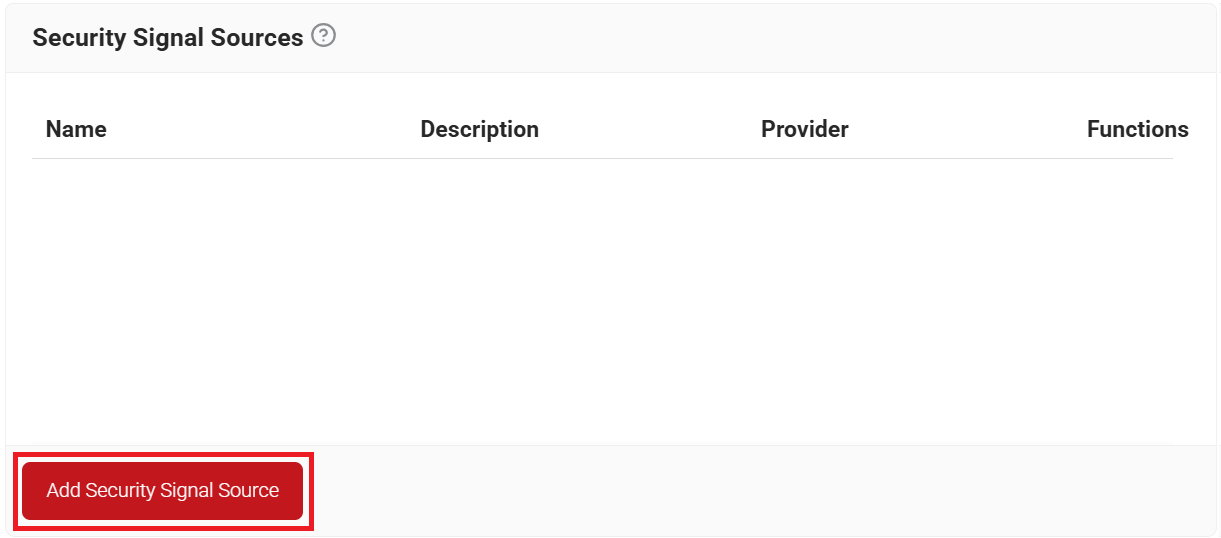
- Click Add Security Signal Source.

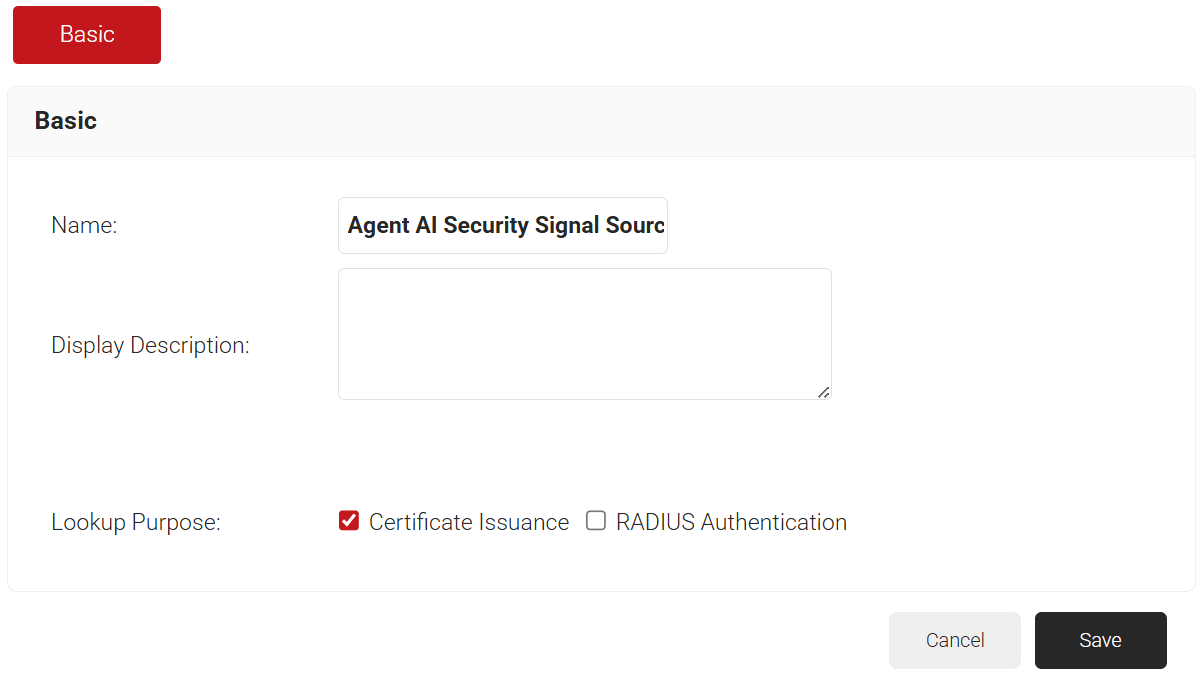
- In the Basic section, enter the name of the security signal source in the Name field.
- In the Display Description field, enter a suitable description for the security signal source.
- In the Lookup Purpose field, select Certificate Issuance.

- Click Save. The page refreshes, and the Conditions and Settings tabs are displayed.
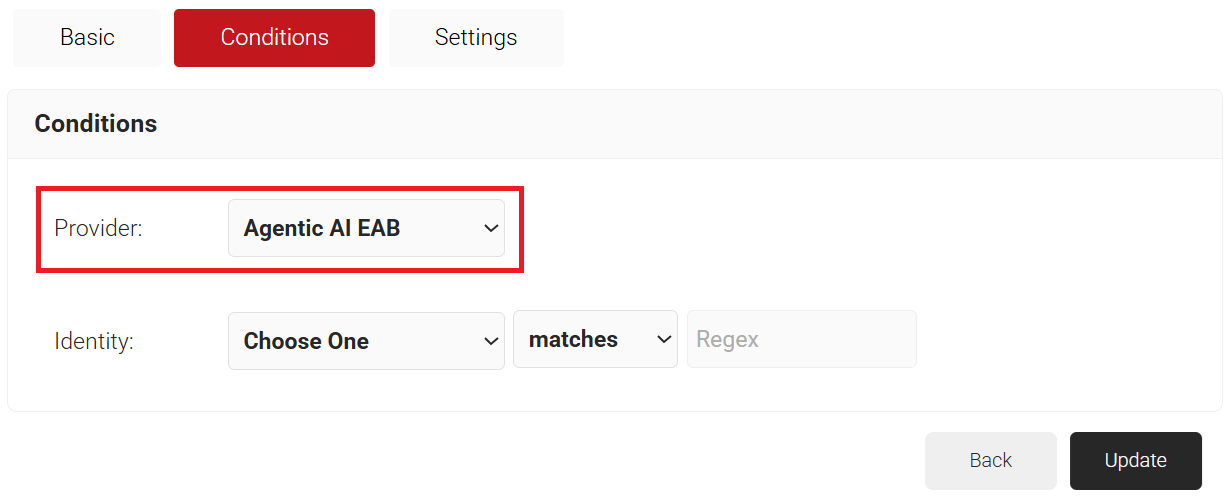
- Select the Conditions tab:
- From the Provider drop-down list, select the Agentic AI EAB token created in the Creating an ACME (Pre-authorized) Server Certificate Enrollment Token section.

- From the Provider drop-down list, select the Agentic AI EAB token created in the Creating an ACME (Pre-authorized) Server Certificate Enrollment Token section.
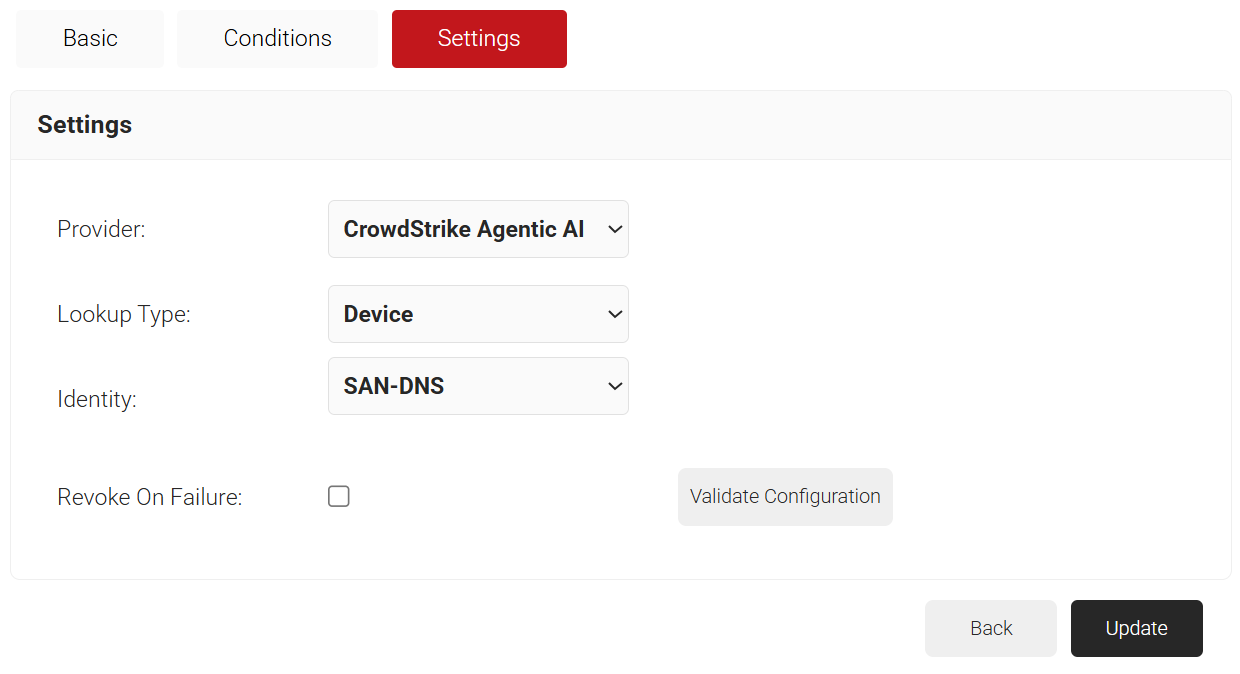
- Select the Settings tab:
- From the Provider drop-down list, select the CrowdStrike security platform created in the Configuring a Security Platform as the Lookup Source section.
- From the Lookup Type drop-down list, select Device.
- From the Identity drop-down list, select SAN-DNS.

- Click Validate Configuration to verify the lookup is valid.

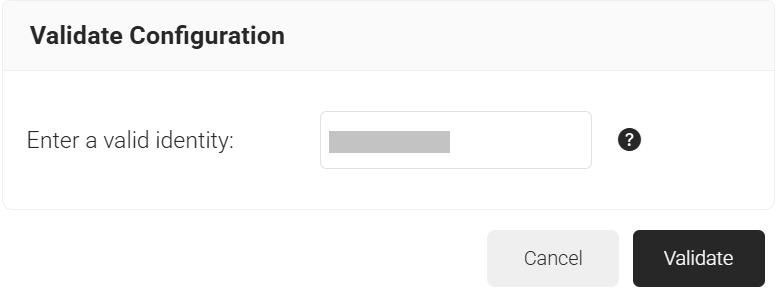
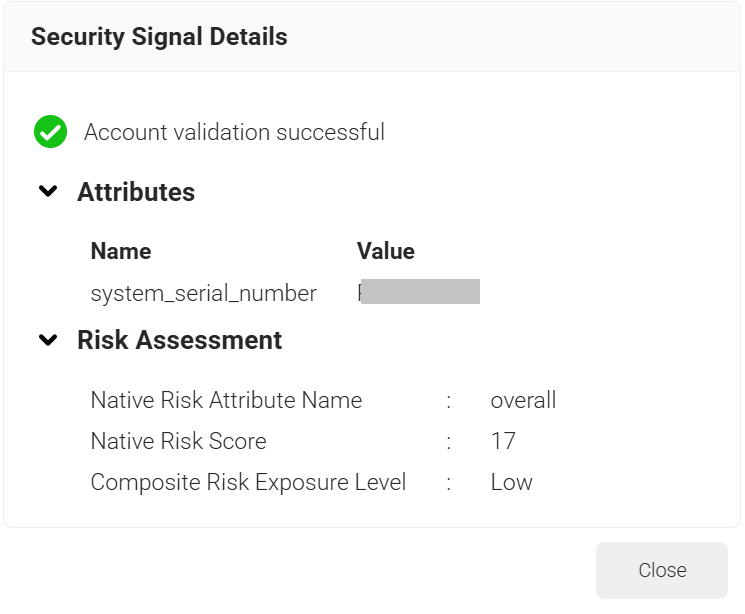
- In the Validate Configuration pop-up window, enter the device’s serial number in the Enter a valid identity field, then click Validate to verify the account.

- Click Update.
A certificate template defines how information is encoded in a certificate issued by the Certificate Authority (CA). It includes a list of certificate attributes and specifies how information must be encoded.
SecureW2 recommends creating a new certificate template for this purpose rather than modifying an existing one.
For AI agents, this template includes a SPIFFE URI composed of the scheme, trust domain, and path. The path (which acts as the workload identifier) is dynamically populated with an attribute retrieved from the configured platform at issuance. This guide illustrates the setup using CrowdStrike.
To create a new certificate template, perform the following steps:
- Navigate to Dynamic PKI > Certificate Authorities.
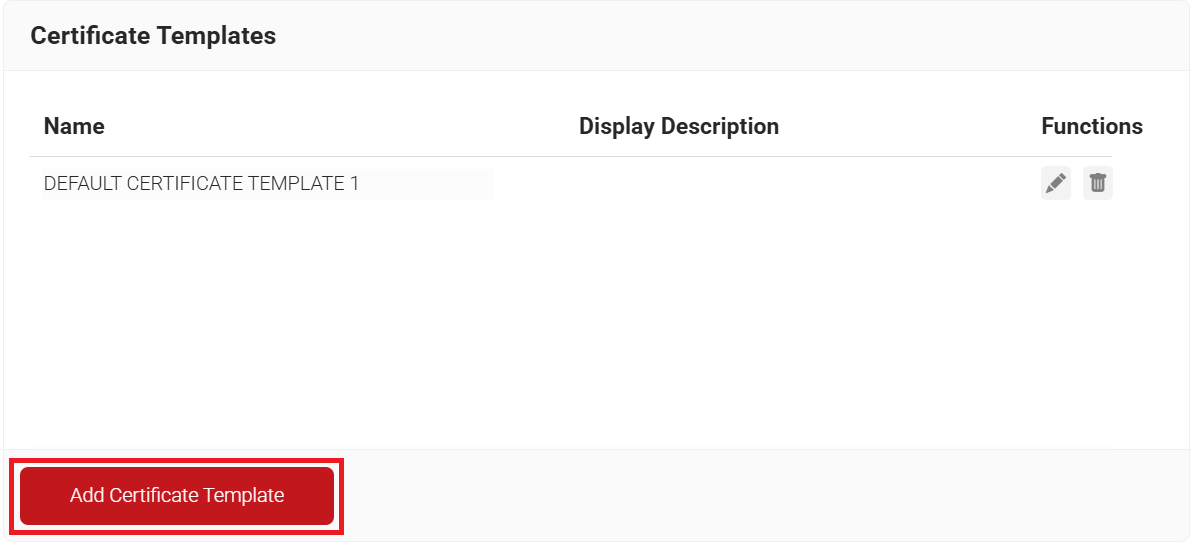
- Scroll to the Certificate Templates section and click Add Certificate Template.

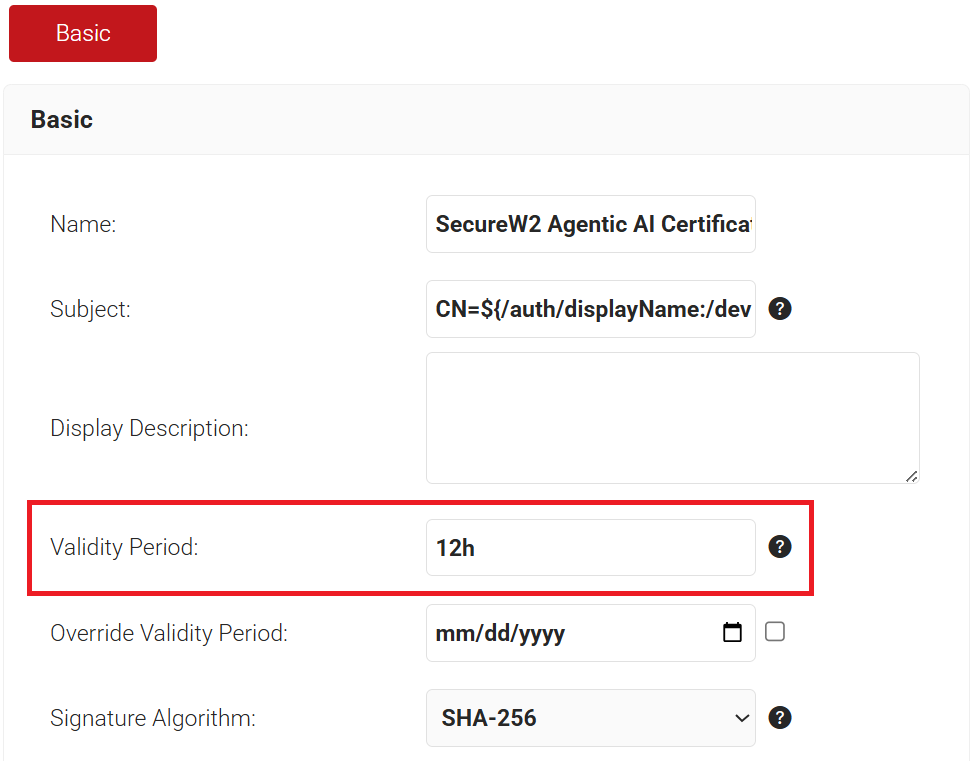
- In the Basic section, enter the name of the certificate template in the Name field.
- In the Validity Period field, enter the certificate’s validity period. SecureW2 recommends a 12-hour validity period (shorter), and you can configure this based on your requirements.

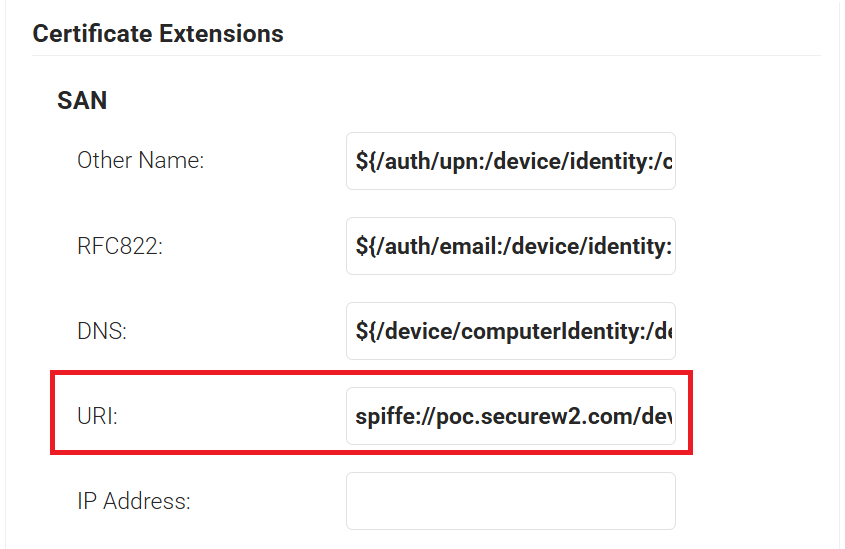
- In the SAN section, enter spiffe://poc.securew2.com/device/${/auth/endpointProtectionPlatform/system_serial_number} in the URI field.
This is a sample value you can configure to meet your requirements. It is made up of three parts: the scheme (spiffe://), the trust domain (poc.securew2.com), and the path (/device/${/auth/endpointProtectionPlatform/system_serial_number}), which serves as the workload identifier and is dynamically populated with the device’s serial number at issuance.
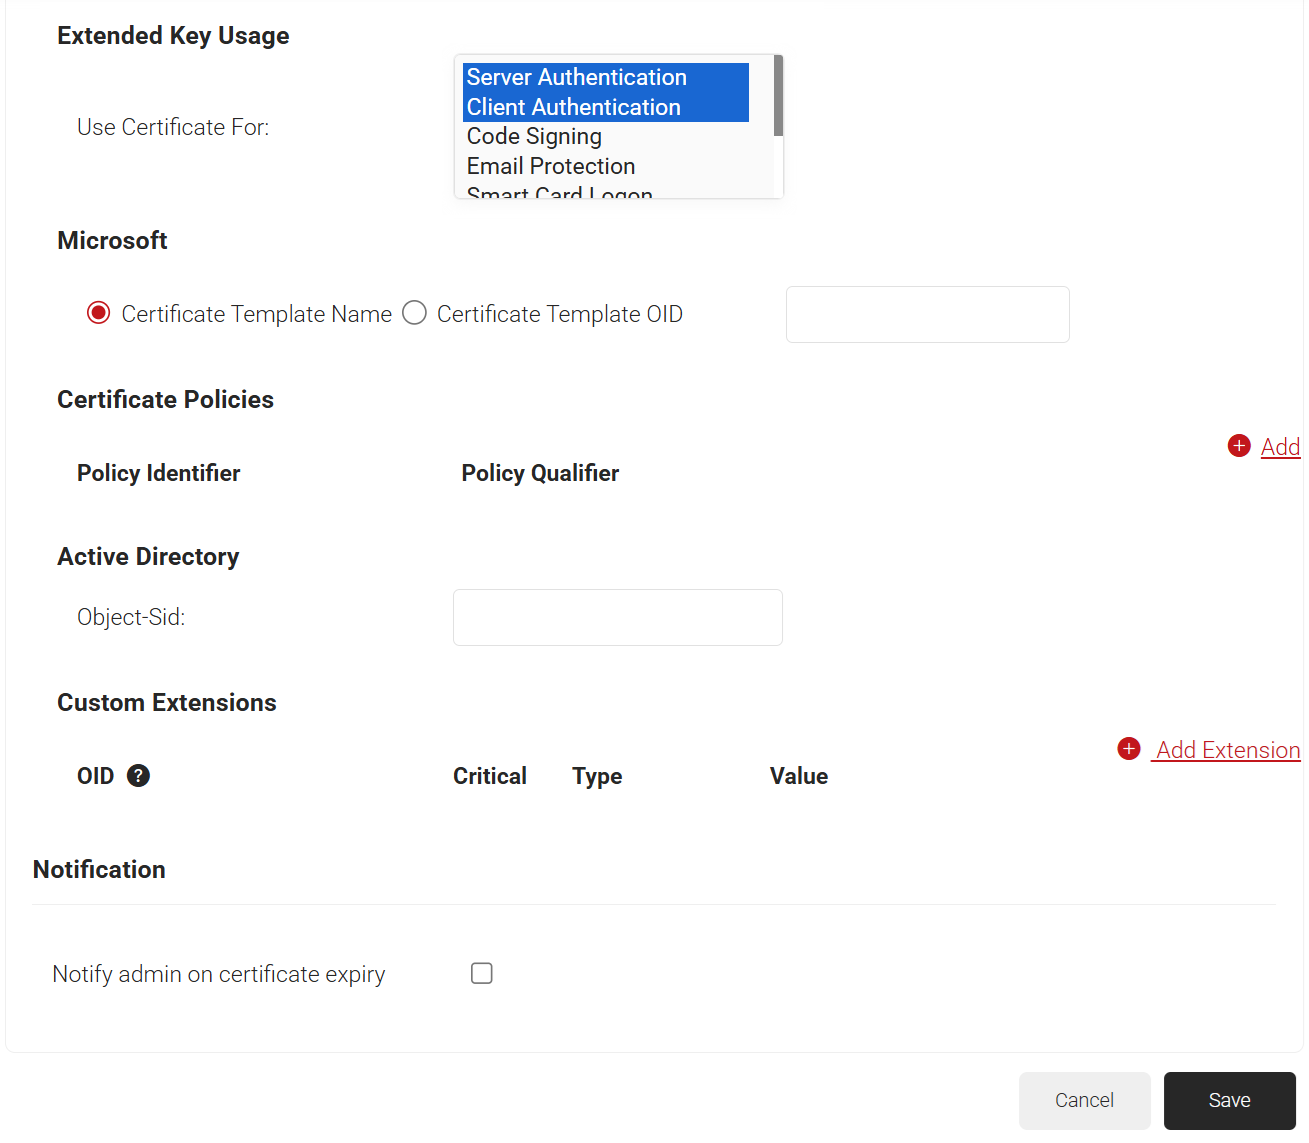
- In the Extended Key Usage section, select Server Authentication and Client Authentication in the Use Certificate For field.
- Retain the default values for the remaining fields in the certificate template.
- Click Save.

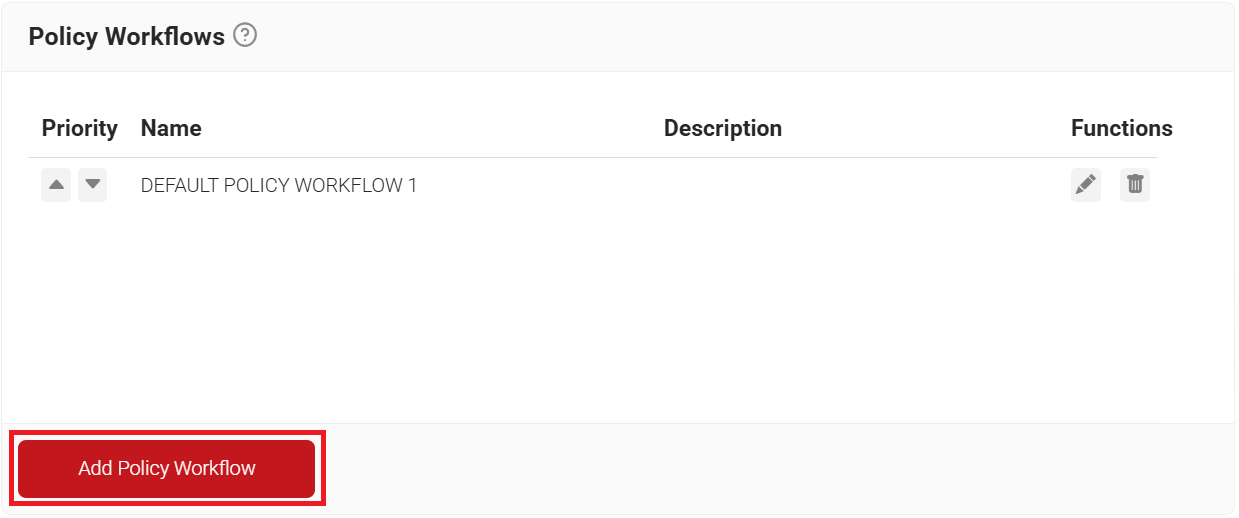
Policy Workflow segments AI agents based on defined criteria or attributes retrieved from the configured platform’s lookup. It allows you to define and create roles based on these attributes. This guide illustrates the setup using CrowdStrike.
To create a policy workflow, perform the following steps:
- Navigate to Policy Management > Policy Workflows.
- Click Add Policy Workflow.

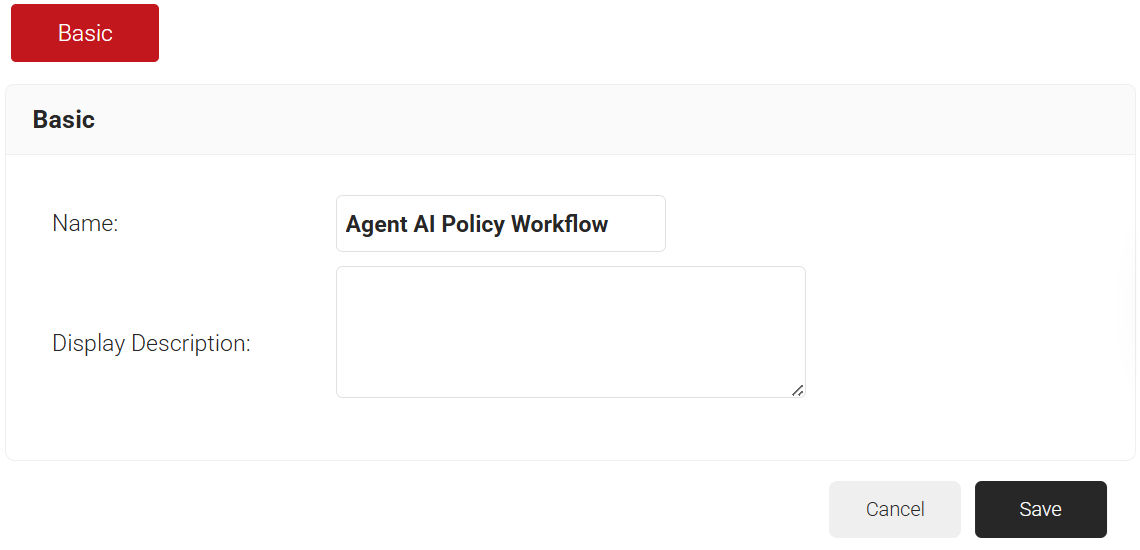
- In the Basic section, enter the name of the Policy Workflow in the Name field.
- In the Display Description field, enter a suitable description for the Policy Workflow.

- Click Save.
- The page refreshes, and the Conditions tab is displayed.
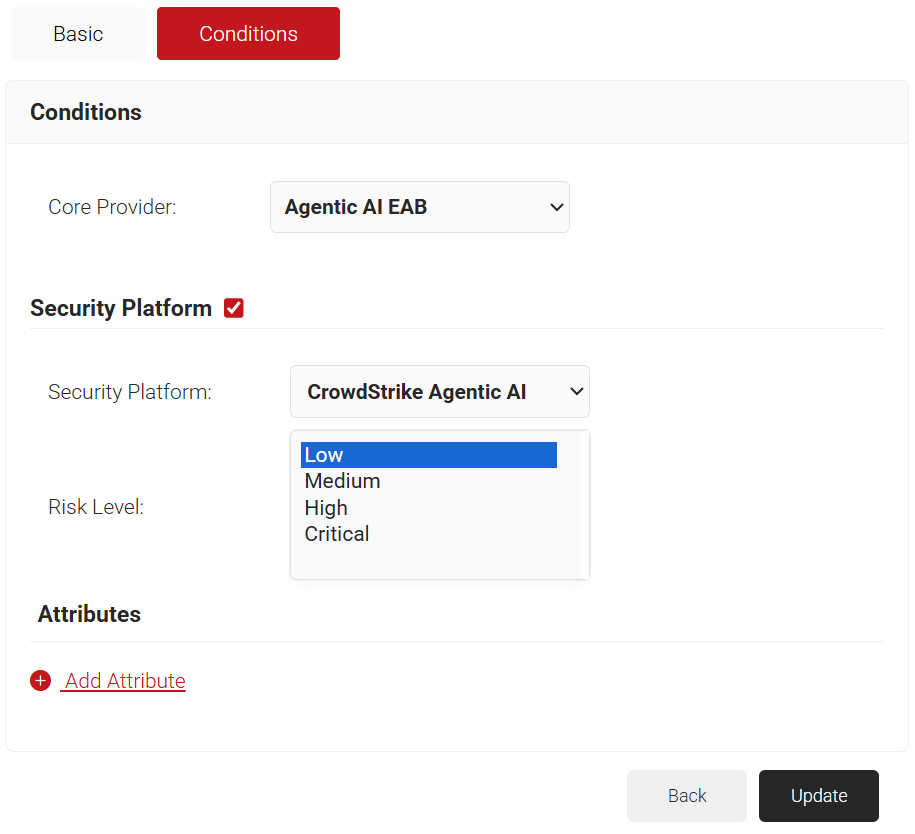
- Select the Conditions tab.
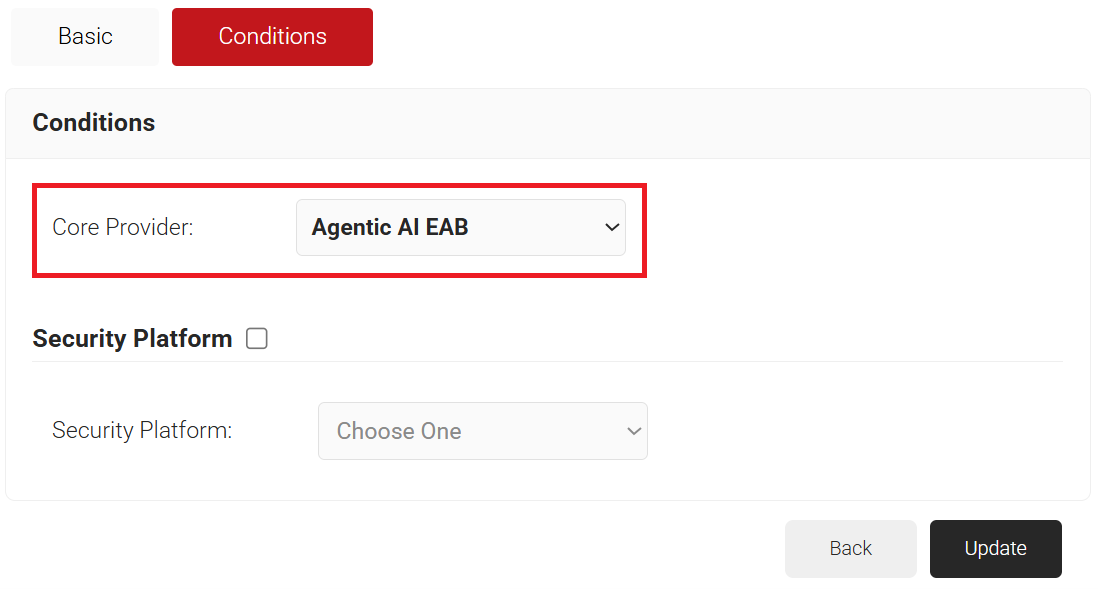
- From the Provider drop-down list, select the Agentic AI EAB token created in the Creating an ACME (Pre-authorized) Server Certificate Enrollment Token section.

- From the Provider drop-down list, select the Agentic AI EAB token created in the Creating an ACME (Pre-authorized) Server Certificate Enrollment Token section.
- In the Security Platform section:
- Enable the checkbox beside Security Platform. This allows you to select CrowdStrike as an additional condition for the Policy Workflow, so the AI agent is verified via the CrowdStrike lookup before certificate issuance.
- From the Security Platform drop-down list, select the CrowdStrike security platform created in the Configuring a Security Platform as the Lookup Source section.
- In the Risk Level list, select the appropriate risk level for the Policy Workflow. For example, you can create a Policy Workflow with the Low risk level, then map it to an Enrollment Policy to allow SVID issuance for AI agents that meet that risk level.

- Click Update.
An Enrollment Policy determines how SVIDs are issued to AI agents. Each role defined in the Policy Workflow is assigned a unique Enrollment Policy for this purpose.
To create an enrollment policy, perform the following steps:
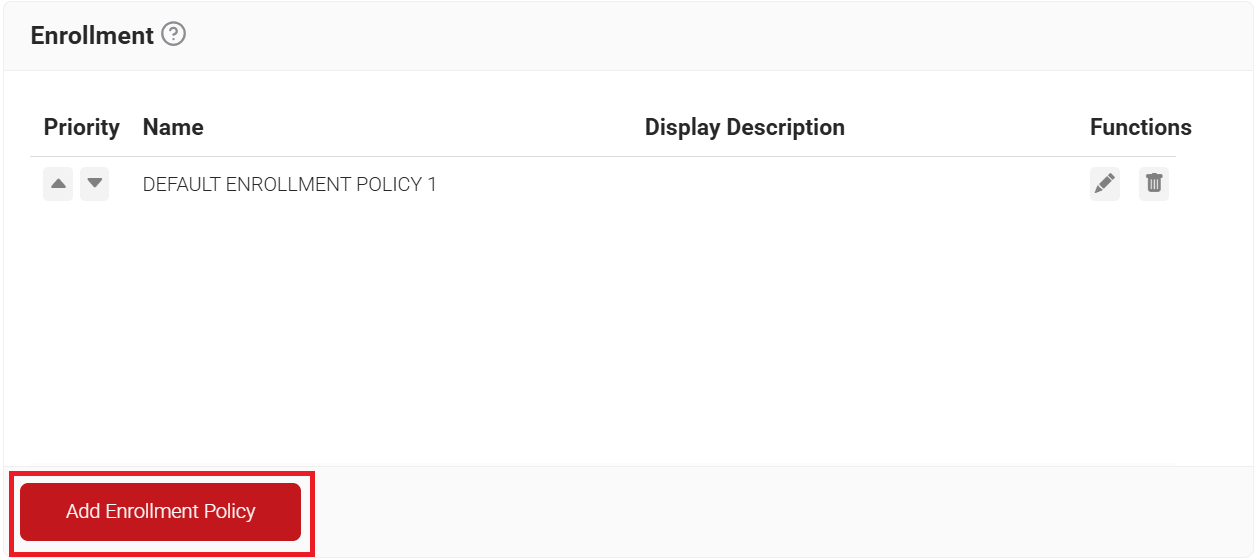
- Navigate to Policy Management > Enrollment.
- Click Add Enrollment Policy.

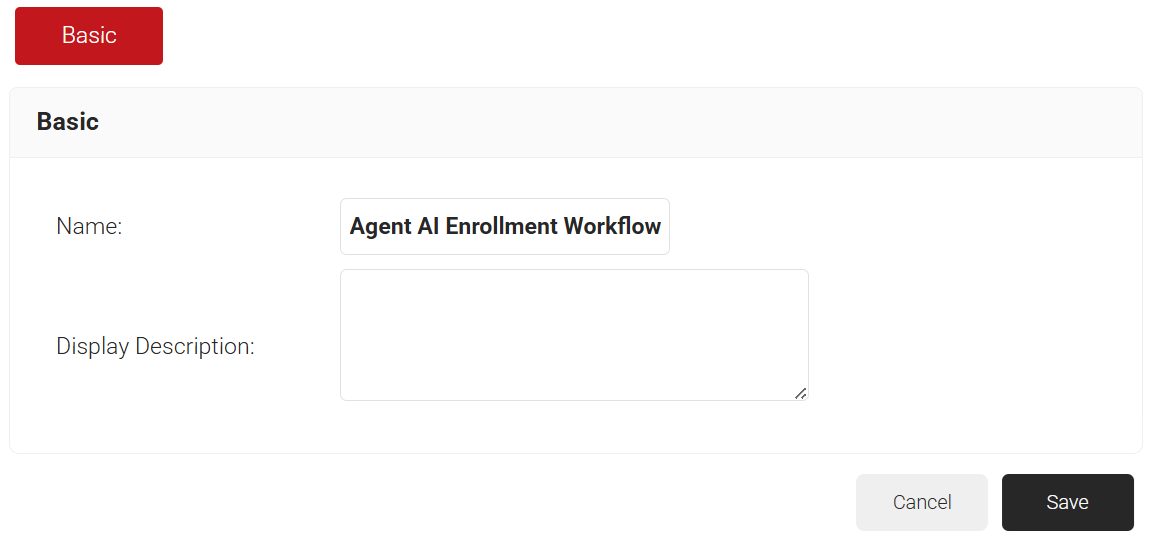
- In the Basic section, enter the name of the enrollment policy in the Name field.
- In the Display Description field, enter a suitable description for the enrollment policy.

- Click Save. The page refreshes, and the Conditions and Settings tabs are displayed.
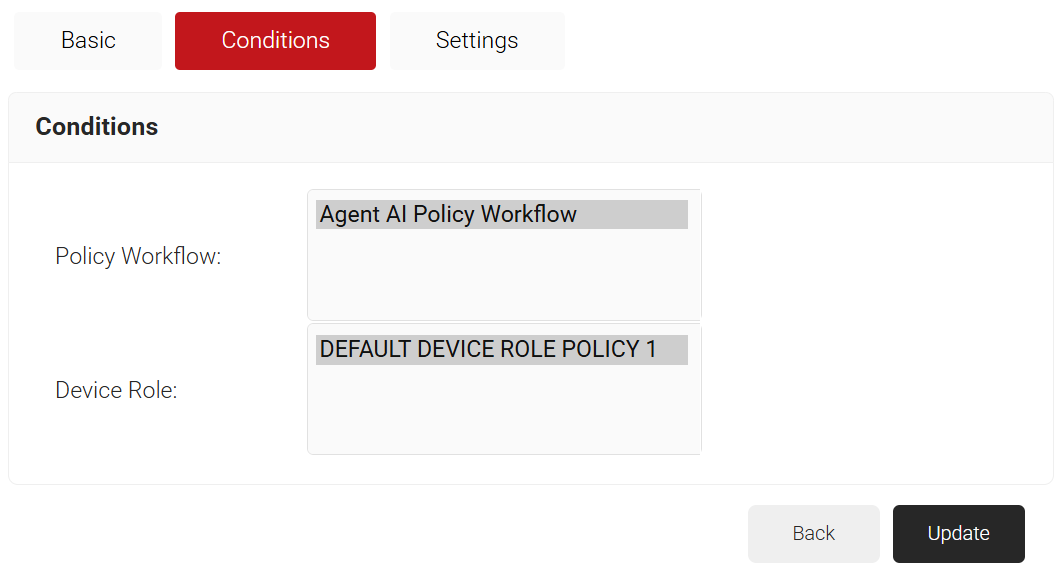
- Select the Conditions tab.
- In the Policy Workflow field, select the policy workflow created earlier in the Creating a Policy Workflow section.
- In the Device Role field, select DEFAULT DEVICE ROLE POLICY 1.

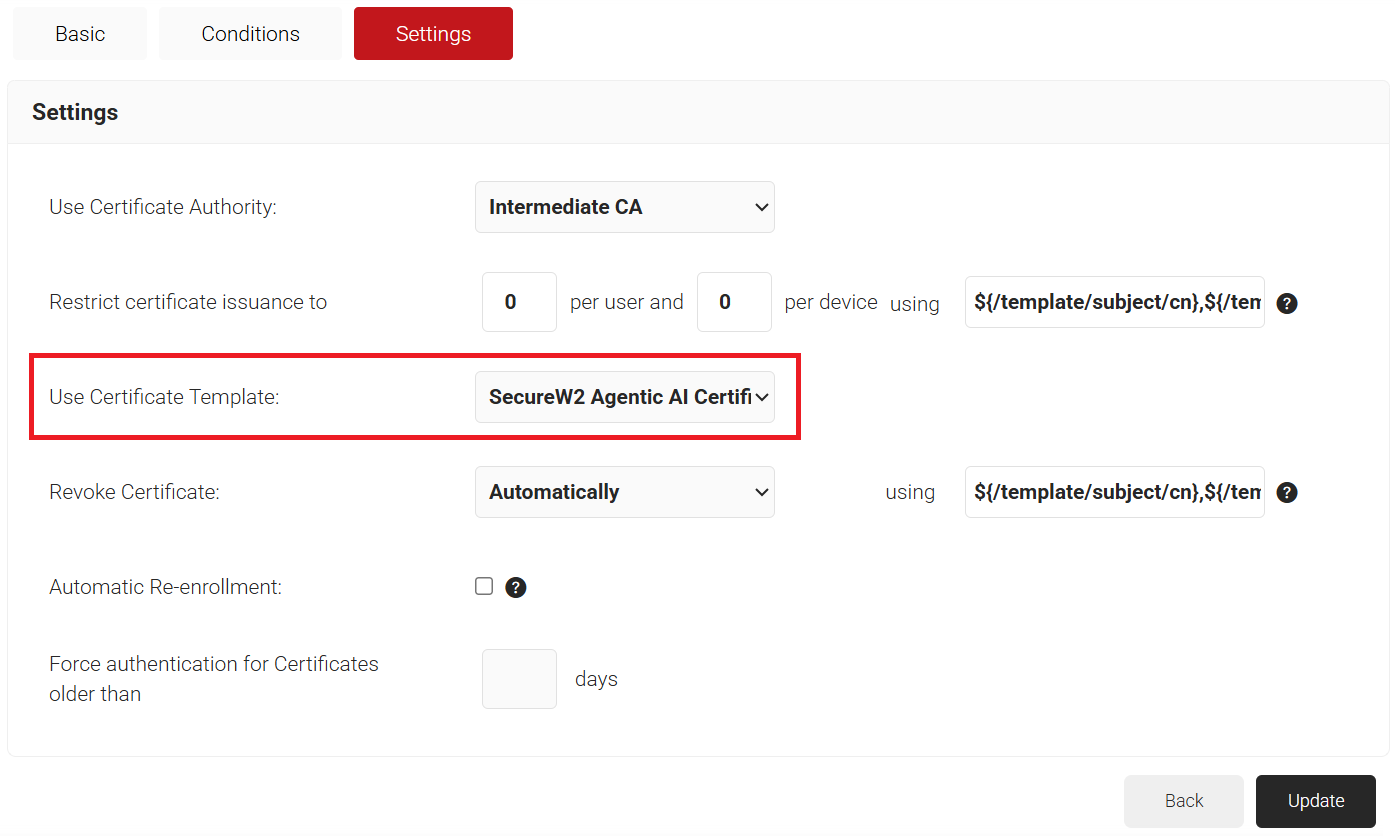
- Select the Settings tab.
- From the Use Certificate Authority drop-down list, select the intermediate CA.
- From the Use Certificate Template drop-down list, select the certificate template created earlier in the Creating a Certificate Template section.
- In the other settings, retain the default values.

- Click Update.
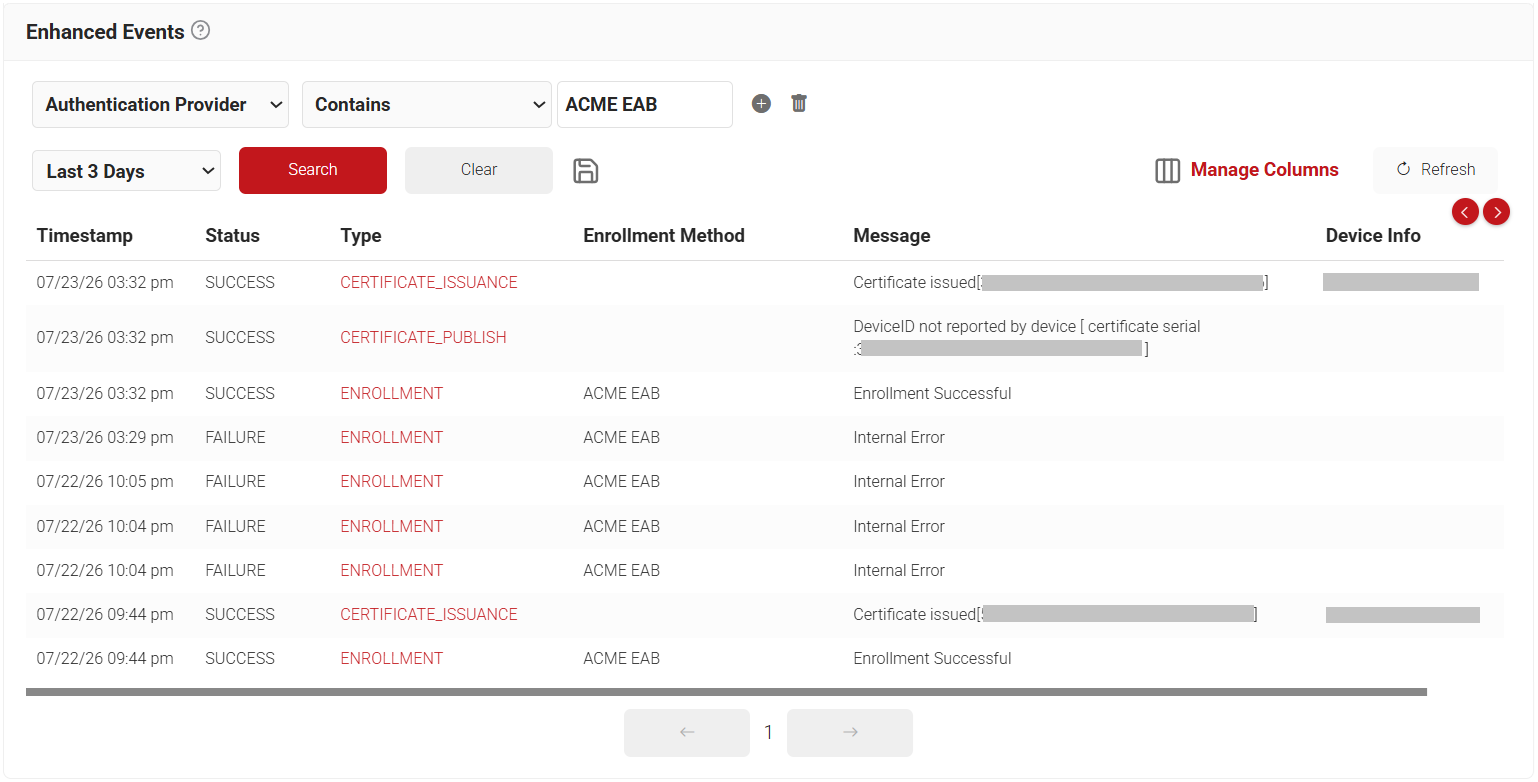
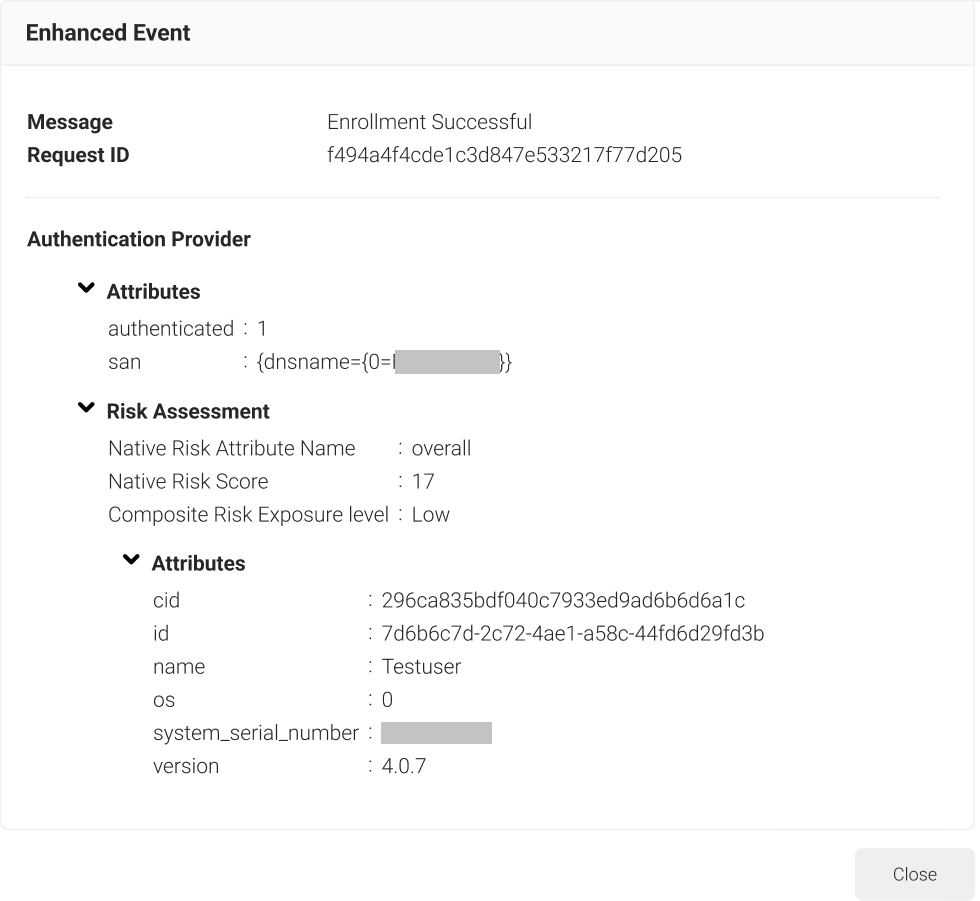
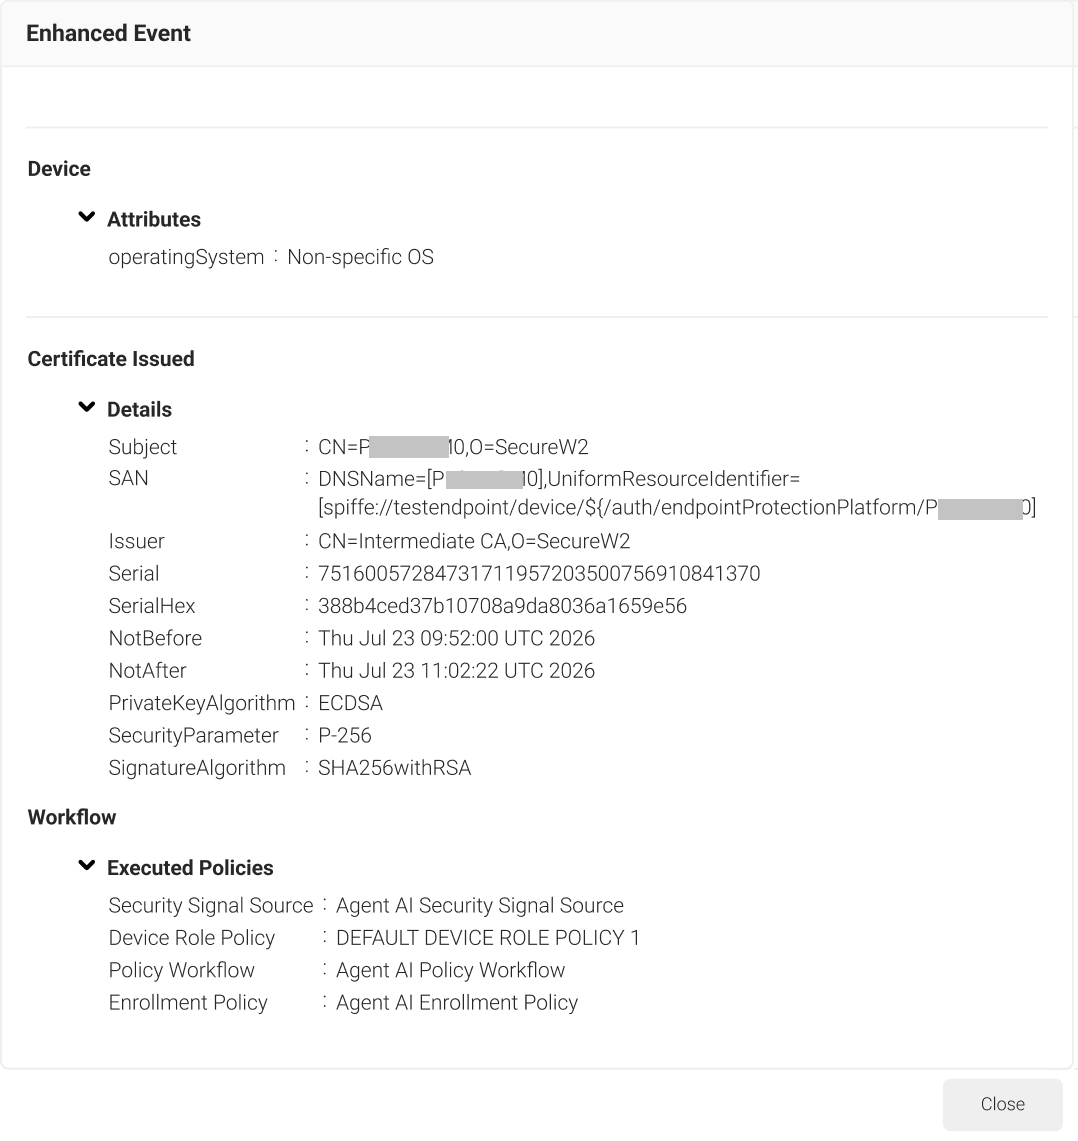
SecureW2 Admins can verify successful certificate enrollment by navigating to Data and Monitoring > Enhanced Events, where the enrolled device will display a Certificate Issued message.