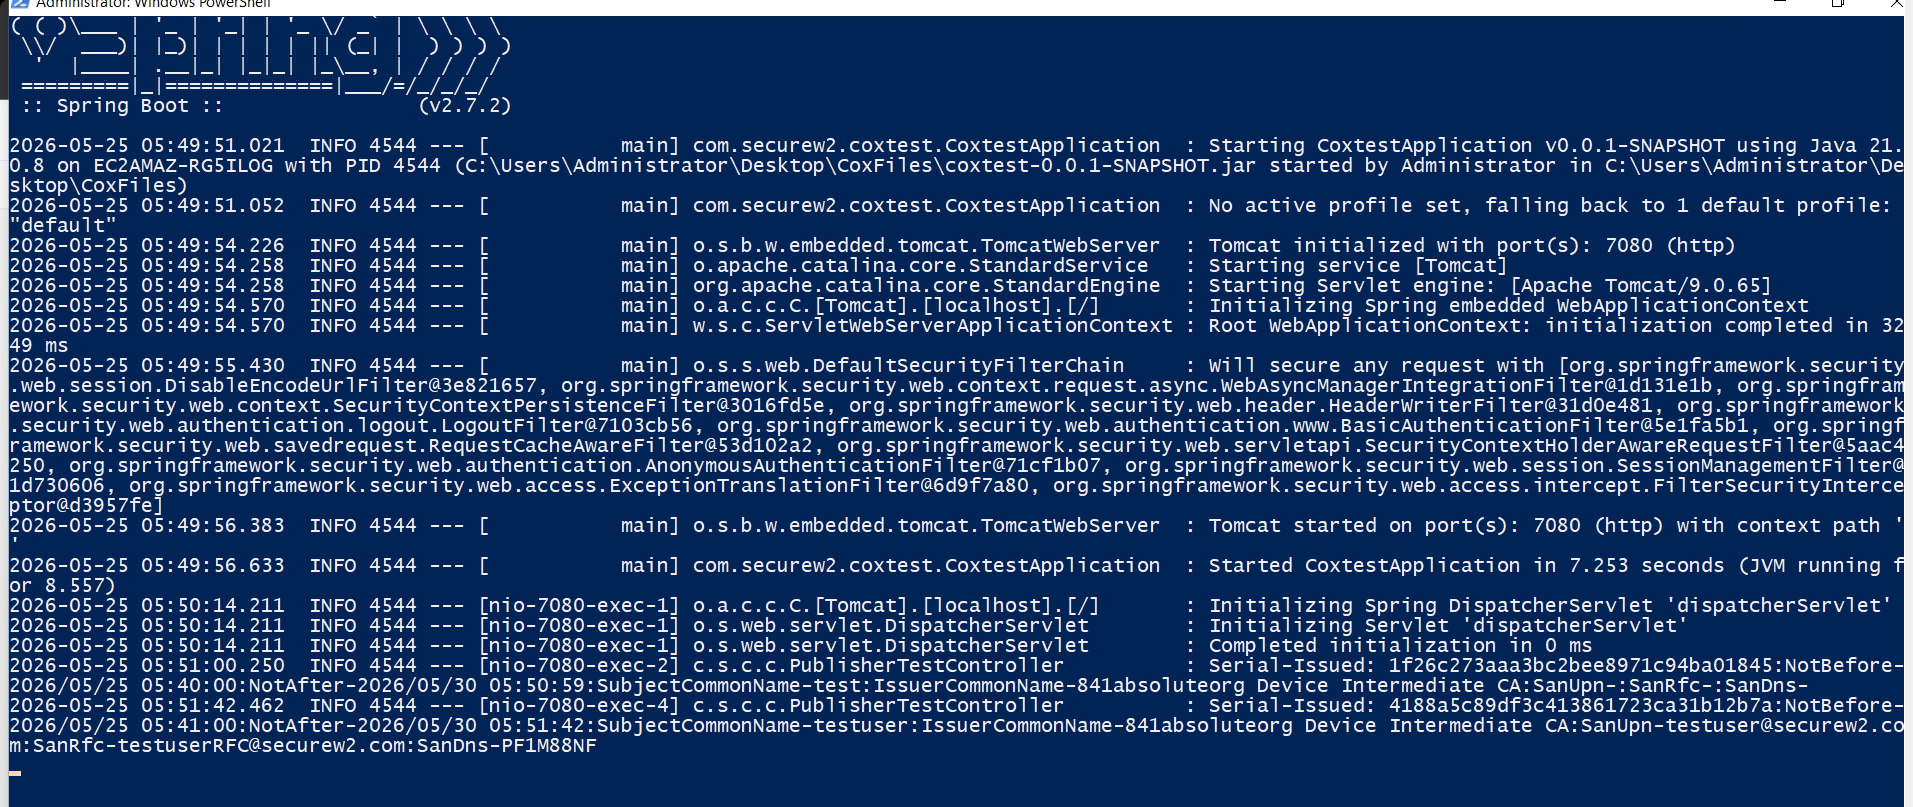
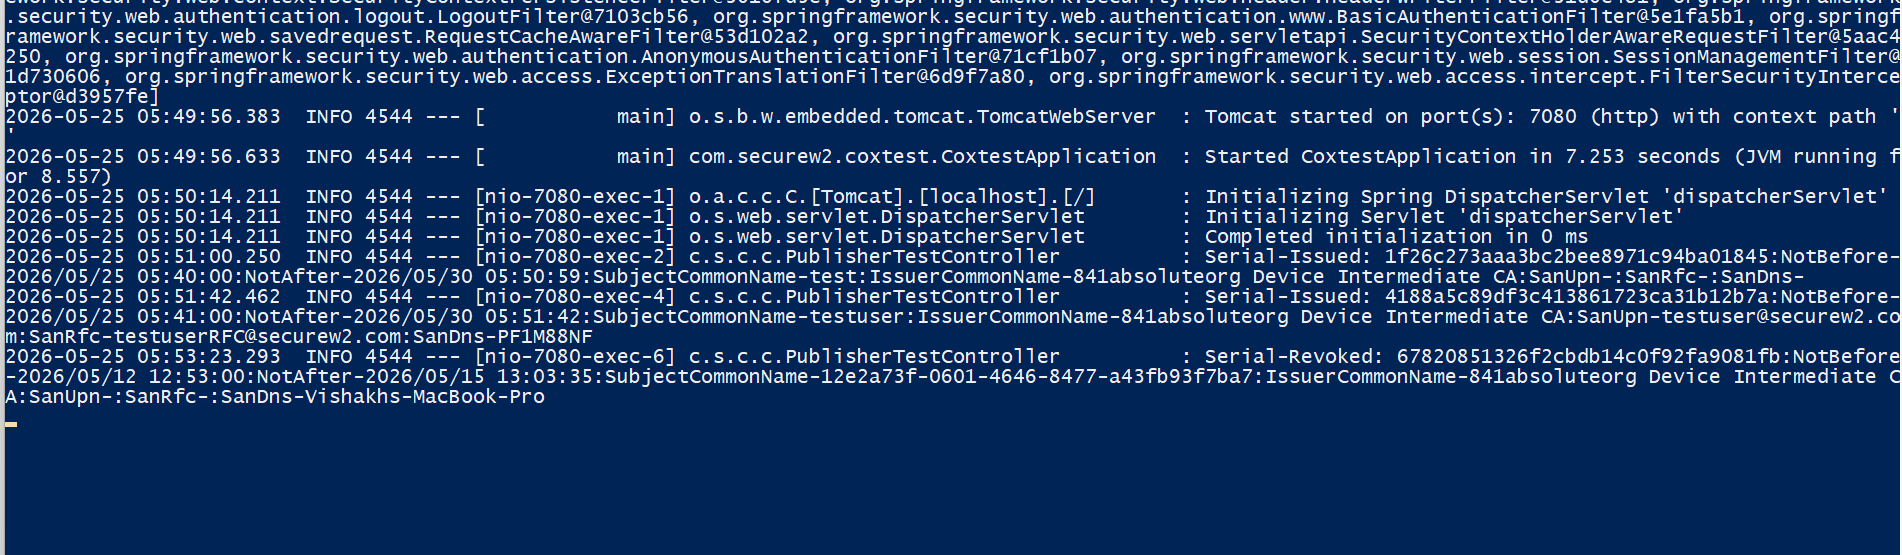
Generic HTTP sends real-time JoinNow events to an HTTP endpoint you define. Use it when SecureW2 doesn’t natively support your infrastructure.
Generic HTTP supports two event categories:
- Next Generation Firewall: Sends RADIUS accounting events (login and logout) to your firewall.
- Certificate Events: Sends certificate events (issuance and revocation) to your external server.
This document explains how to configure Generic HTTP to forward RADIUS accounting events to your firewall and certificate events to your external server.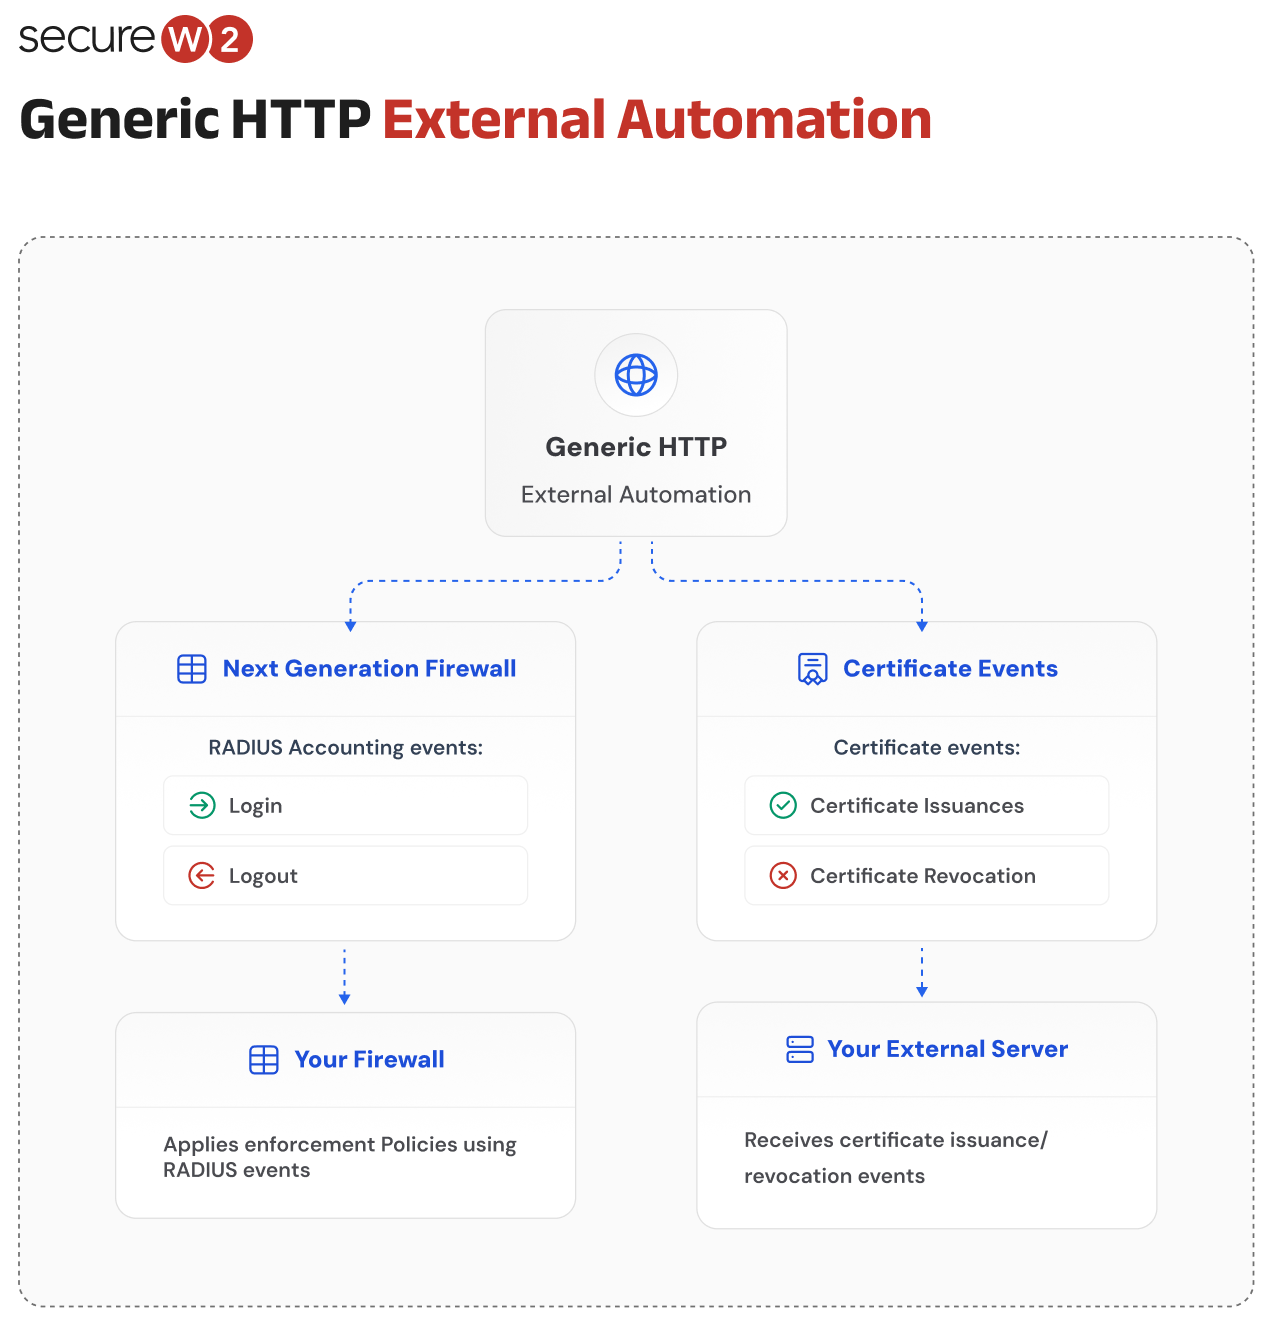
A Next-Generation Firewall automation forwards RADIUS accounting events (Login and Logout) from JoinNow to your firewall, where they can be used to apply enforcement policies.
To create a Generic HTTP External Automation for your firewall, perform the following steps:
- Log in to the JoinNow Management Portal.
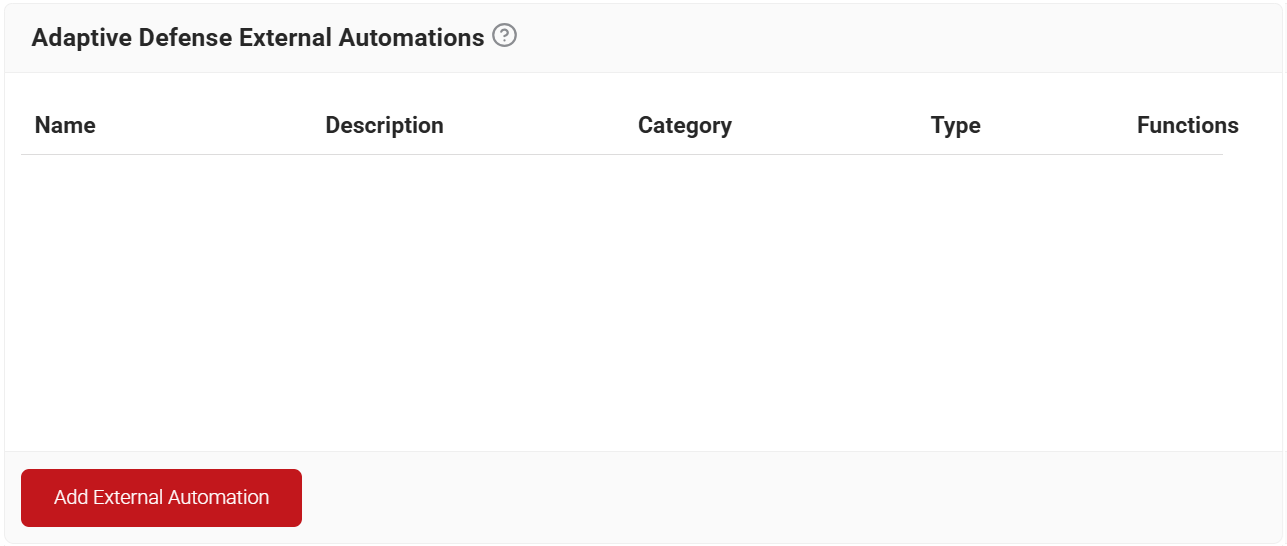
- Navigate to Integration Hub > Adaptive Defense External Automations.
- Click Add External Automation.

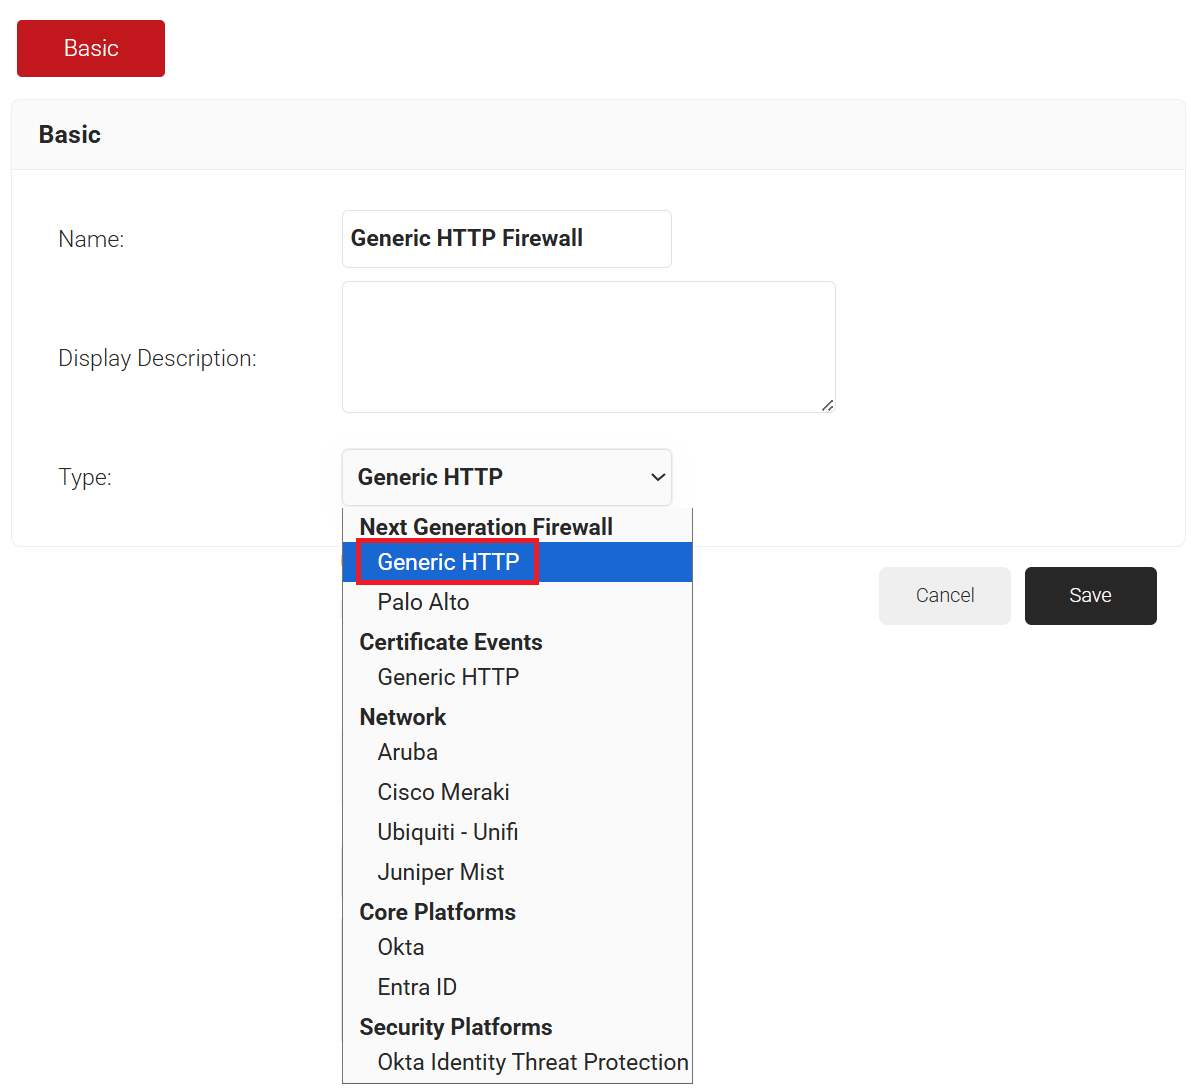
- In the Basic section, enter the name of the adaptive defense external automation in the Name field.
- In the Description field, enter a description for the adaptive defense external automation.
- From the Type drop-down list, select Generic HTTP under Next Generation Firewall.

- Click Save.
- Click the Configuration tab.
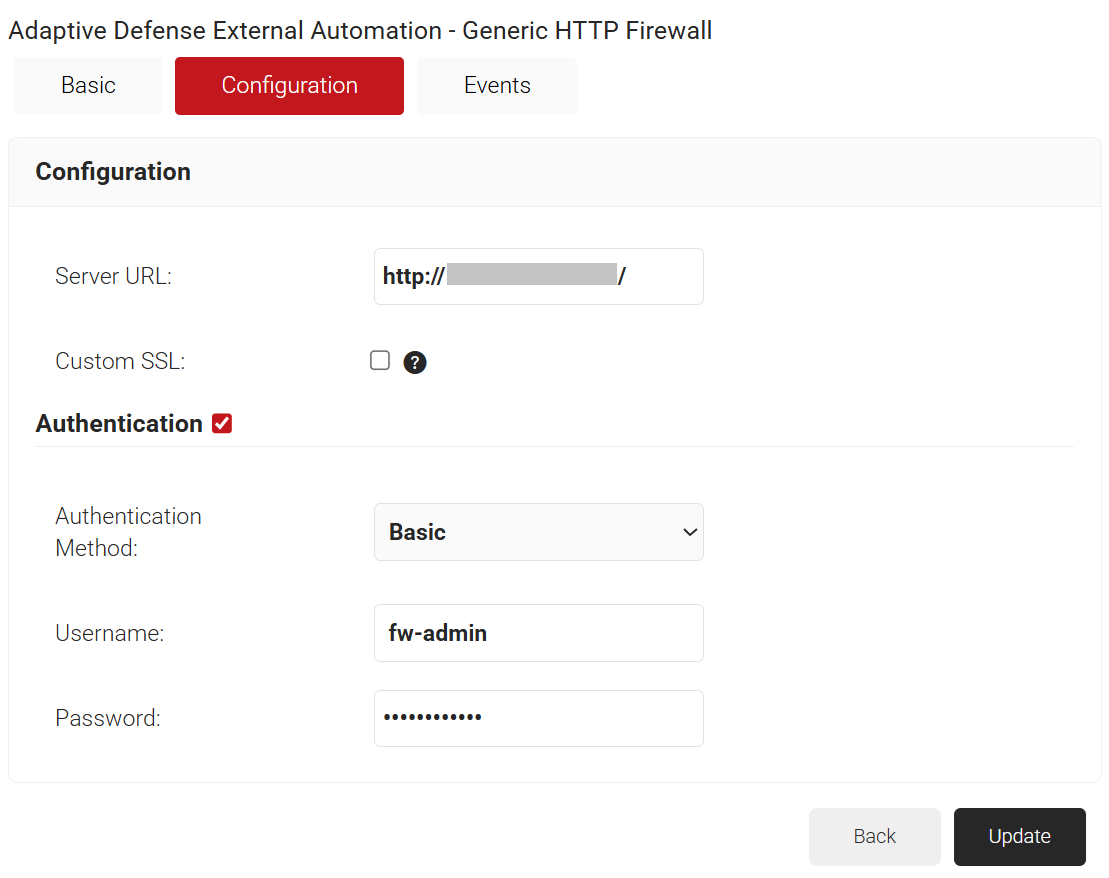
- In the Server URL field, enter the firewall URL to which RADIUS accounting events must be pushed.
- (Optional) To use your organization’s certificate, select the Custom SSL checkbox.
- In the Certificate field, click Choose File.
- Select the required certificate and click Upload.
- Select the Authentication checkbox.
- From the Authentication Method drop-down list, select any one of the following options:
- Basic
- OAuth
- API Key
- If you select Basic as the authentication method:
- In the Username and Password fields, enter the credentials configured on the firewall server. JoinNow uses these credentials to authenticate when forwarding events.

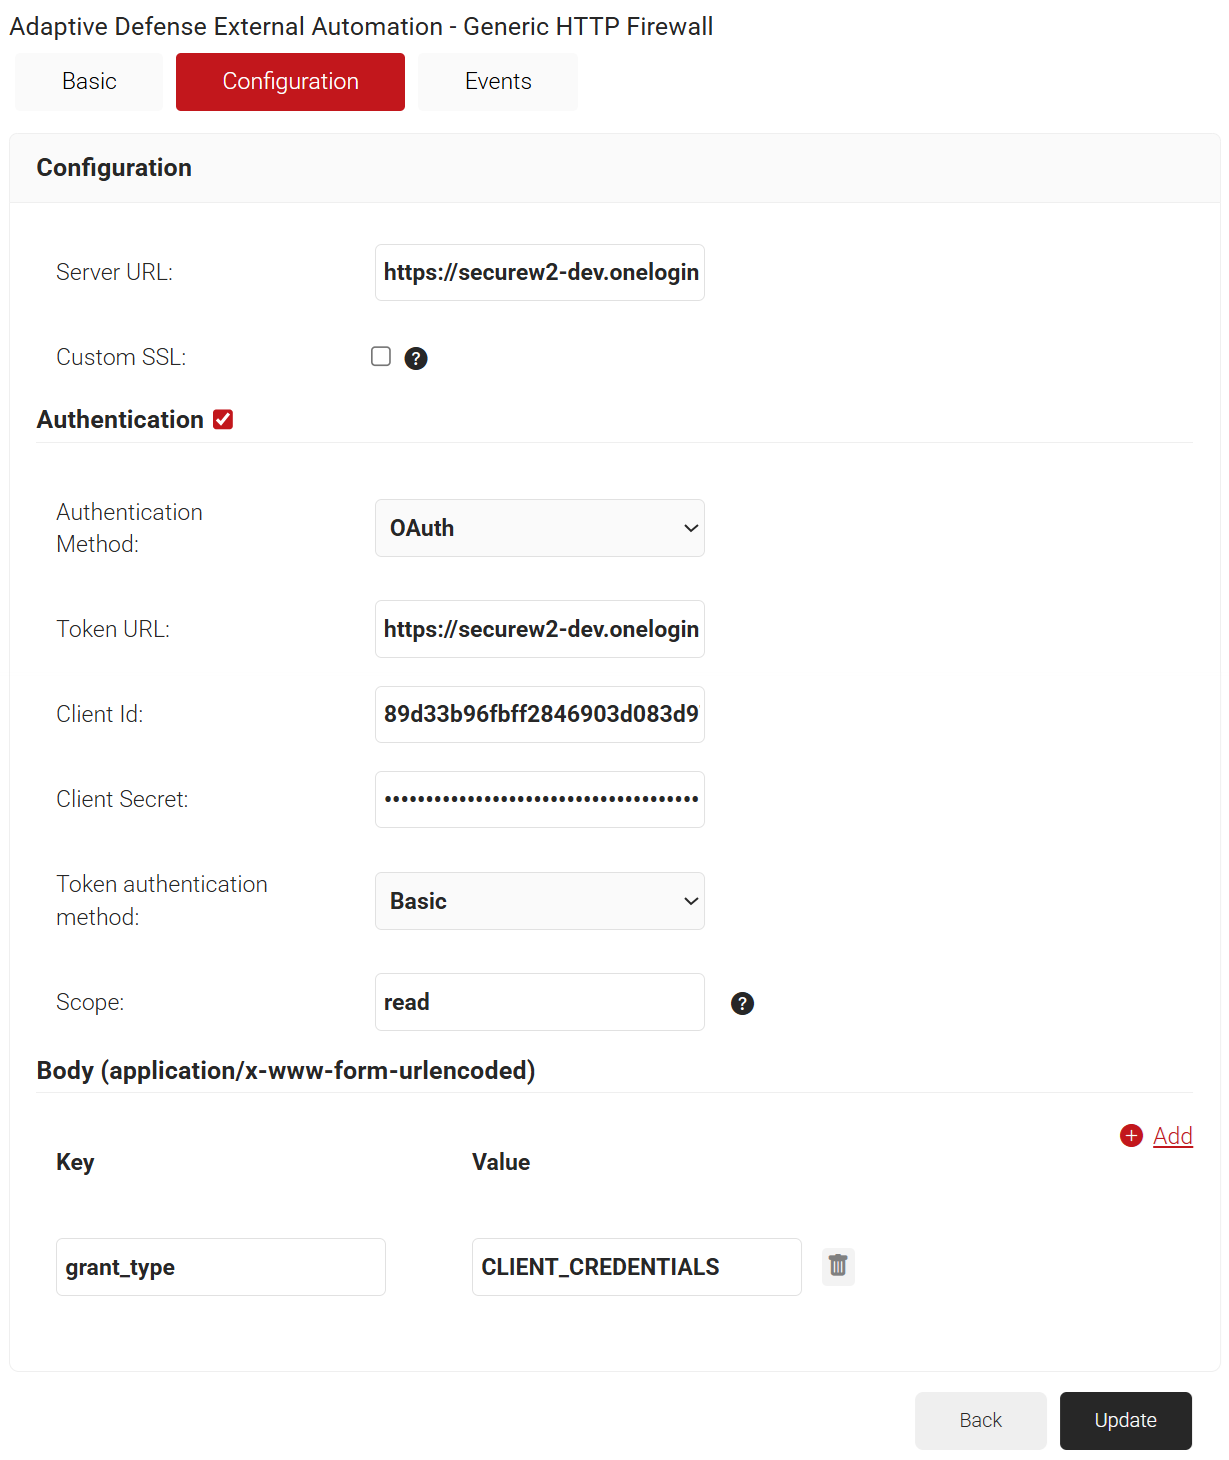
- If you select OAuth as the authentication method:
- In the Token URL field, enter the OAuth authentication server URL.
- In the Client ID field, enter the Client ID provided by the OAuth server.
- In the Client Secret field, enter the client secret provided by the OAuth server.
- From the Token Authentication Method drop-down list, select Basic or Request Body.
- In the Scope field, enter the required scope.
- In the Body section, click Add and enter the required key-value pairs.

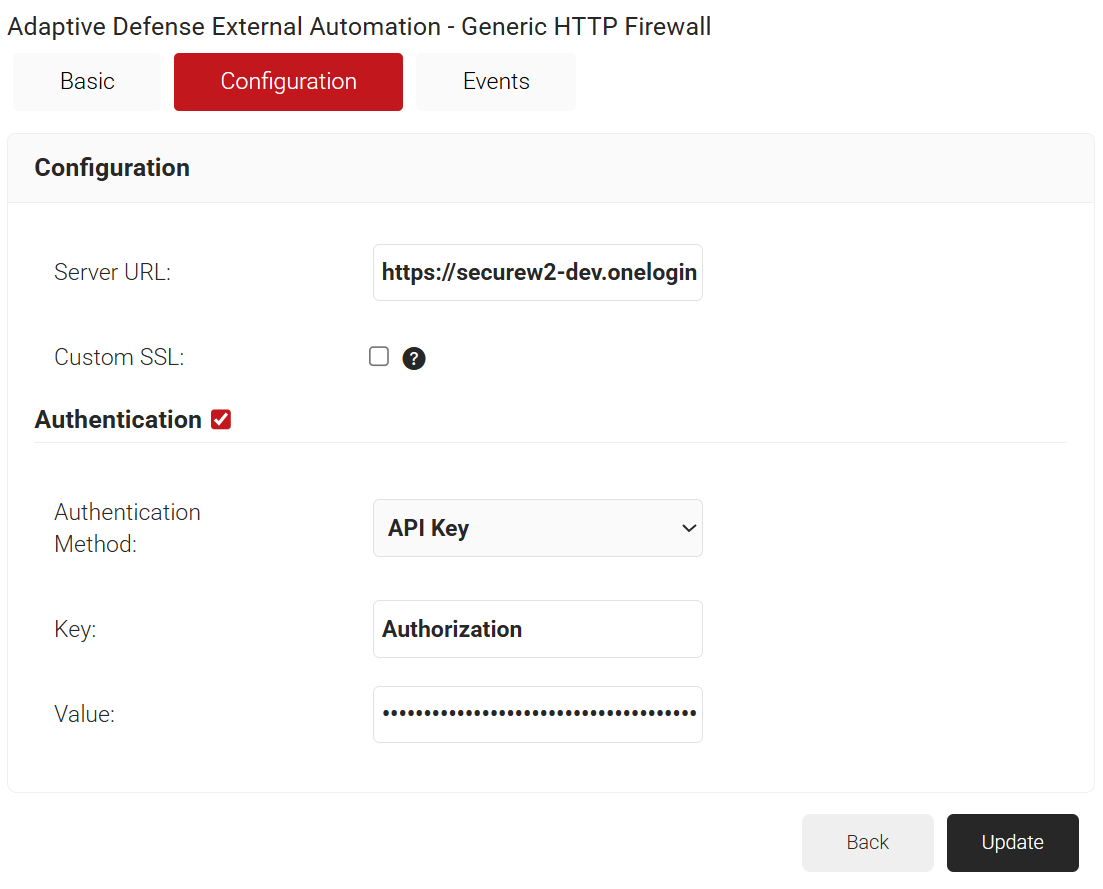
- If you select API Key as the authentication method:
- The Key field displays Authorization by default.
- In the Value field, enter the API key provided by the external server.

- In the Username and Password fields, enter the credentials configured on the firewall server. JoinNow uses these credentials to authenticate when forwarding events.
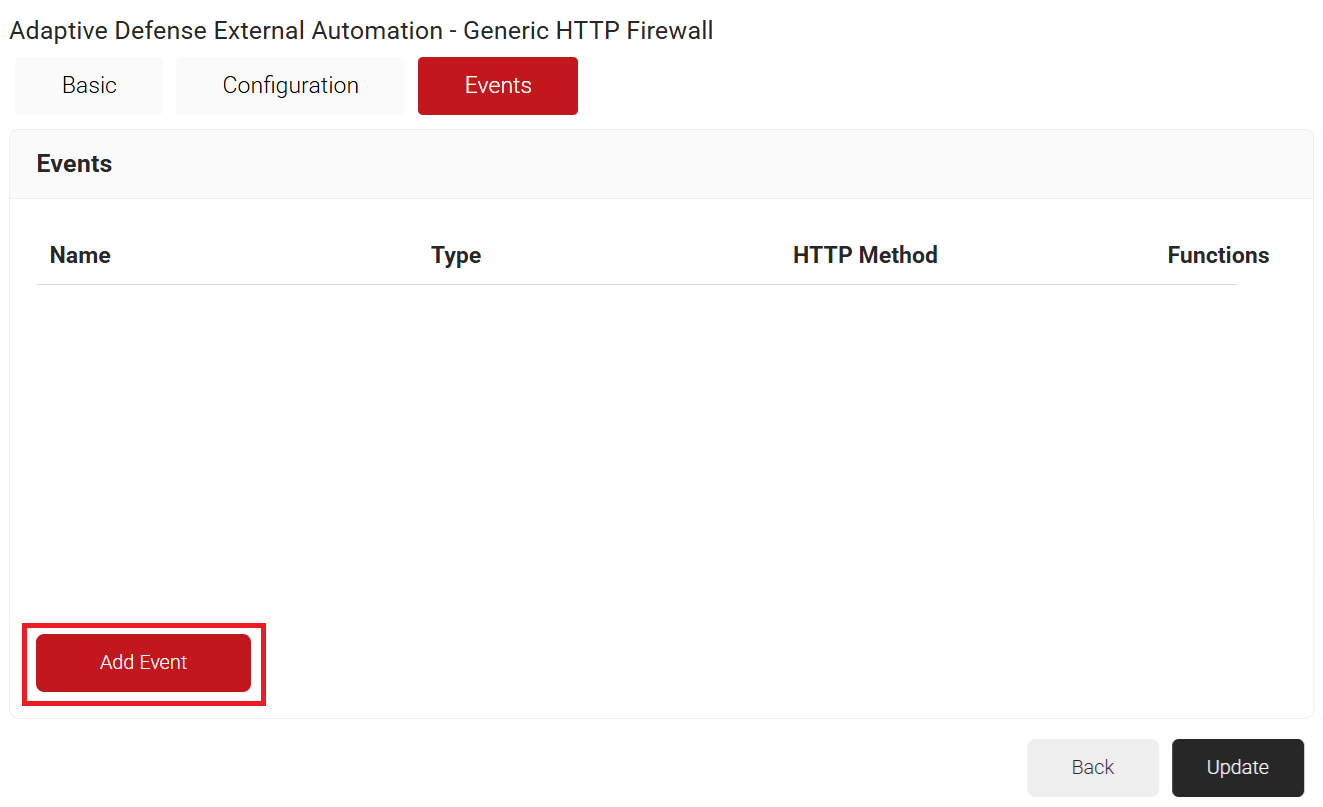
- Click the Events tab and then click Add Event.

- In the Name field, enter a name for the event.
- From the Event Type drop-down list, select Login or Logout.NOTE: Each event type must be unique. You cannot create more than one event of the same type.
- The HTTP Method drop-down list is set to Post by default. This is the only supported method.
- From the Request Type drop-down list, select the appropriate request type for the firewall. The options are:
- REST
- SOAP
- For REST Request type:
- In the Relative Path (If any) field, enter the endpoint path.
- In the Headers section, click Add Header, and then enter a valid header name and value.
- From the Content Type drop-down list, select the request payload format.
- JSON (application/json)
- XML (application/xml)
- XML (text/xml)
- In the Content field, enter the supported attributes for the request payload.
A sample JSON payload is shown below.
HTTP Event with JSON Request Payload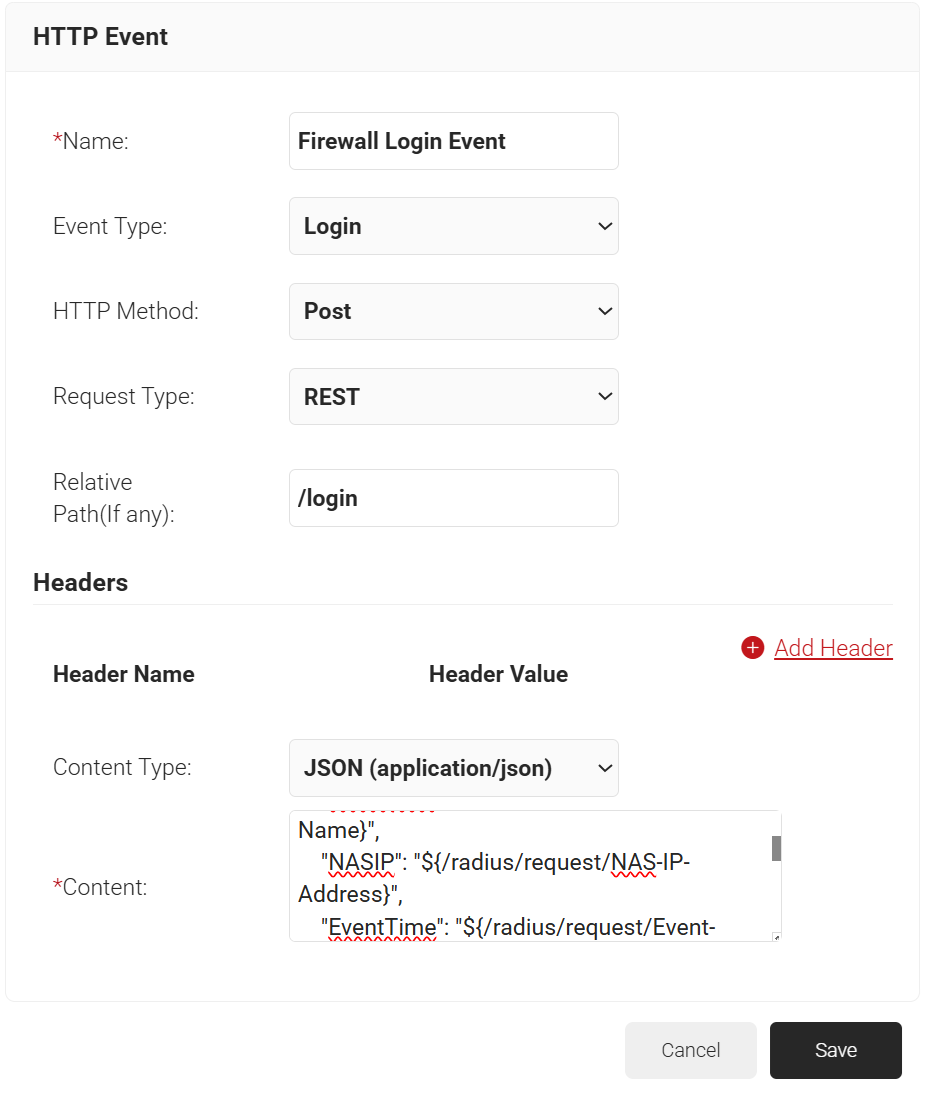
A sample XML payload for the REST request type is shown below.
HTTP Event with XML Request Payload (REST)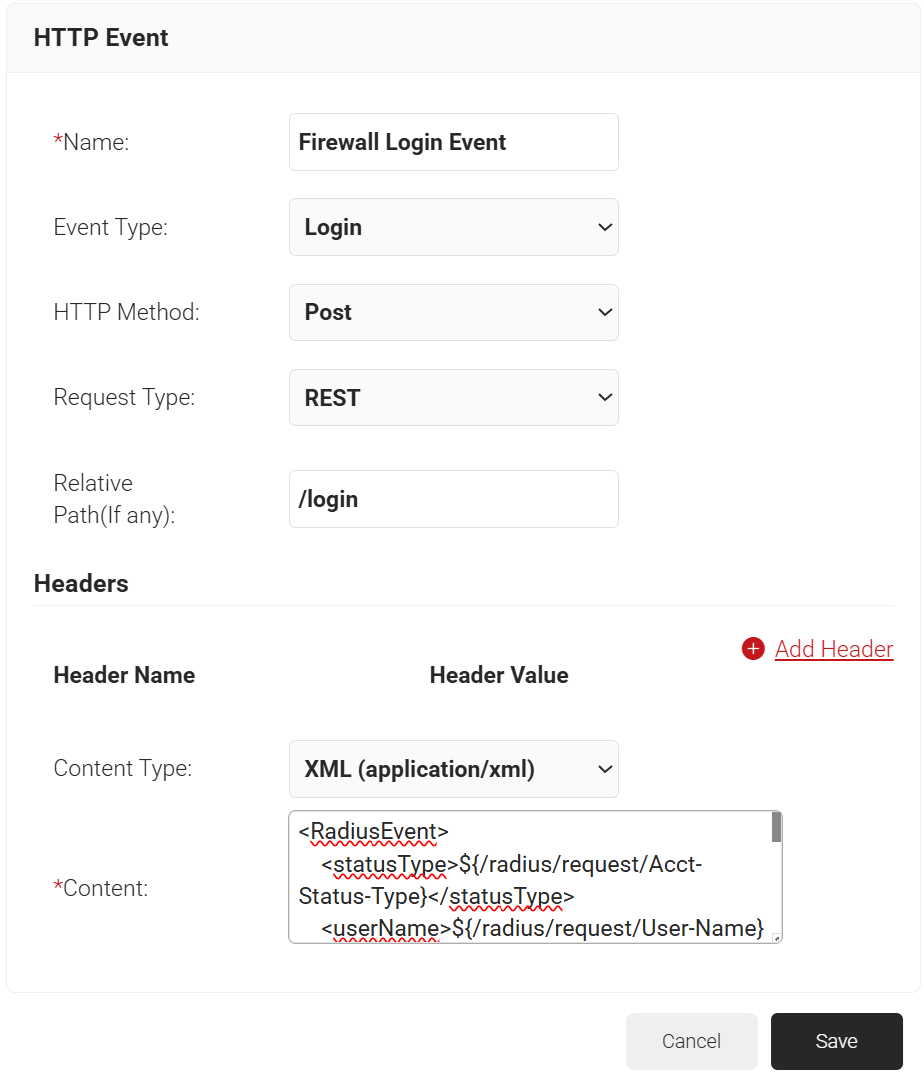
- For SOAP Request type:
- In the Relative Path (If any) field, enter the endpoint path.
- In the Headers section, click Add Header, and then enter a valid header name and value.
- From the Content Type drop-down list, select the request payload format.
- XML (application/xml)
- XML (text/xml)
- In the Content field, enter the supported attributes for the request payload.
NOTE: Please provide the content without specifying the Authentication headers. Authentication headers will be added automatically based on the details provided in the Configuration tab.
A sample XML payload for the SOAP request type is shown below.
HTTP Event with XML Request Payload (SOAP)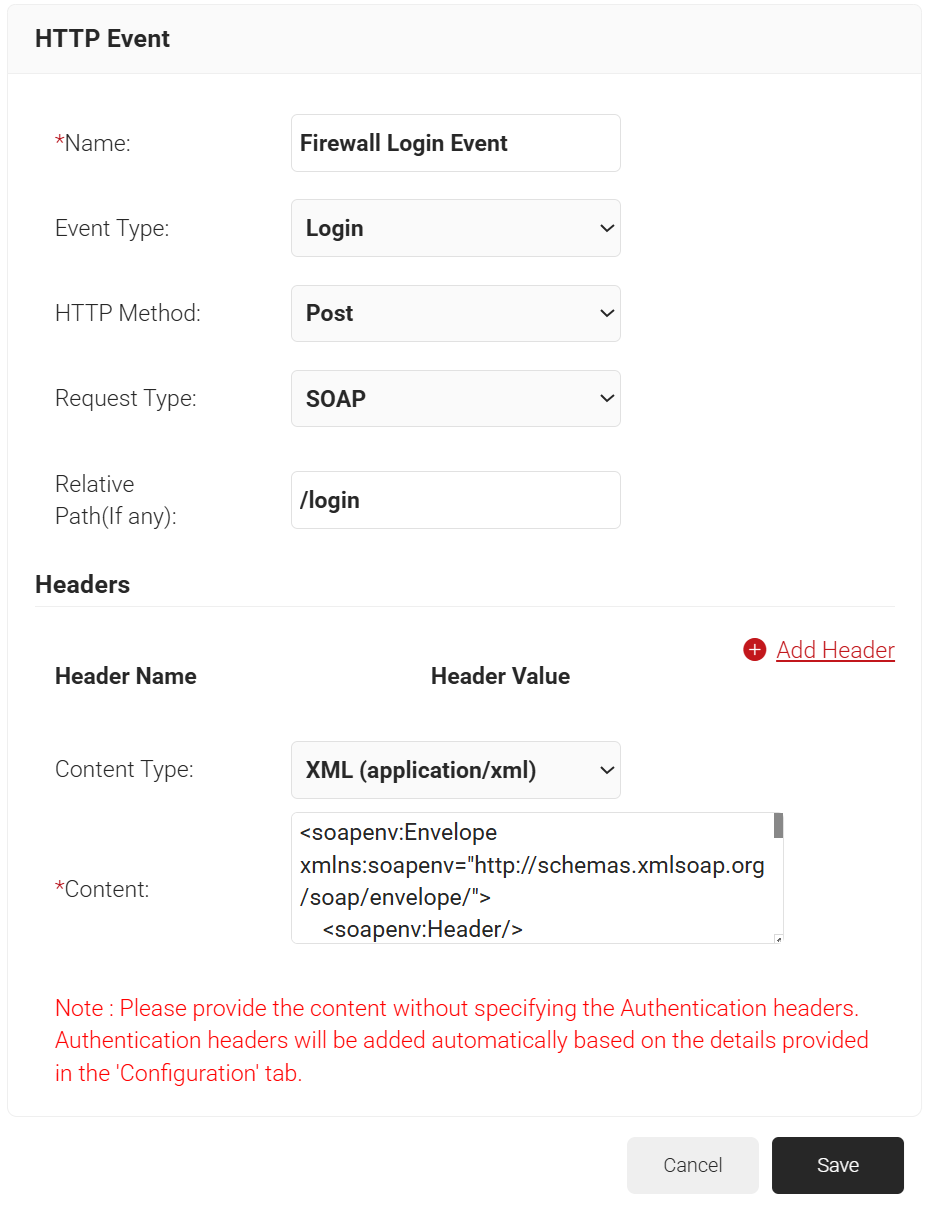
- Click Save.
- Click Update.
Use Generic HTTP to publish certificate events from JoinNow to an external server when a native integration isn’t available. Each time a certificate is issued or revoked, JoinNow sends the event to the HTTP endpoint you configure.
To publish certificate events through a Generic HTTP External Automation, perform the following steps:
- Navigate to Integration Hub > Adaptive Defense External Automations.
- Click the Add External Automation.
- In the Basic section, enter the name of the adaptive defense external automation in the Name field.
- In the Description field, enter a description for the adaptive defense external automation.
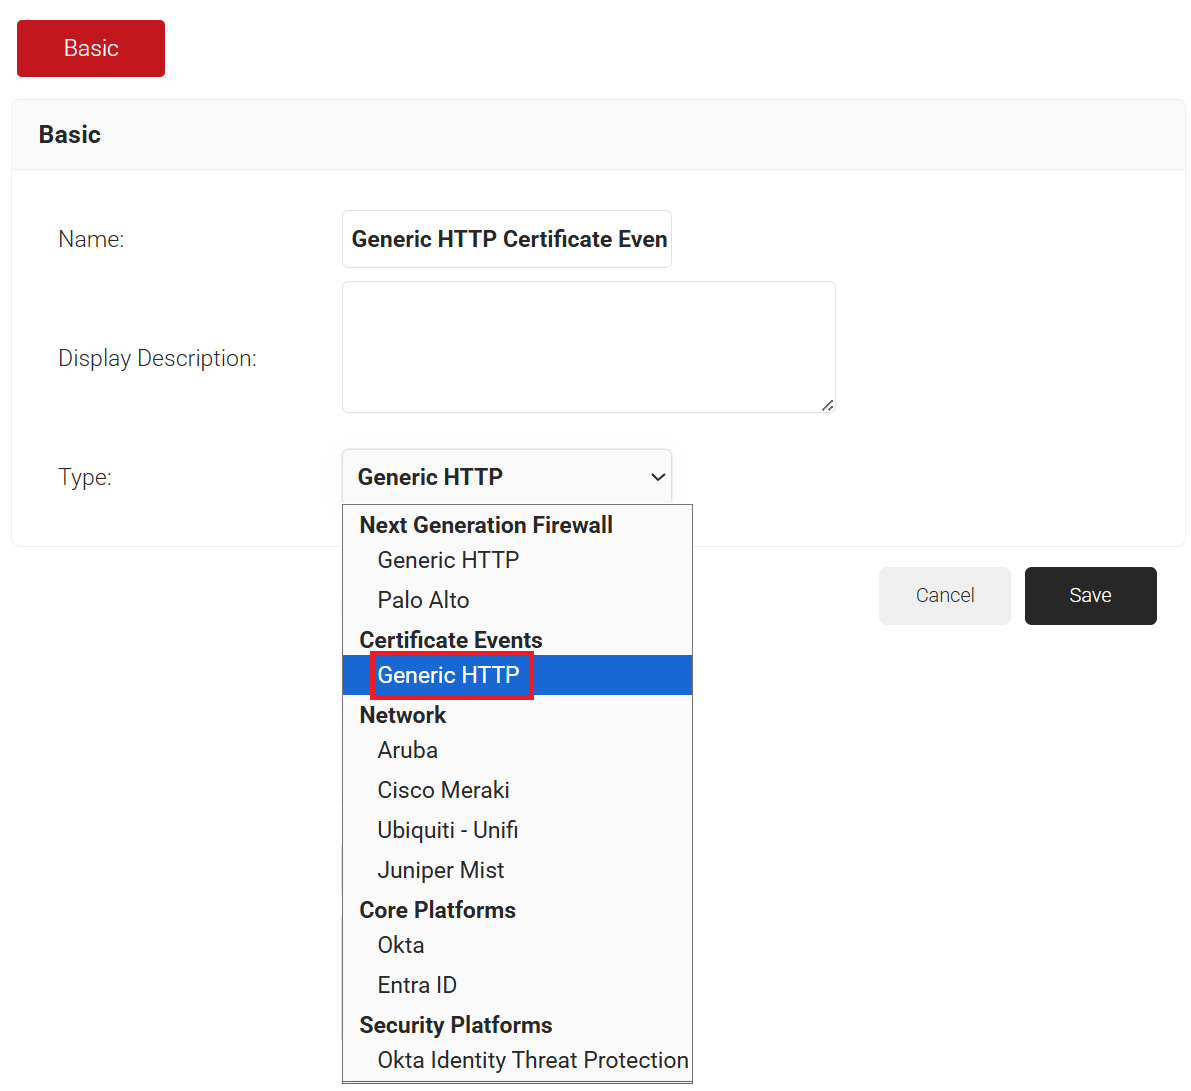
- From the Type drop-down list, select Generic HTTP under Certificate Events.
- Click Save.
- Click the Configuration tab.
- In the Server URL field, enter the firewall URL to which RADIUS accounting events must be pushed.
- (Optional) To use your organization’s certificate, select the Custom SSL checkbox.
- In the Certificate field, click Choose File.
- Select the required certificate and click Upload.
- Select the Authentication checkbox.
- From the Authentication Method drop-down list, select any one of the following options:
- Basic
- OAuth
- API Key
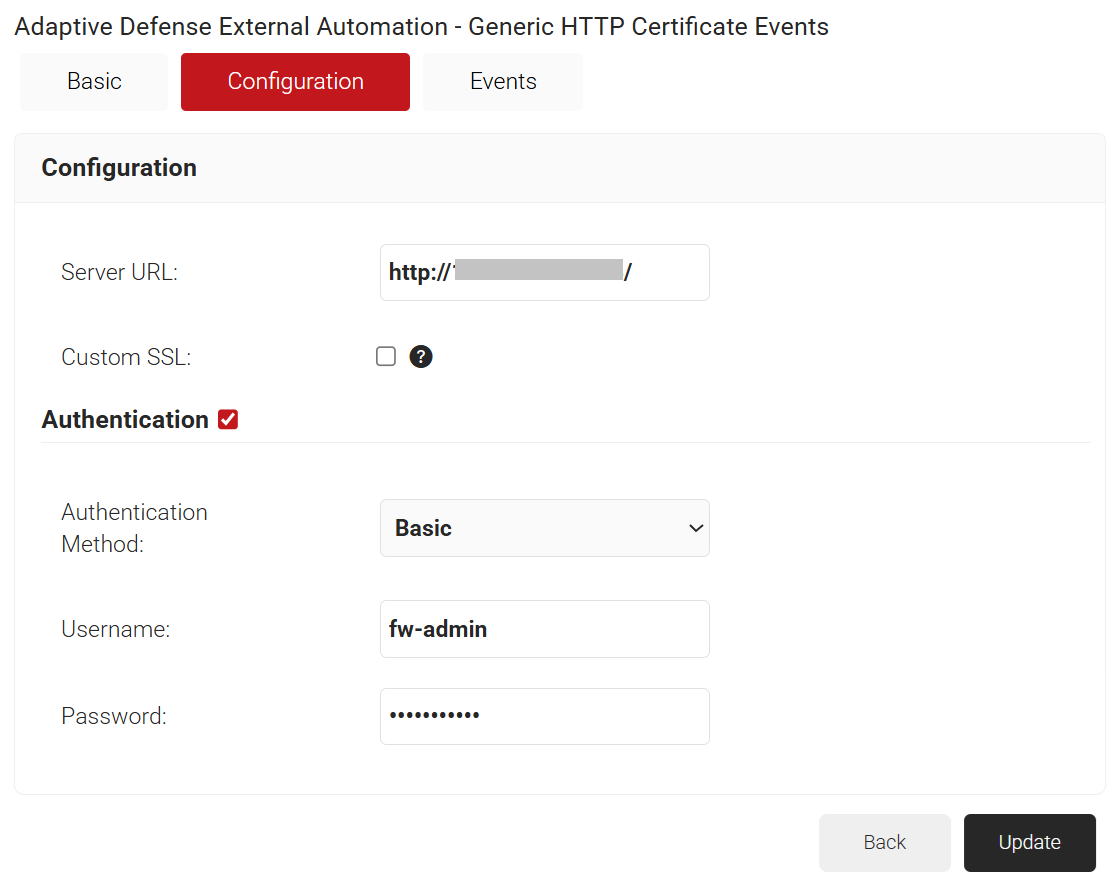
- If you select Basic as the authentication method:
- In the Username and Password fields, enter the credentials configured on the external server. JoinNow uses these credentials to authenticate when publishing certificate events.

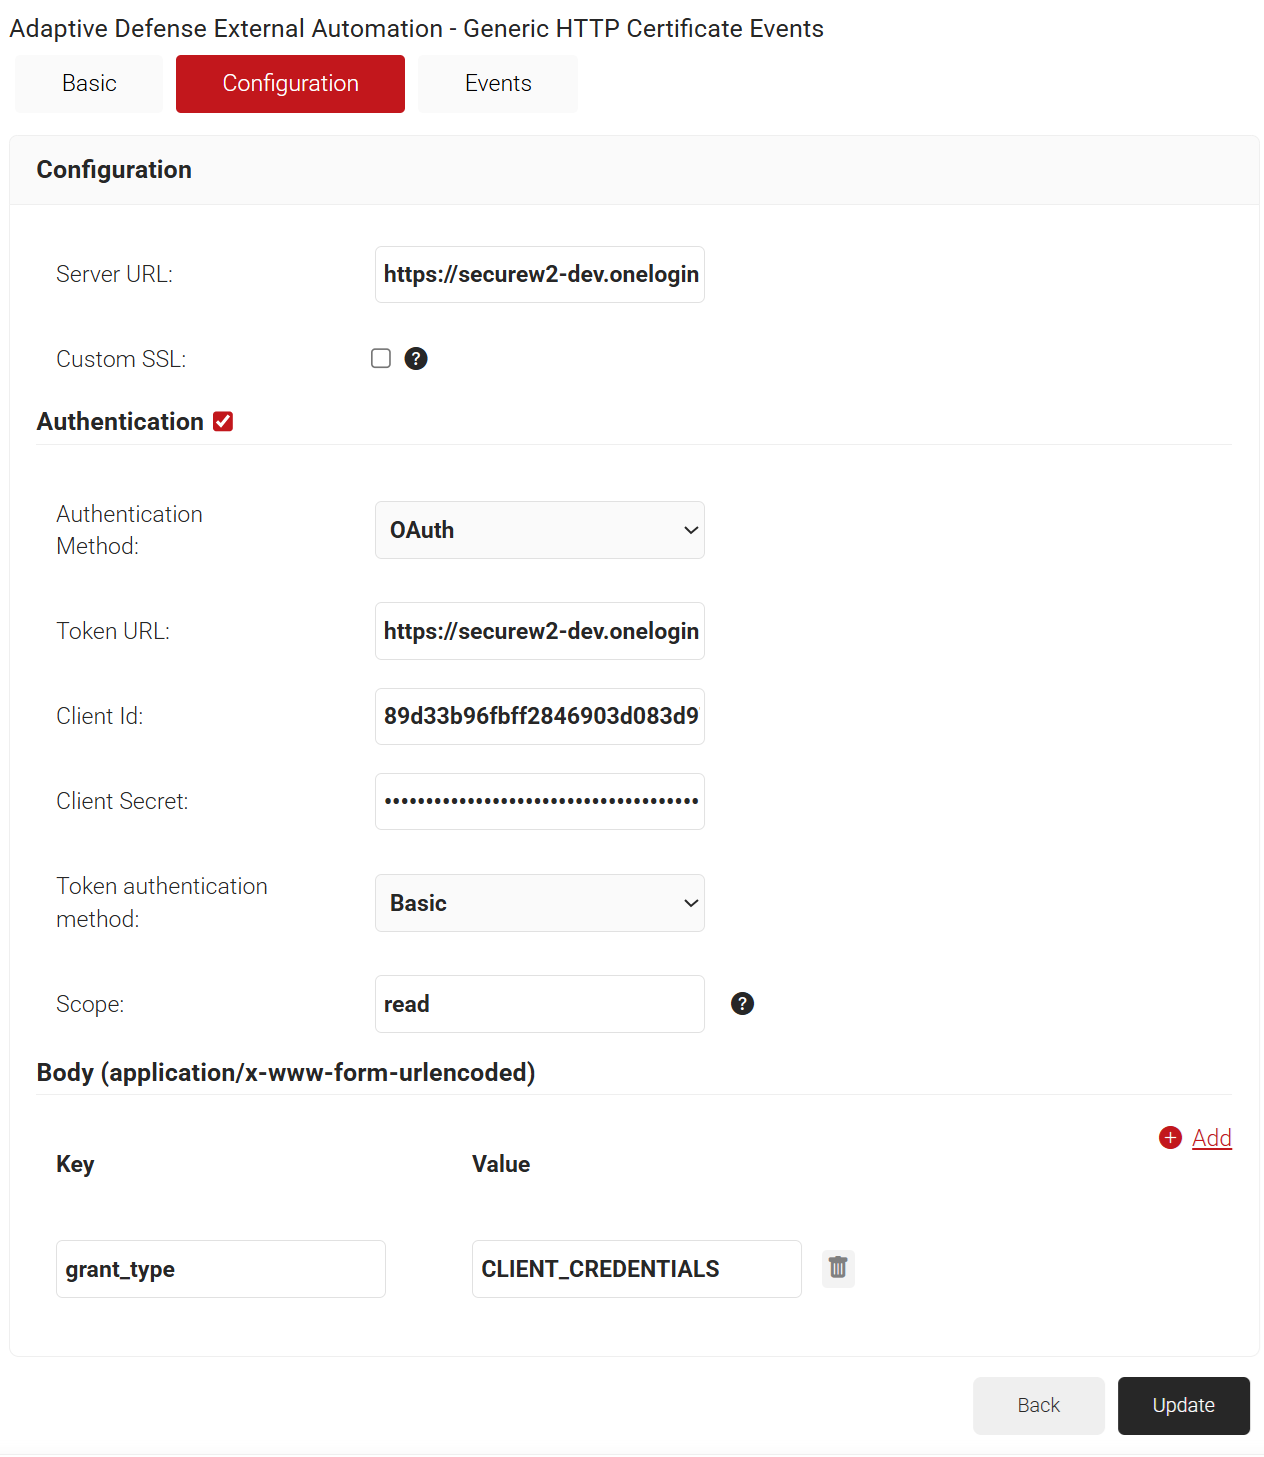
- If you select OAuth as the authentication method:
- In the Token URL field, enter the OAuth authentication server URL.
- In the Client ID field, enter the Client ID provided by the OAuth server.
- In the Client Secret field, enter the client secret provided by the OAuth server.
- From the Token Authentication Method drop-down list, select Basic or Request Body.
- In the Scope field, enter the required scope.
- In the Body section, click Add and enter the required key-value pairs.

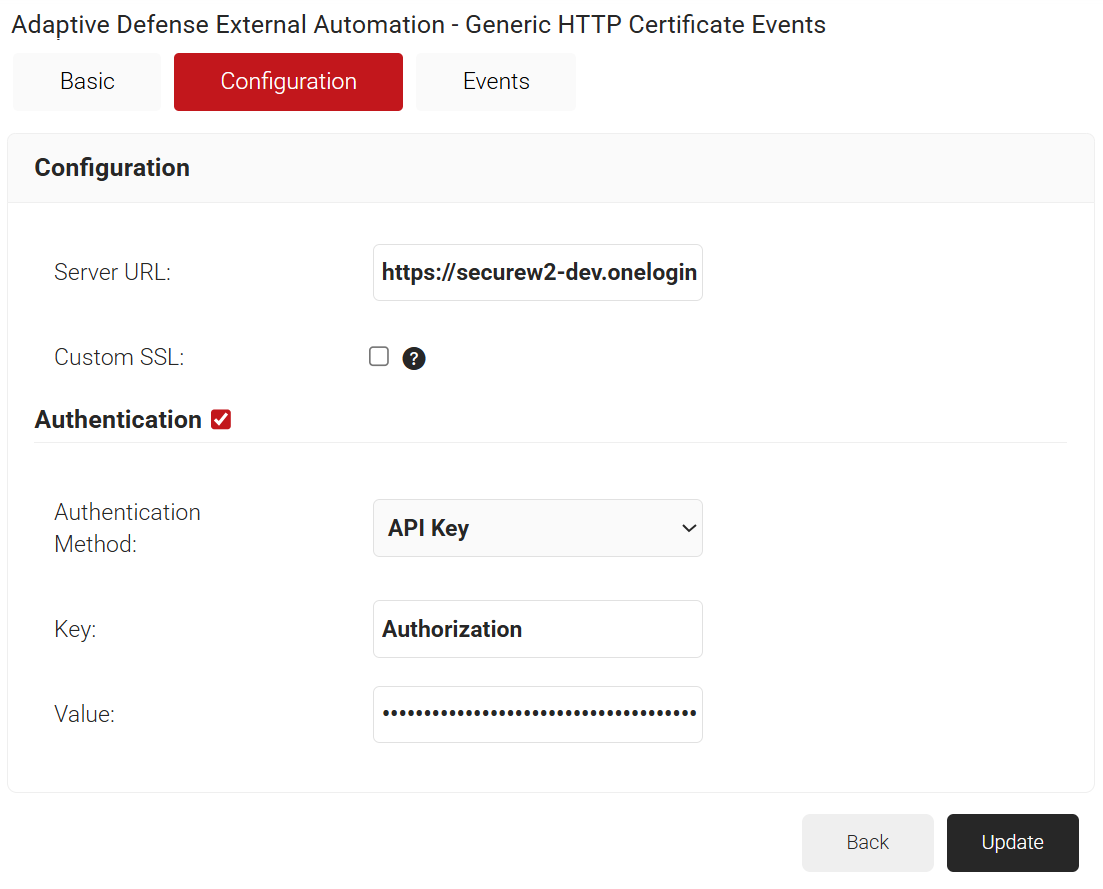
- If you select API Key as the authentication method:
- The Key field displays Authorization by default.
- In the Value field, enter the API key provided by the external server.
- In the Username and Password fields, enter the credentials configured on the external server. JoinNow uses these credentials to authenticate when publishing certificate events.
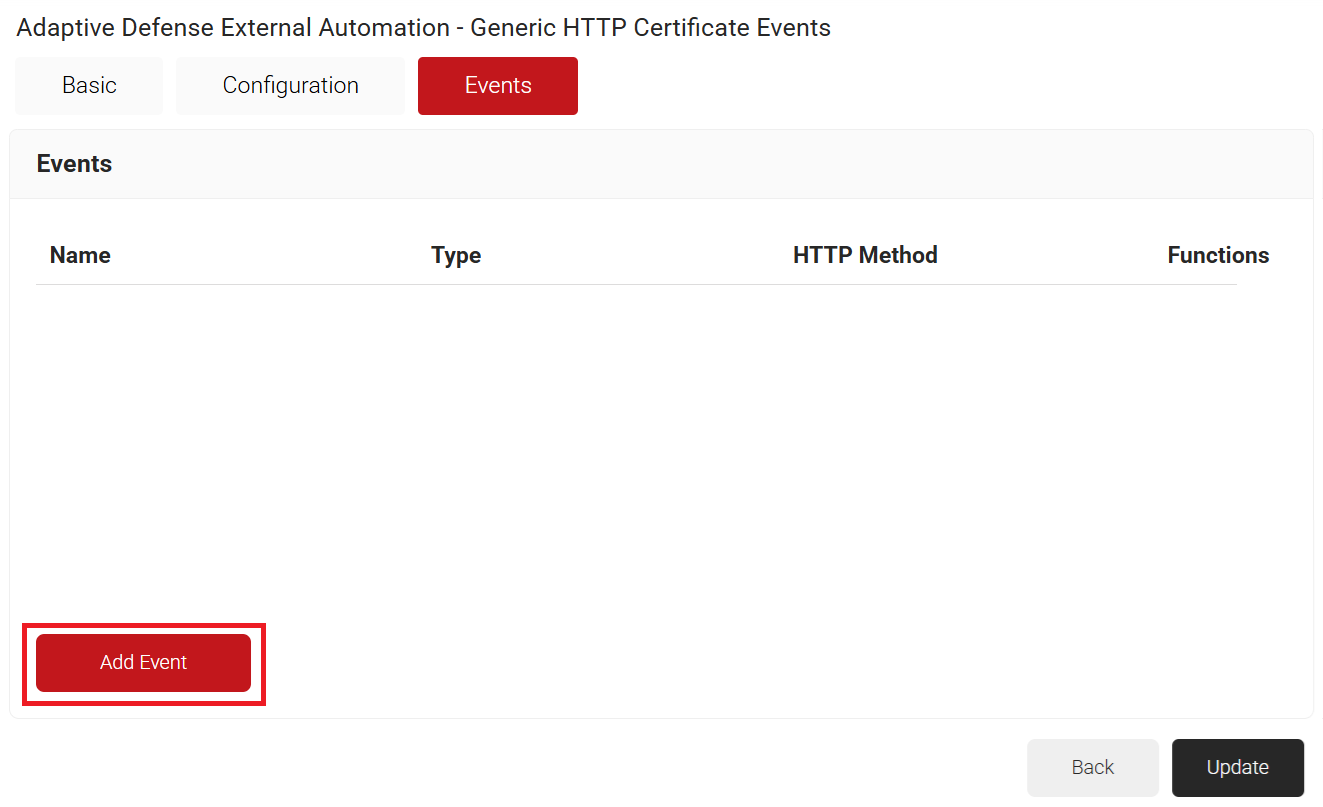
- Click the Events tab and then click Add Event.
- In the Name field, enter a name for the event.
- From the Event Type drop-down list, select Certificate Issuance or Certificate Revocation.NOTE: Each event type must be unique. You cannot create more than one event of the same type.
- The HTTP Method drop-down list is set to Post by default. This is the only supported method.
- From the Request Type drop-down list, select the appropriate request type for the firewall. The options are:
- REST
- SOAP
- For REST Request type:
- In the Relative Path (If any) field, enter the endpoint path.
- In the Headers section, click Add Header, and then enter a valid header name and value.
- From the Content Type drop-down list, select the request payload format.
- JSON (application/json)
- XML (application/xml)
- XML (text/xml)
- In the Content field, enter the supported attributes for the request payload.
A sample JSON payload is shown below.
Certificate Issuance Event with JSON Request Payload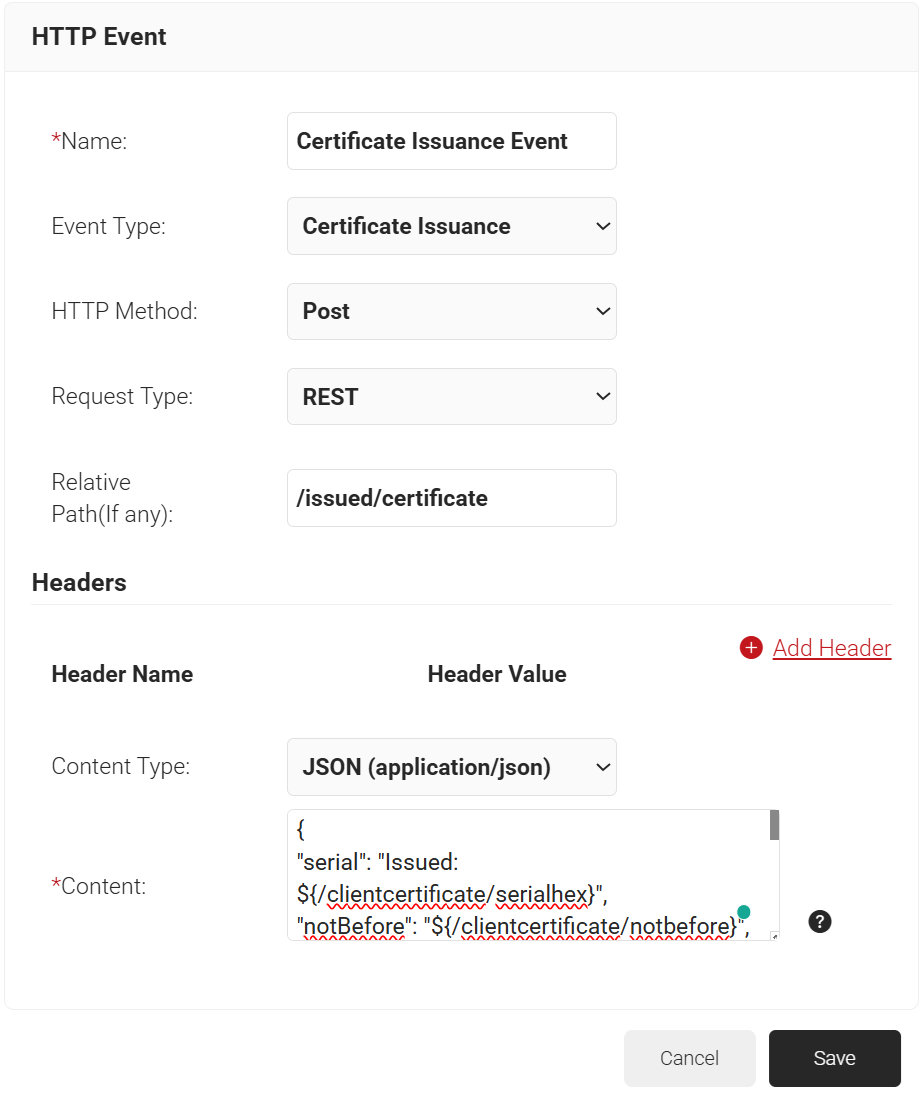
A sample XML payload for the REST request type is shown below.
Certificate Issuance Event with XML Request Payload (REST)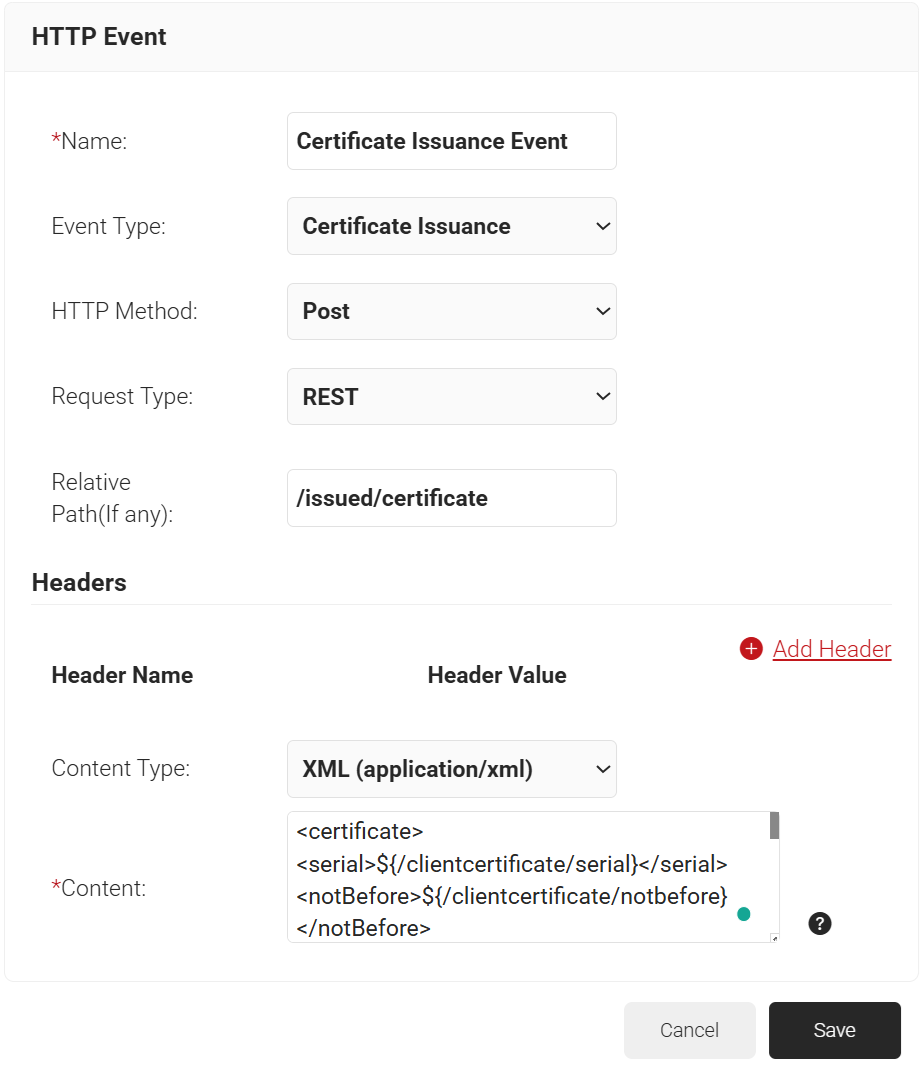
- For SOAP Request type:
- In the Relative Path (If any) field, enter the endpoint path.
- In the Headers section, click Add Header, and then enter a valid header name and value.
- From the Content Type drop-down list, select the request payload format.
- XML (application/xml)
- XML (text/xml)
- In the Content field, enter the supported attributes for the request payload.
NOTE: Please provide the content without specifying the Authentication headers. Authentication headers will be added automatically based on the details provided in the Configuration tab.
A sample XML payload for the SOAP request type is shown below.

- Click Save.
- Click Update.