NinjaOne MDM allows you to enroll macOS devices by manually installing the enrollment profile.
To generate an enrollment profile for macOS, perform the following steps:
- Log in to the NinjaOne portal.
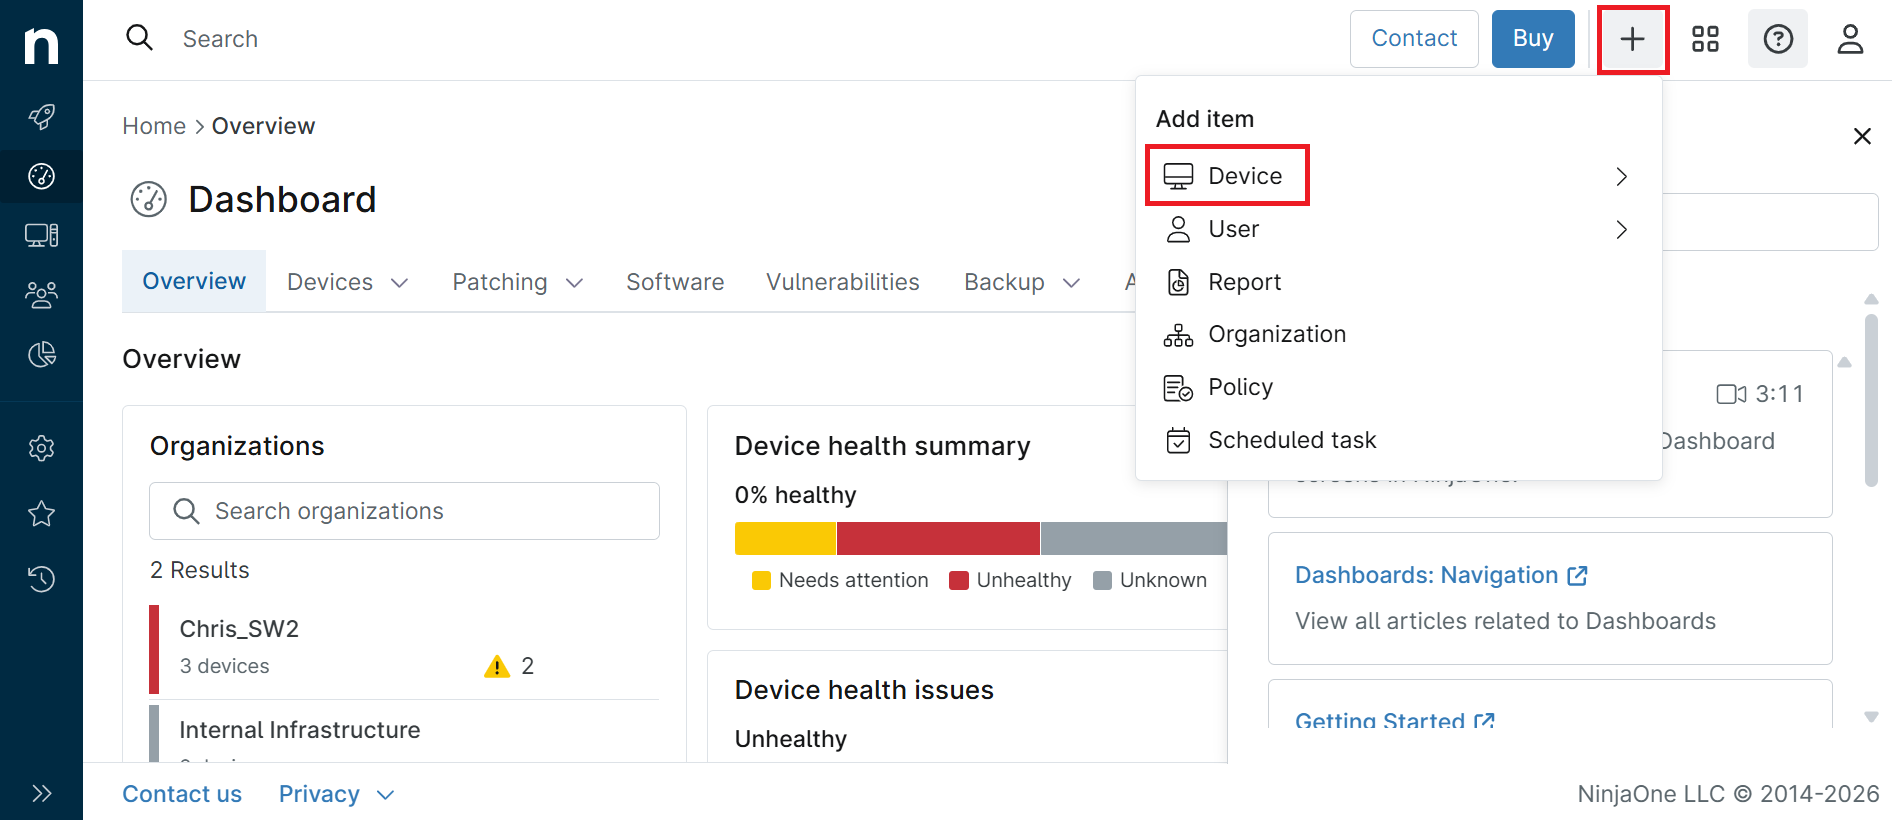
- On the Dashboard page, click the + icon in the top-right corner.

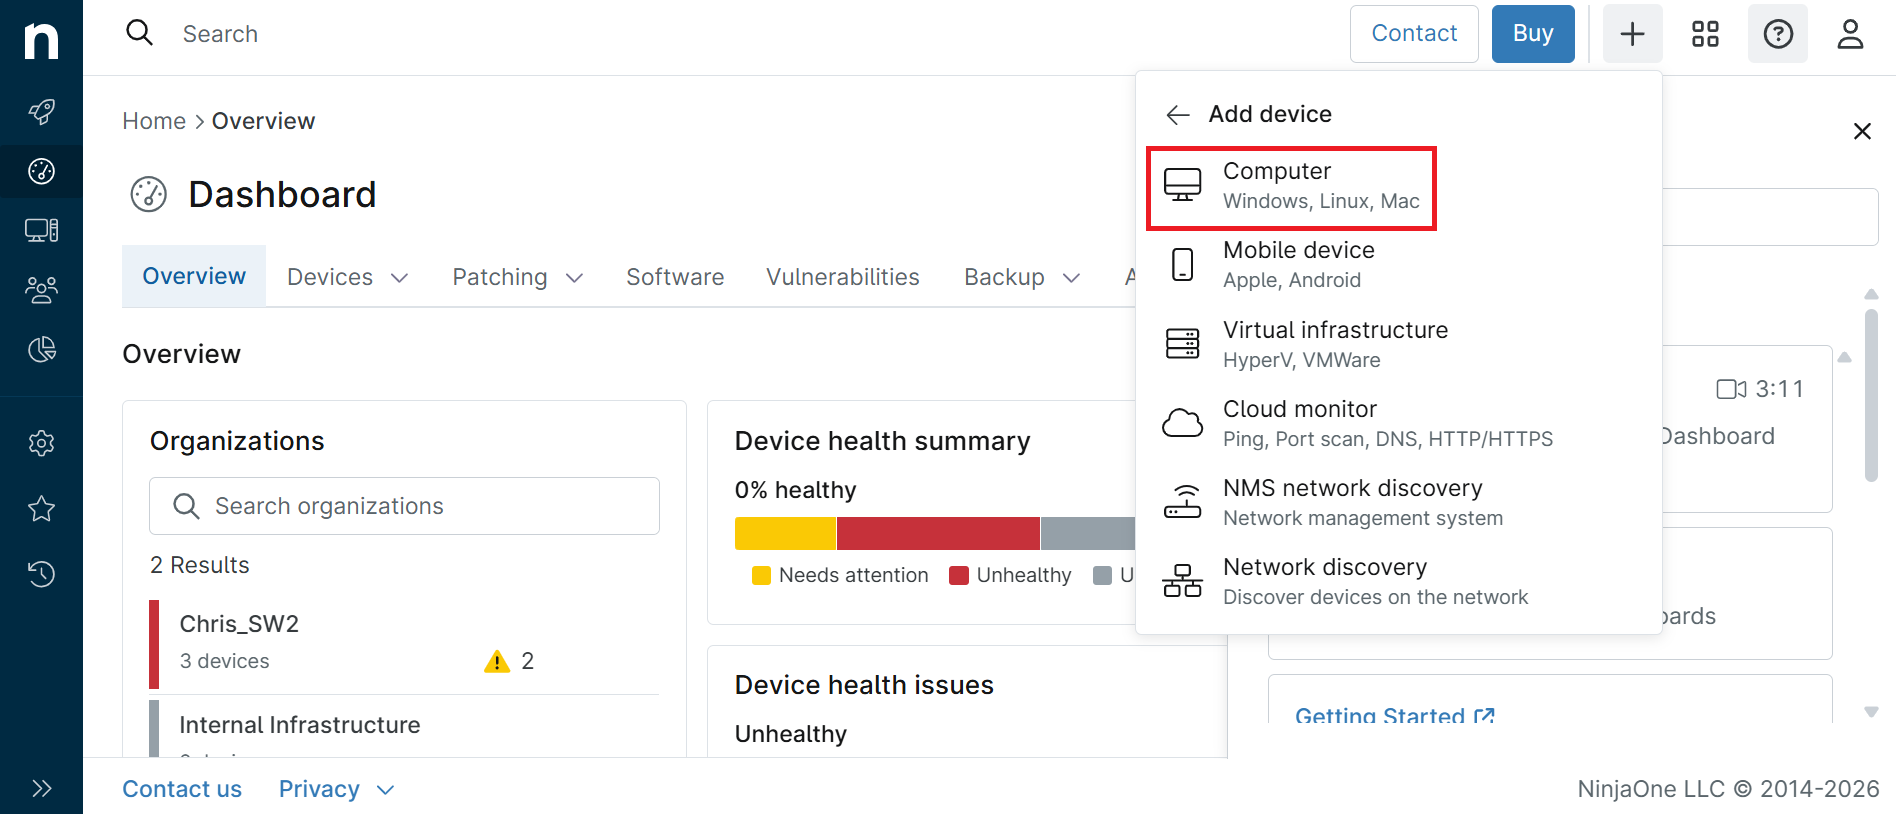
- Click Device and then select Computer.

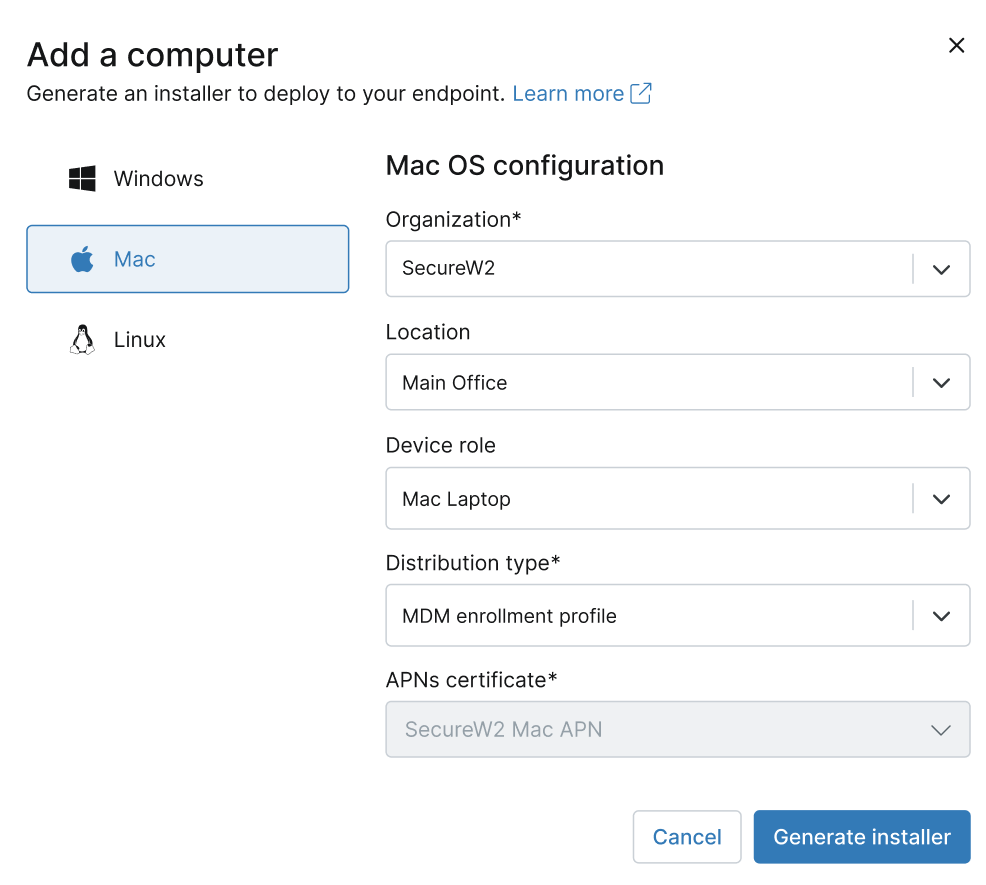
- On the Add a computer pop-up window, select Mac.
- In Mac OS configuration:
- Specify the Organization, Location, and Device role for the device.
- From the Distribution type drop-down list, select MDM enrollment profile and select the APN certificate.

- Click Generate installer.
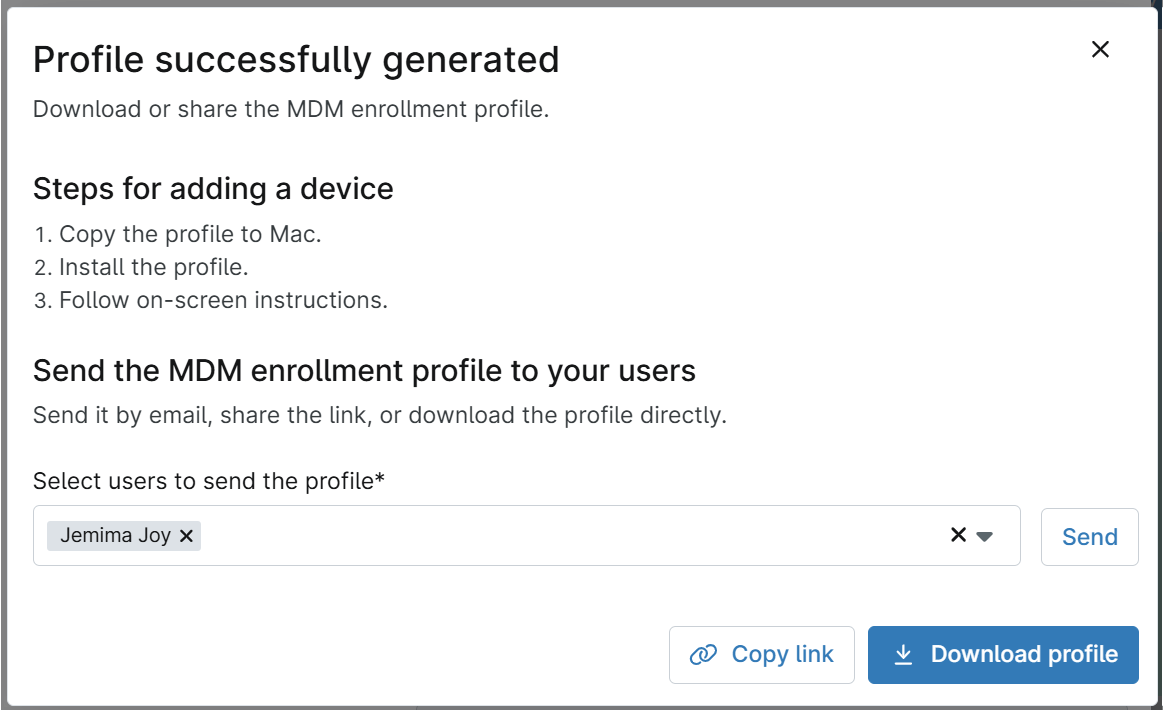
- Once the installer is generated, you can send the MDM enrollment profile to users using one of the following methods:
- Email: From the Select users to send the profile drop-down list, select the user accounts to email the enrollment profile to.
- Share the link: Click Copy link to copy the installer link to a text editor. The installer link follows this format: https://ca.ninjarmm.com/apple/enroll/xxxxxxxxxxxxx
- Download: Click Download profile to download the installer to your console. The profile you download will be in .mobileconfig format.

NinjaOne allows you to create and edit custom scripts. When running custom scripts on devices, NinjaOne will prompt you to specify optional parameters.
To import a new script into NinjaOne, perform the following steps:
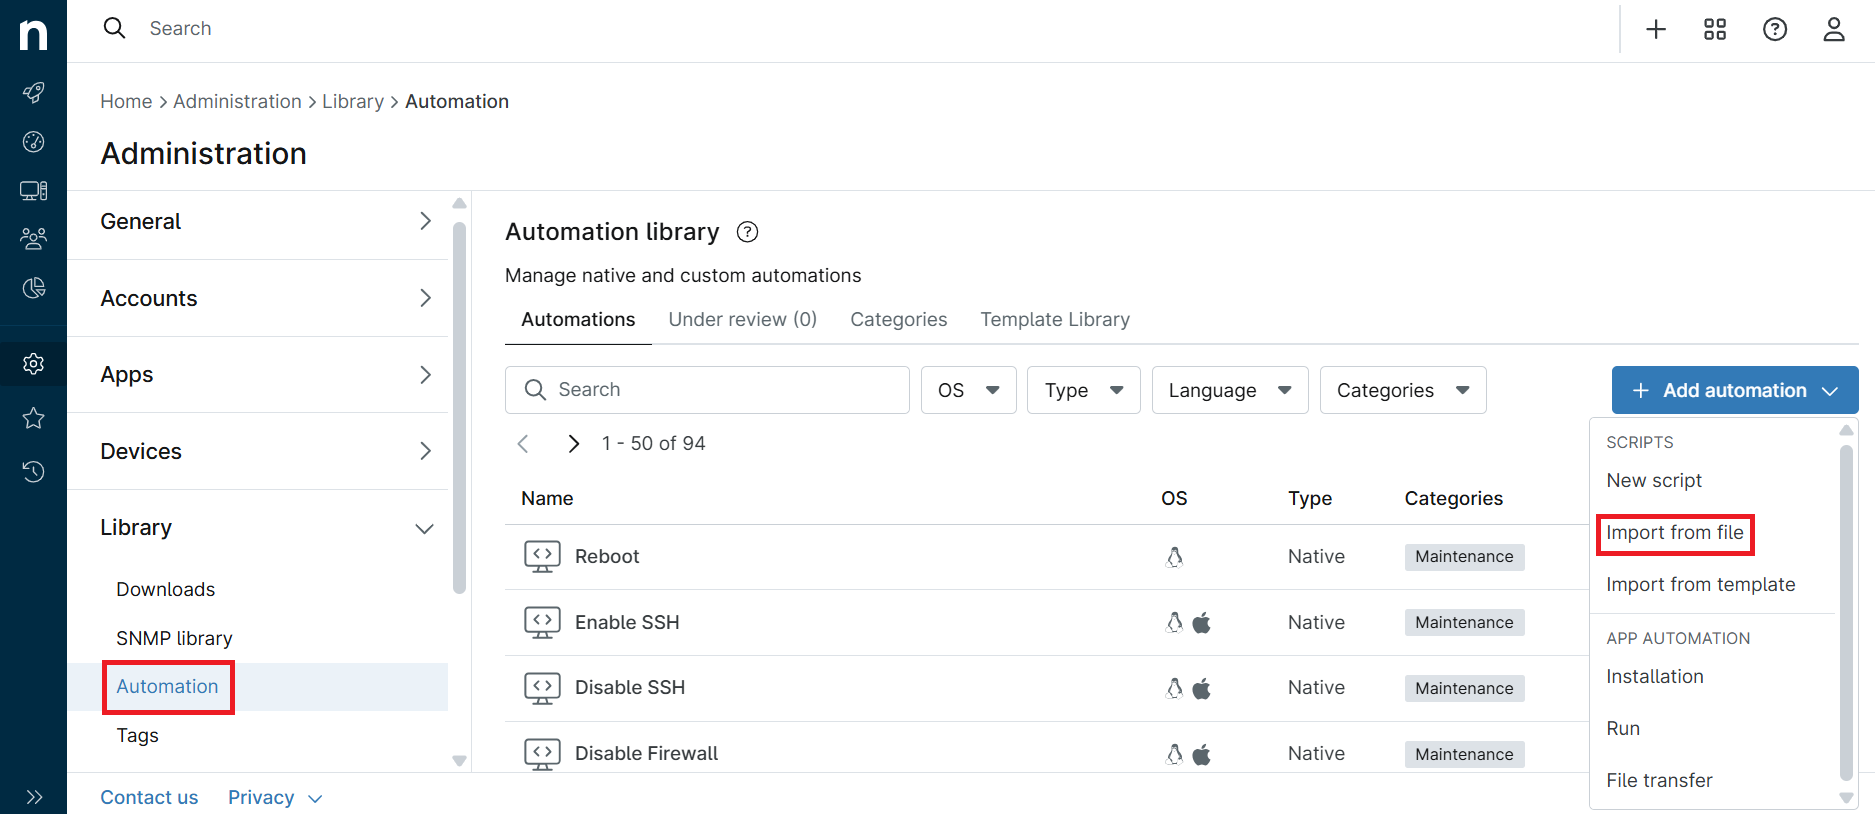
- Navigate to Administration > Library > Automation, then click Add automation > Import from file. Choose the script file you want to import. Before importing, ensure the script includes the API URL and API Secret obtained from the SecureW2 JoinNow portal.

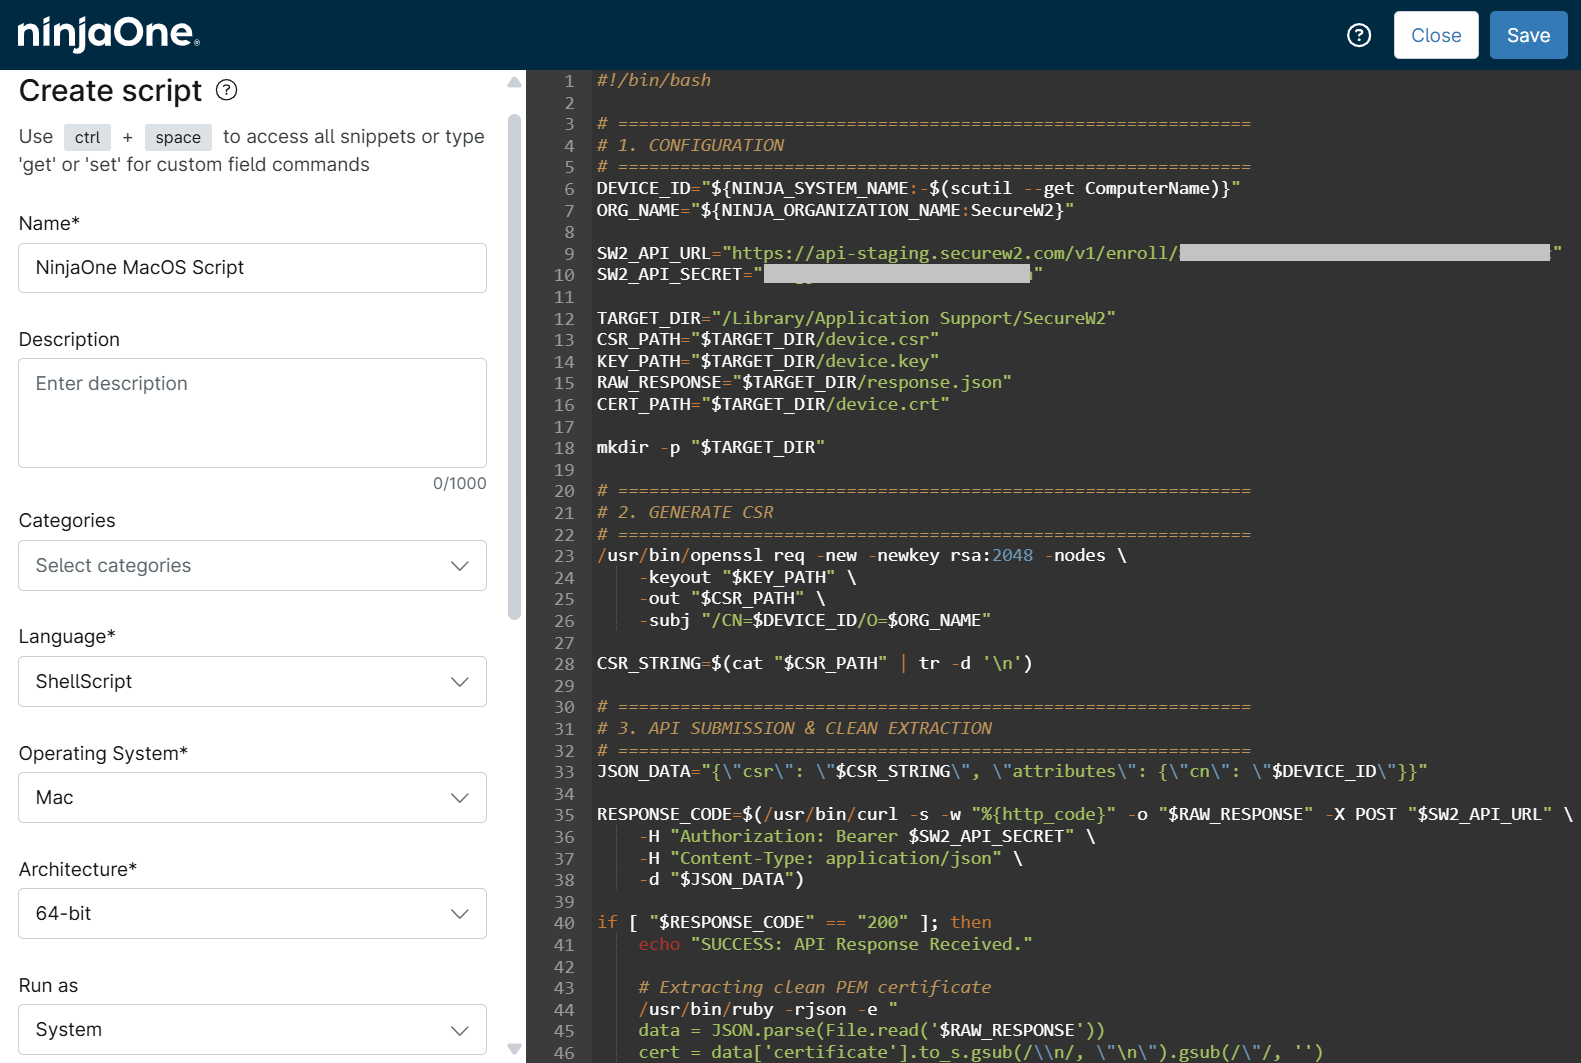
- On the Create Script page:
- In the Name field, enter the name of the script.
- From the Language drop-down list, select ShellScript.
- From the Operating System drop-down list, select Mac.
- From the Architecture drop-down list, select either 32-bit or 64-bit.
- From the Run as drop-down list, select System.

- Click Save.
A policy is a collection of conditions, actions, and settings that can be applied to a group of devices. Devices assigned to the policy inherit these configurations.
To create a new policy, perform the following steps:
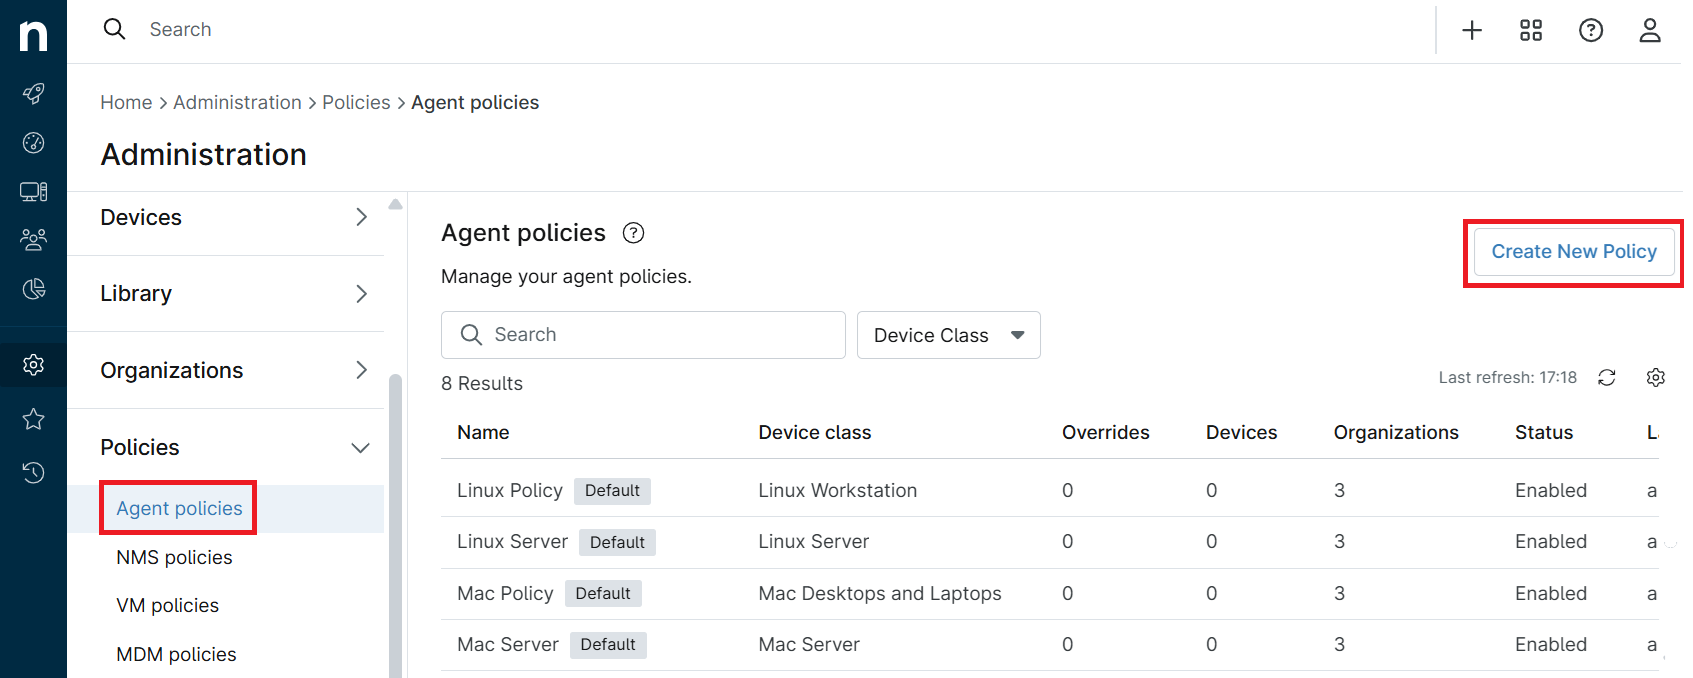
- Navigate to Administration > Policies > Agent policies and then click Create New Policy.

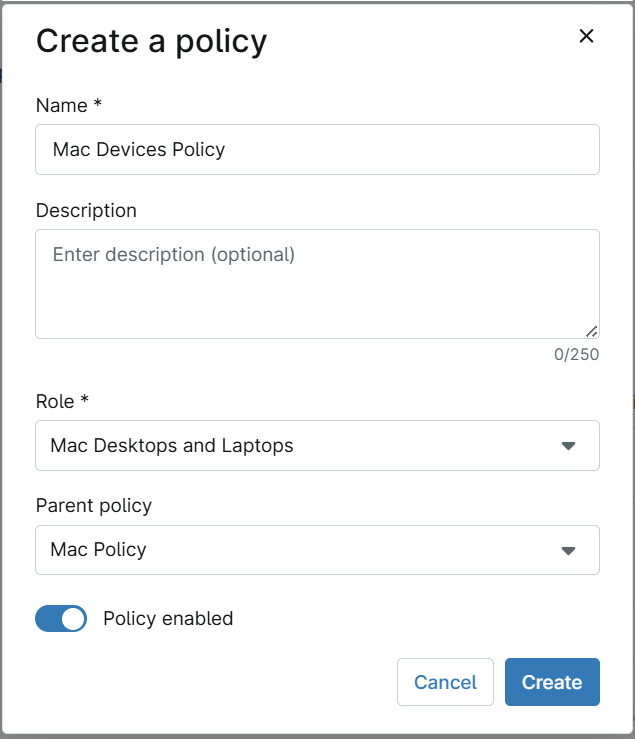
- In the Create a policy dialog box:
- In the Name field, enter the policy name.
- From the Role drop-down list, select Mac Desktops and Laptops to assign the policy to those devices.
- From the Parent policy drop-down list, select an option.

- Click Create.
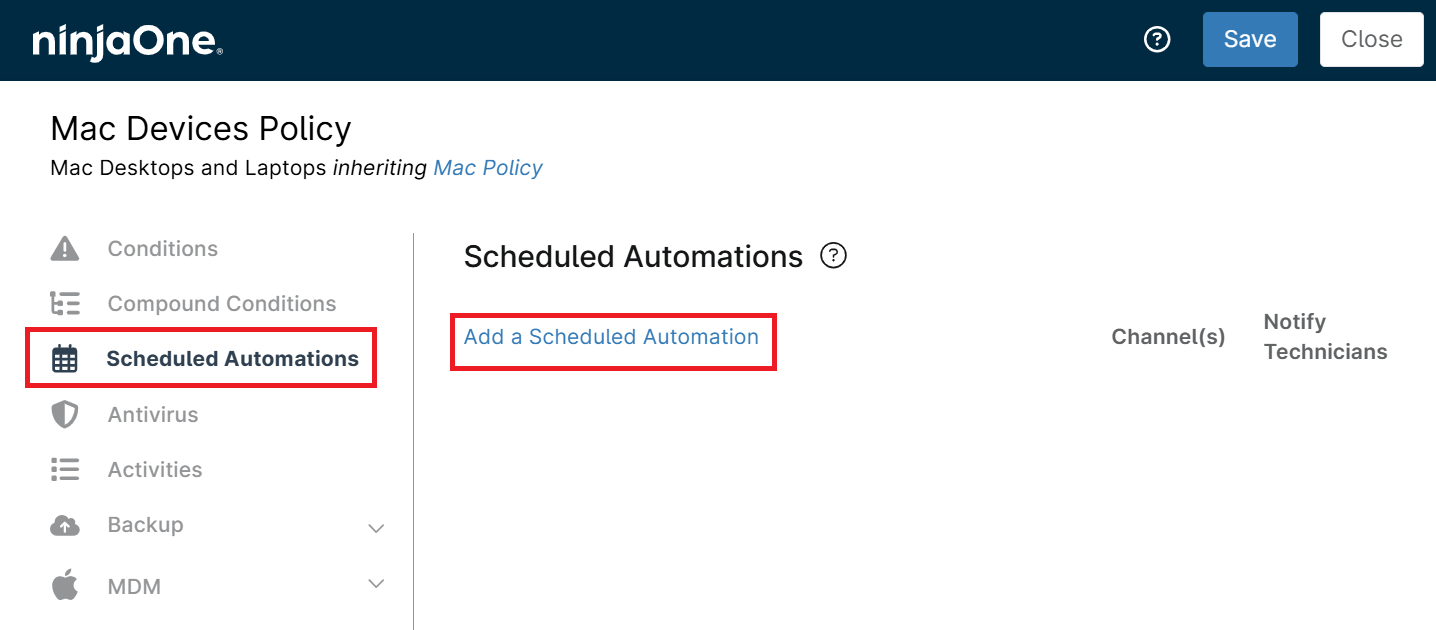
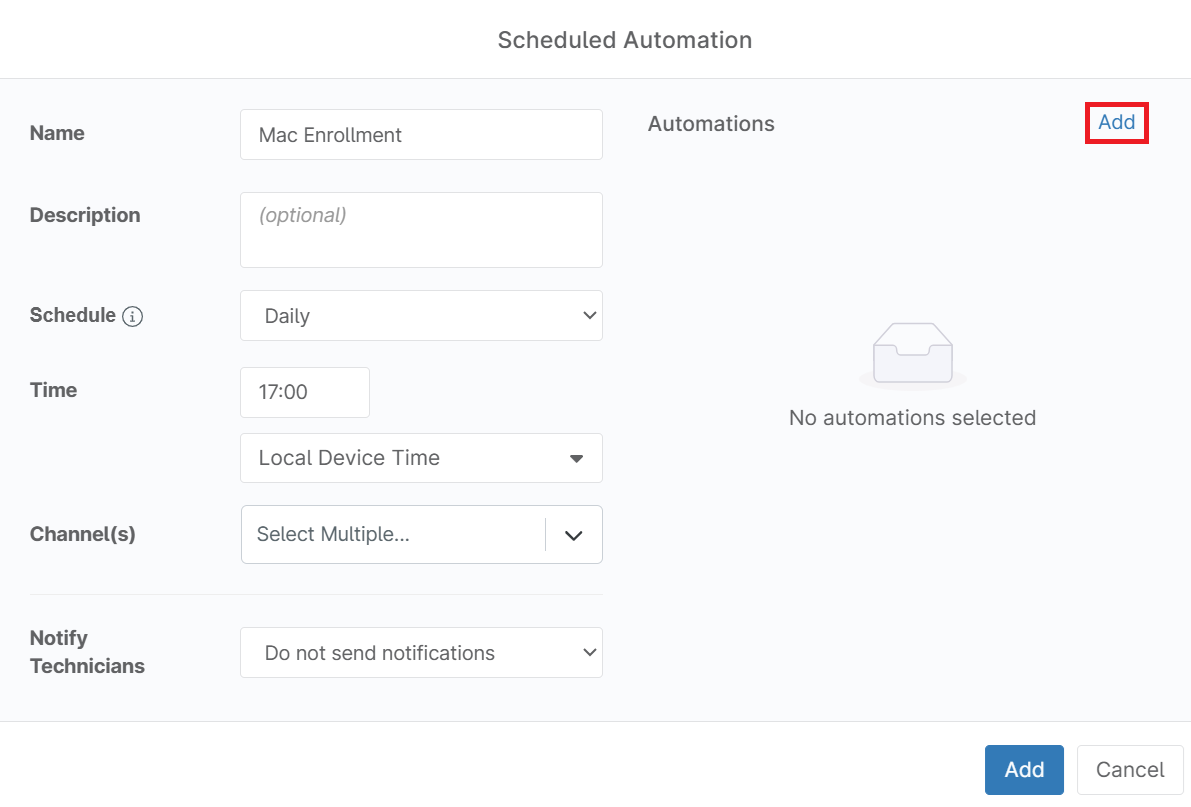
- On the displayed page, click Scheduled Automations in the left pane, then click Add a Scheduled Automation.

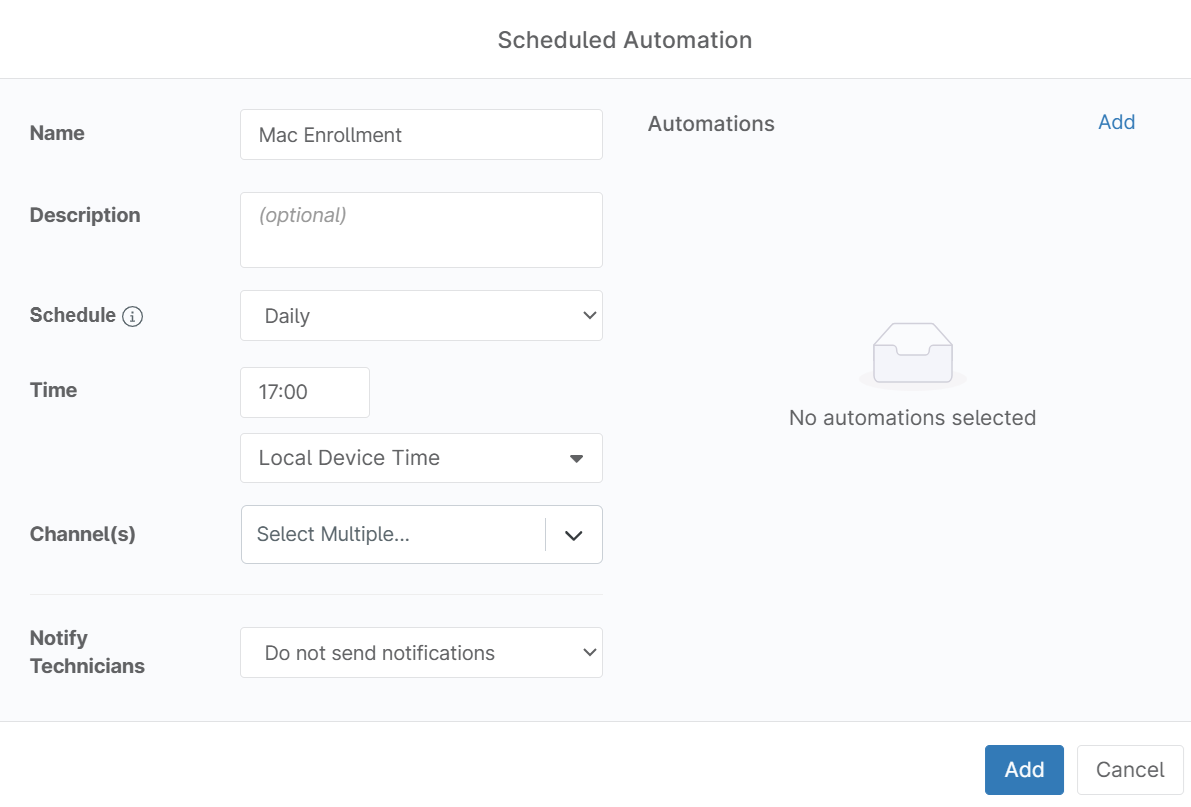
- In the Scheduled Automation pop-up window:
- In the Name field, enter a name for the scheduled automation.
- From the Schedule drop-down list, specify when the automation should run.
NOTE: If the device is offline, the automation will neither run nor be queued. - In the Time field, specify the preferred time.

- To activate the automation, perform the following steps:
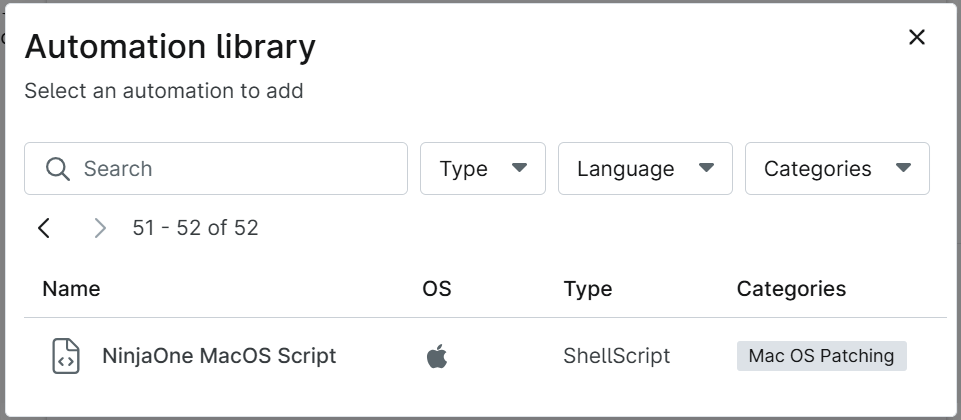
- Click Add Automation in the top-right corner and select the script to run as part of the scheduled automation.
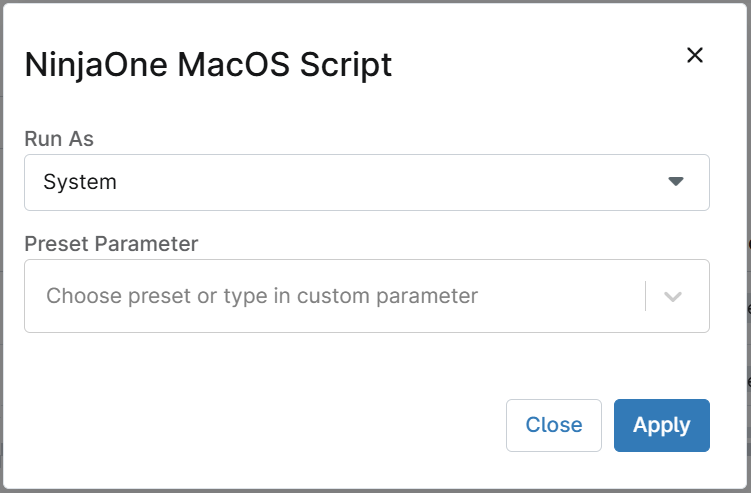
- In the Automation Library dialog, select the custom scripts you added to the library and click Apply. For instructions on creating a custom automation script, see the Creating a Custom Automation Script section.


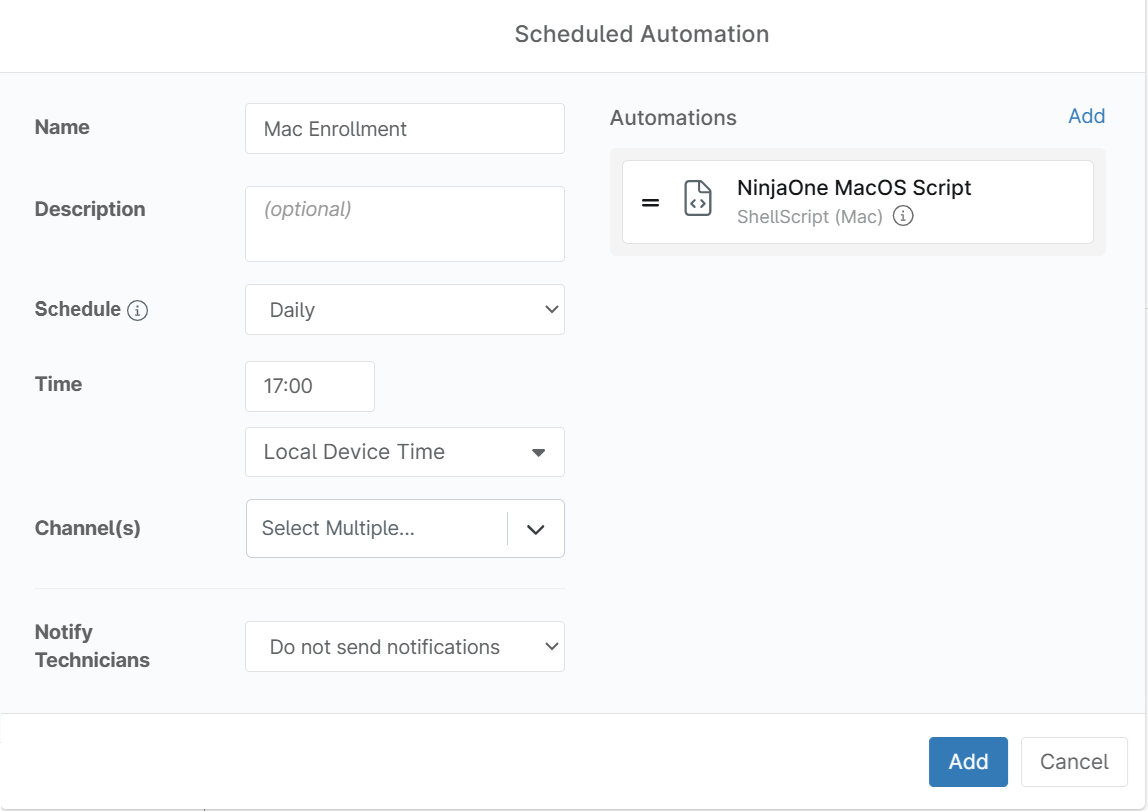
- After adding the script, click Add to apply the configuration for the new scheduled automation and then save your policy.


- Click Add Automation in the top-right corner and select the script to run as part of the scheduled automation.
NinjaOne MDM allows you to enroll Windows devices by manually installing the enrollment profile.
To generate an enrollment profile for Windows, perform the following steps:
- Log in to the NinjaOne portal.
- On the Dashboard page, click the + icon in the top-right corner.
- Click Device and then select Computer.
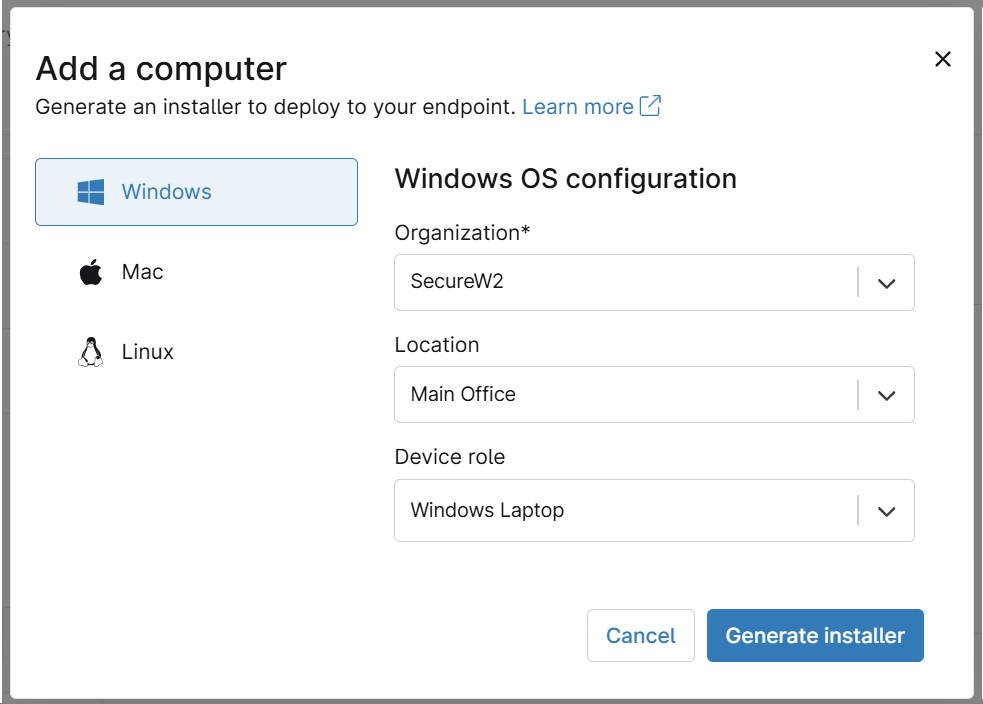
- On the Add a computer pop-up window, select Windows.
- In Windows OS configuration:
- Specify the Organization, Location, and Device role for the device.

- Click Generate installer.
- After generating the installer, you can send the Windows installer package to users using one of the following methods:
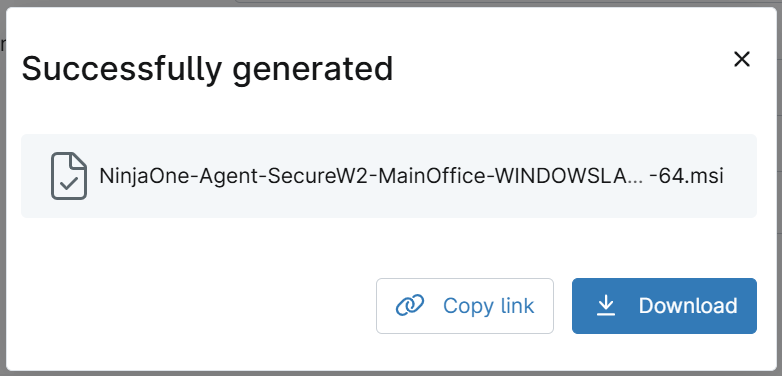
- Share the link: Click Copy link to copy the installer link to a text editor.
- Download: Click Download to save the installer. The downloaded profile will be in .msi format.

- Specify the Organization, Location, and Device role for the device.
To import a new script into NinjaOne, perform the following steps:
- Navigate to Administration > Library > Automation, then click Add automation > Import from file. Choose the script file you want to import. Before importing, ensure the script includes the API URL and API Secret obtained from the SecureW2 JoinNow portal.
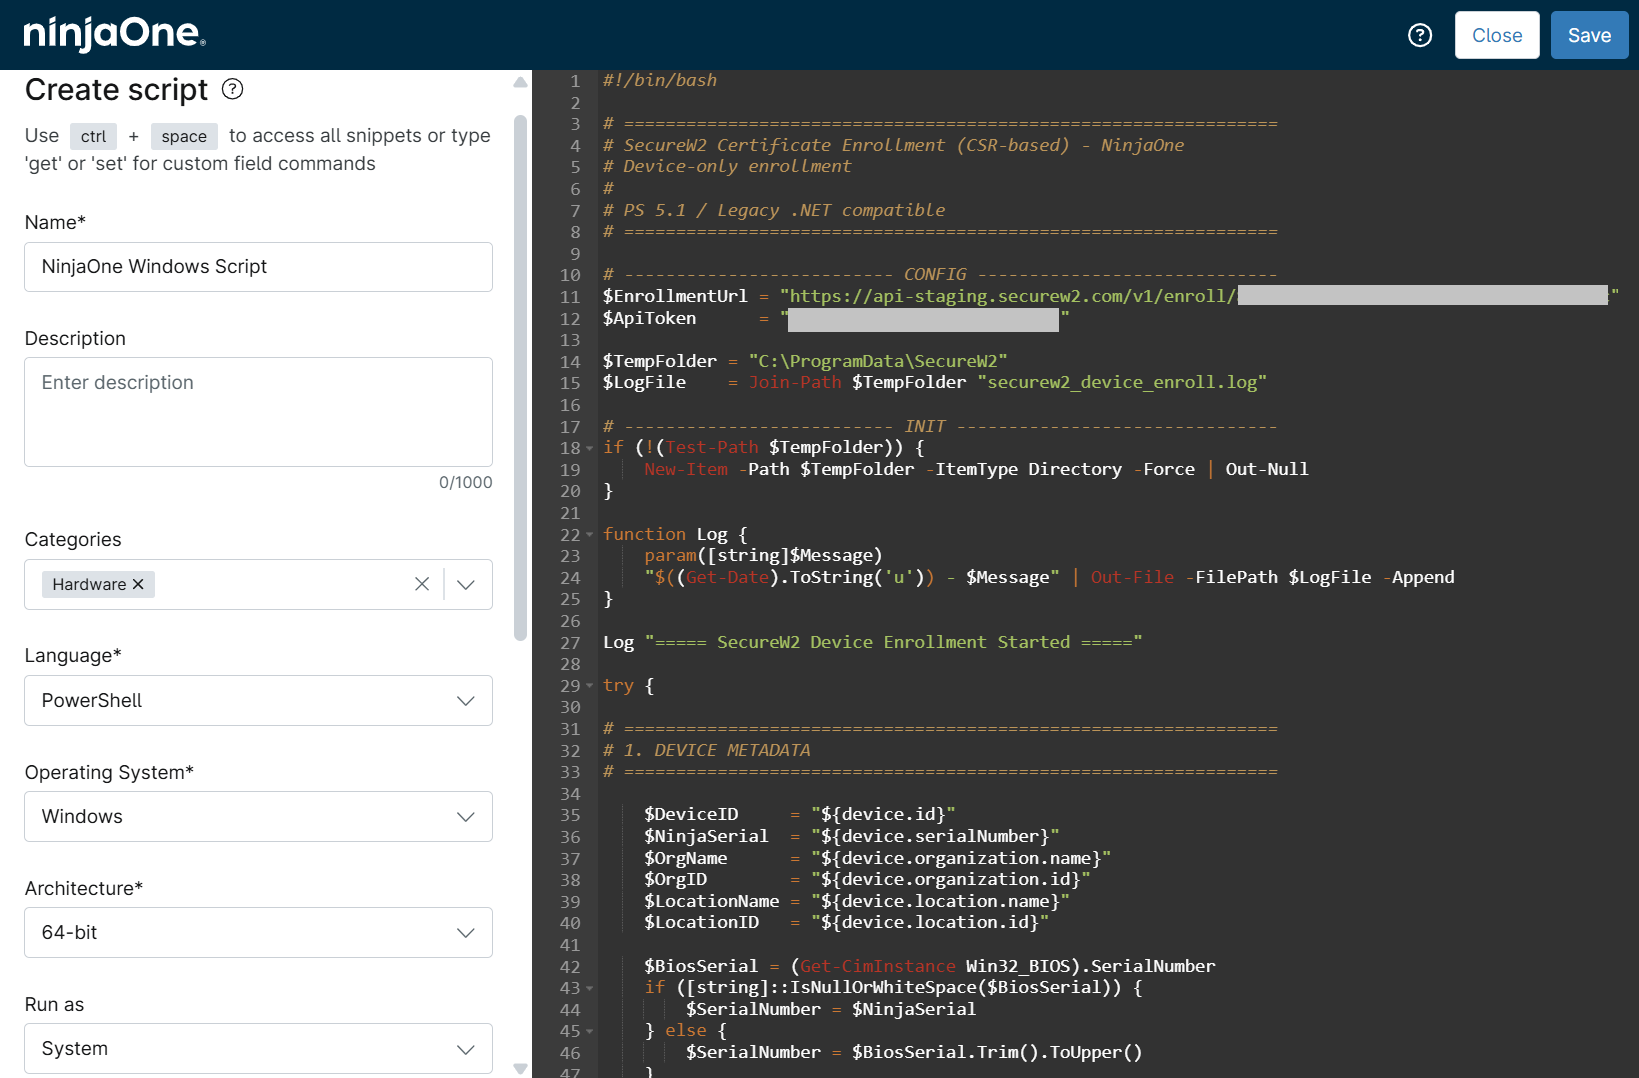
- On the Create Script page:
- In the Name field, enter the name of the script.
- From the Language drop-down list, select PowerShell.
- From the Operating System drop-down list, select Windows.
- From the Architecture drop-down list, select either 32-bit or 64-bit.
- From the Run as drop-down list, select System.

- Click Save.
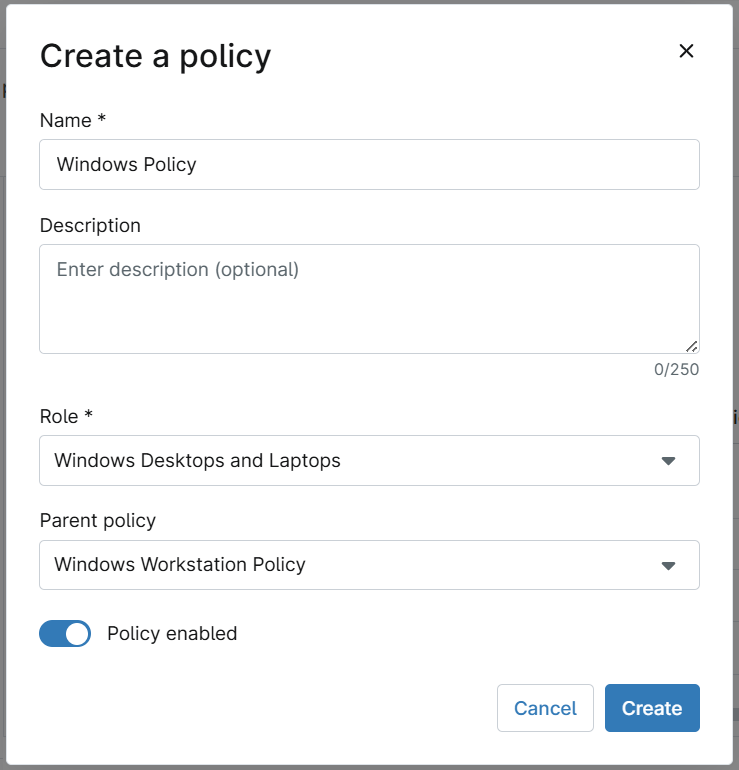
To create a new policy, perform the following steps:
- Navigate to Administration > Policies > Agent policies and then click Create New Policy.
- In the Create a policy dialog box:
- In the Name field, enter the policy name.
- From the Role drop-down list, select Windows Desktops and Laptops to assign the policy to those devices.
- From the Parent policy drop-down list, select an option.

- Click Create.
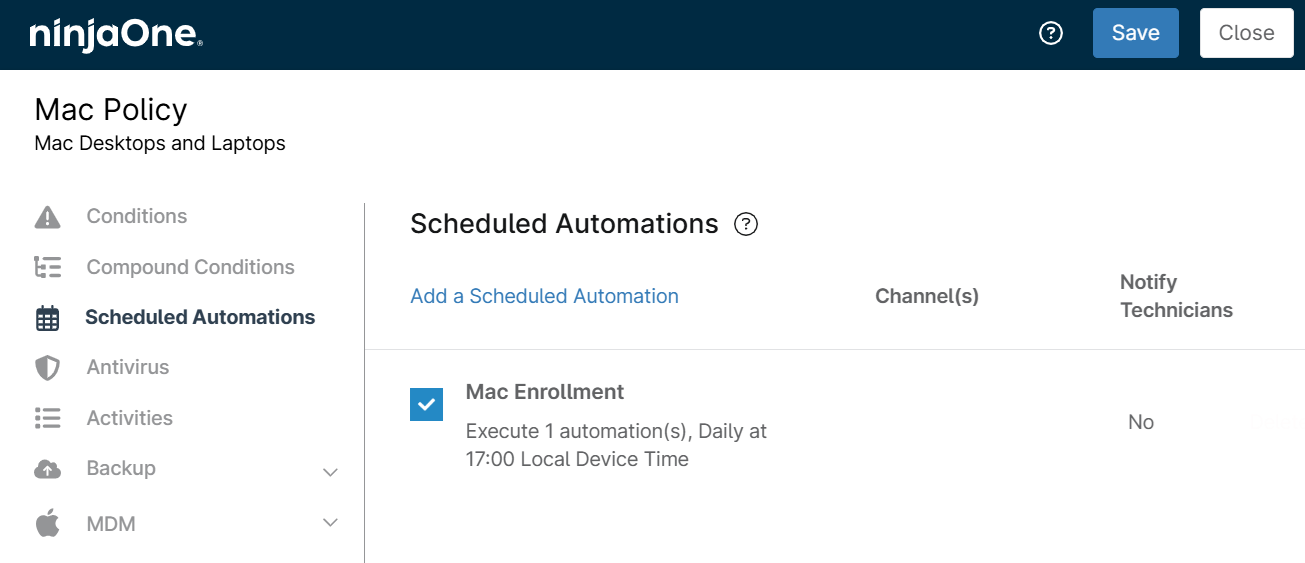
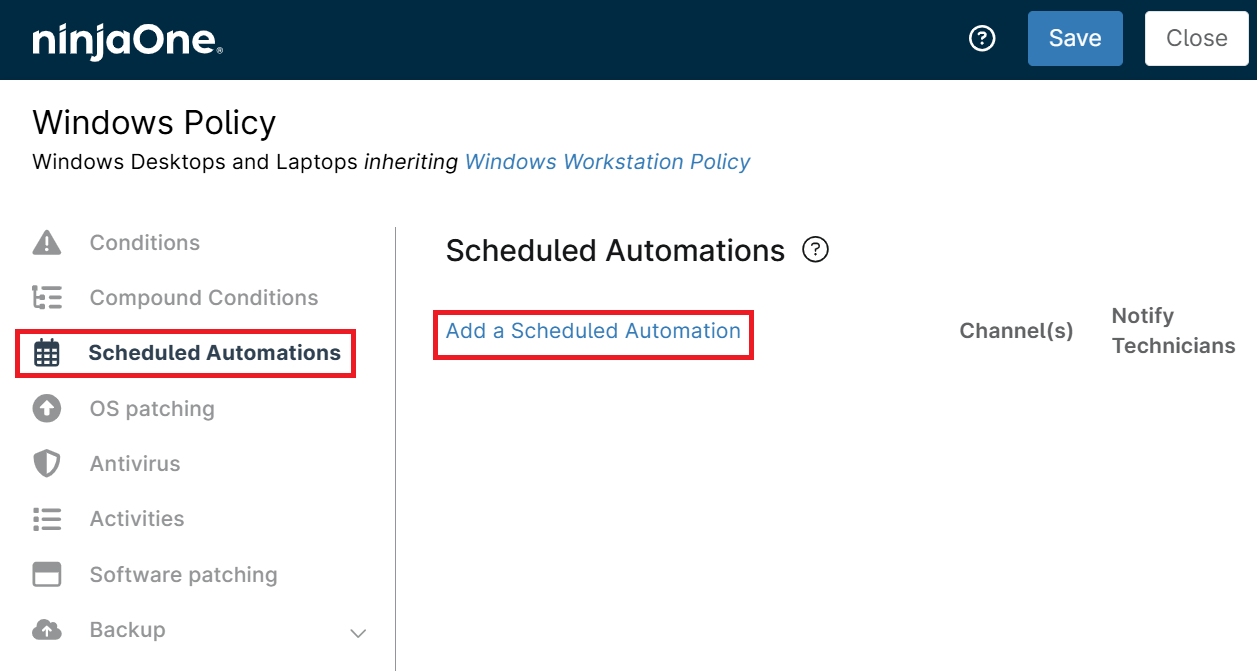
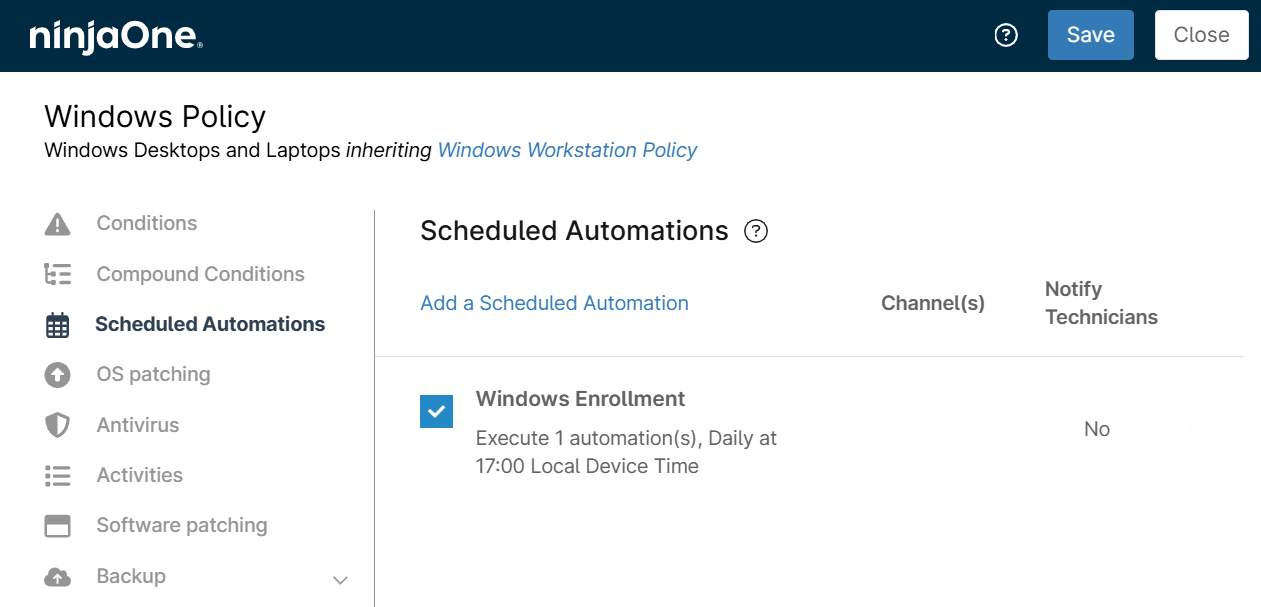
- On the displayed page, click Scheduled Automations in the left pane, then click Add a Scheduled Automation.

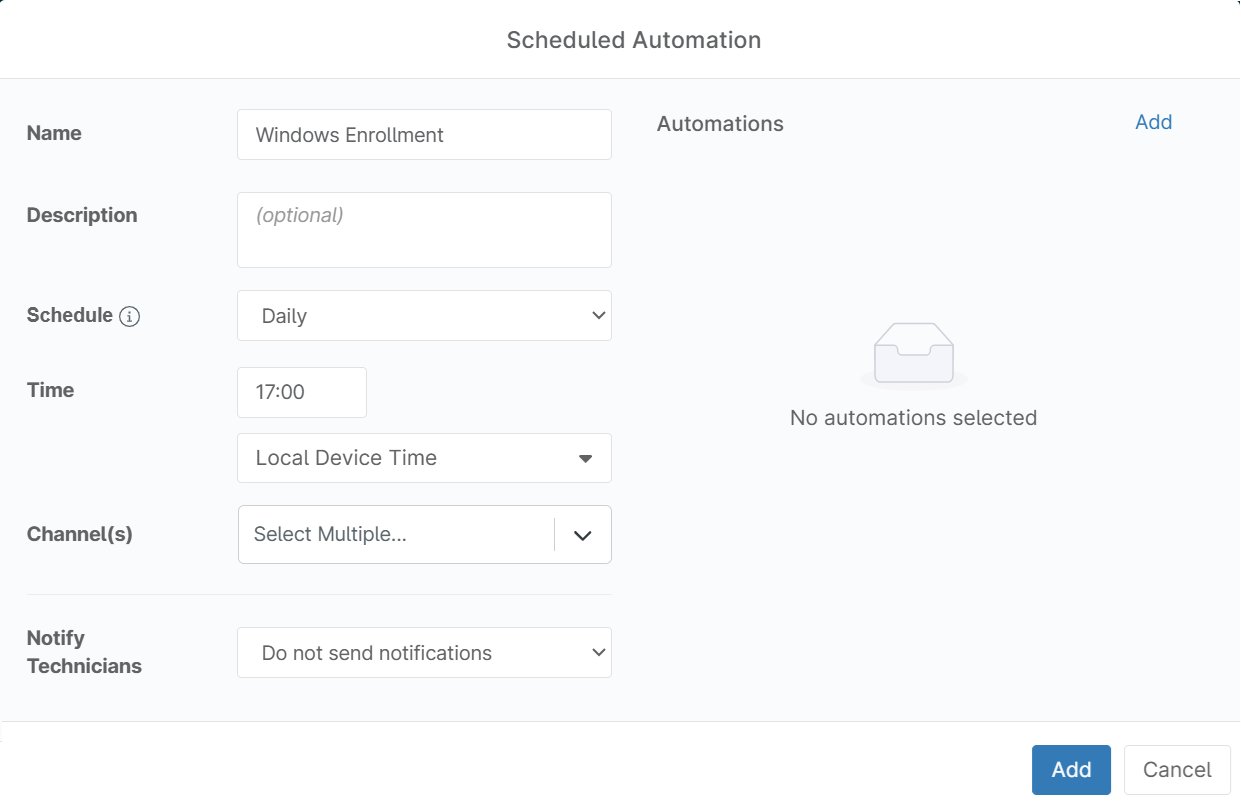
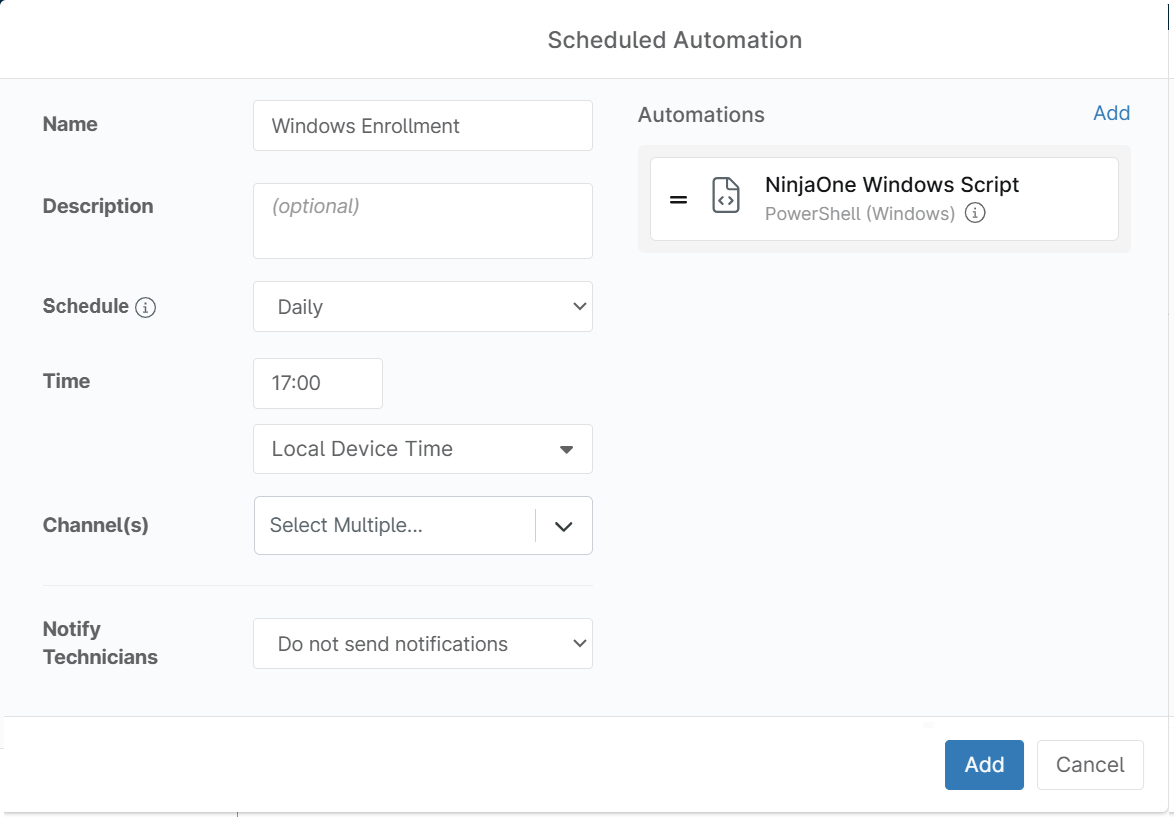
- In the Scheduled Automation pop-up window:
- In the Name field, enter a name for the scheduled automation.
- From the Schedule drop-down list, specify when the automation should run.
NOTE: If the device is offline, the automation will neither run nor be queued. - In the Time field, specify the preferred time.

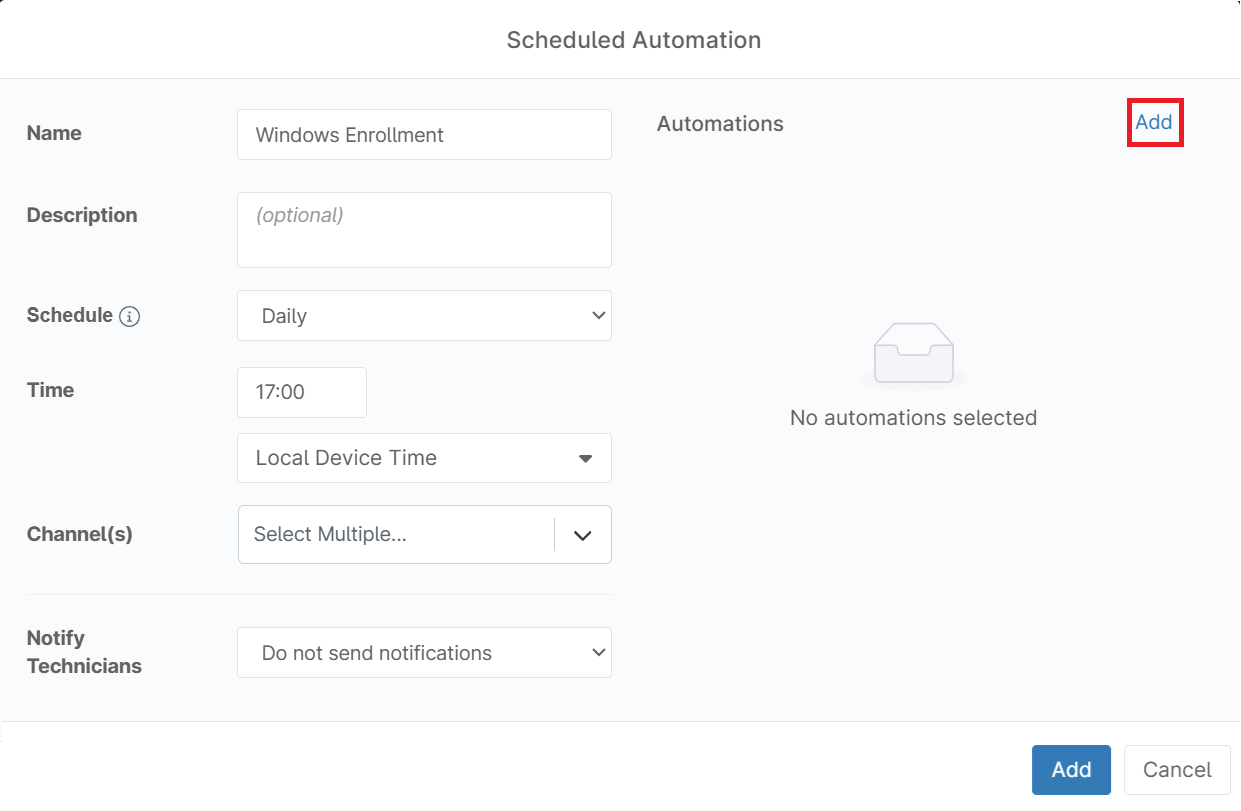
- To activate the automation, perform the following steps:
- Click Add Automation in the top-right corner and select the script to run as part of the scheduled automation.
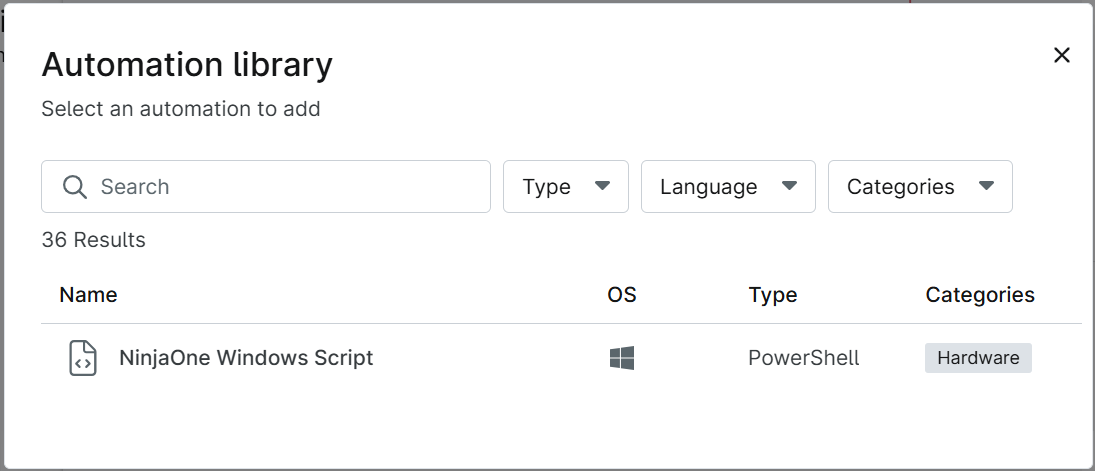
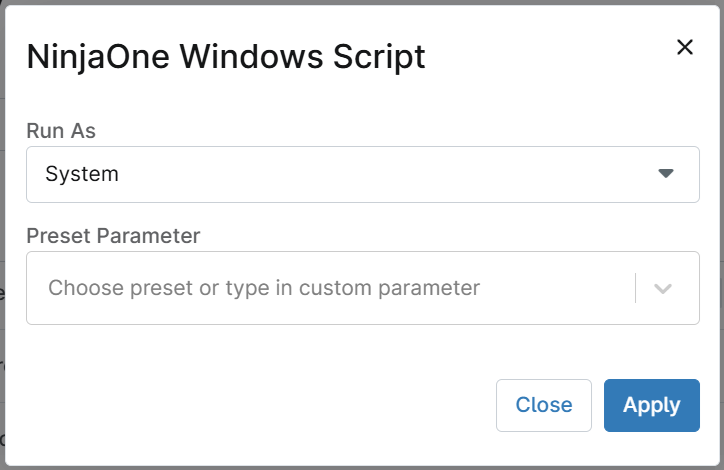
- In the Automation Library dialog, select the custom scripts you added to the library and click Apply. For instructions on creating a custom automation script, see the Creating a Custom Automation Script section.


- After adding the script, click Add to apply the configuration for the new scheduled automation and then save your policy.


- Click Add Automation in the top-right corner and select the script to run as part of the scheduled automation.
SecureW2 recommends using a new intermediate CA as a best practice for SCEP-based enrollments.
To create a new intermediate CA, perform the following steps:
- Log in to the JoinNow Management Portal.
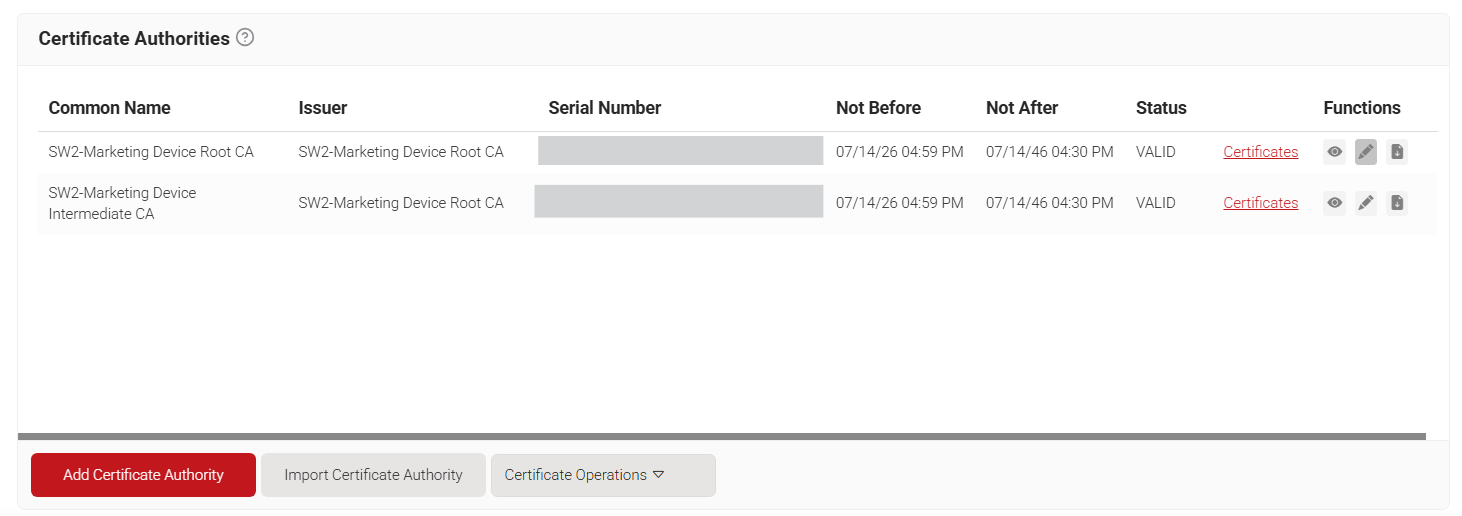
- Navigate to Dynamic PKI > Certificate Authorities.
- Click Add Certificate Authority.

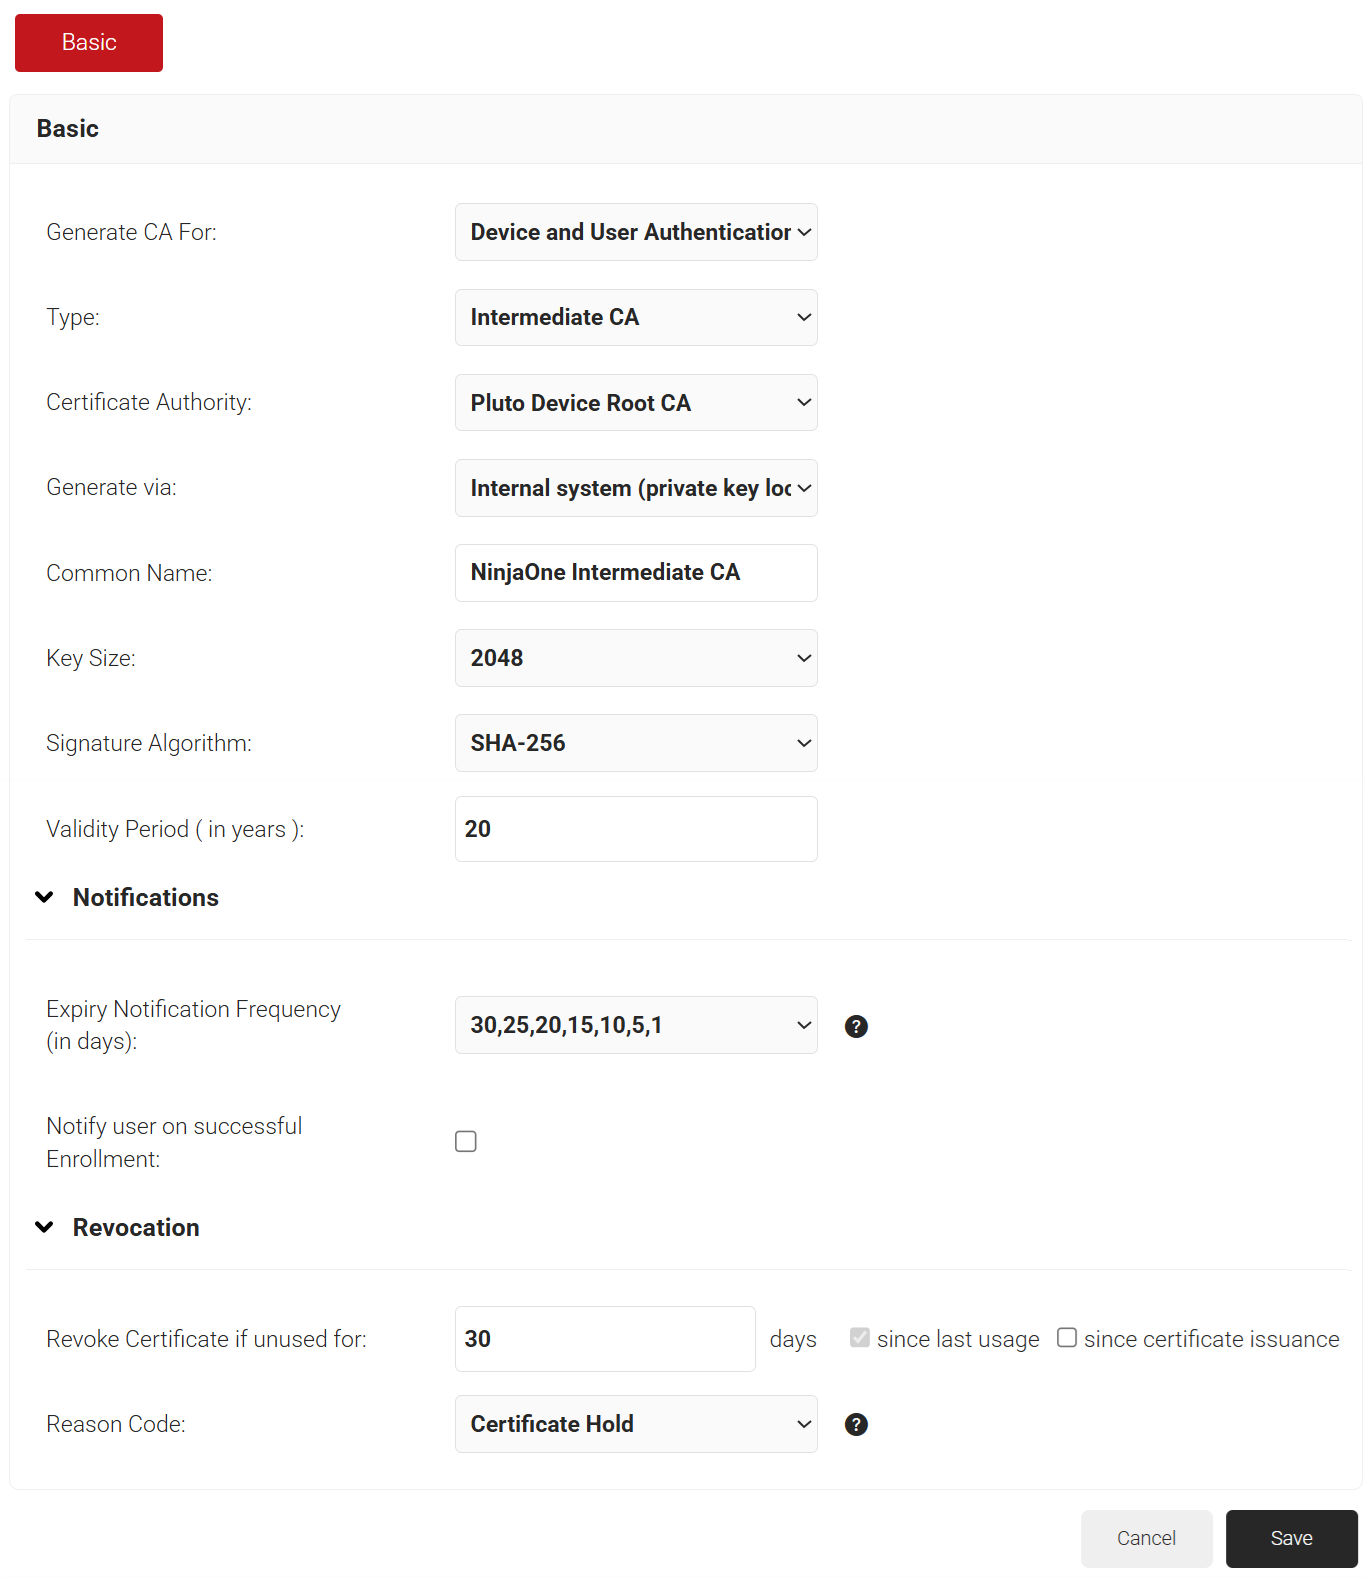
- In the Basic section, from the Generate CA For drop-down list, select the Device and User Authentication option to authenticate devices and users.
- From the Type drop-down list, select Intermediate CA.
- From the Certificate Authority drop-down list, select the default Root CA that comes with your organization.
- For the Common Name field, enter a name.
- From the Key Size drop-down list, select 2048 for the CA certificate key pair.
- From the Signature Algorithm drop-down list, select the signature algorithm for the certificate signing request. The option available is SHA-256.
- In the Validity Period field, enter the validity period for the Intermediate CA in terms of the number of years.
- In the Notifications section:
- From the Expiry Notification Frequency (in days) drop-down list, select the frequency interval for which a certificate expiration notification should be sent to users.
- Select the Notify user on successful Enrollment checkbox to notify users after a successful enrollment.
- If the RFC has a valid email address, the user will receive a certificate-issued or expired notification; otherwise, they will not.
- In the Revocation section:
- In the Revoke Certificate if unused for field, select the number of days after which an unused certificate can be revoked.
- Since last usage – Select this checkbox to revoke the certificate after a specified number of days if it remains unused.
- Since certificate issuance – Select this checkbox to revoke the certificate after a specified number of days after it is issued.
- From the Reason Code drop-down list, select any one of the following reasons for which the certificate is revoked.
- Certificate Hold
- AA Compromise
- Privilege Withdrawn
- Unspecified

- In the Revoke Certificate if unused for field, select the number of days after which an unused certificate can be revoked.
- Click Save. This generates the new intermediate CA.
A certificate template defines how information is encoded in certificates issued by the Certificate Authority. It includes a list of certificate attributes and specifies how each attribute’s value should be encoded. This information is provided by the organization administrator through the JoinNow Management Portal.
To create a certificate template, perform the following steps:
- Navigate to Dynamic PKI > Certificate Authorities.
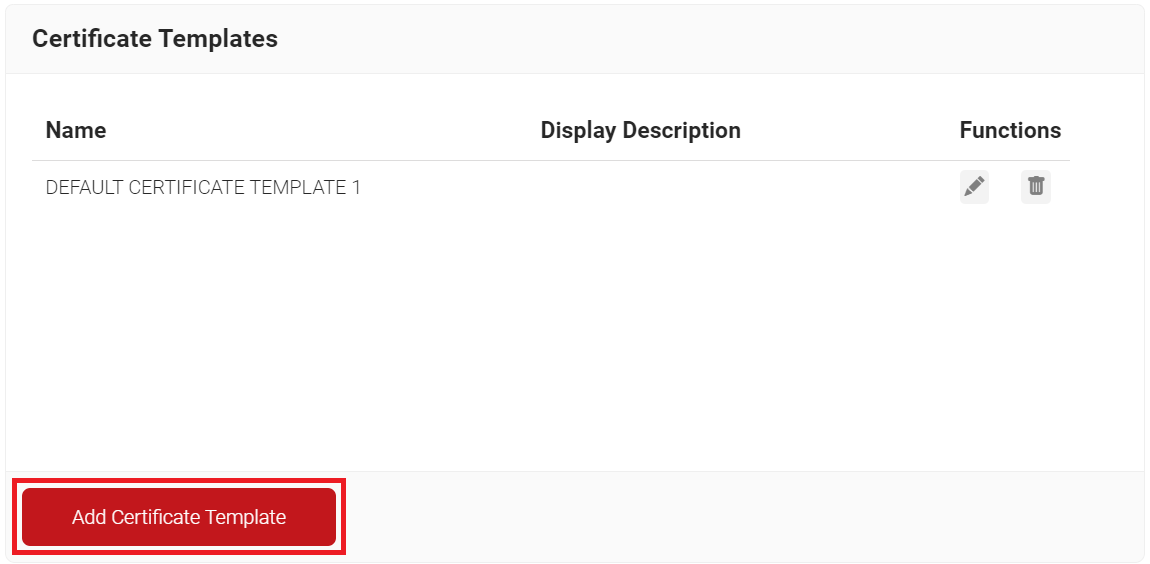
- Scroll to the Certificate Templates section and click Add Certificate Template.

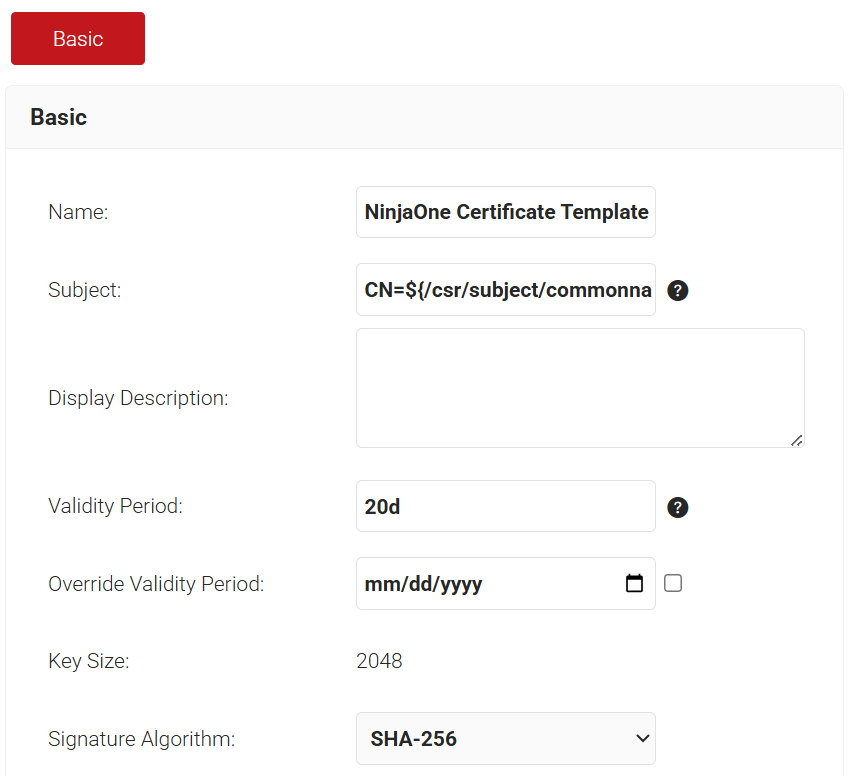
- In the Basic section, enter the name of the certificate template in the Name field.
- In the Subject field, enter CN=${/csr/subject/commonname}. This fetches the configured common name in Jamf School.
- In the Display Description field, enter a suitable description for the certificate template.
- In the Validity Period field, type the validity period of the certificate (based on the requirement).
- To override the Validity Period attribute, select the Override Validity Period checkbox and choose an end date from the date picker to set a hard-coded expiry date for a certificate.
- From the Signature Algorithm drop-down list, select SHA-256 as the signature algorithm for the certificate signing request.

- In the SAN section:
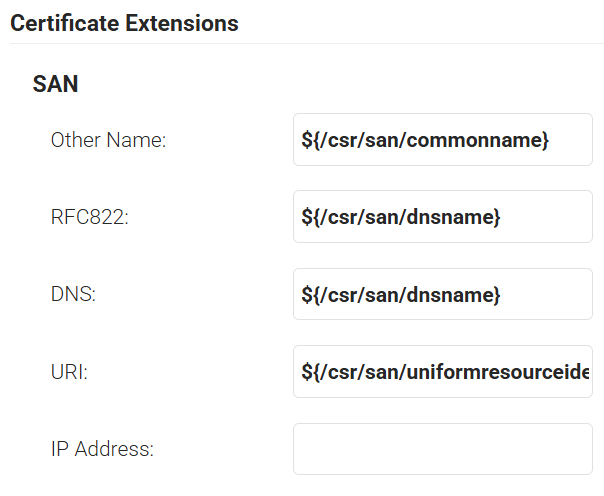
- In the Other Name field, enter ${/csr/san/commonname}
- In the RFC822 field, enter ${/csr/san/dnsname}
- In the DNS field, enter ${/csr/san/dnsname}
- In the URI field, enter ${/csr/san/uniformresourceidentifier}

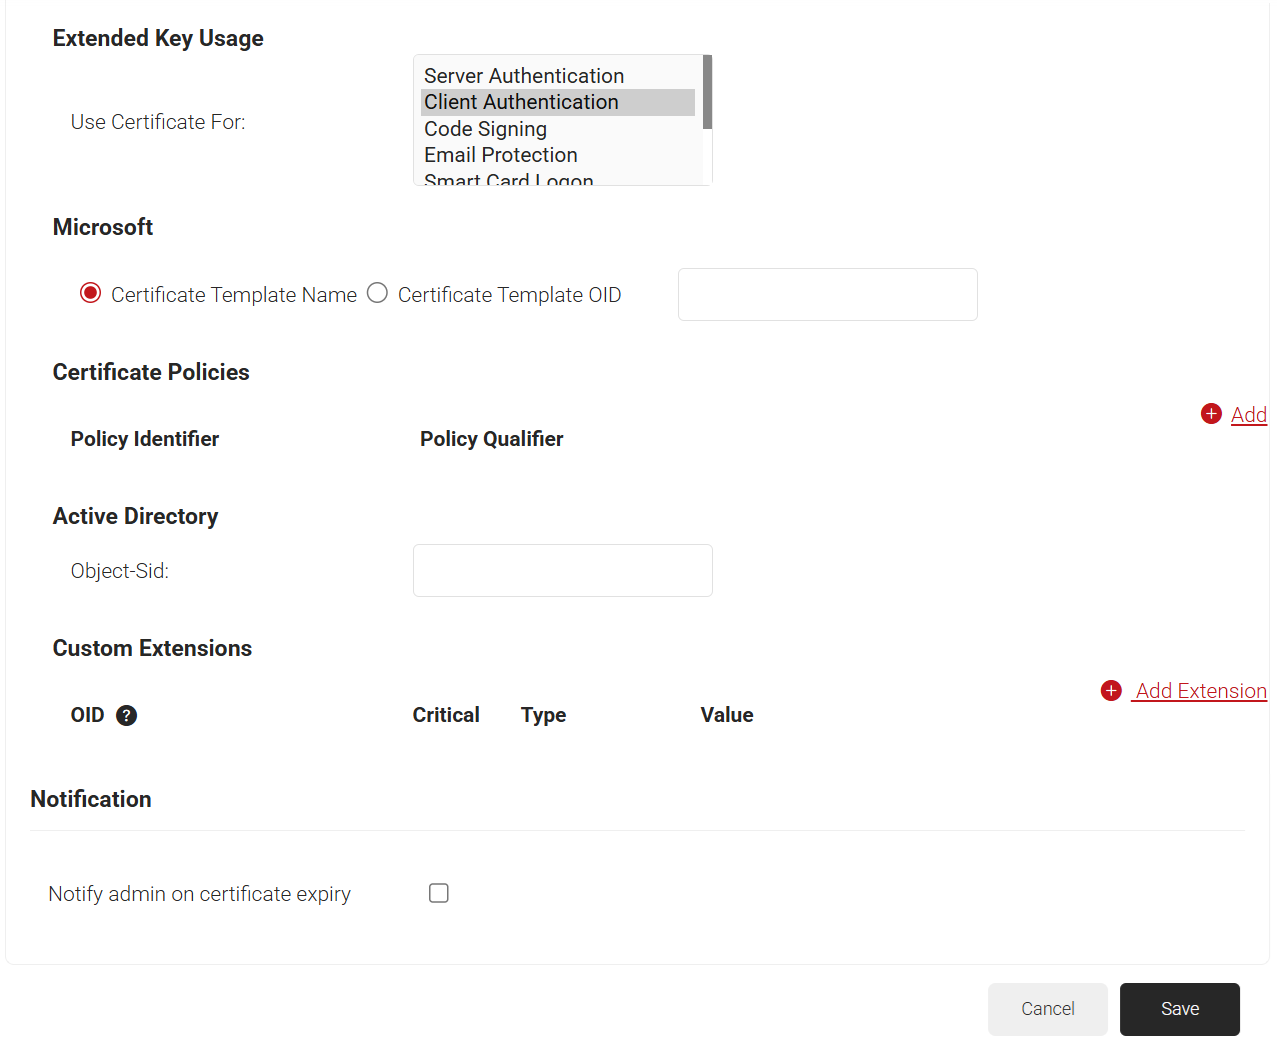
- In the Extended Key Usage section, from the Use Certificate For list, select Client Authentication.
- In the Notification section, select the Notify admin on certificate expiry checkbox to send certificate expiry email notifications to all Admins.

- Click Save.
This section describes how to create a Device Management Platform in JoinNow and configure the shell script with the Enrollment URL and API secret required for certificate enrollment through the REST Enrollment API.
To generate the REST API Certificate Management Token, perform the following steps:
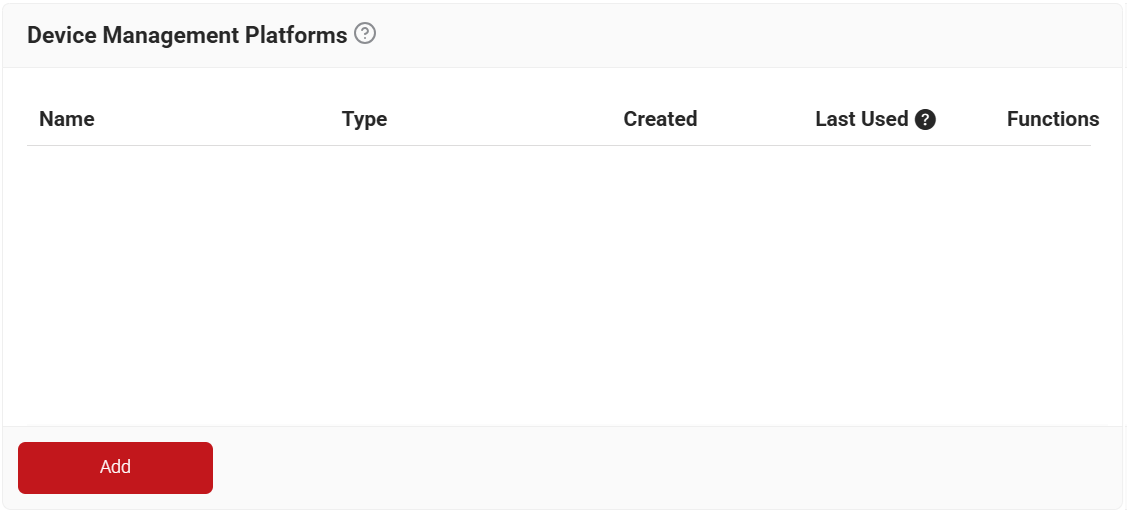
- Navigate to Integrations Hub > Device Management Platforms.
- Click Add.

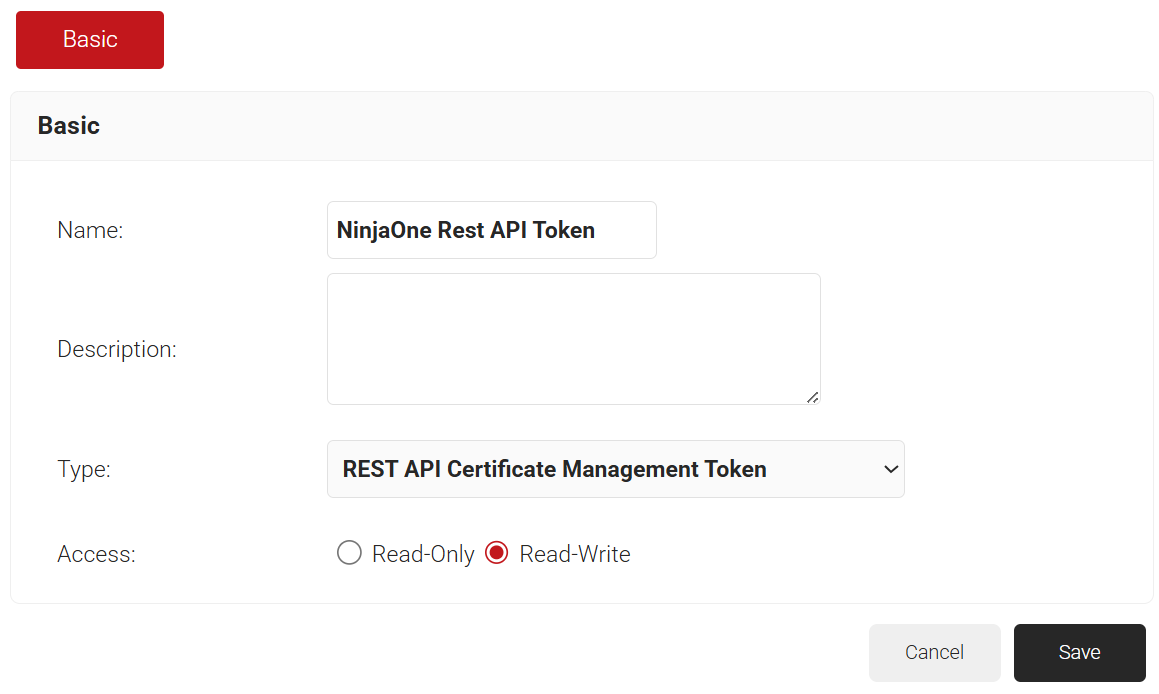
- In the Name field, enter a name for the API token.
- In the Display Description field, enter a description for the API token.
- From the Type drop-down list, select REST API Certificate Management Token.
- In Access, select Read-Write.

- Click Save. A .csv file containing the API secret and Enrollment URL is downloaded.
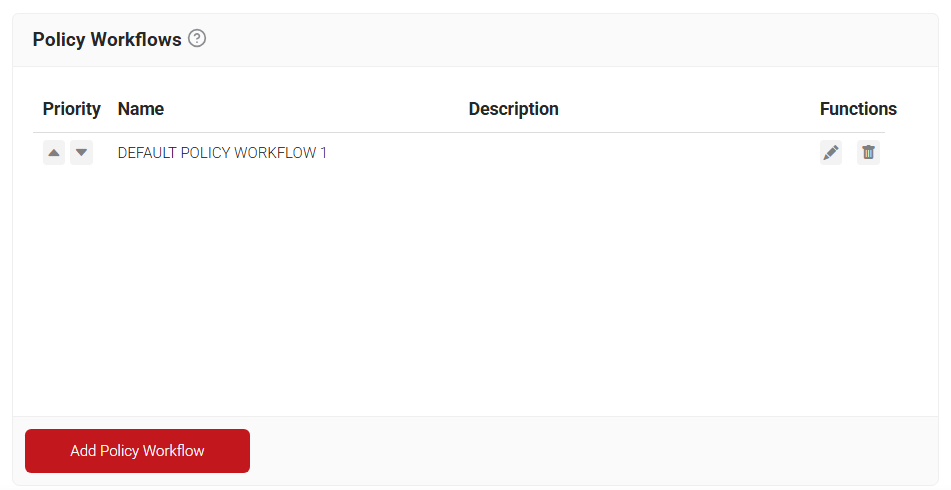
To create a policy workflow, perform the following steps:
- Navigate to Policy Management > Policy Workflows.
- Click Add Policy Workflow.

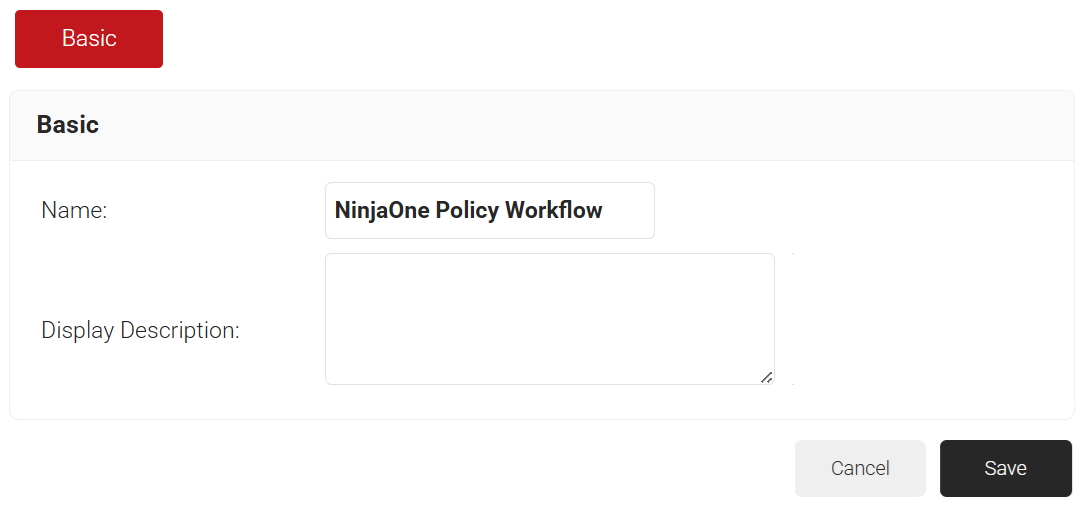
- In the Basic section, enter the name of the policy workflow in the Name field.
- In the Display Description field, enter a suitable description for the policy workflow.

- Click Save.
- The page refreshes, and the Conditions tab is displayed.
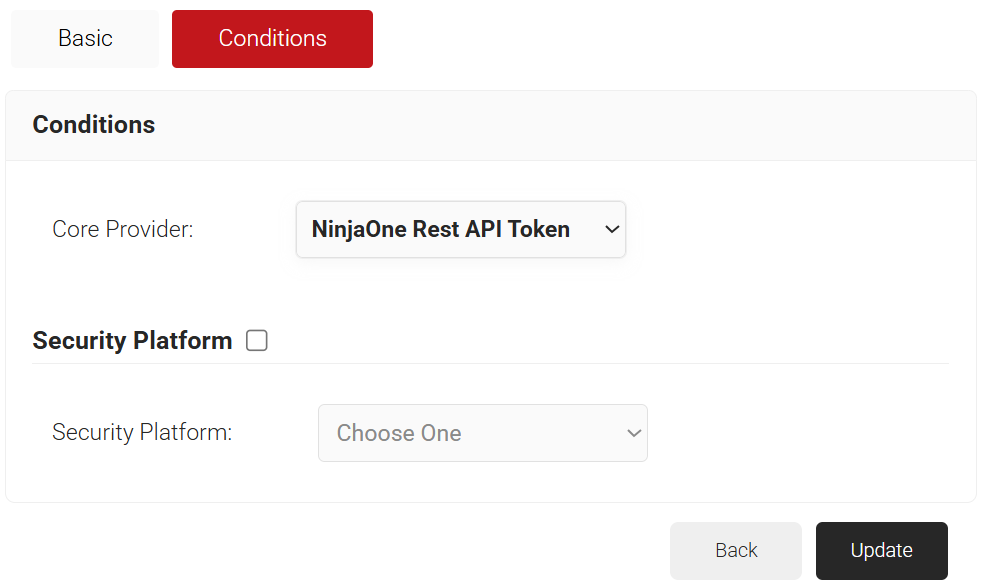
- Click the Conditions tab.
- From the Core Provider drop-down list, select the device management platform you created earlier.

- Click Update.
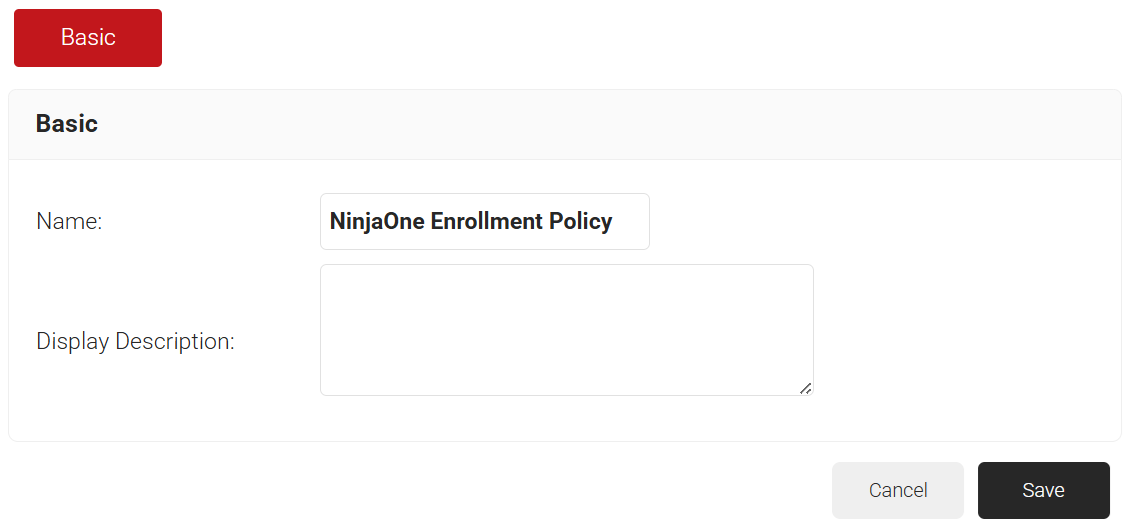
To create an enrollment policy, perform the following steps:
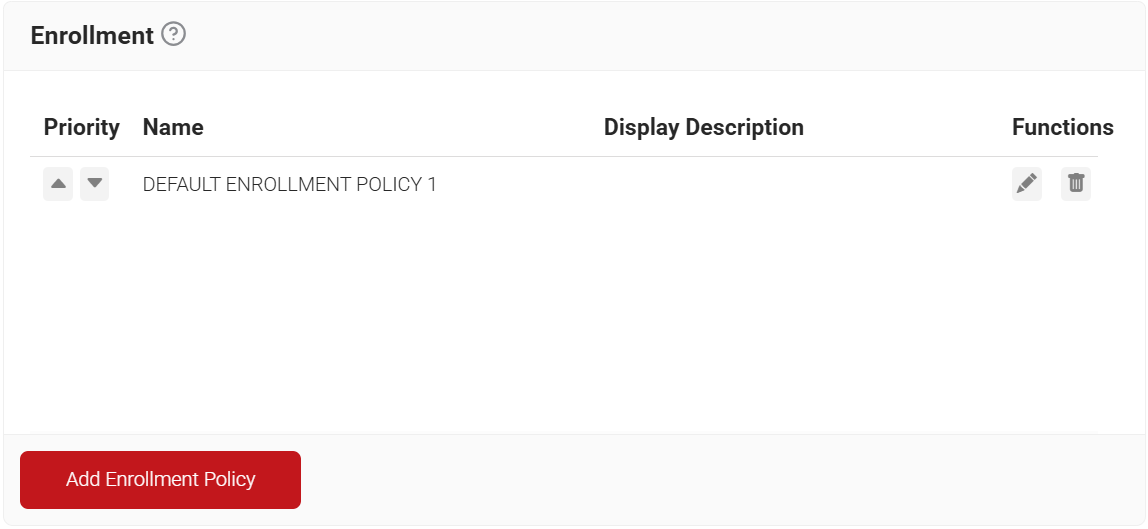
- Navigate to Policy Management > Enrollment.
- Click Add Enrollment Policy.

- In the Basic section, enter the name of the enrollment policy in the Name field.
- In the Display Description field, enter a suitable description for the enrollment policy.

- Click Save.
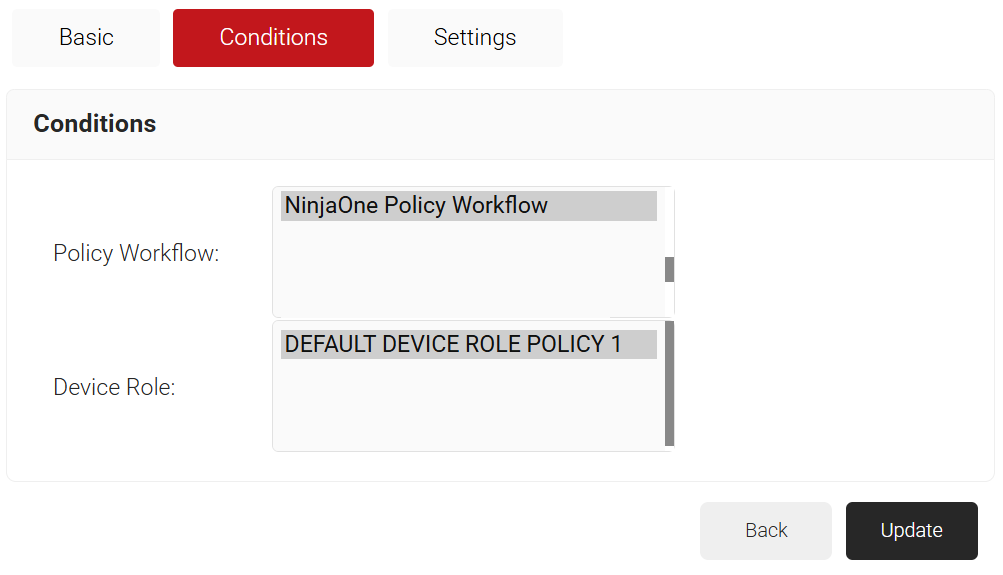
- The page refreshes, and the Conditions and Settings tabs are displayed.
- Click the Conditions tab.
- From the Policy Workflow list, select the policy workflow you created earlier (see the Creating a Policy Workflow section).
- From the Device Role drop-down list, select DEFAULT DEVICE ROLE POLICY 1.

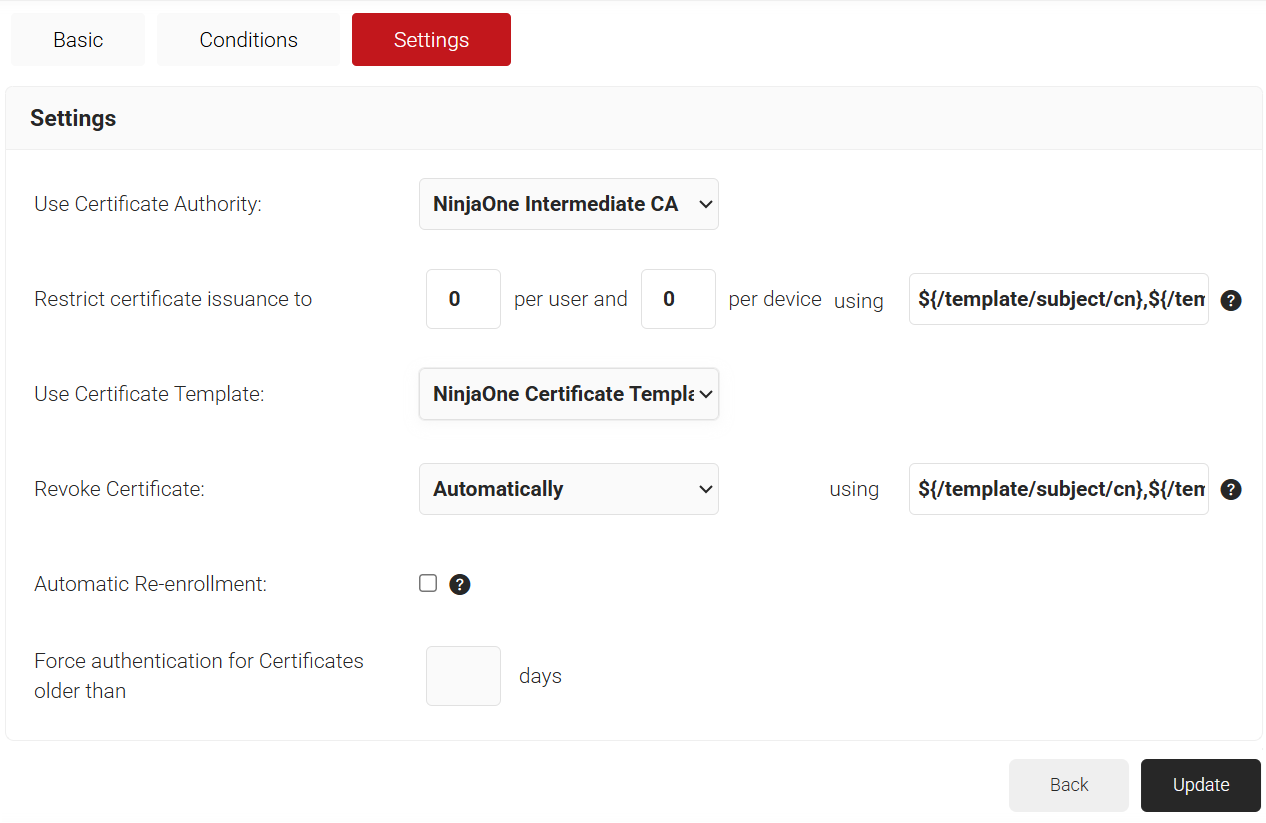
- Click the Settings tab.
- From the Use Certificate Authority drop-down list, select the intermediate CA you created earlier (see the Creating an Intermediate CA for SCEP Gateway Integration section).
- From the Use Certificate Template drop-down list, select the template you created earlier (see the Creating a Certificate Template section).
- In the other settings, retain the default values.

- Click Update.
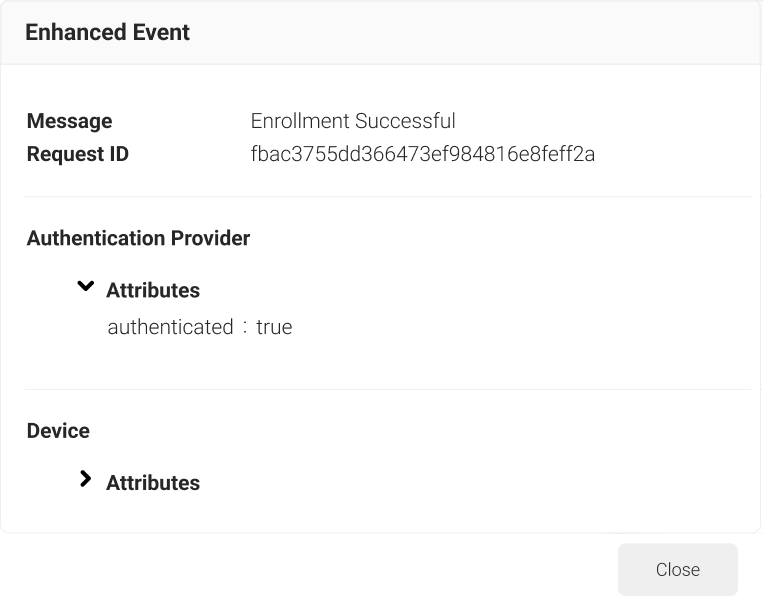
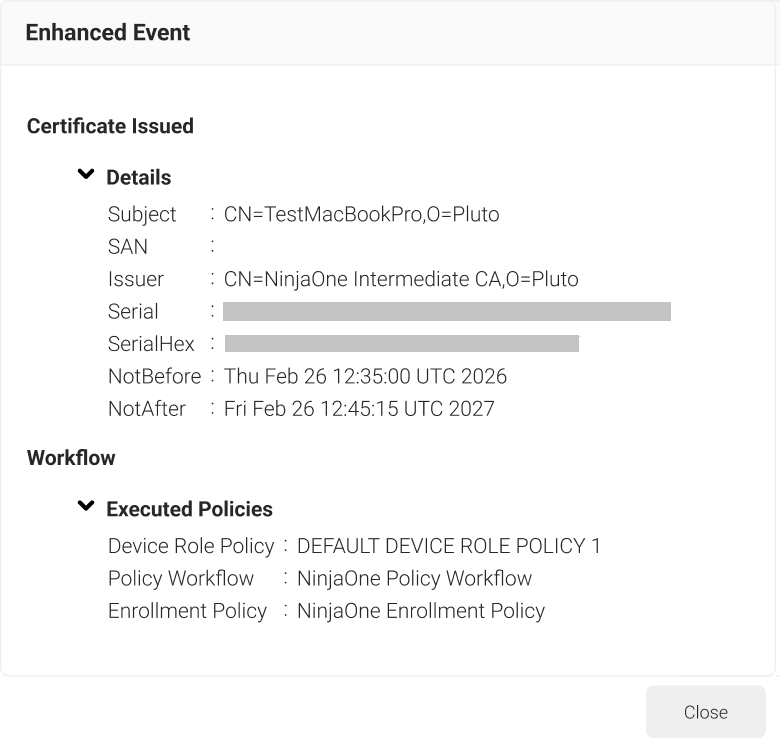
SecureW2 Admins can check for successful certificate enrollment under Data and Monitoring > Enhanced Events.