To create a new intermediate CA:
- Log in to the JoinNow Management Portal.
- Navigate to PKI > Certificate Authorities.
- Click Add Certificate Authority.

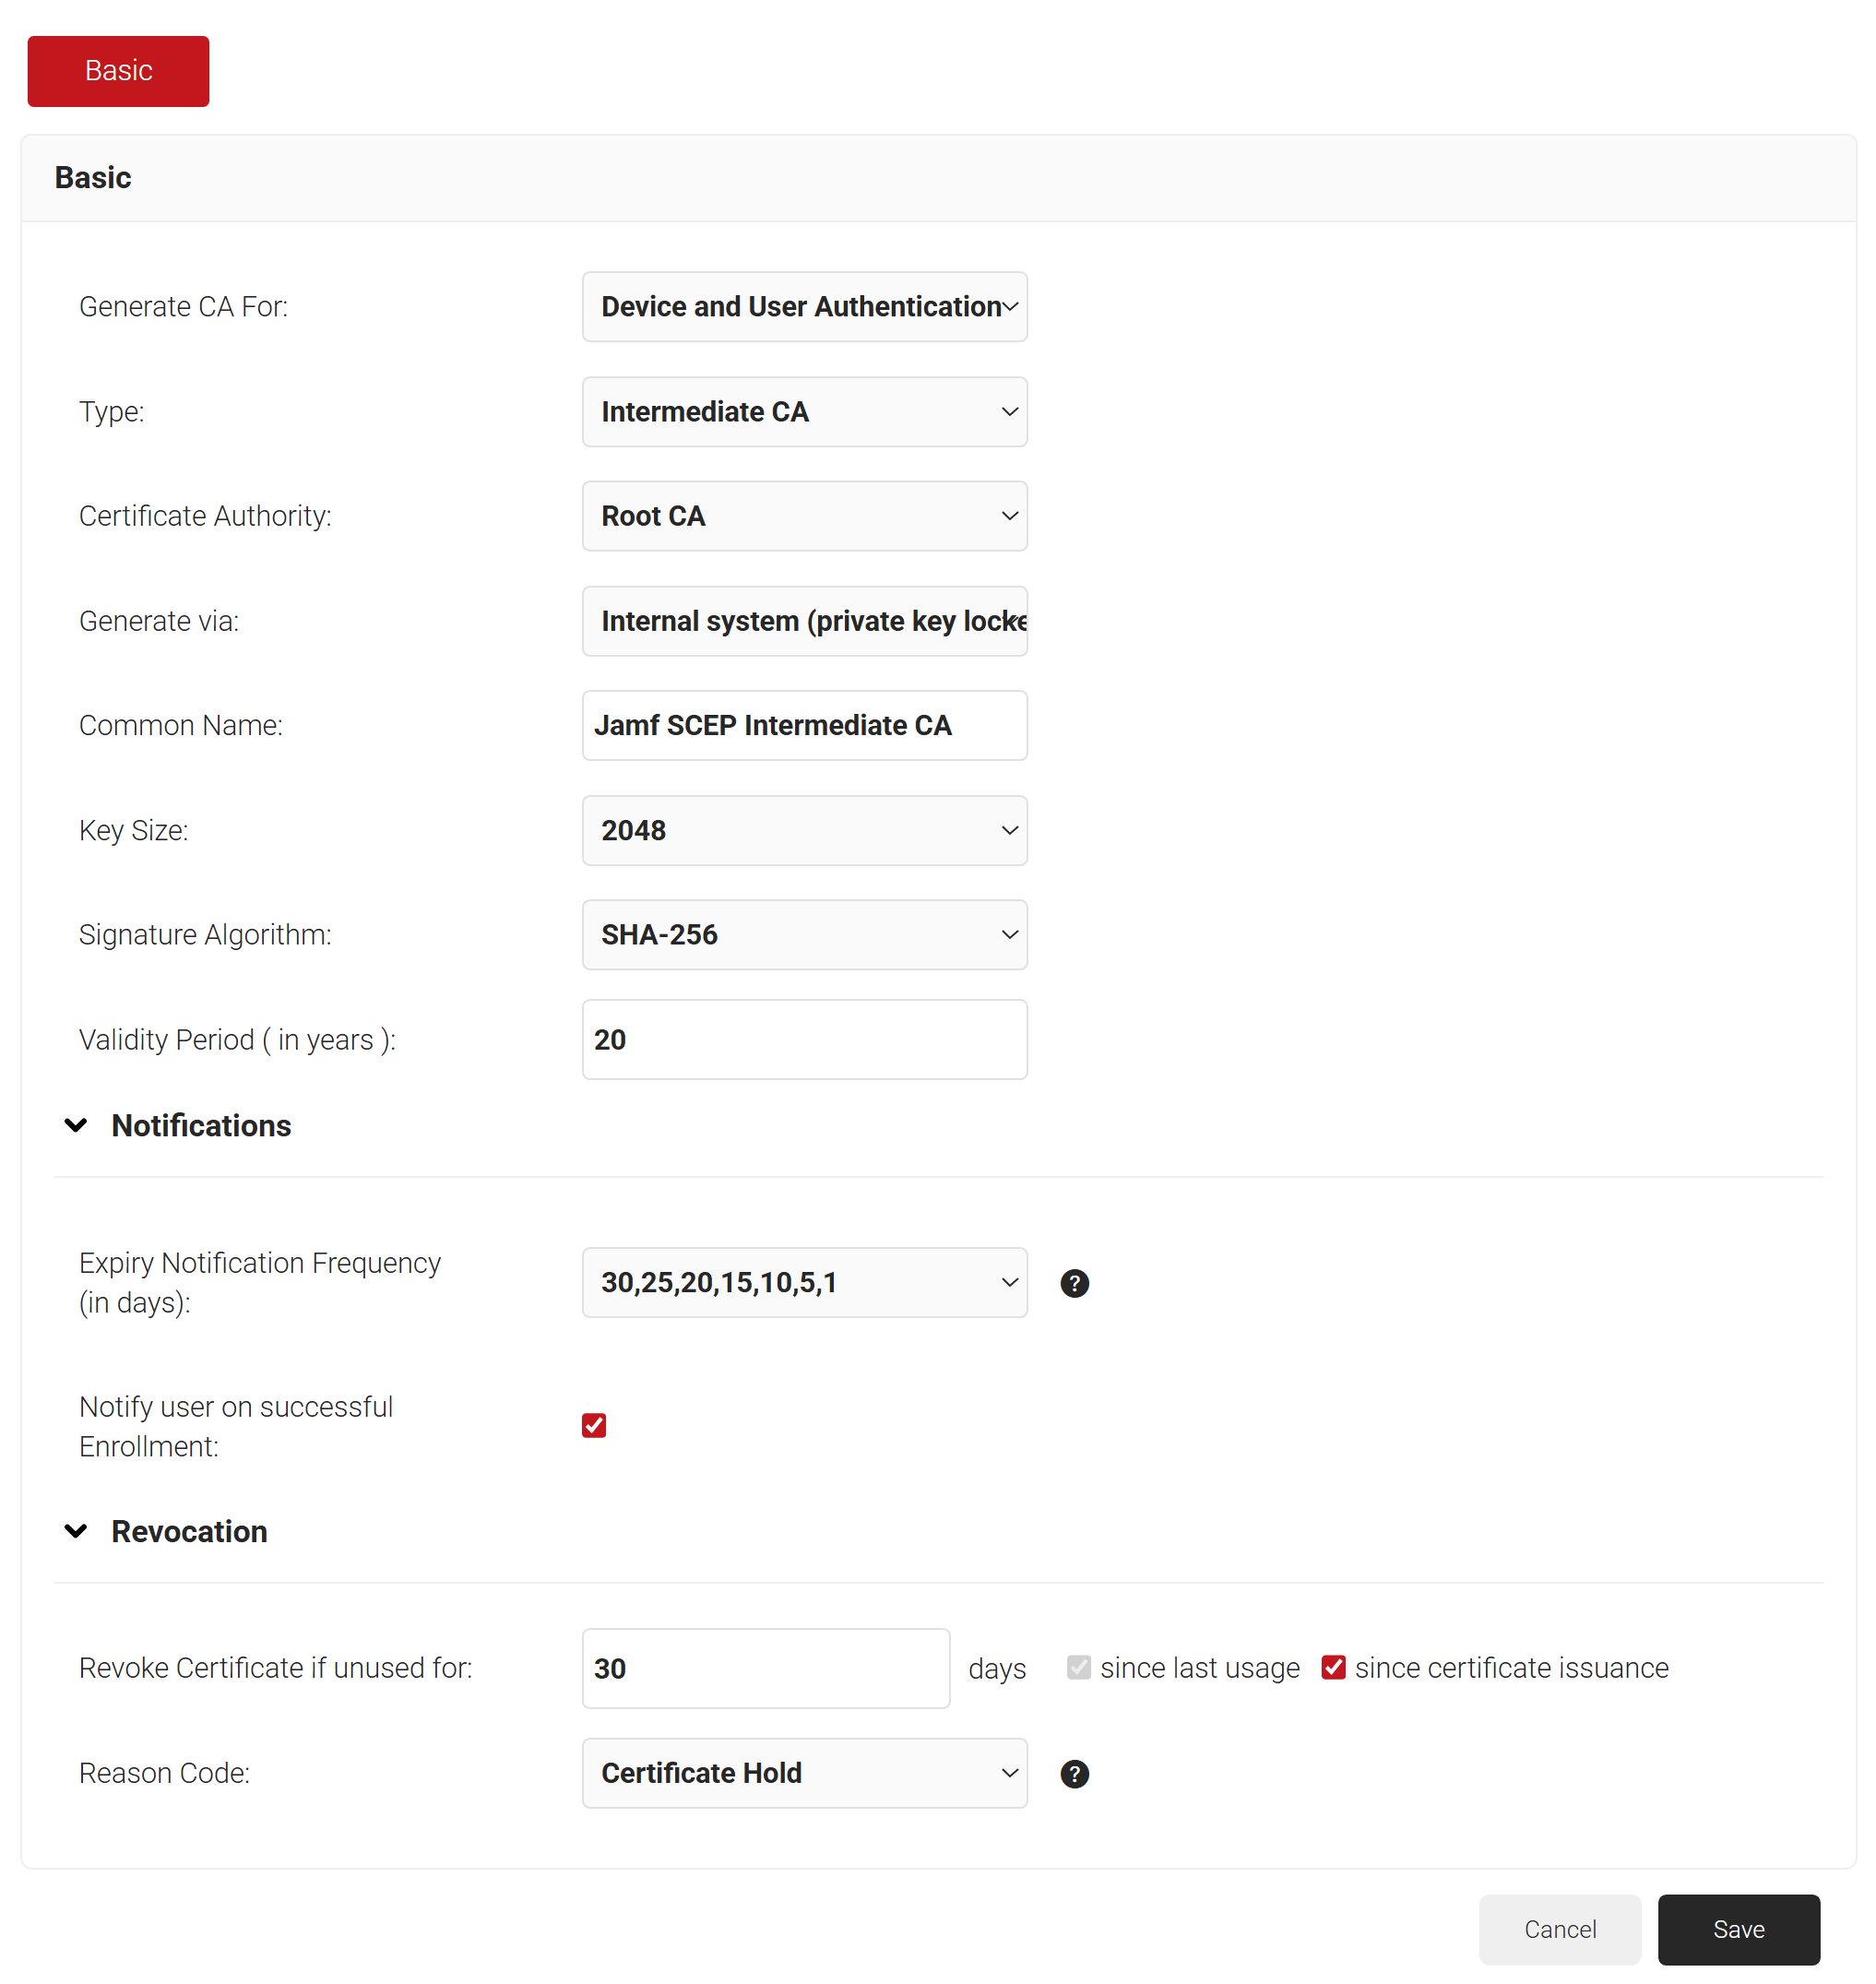
- In the Basic section, from the Generate CA For drop-down list, select the Device and User Authentication option to authenticate devices and users.
- From the Type drop-down list, select Intermediate CA.
- From the Certificate Authority drop-down list, select the default Root CA that comes with your organization.
- In the Common Name field, enter a name. SecureW2 recommends a name that includes “SCEP.”
- From the Key Size drop-down list, select 2048 for the CA certificate key pair.
- From the Signature Algorithm drop-down list, select the signature algorithm for the certificate signing request. The option available is SHA-256.
- In the Validity Period (in years) field, enter the validity period for the Intermediate CA in terms of the number of years.
- In the Notifications section:
- From the Expiry Notification Frequency (in days) drop-down list, select the frequency interval for which a certificate expiration notification should be sent to users.
- Select the Notify user on the successful Enrollment checkbox to notify users after a successful enrollment.
- If the RFC has a valid email address, the user will receive the certificate issued or expired notification; otherwise, they will not receive the notification.
- In the Revocation section:
- In the Revoke Certificate if unused for field, select the number of days after which an unused certificate can be revoked.
- Since last usage – Select this checkbox to revoke the certificate after a specified number of days if it remains unused.
- Since certificate issuance – Select this checkbox to revoke the certificate after a specified number of days after it is issued.
- From the Reason Code drop-down list, select any one of the following reasons for which the certificate is revoked.
- Certificate Hold
- AA Compromise
- Privilege Withdrawn
- Unspecified

- In the Revoke Certificate if unused for field, select the number of days after which an unused certificate can be revoked.
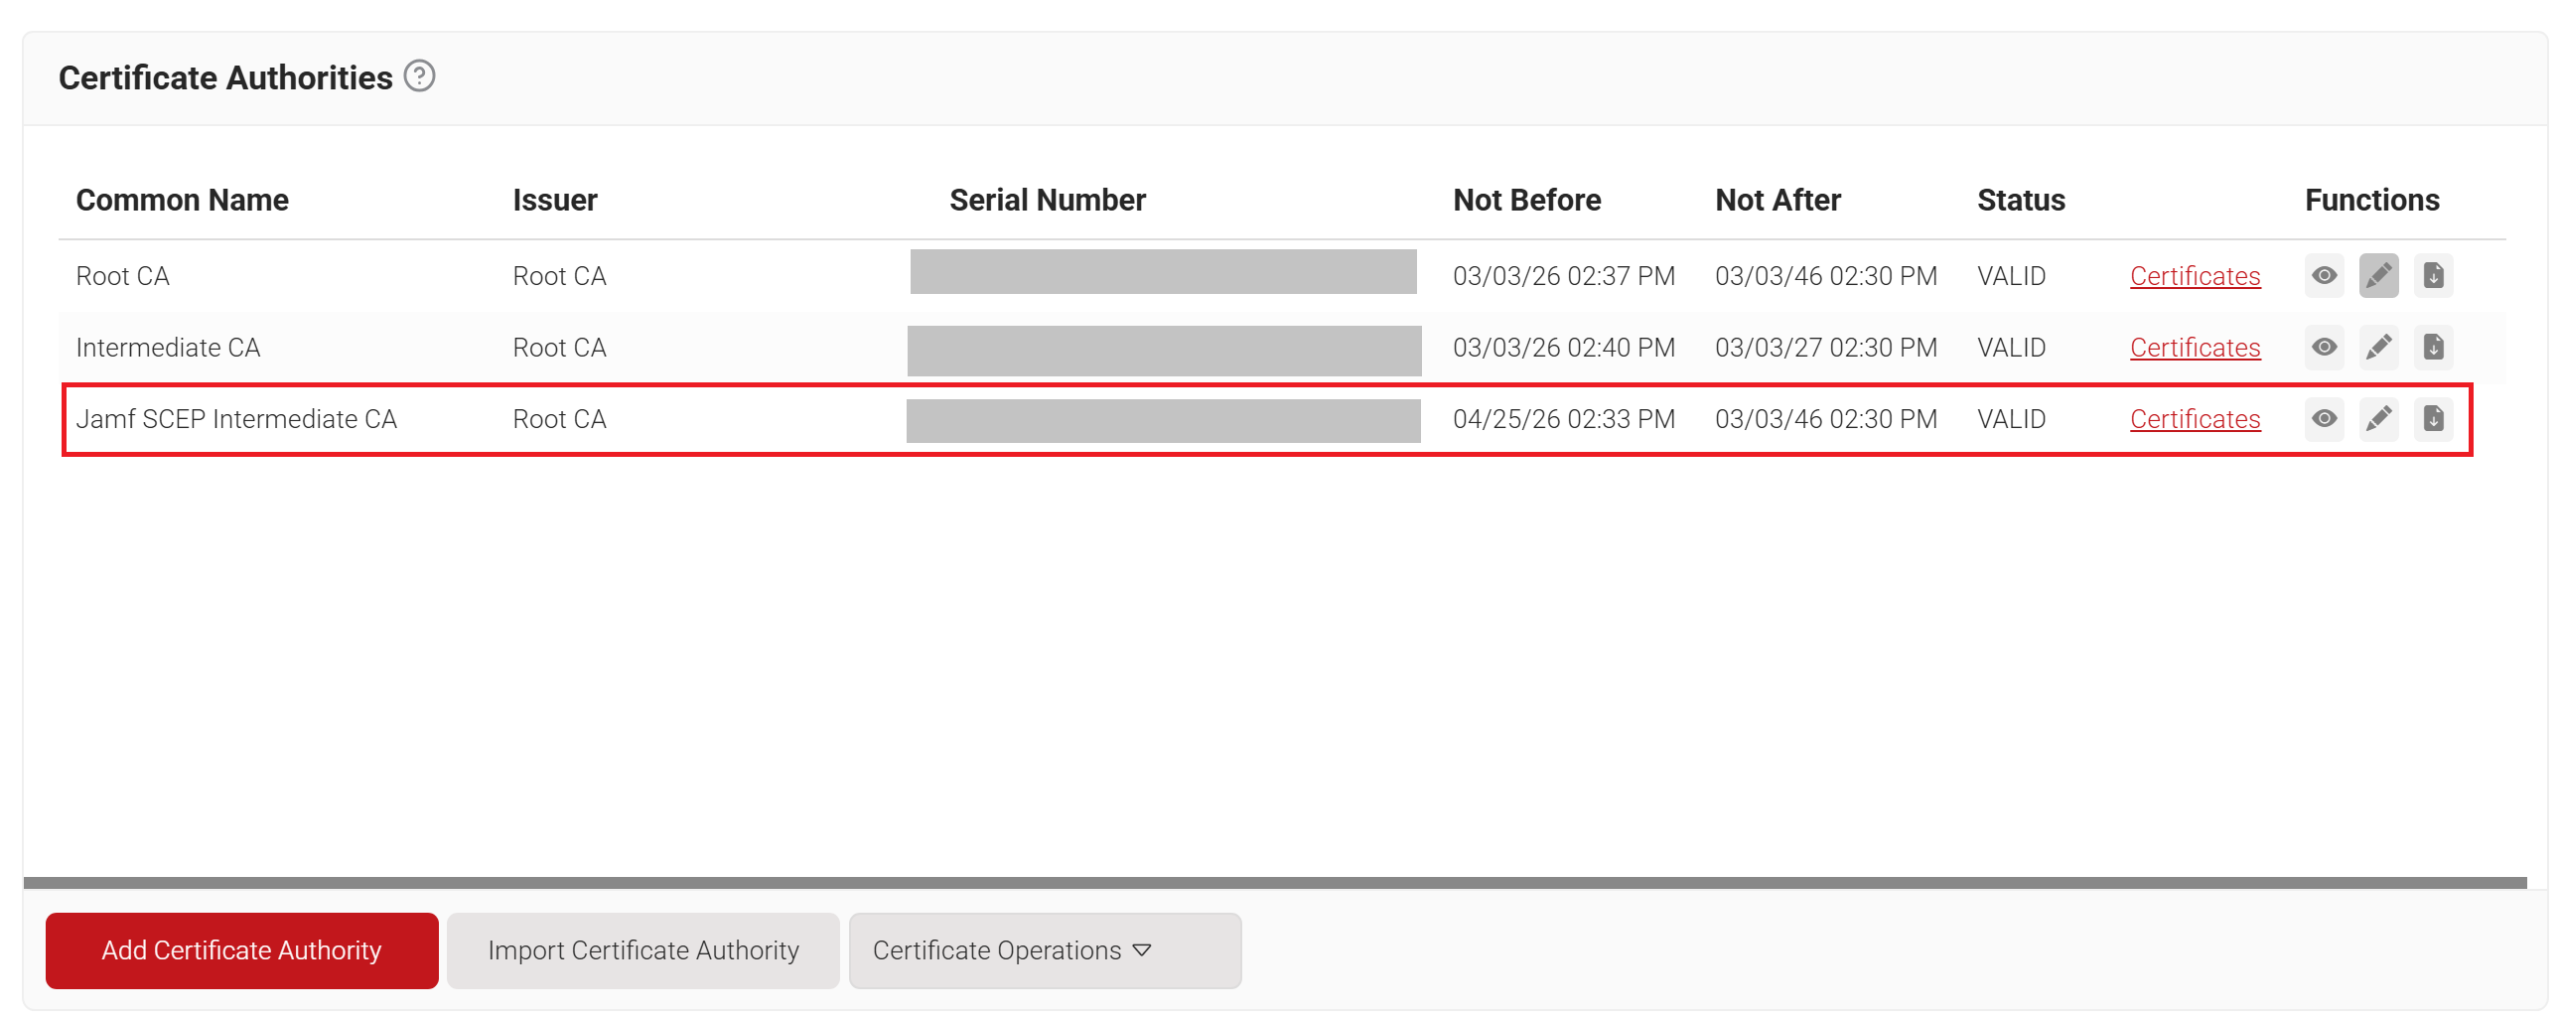
- Click Save. This generates the new intermediate CA.


Setting up a tailored SCEP certificate template is a pivotal step in certificate management protocols. To create a Jamf Certificate Template:
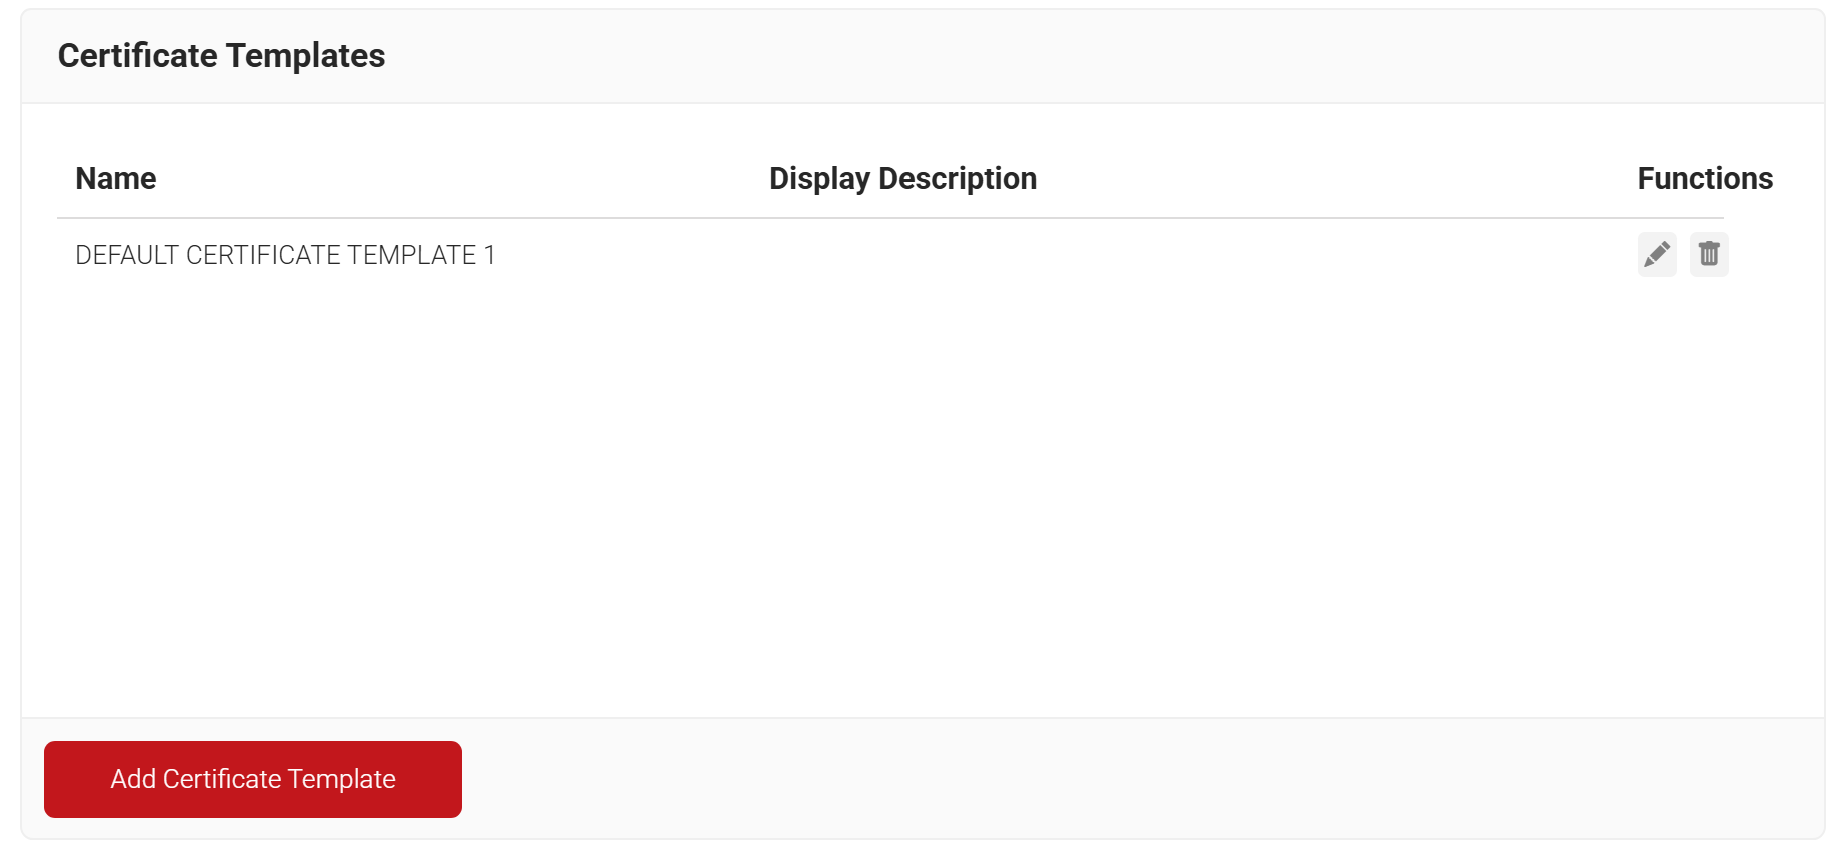
- Navigate to Dynamic PKI > Certificate Authorities.
- Scroll to the Certificate Templates section and click Add Certificate Template.

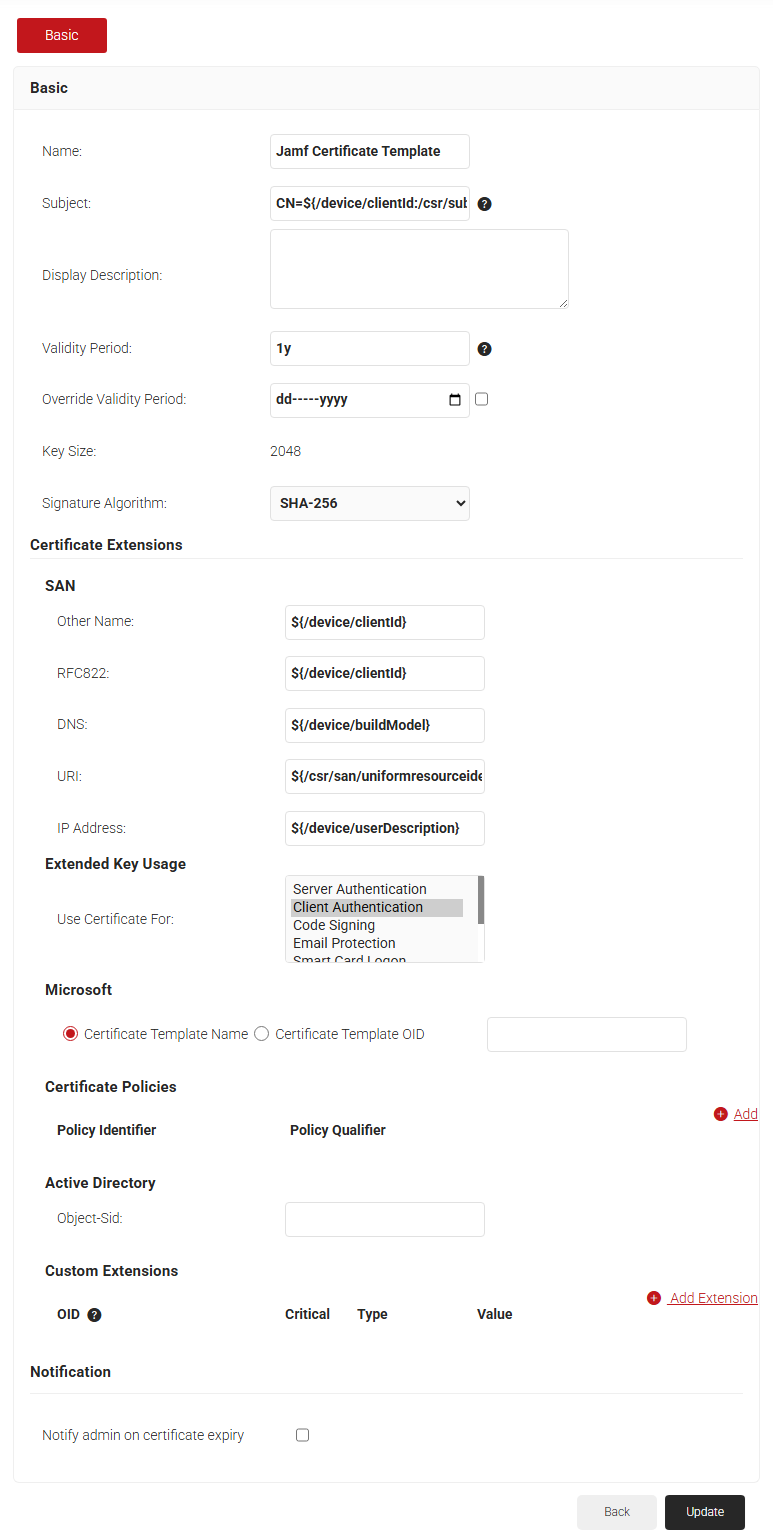
- In the Basic section, enter the name of the certificate template in the Name field.
- In the Subject field, enter CN=${/device/clientId:/csr/subject/commonname}. This fetches the common name configured in the Jamf.
- In the Display Description field, enter a suitable description for the certificate template.
- In the Validity Period field, type the validity period of the certificate (based on the requirement).
- In the Override Validity Period field, choose a specific date to bypass the validity period.
- From the Signature Algorithm drop-down list, select SHA-256 as the signature algorithm for the certificate signing request.
- Under the SAN section, enter the following values:
- In the Other Name field, enter ${/device/clientId}
- In the RFC822 field, enter ${/device/clientId}
- In the DNS field, enter ${/device/buildModel}
- In the URI field, enter ${/device/userDescription}
- In the Extended Key Usage section, from the Use Certificate For list, select Client Authentication.

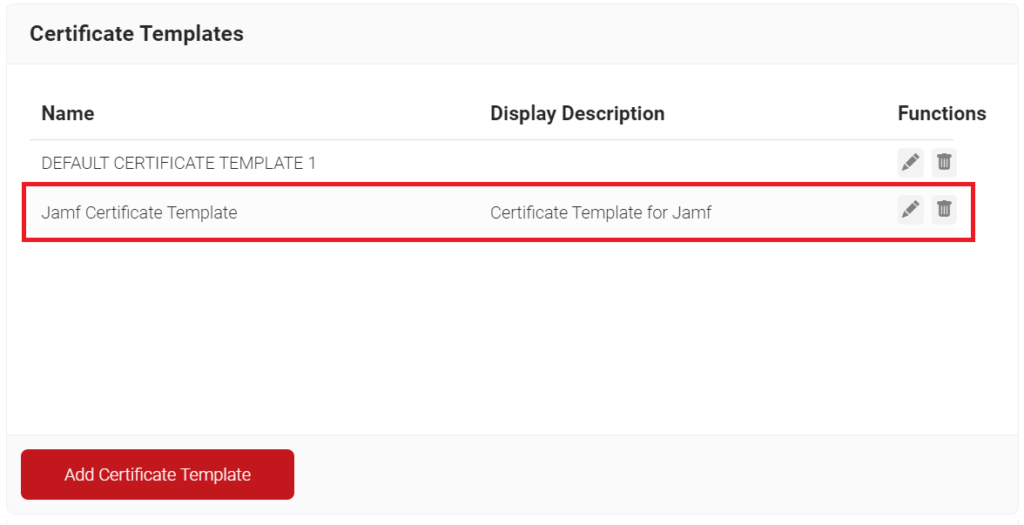
- Click Save.

The signing certificate can be created from the JoinNow Management Portal using the Create Certificate option.
NOTE: The CA that is configured in Policy Management > Enrollment to issue certificates for Jamf enrollment requests should be the same CA with which you create this signing certificate.
To create a Jamf signing certificate:
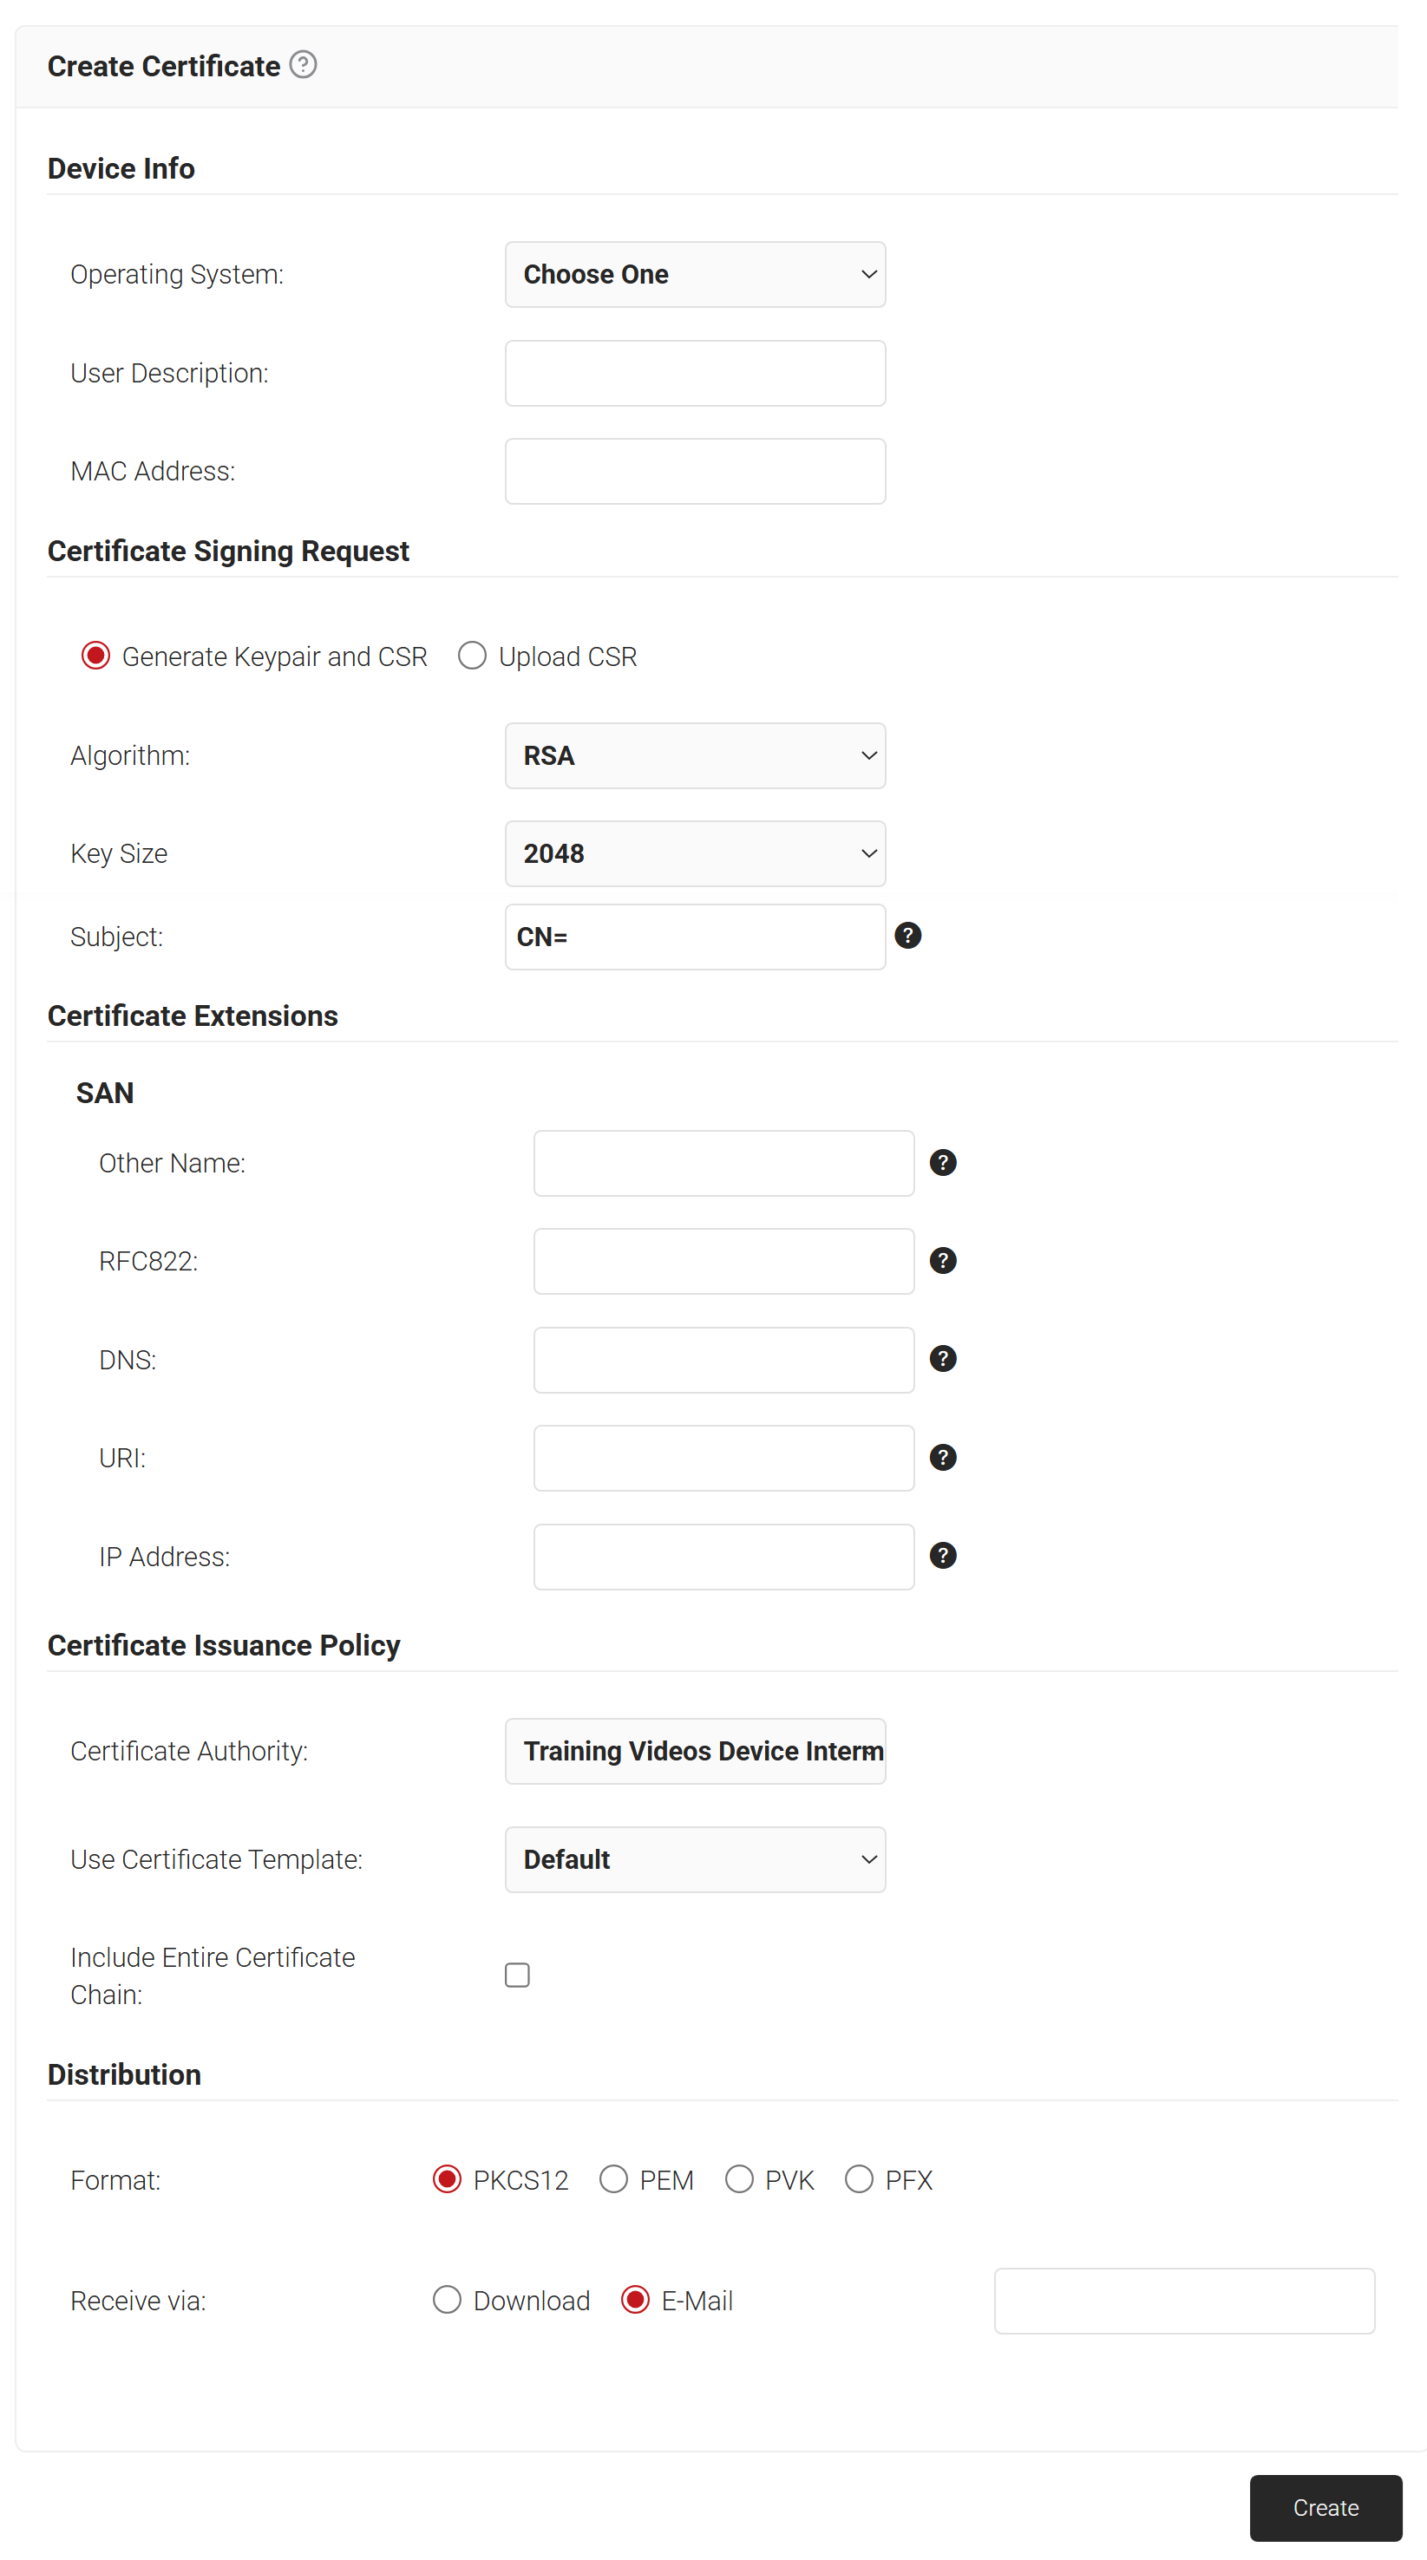
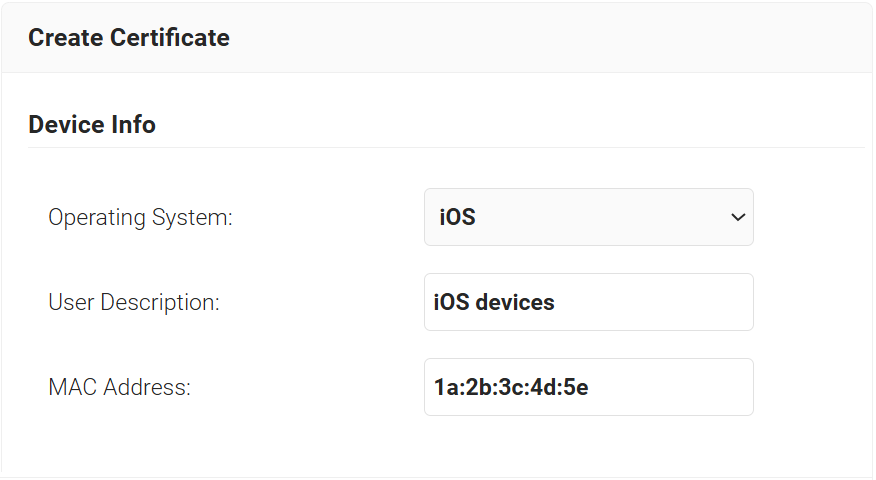
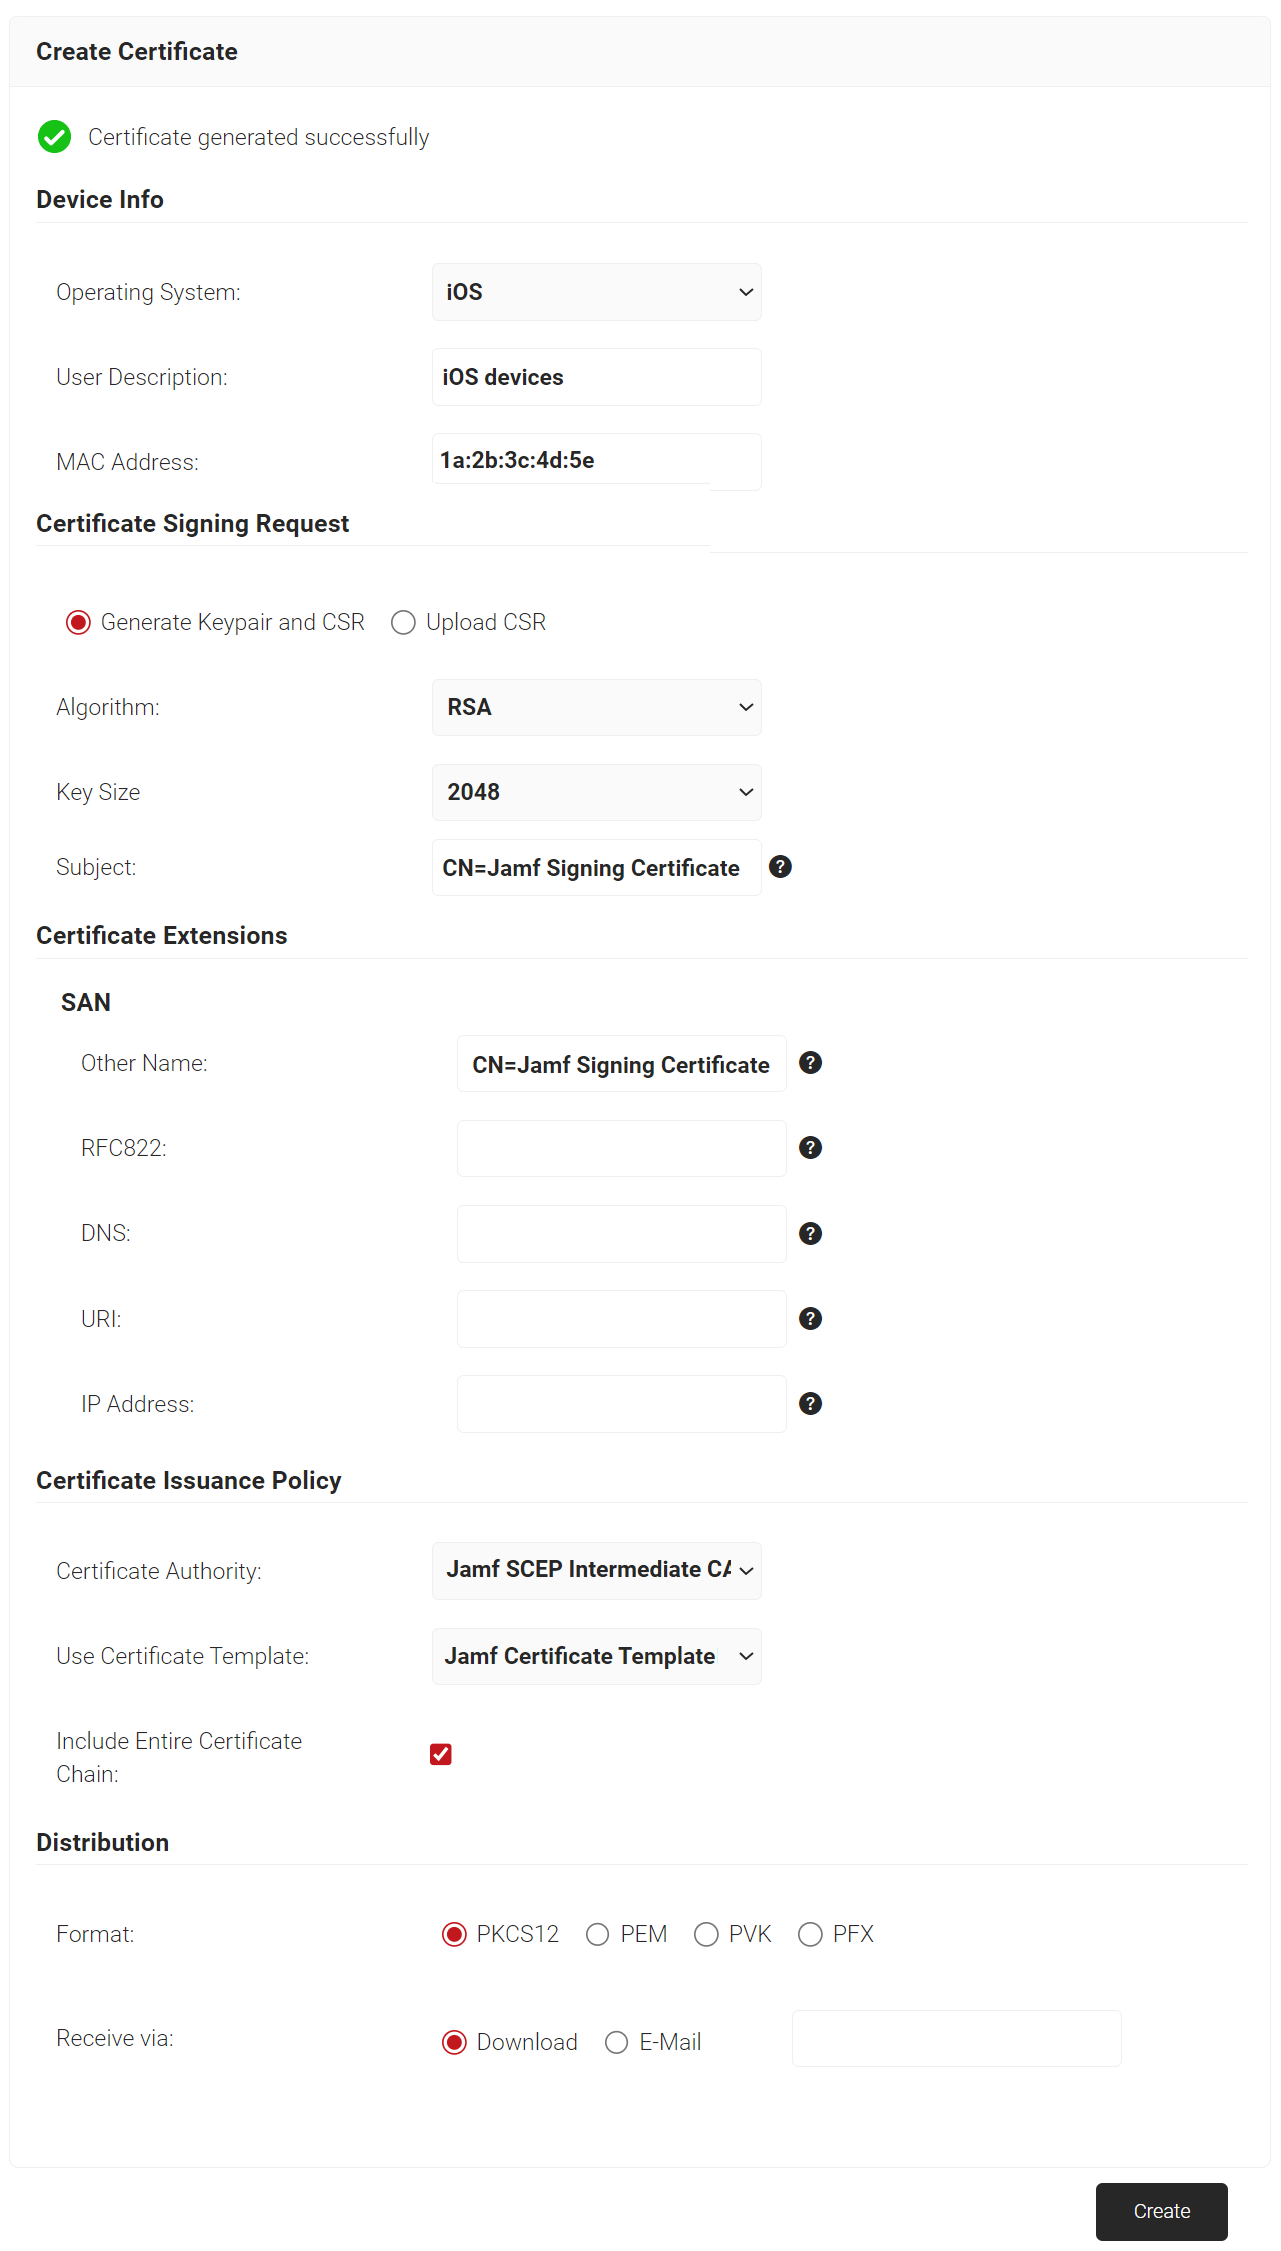
- Navigate to PKI > Create Certificate.

- In the Device Info section, from the Operating System drop-down list, select an operating system.
- In the User Description field, enter a suitable description.
- In the MAC Address field, enter a unique MAC address.

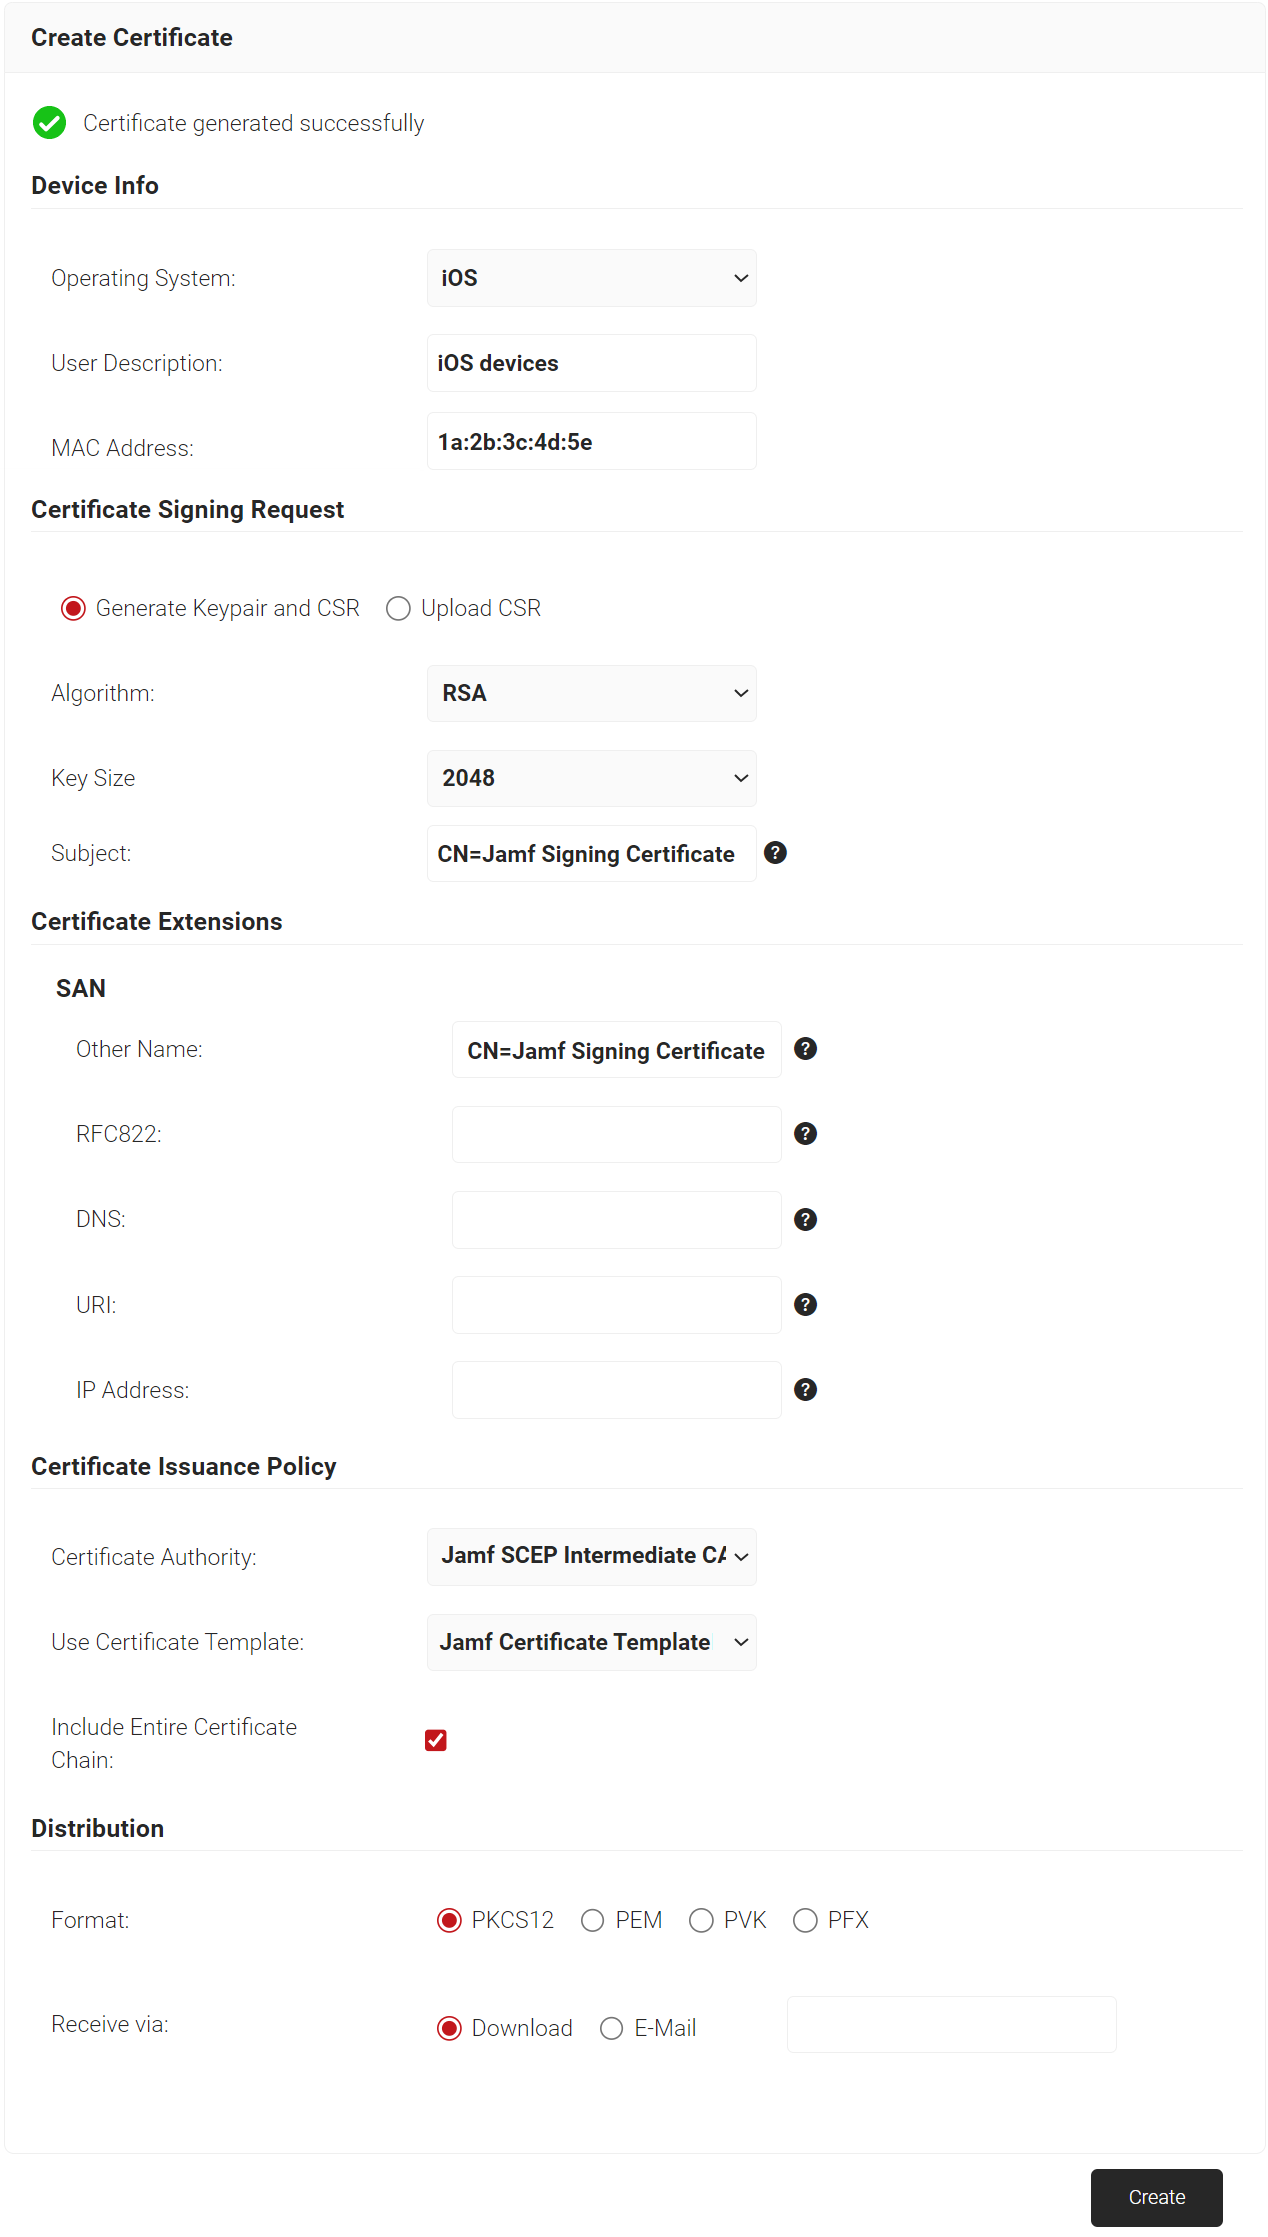
- In the Certificate Signing Request section, select the Generate Keypair and CSR option to generate a keypair and CSR file and create client certificates.
- From the Algorithm drop-down list, select RSA.
- From the Key Size drop-down list, select 2048.
- In the Subject field, enter the common name (the recommended name format for the certificate is “Jamf Signing Certificate”). This helps with easy identification of the CA.
- In the Other Name field, enter the same value as in the Subject field. Ignore the other fields.

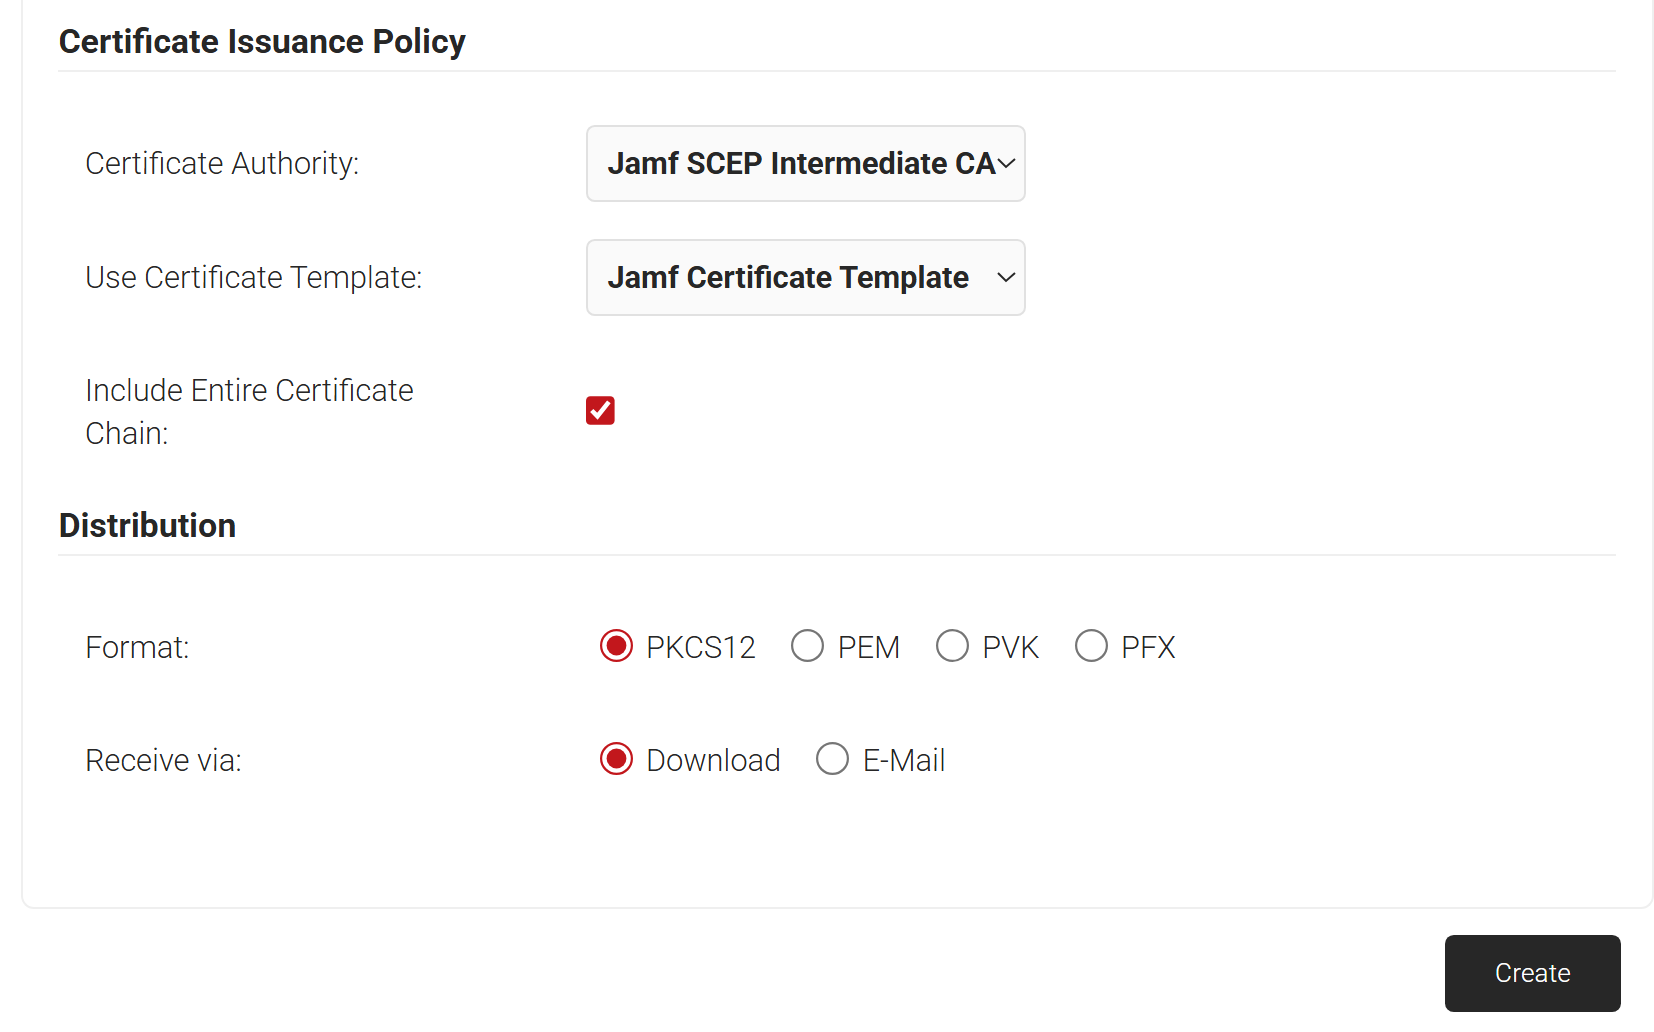
- In the Certificate Issuance Policy section, from the Certificate Authority drop-down list, select the intermediate CA created earlier for issuing certificates to clients using SCEP (refer to the Creating an Intermediate CA for SCEP Gateway Integration section).
- From the Use Certificate Template drop-down list, select the certificate template created in the Creating a Certificate Template for Jamf section.
- Select the Include Entire Certificate Chain checkbox. This is mandatory.
- In the Distribution section, for the Format field, select PKCS12.
- In the Receive via field, select Download.

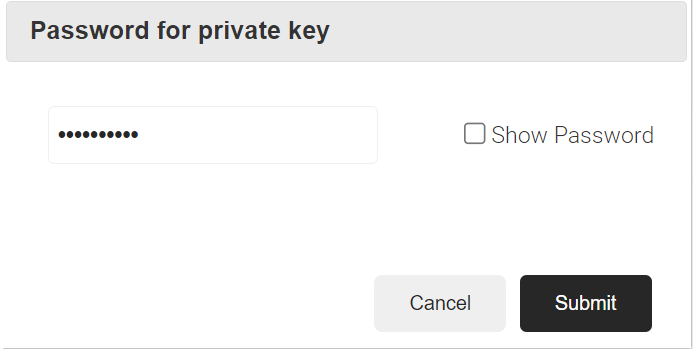
- Click the Create button, and a Password for private key pop-up window opens. Enter the password for the certificate file and click Submit.


The SCEP URL serves as an endpoint that managed devices can use to connect to the SCEP server and enroll for certificates. The secret is also passed along to Jamf’s external CA for authentication of these certificate requests.
An SCEP URL and secret can be generated by creating a Device Management Platform in the JoinNow Management Portal.
Additionally, the tokens created for SCEP Enrollment can also be used in Policy Management to assign a user/device role based on the token in the incoming request.
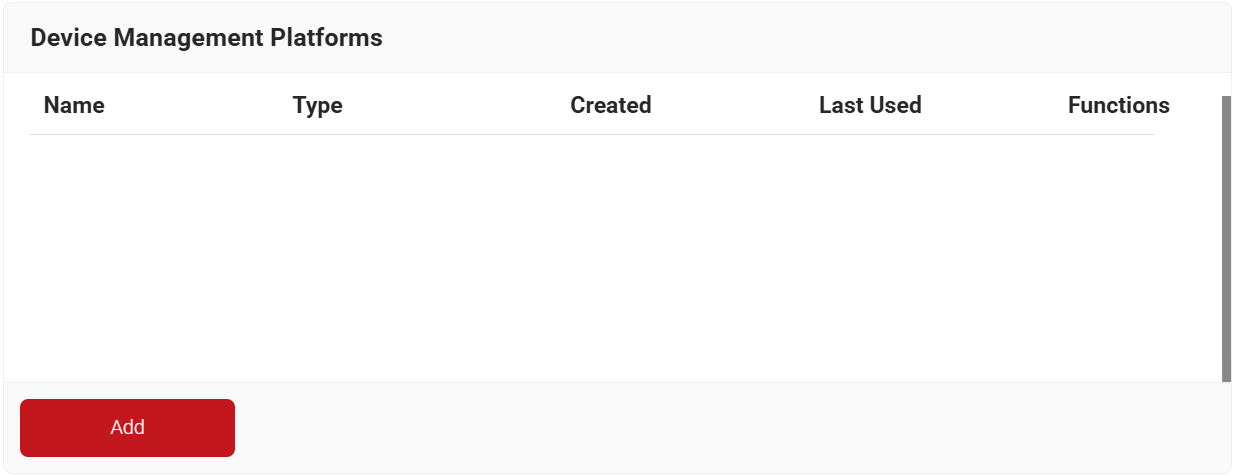
To create a Device Management Platform, perform the following steps:
- Navigate to Integration Hub > Device Management Platforms.
- Click Add.

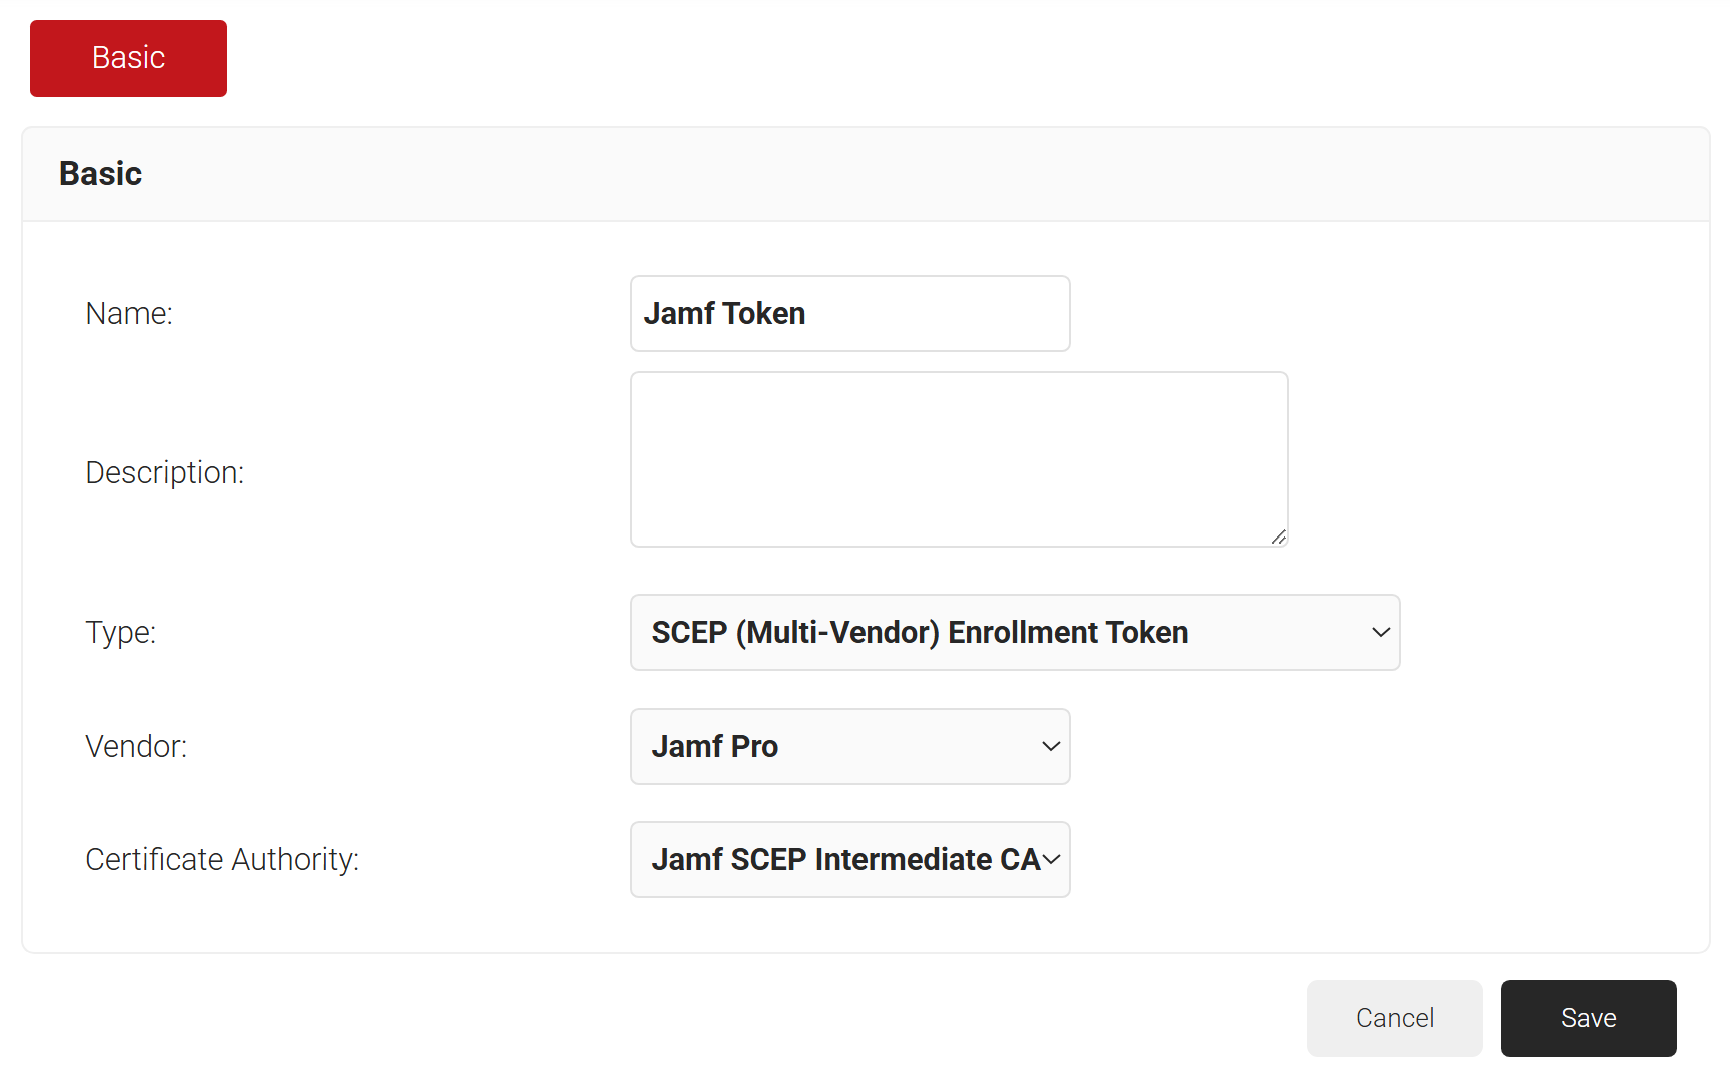
- In the Basic section, enter the name of the device management platform in the Name field.
- In the Description field, enter the description for the device management platform.
- From the Type drop-down list, select SCEP (Multi-Vendor) Enrollment Token.
- From the Vendor drop-down list, select Jamf Pro.
- From the Certificate Authority drop-down list, select the Intermediate CA created in Creating an Intermediate CA for SCEP Gateway Integration. If you do not select a CA, the organization CA is used by default.

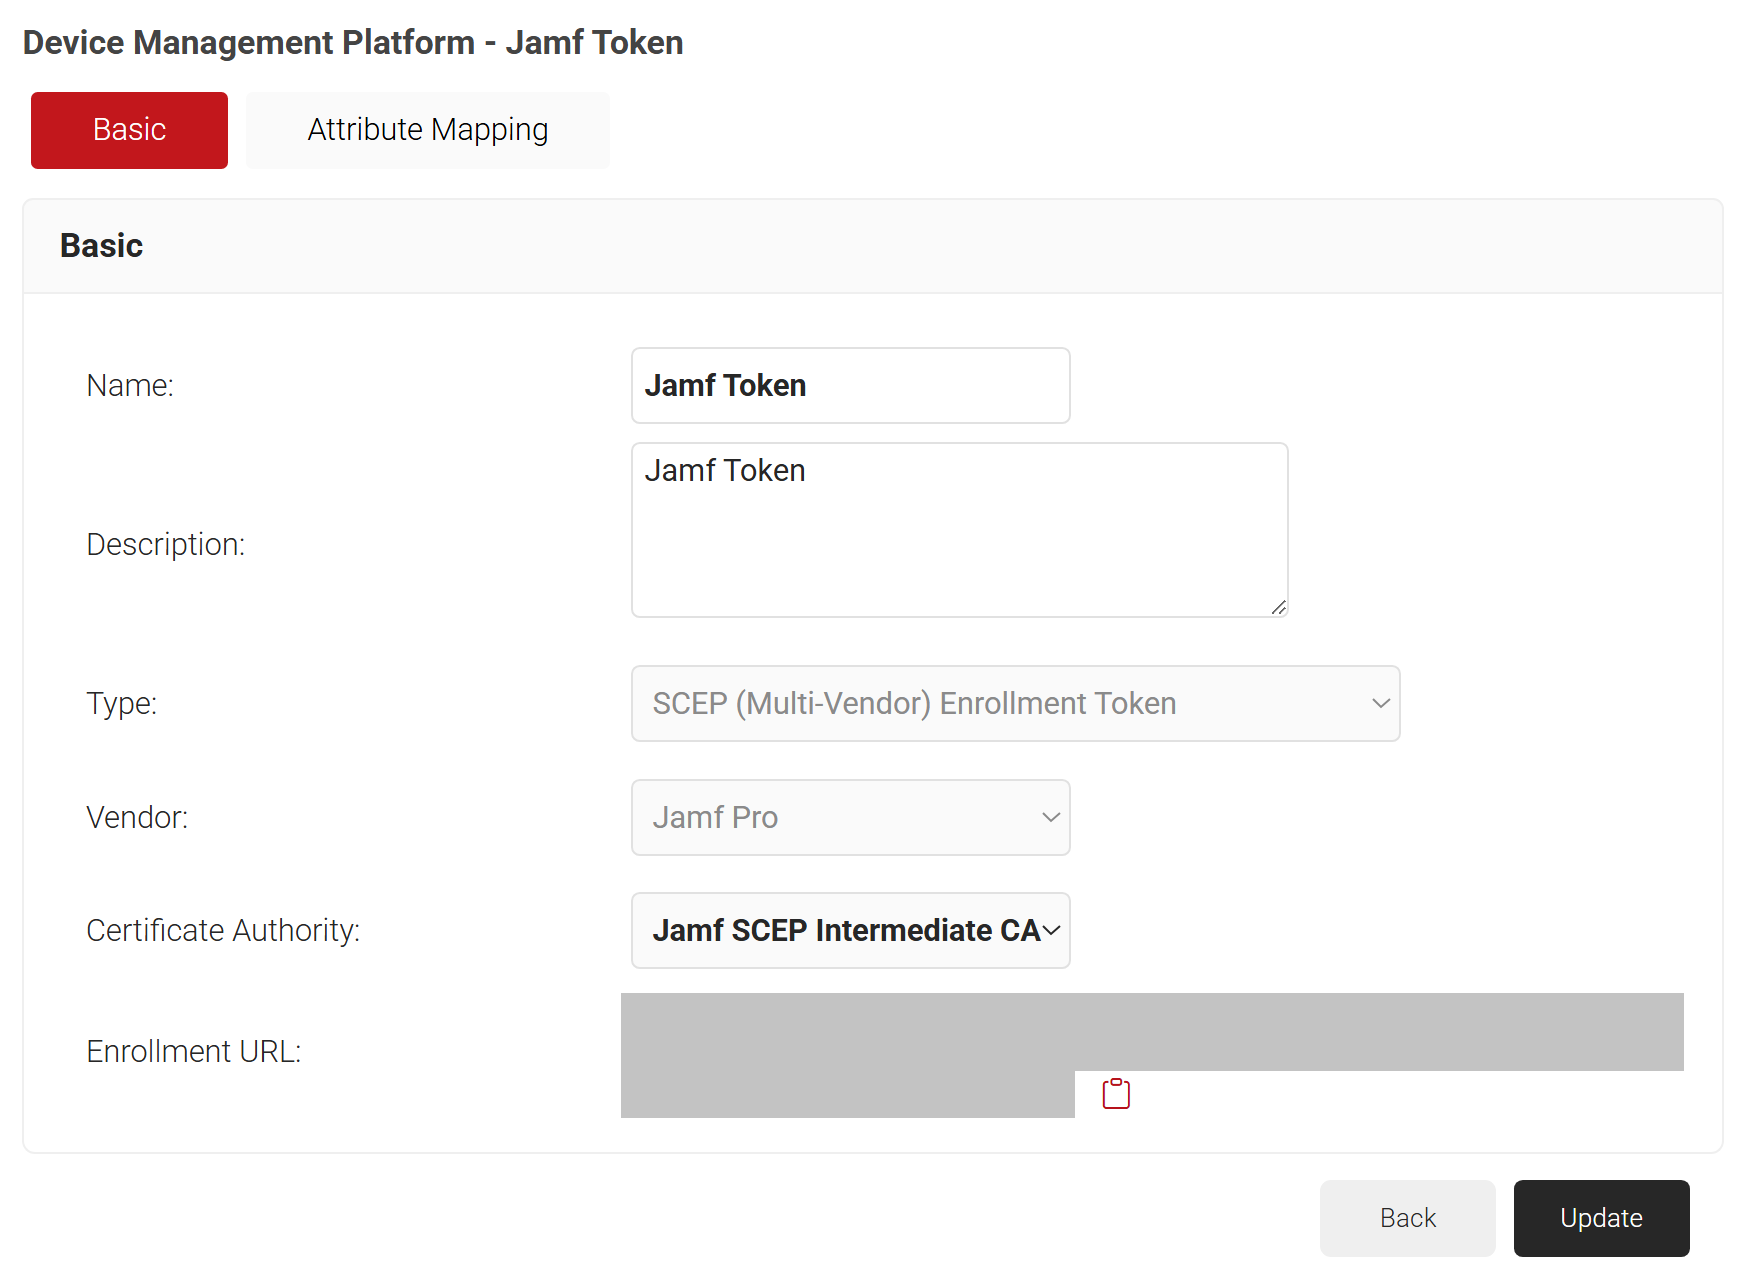
- Click Save. A .csv file containing the API secret and Enrollment URL is downloaded, and the Enrollment URL is displayed on the screen.
NOTE: Save this file securely. It is downloaded only once during token creation. If you lose it, you can not retrieve the secret. - The page refreshes, and the Attribute Mapping tab is displayed.

- Click Update.


NOTE: You can also refer to the steps in Configuring Device Management Platform (SCEP Enrollment Token) in the JoinNow MultiOS and Connector Configuration Guide, which is available in the Management Portal.
To configure a Policy Workflow:
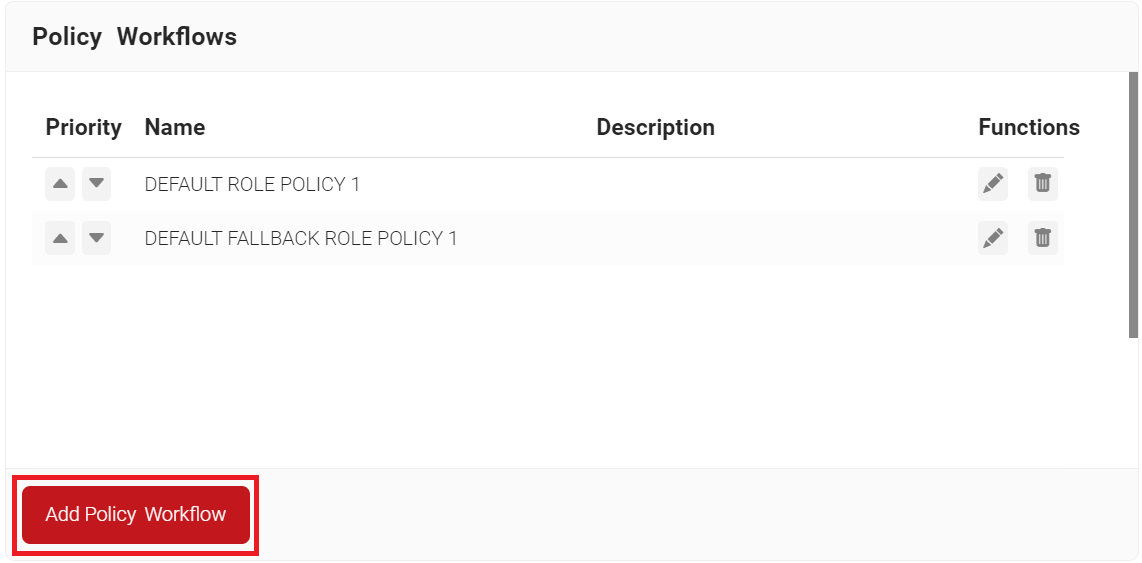
- Navigate to Policy Management > Policy Workflows.
- Click Add Policy Workflow.

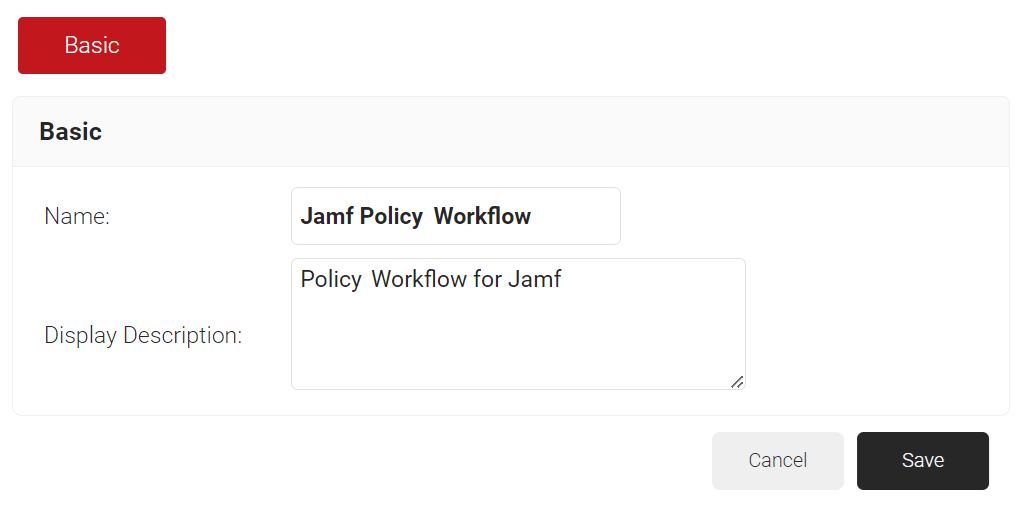
- In the Basic section, enter the name of the policy workflow in the Name field.
- In the Display Description field, enter a suitable description for the policy workflow.

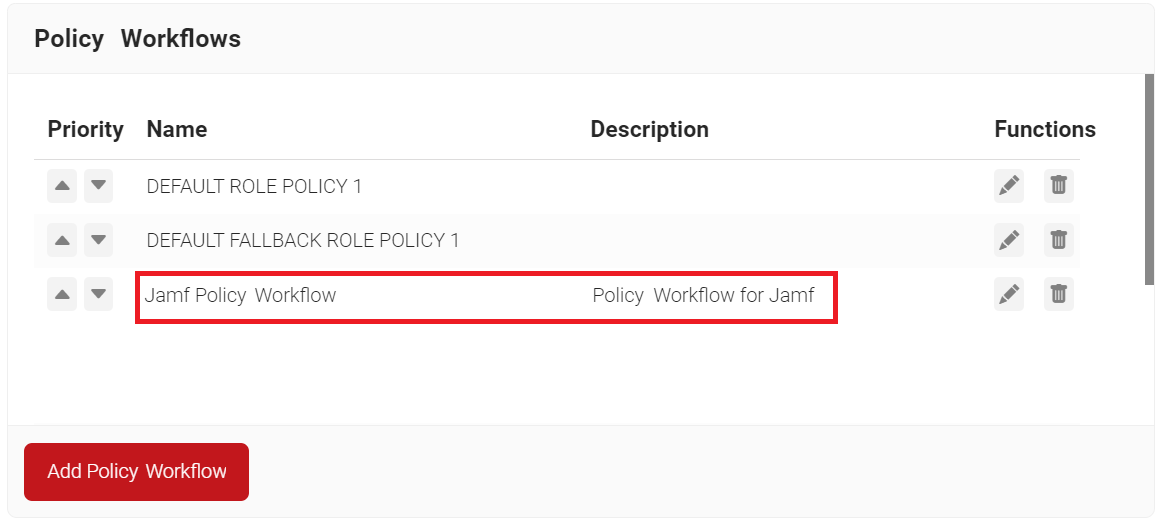
- Click Save.
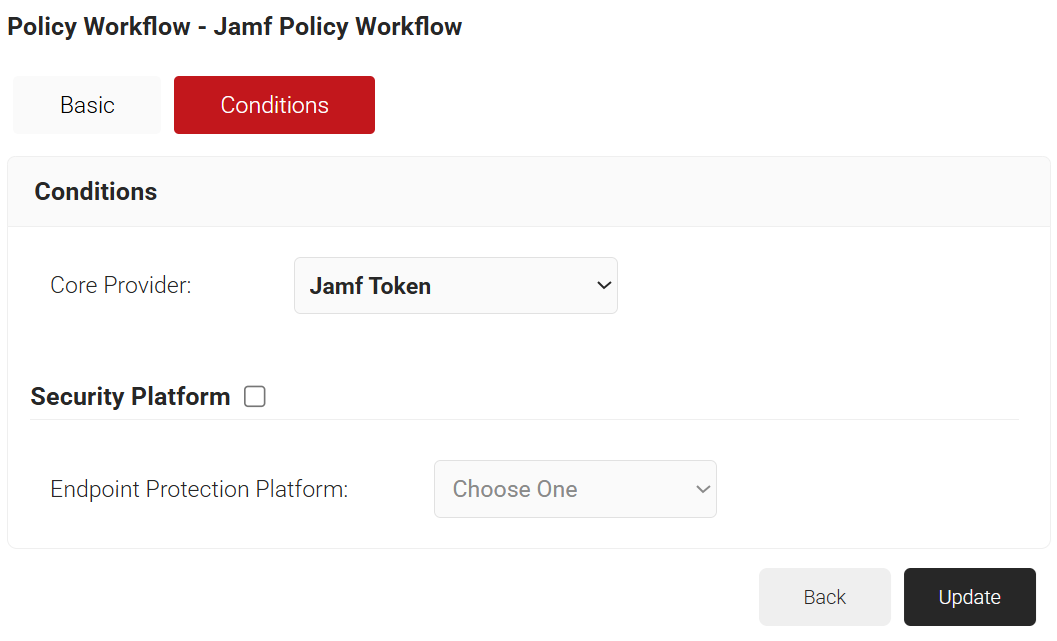
- The page refreshes, and the Conditions tab is displayed.
- Select the Conditions tab.
- From the Core Provider drop-down list, select the JAMF token you created earlier (see the Creating a Device Management Platform section).

- Click Update.

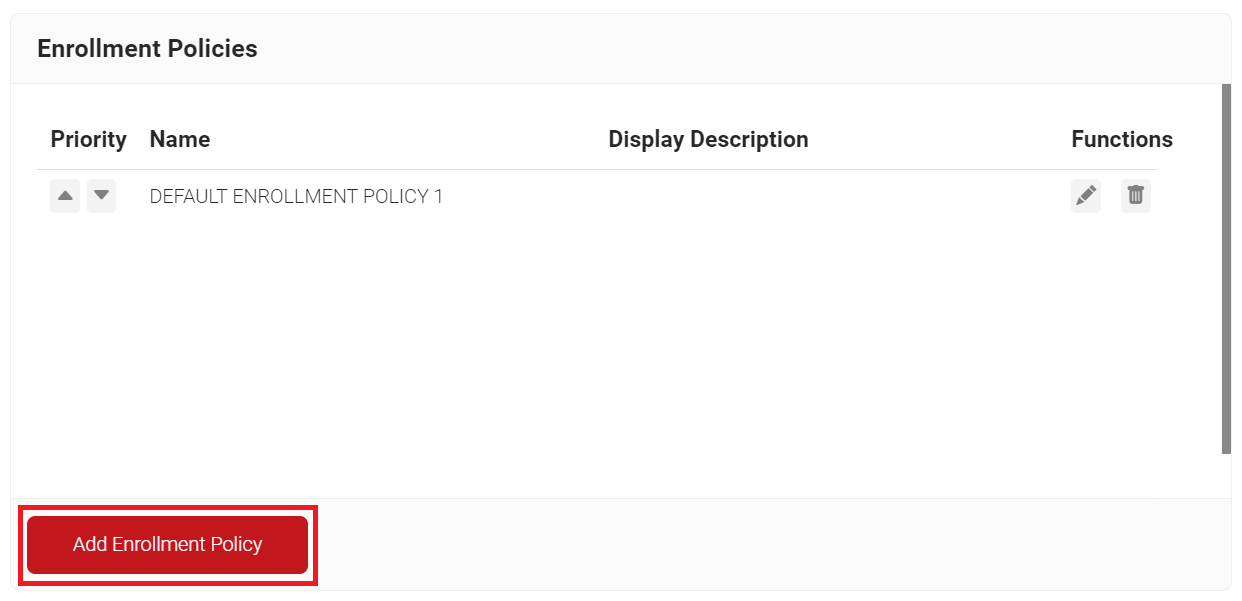
To add an Enrollment Policy, perform the following steps:
- Navigate to Policy Management > Enrollment.
- Click Add Enrollment Policy.

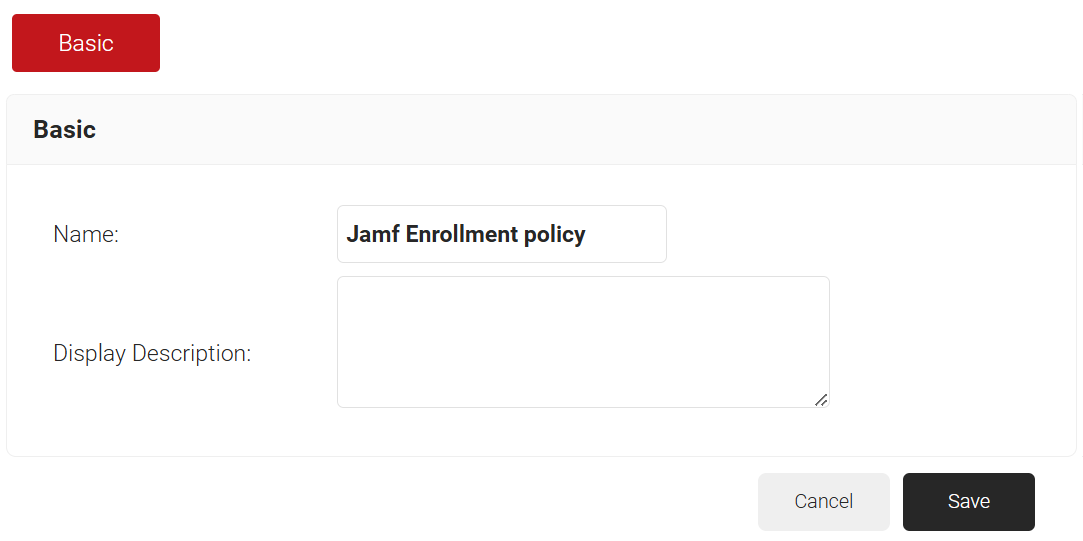
- Under the Basic section, in the Name field, enter the name of the enrollment policy.
- In the Display Description field, enter a suitable description for the enrollment policy.

- Click Save.
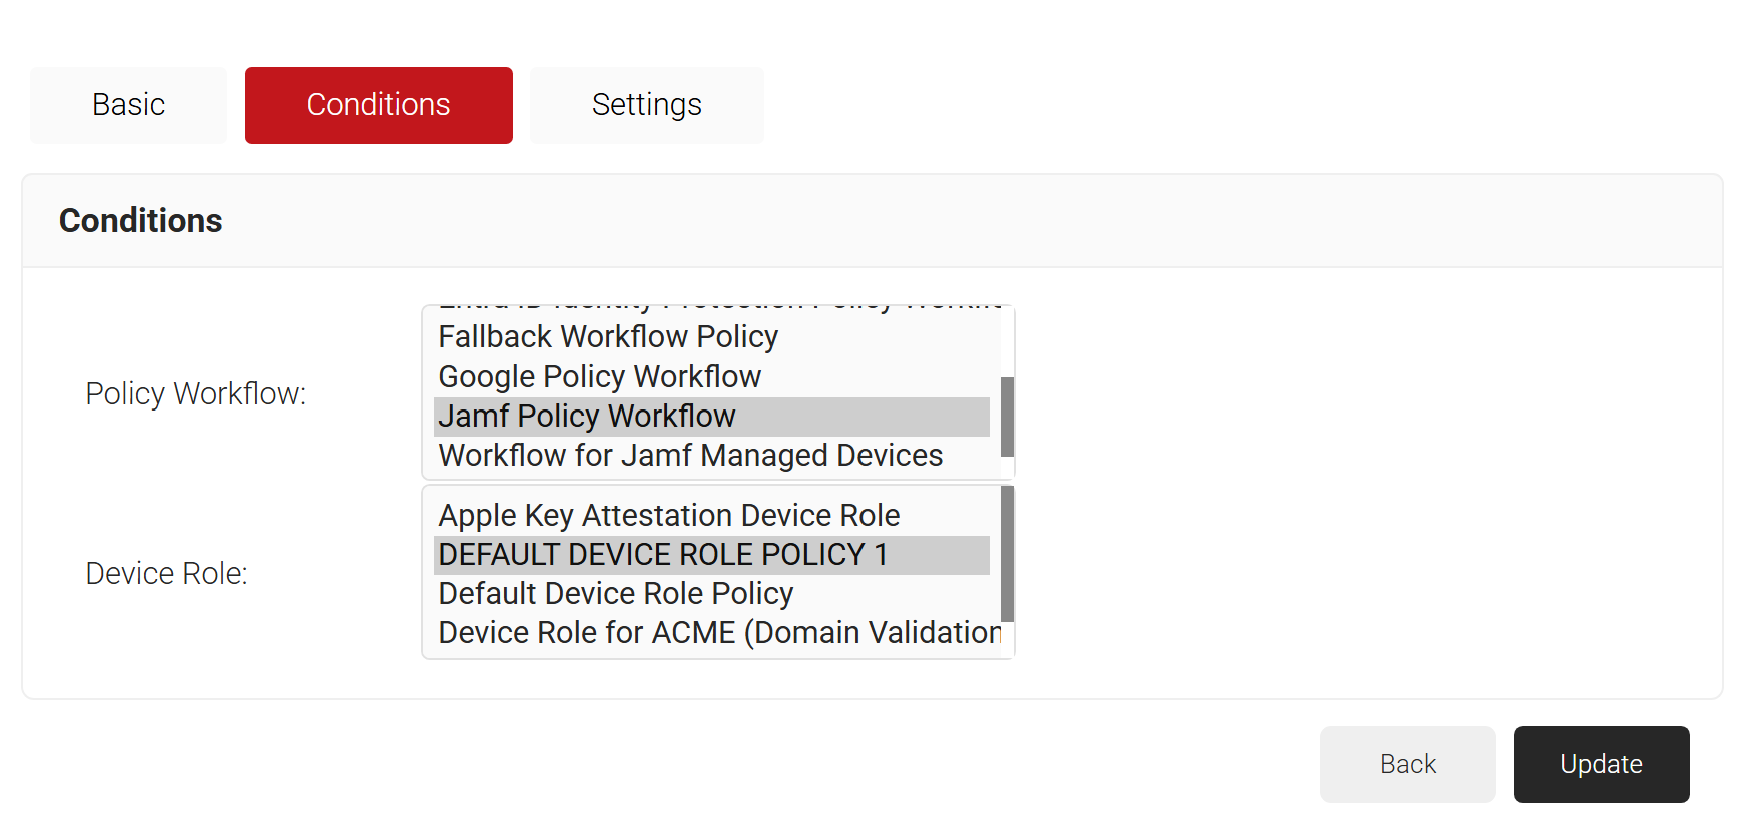
- The page refreshes, and the Conditions and Settings tabs are displayed.
- Select the Conditions tab.
- In the Conditions section, from the Role list, select the role policy you created in the Configuring a Policy Workflow section.
- From the Device Role list, select DEFAULT DEVICE ROLE POLICY 1.

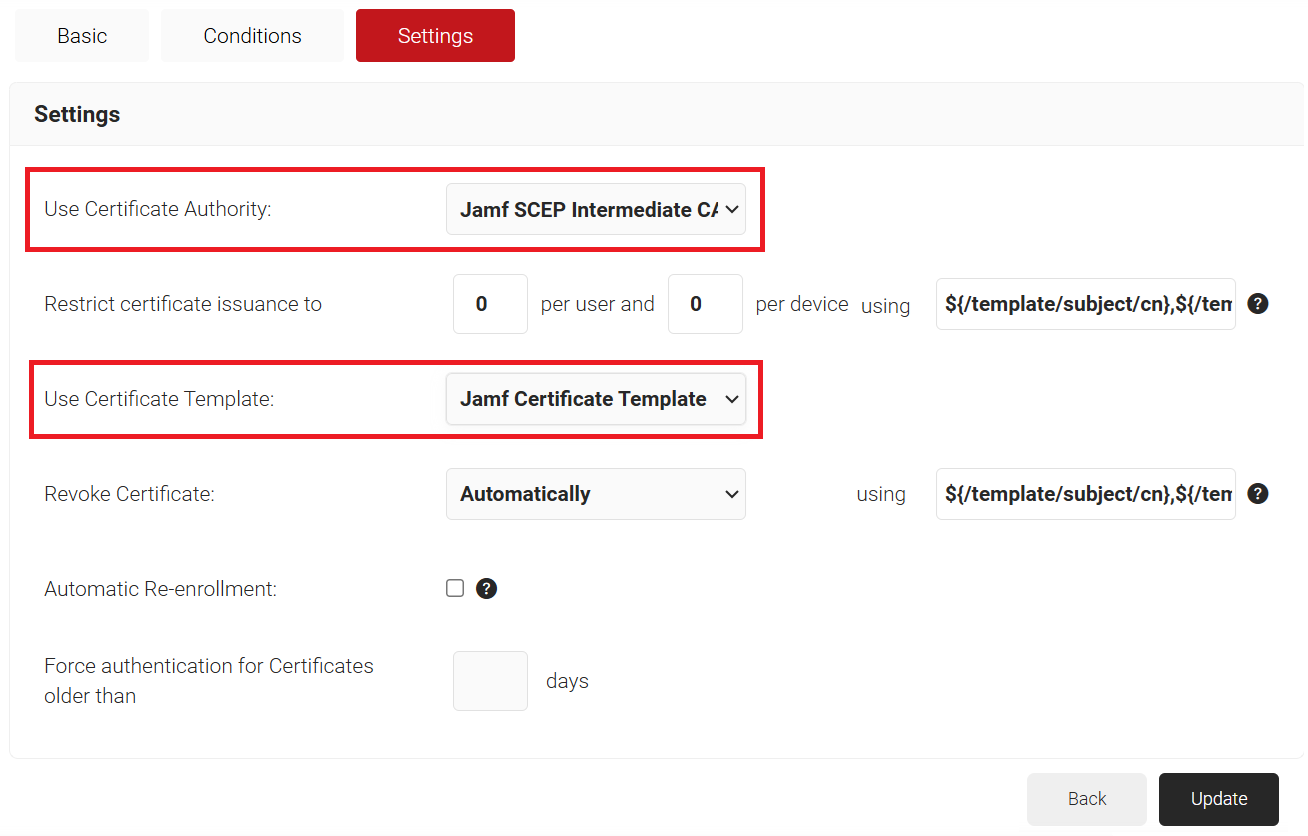
- Select the Settings tab.
- In the Settings section, from the Use Certificate Authority drop-down list, select the intermediate CA you created earlier (see the Creating an Intermediate CA for Jamf SCEP Gateway Integration section).
- From the Use Certificate Template drop-down list, select the template you created earlier (see the Creating a Certificate Template for Jamf section).

- In the other settings, retain the default values.
- Click Update.


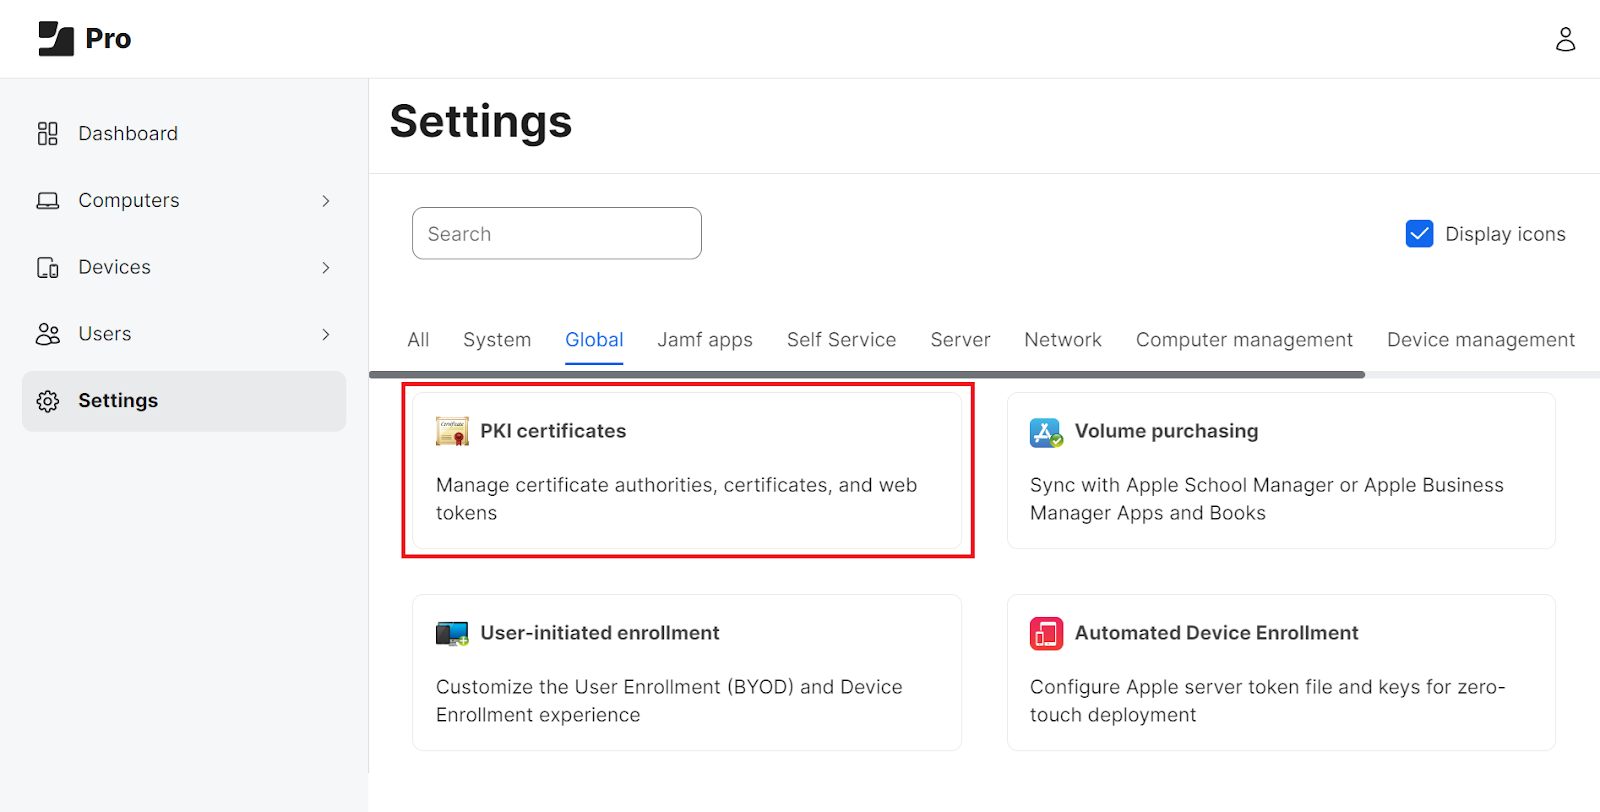
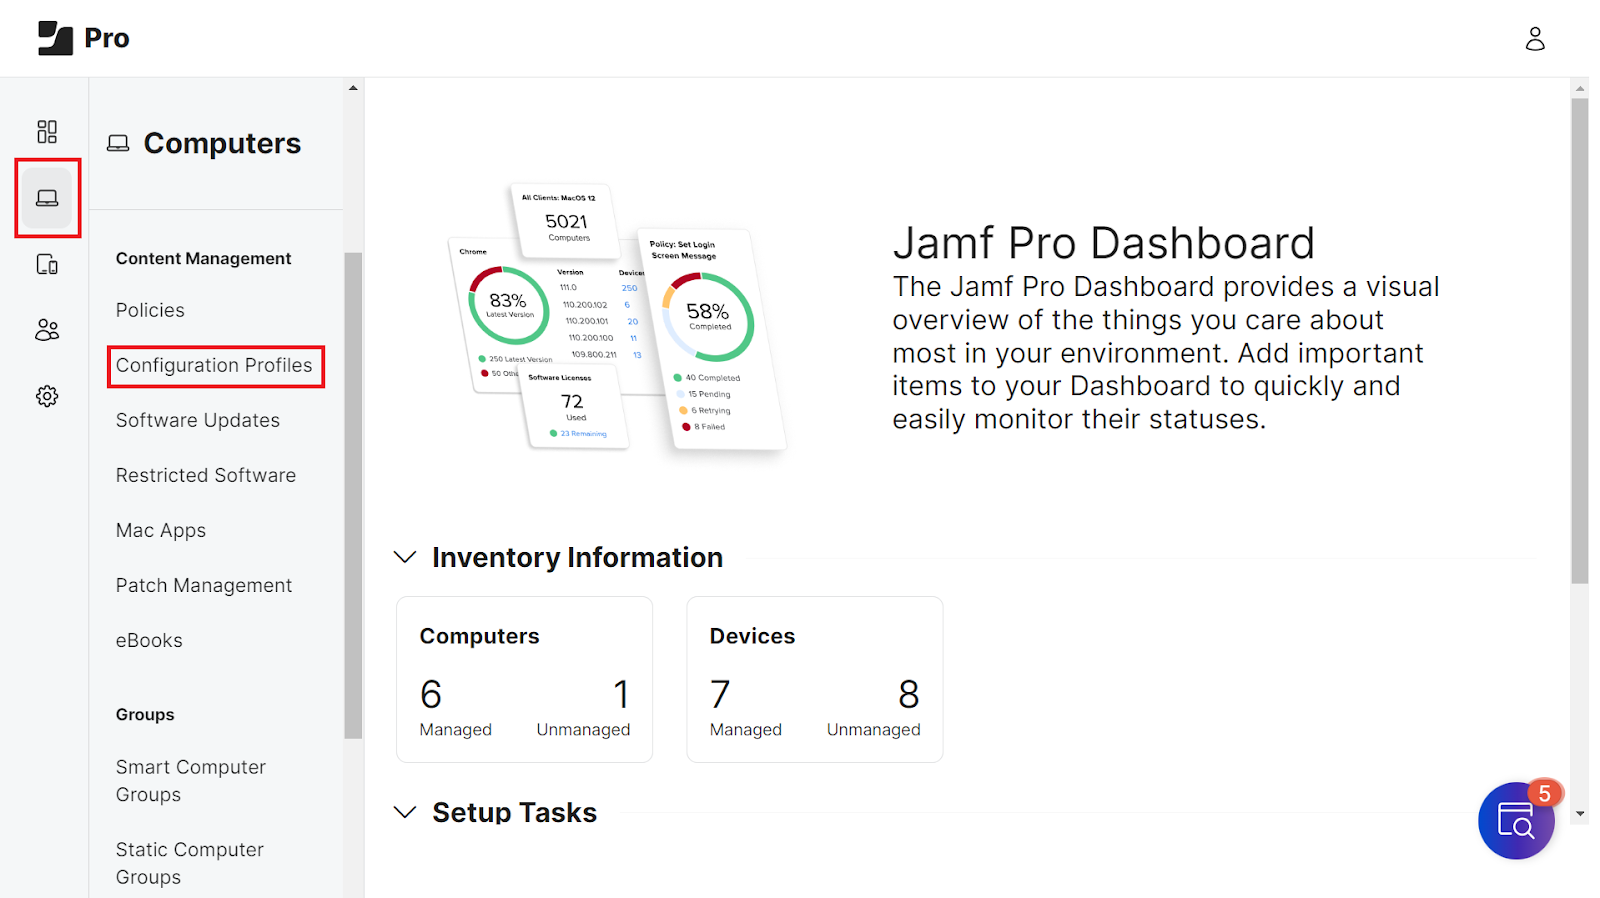
- Log in to the Jamf Pro console.
- Navigate to Settings > Global.
- Click PKI certificates.

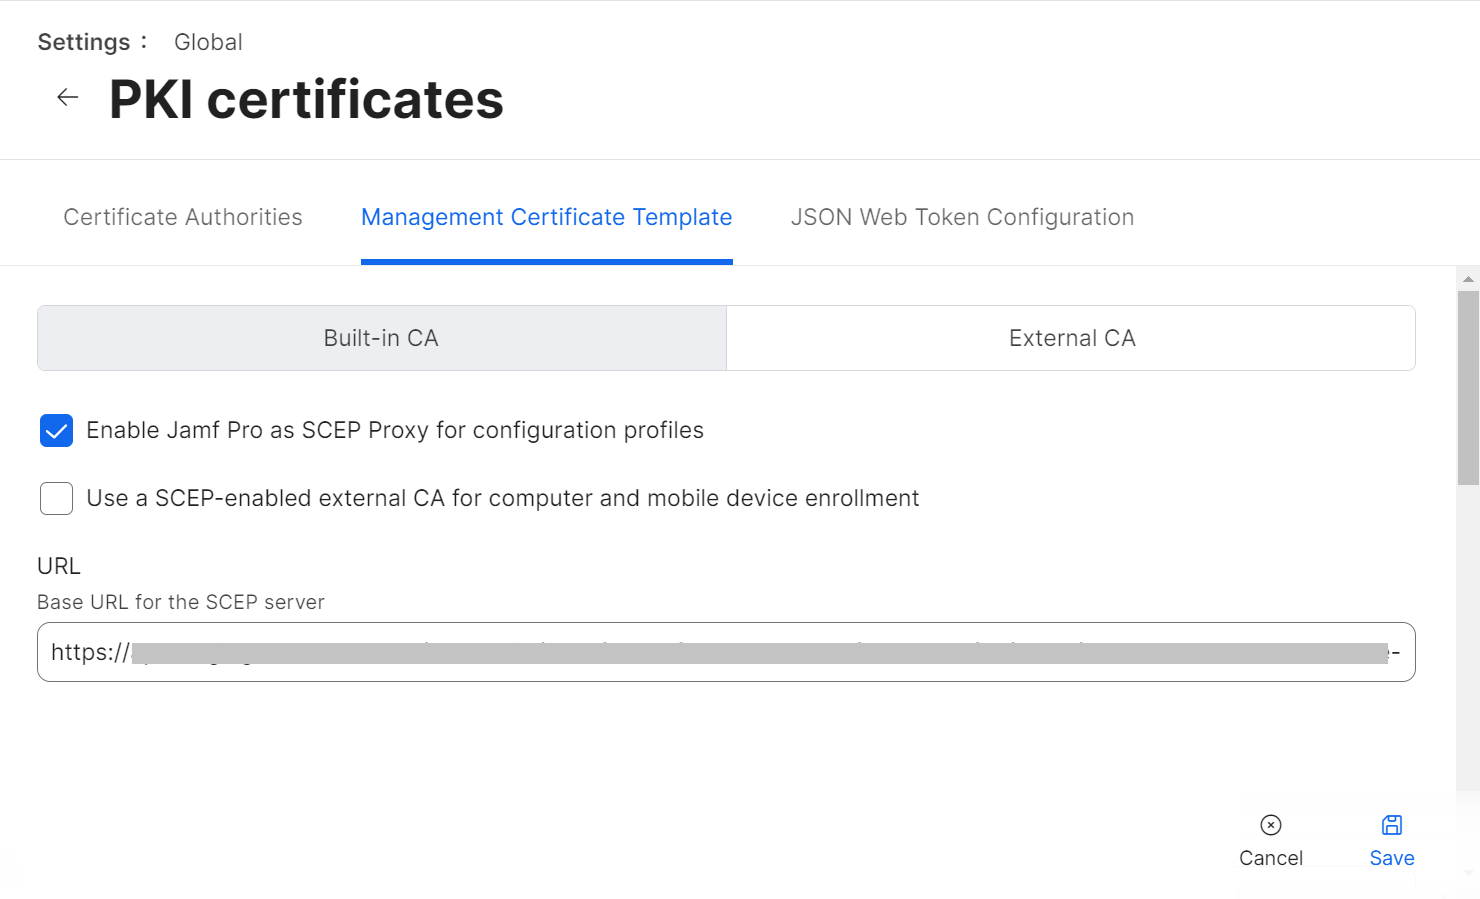
- Select the Management Certificate Template tab, select External CA, and click Edit.

- Select the Enable Jamf Pro as SCEP Proxy for configuration profiles checkbox.
- In the URL field, enter the new SCEP URL you saved in the CSV file.
 NOTE: You can also refer to the steps in Configuring API Tokens (SCEP Enrollment Token) in the JoinNow MultiOS and Connector Configuration Guide available in the Management Portal.
 - In the Name field, enter the name of the certificate issuing CA created in the JoinNow Management portal.
- In the Subject field, enter CN=$DEVICENAME
- From the Subject Alternative Name Type drop-down list, select None.

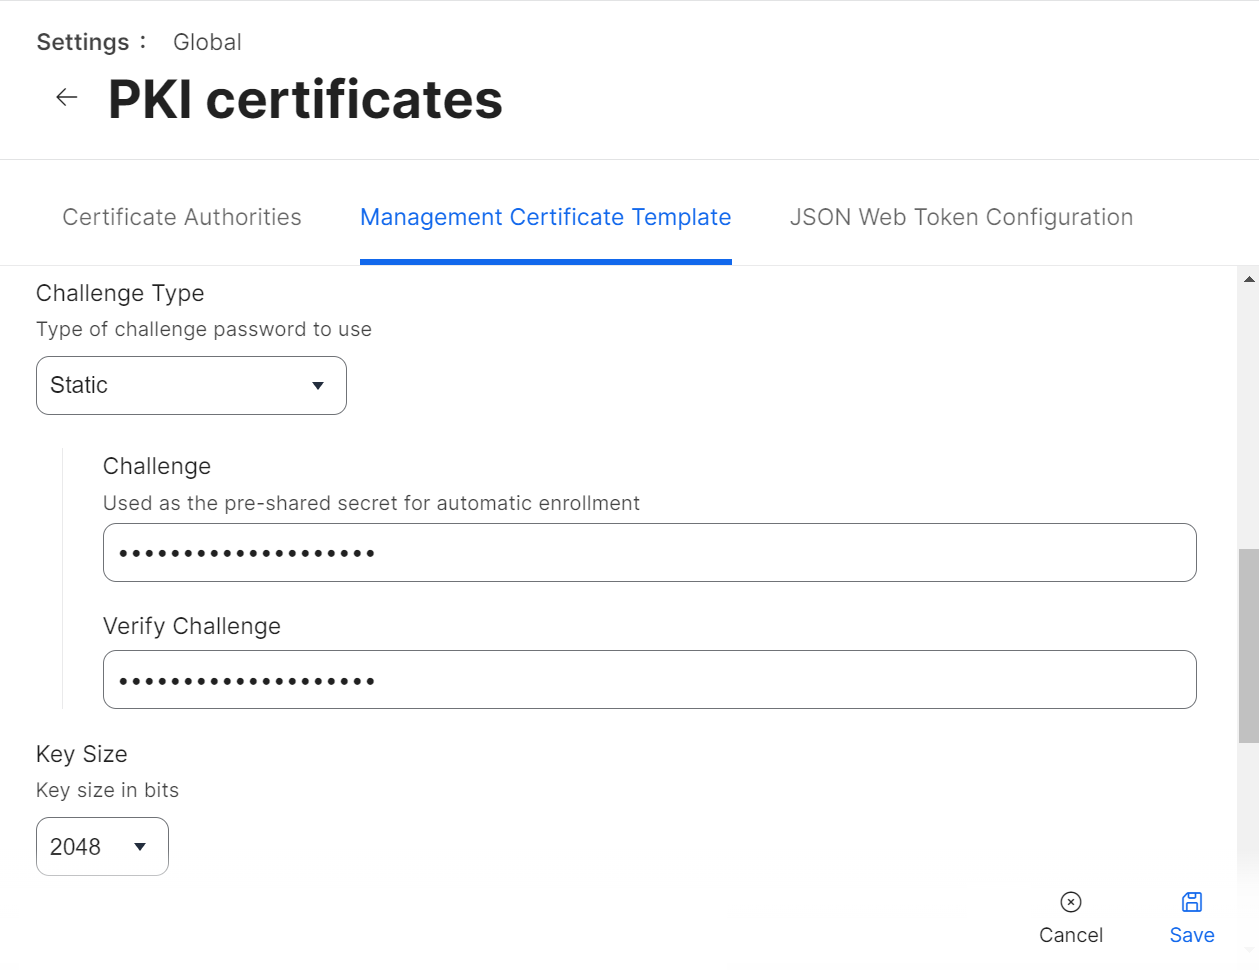
- From the Challenge Type drop-down list, select Static.
- In the Challenge and Verify Challenge fields, enter the Secret from the CSV file you downloaded in the Generating a SCEP URL and Secret section.
- From the Key Size drop-down list, select 2048. SecureW2 does not recommend selecting “1024”.

- Click Save.
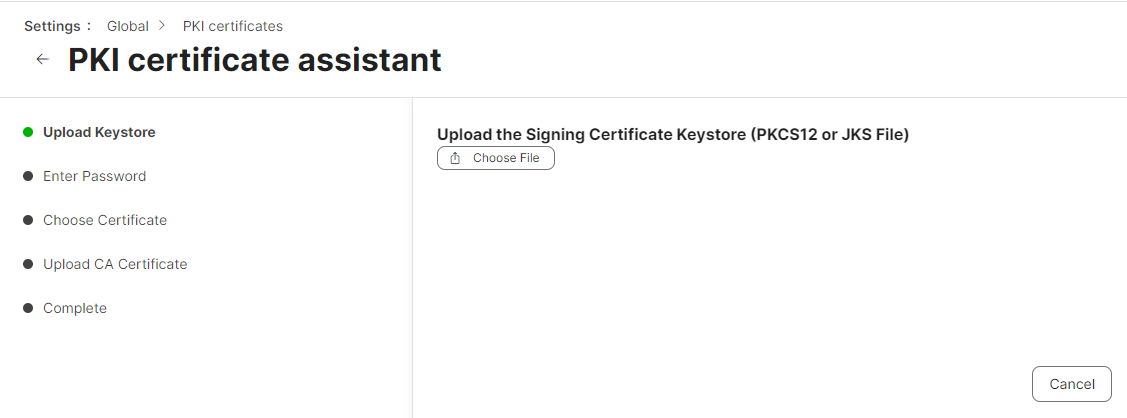
- Under the Signing Certificate section, click Change Signing and CA Certificates to upload the signing certificate you created in the Creating a Signing Certificate for Jamf section.

- On the Upload Keystore step, click Choose File and upload the PKCS12 file you downloaded in the Creating a Signing Certificate for Jamf section.

- Click Next.
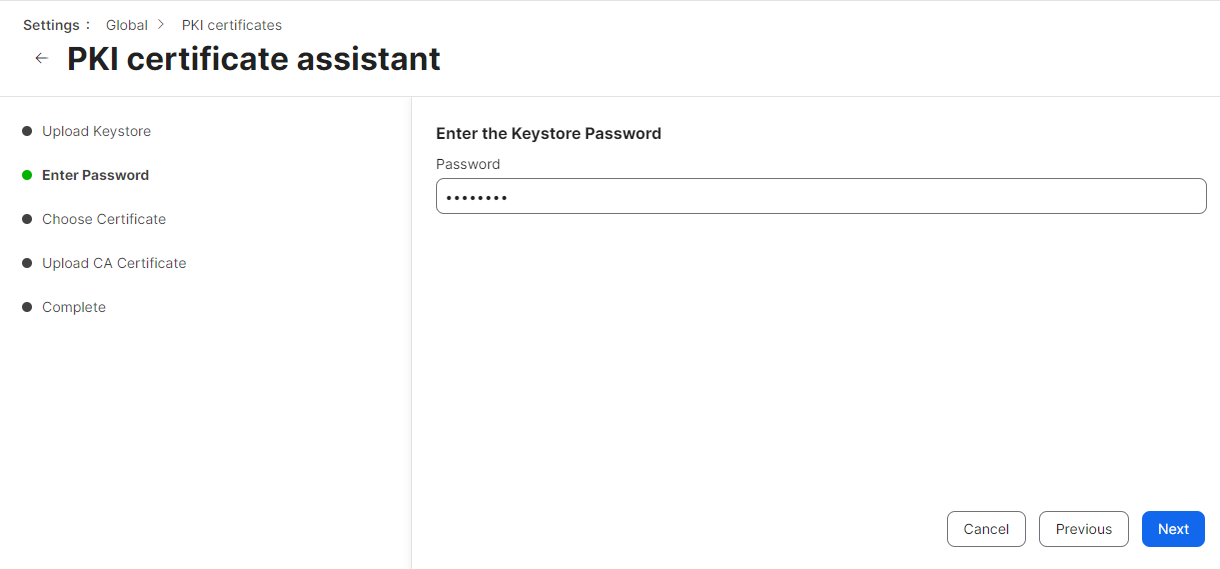
- On the Enter Password step, enter the password you entered in the Password for private key prompt in the Creating a Signing Certificate for Jamf section when you created the certificate.

- Click Next.
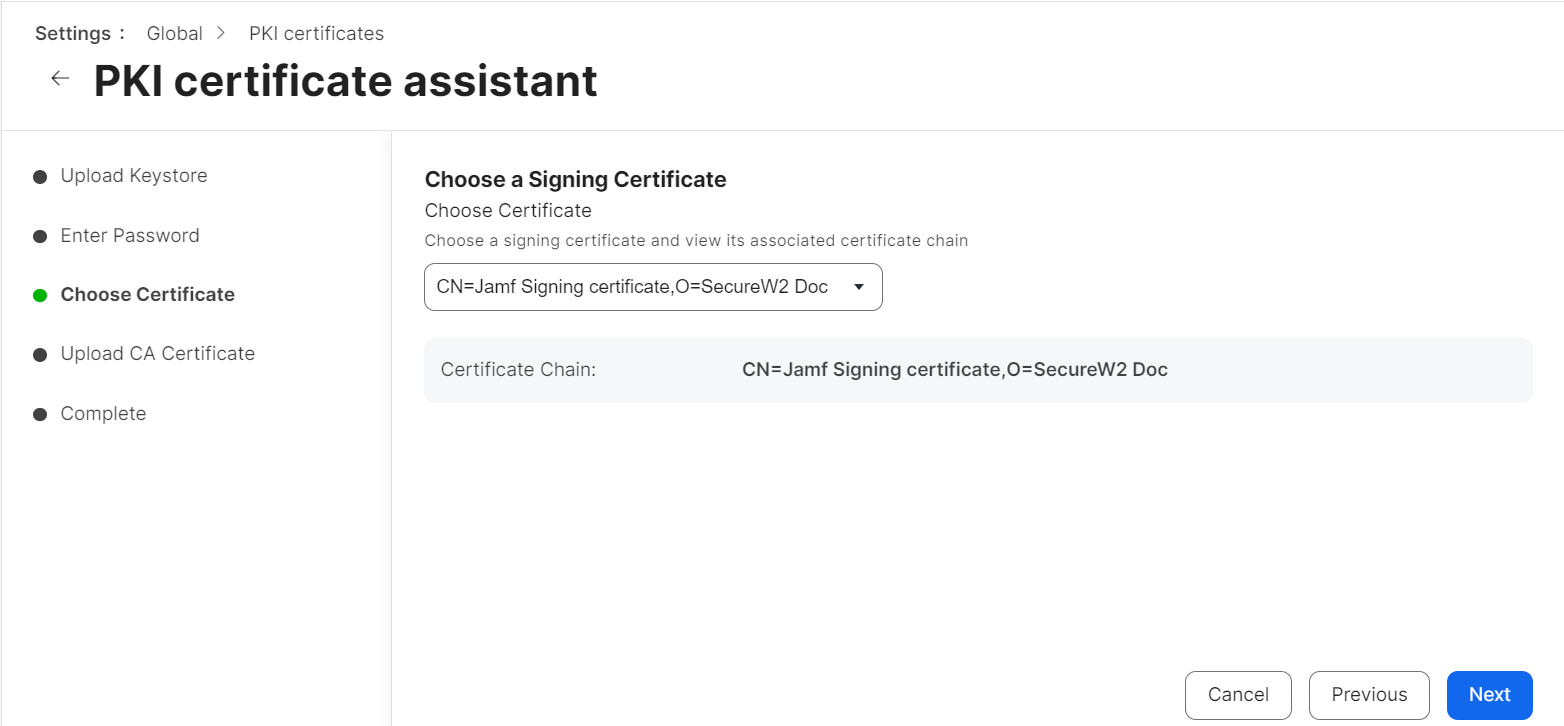
- On the Choose Certificate step, verify that the correct CA certificate is selected from the Choose Certificate drop-down list and that the correct certificate chain is displayed.

- Click Next.
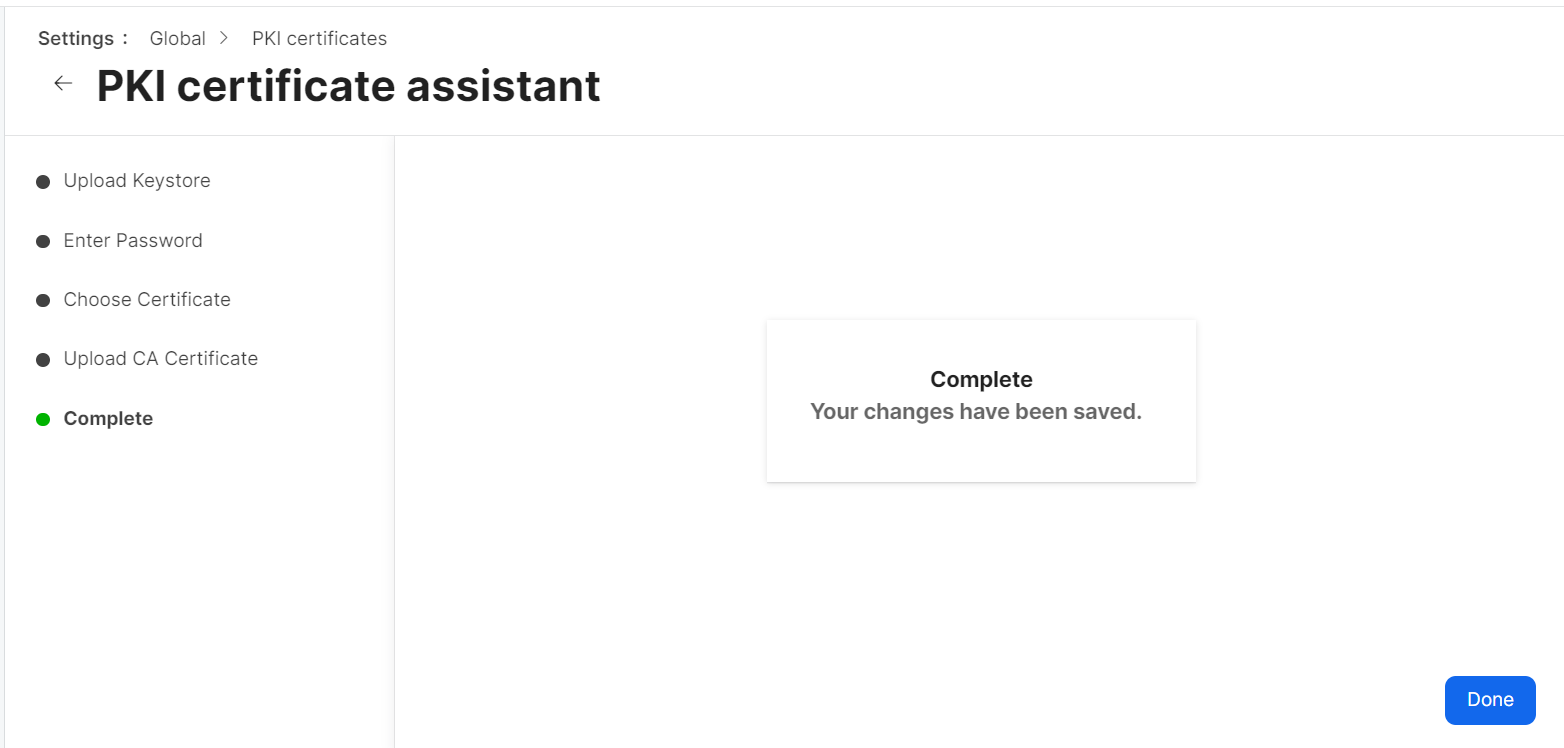
- On the Upload CA Certificate step, click Next to skip the upload. The CA certificate is already present in PKCS12.
- On the Complete step, click Done.


 NOTE: You can also refer to the steps in Configuring API Tokens (SCEP Enrollment Token) in the JoinNow MultiOS and Connector Configuration Guide available in the Management Portal.
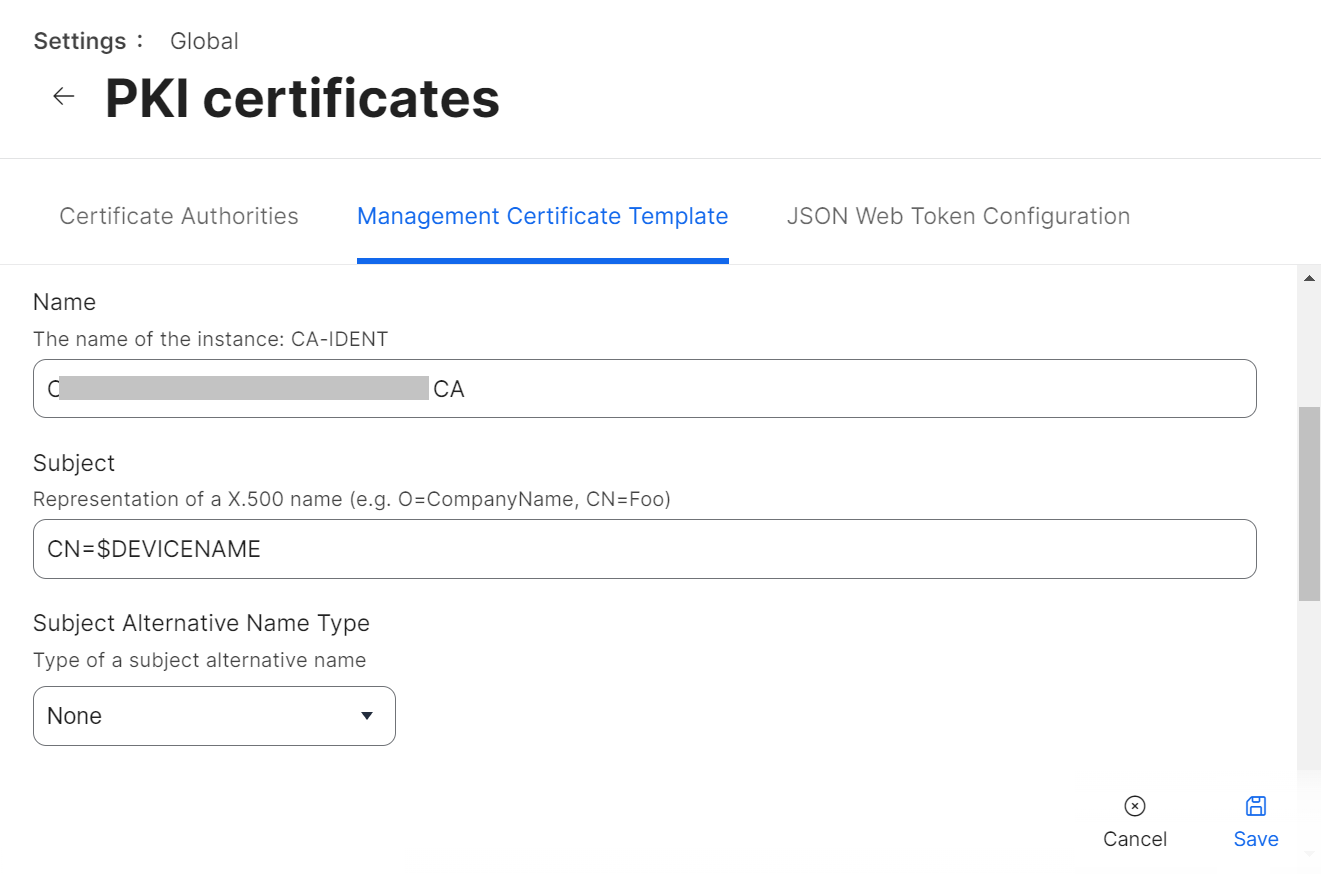

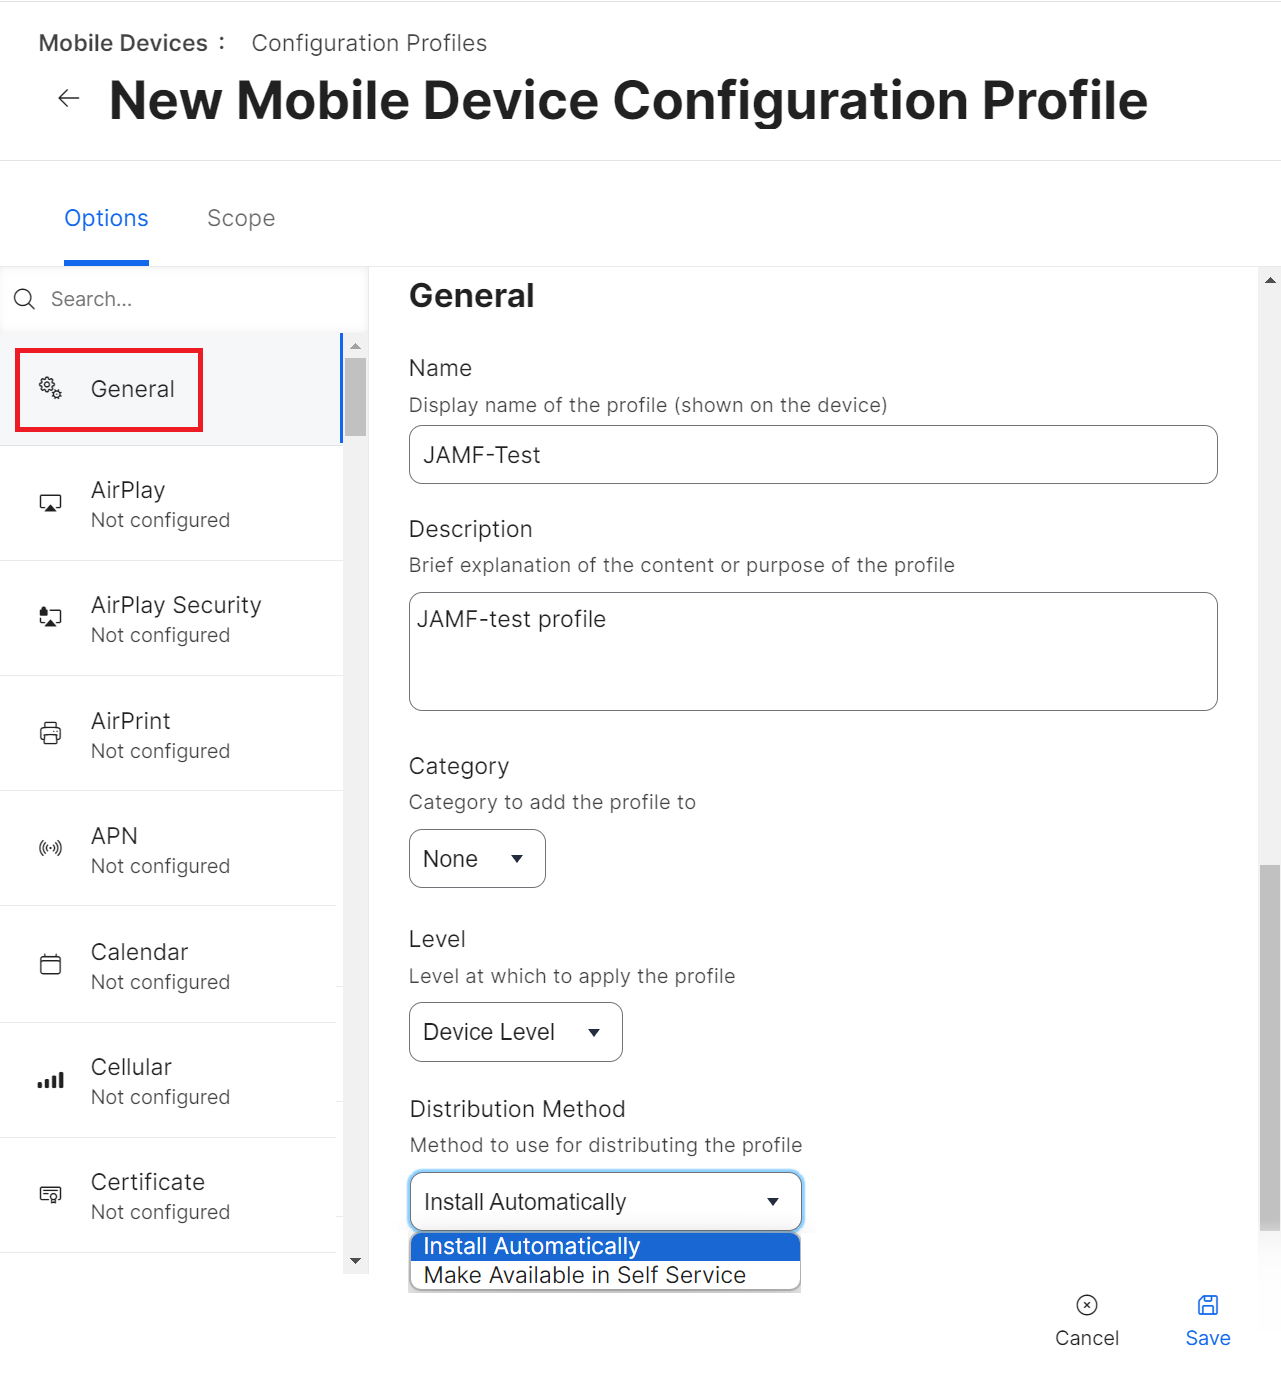
To set up a Jamf configuration profile for iOS, perform the following steps:
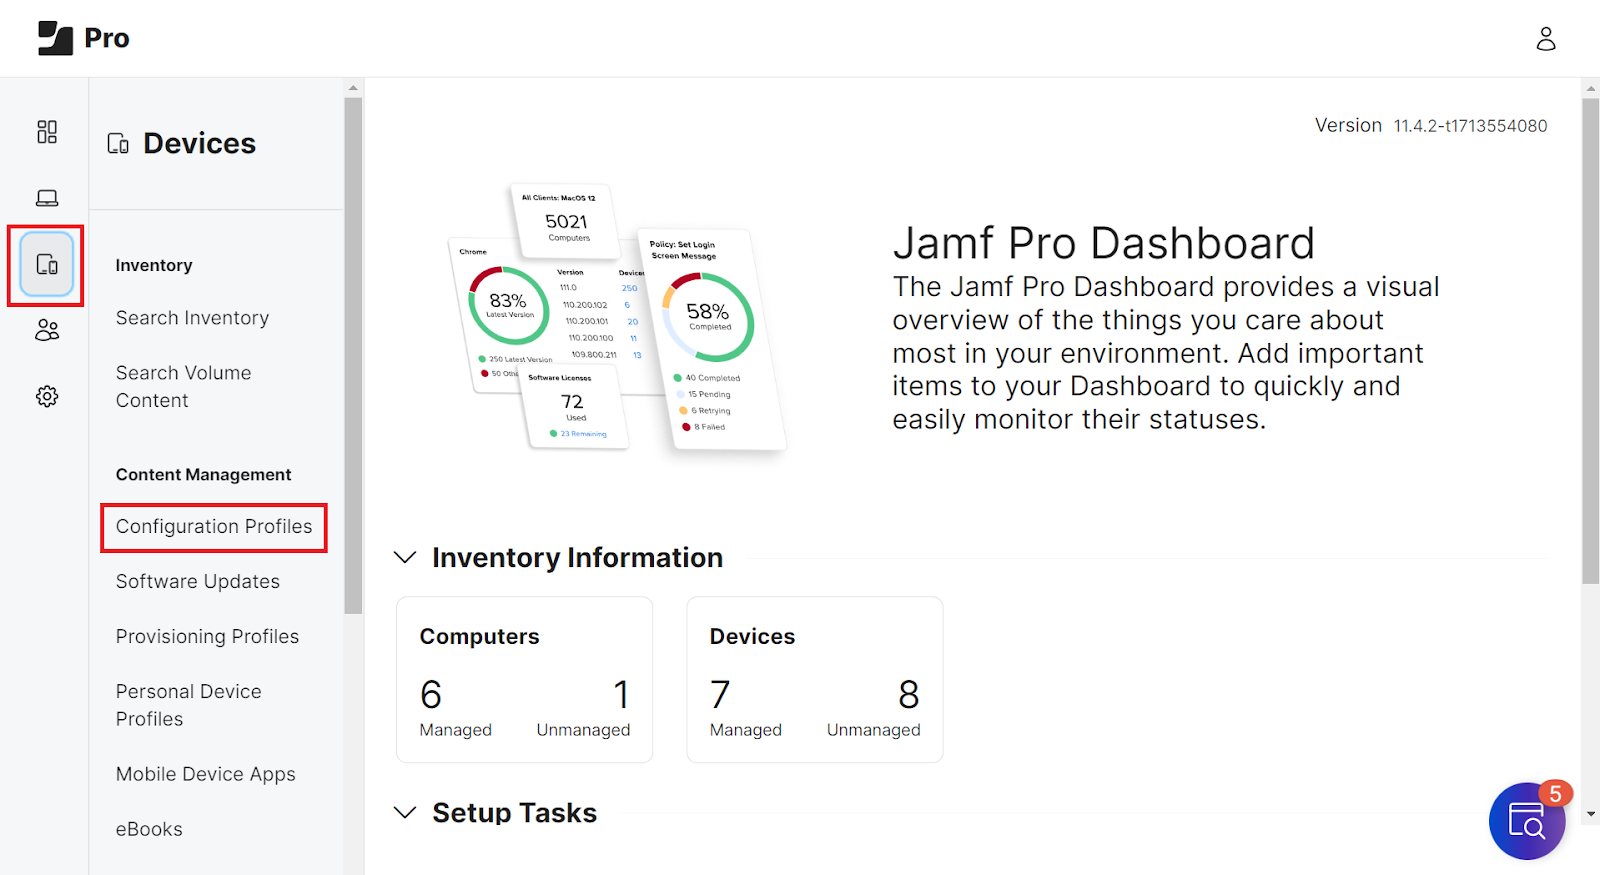
- From your Jamf Pro console, go to Devices > Configuration Profiles.

- Click + New.
NOTE: To update an existing configuration profile, click Edit for the profile. - Select Options > General.
- In the Name field, enter a name that can reflect the profile for the specific OS.
- In the Description field, enter a descriptive text explaining the purpose of this configuration.
- From the Distribution Method drop-down list, select Install Automatically or Make Available in Self-Service.


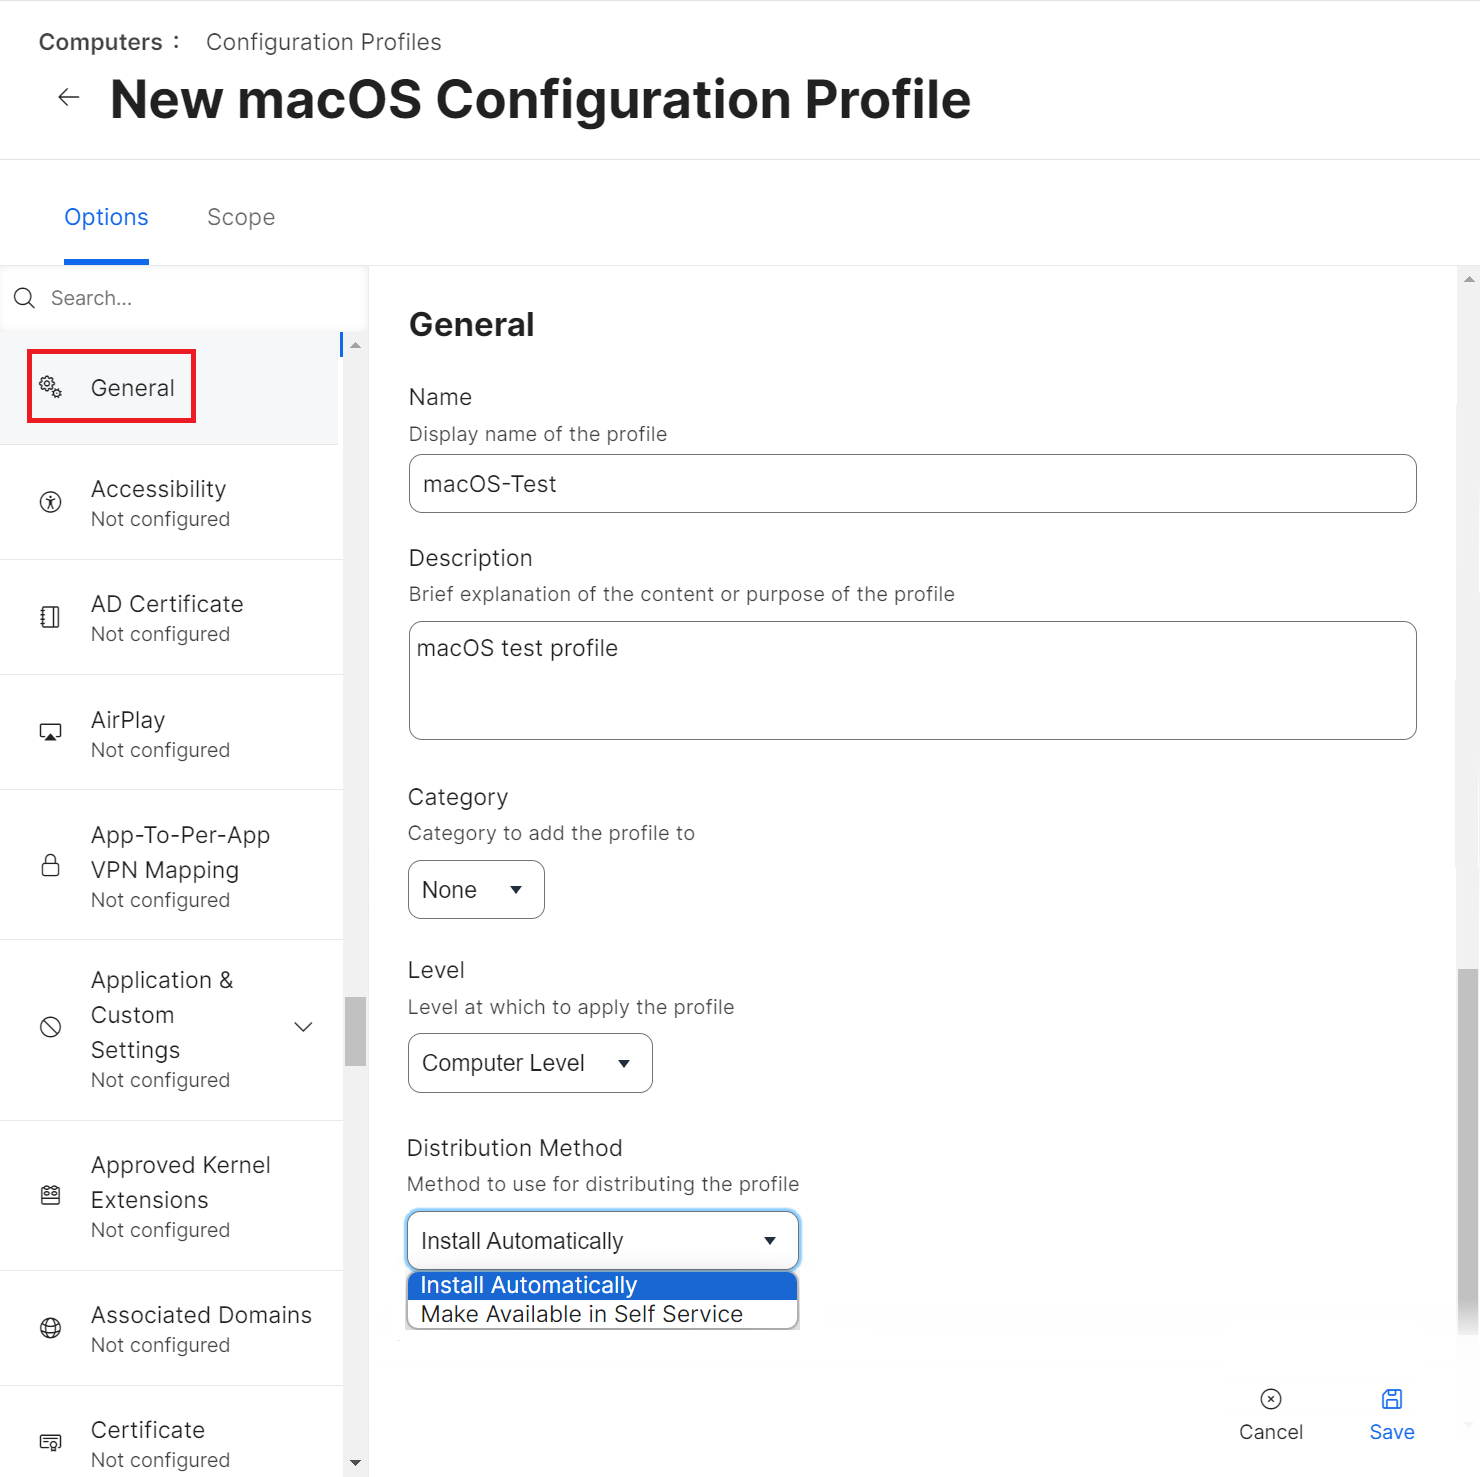
To set up a Jamf configuration profile for macOS:
- From your Jamf Pro console, go to Computers > Configuration Profiles.

- Click New.
NOTE: To update an existing configuration profile, click Edit for the profile. - Select Options > General.
- In the Name field, enter a name for the OS profile. E.g. MacOS_Office.
- In the Description field, enter a description for the configuration profile.
- From the Level drop-down list, select Computer Level.
- From the Distribution Method drop-down list, select Install Automatically or Make Available in Self Service.

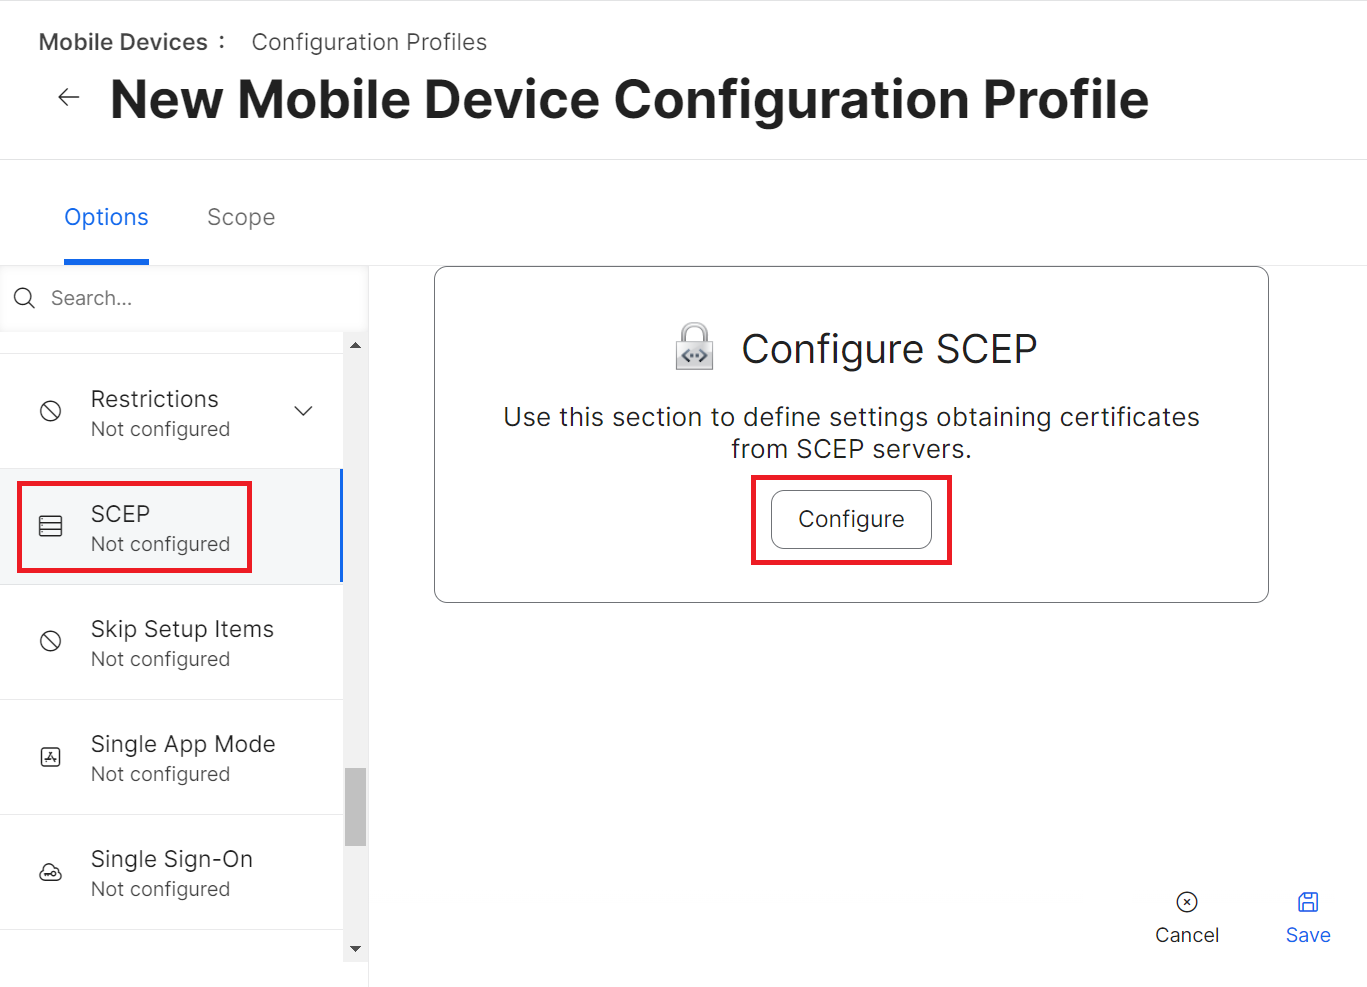
To set up Jamf as a SCEP proxy, perform the following steps:
- From your Jamf Pro console, go to Options > SCEP. The steps are similar for both the iOS and macOS configuration profiles.
- Click Configure.

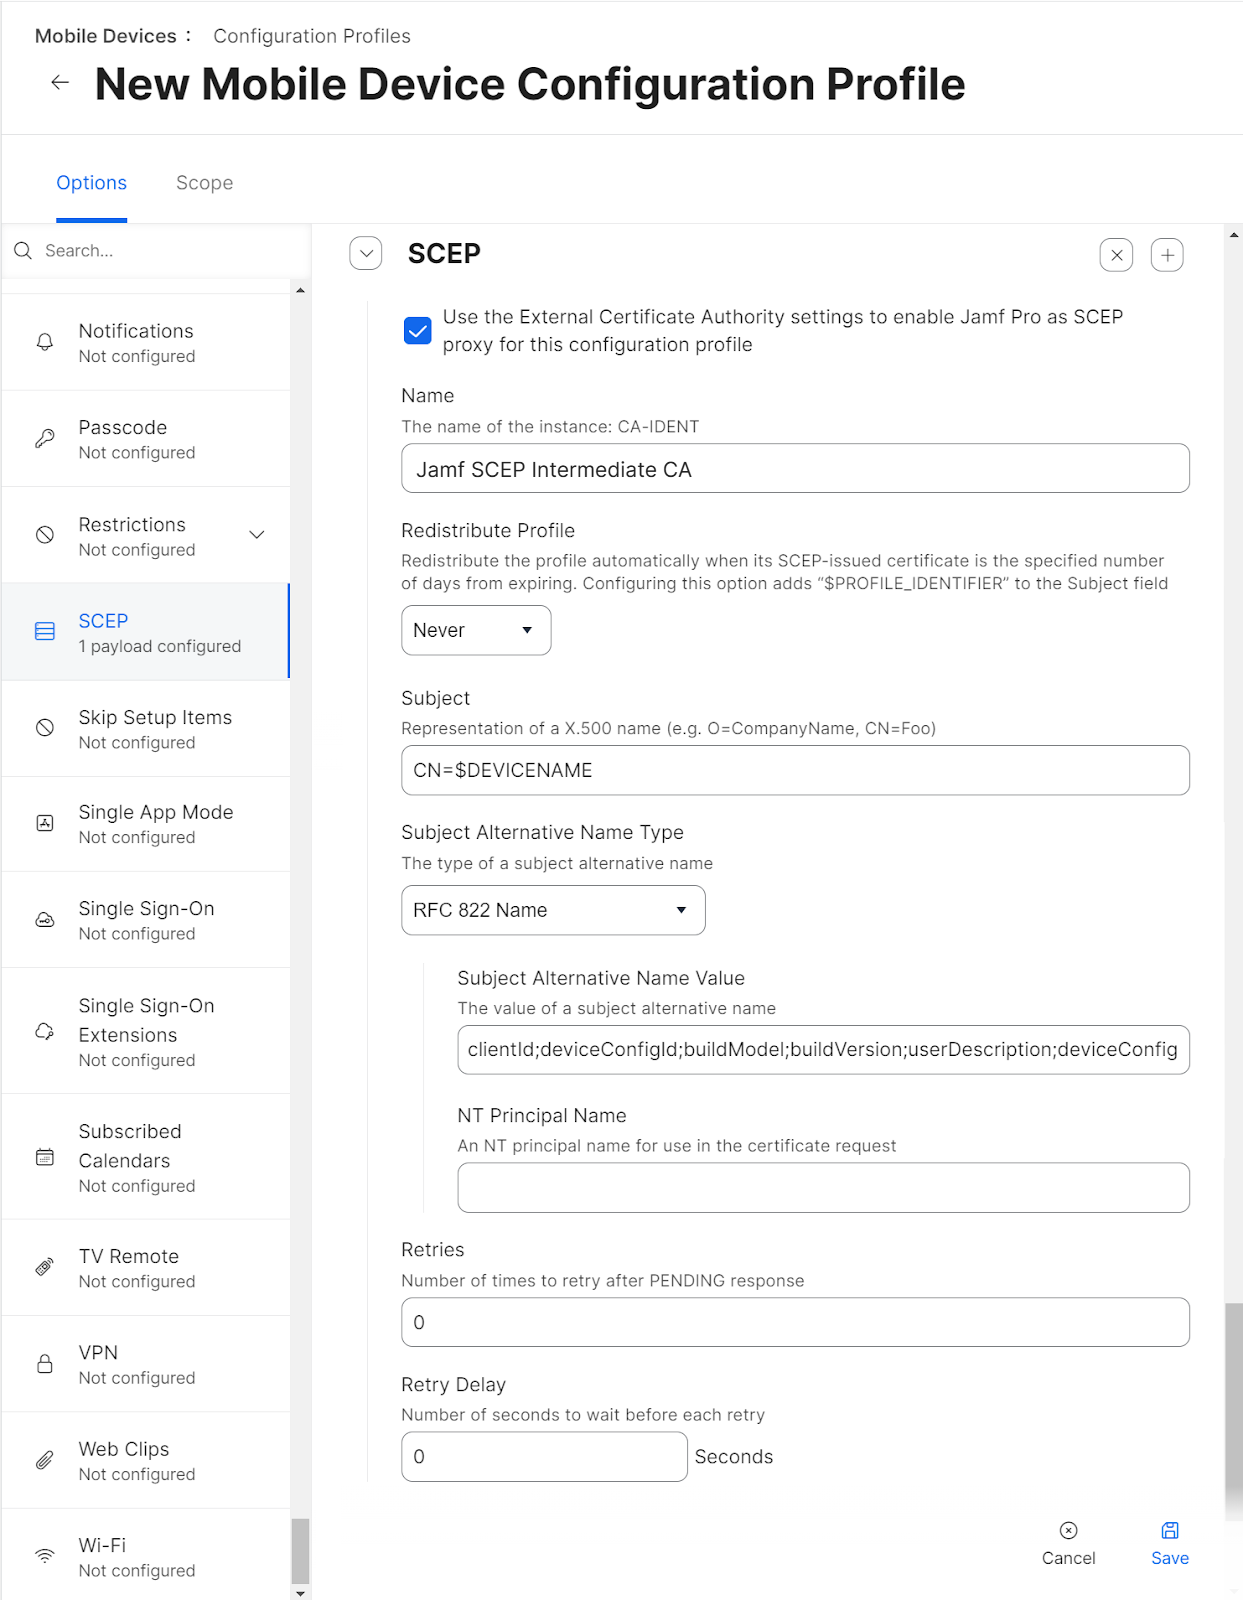
- Select the Use the External Certificate Authority settings to enable Jamf Pro as SCEP proxy for this configuration profile checkbox.
- In the Name field, enter the common name of the intermediate CA that will issue the certificate for the client. The common name can be found in the JoinNow Management Portal.
- From the Redistribute Profile drop-down list, select the desired number of days.
- In the Subject field, enter a value that will help the administrators identify the device. If you wish, you can make this a static value.
Examples:
CN=$DEVICENAME
CN=$UDID
CN=$SERIALNUMBER
NOTE: What you enter as Subject and Subject Alternative Name are referred to as payload variables, and define the common name that you want to be encoded on certificates. You can find available iOS payload variables here: https://docs.jamf.com/9.9/casper-suite/administrator-guide/iOS_Configuration_Profiles.html - From the Subject Alternative Name Type drop-down list, select RFC 822 Name. This is mandatory.
- In the Subject Alternative Name Value field, use the appropriate variables from the list below according to the business requirements.
clientId;deviceConfigId;buildModel;buildVersion;userDescription;deviceConfigName;enrollmentPolicyId;organizationId;language;profileId;operatingSystem;osVersion
The values returned by these variables will be encoded as the Subject Alternative Name Value attributes on issued certificates.
Example:
If the customer wants to use variables such as clientId, buildModel, and profileId, they should use the format mentioned below.
clientId;;buildModel;;;;;;;profileId;;
You can use the appropriate variables and skip the rest but retain the semicolons in the list.
- Click Save.
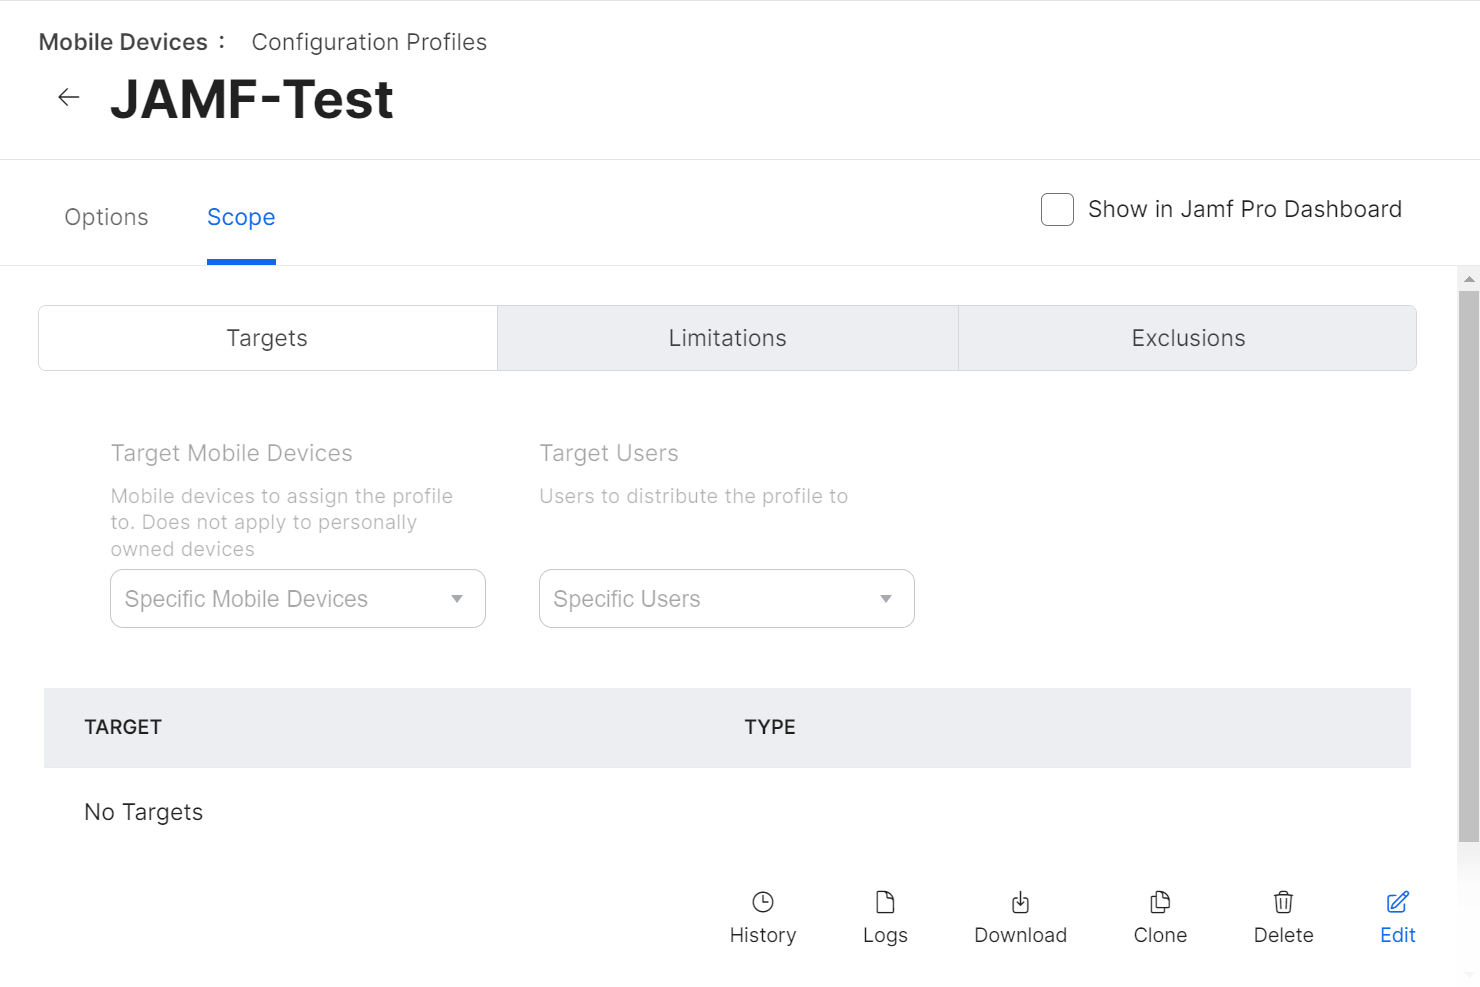
- Navigate to the Scope section and update the scope for the devices to which the configuration profile will be pushed.

- From your Jamf Pro console, go to Devices > Configuration Profiles. The steps 2 to 10 are similar for both the iOS and macOS configuration profiles.
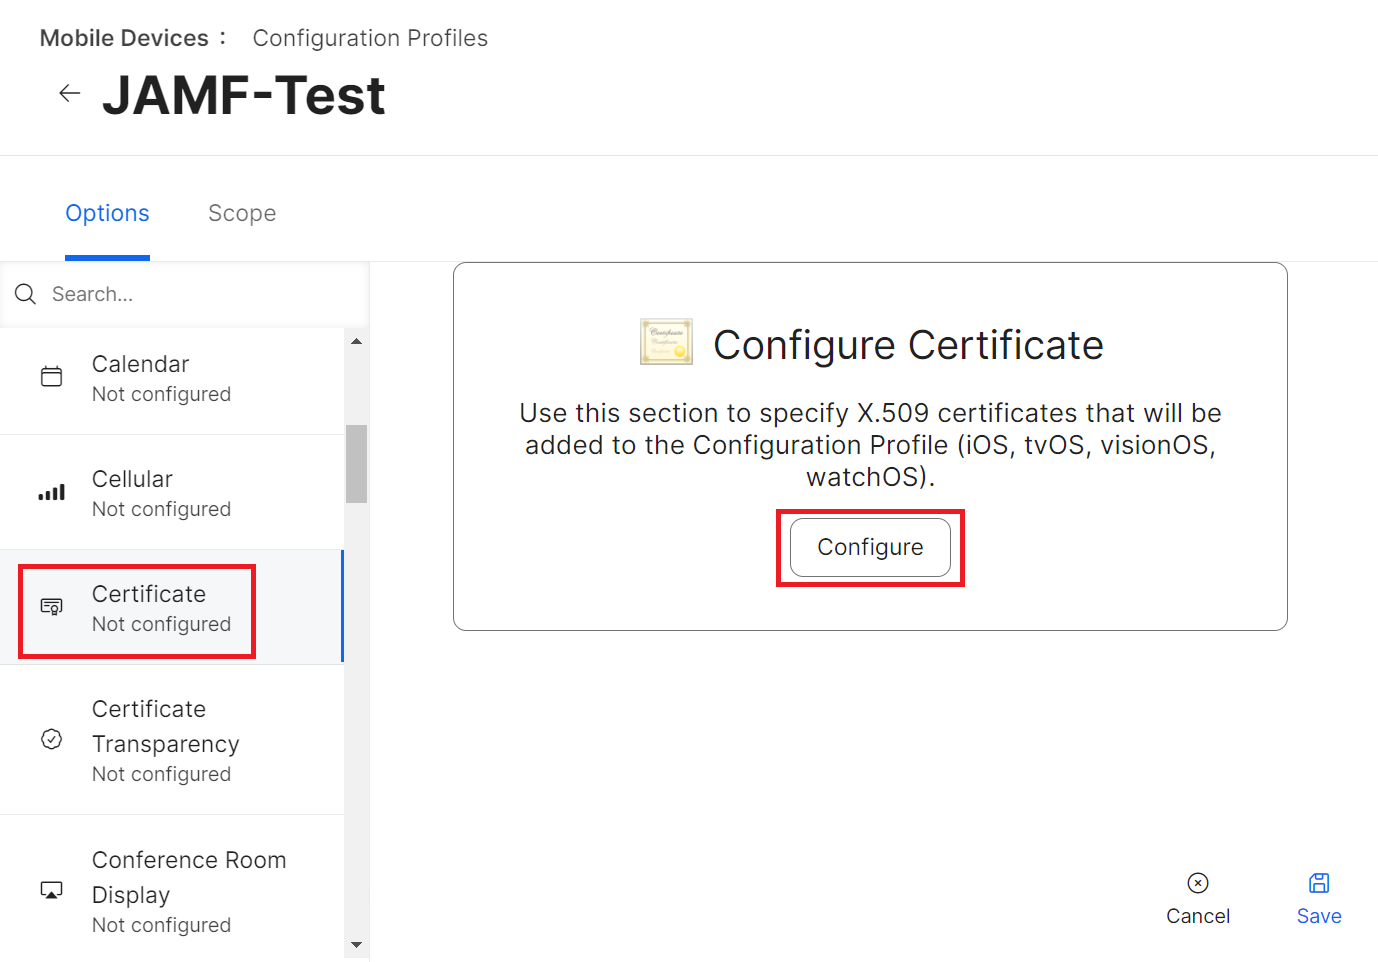
- Click Edit for the configuration profile you want to configure.
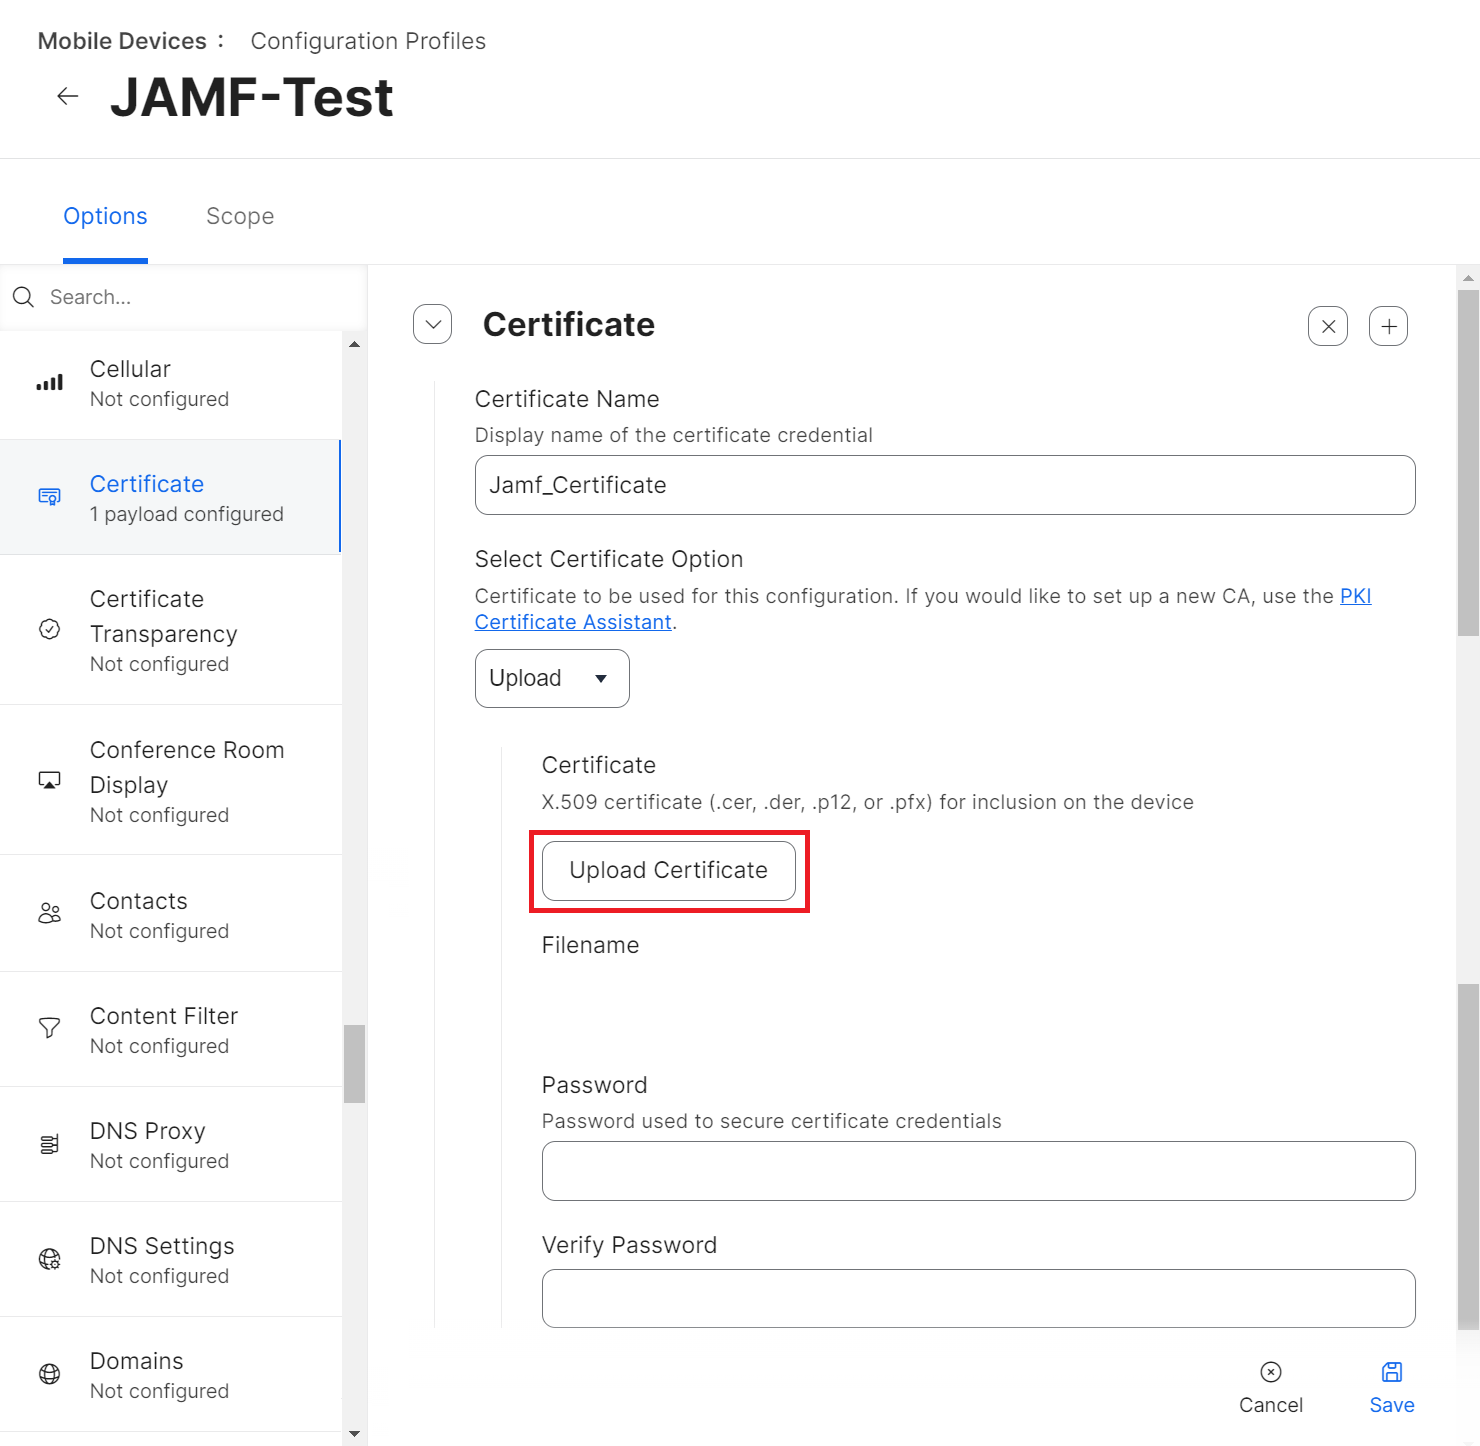
- Select Options > Certificate.
- Click Configure.

- In the Certificate Name field, enter the name of the certificate being added. This will be the Common Name (Issued To).
- From the Select Certificate Option drop-down list, select Upload.

- Click Upload Certificate.
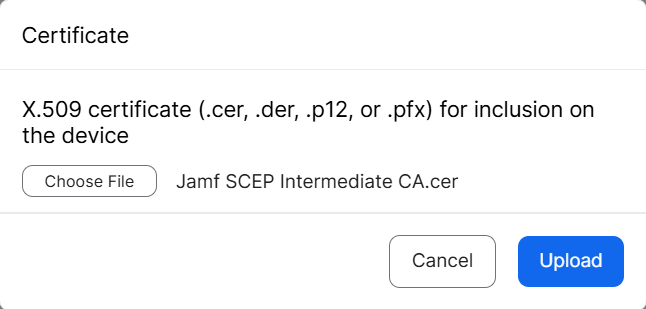
- On the Certificate pop-up window, click Choose File and upload the issuing Root CA from the JoinNow Management portal under PKI > Certificate Authorities.

- Click Upload.
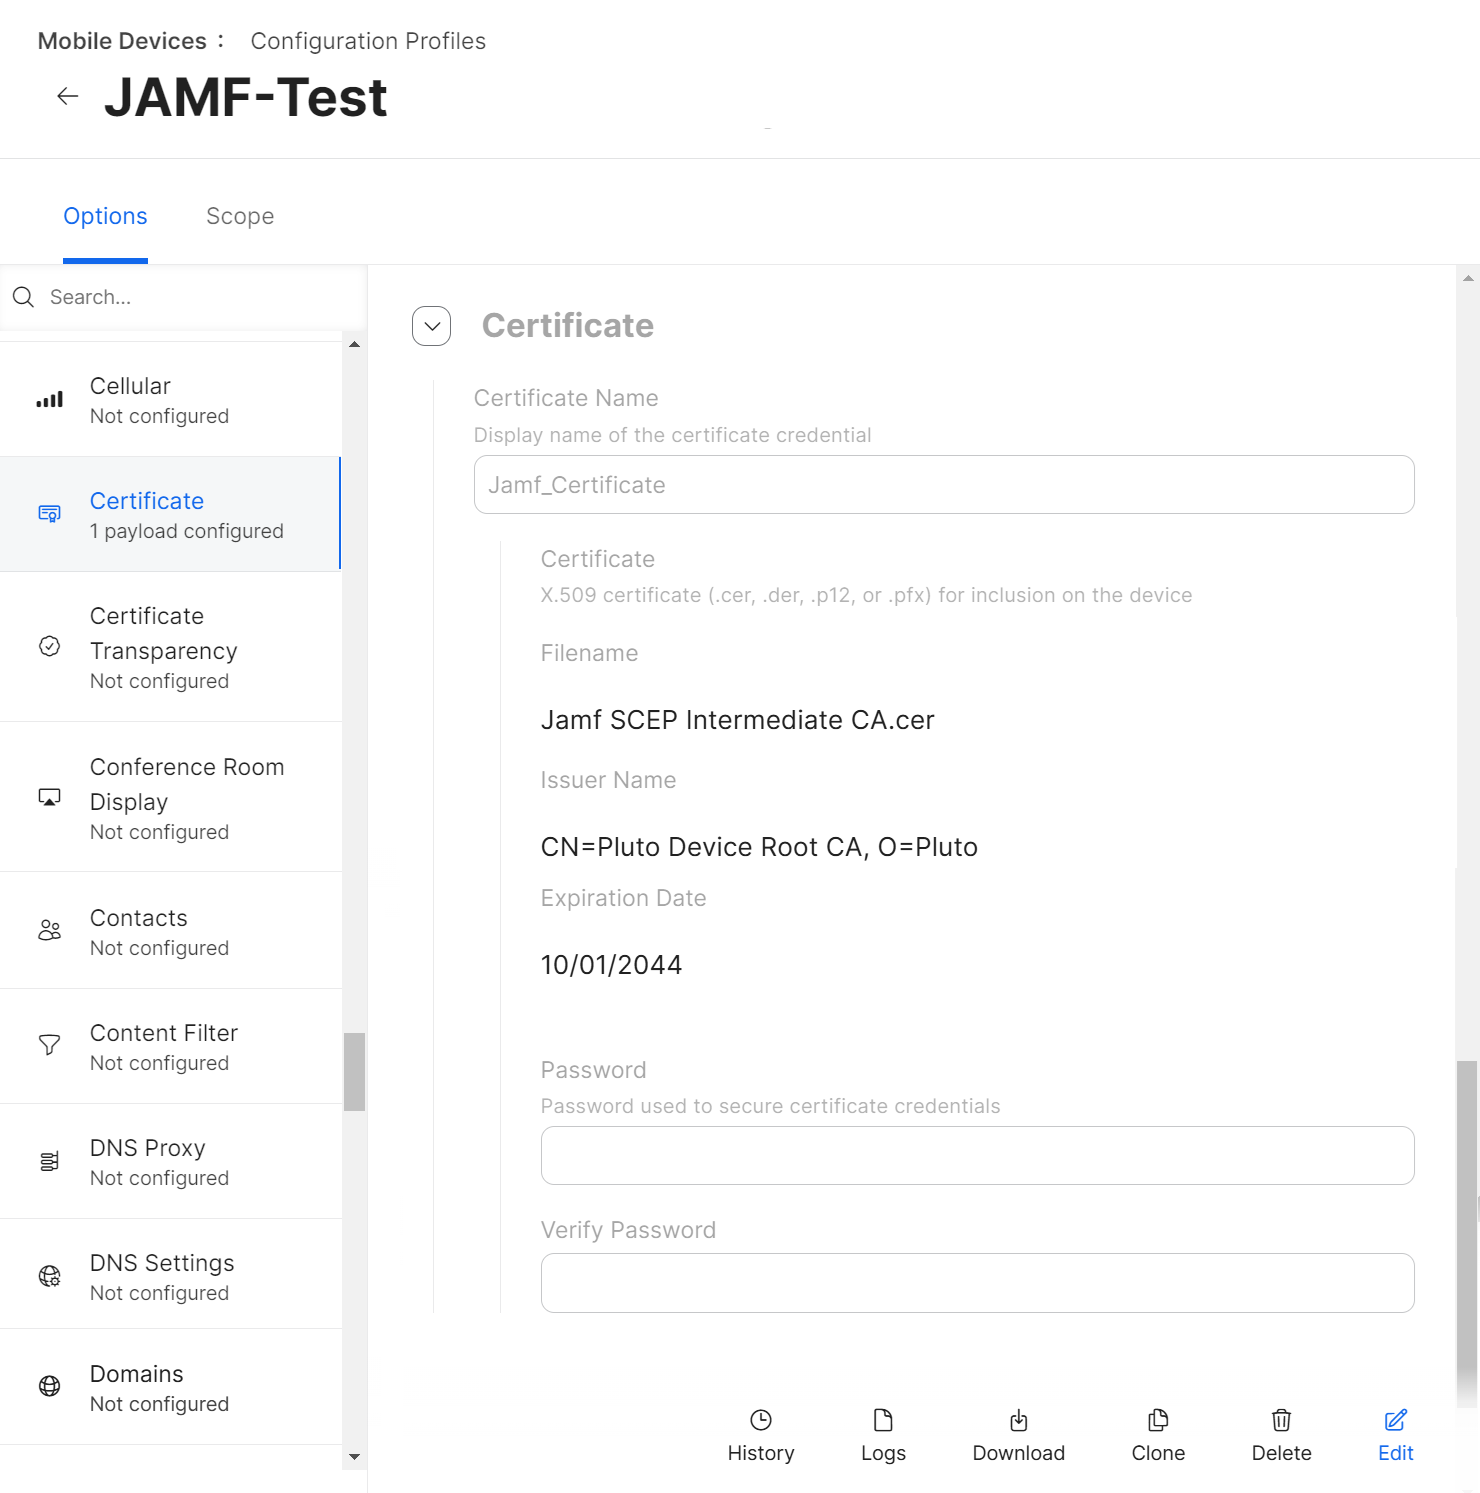
- After the certificate uploads, click Save.

NOTE: If the setup has more than one RADIUS server for validation, you can add more than one Common Name with the same certificate payload configuration.
To set up the Wi-Fi Payload for iOS, perform the following steps:
- From your Jamf Pro console, go to Devices > Configuration Profiles. For macOS devices, navigate to Computers > Configuration Profiles > Edit > Options > Network. Steps 4 to 16 are similar for both the iOS and macOS configuration profiles.
- Click Edit for the configuration profile you want to configure.
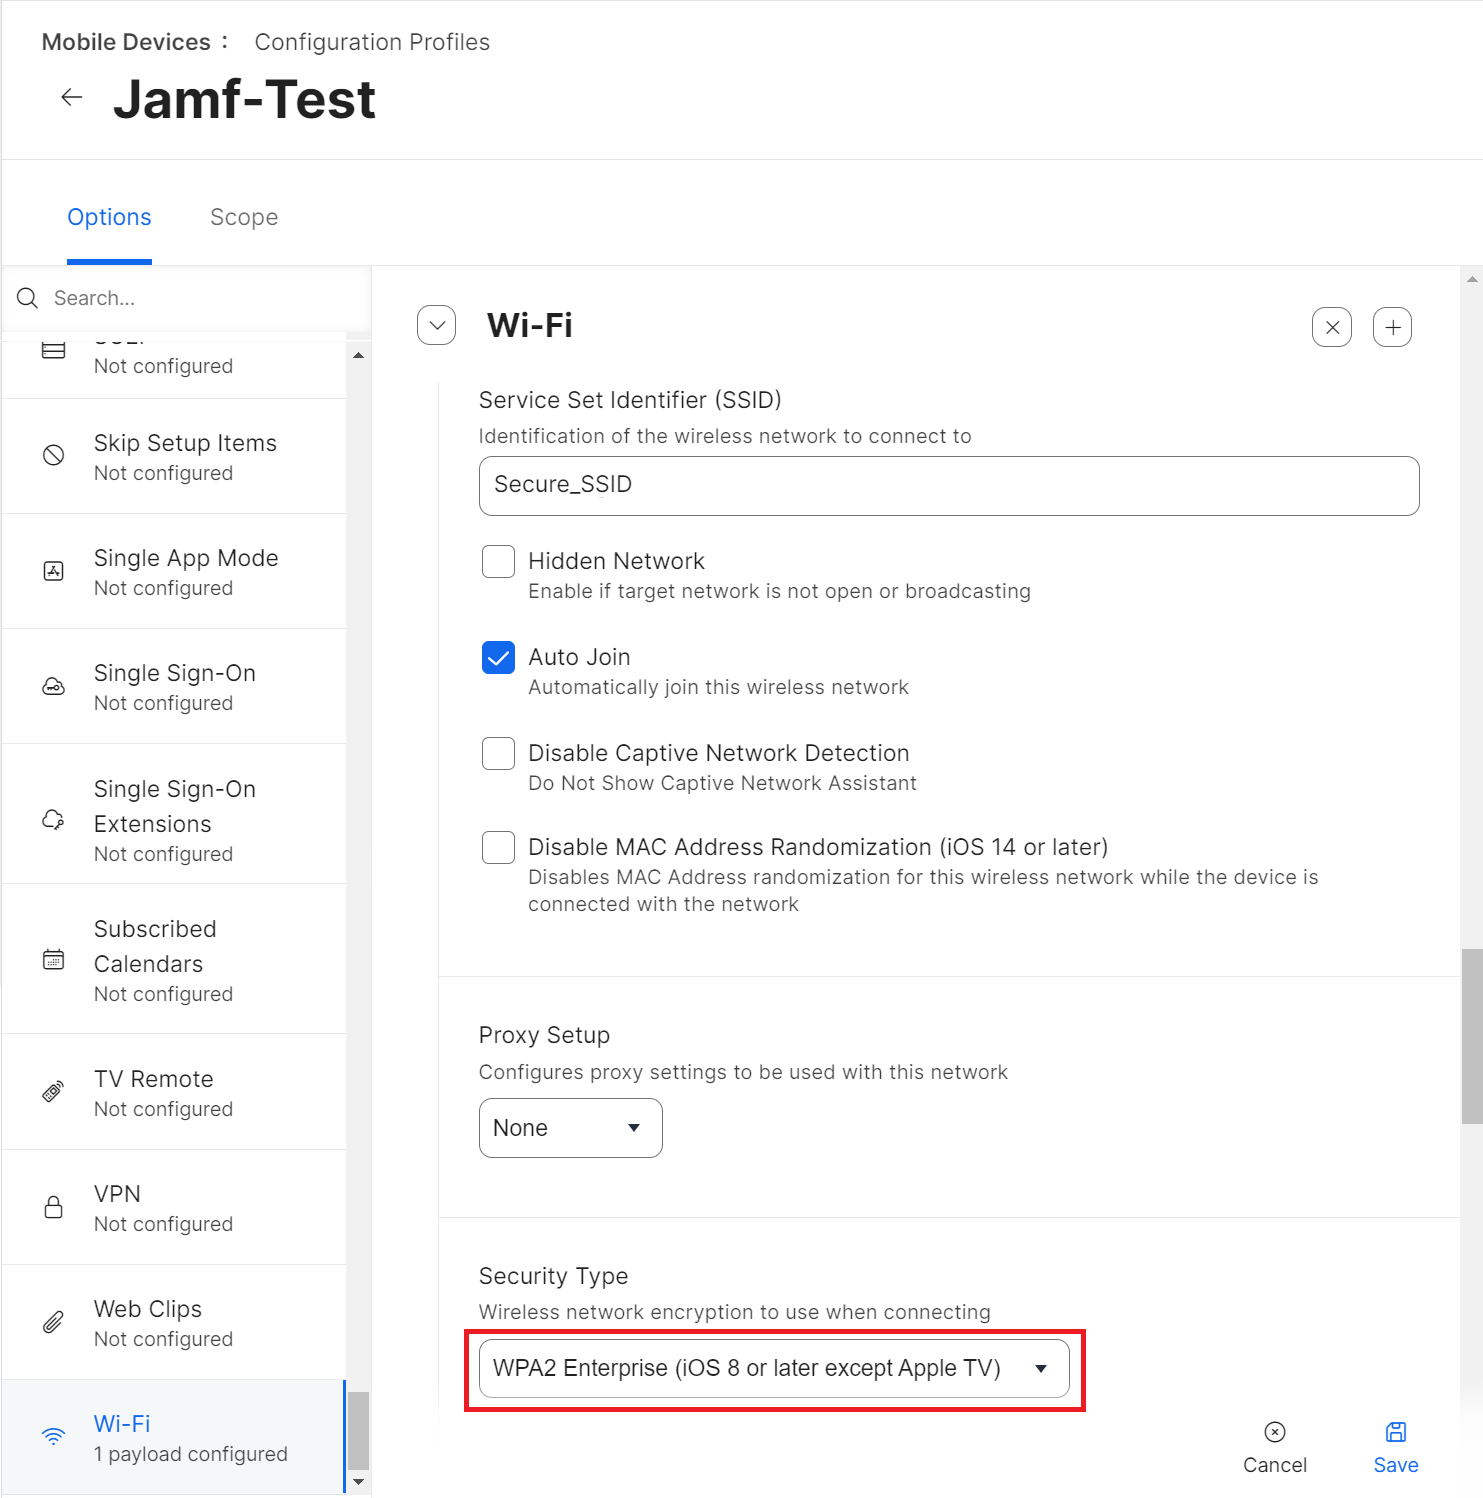
- Select Options > Wi-Fi.
- Click Configure.

- In the Service Set Identifier (SSID) field, enter the name of the secure network.
- Select other applicable settings as per the organization’s requirements.
- From the Security Type drop-down list, select WPA2 Enterprise (iOS 8 or later except Apple TV).

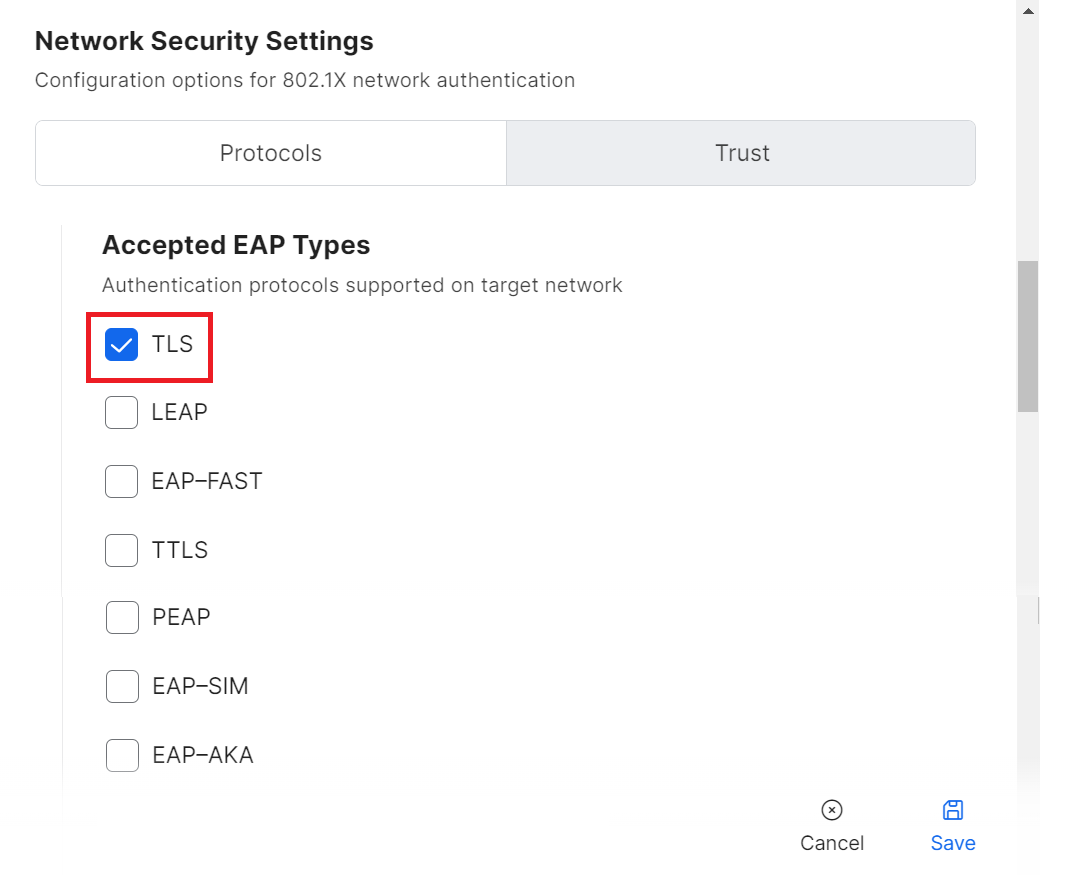
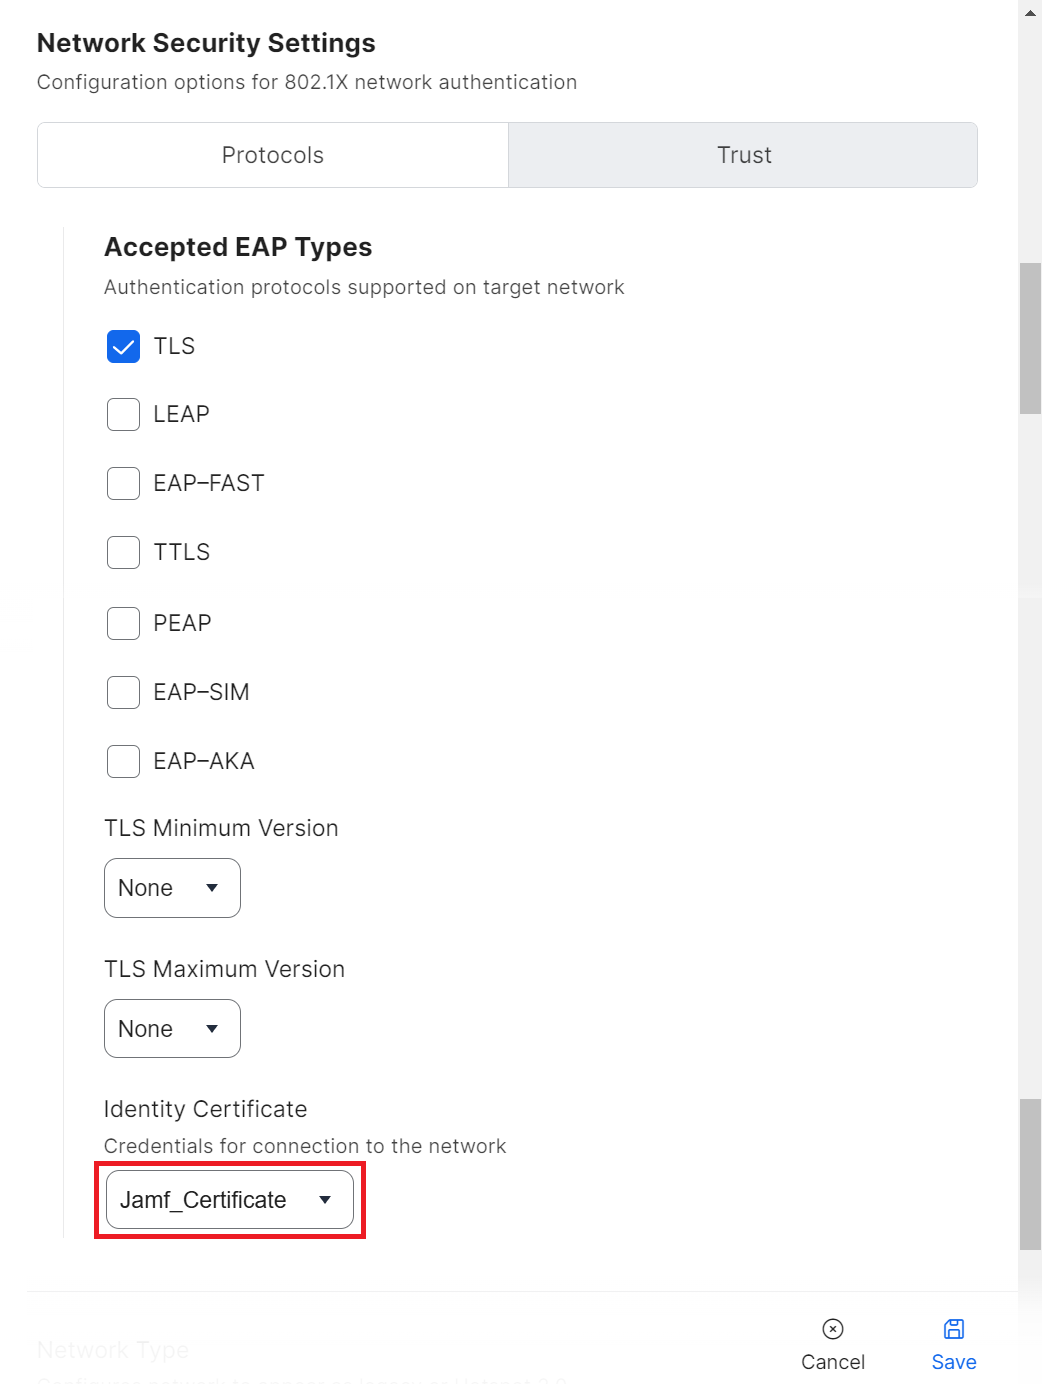
- Under the Network Security Settings section, select the Protocols tab.
- In the Accepted EAP Types section, select the TLS checkbox.

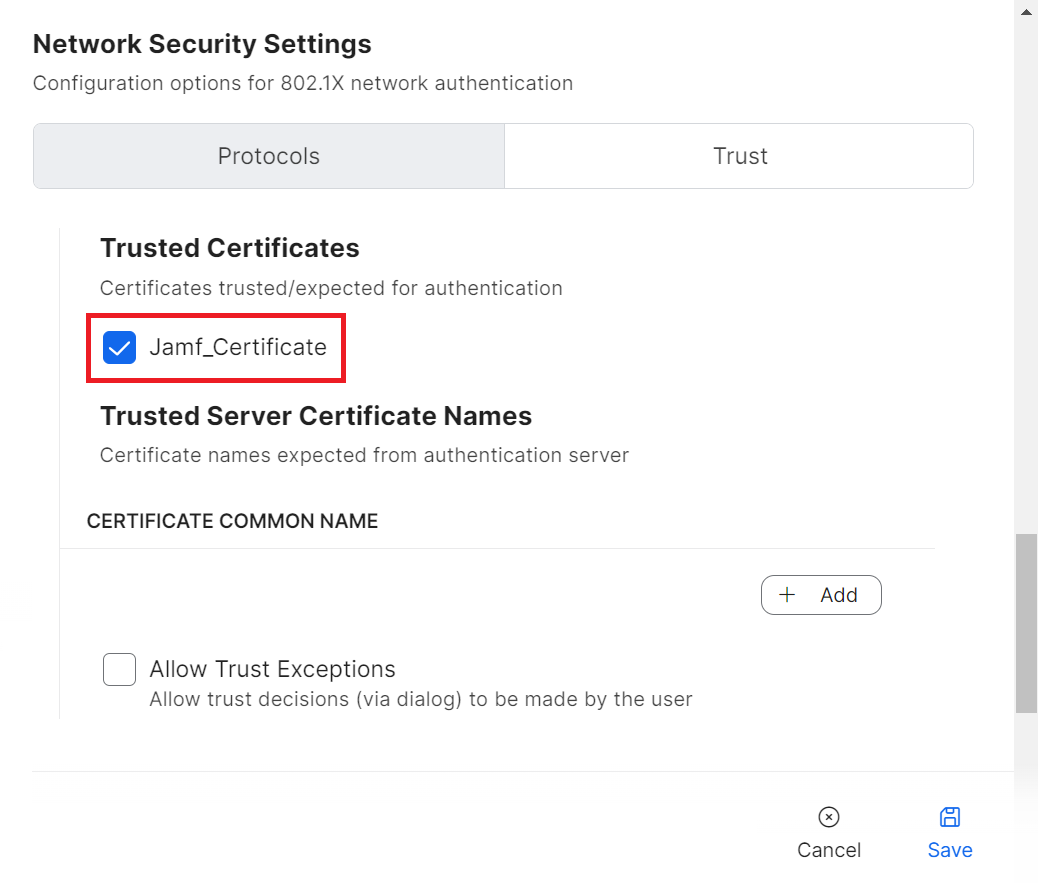
- Click the Trust tab.
- In the Trusted Certificates section, select the checkbox for the certificate you uploaded.

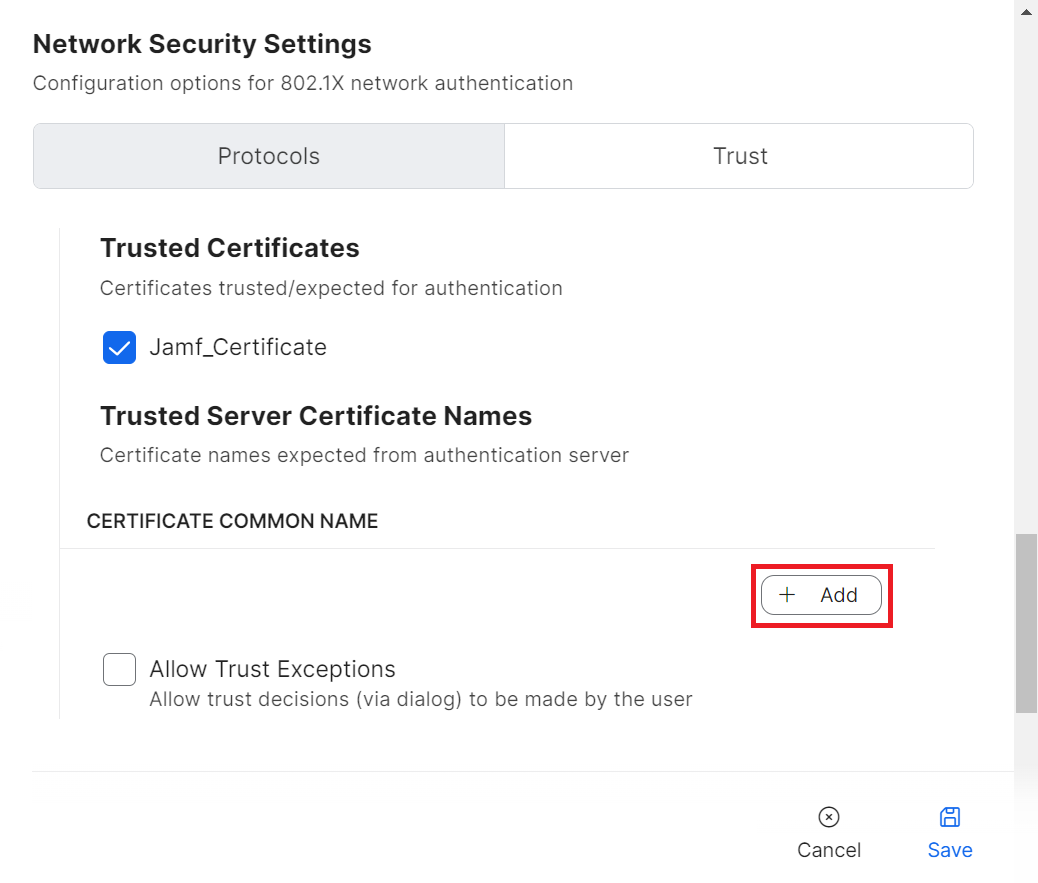
NOTE: Along with validating a RADIUS server by certificates, specify the RADIUS server certificate names for validation as an additional security measure. This is available in the Wi-Fi payload when the uploaded certificate is enabled. - In the CERTIFICATE COMMON NAME section, click + Add.
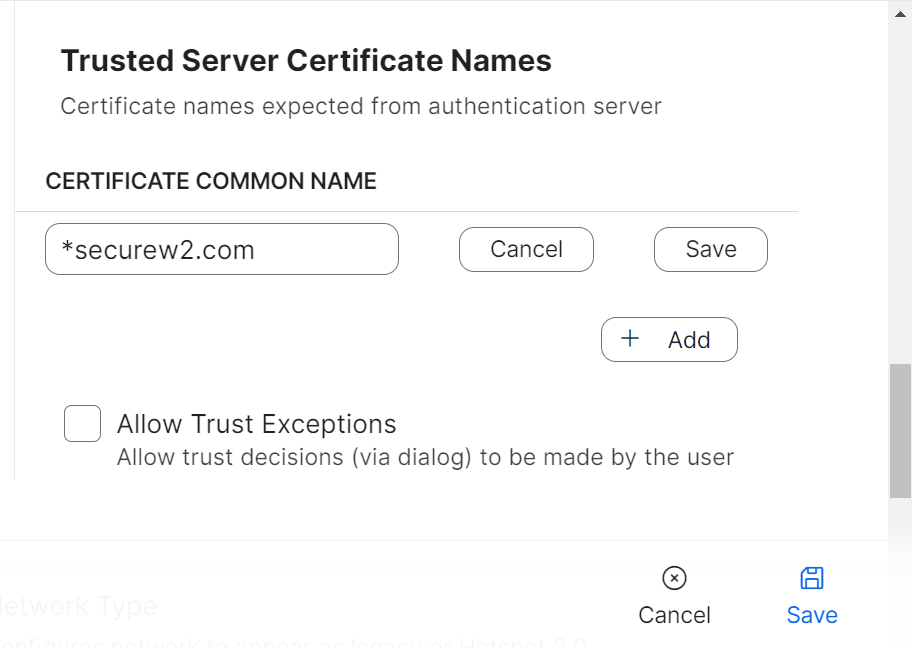
- In the field that appears, enter the name of the RADIUS server used for validation, and then click Save.

- Navigate back to the Protocols tab.
- From the Identity Certificate drop-down list, select the CA from the SCEP payload.

- Click Save to save the Wi-Fi payload.


When a device successfully enrolls, the Configuration Profiles table shows an increased value for Completed.
Admins can also check for successful certificate enrollment under Data and Monitoring > General Events. The Chrome device enrolled will display a Certificate Issued message.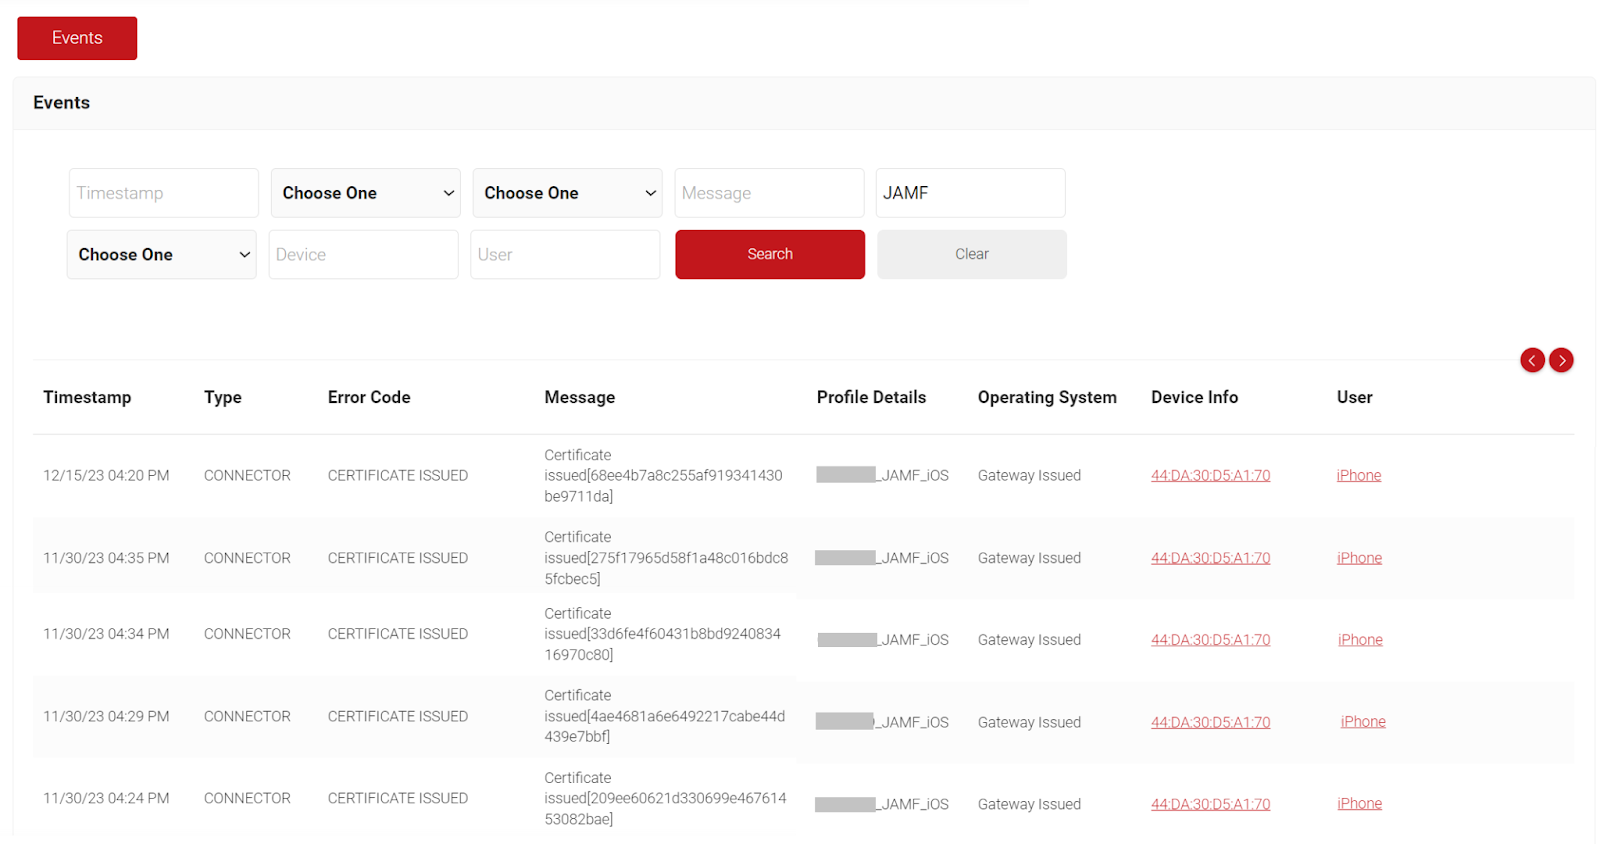
- Smart Device/Computer Groups (Revocation of devices/computers is based on set criteria)
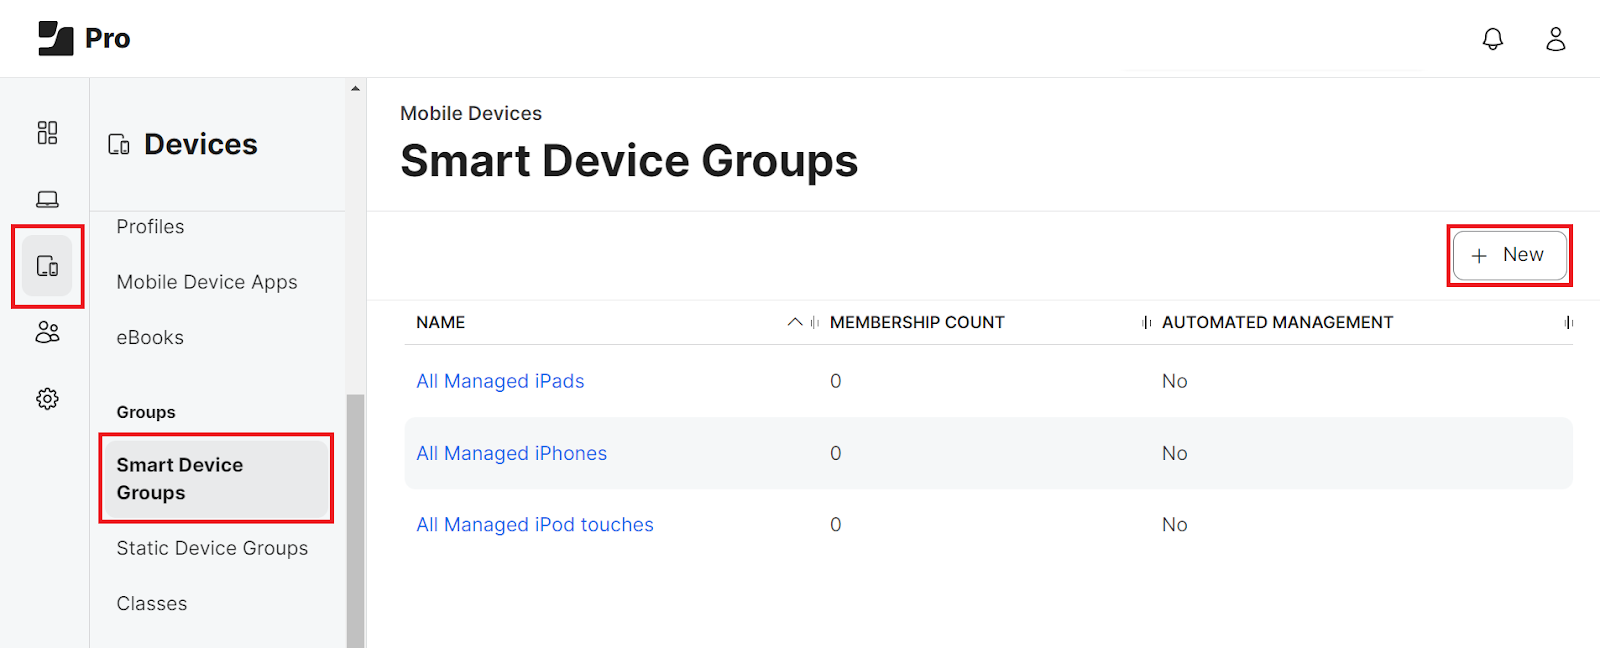
To add Smart Device Groups:
- From your Jamf Pro console, go to Devices > Smart Device Groups. For Smart Computer Groups, please click on Computers. Steps II to VIII are similar for both the Smart Device Groups and Computer Groups.
- Click + New.

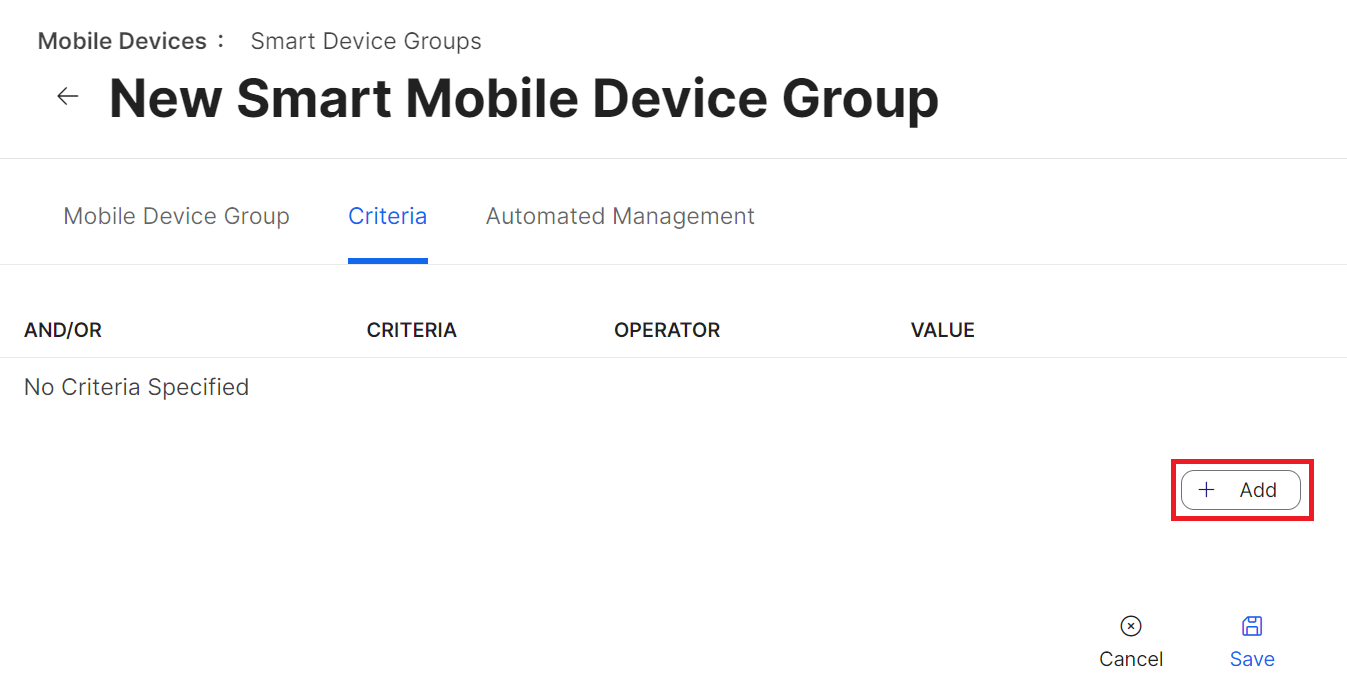
- Under the Mobile Device Group tab, in the Display Name field, enter a name for your group.

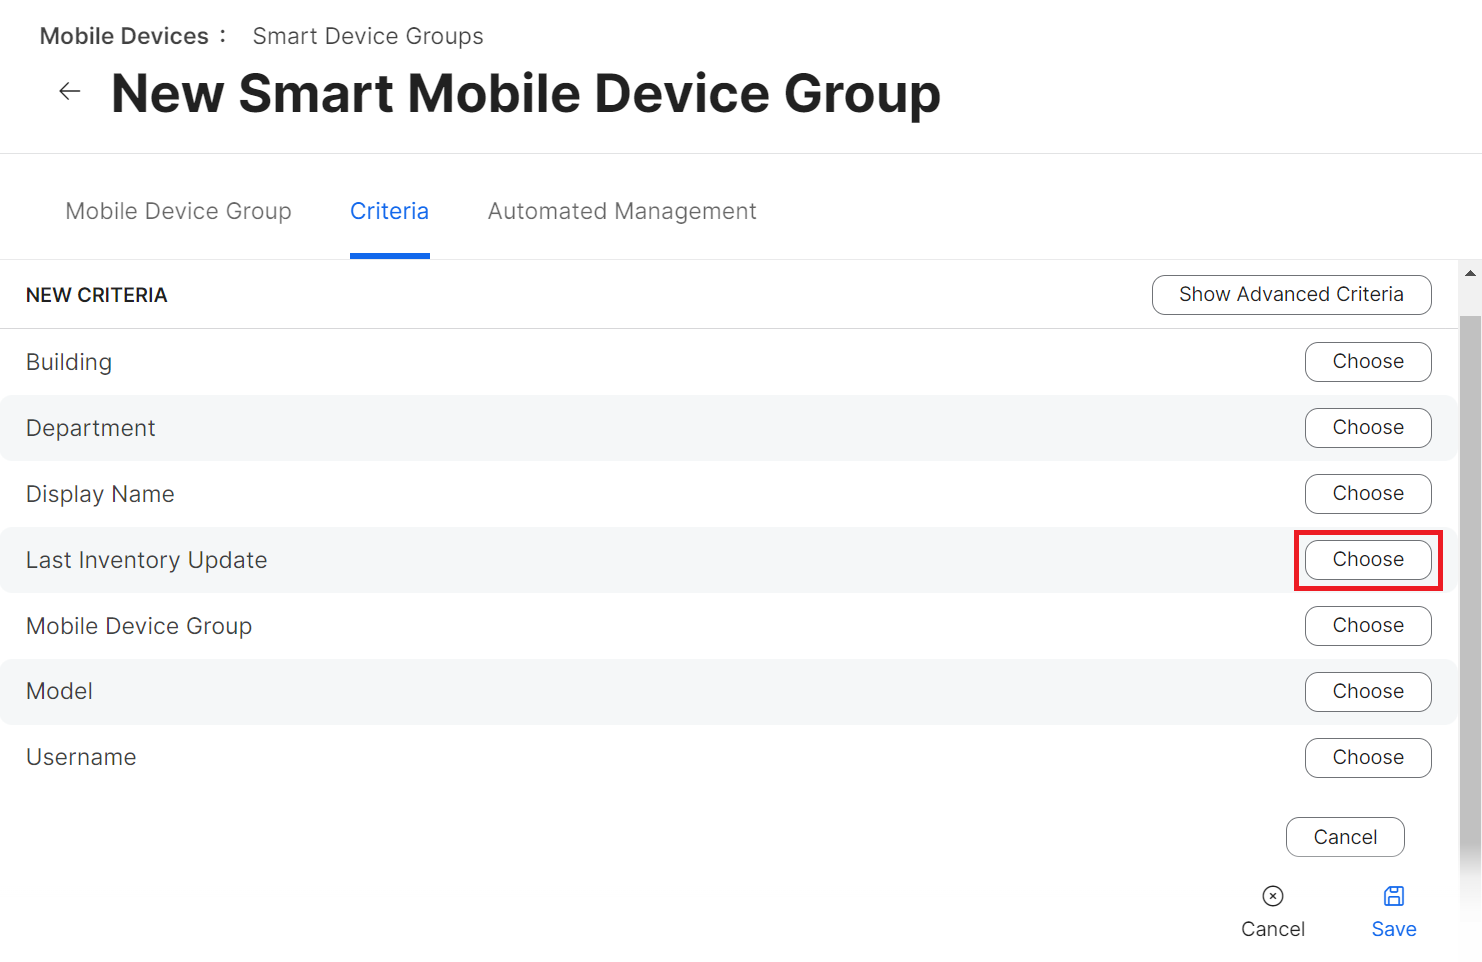
- Navigate to the Criteria tab and click Add. You can establish a set of criteria for a group and add devices when they meet the specified conditions.

In the following example, the criterion used is the Last Inventory Update.Jamf synchronizes with managed devices regularly. If an update between a device and Jamf has not occurred within the configured time interval, Jamf verifies that the criteria have been met and automatically moves the device to this group. The relevant device information is then shared with the JoinNow Management Portal, and the corresponding certificate on the device is automatically revoked.Please refer to https://docs.jamf.com/10.42.0/jamf-pro/documentation/Smart_Groups.html for more information on Smart Device/Computer group configurations. - Click Choose.

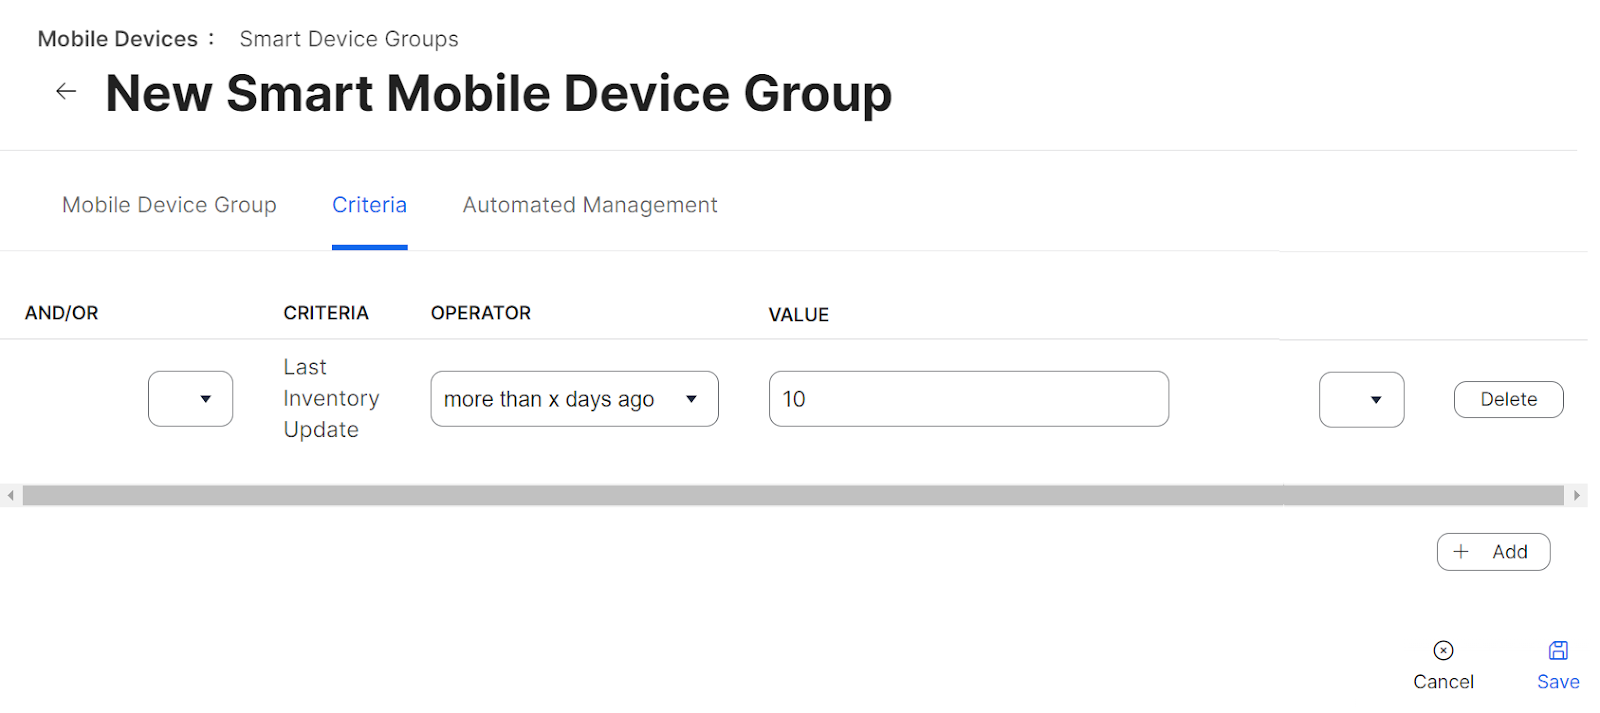
- From the OPERATOR drop-down list, choose the period type/date based on which revocation should be applied.
- In the VALUE field, enter the date/number of days. In our example, the OPERATOR selected is more than x days ago, and the VALUE entered is “10”. So, if an update between Jamf and the device has not occurred for more than 10 days, all certificates in the device will be revoked.

- Click Save. The Smart Device Group is created.

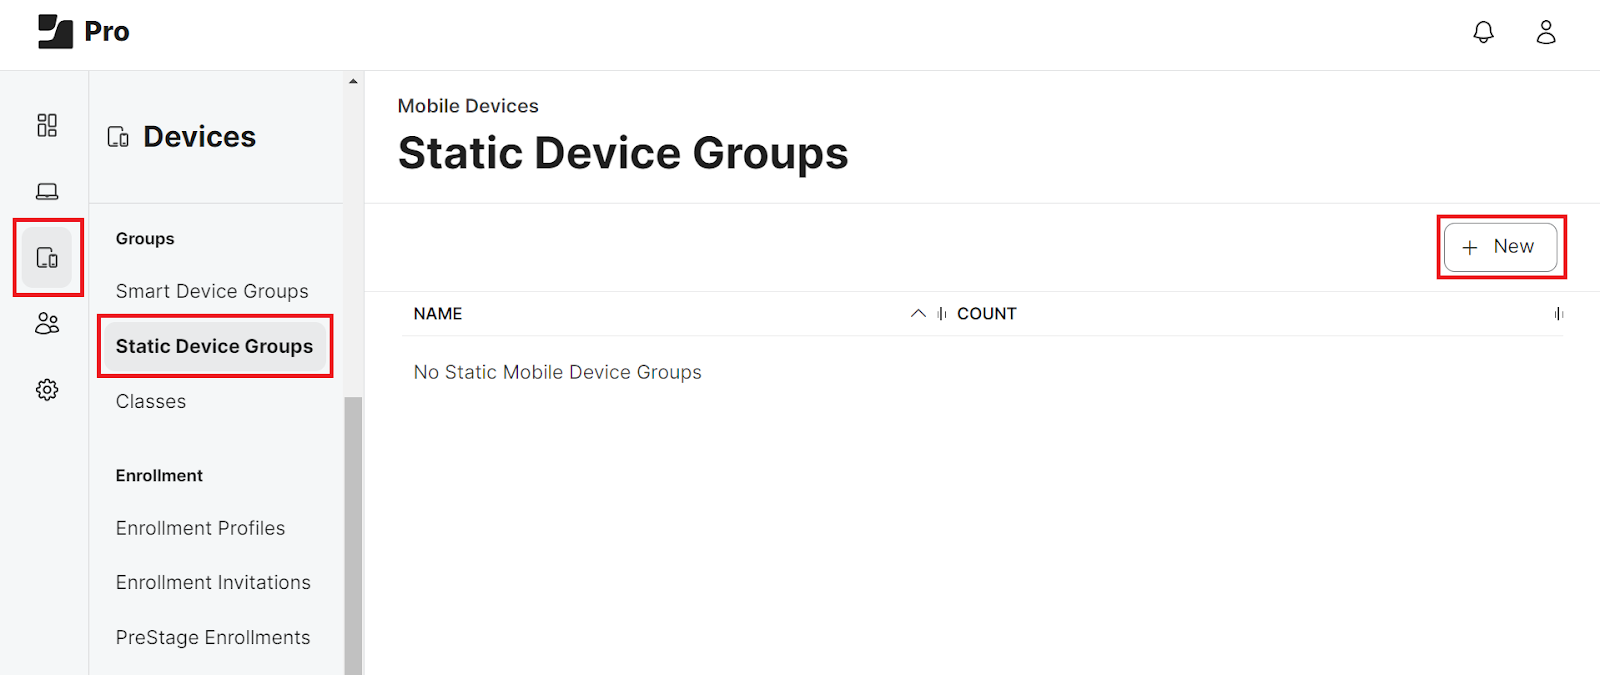
2. Static Device/Computer Groups (Revocation of devices/computers is automatic when added to these groups)
- From your Jamf Pro console, go to Devices > Static Device Groups. For Static Computer Groups, please click on Computers. Steps II to VI are similar for both the Static Device Groups and Computer Groups.
- Click + New.

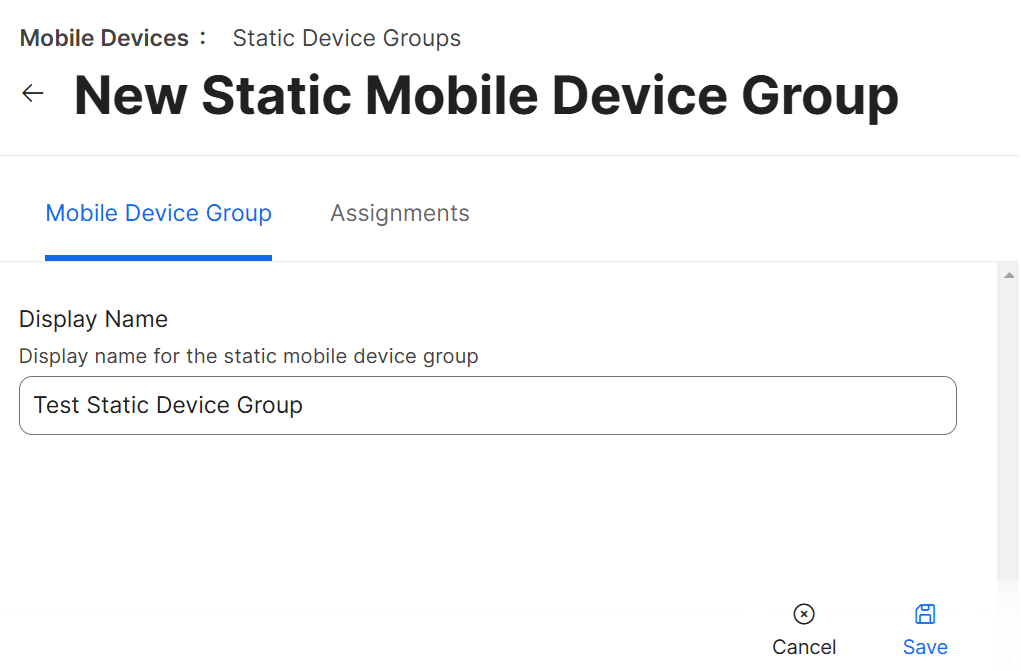
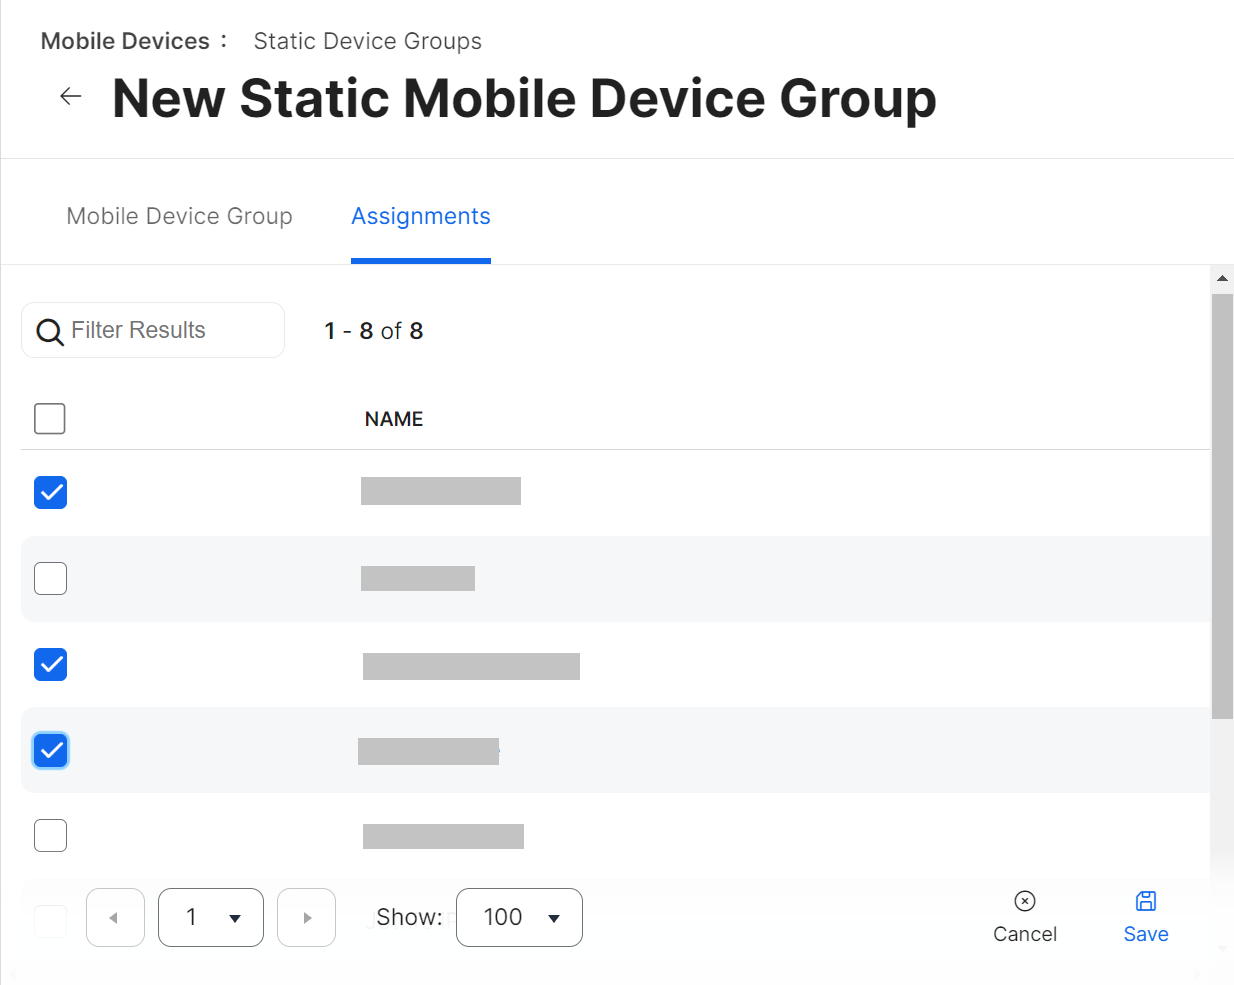
- Under the Mobile Device Group tab, in the Display Name field, enter a name for your group.

- Navigate to the Assignments tab.
- Select the devices you want to add to this group by clicking the checkbox.

- Click Save.
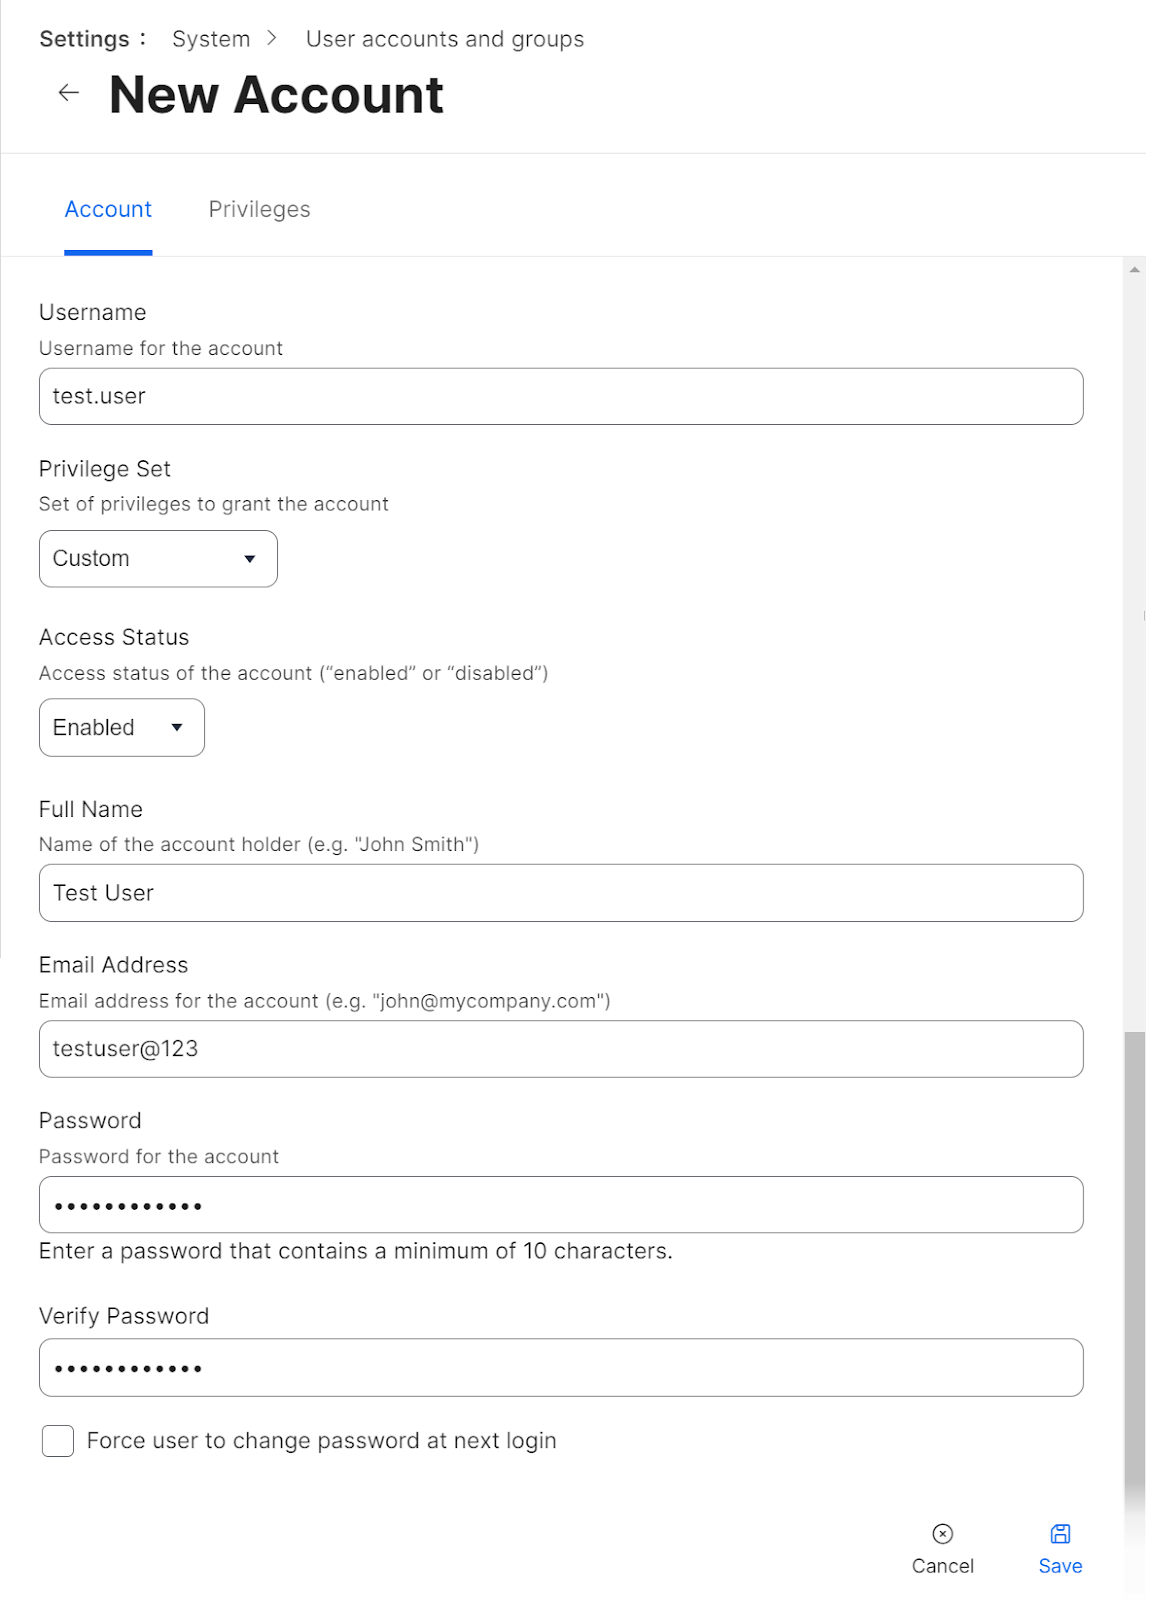
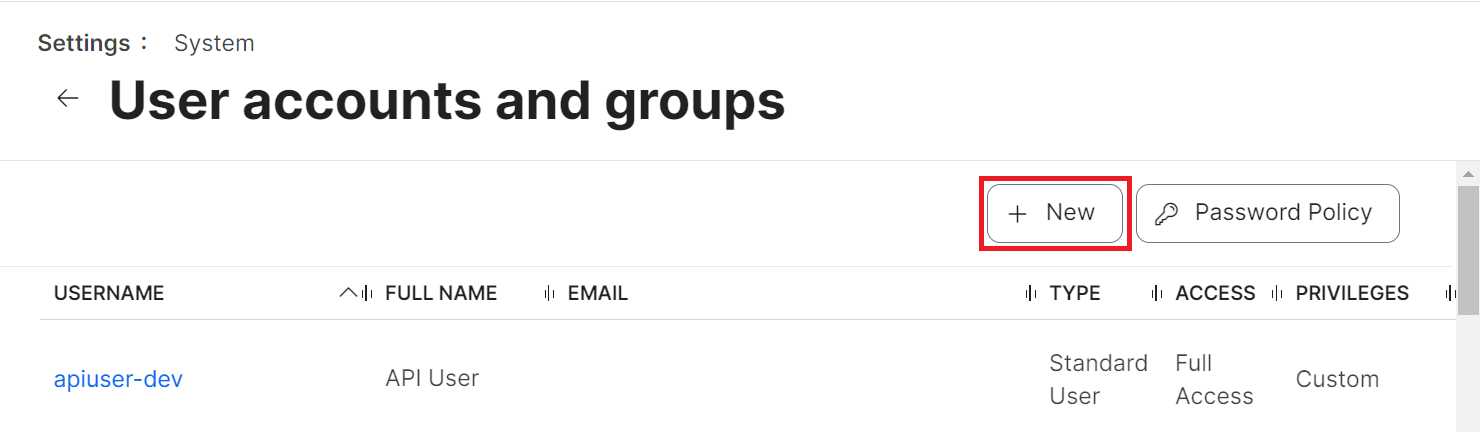
- From your Jamf Pro console, go to Settings > User accounts and groups.

- Click the + New button.

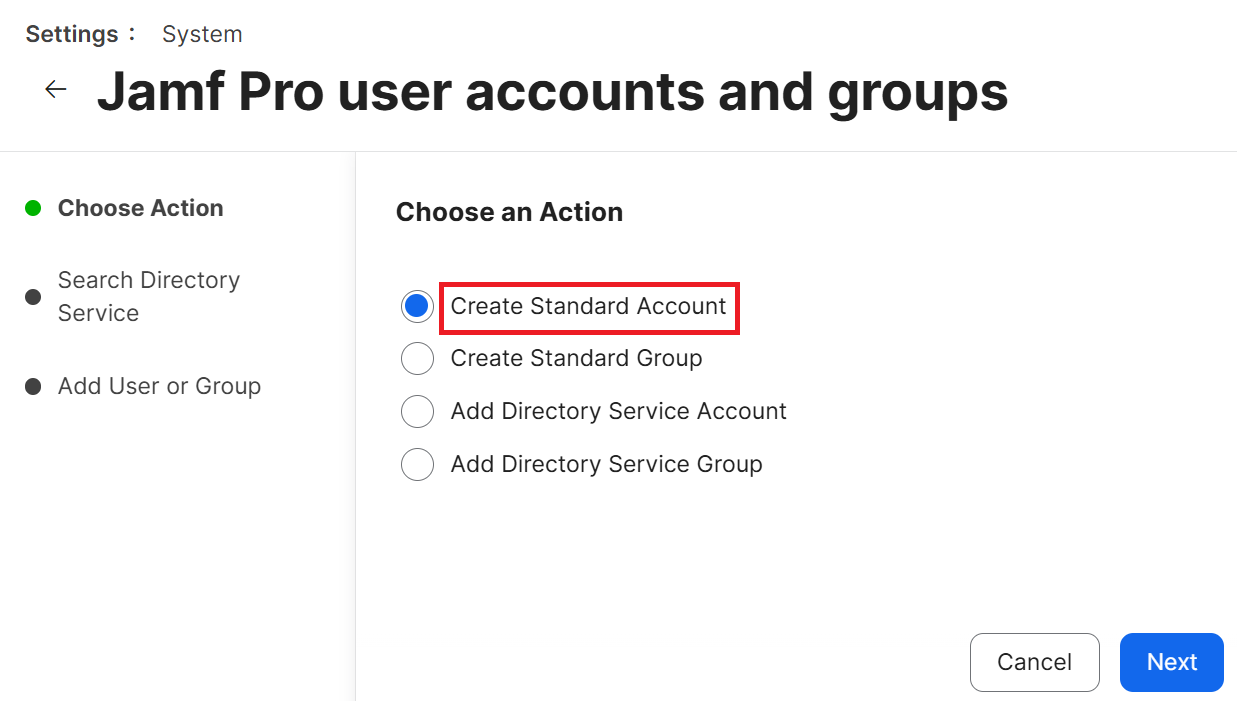
- On the Choose an Action step, select the Create Standard Account option and click Next.

- In the Account tab:

- In the Username field, enter a username for the account.
- From the Privilege Set drop-down list, select Custom.
- Enter the other details, such as email address, password, and so on, in the respective fields.

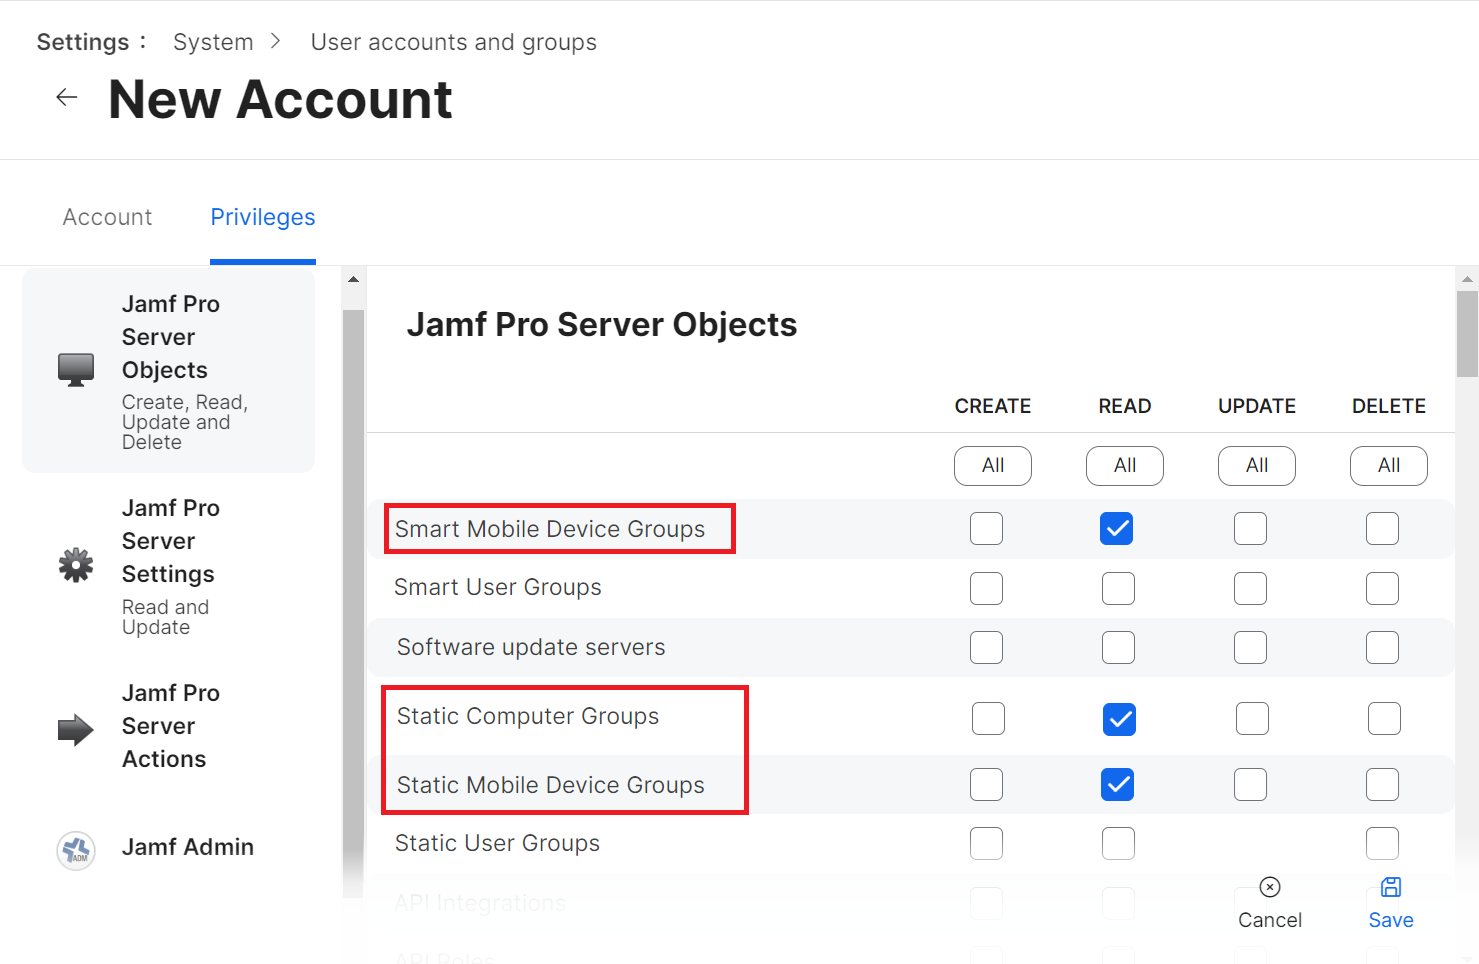
- Click the Privileges tab and select the READ checkbox for the following items.
- Mobile Devices
- Smart Computer Groups
- Smart Mobile Device Groups
- Static Computer Groups
- Static Mobile Device Groups
- Computers

- Click Save.