Google Suite, also known as Google Workspace is many people’s go to cloud-based productivity suite. While Google Suite is known for its ease of use, it’s credential-based authentication creates another credential for end users to have to remember which can create security flaws in the long run.
With credential-based identification, many security flaws come to light. With all users having to remember their passwords, it creates vulnerabilities in your security and presents hackers an opportunity for Man-in-the-middle attacks that can lead to costly data breaches.
What is RADIUS
RADIUS (Remote Authentication Dial-In User Service) provides you with essential tools to easily authenticate multiple devices for network access and protect your data from a variety of attacks using a certificate-based authentication. When RADIUS is configured and combined with WPA2-Enterprise, your data is secured and can defend against potential threats.
The RADIUS can be seen as a bouncer to an establishment, the establishment being your network. If the client does not have a valid certificate, the RADIUS rejects entry to your network. RADIUS servers were historically only installed as on-premises hardware which had some high entry costs and maintenance.
Cloud RADIUS provides you with a cloud-based server so you no longer need to provide your own hardware which can be a simpler and cheaper method. Back in the day, a large corporation could have up to 100 RADIUS servers on campus, that had to be securely locked down, just to deal with peak loads. With Cloud RADIUS, you do not have to worry about on-site threats due to physical penetration, on-site maintenance, and is completely virtual.
Can I Use RADIUS with Google Workspace / G-Suite?
Google Apps / G-Suite Allows you to create SAML applications so outside applications can request information from your directory. SAML is a useful authentication protocol that uses a Single-Sign-On (SSO) format that creates a seamless authentication experience, which you can easily use to enable secure WPA2-Enterprise Wi-Fi. Cloud RADIUS works with every major IdP including AD and LDAP and compatible with SAML and JAMF as well as every major access point.
When the IDP decides the end user is trustworthy, you must distribute certificates to the green-lit users. By synching your IDP with SecureW2, the onboarding software then communicates with the IDP granting trust to the end user and issues a certificate. The client can then present the certificate to the RADIUS server to be authenticated and authorized for a secure network access.
How to Set Up WPA-2 Enterprise with Google Workspace / G-Suite
SecureW2 provides you with the means to easily integrate certificate-based authentication from EAP-TLS WPA2-Enterprise connections as it comes packaged with our onboarding software. SecureW2 allows end users to easily self-service their devices for WPA2-Enterprise Wi-Fi. All they need to do is run our app, enter in their G-Suite credentials, and it will auto-configure their device and distribute a certificate that is tied to the identity of the user for the life of the certificate, thus eliminating the need for credentials and enabling a hassle-free and stable connection.
Integration Overview:
- Configure Google Workspace
- Use the Getting Started Wizard
- In SecureW2 Management Portal, admins are able to start configuring their networks for WPA2-Enteprise and certificate-based 802.1X authentication
- Add the SAML provider to SecureW2
- Open Google Admin Console to Configure the SAML IDP
- The SAML IDP provides a list about who is allowed to connect to the network.
- Configure Attribute Mapping
- Set the attributes to segment the network based based on their identity in the organization.
- Configure Network Policies to be Distributed
- These network policies allow administrators to dictate websites, applications, files and more, that each network segment can access.
Configuring Google Workspace
To integrate SecureW2 with Google Workspace, perform the following steps:
- Open your Google developer console.
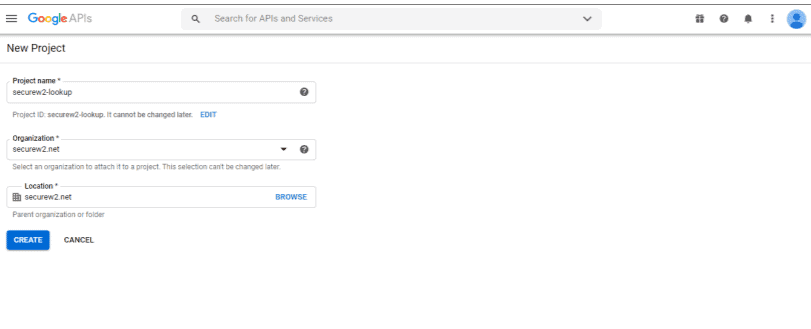
- Select the right project or create a new project.
- Provide the Project name, Organization, and Location. Then, click Create
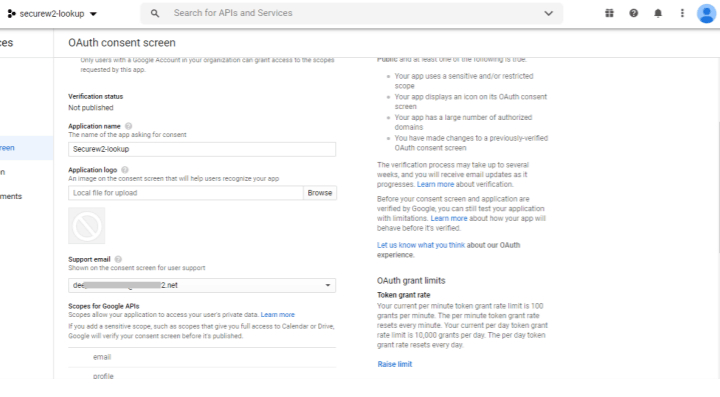
- Create OAuth consent. To do so, click on OAuth consent screen.
- Select Internal, then click Create.
- Provide the Application name, Application logo, and Support email. Then, click Save.
- Click on Credentials in the left menu.
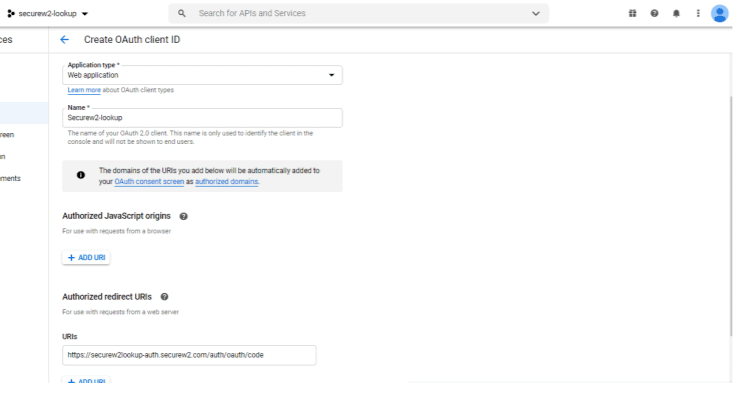
- Click Create Credential > OAuth client ID.
- From Application type, select Web application.
- Under Authorized redirect URIs, add the Authorization Portal redirect URI. You can get this Redirect URI from the SecureW2 Management Portal while configuring G-Suite Identity Lookup.
- Click Update.
- Copy Your Client ID and Your Client Secret and paste them into the IDP configuration. Save them in a secure place, we will need to enter these into SecureW2 later in section: Creating an Identity Lookup Provider.
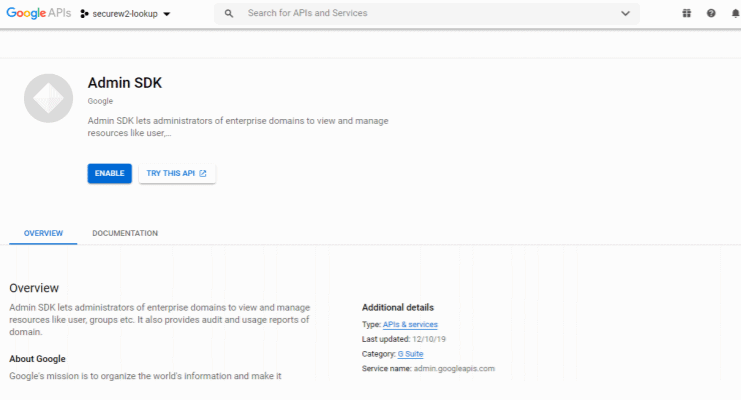
- Enable the Admin SDK service.
Integrate Google SAML Application through SecureW2
- In the Identity Management Section, click on the Identity Provider
- Click Add Identity Provider and fill the Name and Description sections
- In the Type section, enter SAML and click Save
Create SAML Application for WPA2-Enterprise Authentication
- Login to Google Admin Console
- Click Apps and select SAML Apps
- A yellow circle will appear in the bottom right corner (when you hover over it, you will read Enable SSO for a SAML Application), click on it
- Click Set Up My Own Custom App
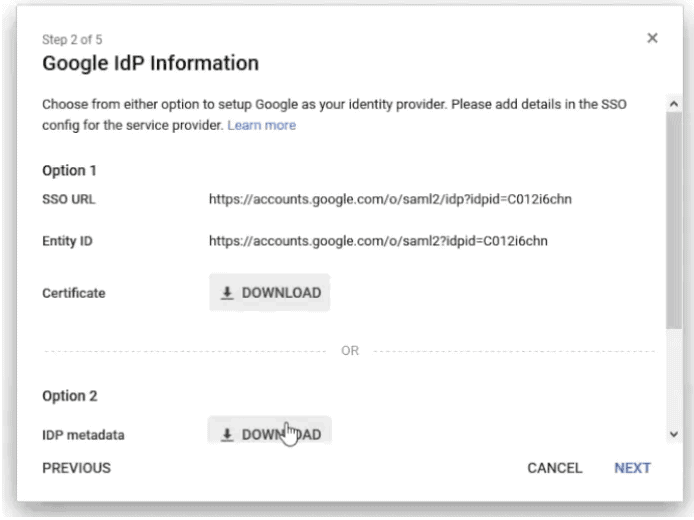
- Download the IDP metadata
- We will add the metadata from Google Workspace
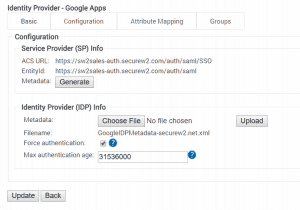
- Navigate to the Identity Provider SecureW2 page, and click on the Configuration tab
- Under Identity Provider (IDP) Info, click Choose File
- Choose the downloaded metadata file, and then click Upload and then Update
- Navigate to the Google SAML App Setup
- Enter the basic information for your app in step 3 (Application Name, Description) and then click Next
- Step 4 requires an ACS URL and EntityId from the SecureW2 Management Portal
- Navigate back to the SW2 Management Portal and copy the ACS URL and EntityId from the Identity Provider section, and paste it into the Service Provider Details of the Google SAML App Setup
- Check the box for Signed Response in the Google Admin page, click Next and Finish
Configure Custom Attribute Map Settings
Attribute Mapping is a great way to segment your network into different groups and make modifications based on the type of user. An example would be adjusting different settings for managers and employees at an organization, such as how many devices they can connect with and how long the certificate is valid for.
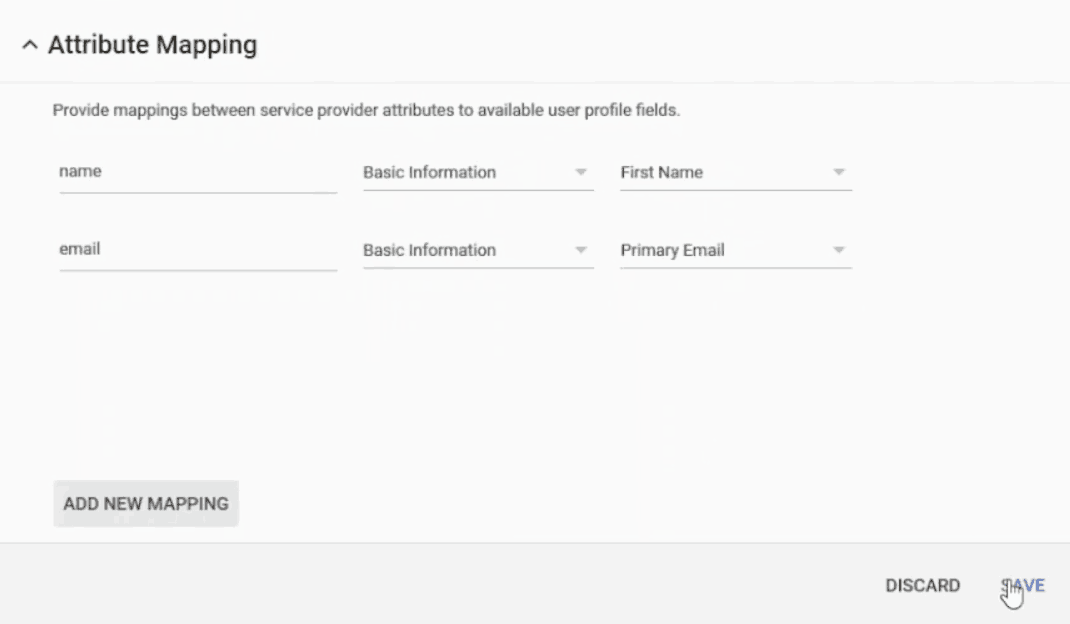
- In the Google Admin Page, scroll down to Attribute Mapping
- Click on Add New Mapping to configure the attributes you will encode into the certificate
- In your directory, you’ll likely have a name and an email
- In the Enter the Application Attribute section, enter name
- In the Select Category section, choose Basic Information
- In the Select User Field section, choose First Name and click Save
- Click Add New Mapping again
- In the Enter the Application Attribute section, enter email
- In the Select Category section, choose Basic Information
- In the Select User Field section, choose Primary Email and click Save
Although you can adjust the attribute names to how you see fit, we recommend using email, displayname and upn. These attributes will give you all the details you need in order to segment your network and use group-based policies to configure network settings. Here is a guide to get these attributes set up:
- Navigate to the SecureW2 Management Portal, and go to the Attribute Mapping tab and click Add
- In the Local Attribute field, type email
- In the Remote Attribute field, select USER_DEFINED and type email into the dialog box that appears and click Next and then click Add
- In the Local Attribute field, type displayName
- In the Remote Attribute field, select USER_DEFINED and type name into the dialog box that appears and click Next and then click Add
- In the Local Attribute field, type upn
- In the Remote Attribute field, select USER_DEFINED and type email into the dialog box that appears and click Next and then click Update
Now that these attributes are connected you can view them in the certificate.
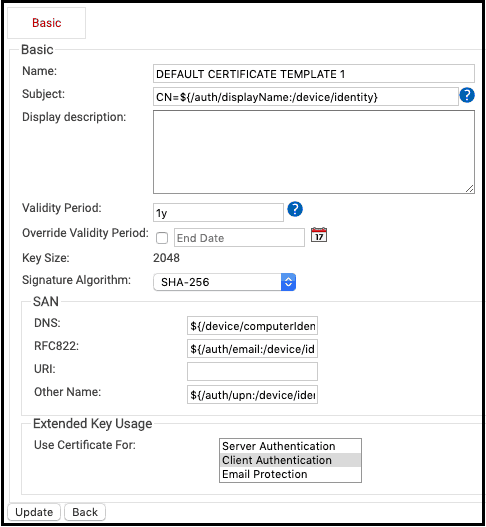
Configure WPA2-Enterprise Network Policy Settings
Policies can be used to create unique network settings for different user groups on your network. Here is a guide on how to set this up:
- Go to Getting Started, enter your SSID name in the SSID field and ensure that EAP Method is set to EAP-TLS and click Create
- This configuration will take approximately 60-90 seconds
- Under Policy Management, click Authentication
- Click Edit next to your network
- Under Conditions, be sure your network is selected
- In Settings, be sure to select the identity provider you created earlier in this process
- Click Update and under Policy Management, click User Roles
- Click Edit on the Default Role Policy that was created
- Under Conditions, select the Identity Provider that was created in the Identity Provider Dropdown, then click Update
How To Set Up RADIUS Information
Now, you need to enter in the RADIUS information. For this guide we are using a Meraki Access Point to show how Cloud RADIUS integrates with an access point. However, Cloud RADIUS is vendor neutral and works with any Enterprise AP vendor.
- Under Wireless, select Access control
- Under Network access change it from the default value of Open (no encryption) to WPA2 Enterprise with “my RADIUS server”
- For the WPA encryption mode, select WPA2 only
- In the Splash page section, leave it set to None (direct access)
You can find the details about your Cloud RADIUS when you go to AAA Management and AAA Configuration. Here you will see a Primary IP Address, Secondary IP Address, Port Number and a Shared Secret.
- Copy the Cloud RADIUS information and paste it back into your Access Point Provider under RADIUS Servers, click the green link to Add a server
- Enter in the Primary IP Address, Port Number, Shared Secret respectively
- You will need to perform the same steps for the Secondary IP Address by entering the Secondary IP Address, Port Number, Shared Secret
- Scroll down and click Save changes
Setting up Devices for RADIUS Authentication
Cloud RADIUS handily comes with an 802.1x onboarding software that allows even non-native devices that do not have access to a native supplicant to self-enroll themselves, and get configured for EAP-TLS WPA2-Enterprise network authentication.
SecureW2’s onboarding software allows you to configure a network profile to send out automatic enrollment for certificates on user devices. This effectively reduces the workload and maintenance that can become tedious over time.
Cloud RADIUS allows a more simple and cheaper option to quickly get users connected and managed while also keeping your network secure from unwanted guests. Our software will reduce your IT admins workload and make an easier user experience for everyone all at an affordable price. Check out our pricing here.
