It’s no secret that open Wi-Fi networks are infamously insecure, and Pre-Shared Key (PSK) networks aren’t much better. If you tie your organization’s Wi-Fi to a single password and more than a handful of people know it, it’s only a matter of time before that password gets shared with users you might not want on your wireless network.
However, you can’t just apply the same level of security to every single user that accesses your Wi-Fi daily. Using less secure standards – such as PSK – leaves you vulnerable, but requiring everyone, even guests, to enroll for digital certificates to use your Wi-Fi may be unsustainable.
At SecureW2, we believe the approach to Wi-Fi security should be tailored for the different categories of users that access your wireless network every day. That’s why we’re introducing our WebAuth Wi-Fi with Cloud IDPs, an easy-to-use captive portal so employees can use the corporate network on their personal devices.
Categories of Business Wi-Fi Users & Security Options

The highest level of security you can employ for wired and wireless networks is EAP-TLS, certificate-based 802.1x authentication. But as we mentioned previously, this isn’t the best Wi-Fi solution for personal devices that aren’t handling any sensitive information or guests. Your approach to Wi-Fi network security should be more nuanced to enable productivity and accessible connections for your different user categories.
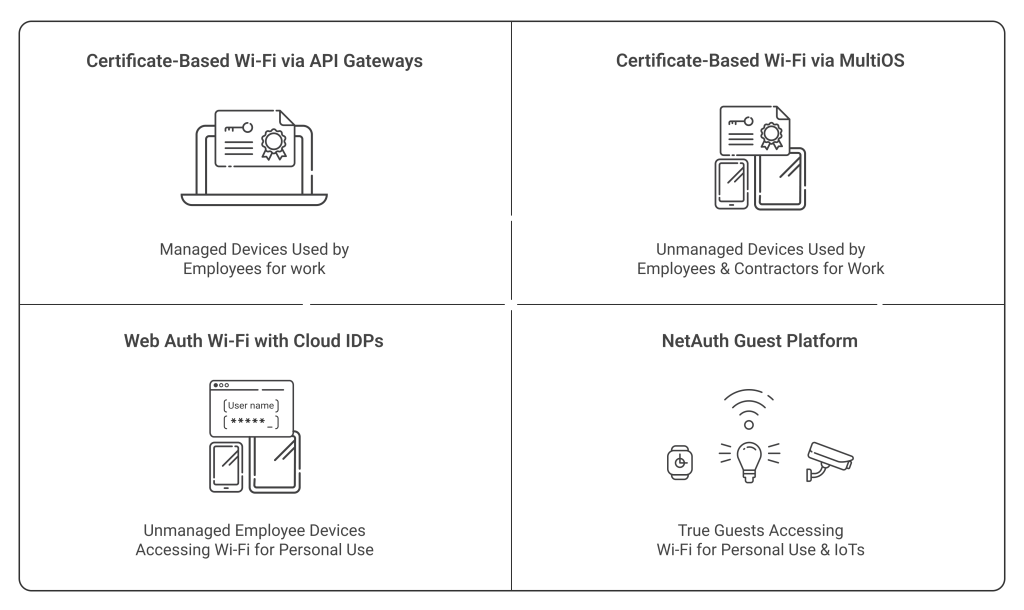
These are the four main types of users we’ve identified:
- Company-owned, managed devices that use your Wi-Fi network for business
- Unmanaged devices and BYODs that are also using Wi-Fi for business
- Unmanaged devices and BYODs that need Wi-Fi access for strictly personal use
- True guest devices and IoTs
For the first two types of devices – managed and unmanaged devices used for work purposes – we offer onboarding technology. Our gateway APIs can automatically distribute certificates to managed devices through the Simple Certificate Enrollment Protocol (SCEP). On the other hand, our dissolvable, self-service onboarding application, JoinNow MultiOS, can allow employees and contractors to configure their own unmanaged devices for certificate-based authentication in seconds.
For true guest devices and IoTs, we offer our NetAuth solution. Our NetAuth guest solution allows true guest devices to connect to your networks through either self-registration or sponsored access. Your employees can save your IT helpdesk time by sponsoring guests themselves, or you can permit self-registration, which guests can complete in just a couple of clicks and temporary credentials sent through email or text.
That just leaves the last category: unmanaged devices that employees may use to access your Wi-Fi for strictly personal purposes. Our new WebAuth Wi-Fi with Cloud IDPs feature is designed to address exactly this scenario.
Unmanaged Devices & BYODs Accessing Wi-Fi for Personal Use
Many employees bring devices on-site that need Wi-Fi access, but won’t ever be used for work. This doesn’t mean that you have to blindly let them onto your network without any visibility or rely on the infamous insecurity of PSK networks.
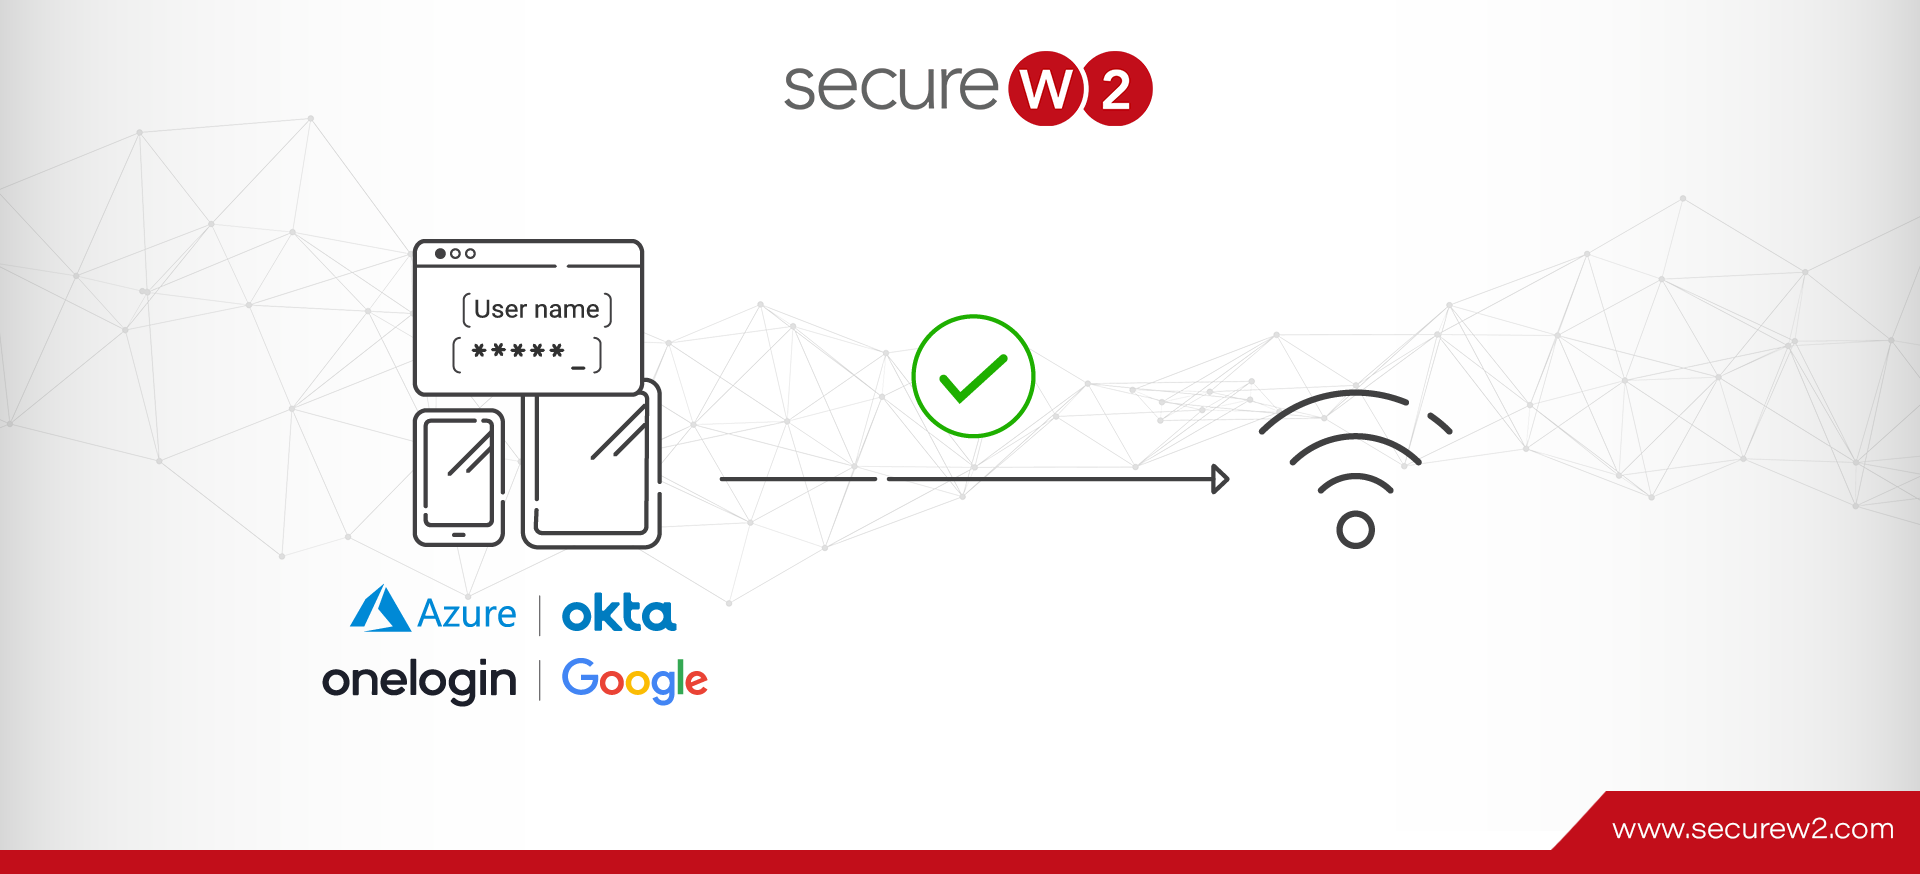
As long as your employees have credentials from a SAML Identity Provider (IDP) such as Azure AD/Entra ID, Okta, Google, or OneLogin, you can leverage our WebAuth Wi-Fi for Cloud IDPs solution. WebAuth is simple. It provides a captive portal that your end-users can enter their SAML credentials into, tying their Wi-Fi sessions to an identifiable user. All they need to do is connect to your captive portal Wi-Fi, and they’ll be directed to a splash page where they can log in with their username and password.
How Does WebAuth with Cloud IDPs Work?
WebAuth is a surprisingly simple and straightforward solution. In a nutshell, it ties your employees’ SAML credentials directly to your Wi-Fi network through a new captive portal. It uses our Cloud RADIUS authentication service to verify the credentials sent to your access point through these steps:
- An employee connects to your captive portal SSID.
- The employee is directed to a specific and customizable splash page. Here, they are encouraged to enter their SAML IDP credentials.
- Once they enter their credentials, Cloud RADIUS communicates with your SAML IDP to verify that the user exists and that those credentials are accurate. If they’re verified, Cloud RADIUS records the MAC address of the user’s device.
- The user is then granted access to the captive portal SSID.

Recording the device’s MAC address serves a couple of different purposes. First, it gives your administrators a record of the devices accessing your network. By linking MAC addresses to specific user credentials, you know precisely who’s on your Wi-Fi.
The second purpose is convenience. With the MAC address on record, the employee doesn’t need to go through the authentication process every time they use their BYOD to connect to your access point. Of course, you can set a customizable amount of time for requiring re-authentication if you want them to re-login periodically.
Managing WebAuth Wi-Fi Connections
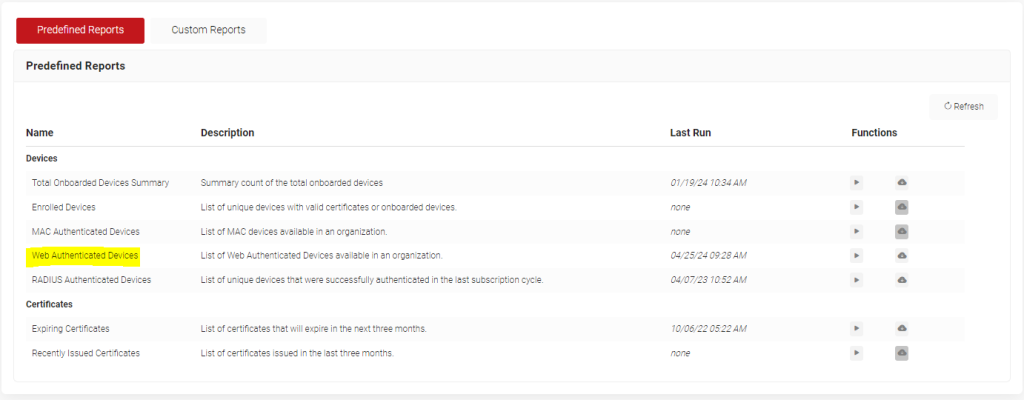
MAC addresses are stored in the SecureW2 database, which grants network administrators visibility for the devices on the network. At any time, you can generate a list of devices that have connected through WebAuth by navigating to the Data & Monitoring > Reports section of the JoinNow Management Portal and running the Web Authenticated Devices report. It is a pre-defined report that specifically identifies WebAuth Wi-Fi devices.

Running the report will generate a .CSV file that shows the MAC address, the username associated with the device, when they first authenticated with that device, and the last time they authenticated.
You can reference this report as necessary and remove devices from the management portal to disconnect them from your WebAuth SSID. To do so, navigate to the Data & Monitoring > Devices section in the JoinNow Management Portal and delete any device you want to disconnect.
How to Configure WebAuth in SecureW2
WebAuth can be easily and quickly set up in the JoinNow management portal. We’ll outline the configuration steps for you below.
Prerequisites
You’ll need access to a couple of different SecureW2 subscriptions to configure WebAuth captive portals, including the following:
- An active Cloud Connector subscription.
- An active WebAuth Wi-Fi with Cloud IDPs subscription.
- An Aruba Networks, Cisco Systems, or Cisco Meraki AP.
- An active Cloud RADIUS subscription.
These configuration steps also assume you have already completed the following steps in the JoinNow management portal and within your IDP:
- Created a SAML application in your IDP and configured the IDP in SecureW2.
- Configured a role policy in SecureW2.
- Configured a network policy with attributes that can be applied after RADIUS authentication.
- Optional: Configured Account Lookup for RADIUS authentication.
- Optional: Configured Event Hooks that can disable devices when users are deactivated in the IDP.
For more information on how to complete these steps, please refer to the Integration with Identity Providers for Certificate Issuance section in our Documentation Hub.
WebAuth Captive Portals Configuration
Once all of the prerequisites outlined above have been met, you may begin configuring Web Authentication following these steps:
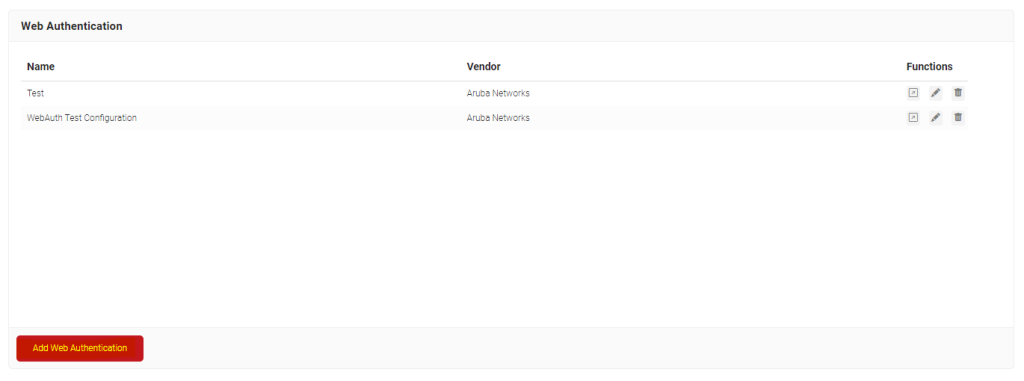
- Select Device Onboarding in the management portal, and then Web Authentication.
- Click the Add Web Authentication Button.

- You’ll be brought to the Basic screen. Add the name, a welcome description for your users, and then select your Access Point vendor from the dropdown. Click the Save button.

- The page will refresh and three new tabs will appear: Configuration, Authentication, and Customization.
- Select the Configuration tab. Put the authentication redirect URL in the URL field. In the username and password parameter fields, enter the username and passwords the users will need to authenticate with.

- Select the Authentication tab next. Choose your Identity Provider to authenticate the credentials with from the Identity Provider drop-down list.
- Optionally, you can check the Force Authentication box and add parameters for how long users have between each re-authentication.

- Select the Customization tab. You may upload a stylesheet in the Stylesheet field here, then click Update.
Implement Captive Portal Wi-Fi & Passwordless Network Security with SecureW2

If you were to ask us, we’d typically recommend certificate-based authentication for your Wi-Fi network. But the more detailed answer is that you can’t apply the same level of security to all users on your wireless network across the board. Different types of users have different security needs.
Fortunately, with the addition of WebAuth Wi-Fi with Cloud IDPs, we can now provide every level of security you need. By enabling captive portal access based on SAML credentials, you can keep track of the devices on your network for personal use, tying them to MAC addresses. Not only does this give you a record of devices on your network, but it simplifies the authentication process for your end-users. After logging in on the splash page once, they can enjoy a seamless connection to your Wi-Fi without needing to re-authenticate for a customizable period of time.
Wireless security shouldn’t be one-size-fits-all. It should be variable based on your organization’s needs and your end-users’ convenience. If you’re interested in learning more about WebAuth Wi-Fi or any of our other solutions, reach out today for a free demo.


